We all know that one of the most popular (and basic) autumn activities is to go apple picking. You’ve probably already noticed all the posts on Instagram with boots, scarves, cider, and apples galore. This is mostly known as a North Eastern tradition, but believe it or not we have orchards for apple picking in Southern California, too!
Last weekend the weather cooled down for a whole day and we finally got some rain, so my husband and I took the trip out to our favorite apple picking spot, Oak Glen, to take advantage of the cool, rainy, fall-like weather.
 Oak Glen is a quaint little town about 2 hours outside of LA. There are lovely orchards where you’ll find all of the traditional autumn favorites, from apples to hayrides to hot cider donuts.
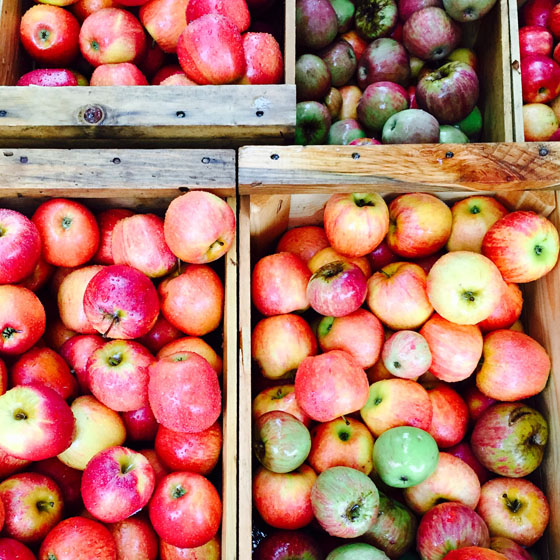 The reason I like going to pick my own apples is because I can usually find varieties that aren’t found in our local markets. This time we came home with Pink Pearl apples. These apples are sweet and tart with a gorgeous pink color.

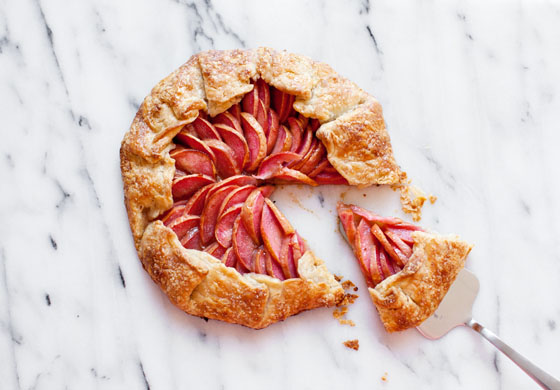
We had some left over pate brisee dough hanging out in the freezer, so I decided to make a galette with the apples and apple jelly we got from our trip. These apples are amazing for baking. They’re super juicy and I think the flavor gets even better when they’re cooked.
Plus, they’re really pretty.

Here’s a recipe to make your own apple galette. You can use any apples you want, but if you can get your hands on some Pink Pearl apples, I highly recommend you do.
Galette Dough
2 1/2 cups all-purpose flour
1 teaspoon salt
1 teaspoon sugar
1 cup (2 sticks) unsalted butter chilled and cut into small pieces
1/4 to 1/2 cup ice water
Apple Filling
1 lb apples, cored
1/4 cup apple jelly
3 tbsp sugar
whole milk
In a bowl combine flour, salt, and sugar. Add butter, and use a dough cutter or food processor to mix the butter in until the mixture until it reaches a course meal texture. Add ice water slowly (1 tbsp at a time) until the dough just holds together without being wet. Divide the dough in half and into balls. Flatten dough balls into discs and wrap in plastic. Refrigerate for one hour.
Roll out chilled dough on parchment paper or a lightly floured surface into a 1/8 inch thick circle. Chill again for about 20 minutes.
Meanwhile core and slice the apples. Pre-heat oven to 400 degrees.

Remove chilled dough round from refrigerator and spoon two tablespoons of jelly on to the dough, leaving at least a 1.5 inch boarder.
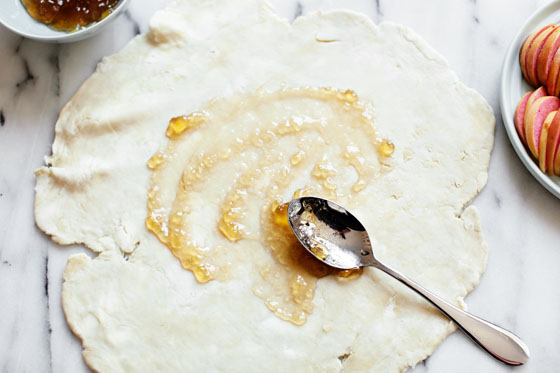 Place apple slices over the jelly in slightly overlapping concentric circles. Sprinkle with 2 tablespoons of sugar.
 Fold the plain dough boarder over the apples. Brush with milk and sprinkle with remaining sugar.
 Transfer galette and parchment paper onto a baking sheet. Bake at 400 degrees for 30 minutes. Lower oven temperature to 375 degrees for another 15 minutes or until dough is golden brown. Heat remaining apple jelly and brush on top of cooked apples for a nice shiny finish. Let cool for 10 minutes and serve.


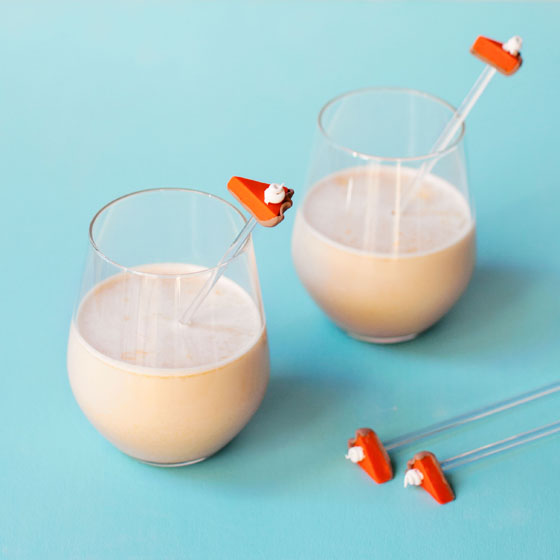
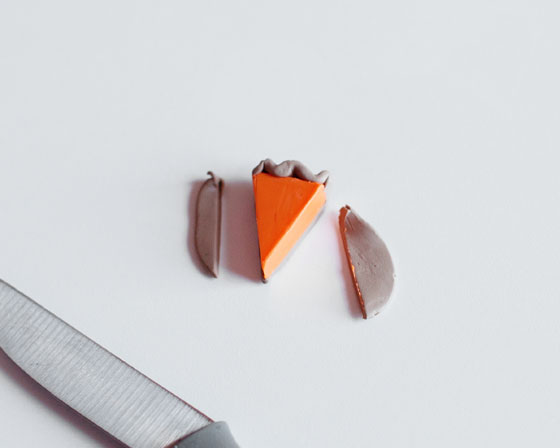
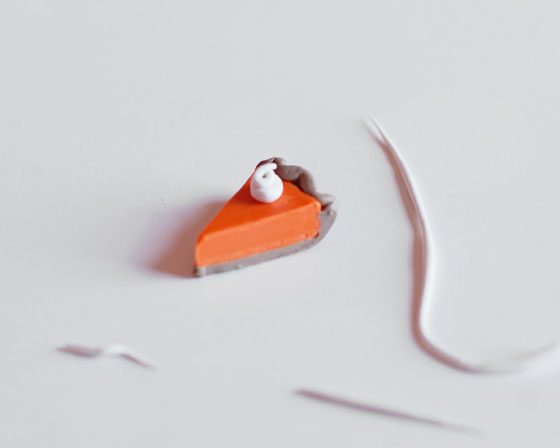
 I love making miniature things out of clay. It’s so…therapeutic. These mini pumpkin pies were particularly easy and fun. Here’s how I did it.
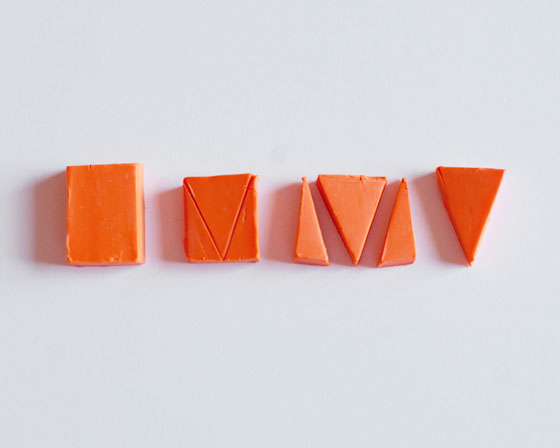
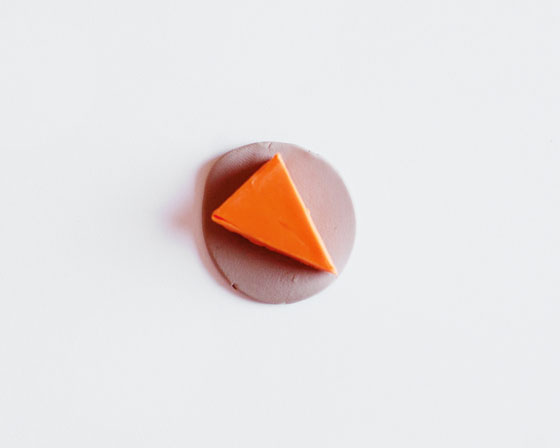

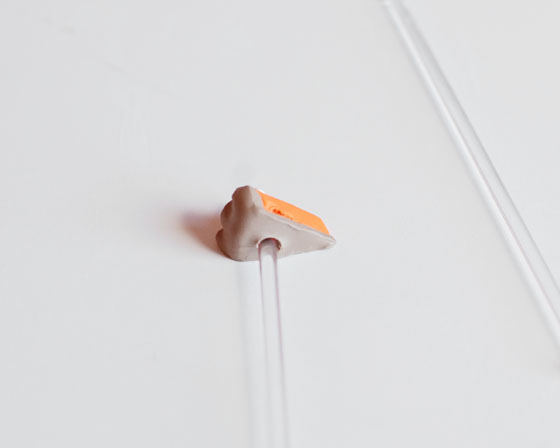 Remove the stick and bake at 275 degrees fahrenheit.
  Using a little super glue, replace the cocktail stick into the pre-made hole.