Unlock this Exclusive Content on Patreon
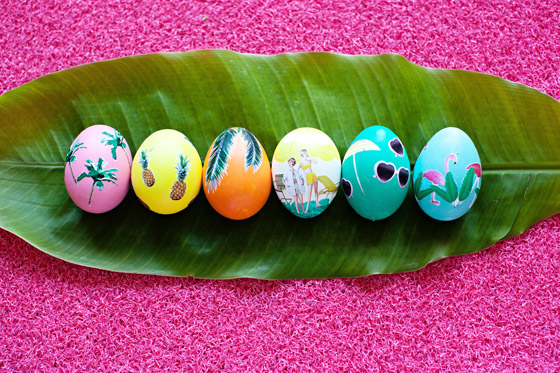

Sometimes I find myself perusing the tablewares section for things I totally don’t need but always end up buying anyway. One of my most recent unnecessary purchases were these little 69 cent glass mugs from IKEA. I figured I could use them for something or another, and I thought the shape was pretty cool, but I thought they needed something to jazz them up. I decided to give them a midcentury, googie style makeover using craft paint and painters tape.
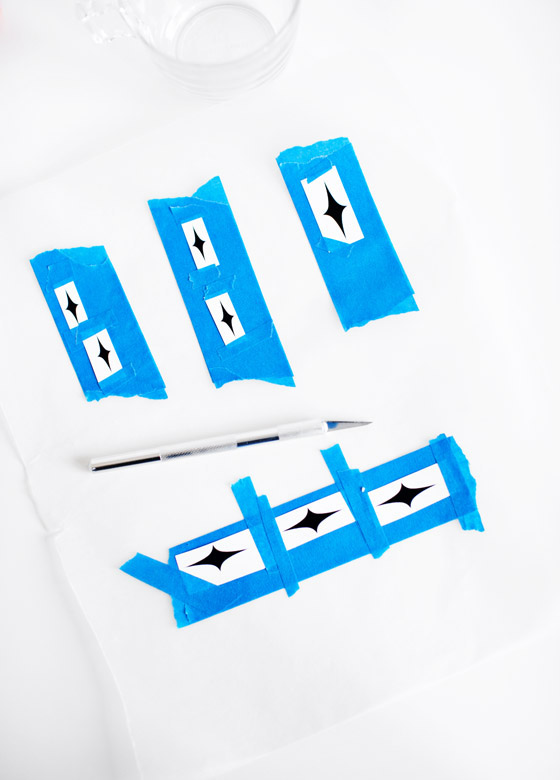
First I found some midcentury style clip art and printed it so I could make my stencil. I used an exacto knife to cut the shapes into painters tape.

Then I applied the tape to the glass in a random pattern.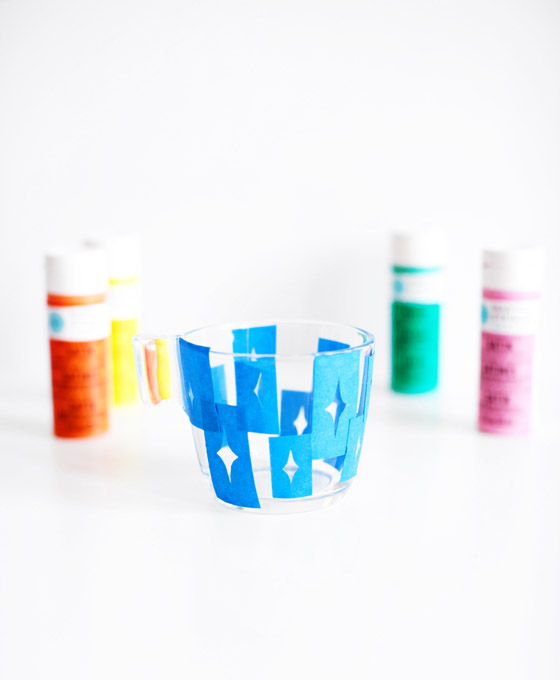
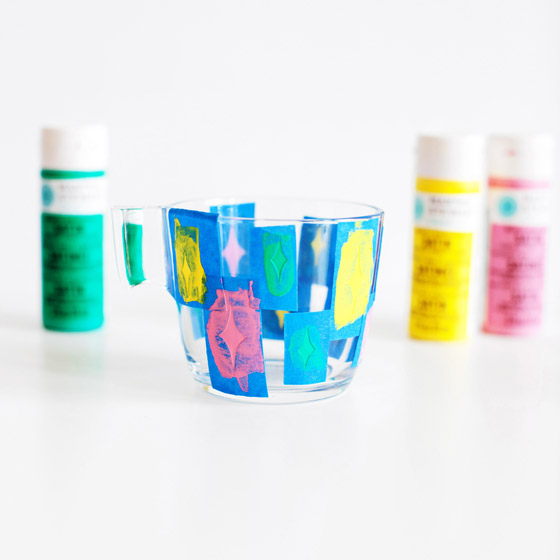
I used a screen printing method to apply the paint. This is where you put on a drop of paint and use a squeegee to drag it across and fill in the stencil to create a smooth finish. You can use a sponge or brush, too, but it probably won’t have as smooth of a finish.
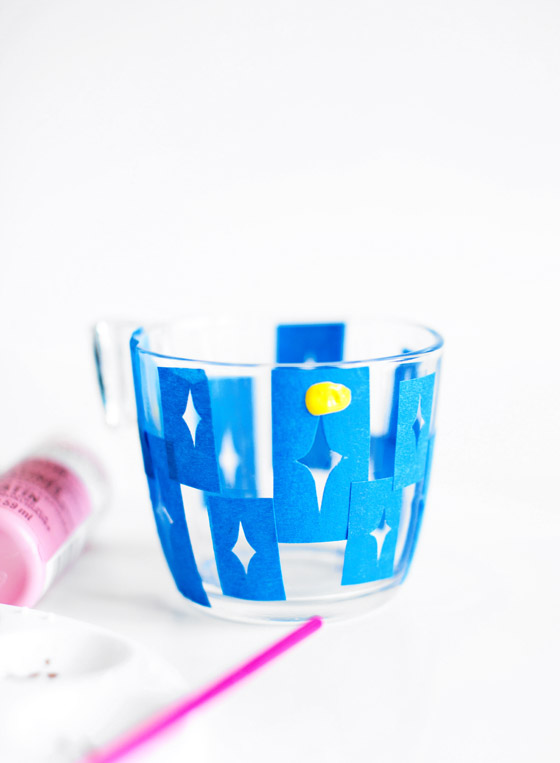
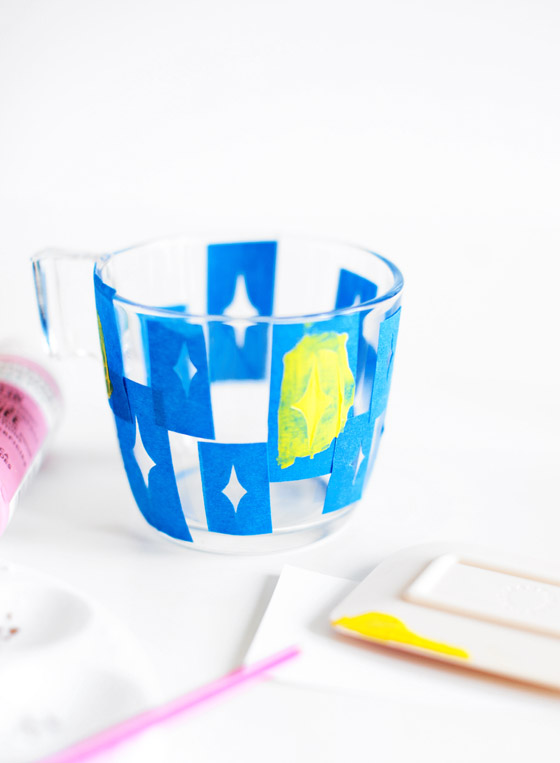
Make sure to remove the tape before the paint dries. Otherwise the tape will take the paint off with it.
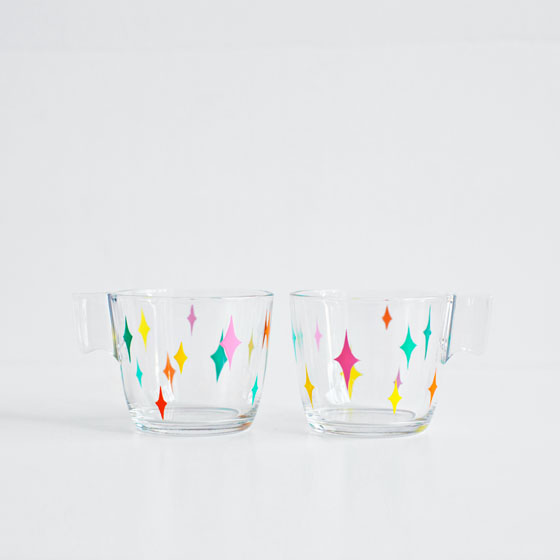
Let the paint dry for about an hour and then place into a cool oven and set the heat to 350 degrees. Let bake for 30 minutes and then shut the oven off. Let the glass cool in the oven and then remove. The paint will be cured and washable.
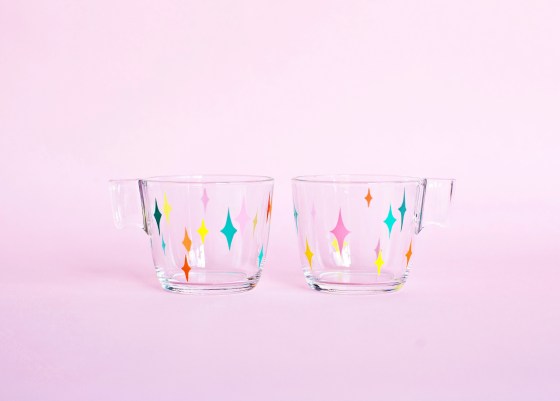
Pretty neat looking cups for 70 cents, huh?


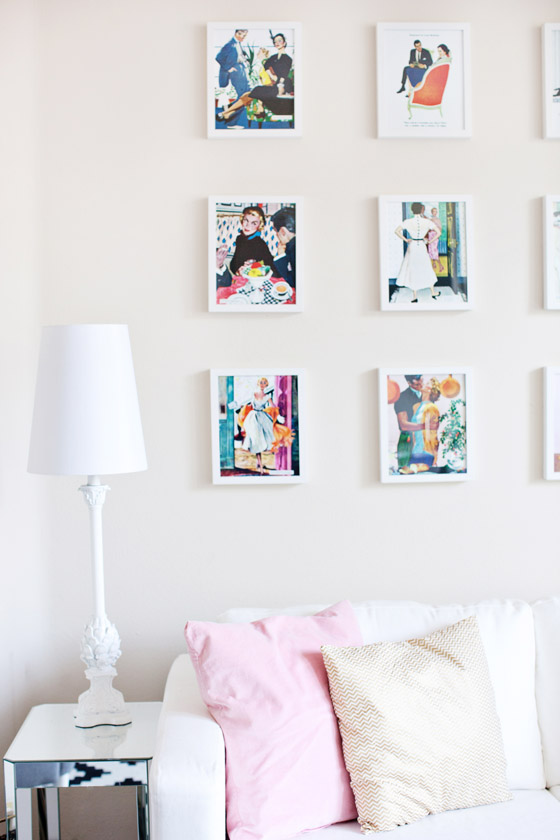
I’m always changing things up in this small, little apartment of mine. I was craving a little more color on my living room walls, so I planned on ditching the large abstract canvas and doing a gallery wall instead.
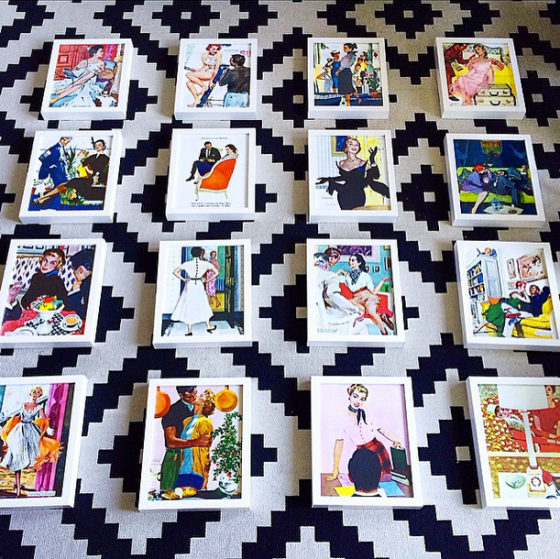
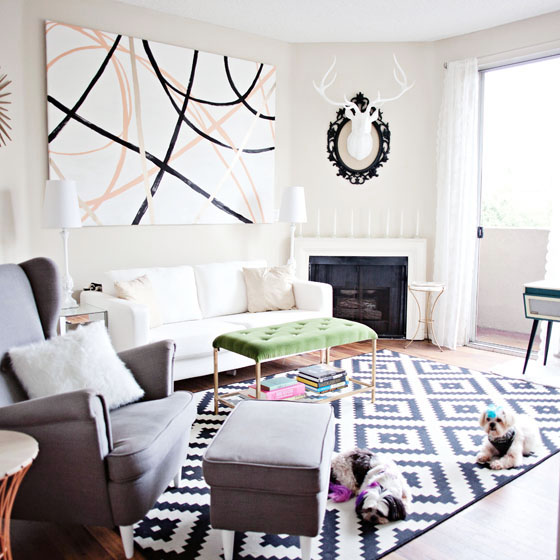 I’d been thinking about doing a gallery wall for awhile but art, even prints in the quantity I needed, were turning out to be too expensive for my project’s budget. I’m a big fan of vintage illustrations like the kind you’d find in The Saturday Evening Post, so when I came across a bunch from the 1950s, I ran to get frames immediately. Ok, more like power walked.
 Gallery walls can be scary! Whether you’re doing a random pattern or lining them up strategically, putting that first hole in the wall is scary business when you’re not sure if you’re going to like how it’s all laid out once it’s up there. I hate patching nail holes more than anything, and I don’t even know where the touchup paint is, so I had to get this right the first time.
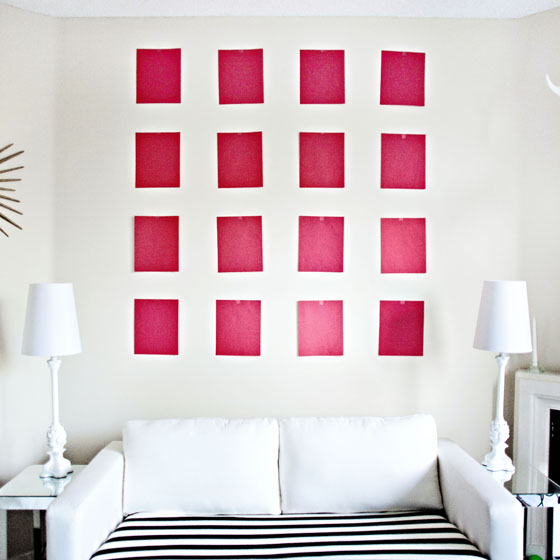
One of my favorite tips for creating gallery walls is to cut pieces of paper to the size and shape of your wall decor. Mark where all of the nails should go, and tape the paper pieces up on the wall to get a better idea of where everything will go. I rearranged my pieces at least 4 times until I got a spacing I was happy with. Measuring is fine, but I like to actually see everything up on the wall before I start making holes. Once I was happy with it, all I needed to do was hammer the nails into the pre-marked paper.
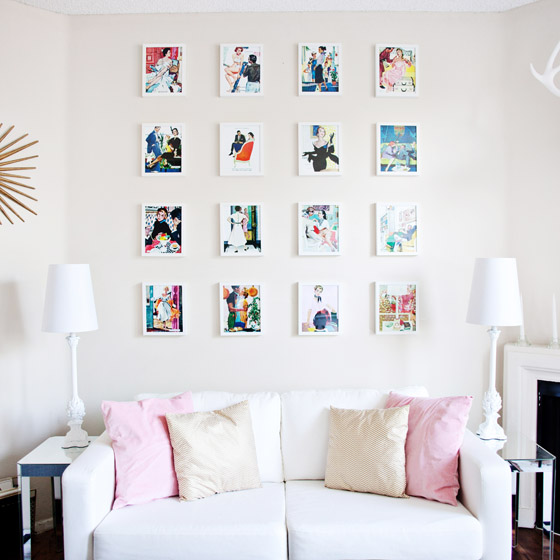
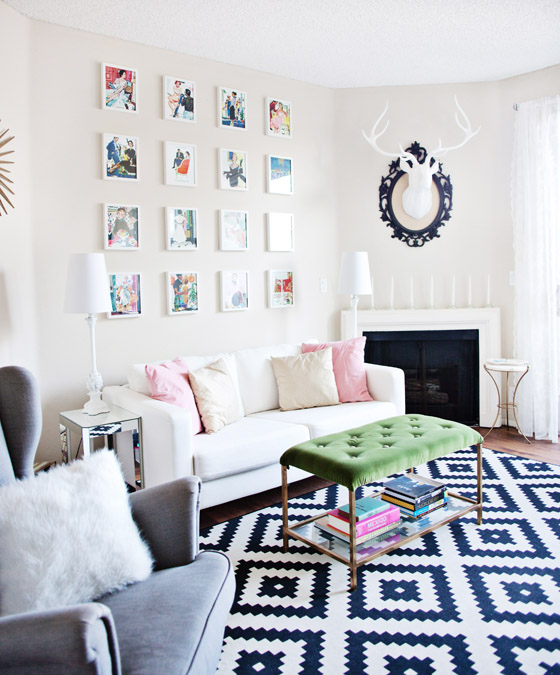
I hung every picture up and used a level to make sure they were all straight and in line, because when one is out of place everything looks wacky. That’s something I’ll probably have to go back and do every once in awhile but it’s SO WORTH IT. If you have a problem with your pictures staying straight, try using a little piece of gum tack on the back corners of the frame.
 The illustrations add a lot of fun color and fun vintage character into the room. I’m definitely happy with it.
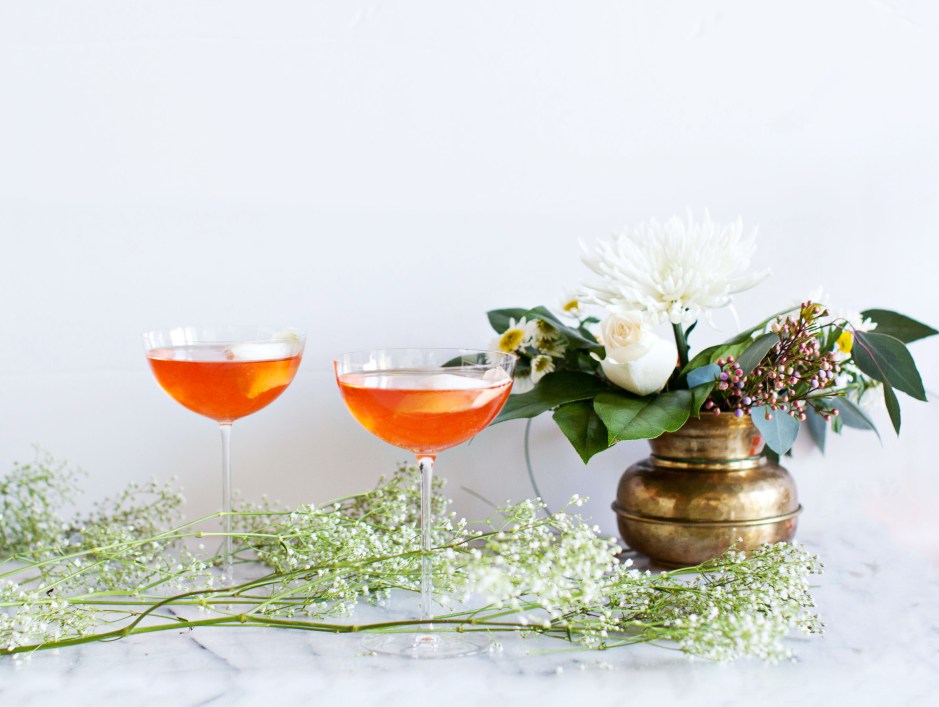
As you can see above, I really like this cool spot in San Diego called Polite Provisions, and one of my favorite drinks on the menu is the Veronica Rose. The menu’s description reads “Aperol, rose gomme, and sparkling wine”. Perfect.
It’s delicious and beautiful, but since I can’t get down to San Diego every time I want one, I recreated it at home. Here’s my version of the Veronica Rose.

This recipe makes two drinks:
1 oz. Aperol
1 oz. rose syrup (I recommend Royal Rose Syrup)
3-4 dashes Angostura bitters
4 oz sparkling wine
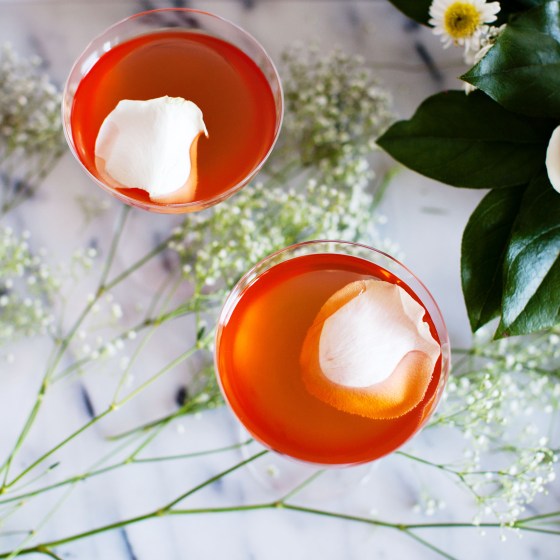
Stir Aperol, rose syrup, and bitters with a cube of ice, strain into chilled glasses. Top with sparkling wine. Garnish with a lemon twist or, as I like to do, a rose petal.
Or if you only want to make it a serving for one…get serious, just use a larger glass.


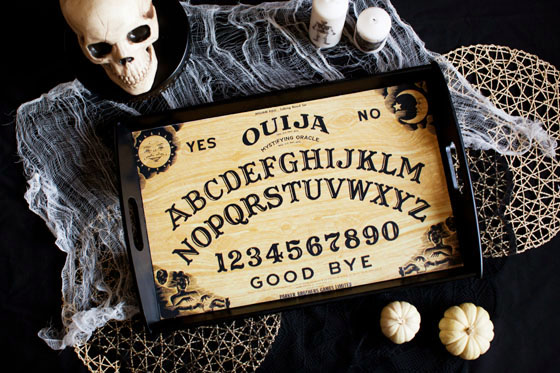
If you want to be the Halloween hostess with the mostest, you need this Ouija board tray to serve your guests their cocktails and treats. Also, maybe conjure some spirits while you’re at it. Just kiddingggg…kind of.
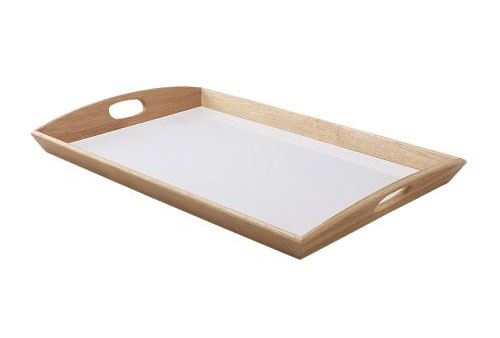
You can find basic serving trays like this at most stores that sell home goods. I got mine at IKEA.
 I wanted to use a classically creepy image and the Ouija board is one of the most iconic things I could think of. It works perfectly for this. I searched for the right image and decided on the William Fuld/Parker Brothers version. This is the image I associate most with the Ouija, and I like the cheekiness of the Parker Brothers name being on there. What a fun toy…and not satanic at all…it’s Parker Brothers!

Above is the image I used for my tray. For it to fit I had it printed at 24 x 18 on heavy paper. You can crop and resize it to fit the size of your tray and then take it to your local print shop. I went to FedEx Office.
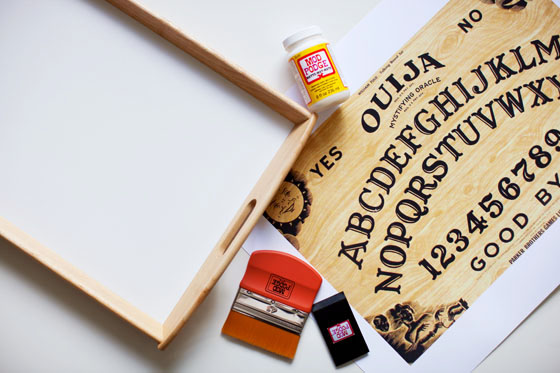 First, I painted the tray black and then I cut out my Ouija image to fit in the bottom of the tray. I used Mod Podge in a matte finish to stick and seal the image on. Easy!
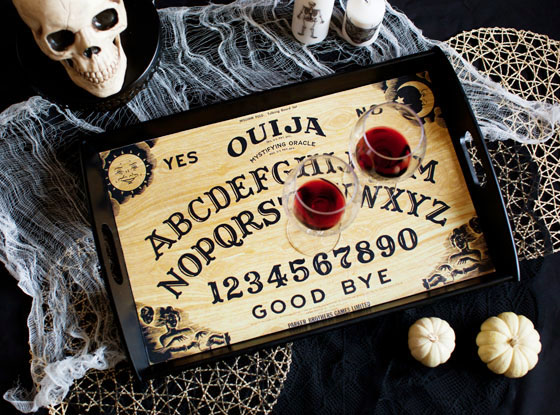
 It looks legit right? I just hope the wine glasses don’t start moving over the letters to spell things out. Although, I’m sure if I drink enough wine it’ll look like that anyway.

I can be a bit of a Halloween traditionalist, you guys. I like my October nights lit by the faces of Jack-o-lanterns and I like those Jack-o-lantern faces to be classic. However, I still like to mix things up sometimes, and get serious, it’s not exactly practical for me to have carved pumpkins sitting around as light sources for the entire month. When I saw the orange FADO at IKEA, I didn’t just see a colorful orb lamp, I saw a potential Jack-o-lantern.

The FADO is a pretty cool lamp on its own. It has a spherical shape that is a throwback to the mid-century space age era and it gives off a nice, soft, glowing light.
Pulling this off is really as simple as drawing or painting a Jack-o-lantern face onto the lamp. I used chalk to draw my ideal face shapes and then painted over it using a charcoal colored chalk paint. You can use a sharpie, a paint pen, or whatever you’d like. I just liked the chalk paint texture against the frosted glass of the FADO. It also looked more vintage to me that way.

I love this little guy. Look how cute he is! And the glow sets the perfect mood light for Halloween movie watching.


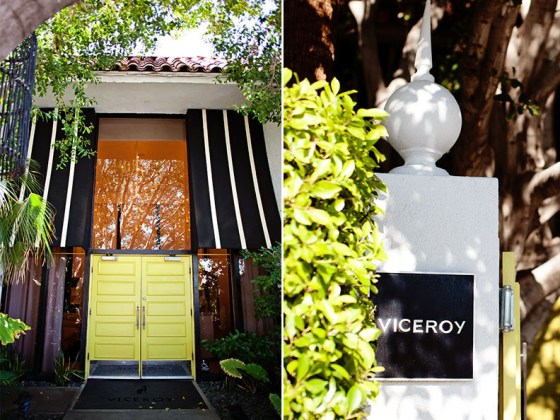
One of the things I love most about Palm Springs is the vintage feel and Viceroy Palm Springs is a perfect place to experience the Hollywood Regency vibe of the area’s glory days. The hotel was designed by Kelly Wearstler, one of my favorite designers.
This spanish style property opened in 1933 as a bungalow retreat, but in 2001 hotelier Brad Korzen (Kelly Wearstler’s husband) turned it into the Viceroy we know today.
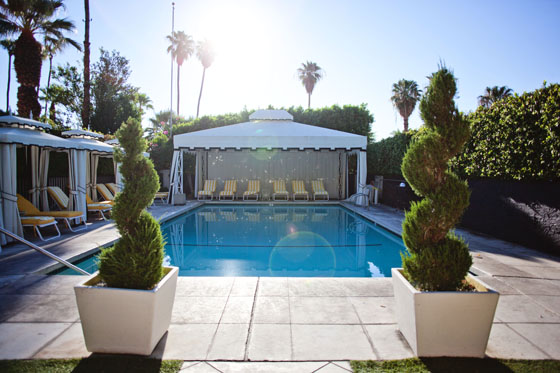
The mountain views make a picturesque backdrop and the property is walking distance from downtown’s shops and restaurants, making it the prime spot to experience what Palm Springs has to offer. But once you’re there, it’s hard to want to leave.
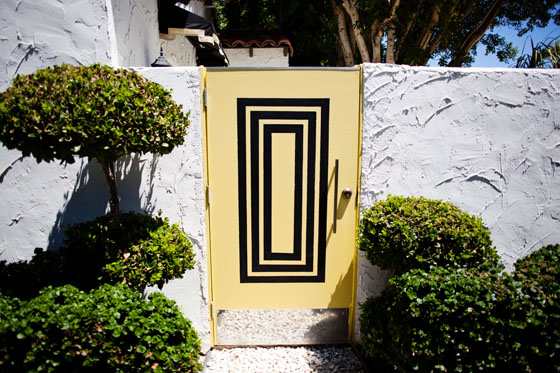
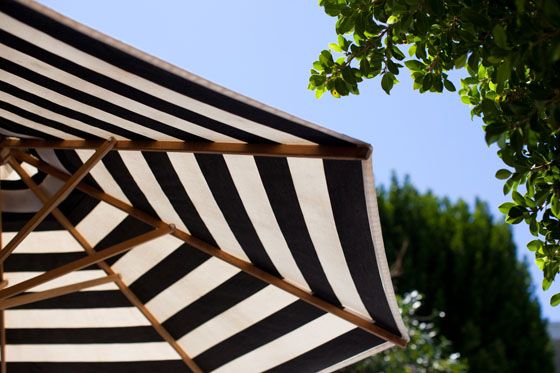
The grounds are classically decorated with black, white, and pops of vibrant lemon yellow.
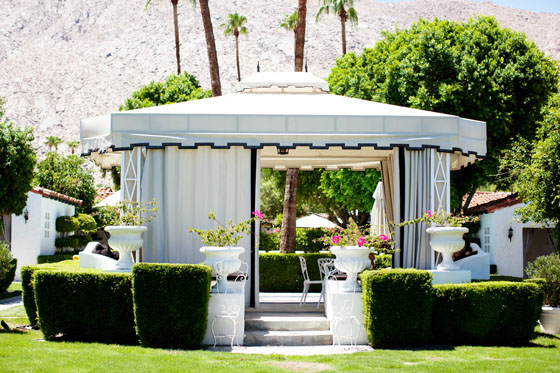
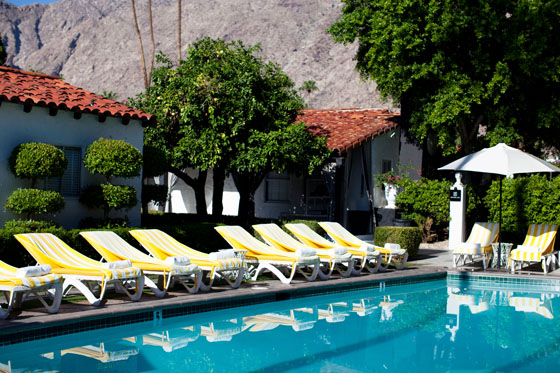
The boutique style resort has 67 rooms, suites, and villas nestled around three pools and manicured courtyards. The pools are open 24 hours, which I LOVE. Major bonus points from me. Night swimming in Palm Springs is like no other. Pool floaties are included and are perfect for both soaking up the sun and star gazing. Or even keeping you afloat when you’ve had too much to drink.
When we pulled up we were greeted by the very friendly valet and escorted to the front desk. We arrived at the hotel a bit early so we had to wait for our room to be ready. That was a mistake on such a hot day, especially with dogs, but the hotel offered us sparkling wine and water, and directed us to the areas where we could lounge and wait. They even brought out water for our pups in a cute bowl.
The property offers a full-service spa and exceptional dining at Citron. I did not partake in any spa services but I did partake in some tasty crab cakes at Citron while we waited for our room.

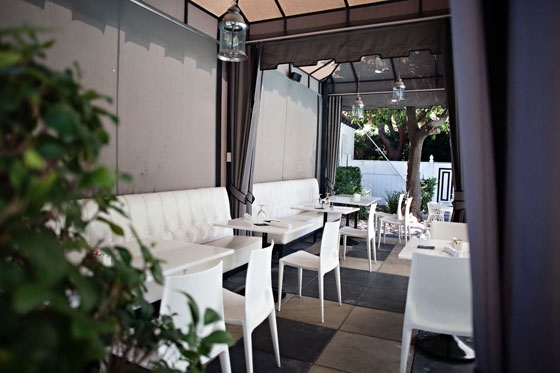
Citron has an indoor dining room, a bar, and an outdoor seating area.
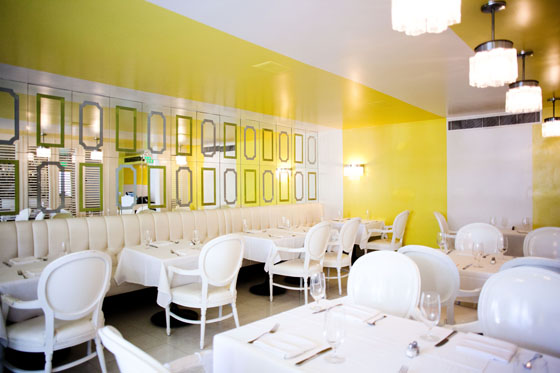
White tufted leather booths and bergére chairs with mirrored and yellow striped walls make this a really glamorous yet fun space. The pet-friendly outdoor area overlooks the main pool for prime people watching.
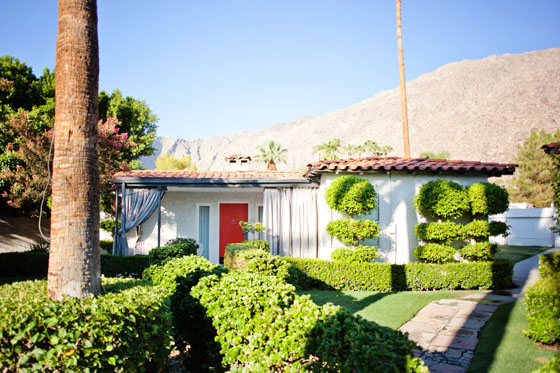
Once we arrived to our room we were not disappointed! A nice and helpful staff member carried our bags and showed us to our one bedroom Dorrington Villa located in the fountain courtyard. I loved this area of the resort. It was so quiet and secluded. I wish I could live there. For a second I considered becoming a squatter, but quickly realized that would probably be a bad idea.
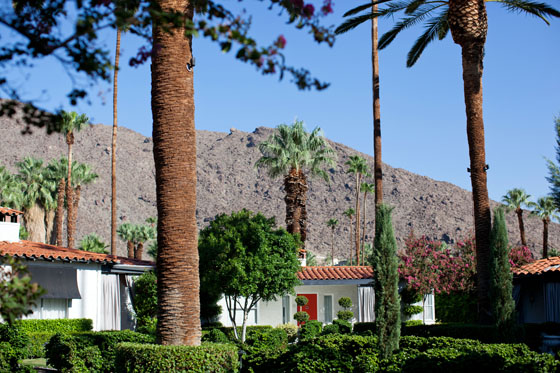
The spanish tile roofs and vibrantly colored front doors made me so happy. The villas are set apart from the main hotel and are private with no shared walls between them. These villas are the real stars of this Viceroy.
Let’s go on a little tour. 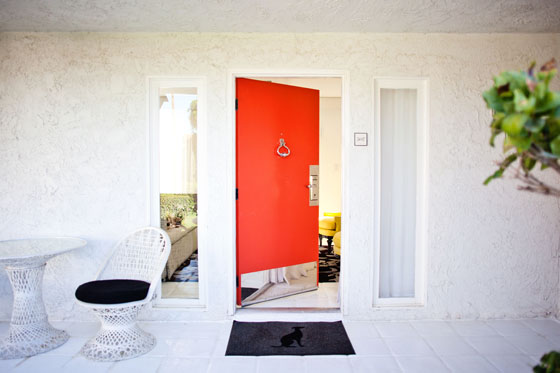
Love at first sight. Look at that door with its amazing color, knocker, and KICKPLATE. I can’t resist a door with a knocker and kickplate. I wanted to hug it. The front patio area had two chairs, a table, and a privacy curtain.

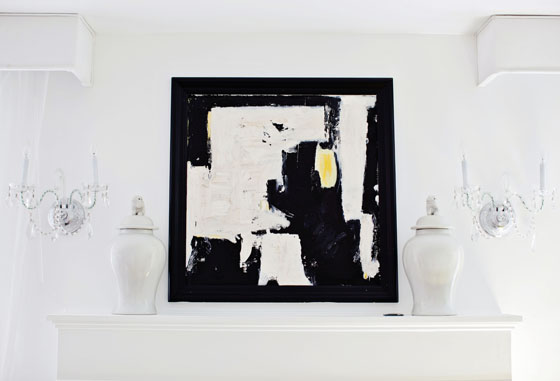
And then I fell even more in love. The room opens up to a bright, open living room. It’s a perfect blend of classic vintage and modern. The black, white, and yellow color scheme obviously continues in here. The gas fireplace is perfectly framed by ceramic ginger jars, crystal sconces, and modern abstract art. The glass filler inside of the fireplace is so much better than faux logs.
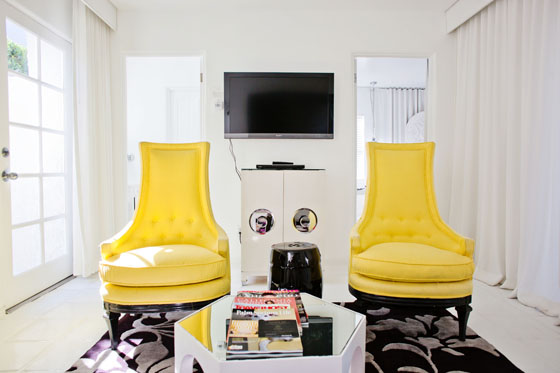
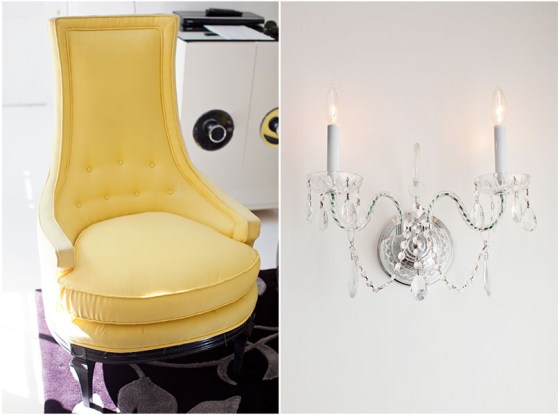 These yellow chairs are the only pop of bright color in the room. The mirrored handles on the cabinet and the mirror-topped octagonal table add a nice reflectiveness and shine to the space. That along with the symmetrical furniture placement is very indicative of Hollywood Regency style.
 On the other side there is a black and white gingham sleeper sofa. Behind that is the dining room.
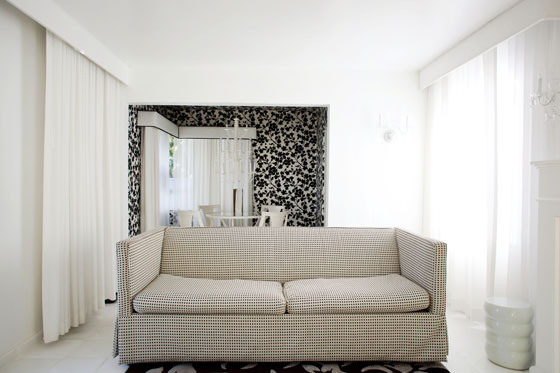
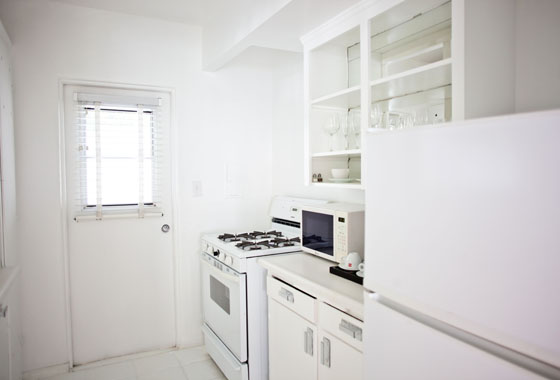
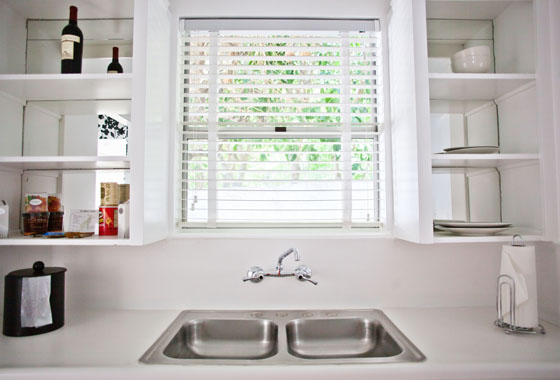
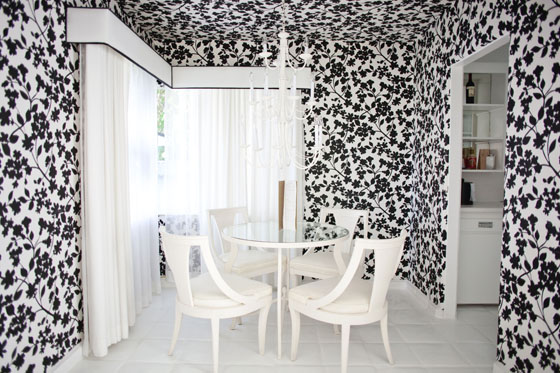 I love the wallpapering in this room. It continues up across the ceiling and seemingly makes the room feel larger. Oh look, more white leather on the curved back dining chairs. Attached to the dining room is the full kitchen. It’s a standard vintage galley kitchen but has every thing you need if you choose to cook and dine in. The painted tile floor continues throughout the entire villa. I love the idea of painting over an existing terra cotta floor.

There’s a stove, microwave, and a goodie stocked refrigerator. The doors were removed from the upper cabinets and mirrors were inserted in the backs. I think that makes the space feel more open.
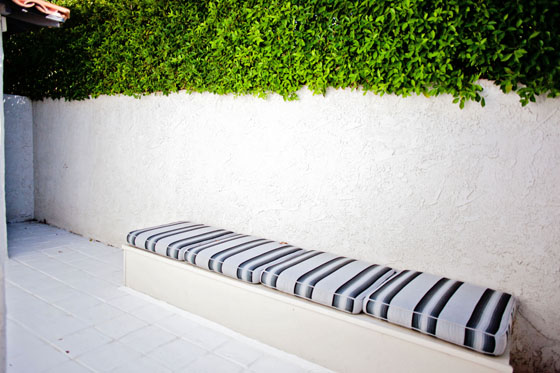
Not only does the villa have a patio area up front, it also has a completely private one in the back.
 Back inside, opposite the dining and living area, there is a bedroom and bathroom. The bathroom has two entrances, one through the vanity area off of the living room, and one through the bedroom.
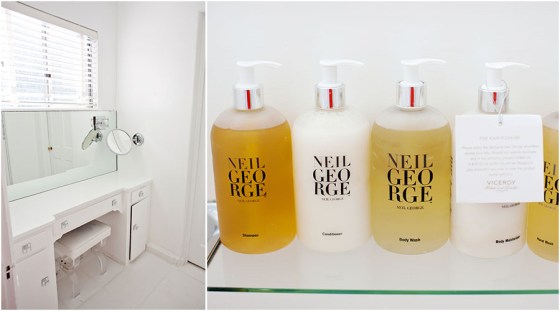
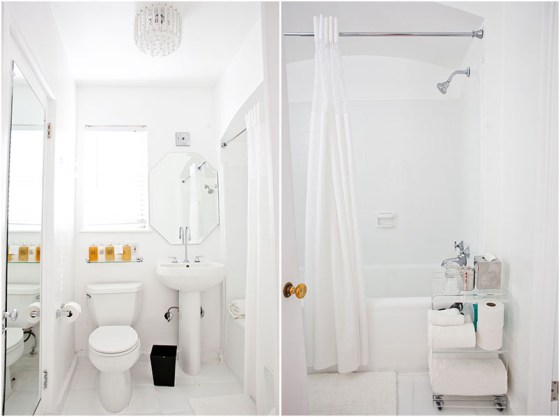
I adore a vanity area. The window above the mirror gives off a nice natural light for applying makeup and there’s enough drawer and cabinet space to store all your goodies. This bathroom is so classic and beautiful. I love that there’s a window. I love the arched shower. I love it all. It has everything you need. A stylish pedestal sink, a great light fixture, and a bath deep enough for a good soak. The shower also had the most amazing water pressure. All bath products are by Neil George.
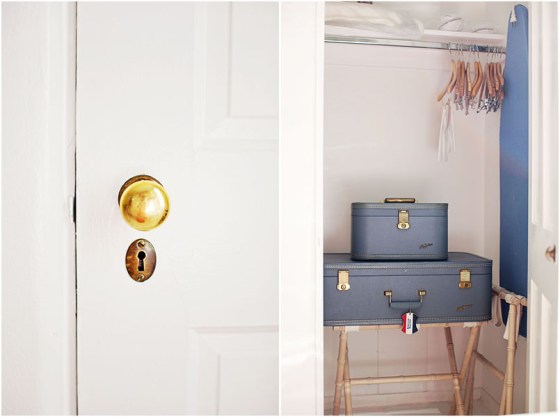
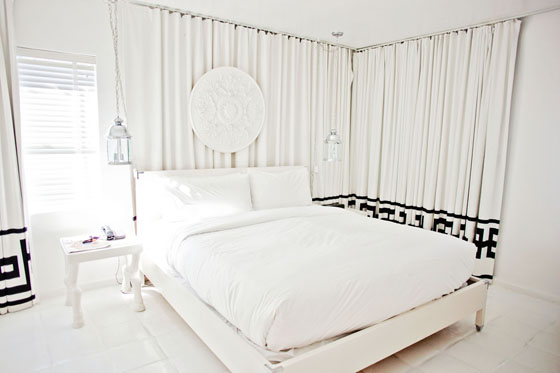
The bedroom is serene in all white. I thought the king sized bed was plush and comfortable. The hanging lamps are a nice touch. By the way all of the lights are on dimmers, which is almost unheard of in hotel rooms, but something I definitely appreciate. The white curtains have a stylish Greek key design and wrap around the entire room. Another unique design element I love is the placement of the medallion above the bed. There is also an armoir and television inside of the room. There is no dresser but there’s a large closet with stylish bamboo luggage racks. There are also slippers and robes!
My only concerns with the hotel and its rooms is that with the use of so much white, special attention needs to be paid to housekeeping and maintenance. There is inevitably going to be more visible wear and tear on light colored walls and upholstery. The furnishings are due for a good steam cleaning and leather reconditioning. The rooms and the hotel were clean, yes, but in need of a little TLC.
Also, be aware that summer heat pushes bugs indoors, especially with the drought California is currently experiencing. I was alarmed to find a big bug crawl out of the fireplace one evening, though I’m sure the hotel does their best with pest control. They even leave a bedside note to warn you and ask you to give them a ring should you find any “unwanted guests” in your room.
Besides those concerns I loved staying here. At 470 square feet this villa is actually smaller than my current apartment, but because of the layout it felt much larger. If I could find an apartment or home similar to this I would probably live in it forever.
All in all we loved it and will stay there again. And soon I hope!
Special thanks to Viceroy Palm Springs for a lovely stay.
Viceroy Palm Springs
415 S Belardo Rd
Palm Springs, CA 92262
(760) 320-4117
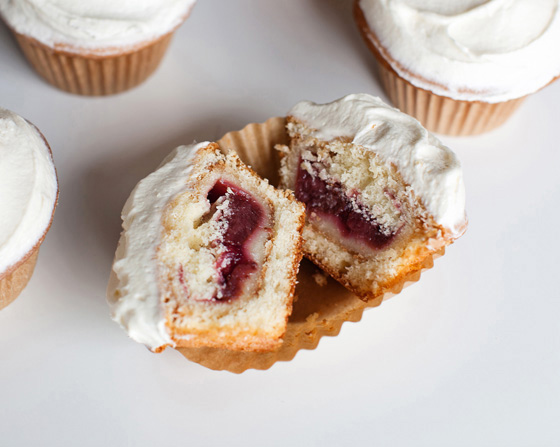
Mini Pie Cupcakes? Mini PieCakes? CupPieCakes?
Call them whatever you want but these are my new favorite things. Remember the pie-cake I made? It’s almost like that, but in cupcake form. Sure, the cake was good, but most of the time I’ll pick cupcakes over cake. This version is more simple and mild, but still very delicious and interesting. These cupcakes were a lot easier to manage and took a lot less time than the monster pie-cake. So if you’re feeling intimidated by pie-cakes because of flavor and effort, try this instead.
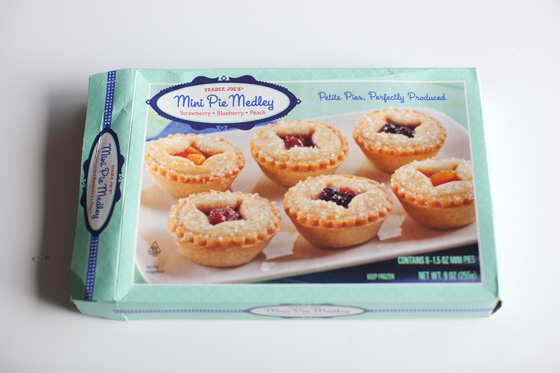
This time I made the cake and frosting from scratch, which I very much prefer and will do next time I attempt a pie-cake. What I didn’t make from scratch were the mini pies. It would be simple enough to do that using a mini cupcake tin, but it wasn’t necessary because Trader Joe’s has the best mini pies ever. Are you familiar with this medley of fruit pies? Well, you should be.
All you need to do is whip up some cake batter and frosting (your own recipe or boxed is fine) and buy (or make) some mini pies. If you’re using frozen pies, let them thaw out for a bit.

I made my favorite yellow cake recipe. It has a classic flavor and is the perfect density to hold the pie.
Ingredients
1 cup unsalted butter
2 cups sugar
1 1/2 teaspoons vanilla extract
4 eggs
3 cups sifted cake flour
1 tablespoon baking powder
1/2 teaspoon salt
1 cup milk
Cream room temperature butter until light and fluffy. Add sugar and continue to beat. Gradually add the vanilla and eggs (one at a time) and mix well. Sift together the dry ingredients. Add them to the butter mixture alternating with the milk.
Line your cupcake pan with cupcake liners. Pour a small amount of batter into the liner and push it up the sides a little. Place the mini pie in and top with more cake batter. Bang the pan on the counter to make sure everything is settled in there. Then bake at 350 degrees for 25-30 minutes.

The frosting I used is a simple buttercream.
Ingredients
1 cup (2 sticks) unsalted butter
1 teaspoons vanilla extract
4 cups powdered sugar
2-3 tablespoons milk
Cream together the butter and vanilla. Sift the powdered sugar and add it to the butter mixture. Scrape down the bowl often to make sure all everything is mixed in. Add milk one tablespoon at a time until it’s your desired consistency. Beat until smooth for about 2-4 minutes.
 What you get is PIE INSIDE OF CAKE IN CUPCAKE FORM. You get the best of both worlds. The pie center is so good. And the piecrust goes super well with the fluffy cake. It’s basically a dream hybrid dessert.
You would think after our summer road trip we’d want to take a little break from hotel life for awhile, right? Oh, no. Not us. We almost immediately got the urge for another adventure so we headed out to our beloved Palm Springs. 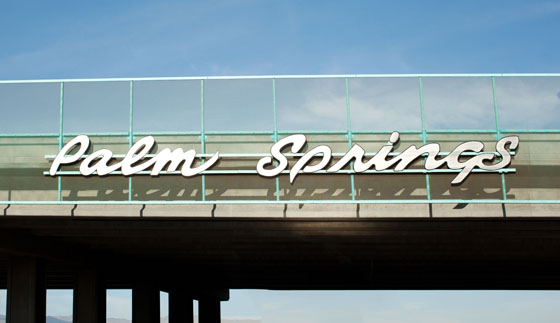 Oh, Palm Springs. How I love your style. If you know me, you know I have a love for all things vintage, and Palm Springs is the best place to catch the vintage vibe. Whenever I look for a hotel I always look for three things: great design, great dining, and pet-friendliness. But when it comes to Palm Springs, a great POOL is a must. Summer temps soar into the 100’s so there is no point to being outside unless there is a pool and drinks. This time we stayed at The Saguaro Palm Springs – a Joie de Vivre hotel. It was my first time staying here but I’ve had it on my mind for awhile, and it has everything on my list of requirements.
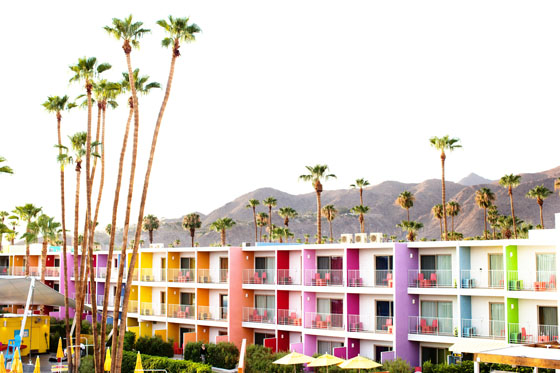
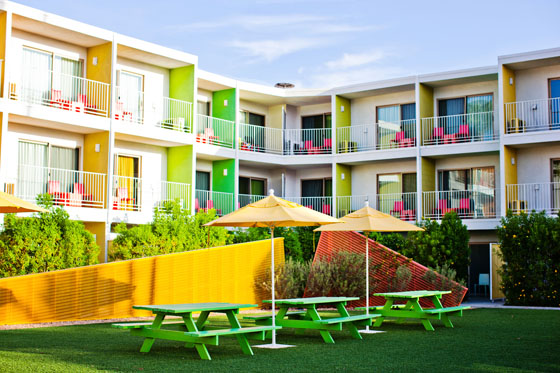
 It was originally built in 1965 and had former lives as a Ramada and a Holiday Inn, but it’s never been as cute as this! The Saguaro opened in early 2012 and has taken on a new life in vibrant technicolor.
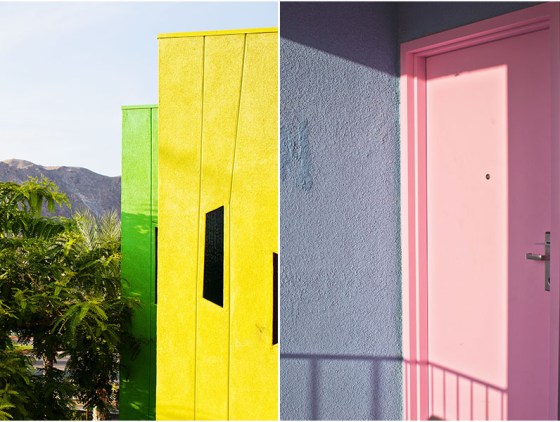
  The rainbow colored palette is the work of Peter Stamberg and Paul Aferiat, of New York-based Stamberg Aferiat Architecture. Each hue is inspired by indigenous flowers of the Colorado Desert and carried throughout the property.
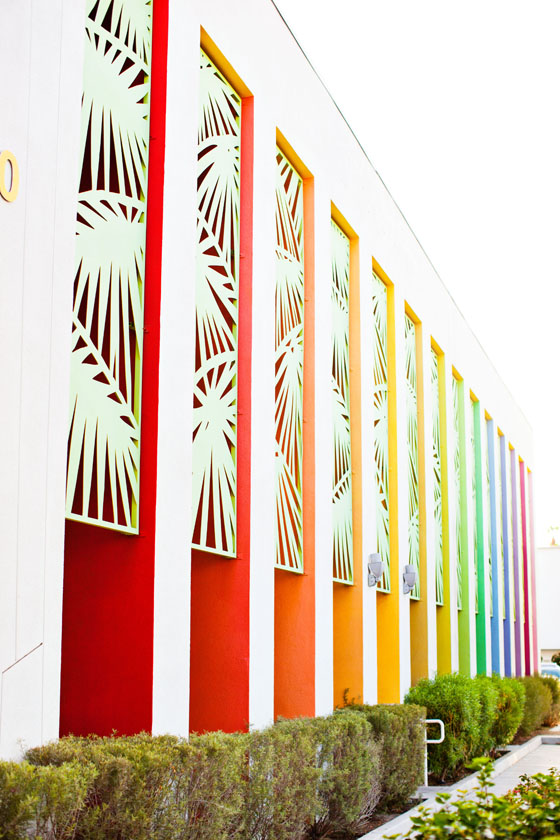
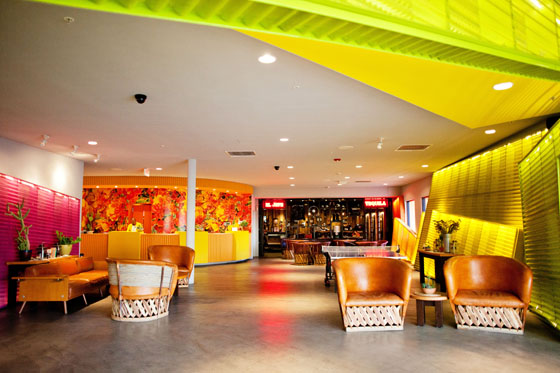 And the color continues inside where it’s met with handcrafted Mexican furniture. An interesting contrast that makes sense when you consider the southwestern inspiration. I loved the use of cacti and vintage brownie cameras as decor, further bringing the desert and vintage elements together. It works.
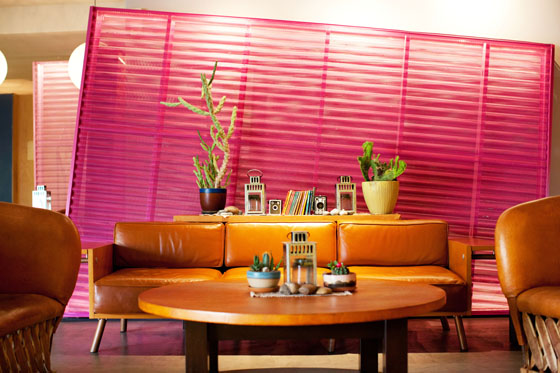
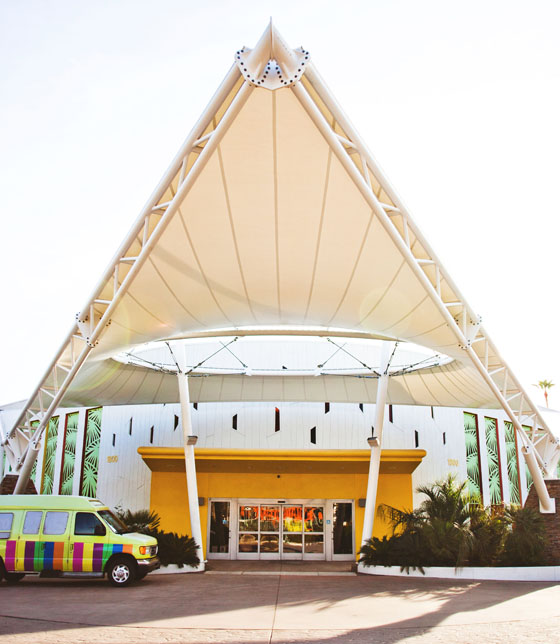
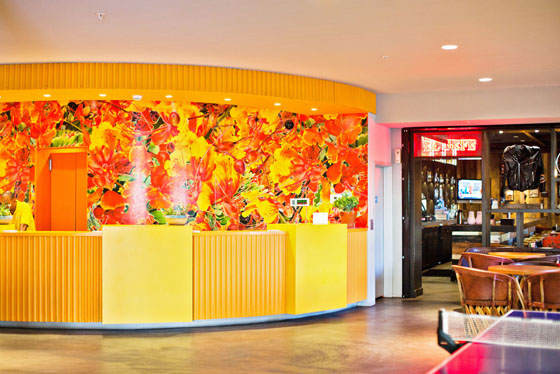 The front desk stands out with its bold orange and yellow floral walls. The front desk staff was very helpful and accommodating to us. Great first impression. We were directed to our room on the color coded map and were happy to find self parking was ample and a breeze.
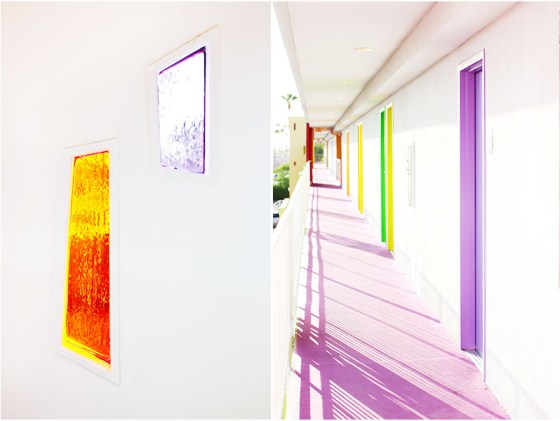
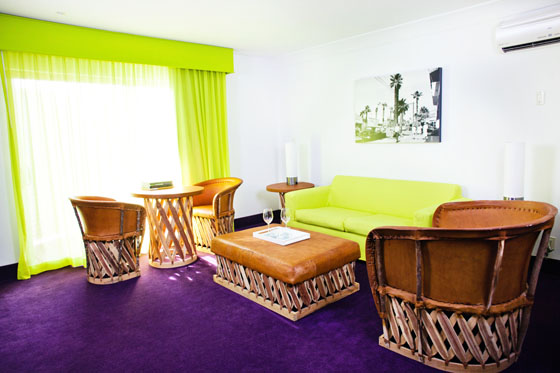 Our king suite was spacious, and of course, colorful! The rooms are minimally decorated with only a few coffee table books and retro photography on the wall. The living area had a comfortable pull out sofa, little dining area, dresser, flat screen TV, and a walk out balcony. Oh and a refrigerator to store your drinks and stuff. Very convenient.
 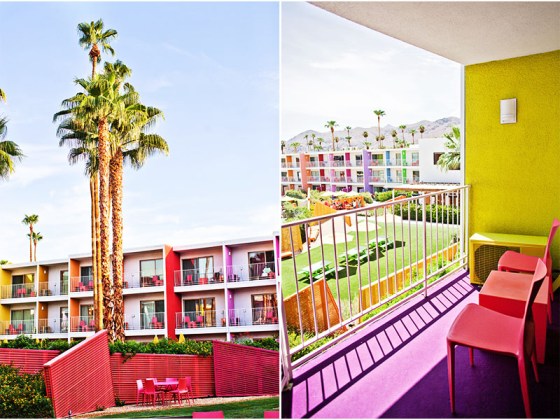 The bathroom was ORANGE, spacious, and had a good shower. I hate when showers just have that weird, stupid mist that sprays at you and you can’t rinse your hair well, so you have to stick it under the bath faucet…sorry I’m ranting. This shower had none of that! It was delightful. The toiletries by Lather smelled gooooood. Lavender Lime lotion, bamboo lemongrass body wash, yuzu bergamot conditioner, and mint thyme shampoo. I was about to be like “heyyyy, can I have like 27 of each to take home?”, but then I just figured I should just buy them like a regular person.
 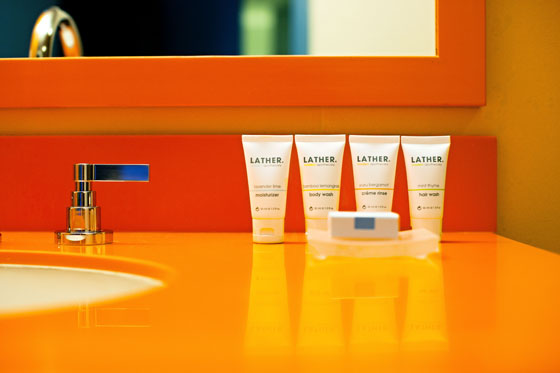 The bathroom has everything you need. My only “meh” is that the tile didn’t do it for me, aesthetically speaking. Hopefully it’s just left over from the Holiday Inn days. Anyway, enough about tile. LOOK ROBES! Hooded ones.
 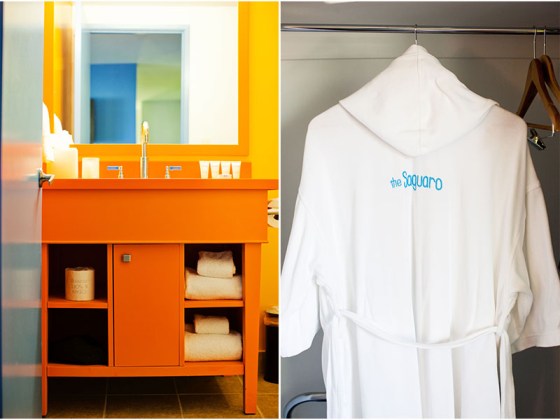 The bedroom portion had a work desk, a table, and another wall-mounted TV. And a bed. Duh. Oh man, that bed was super comfy. I hadn’t slept that well in days.
 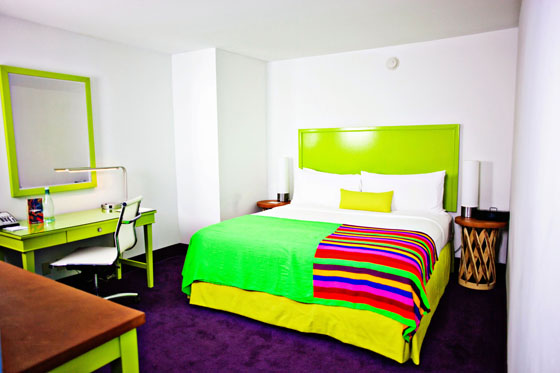 A lot of people are picky about room noise, but the room was quiet to me (except when the DJ was pumping jams on Saturday afternoon). It might be because I live in an apartment building on one of the busiest streets in Los Angeles, but I honestly didn’t notice any noise coming from other rooms. Bonus points for having lamps with electrical outlets on the base. I hate having to find a place to plug my phone and laptop in. Extra bonus points for the washable slipcovers on the sofas. That’s a good idea considering the dog friendly policy.
 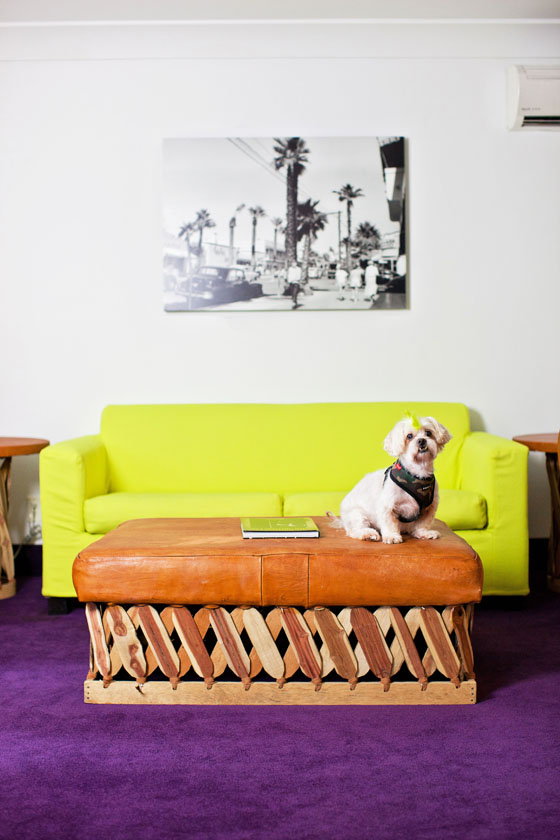 WAIT. Let me talk about their super friendly dog policy real quick. No pet fee and they don’t stick you in the crappy rooms. They even included bowls and cute dog things.
 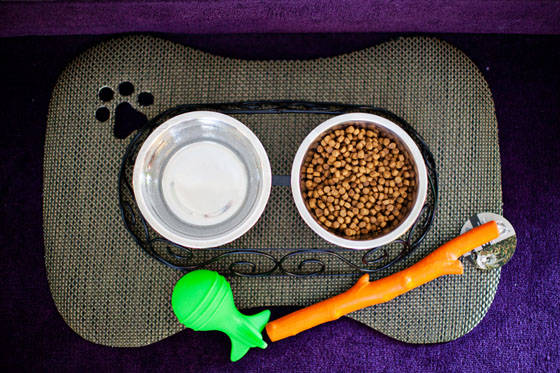 Mango and Pandie loved watching people at the pool and their hair colors fit right in.
 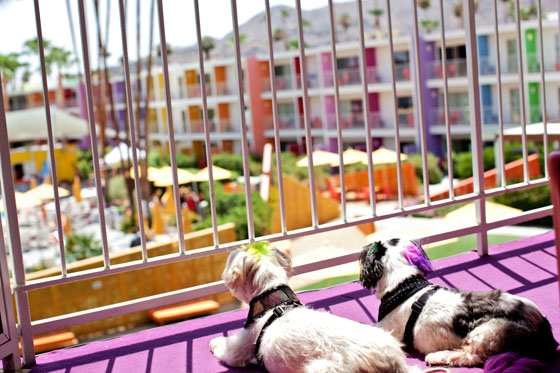 Now for the pool. The pool is important. If you don’t have a pool in Palm Springs, what is even the point? The Saguaro has one of the best and it’s open until midnight. There are two hot tubs, if you feel the need to soak.
 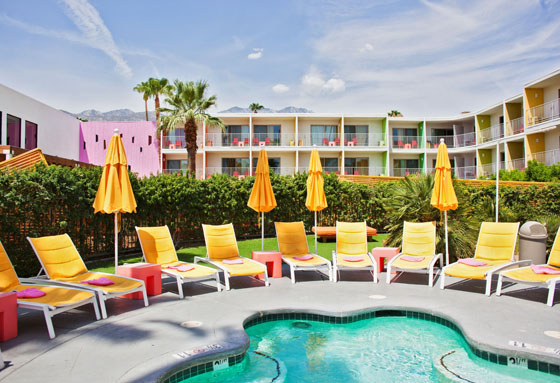 There is also a pool bar that has light snacks and drinks. Helllooooo. But wait, that reminds me. The middle portion of the pool goes to 9ft deep. Normally, I’m excited if any pool goes to even 6 ft deep, but in this case it’s kind of a funny problem. Every weekend they host a pool party (12pm-6pm) with a DJ and the drinks are flowing. Everyone ends up crowding into the shallow areas because they can’t stand and party it up while trying to keep their head above water in the deep end. Just make sure you snag a pool floaty if you can’t snag a spot in the shallow end. Oh, and one more minor observation: while it’s cool they have a DJ (because what pool is a party without one), they really need a better playlist. I enjoy the occasional ironic 90’s jam as much as anyone, but there really needs to be a better mix if they want to attract the crowd I think they do.
 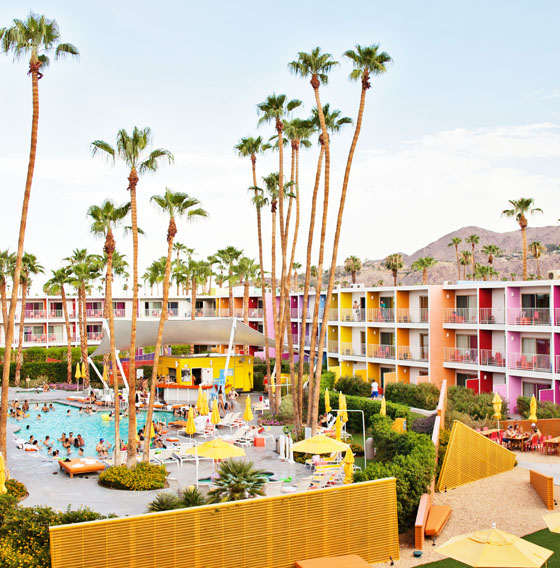 The property also has a spa, bocci ball court, and daily yoga that I can appreciate but did not partake in.
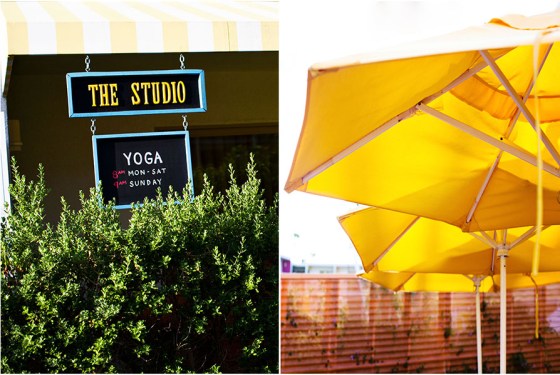
 And FREE BIKE RENTALS!
 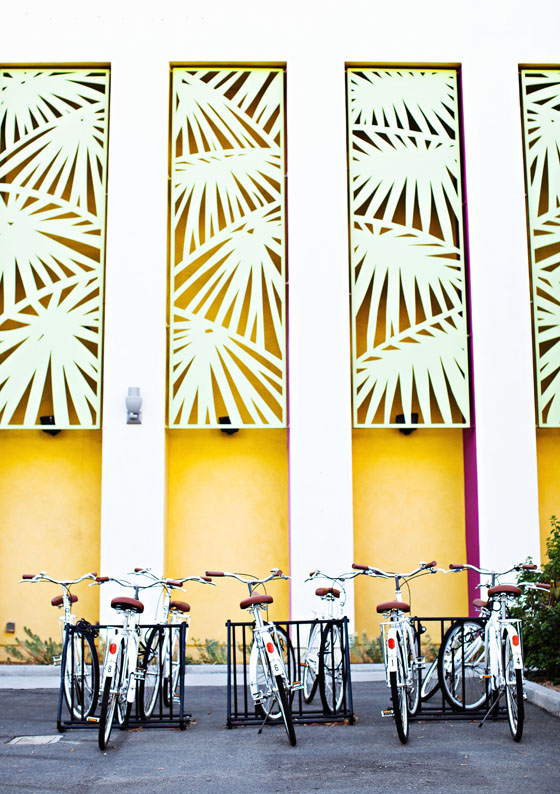 Jvee got stung by a bee and it was 106 degrees so we had to cut it short (typical luck), but taking these for a ride around the neighborhood is a blast. Rentals are for two hours at a time.
  There are two restaurants at the hotel, Tinto and El Jefe by Iron Chef Jose Garces. Tinto was closed during our stay but we had dinner at El Jefe where our server was very sweet and attentive. We ordered the vegetarian queso fundido as our appetizer. I had the fish tacos and loved them. Some of the best cabbage on a fish taco I’ve ever had. Jvee had the carne asada tacos because they were out of the cabrito that he had his heart set on. He enjoyed them. I liked the taco presentation. Very cute. However, I wish the food came out in the right order. My tacos came out, then the queso appetizer, then Jvee’s carne asada tacos. But it all tasted good in the end. You better get THE MARGARITAS. These aren’t watered down chain restaurant margs. I caught a little buzz off of one and the flavor was tops. I recommend the charred pineapple, even though I kind of wished it came with a charred pineapple garnish.
 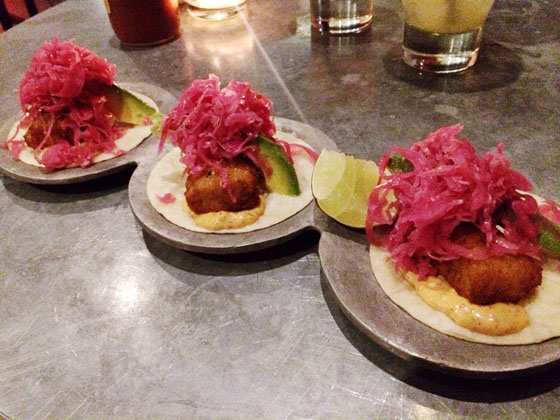 Everywhere you look there’s color and it makes you happy!
 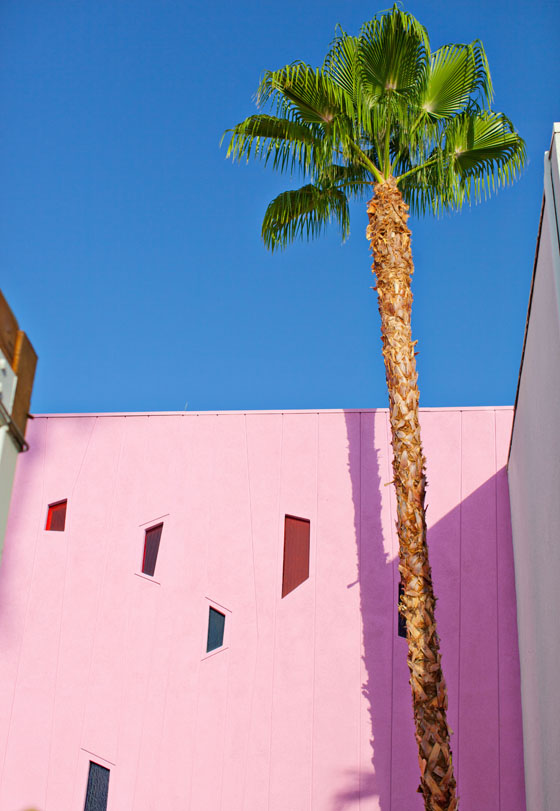 And the views!
 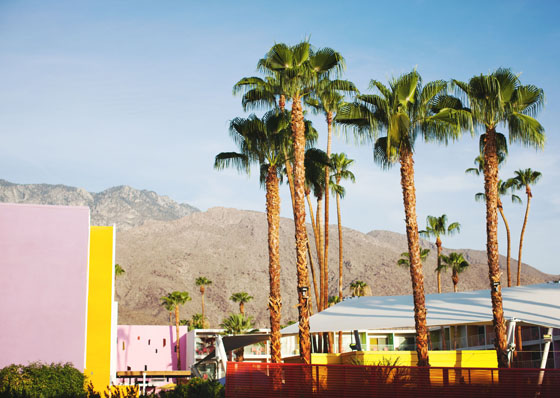 Maybe it’s the colors. Maybe it’s the tequila. I don’t know, but I’m definitely going back. I highly recommend you take a little visit to The Saguaro, too. And don’t forget to dress the part.
 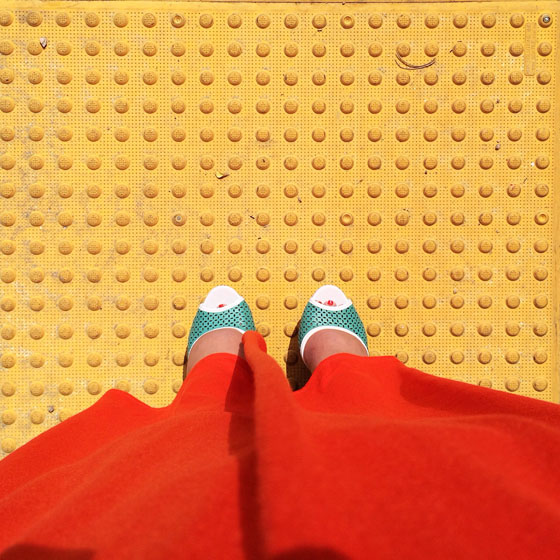 Bye until next time.

Ok, guys. I already showed you how to make the sugar eggs I adore so much, now I’m going to show you how to make adorable little nests using the same method.

Use the same mixture and method as the Sugar String Easter Egg Baskets (3 parts sugar, 1 part water, crochet string). This time just use a smaller balloon…
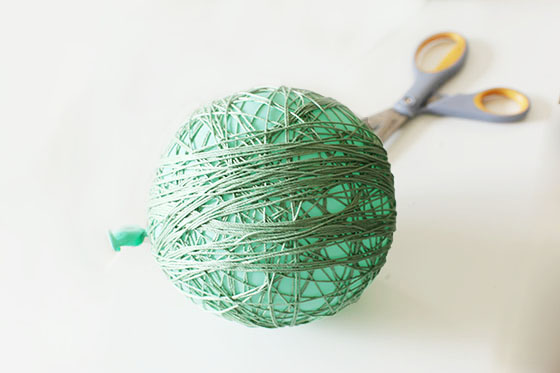
…and once it’s dry cut it in half.

Fill them up with candy eggs and those nasty little marshmallow Peep bird things you all seem to love and watch everyone go gaga over the cuteness!