

Stay tuned!
Stay tuned!

A few months ago my cousin came to visit and one of our favorite things to do when she’s in town is to go to Joshua Tree to look at the Milky Way and low-key scout for UFOs. We usually drive there and park our car inside of the National Park for a few hours, but this time we decided to make a weekend out of it and rent a house.
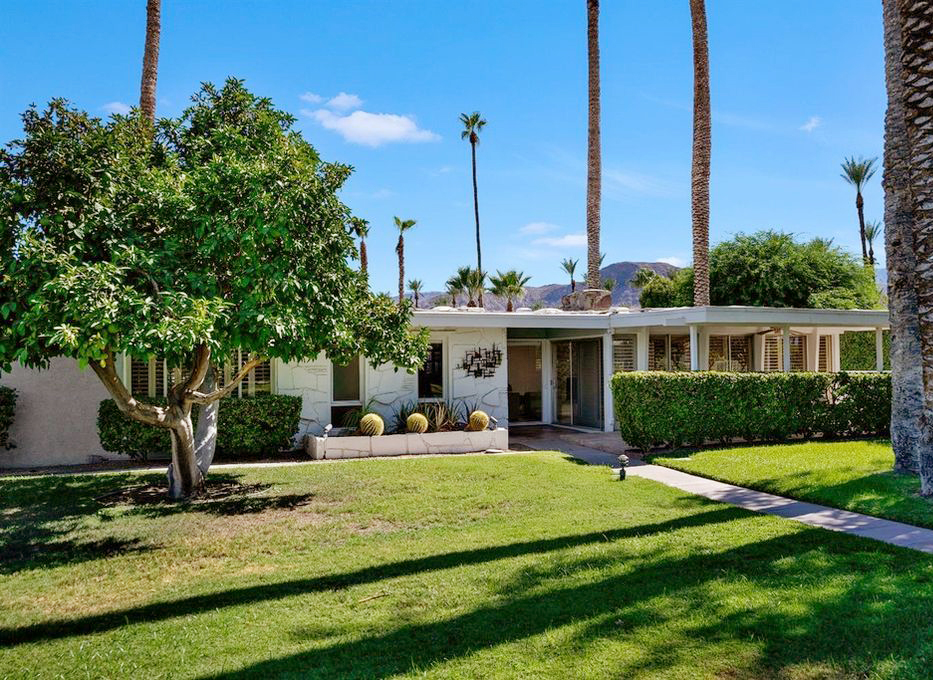
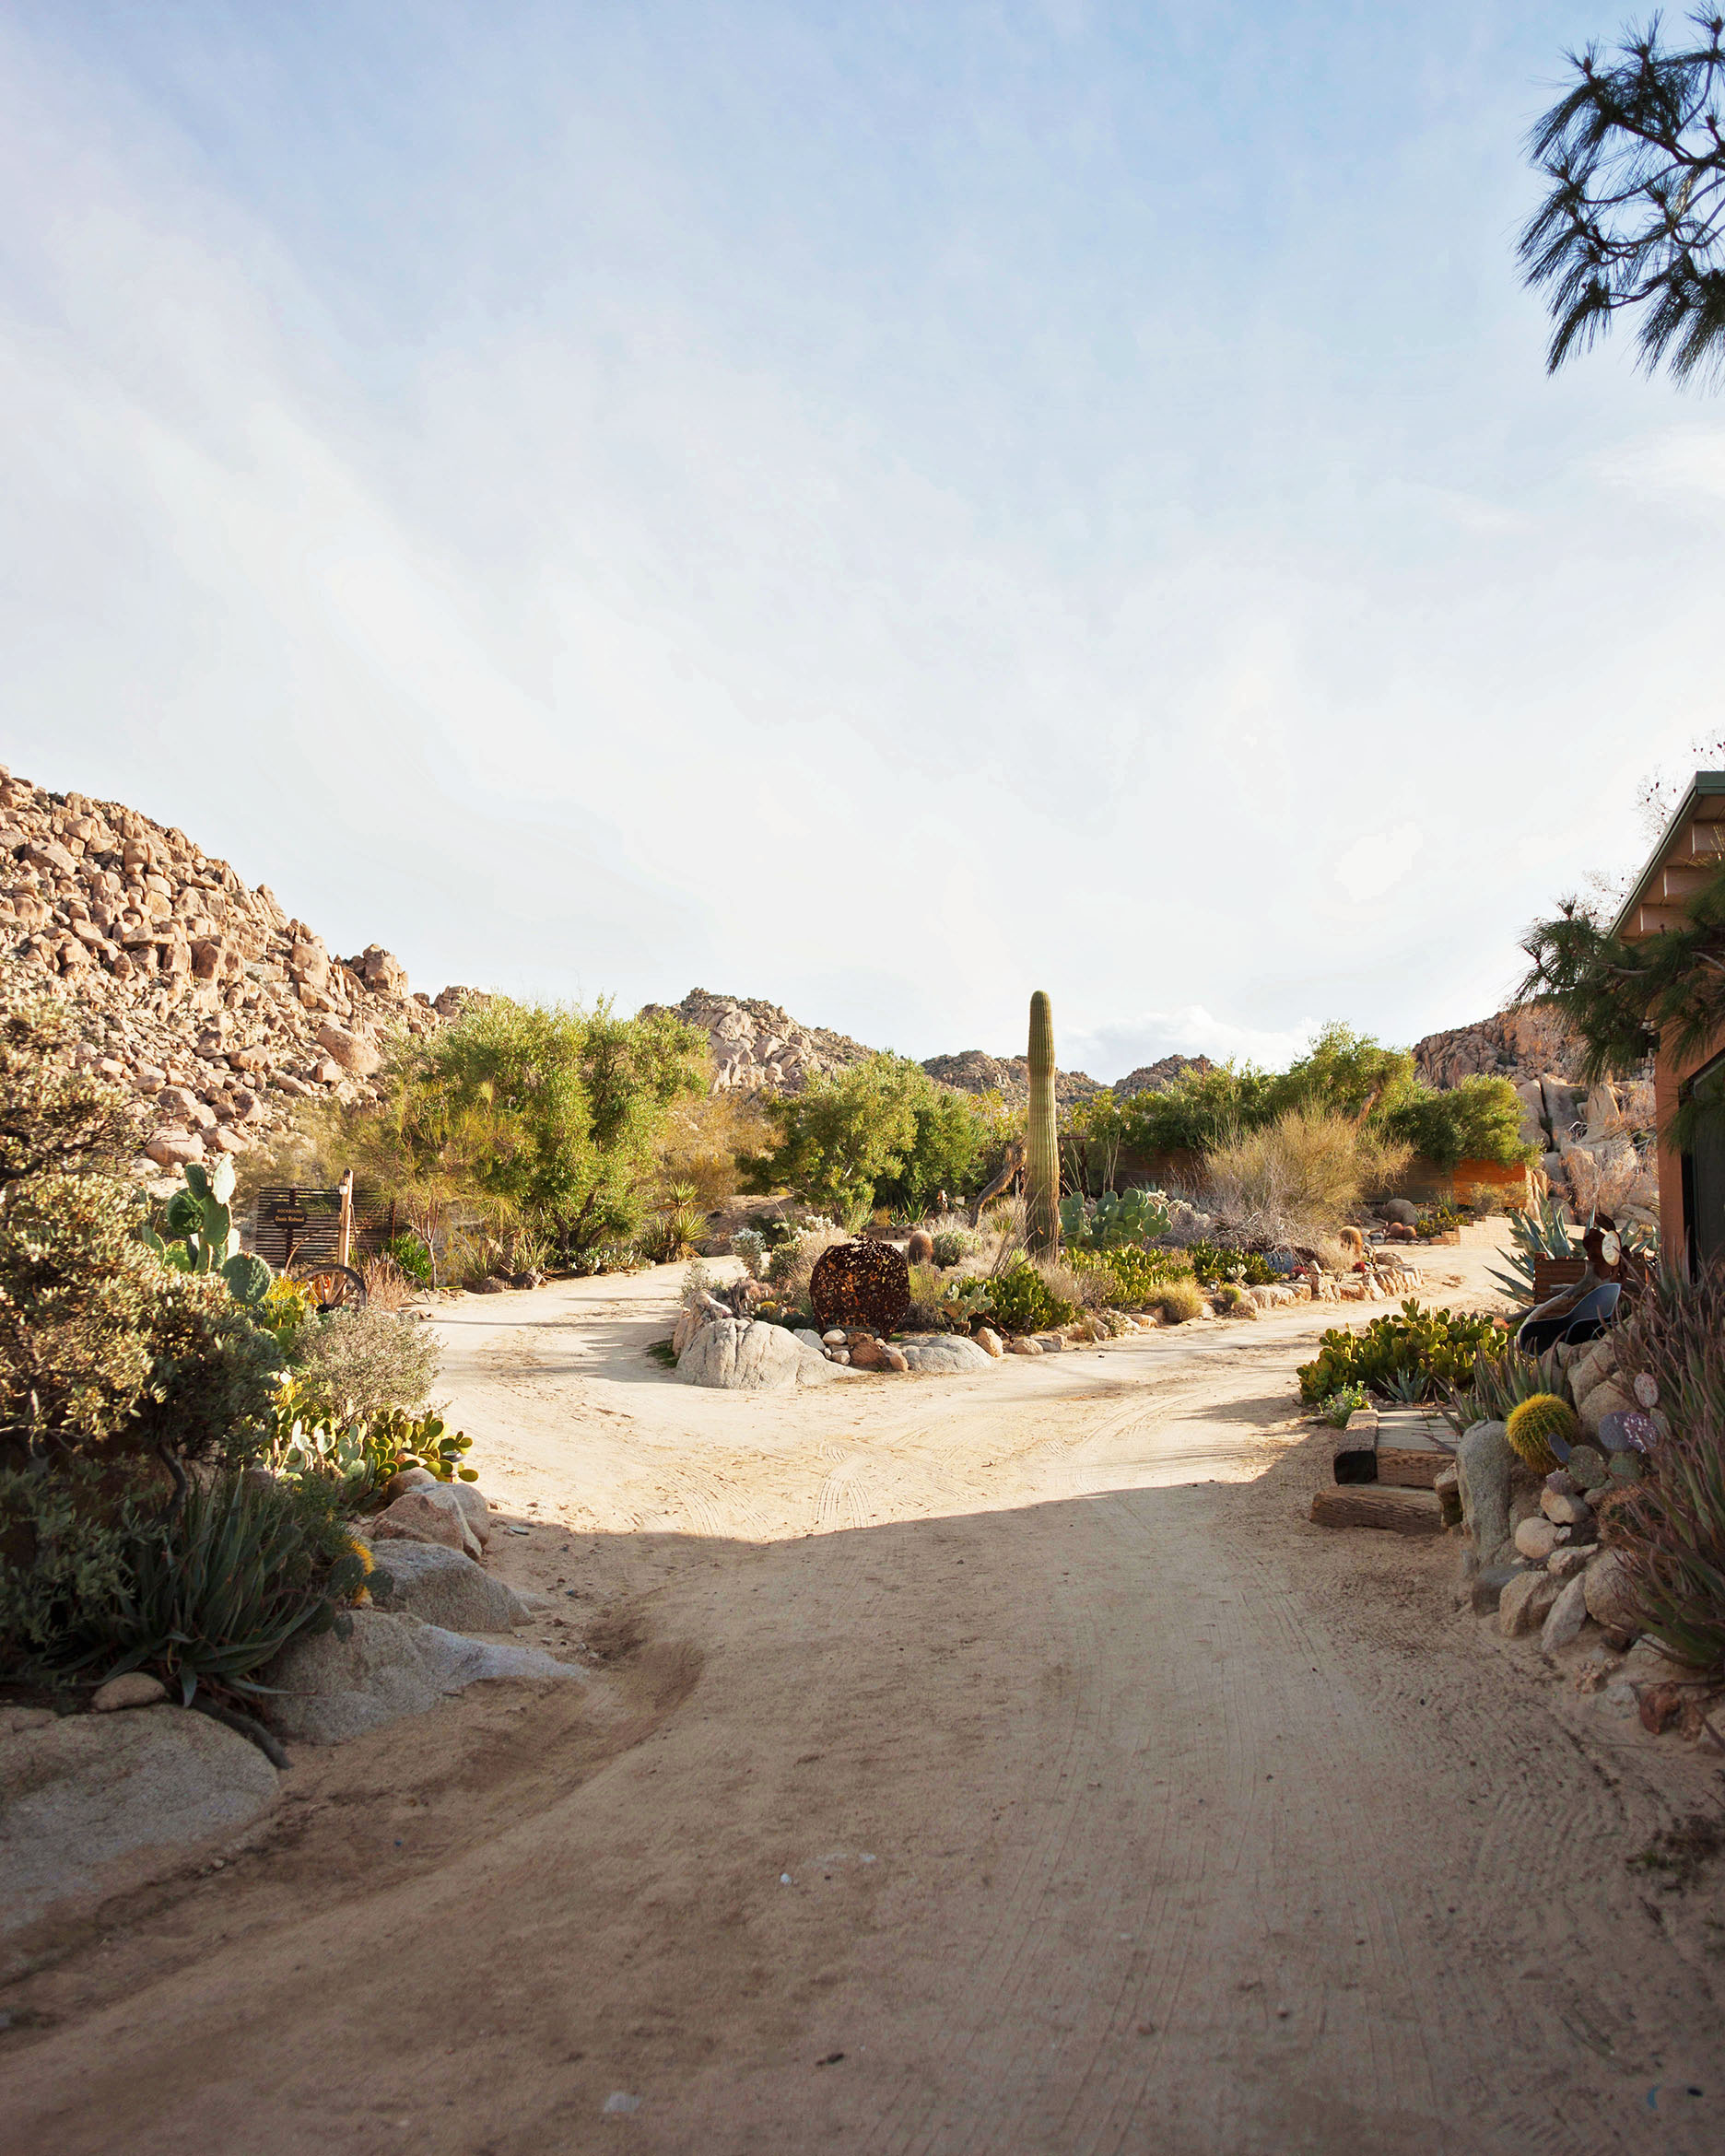
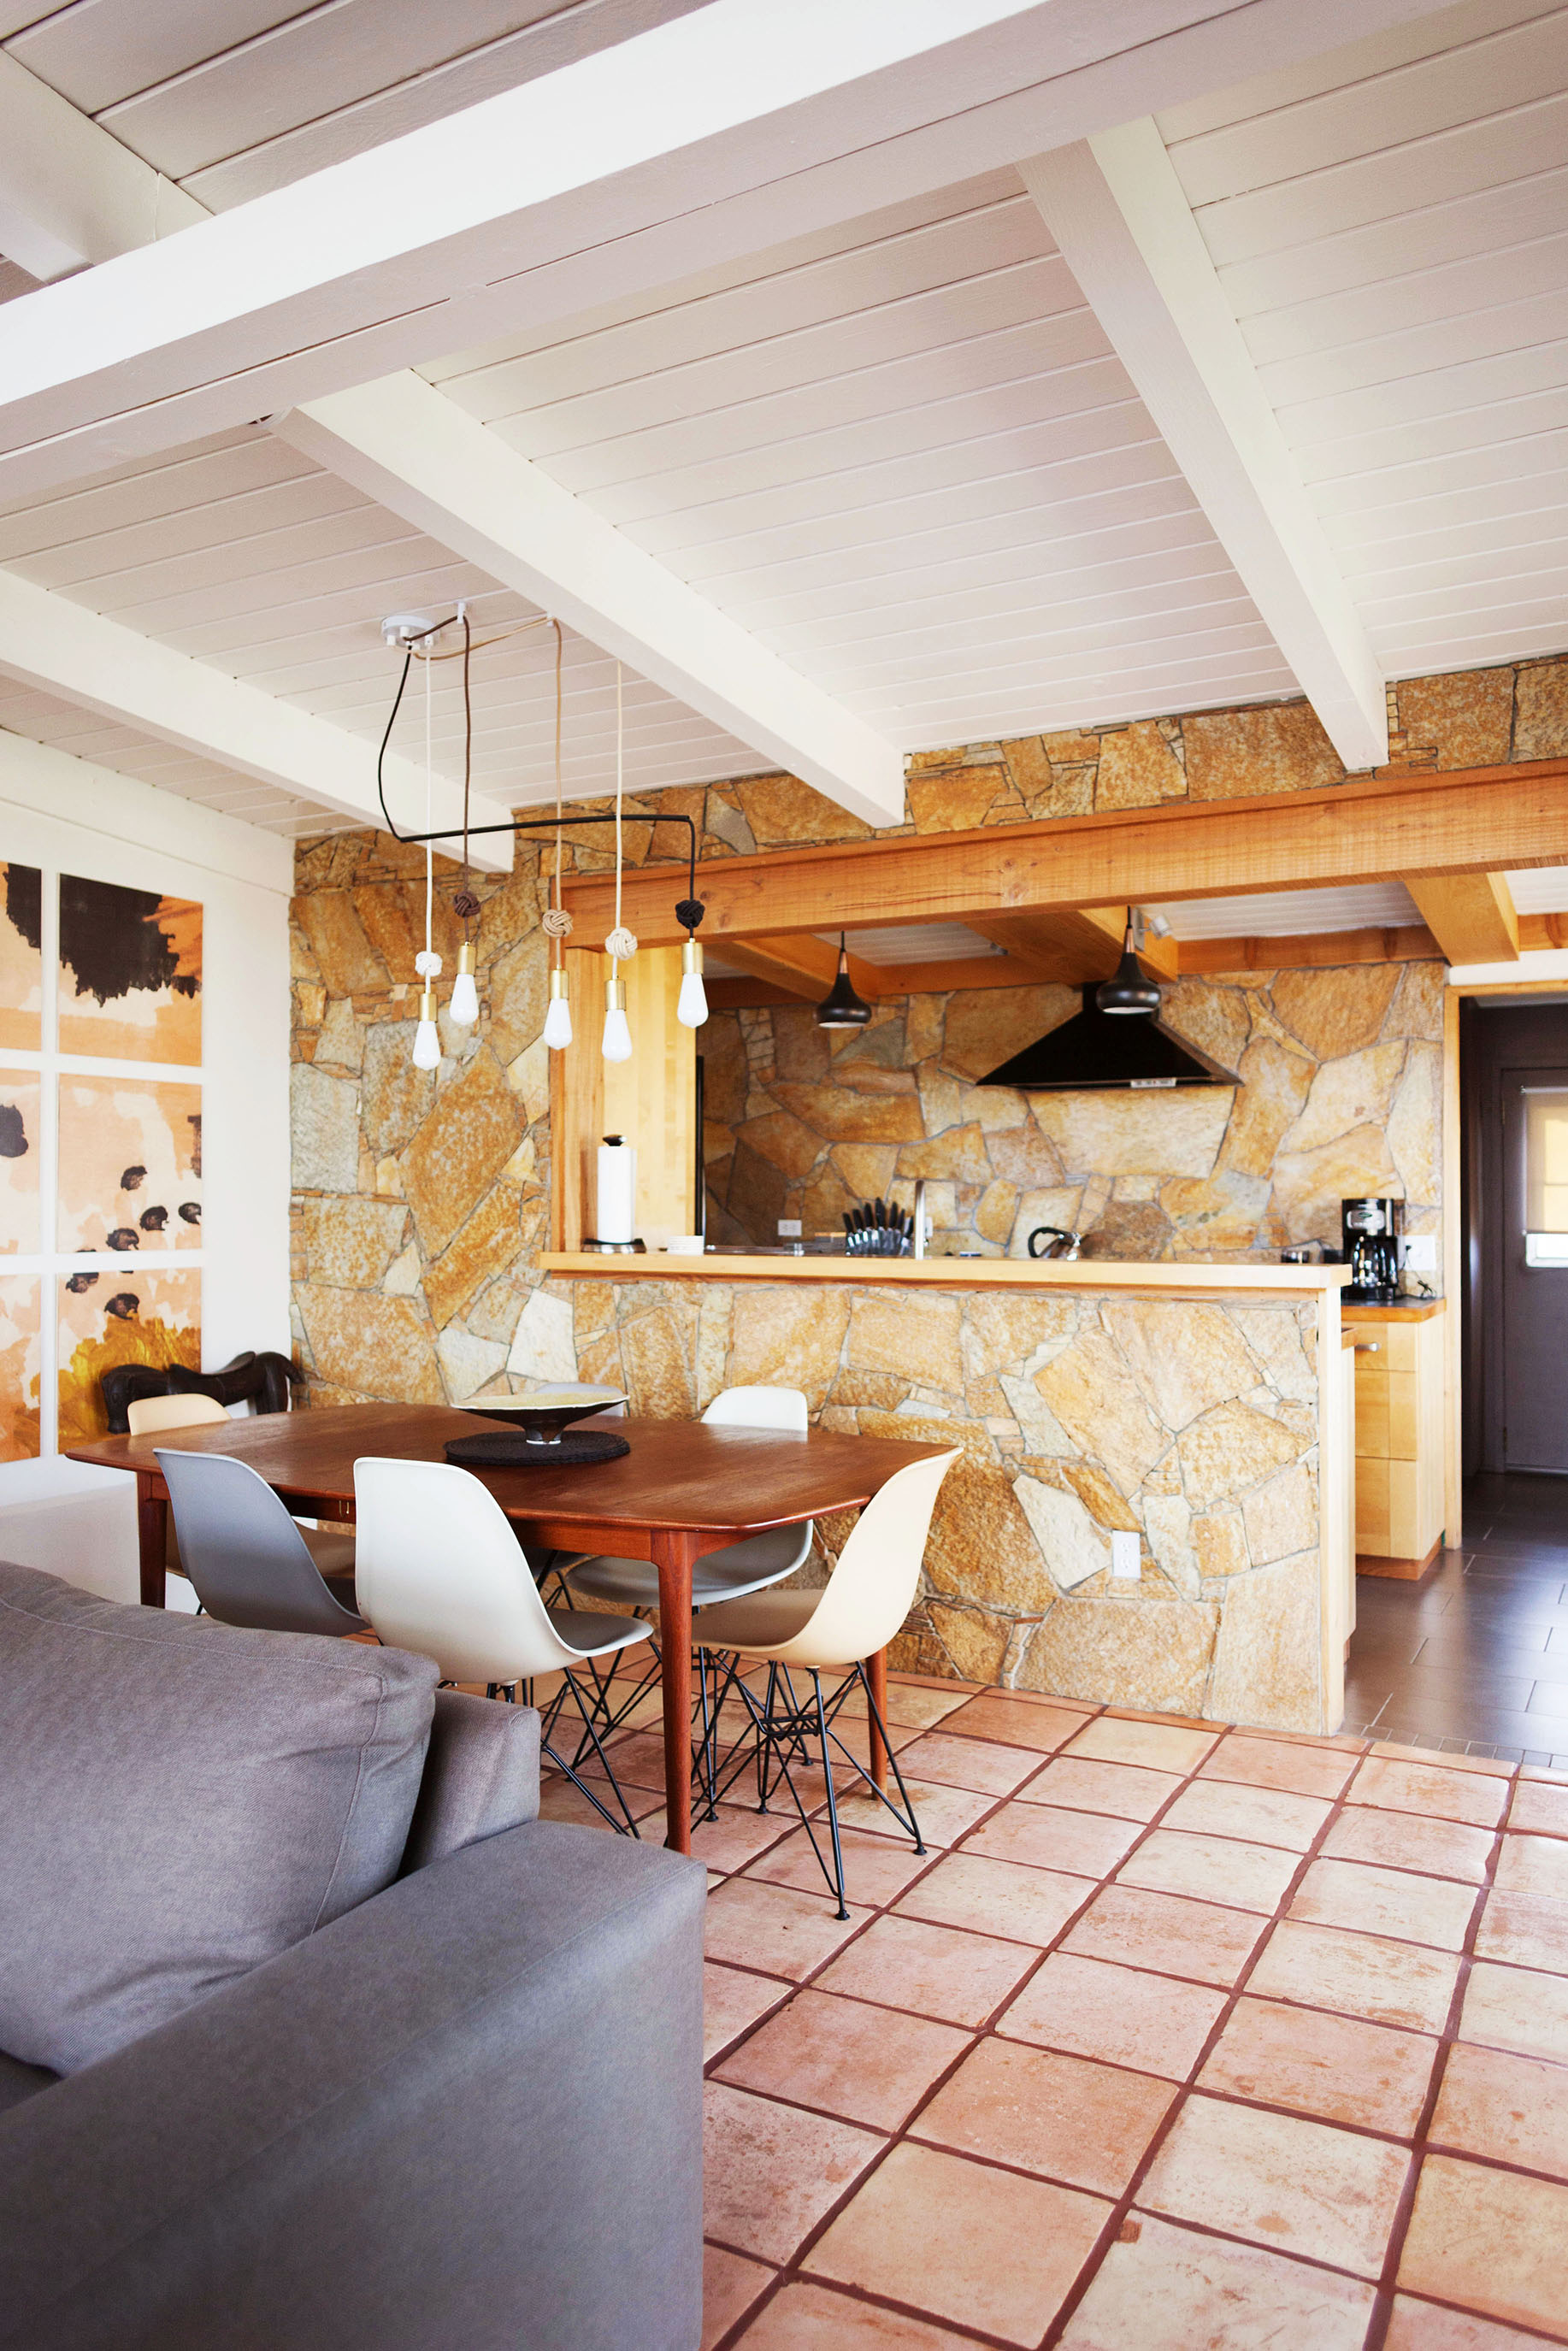
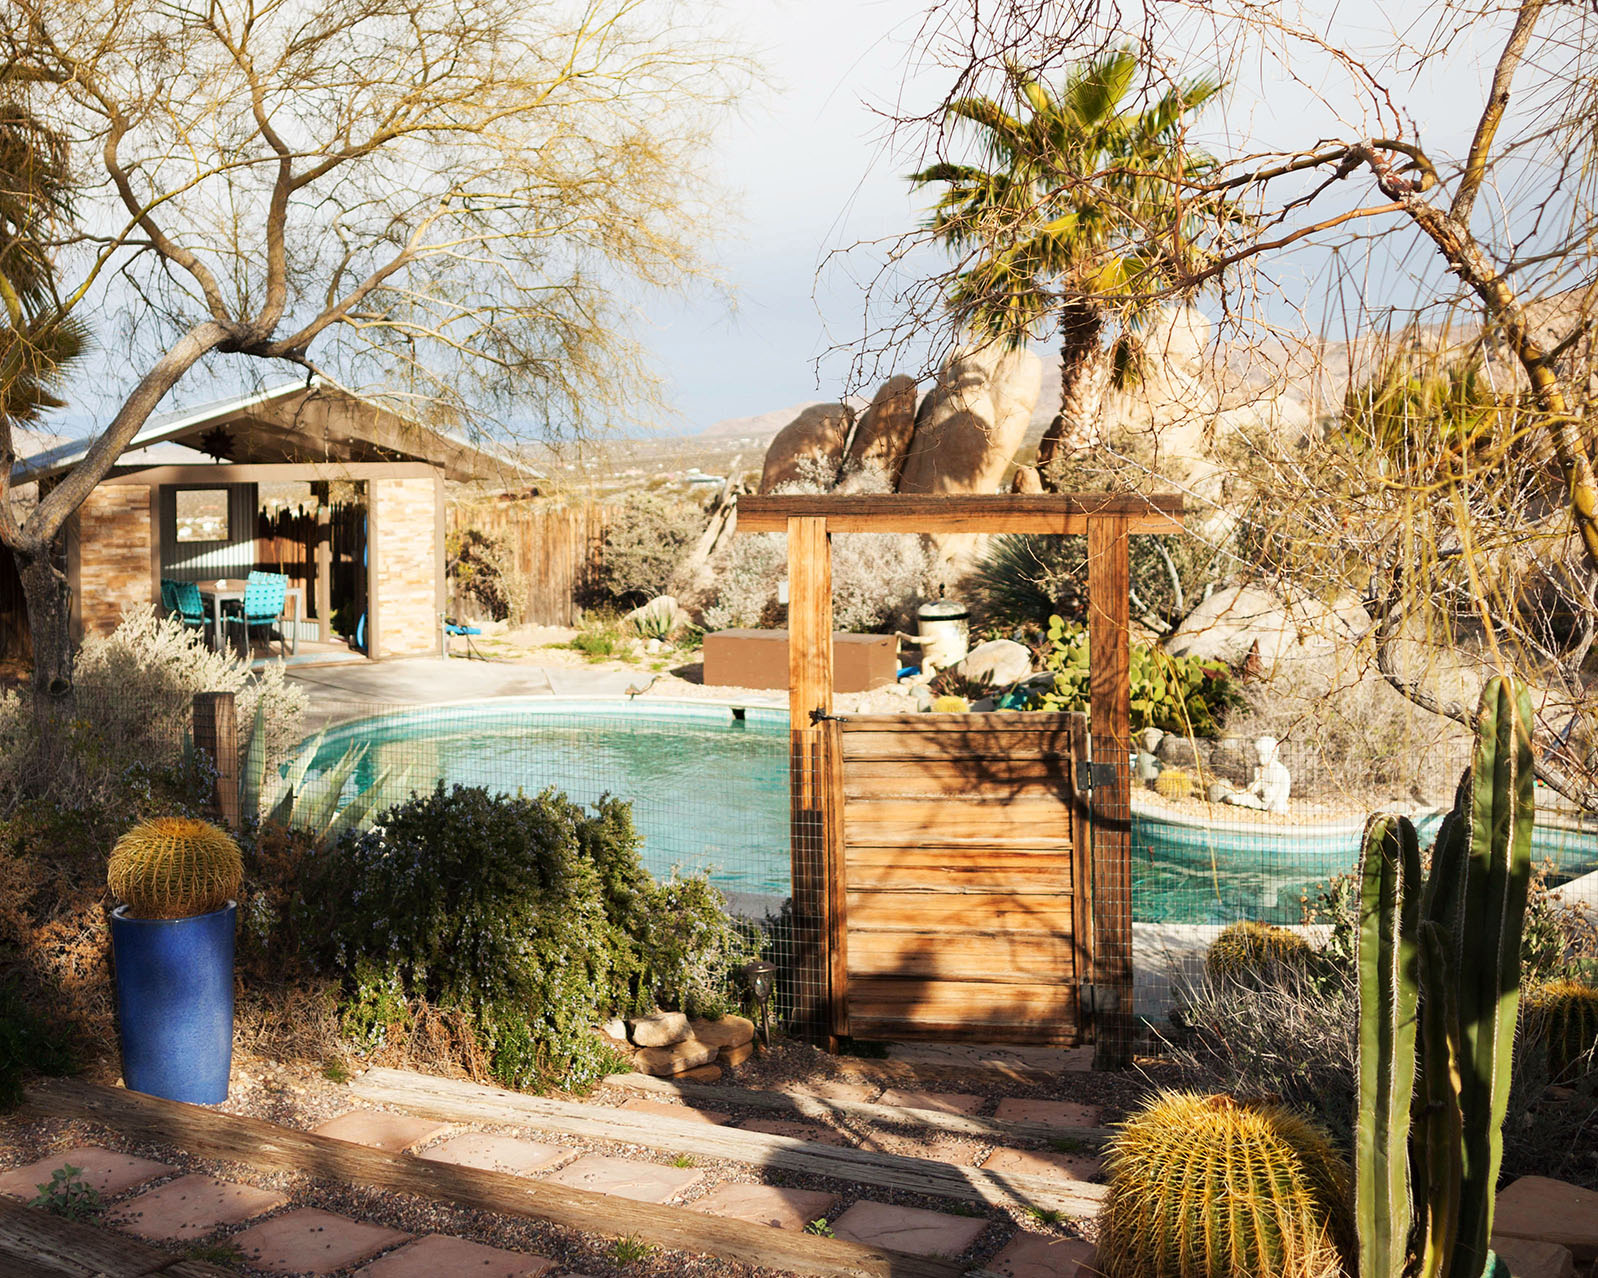
It just so happens one of my long-time Instagram friends owns a mid-century estate there and offered it to us for a couple of days. The property, appropriately named Rock Bound Oasis Retreat, was built in 1954, and has a main house and a separate casita. It’s nestled between boulders with sprawling views of the surrounding desert landscape.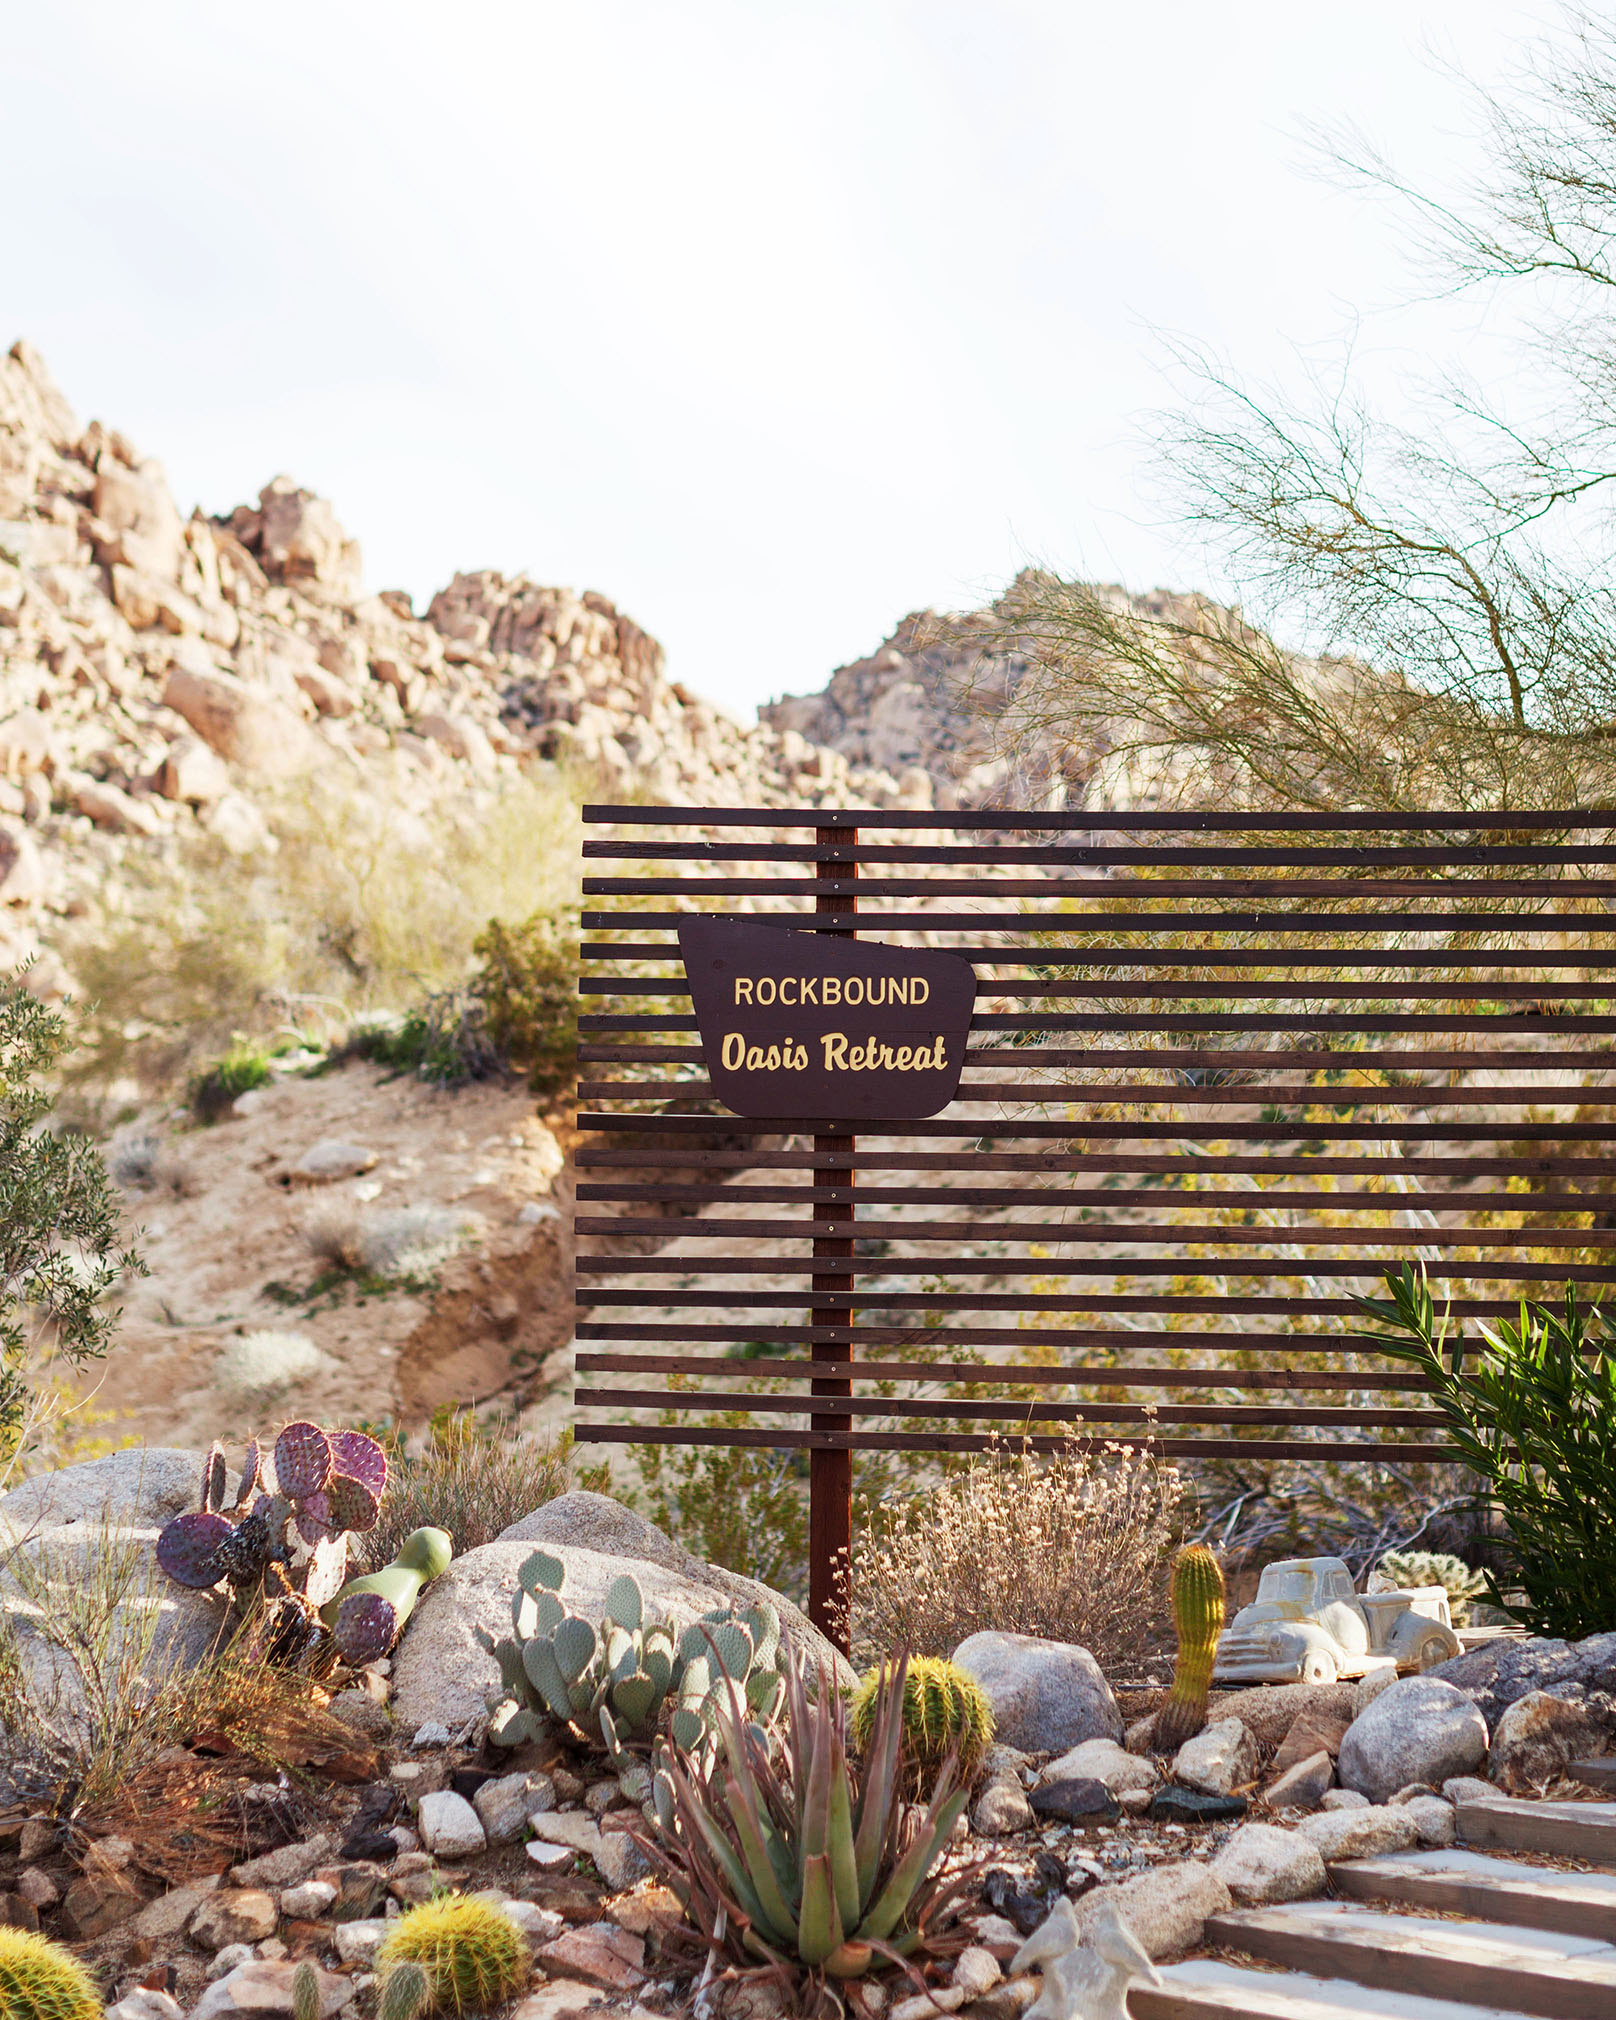

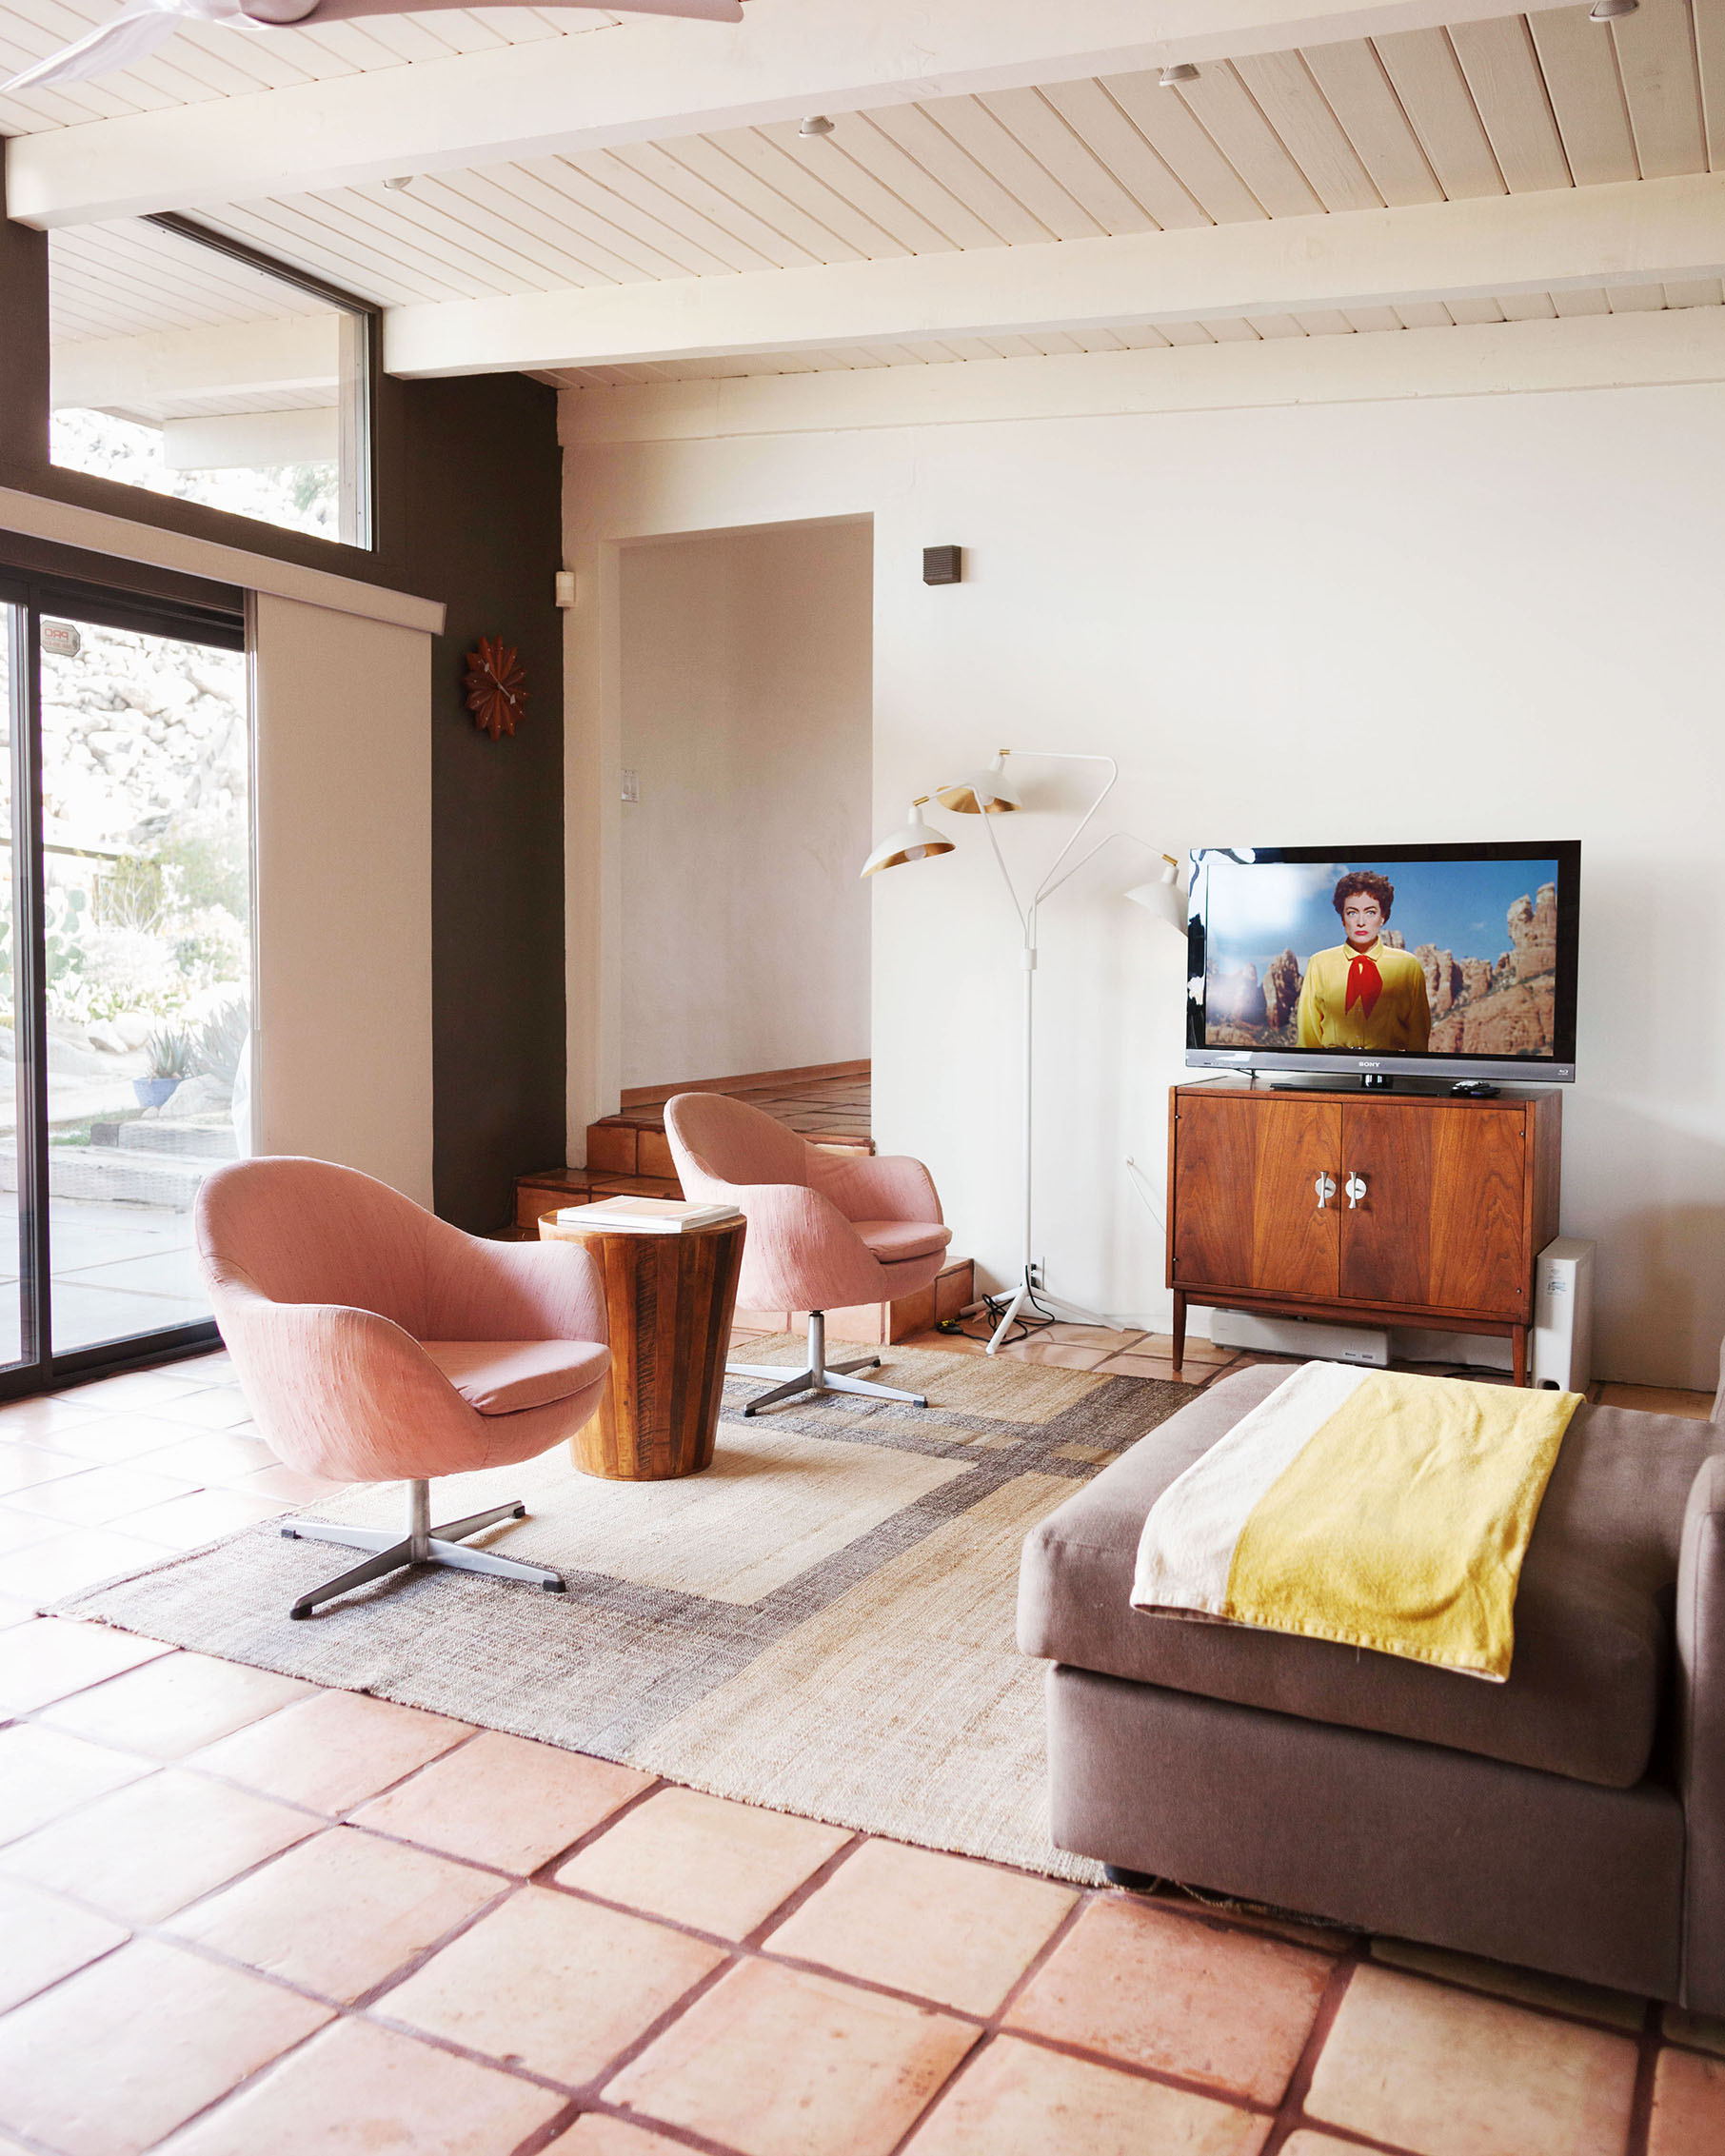
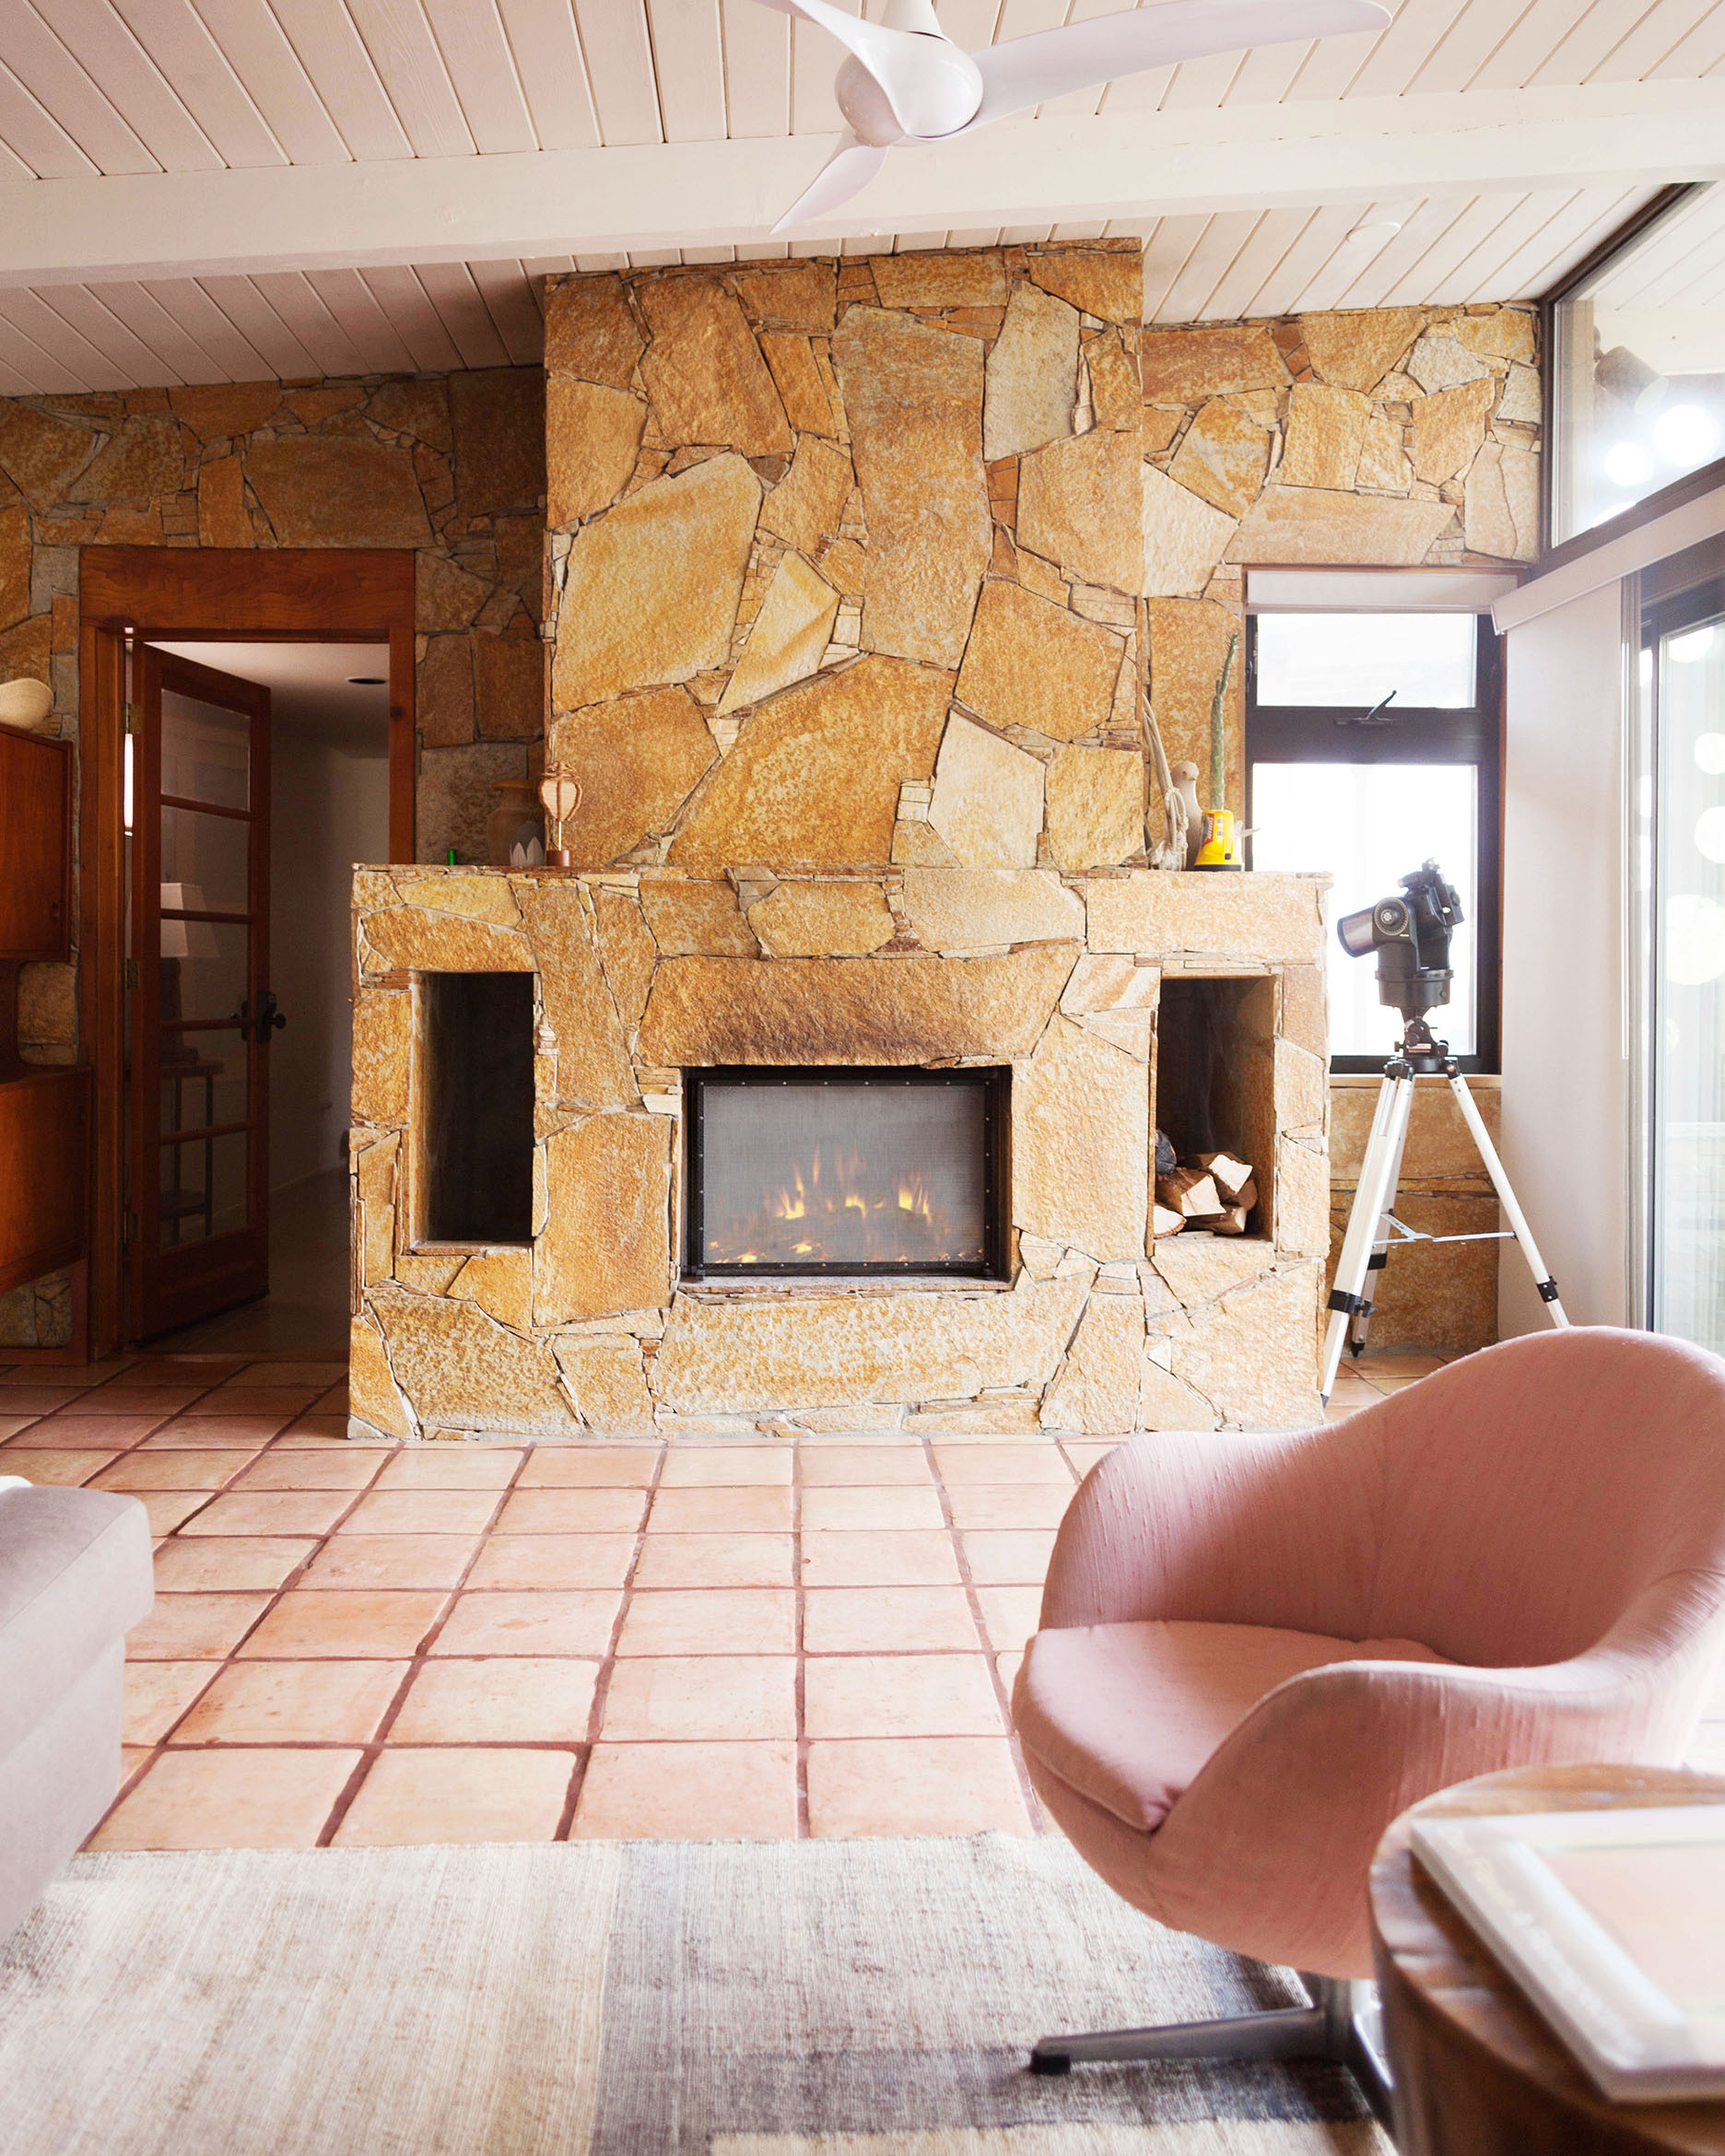
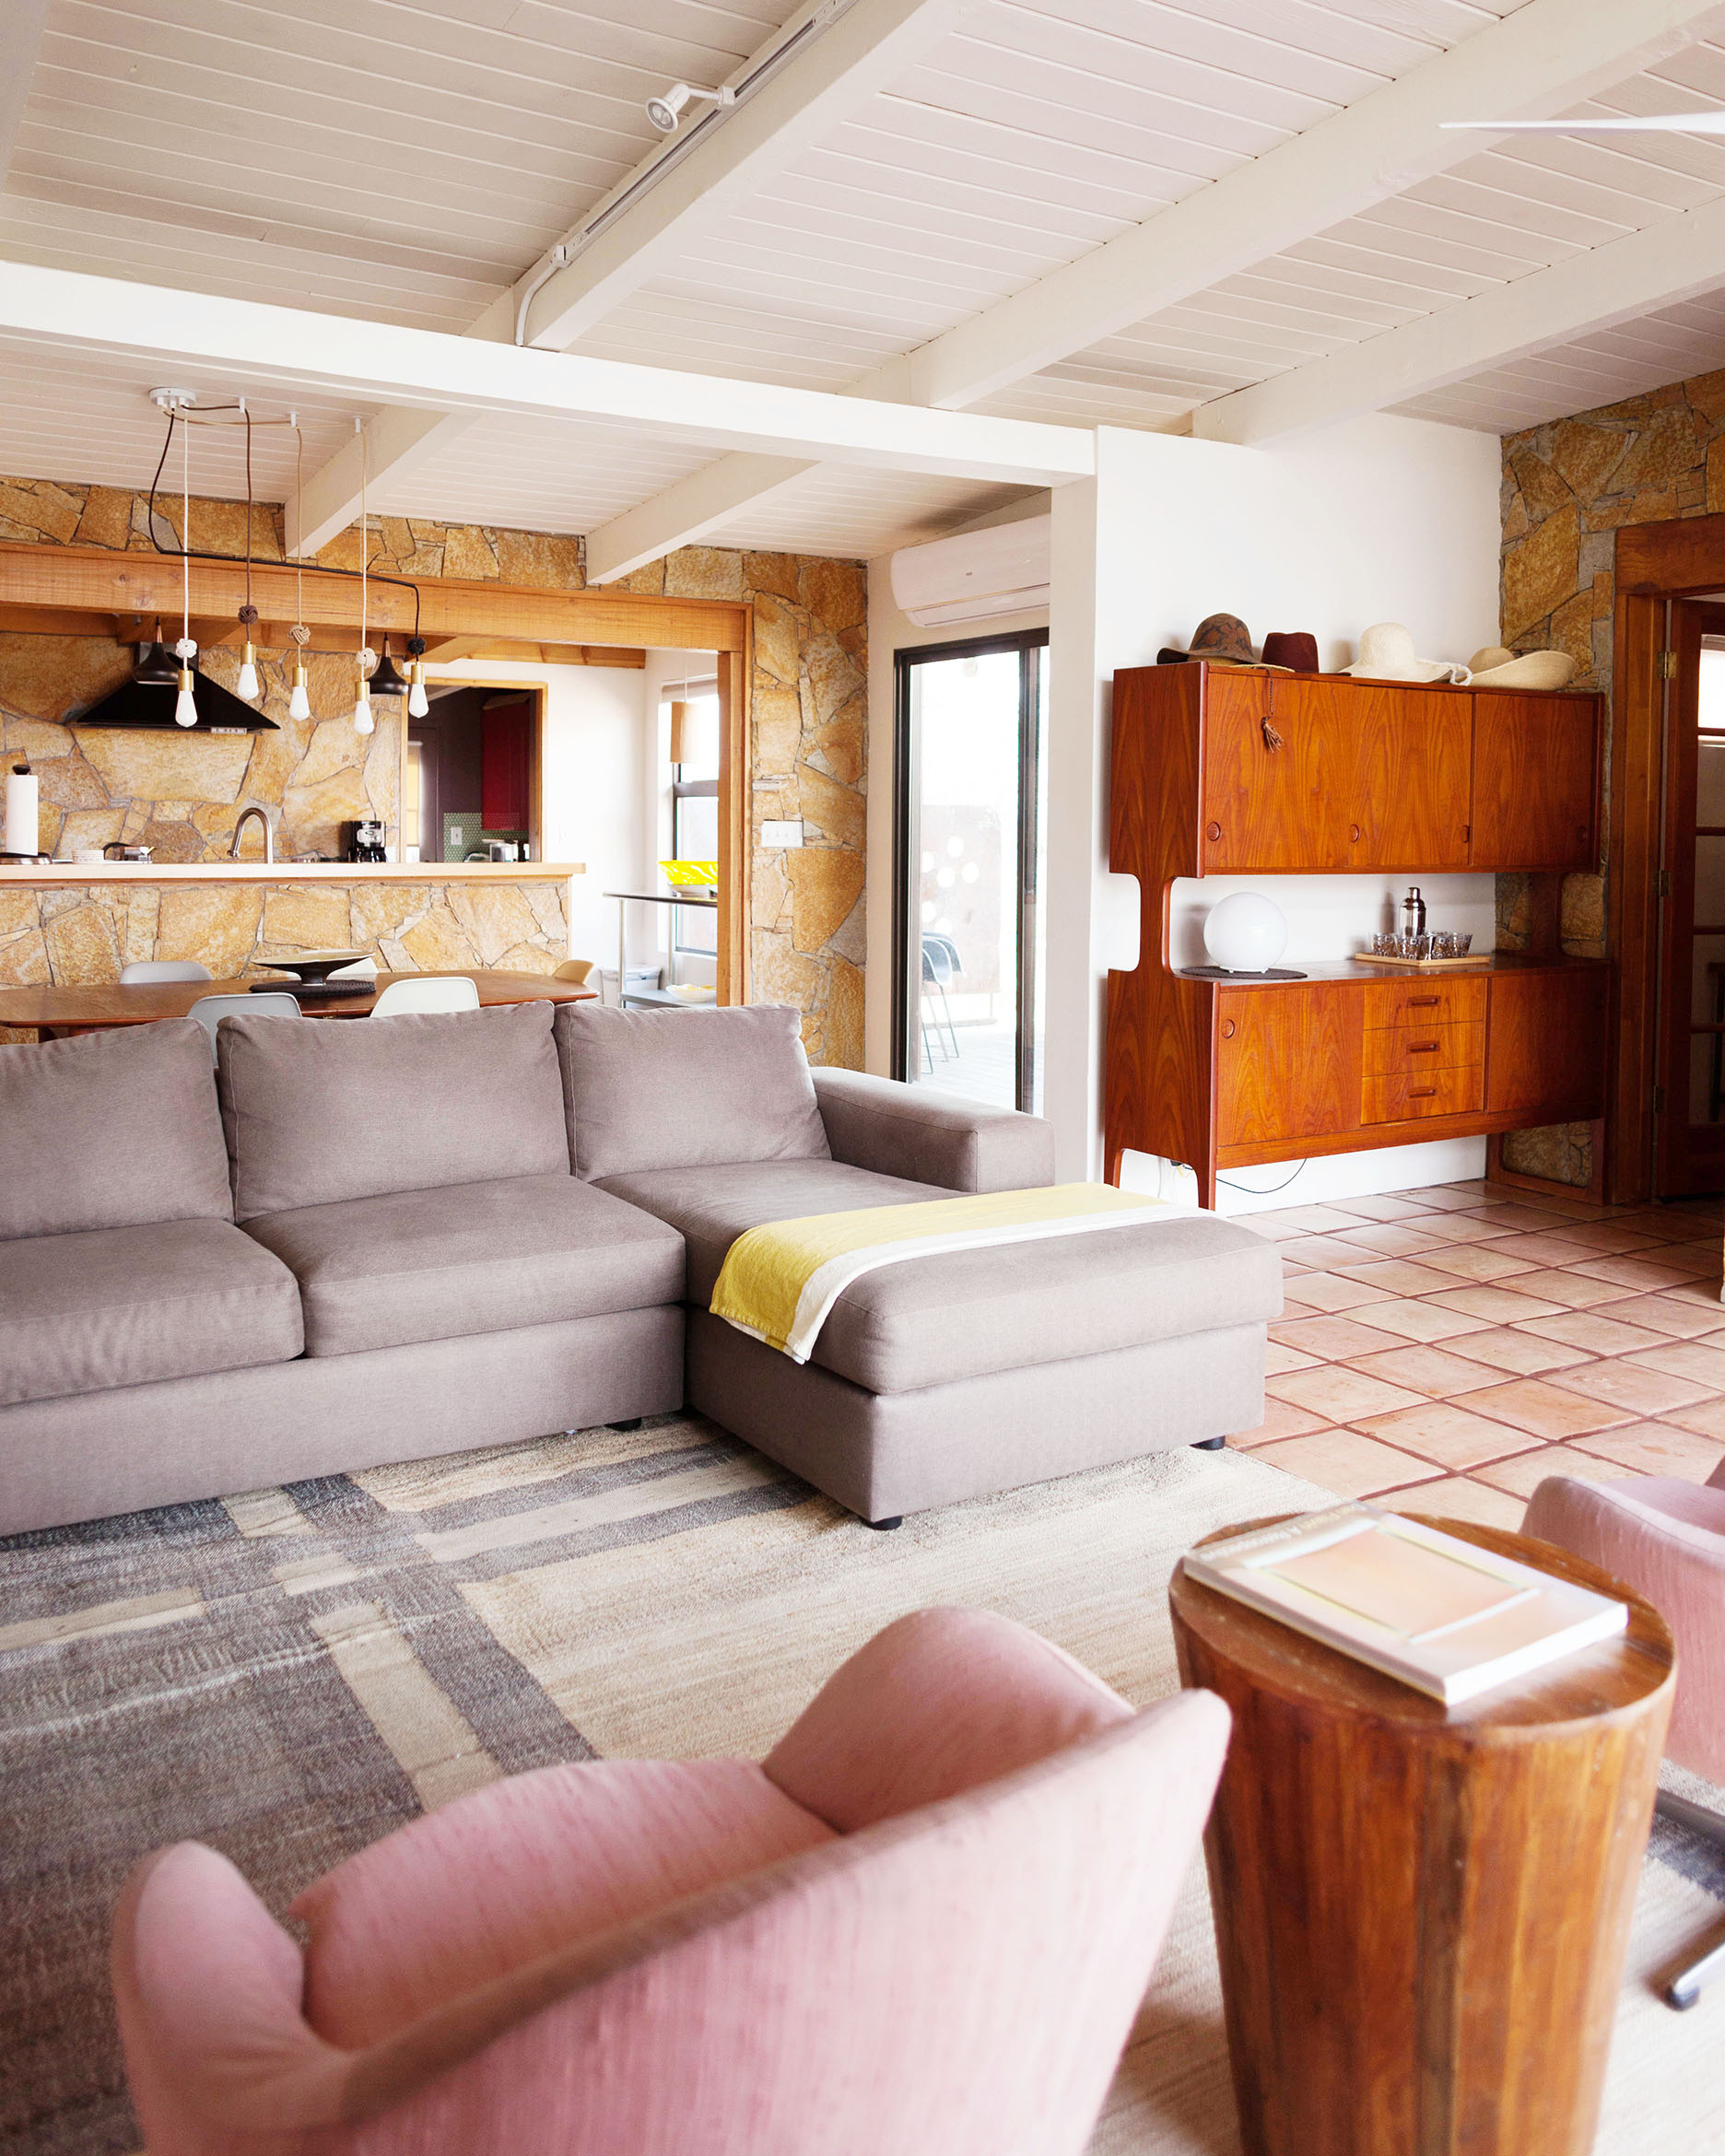
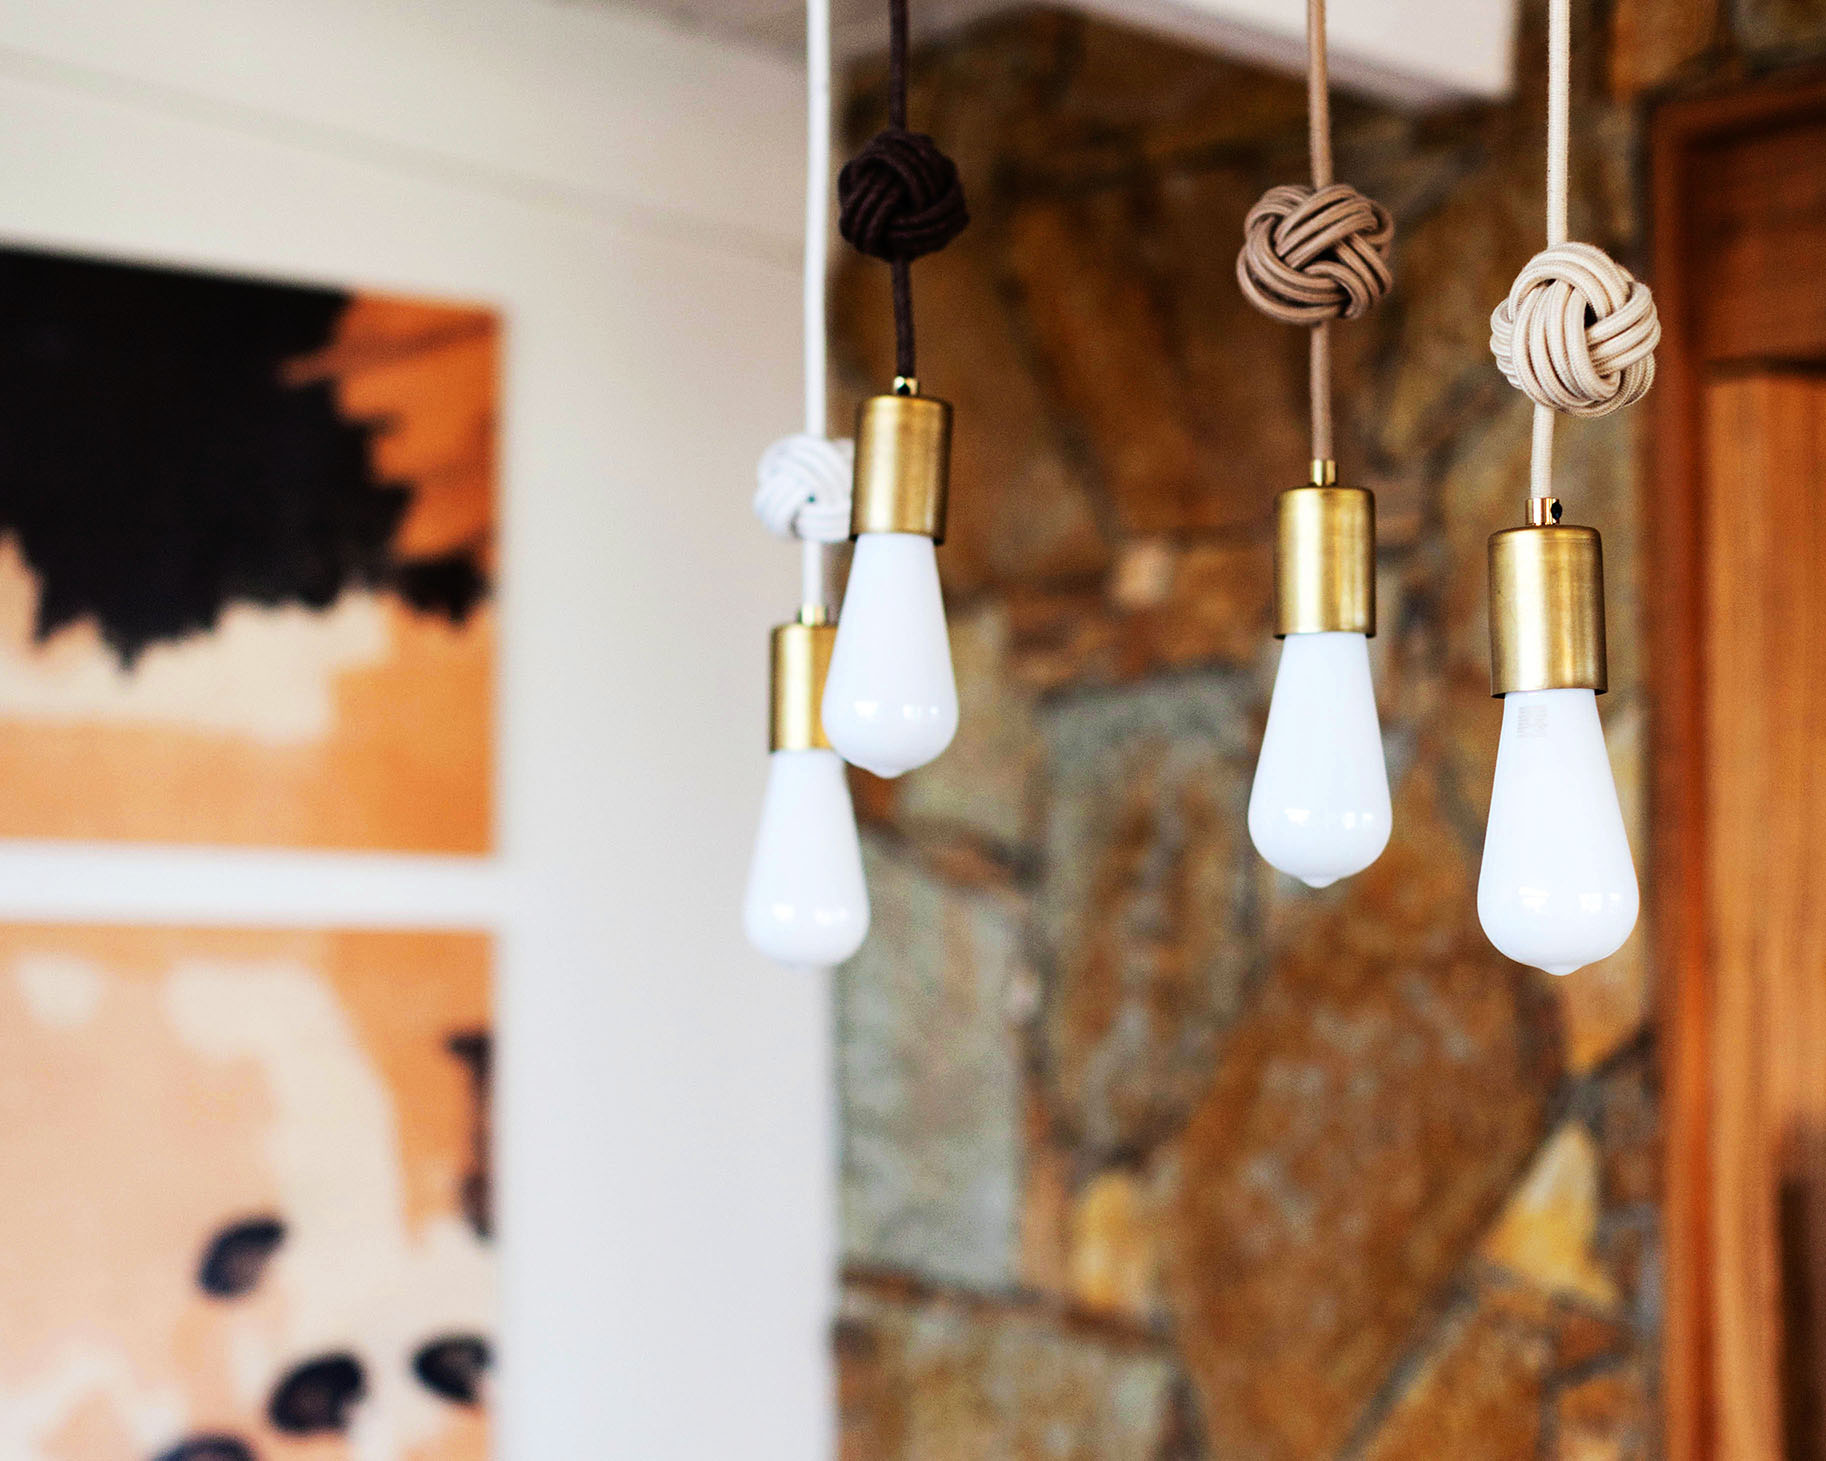
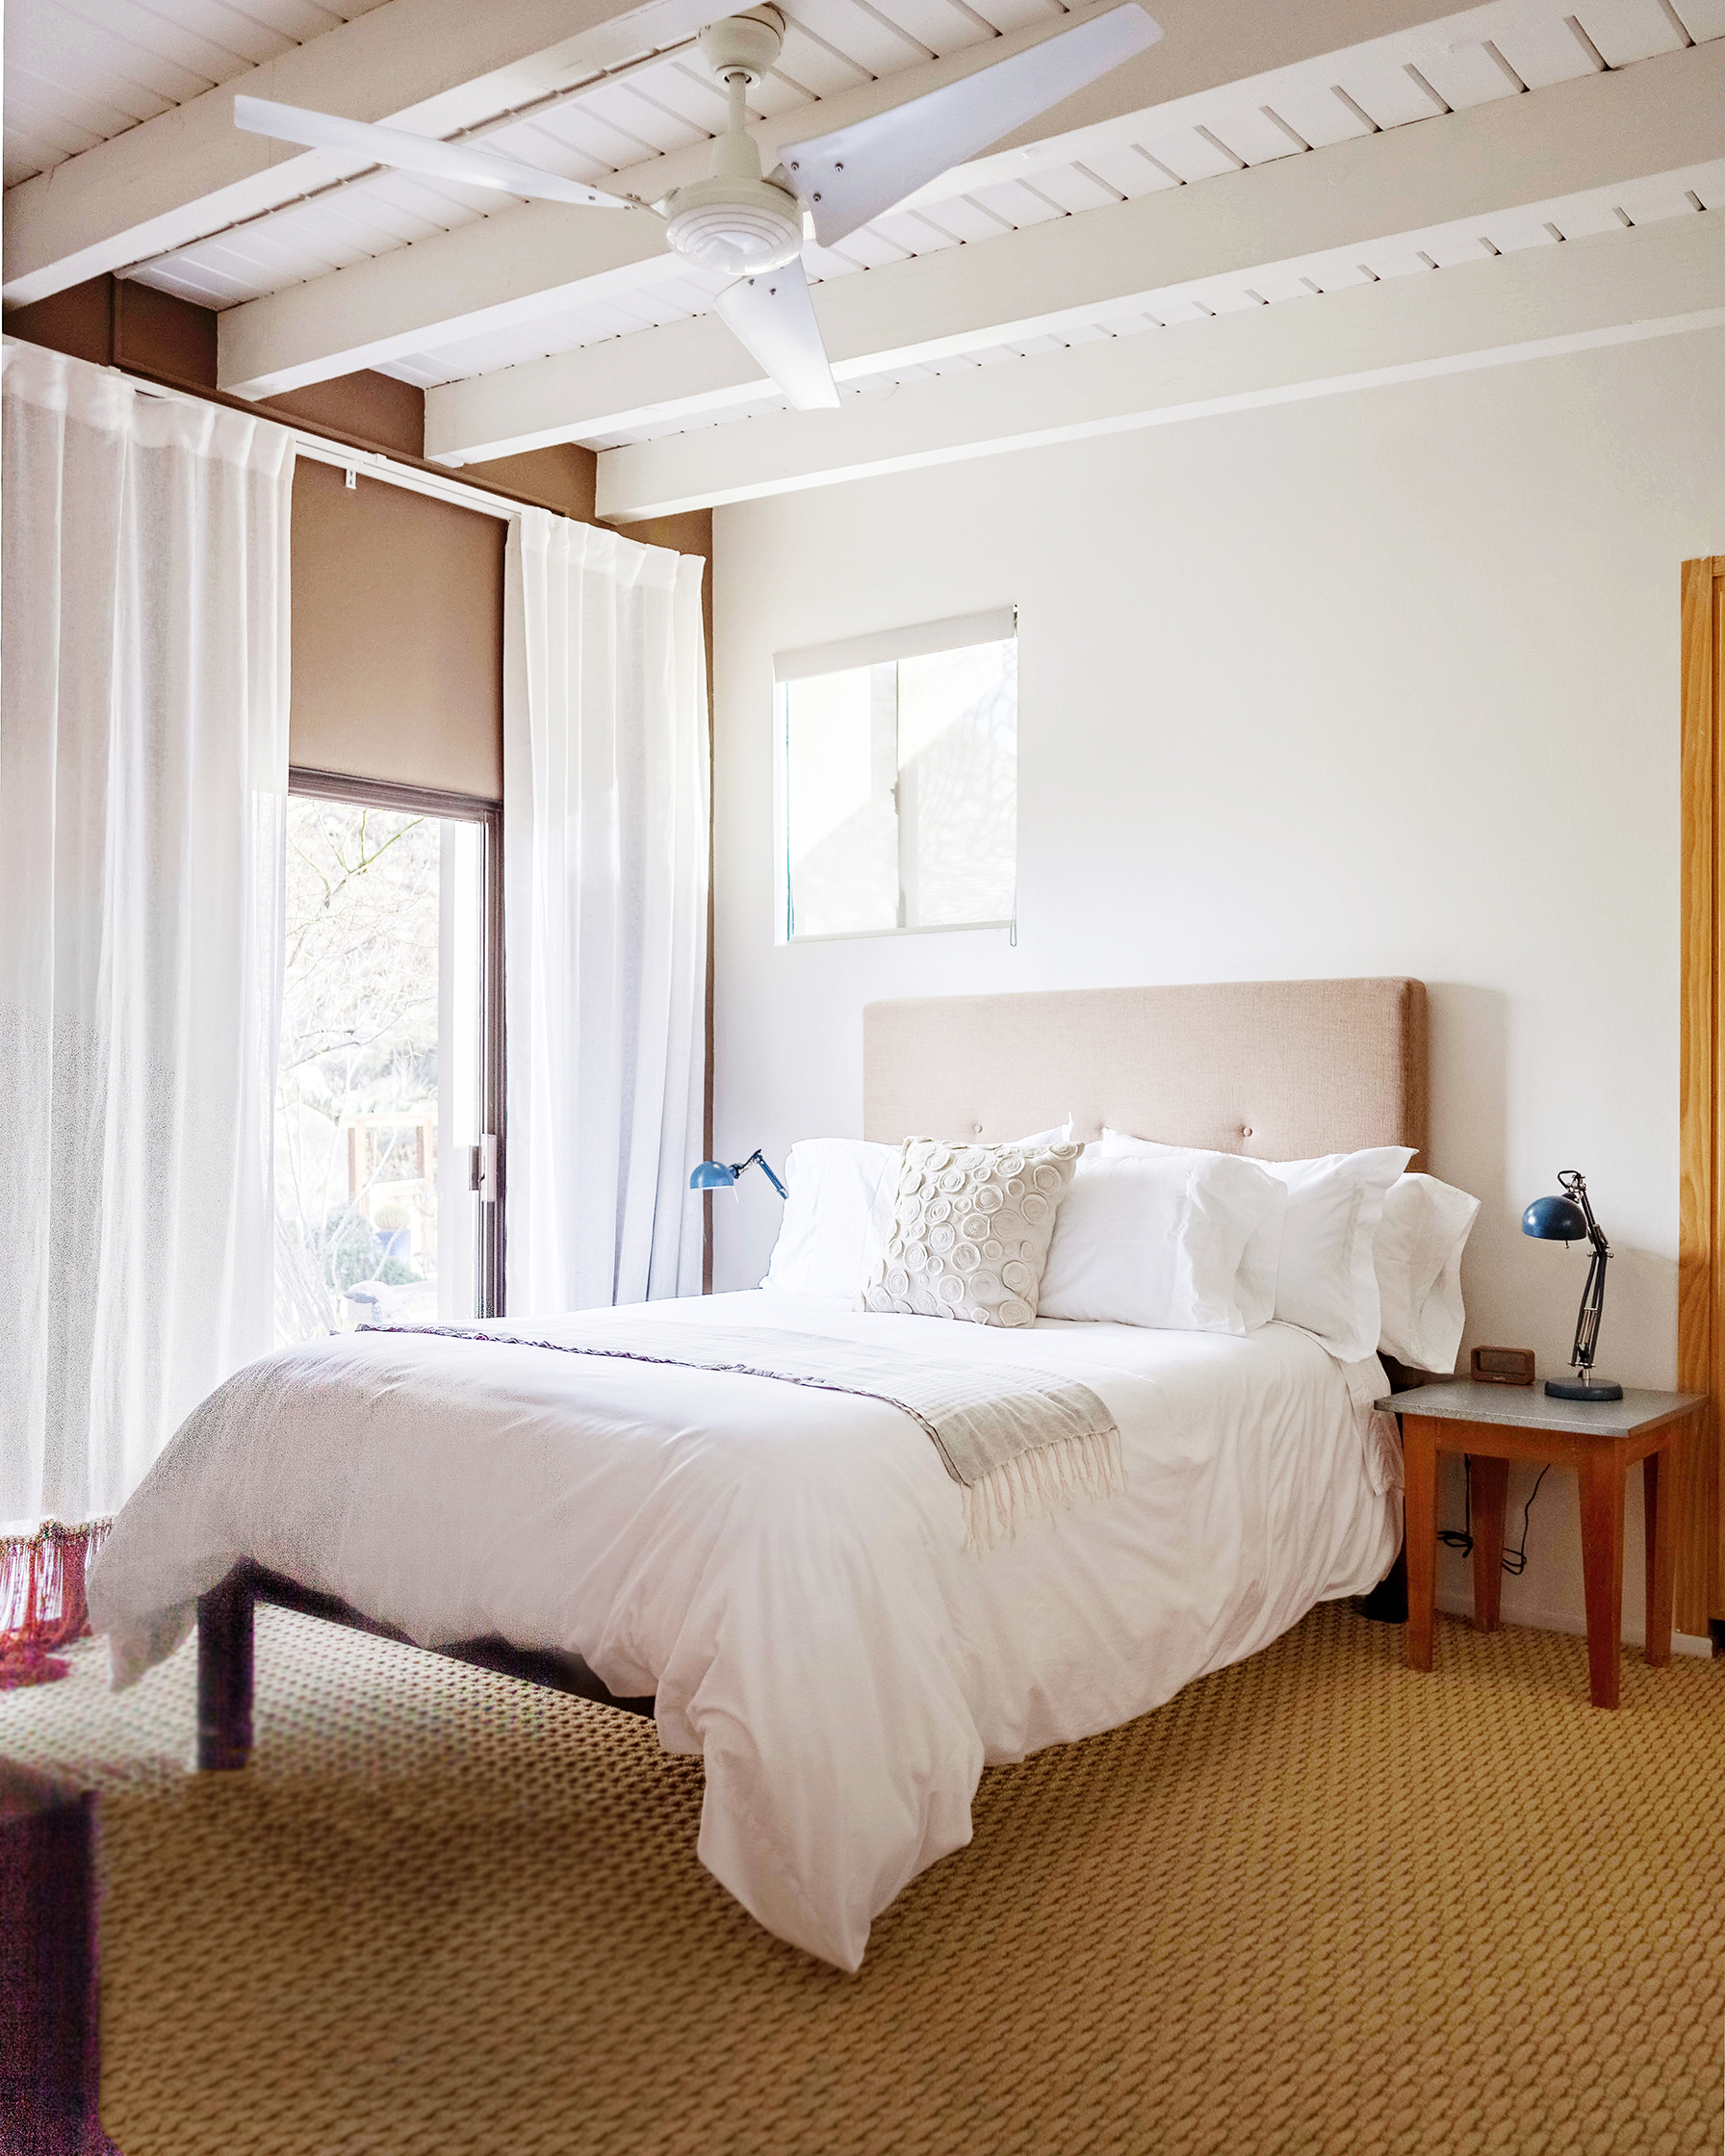
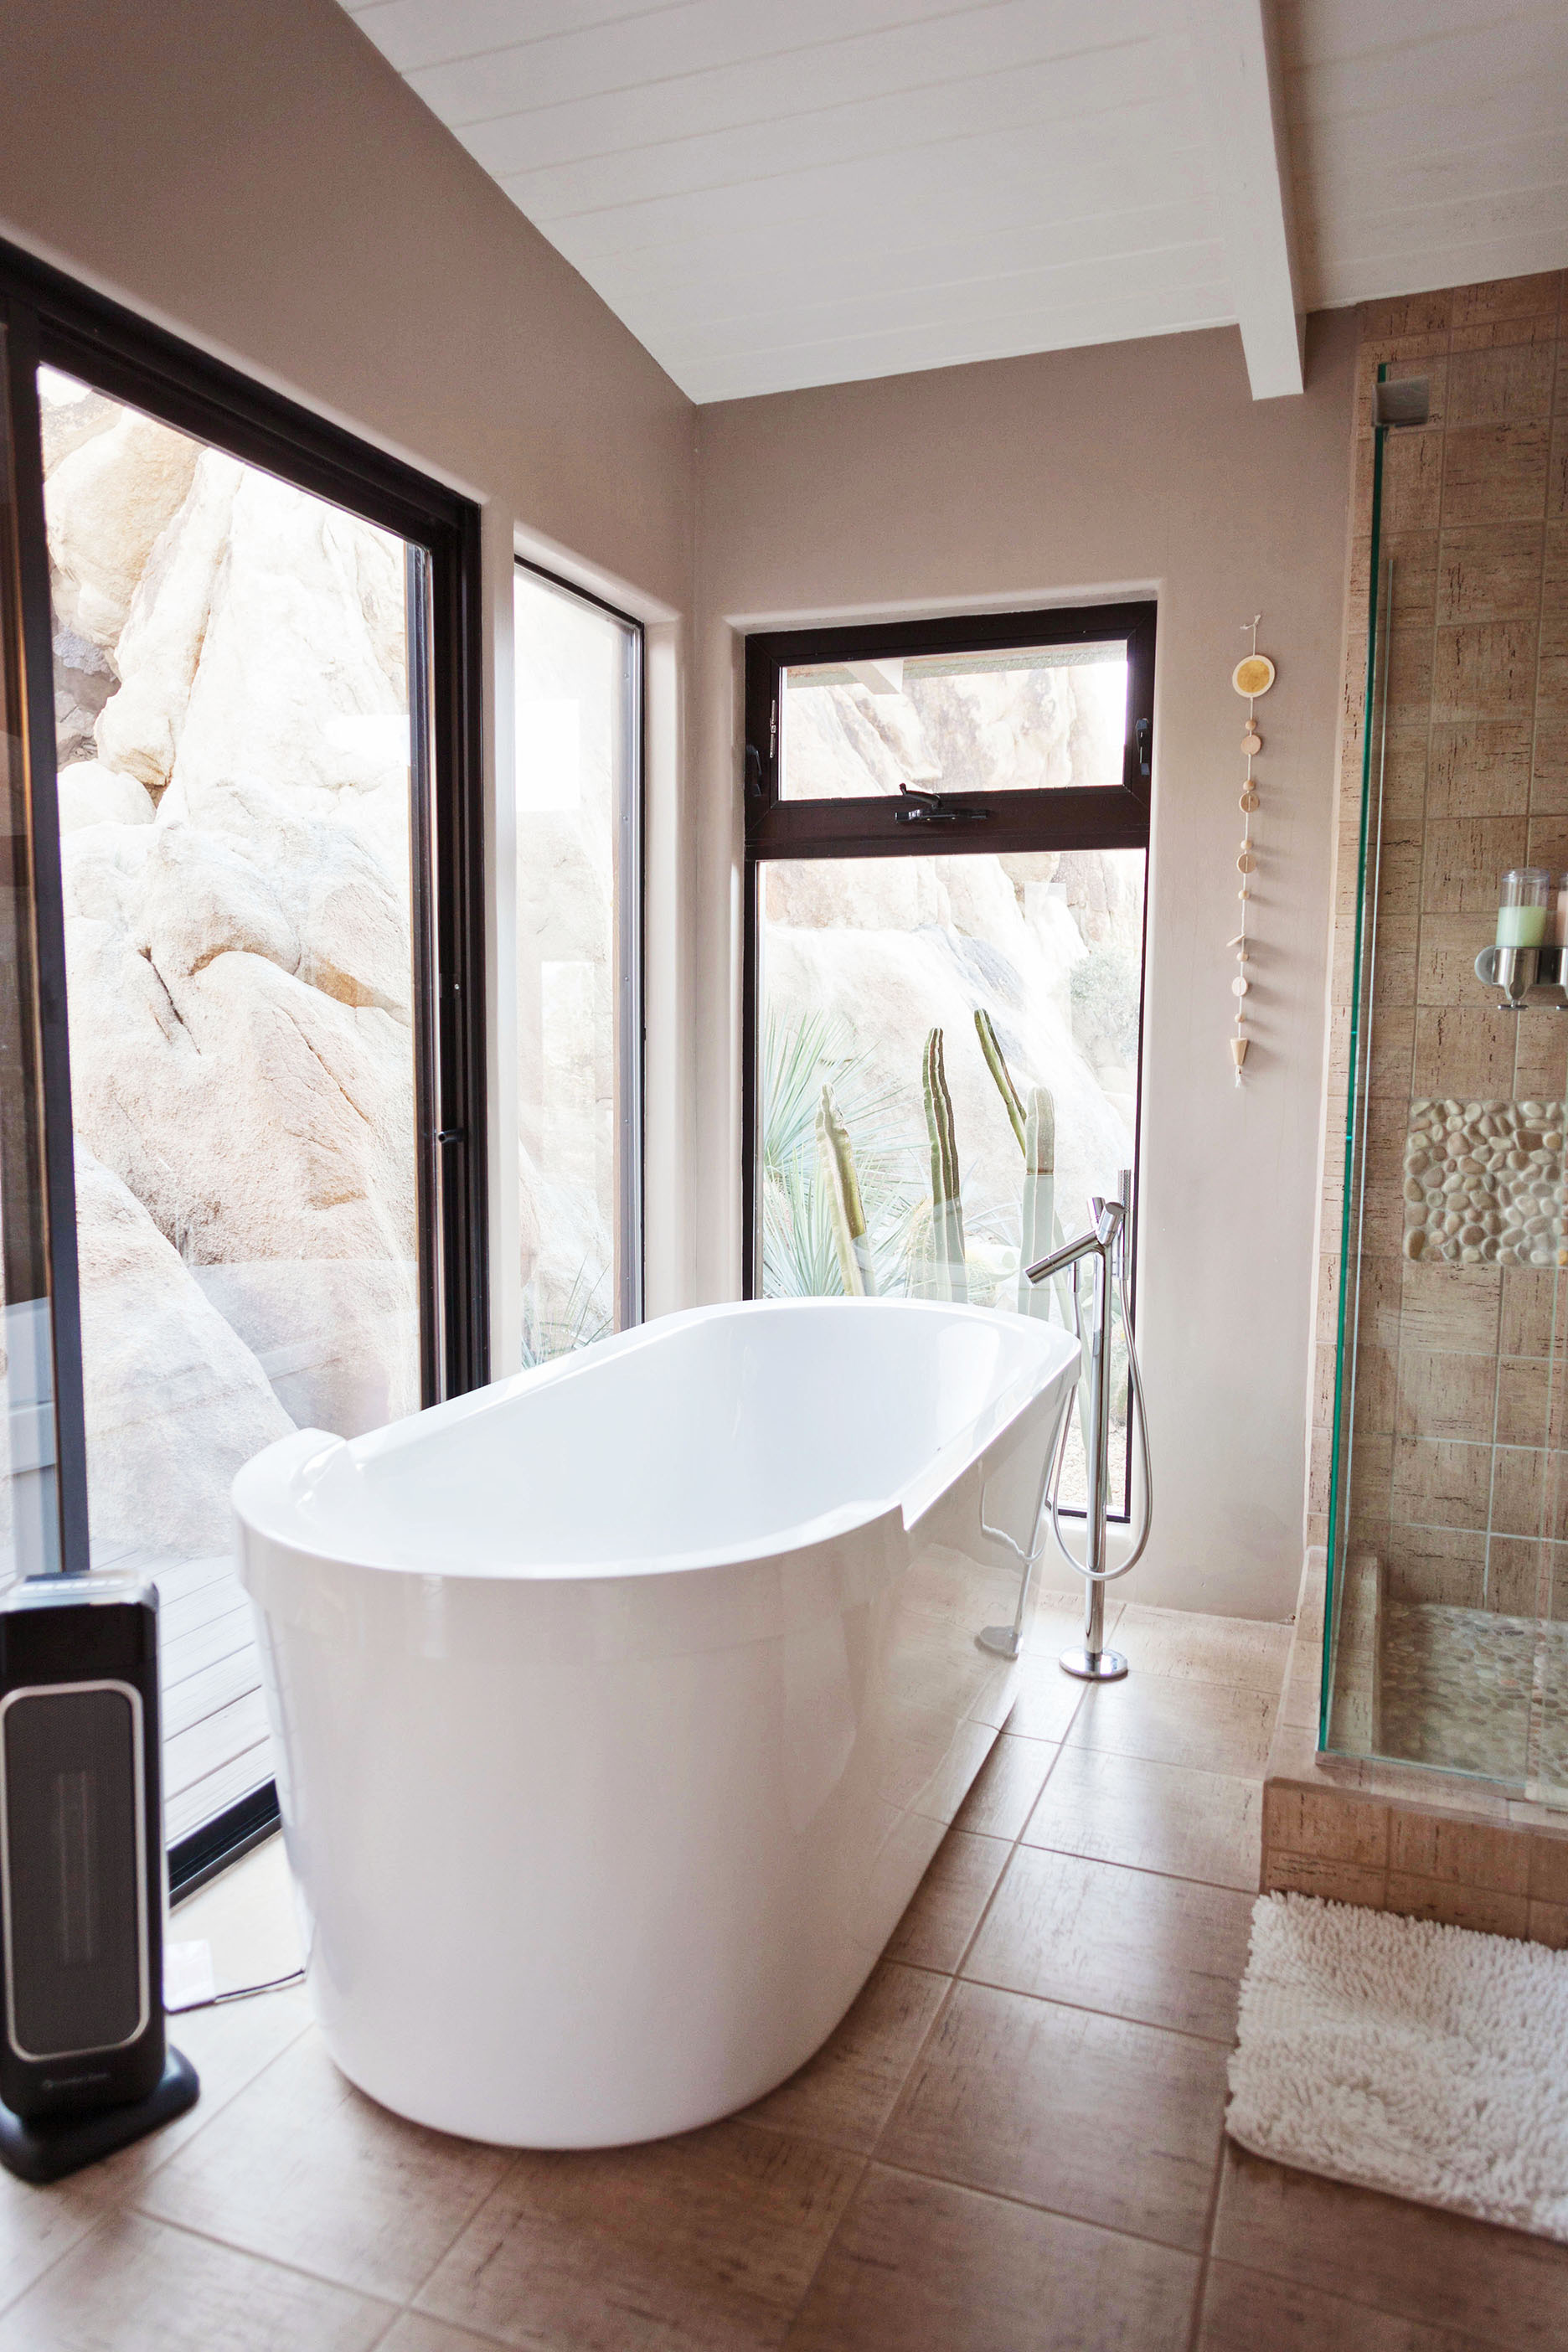
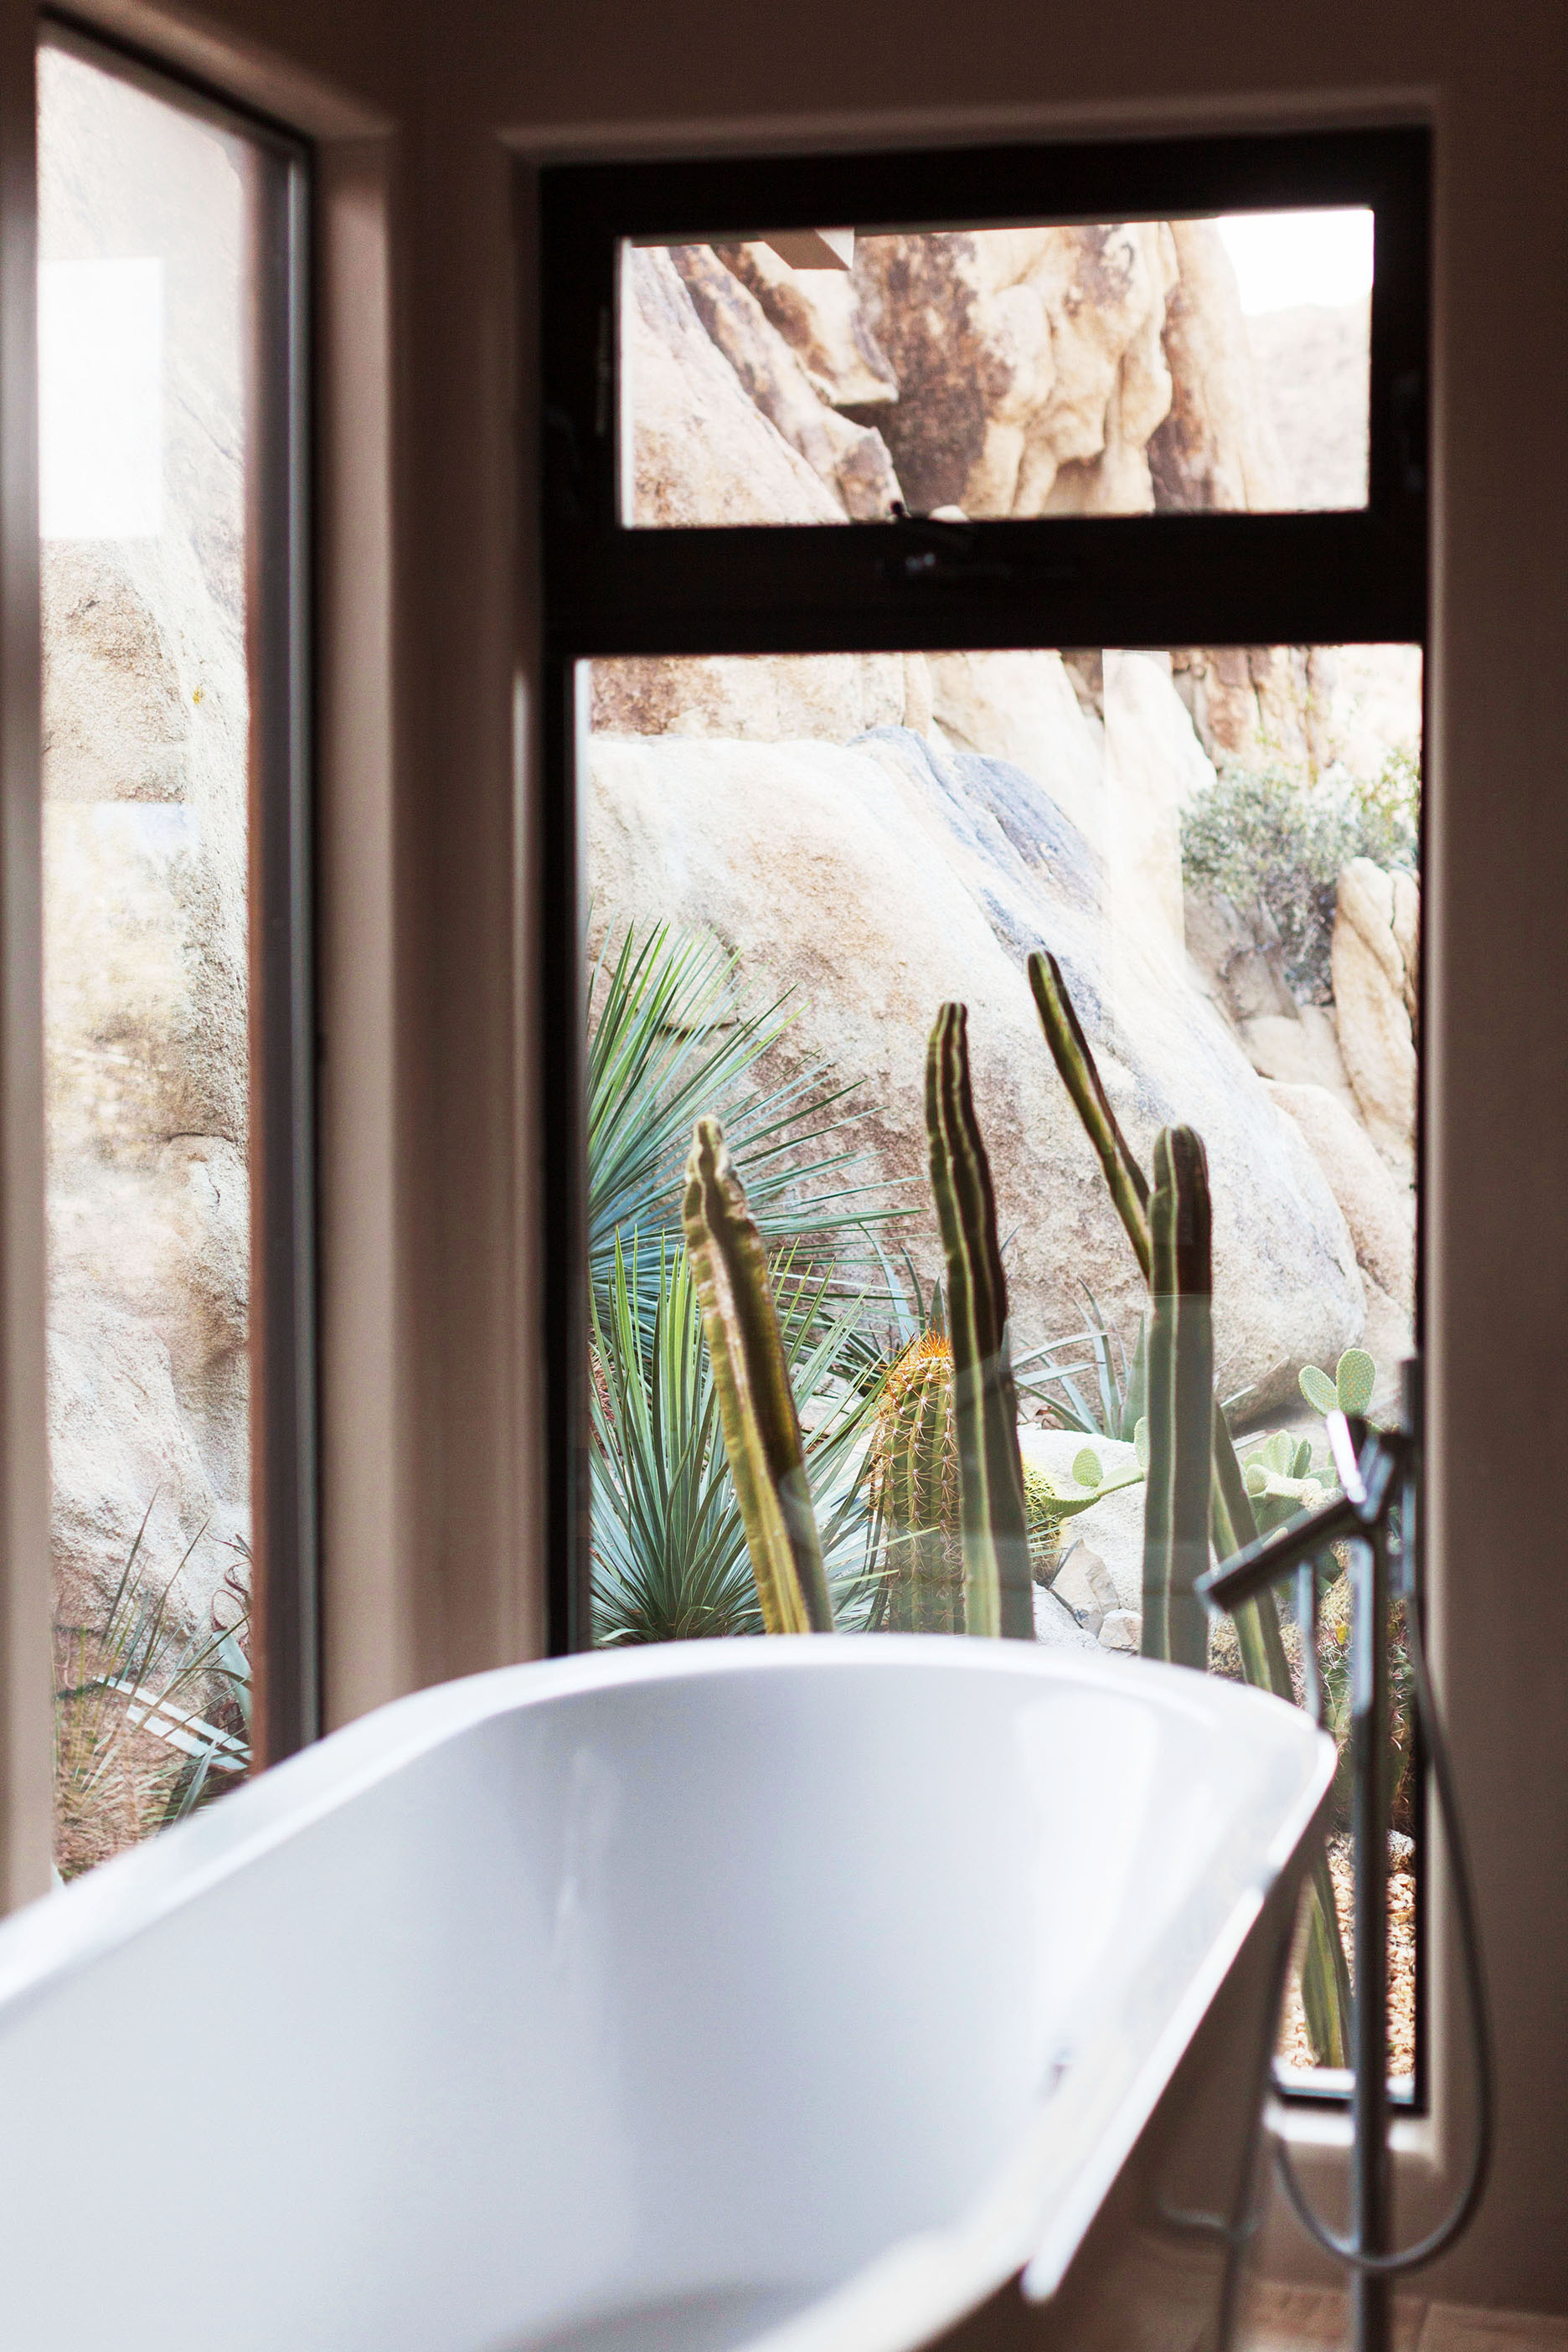
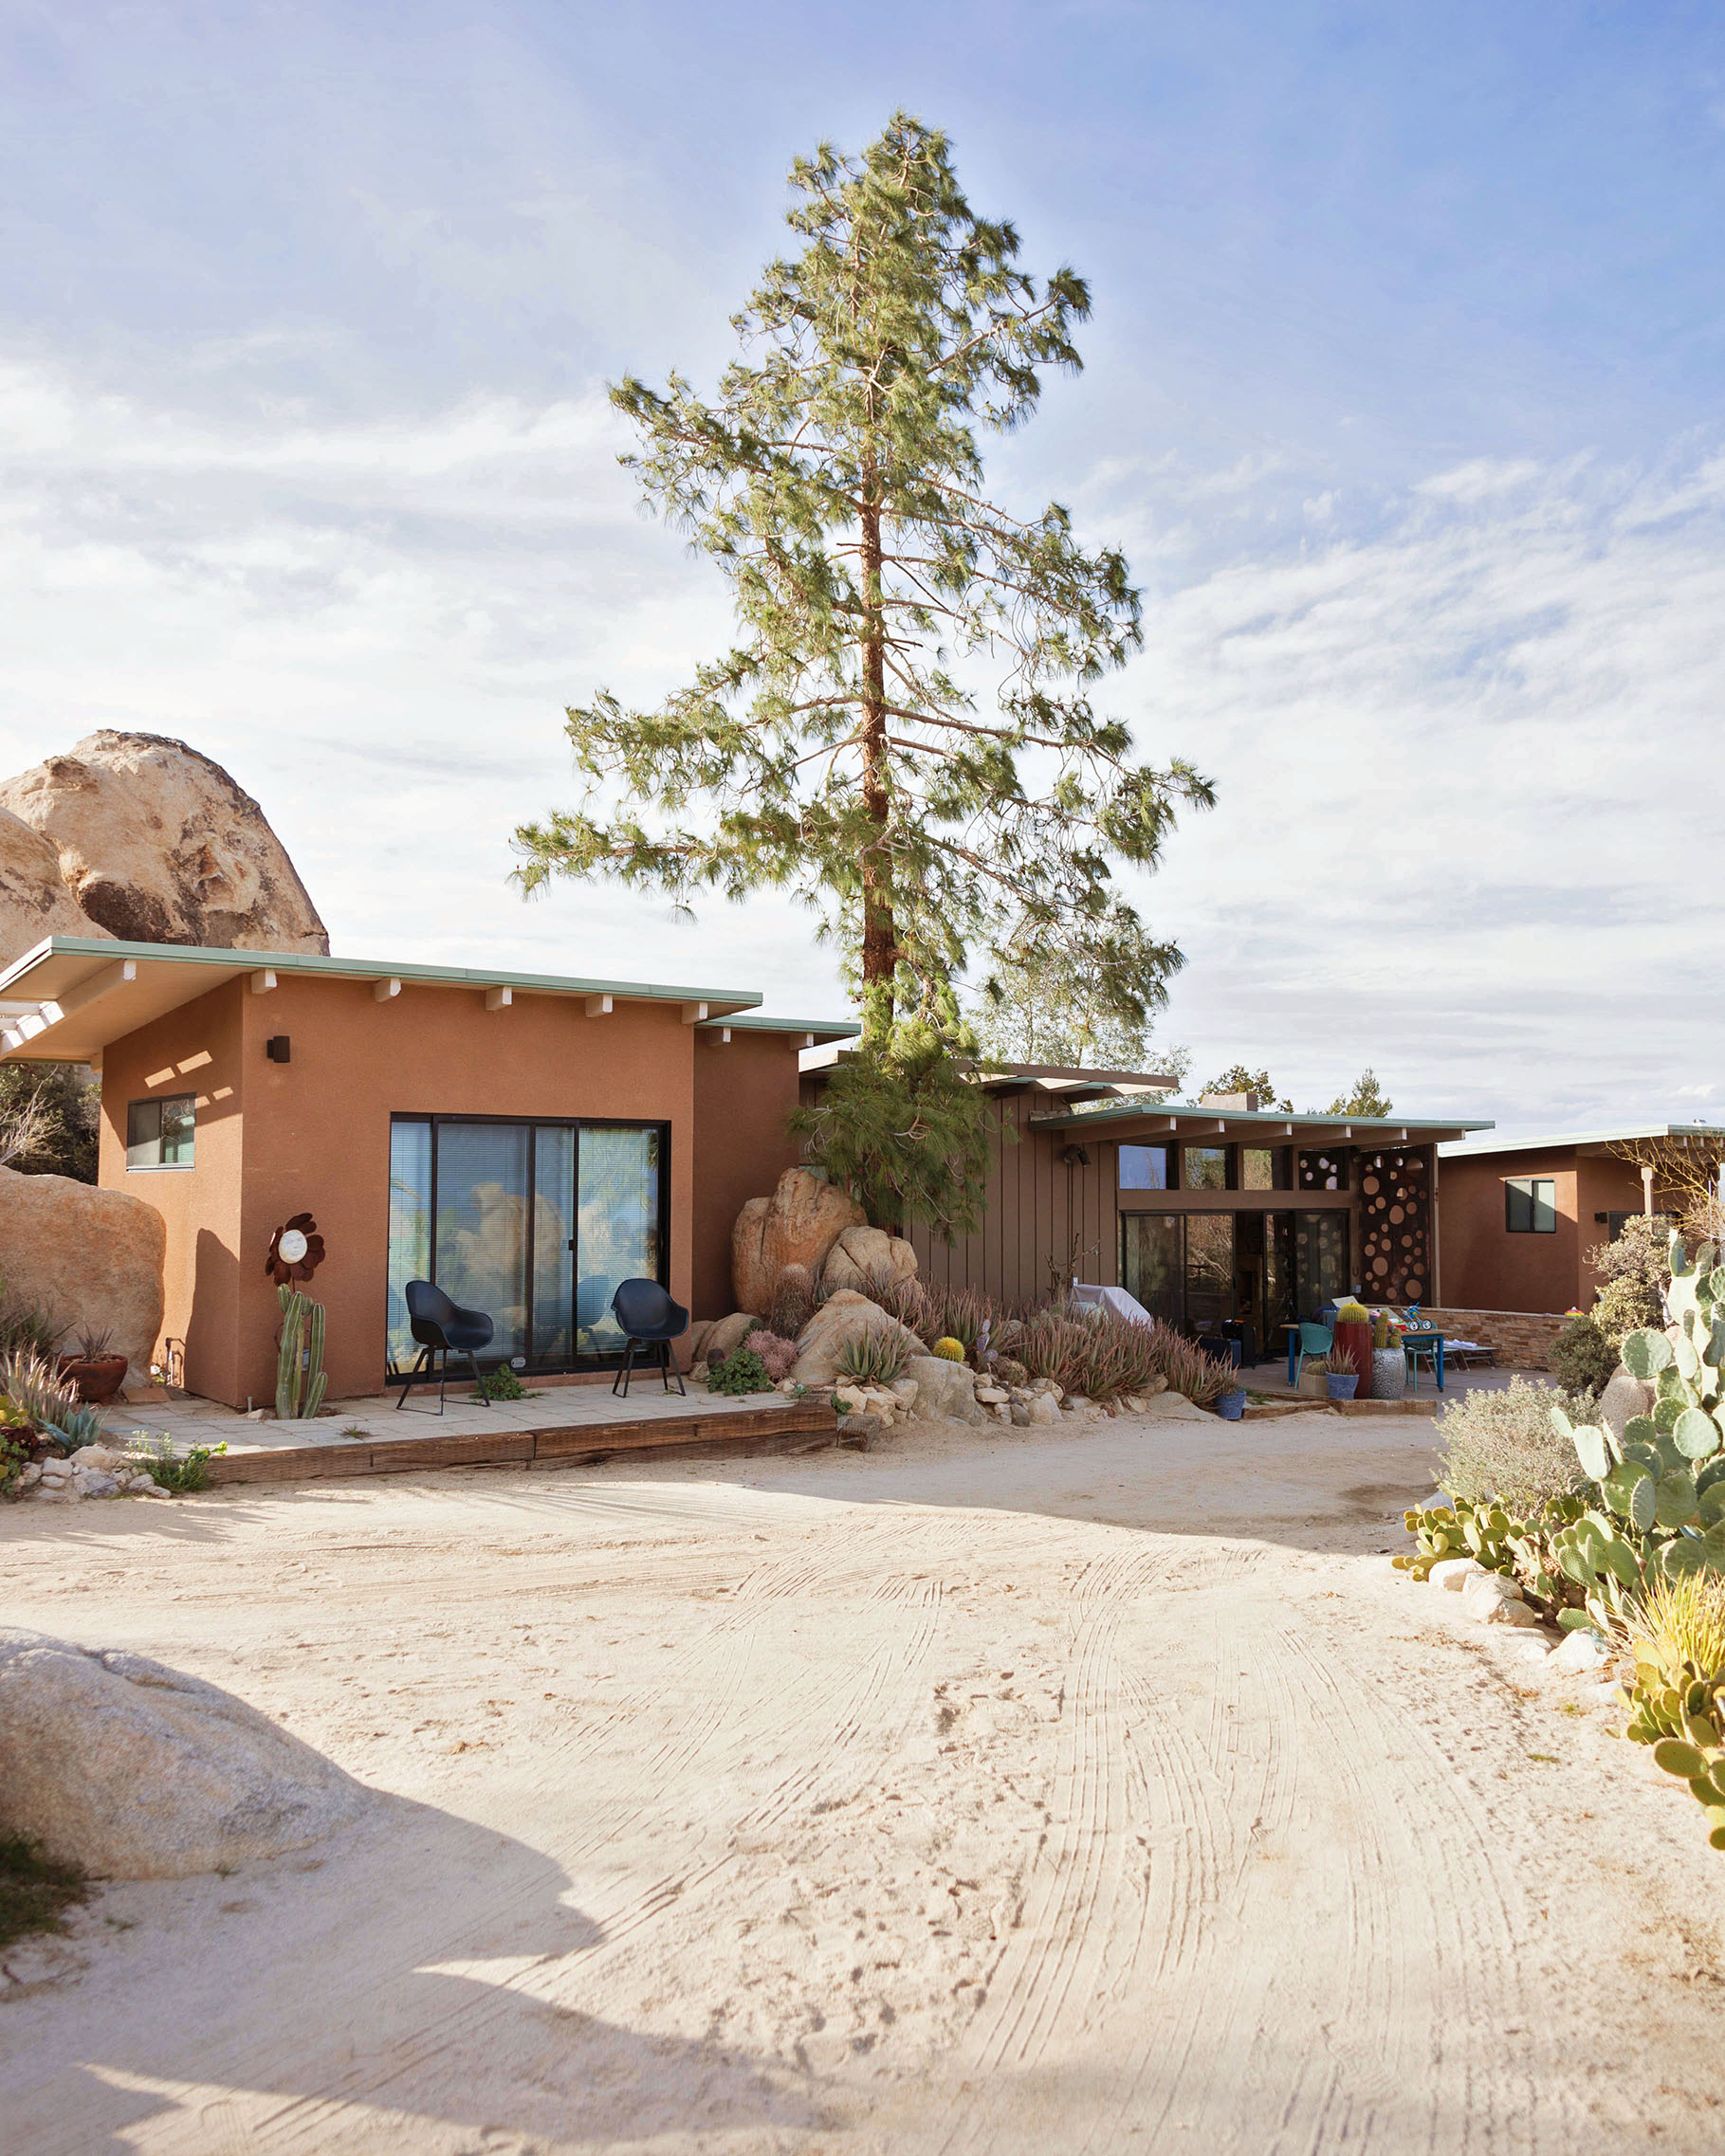 The main house has three bed rooms and two bathrooms, fireplace, huge soaking tub with an unreal view, and all of the necessities to make you feel at home. It has Neutra inspired interiors with rock walls and earthy nuetrals.
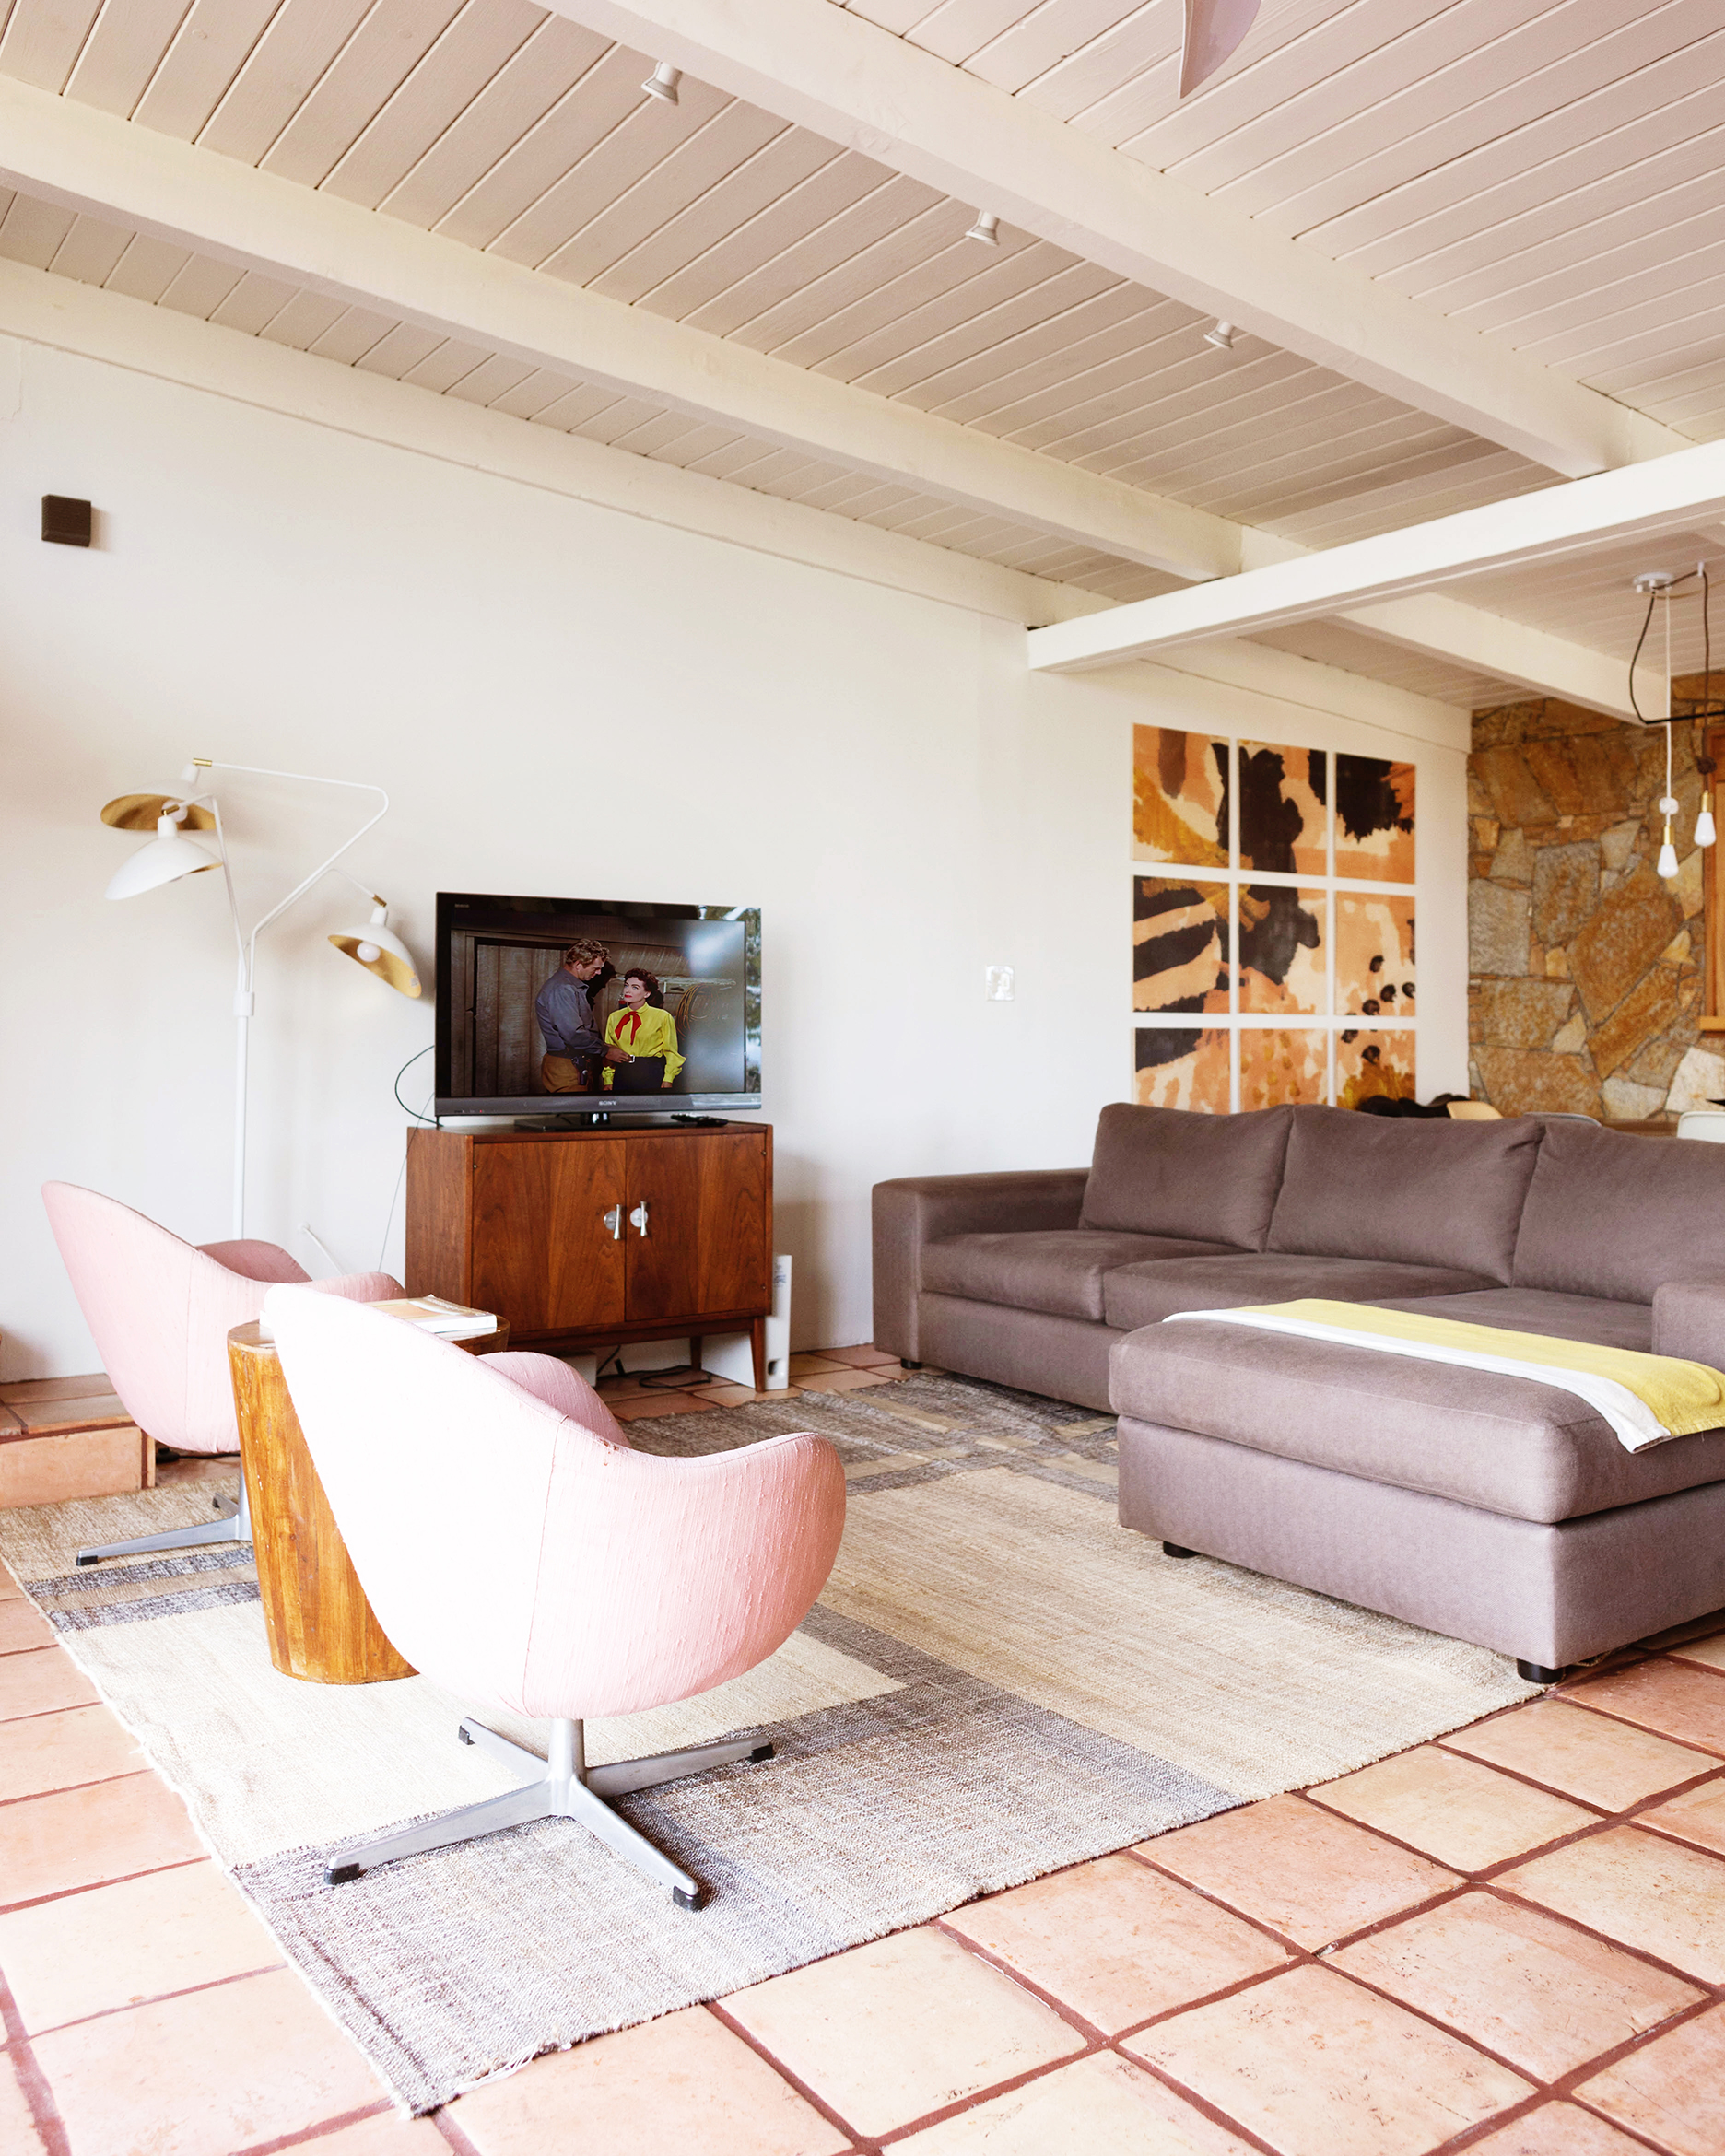
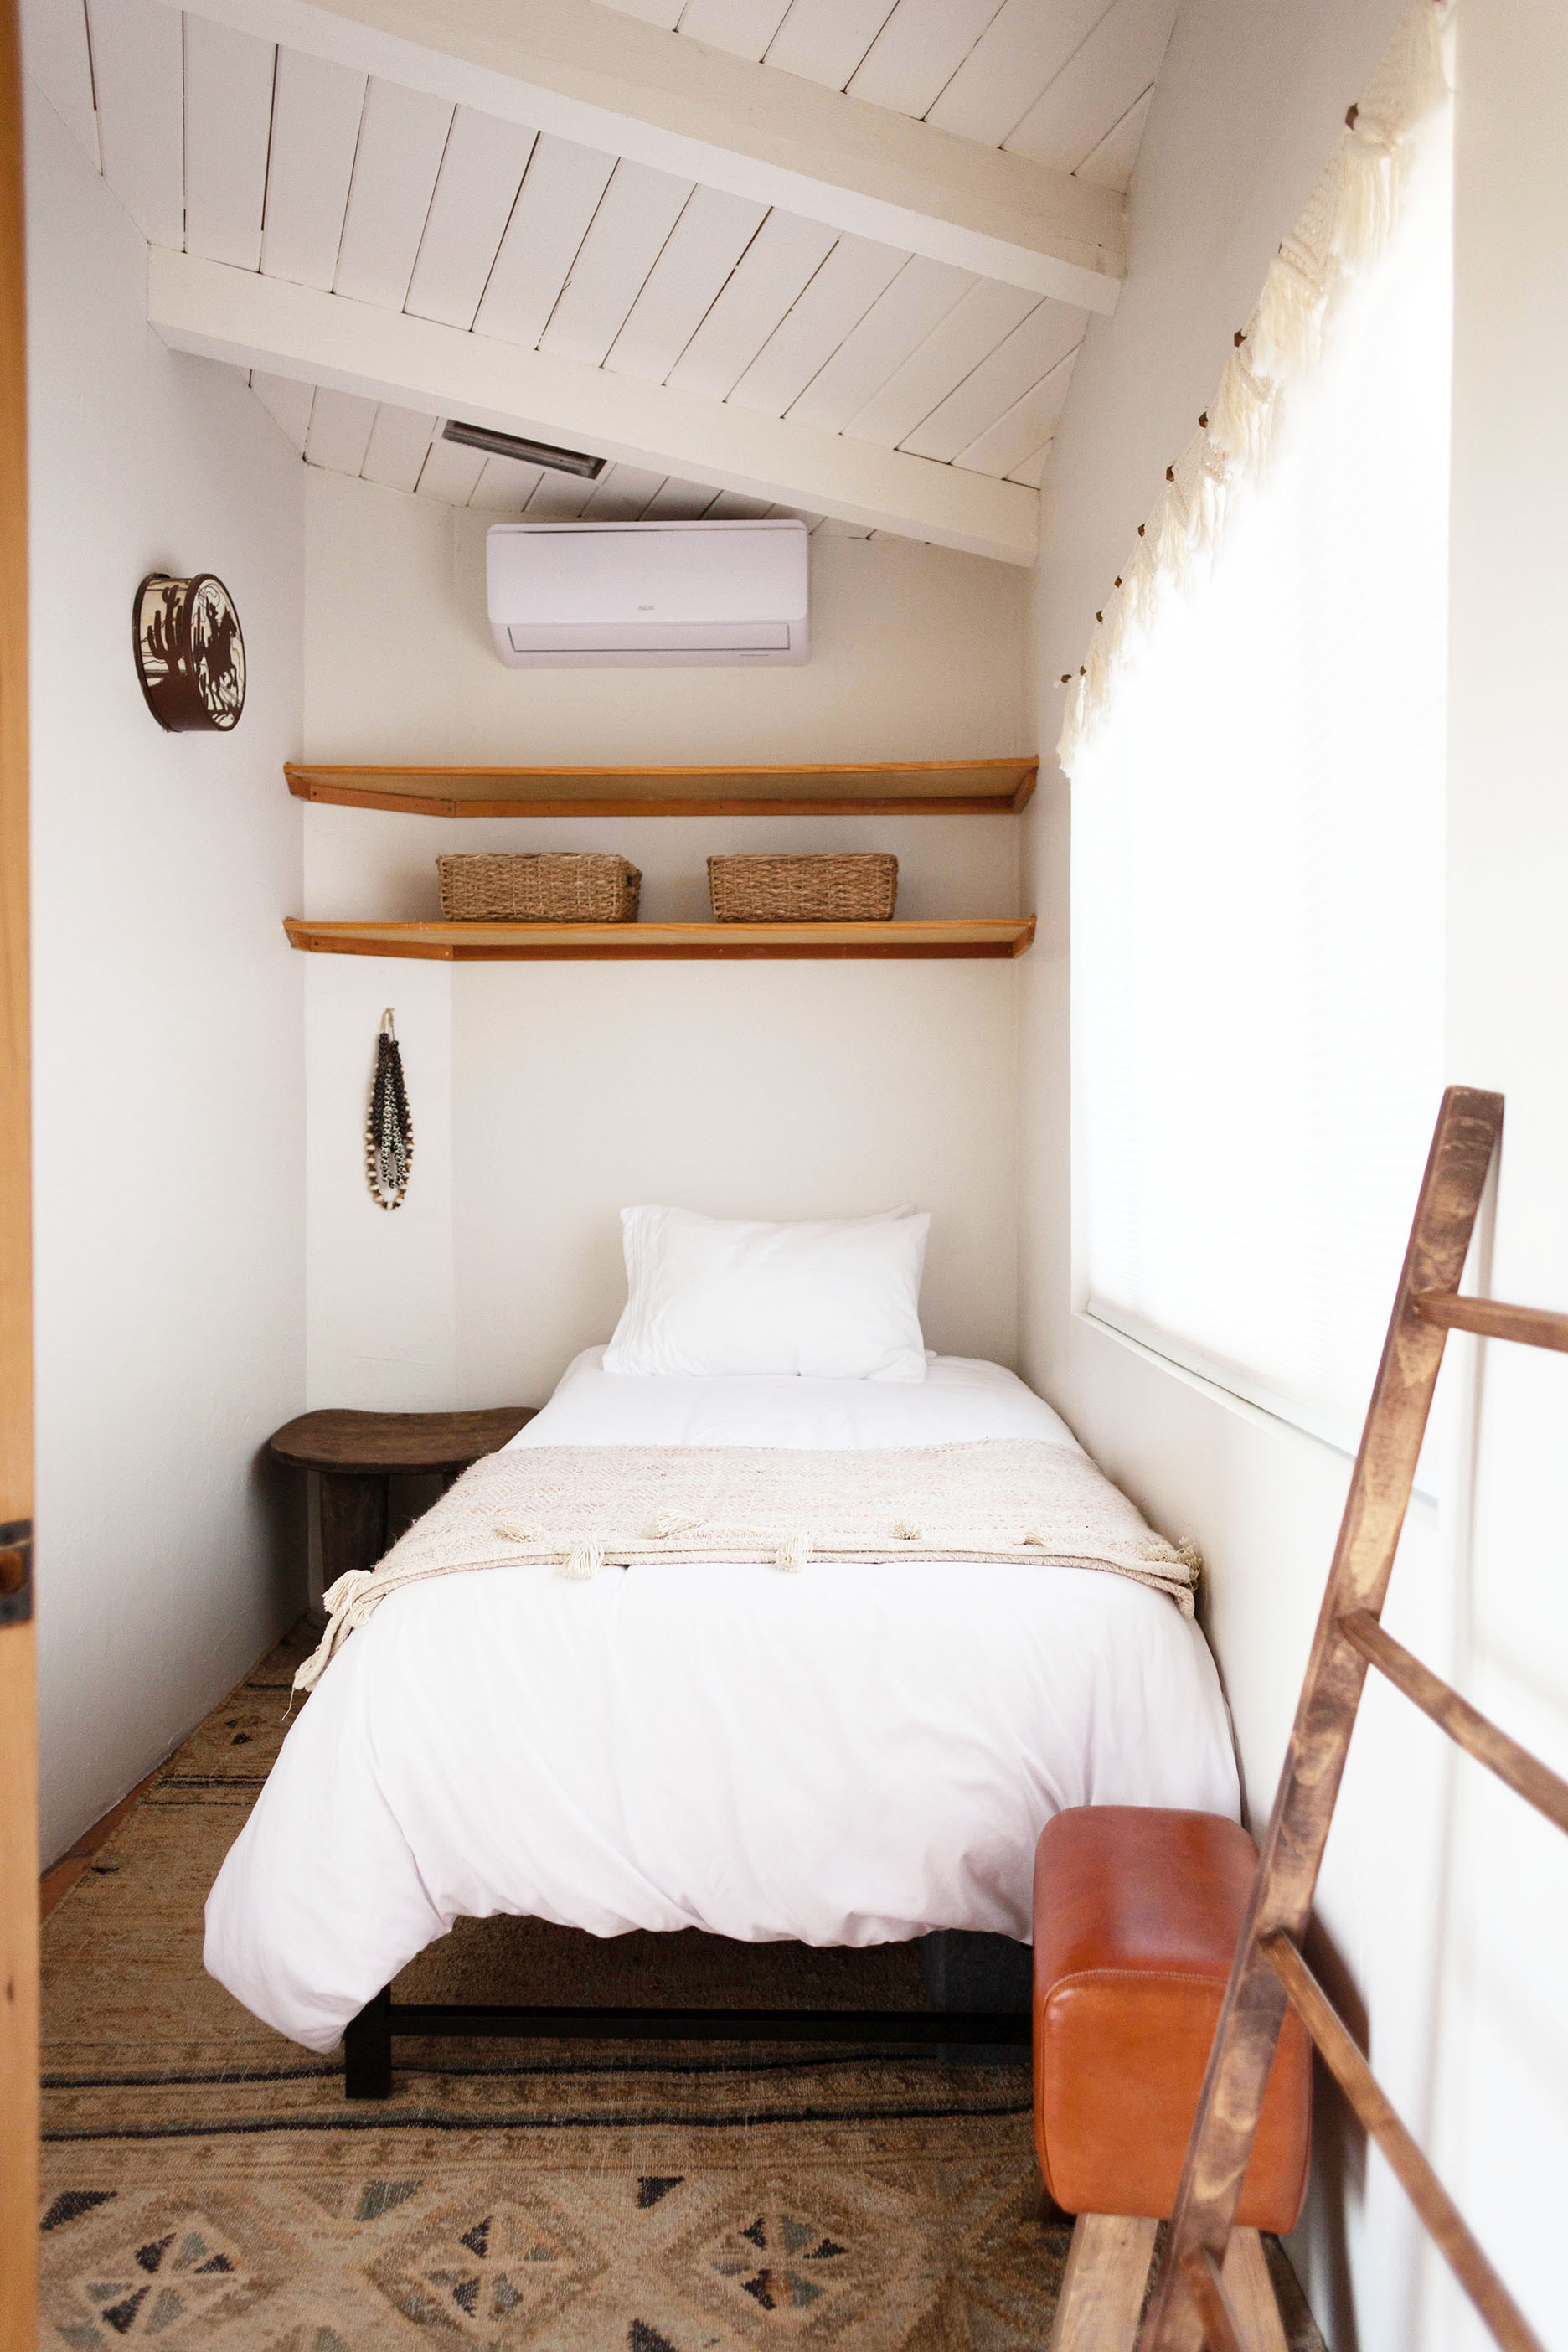
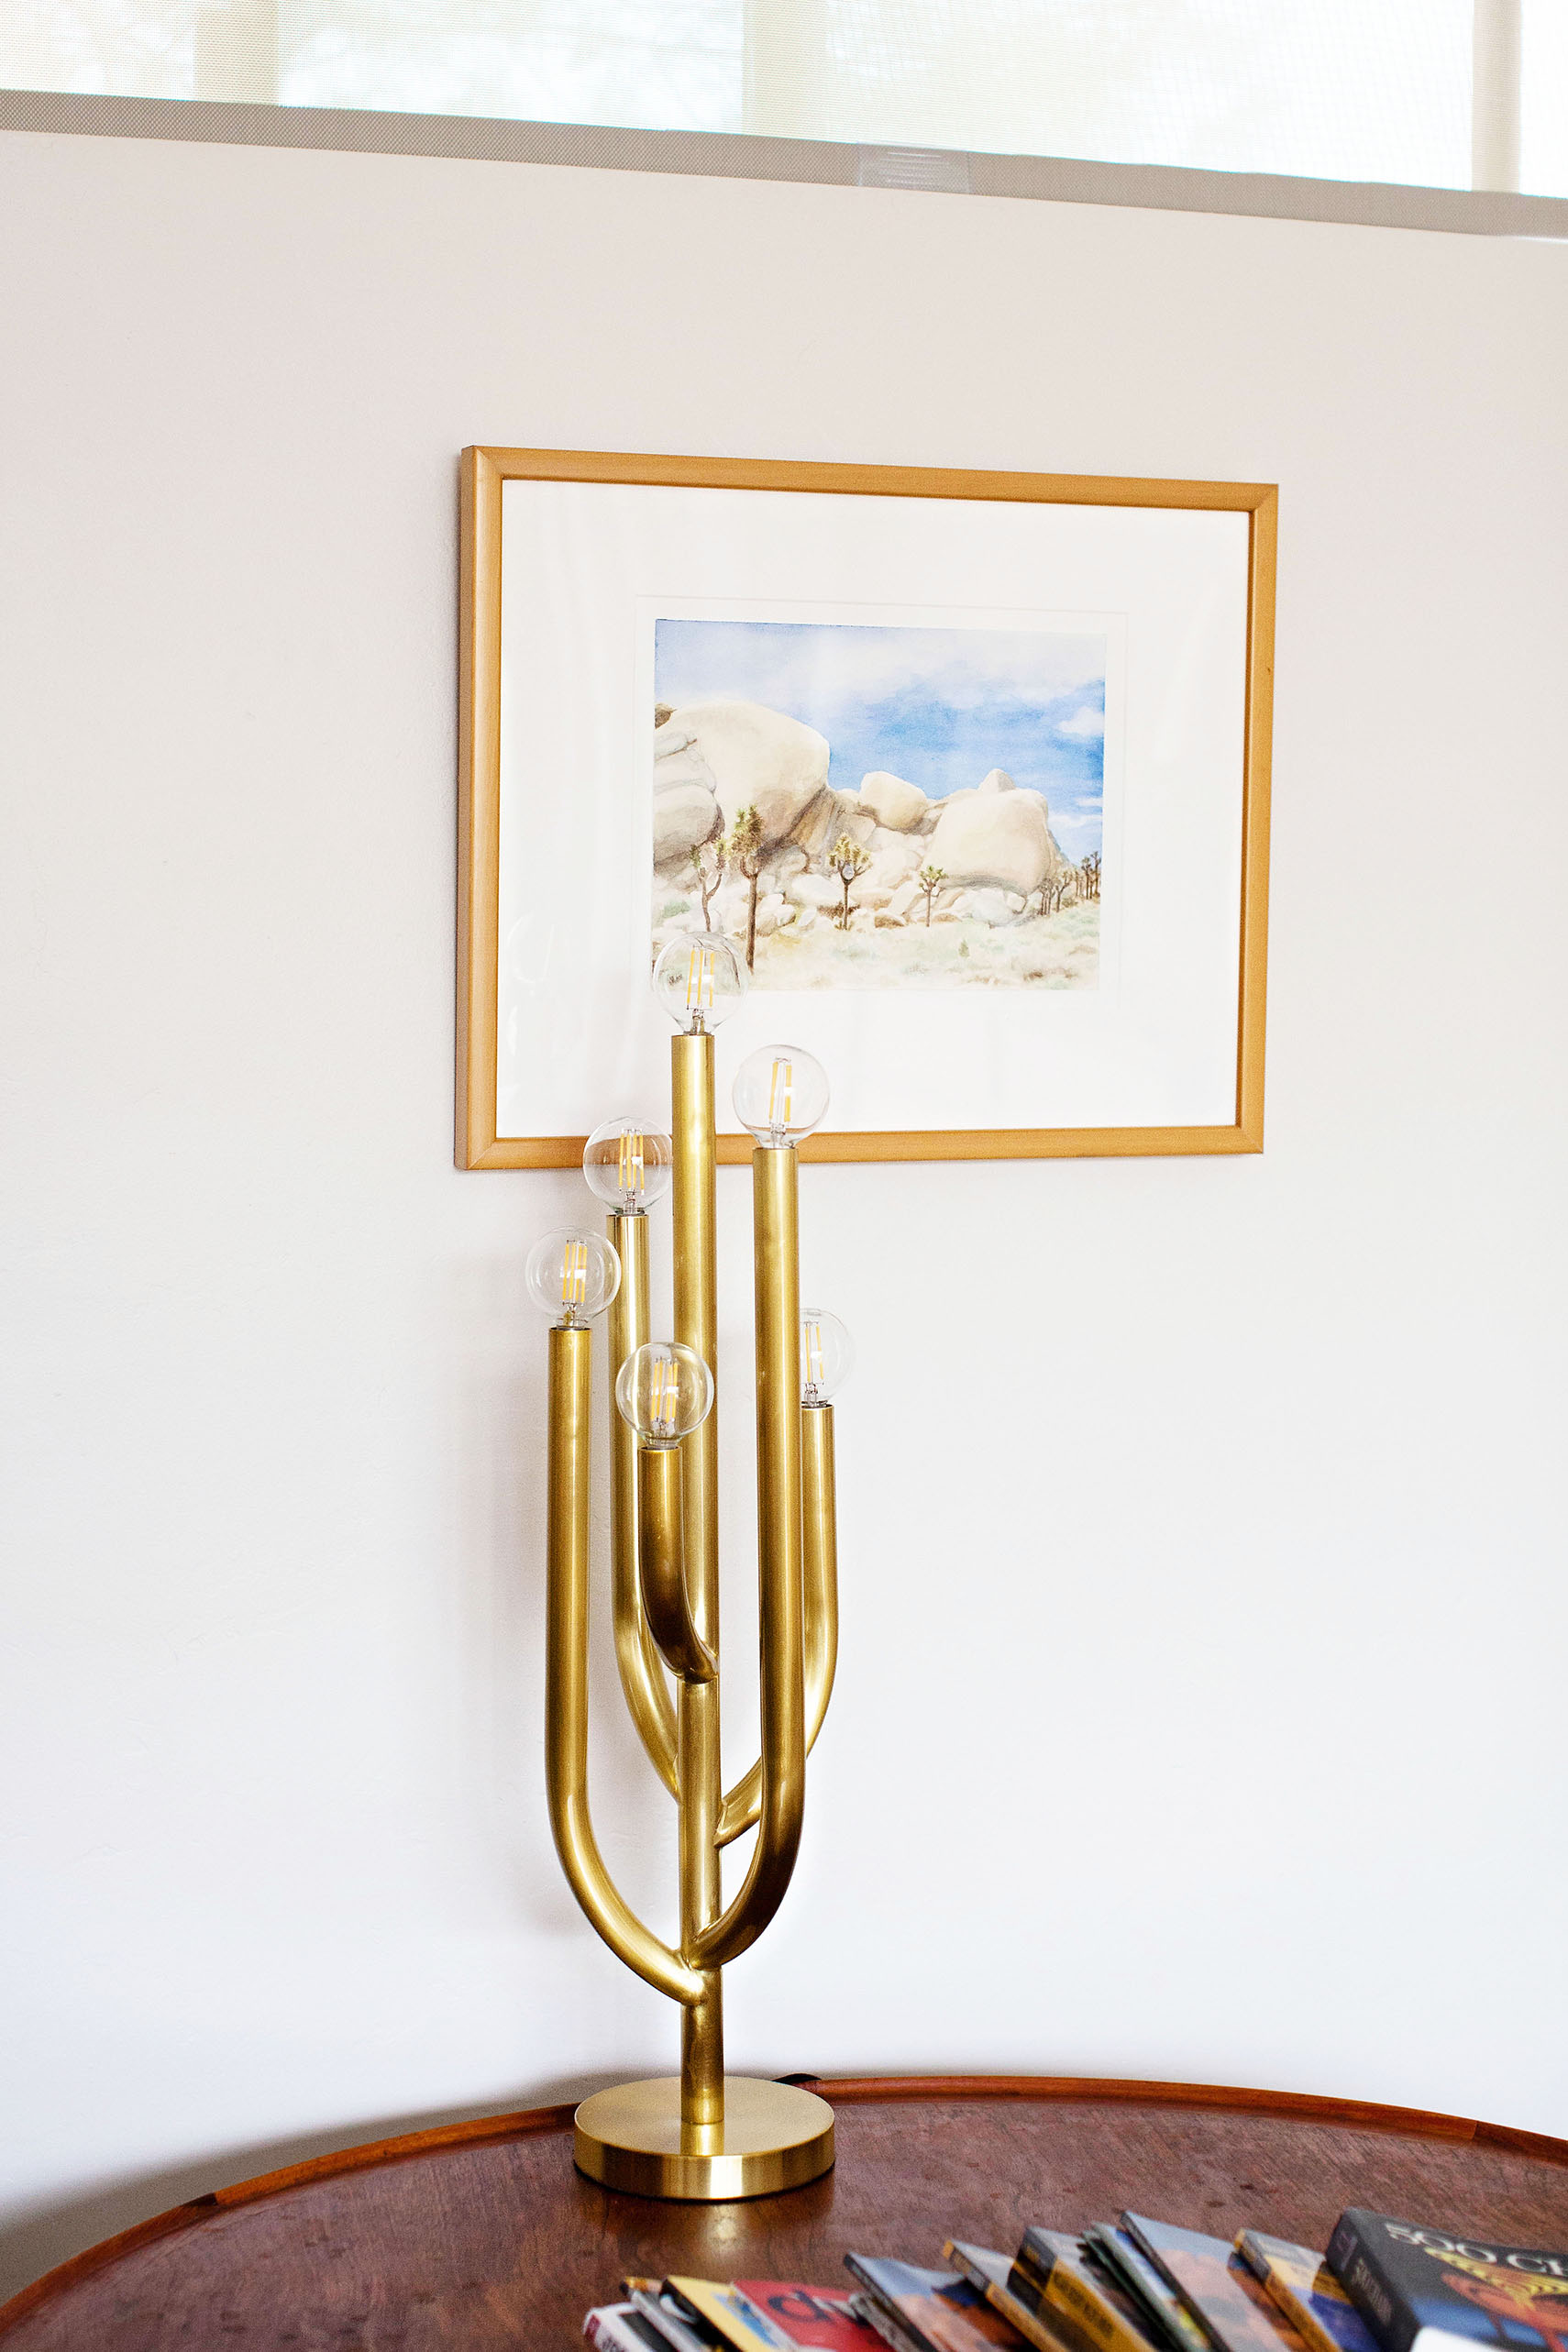
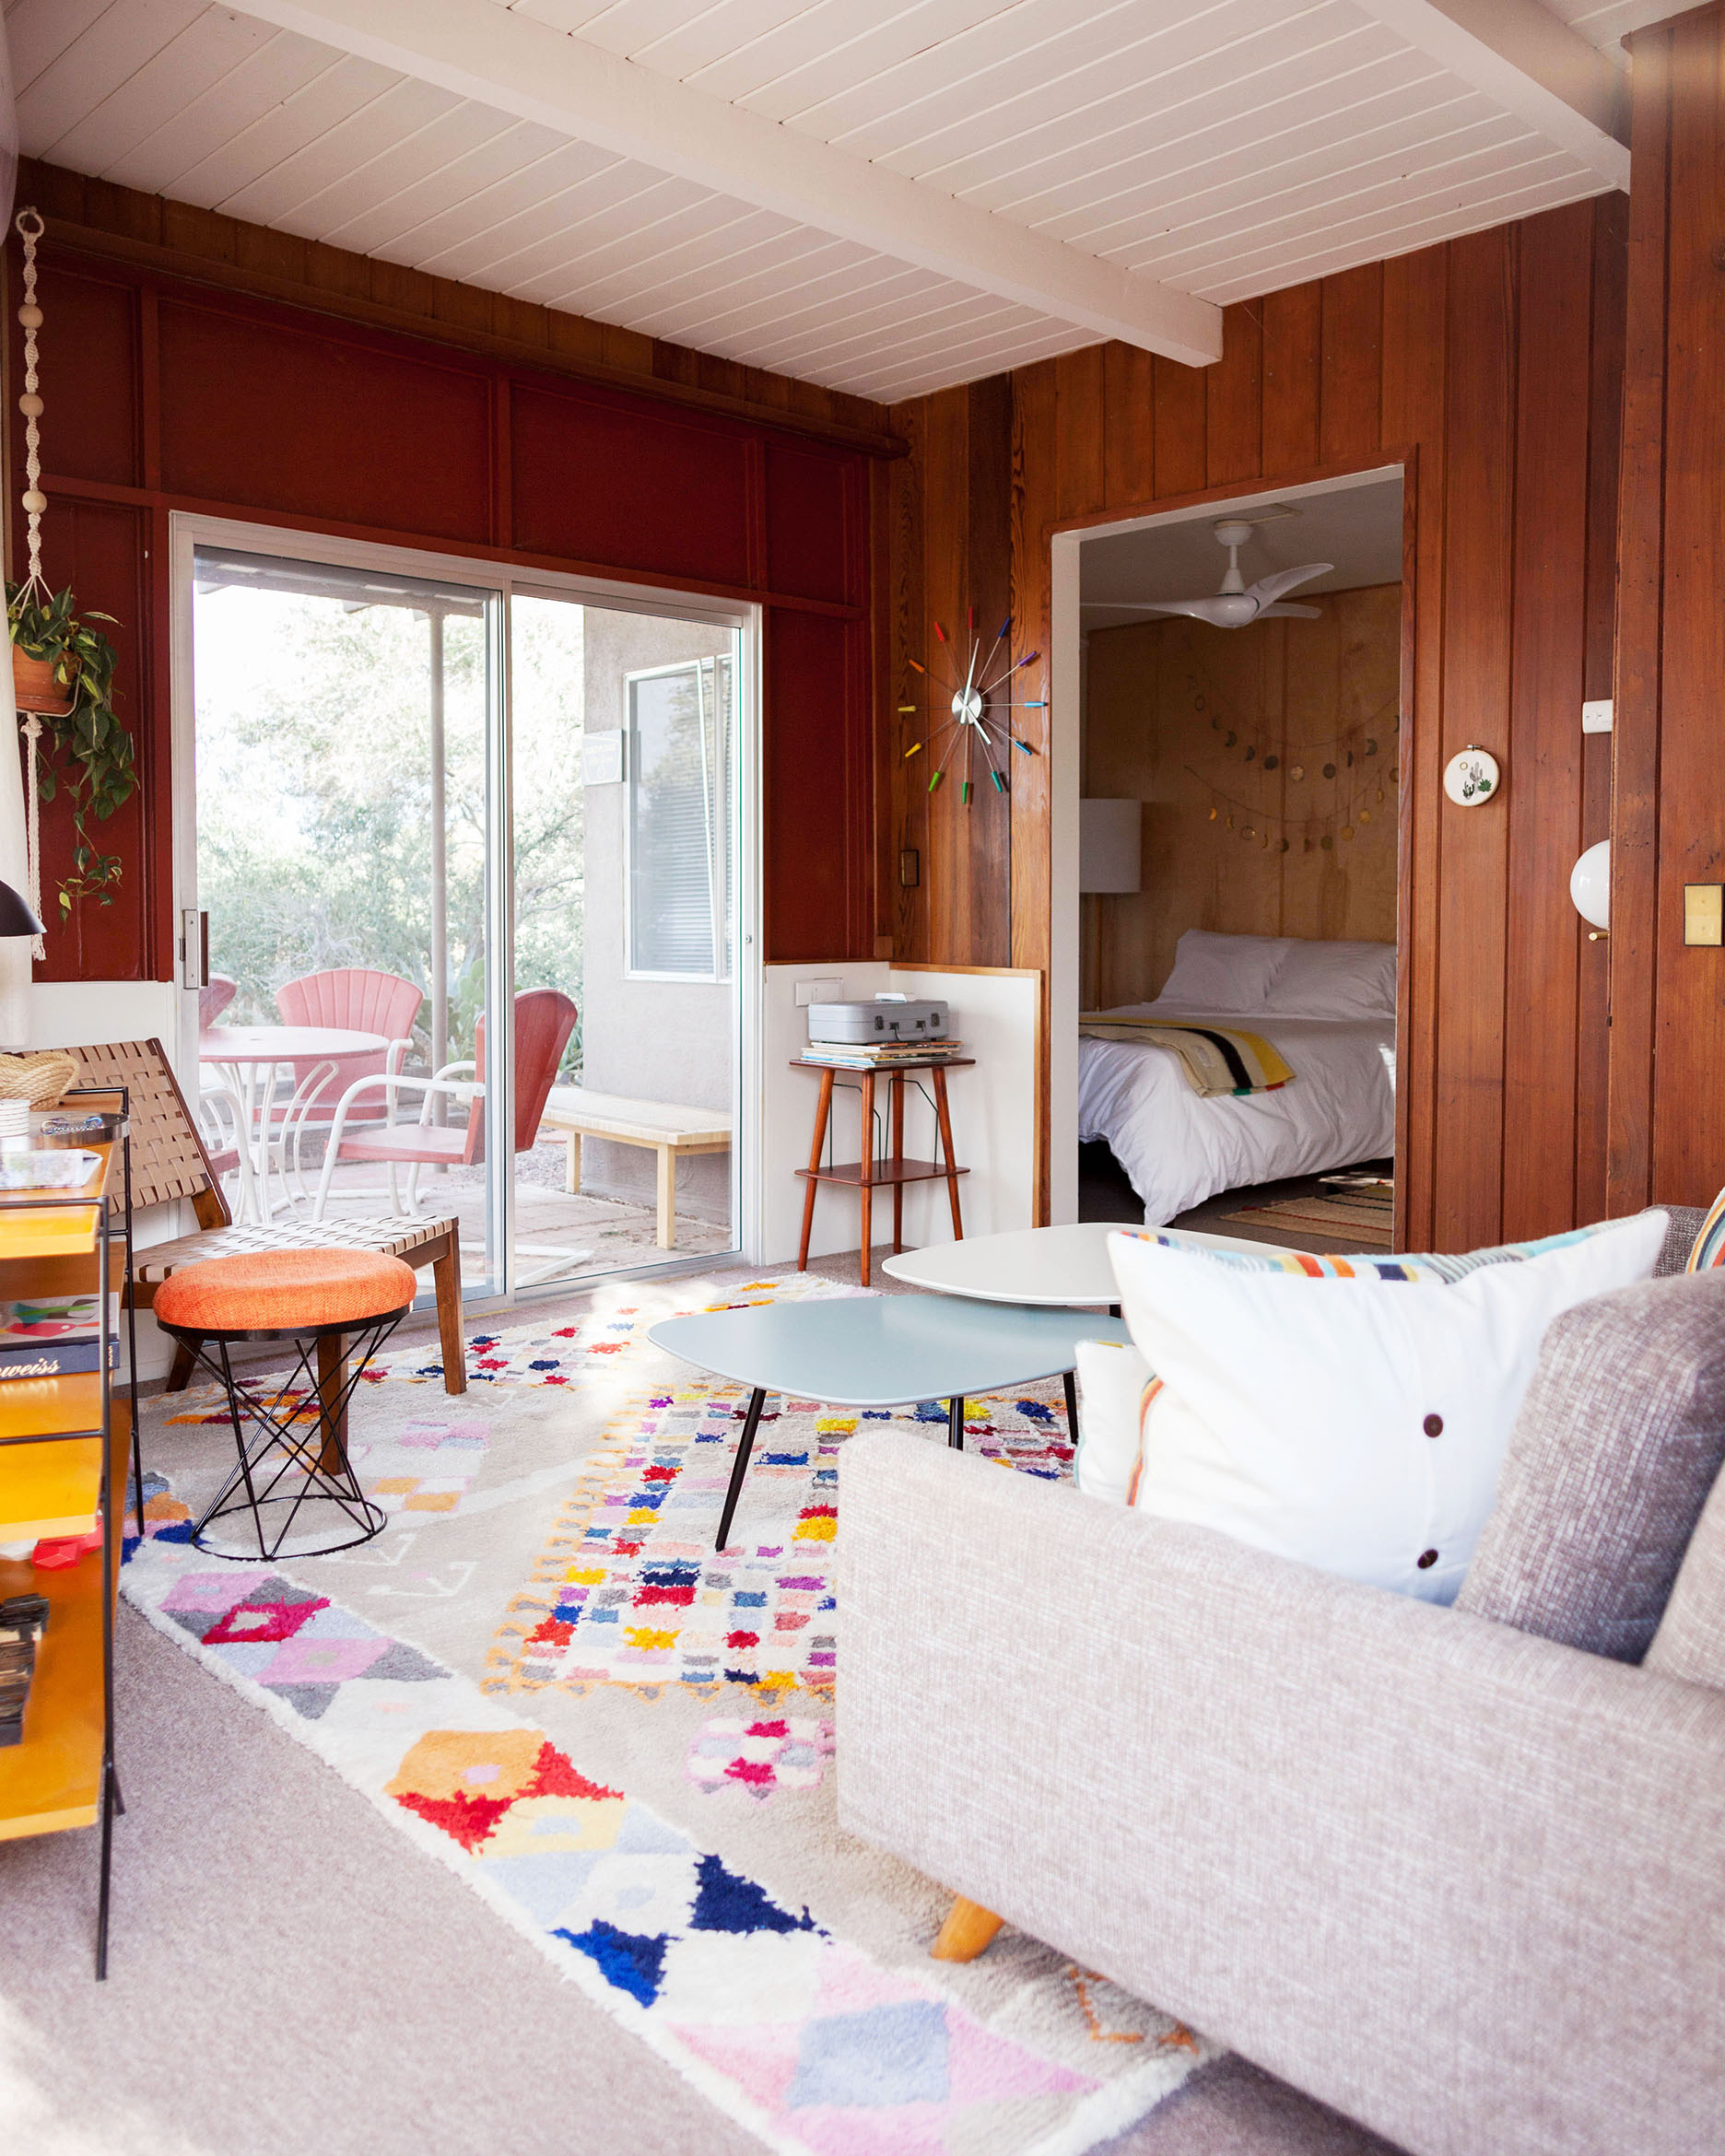
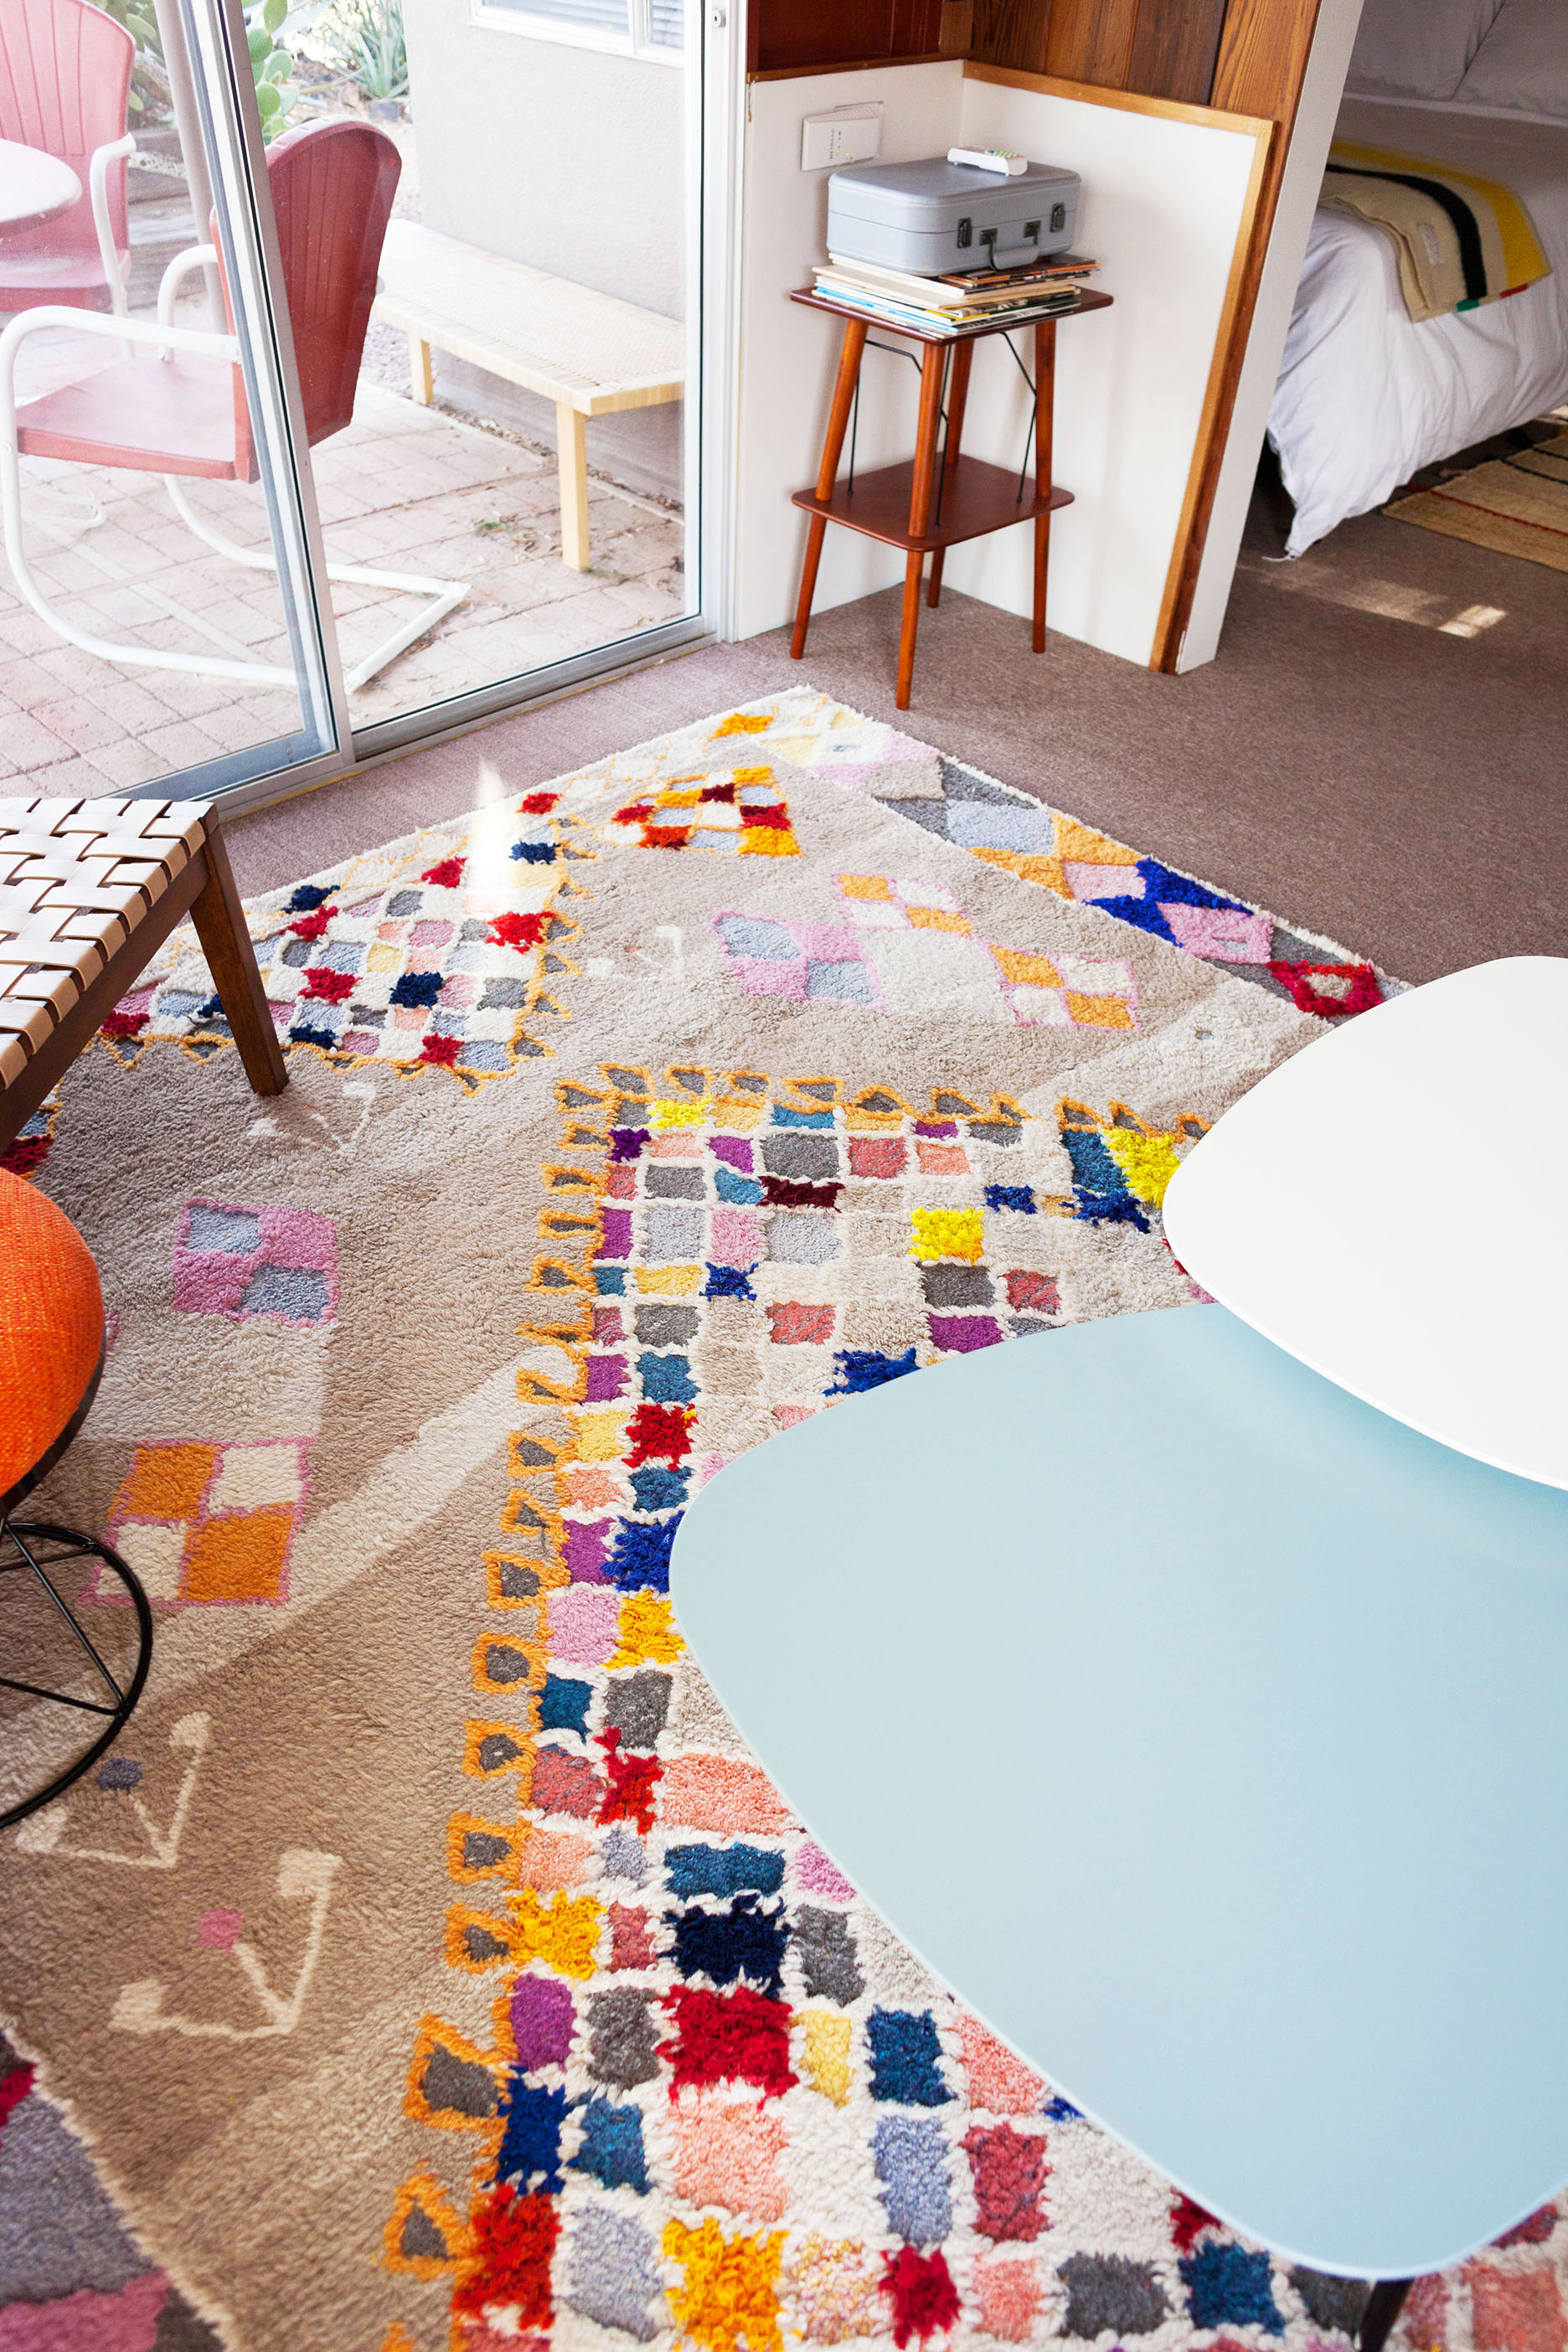
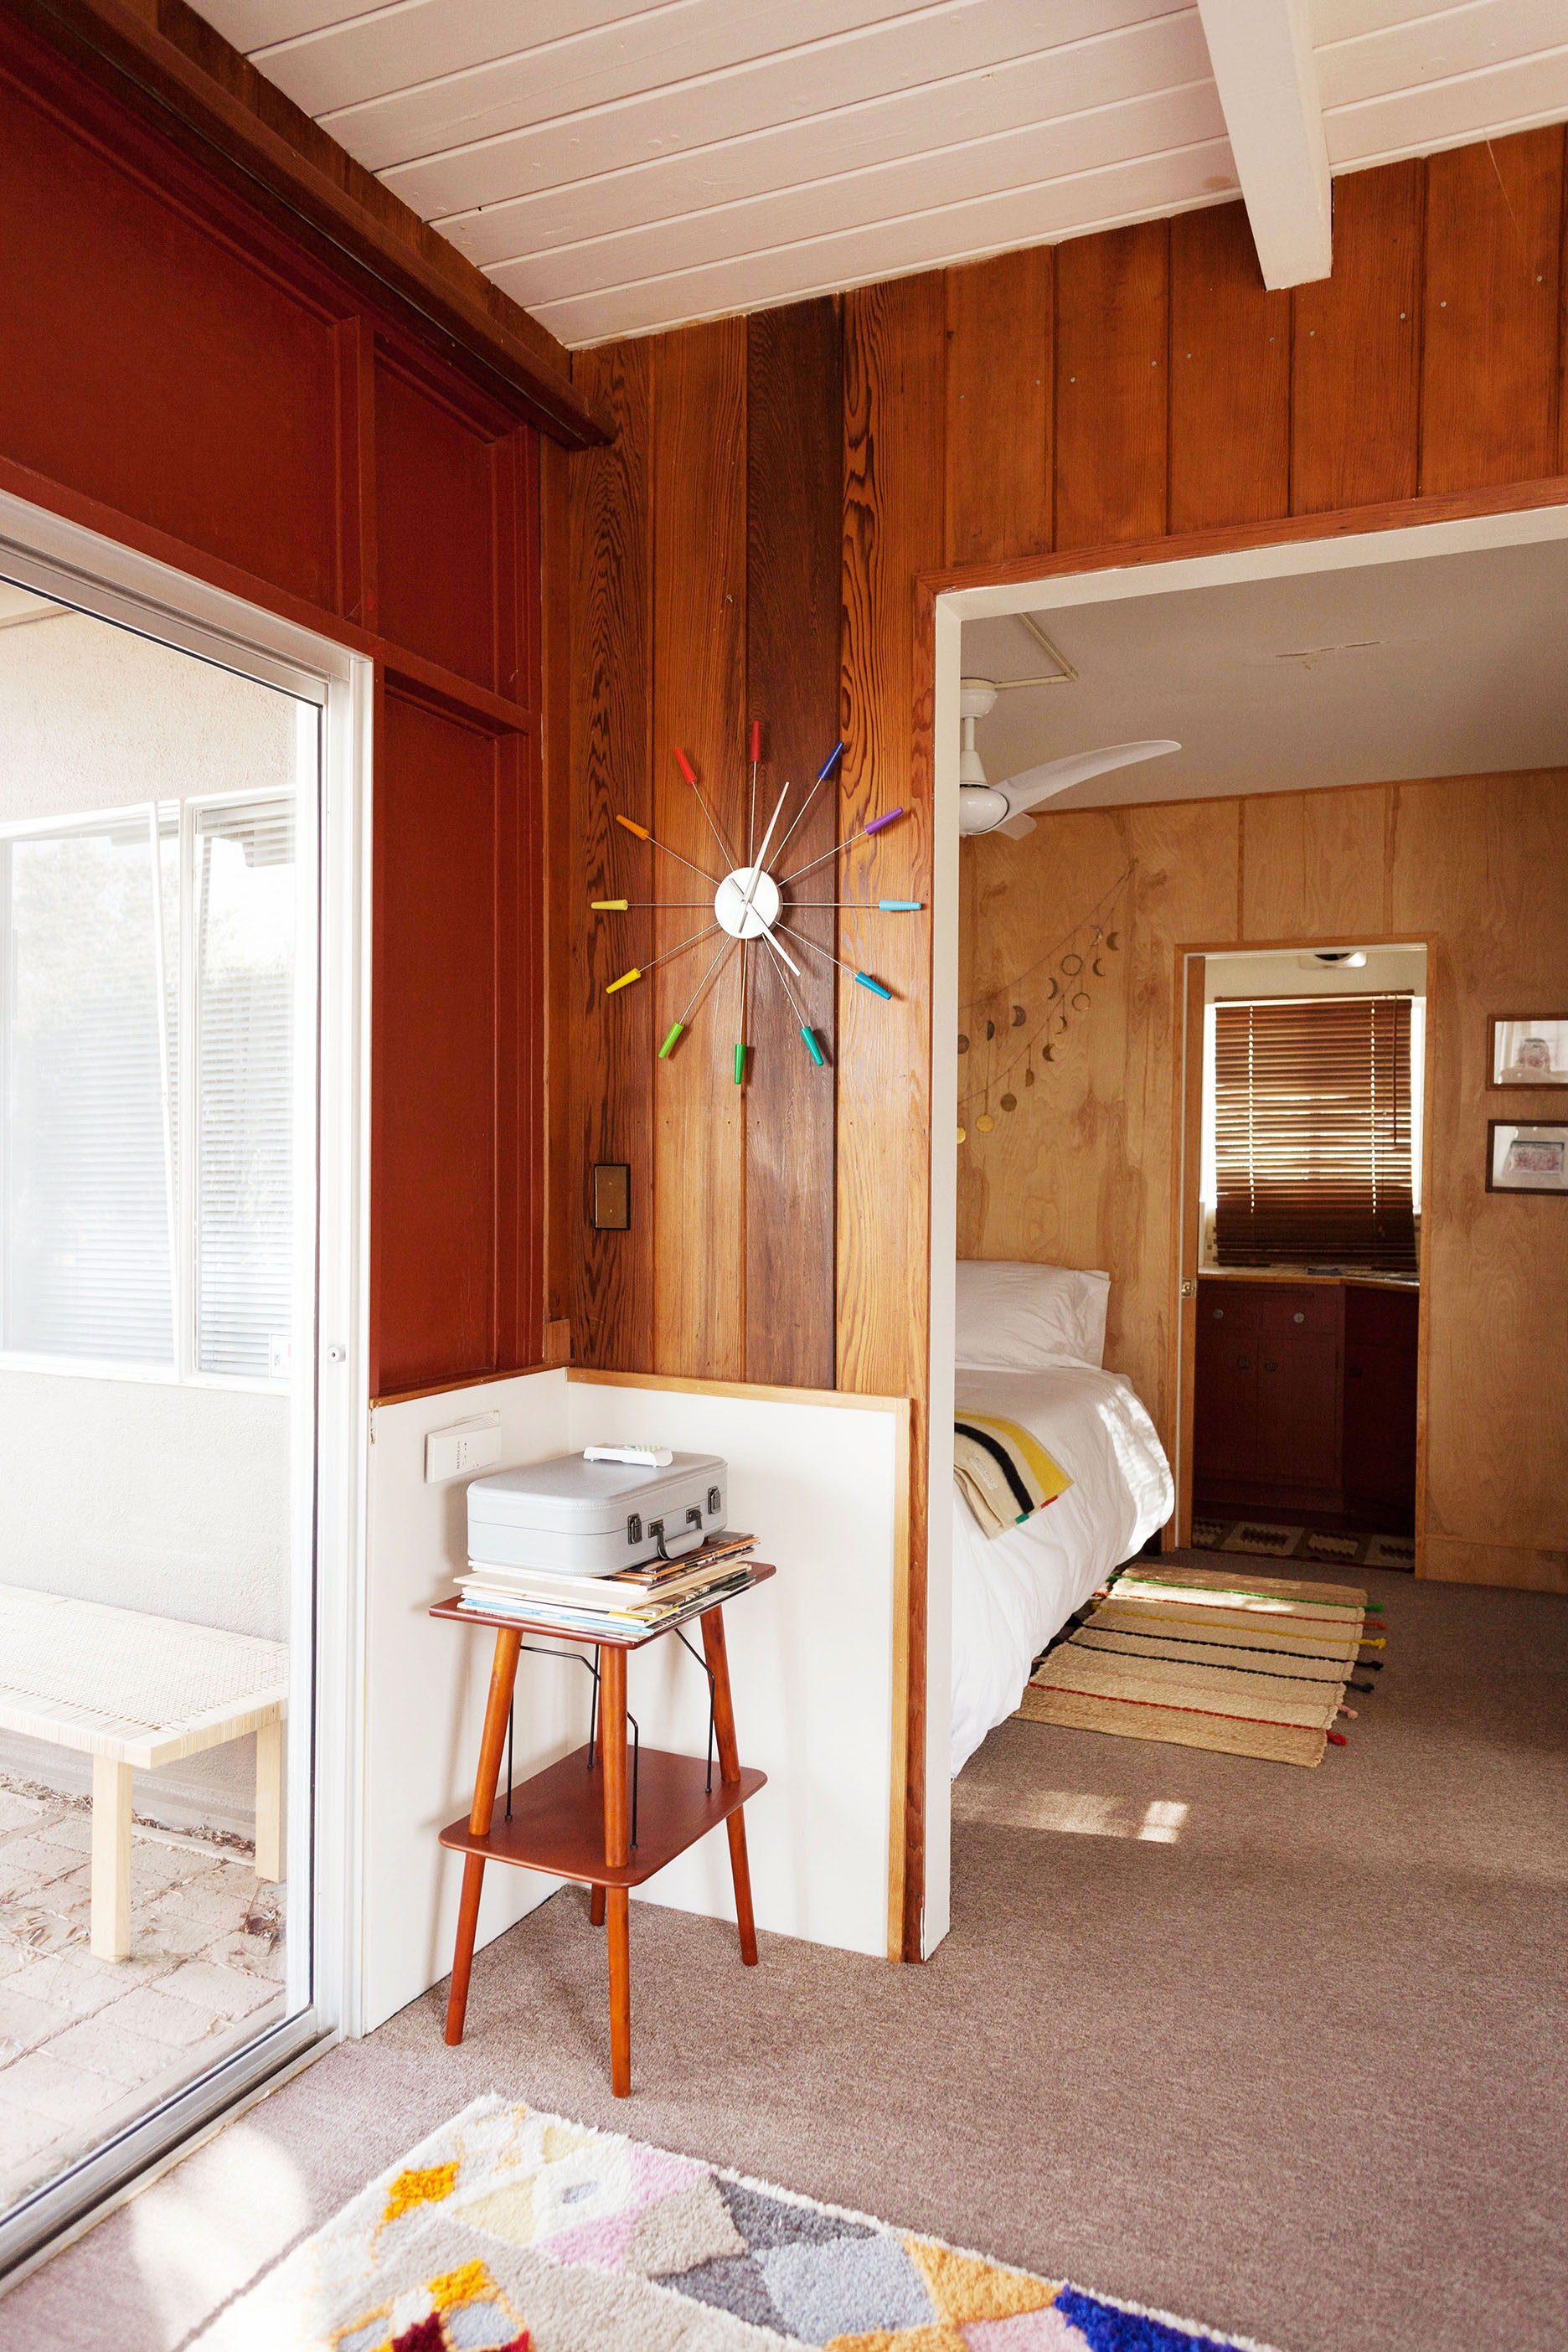
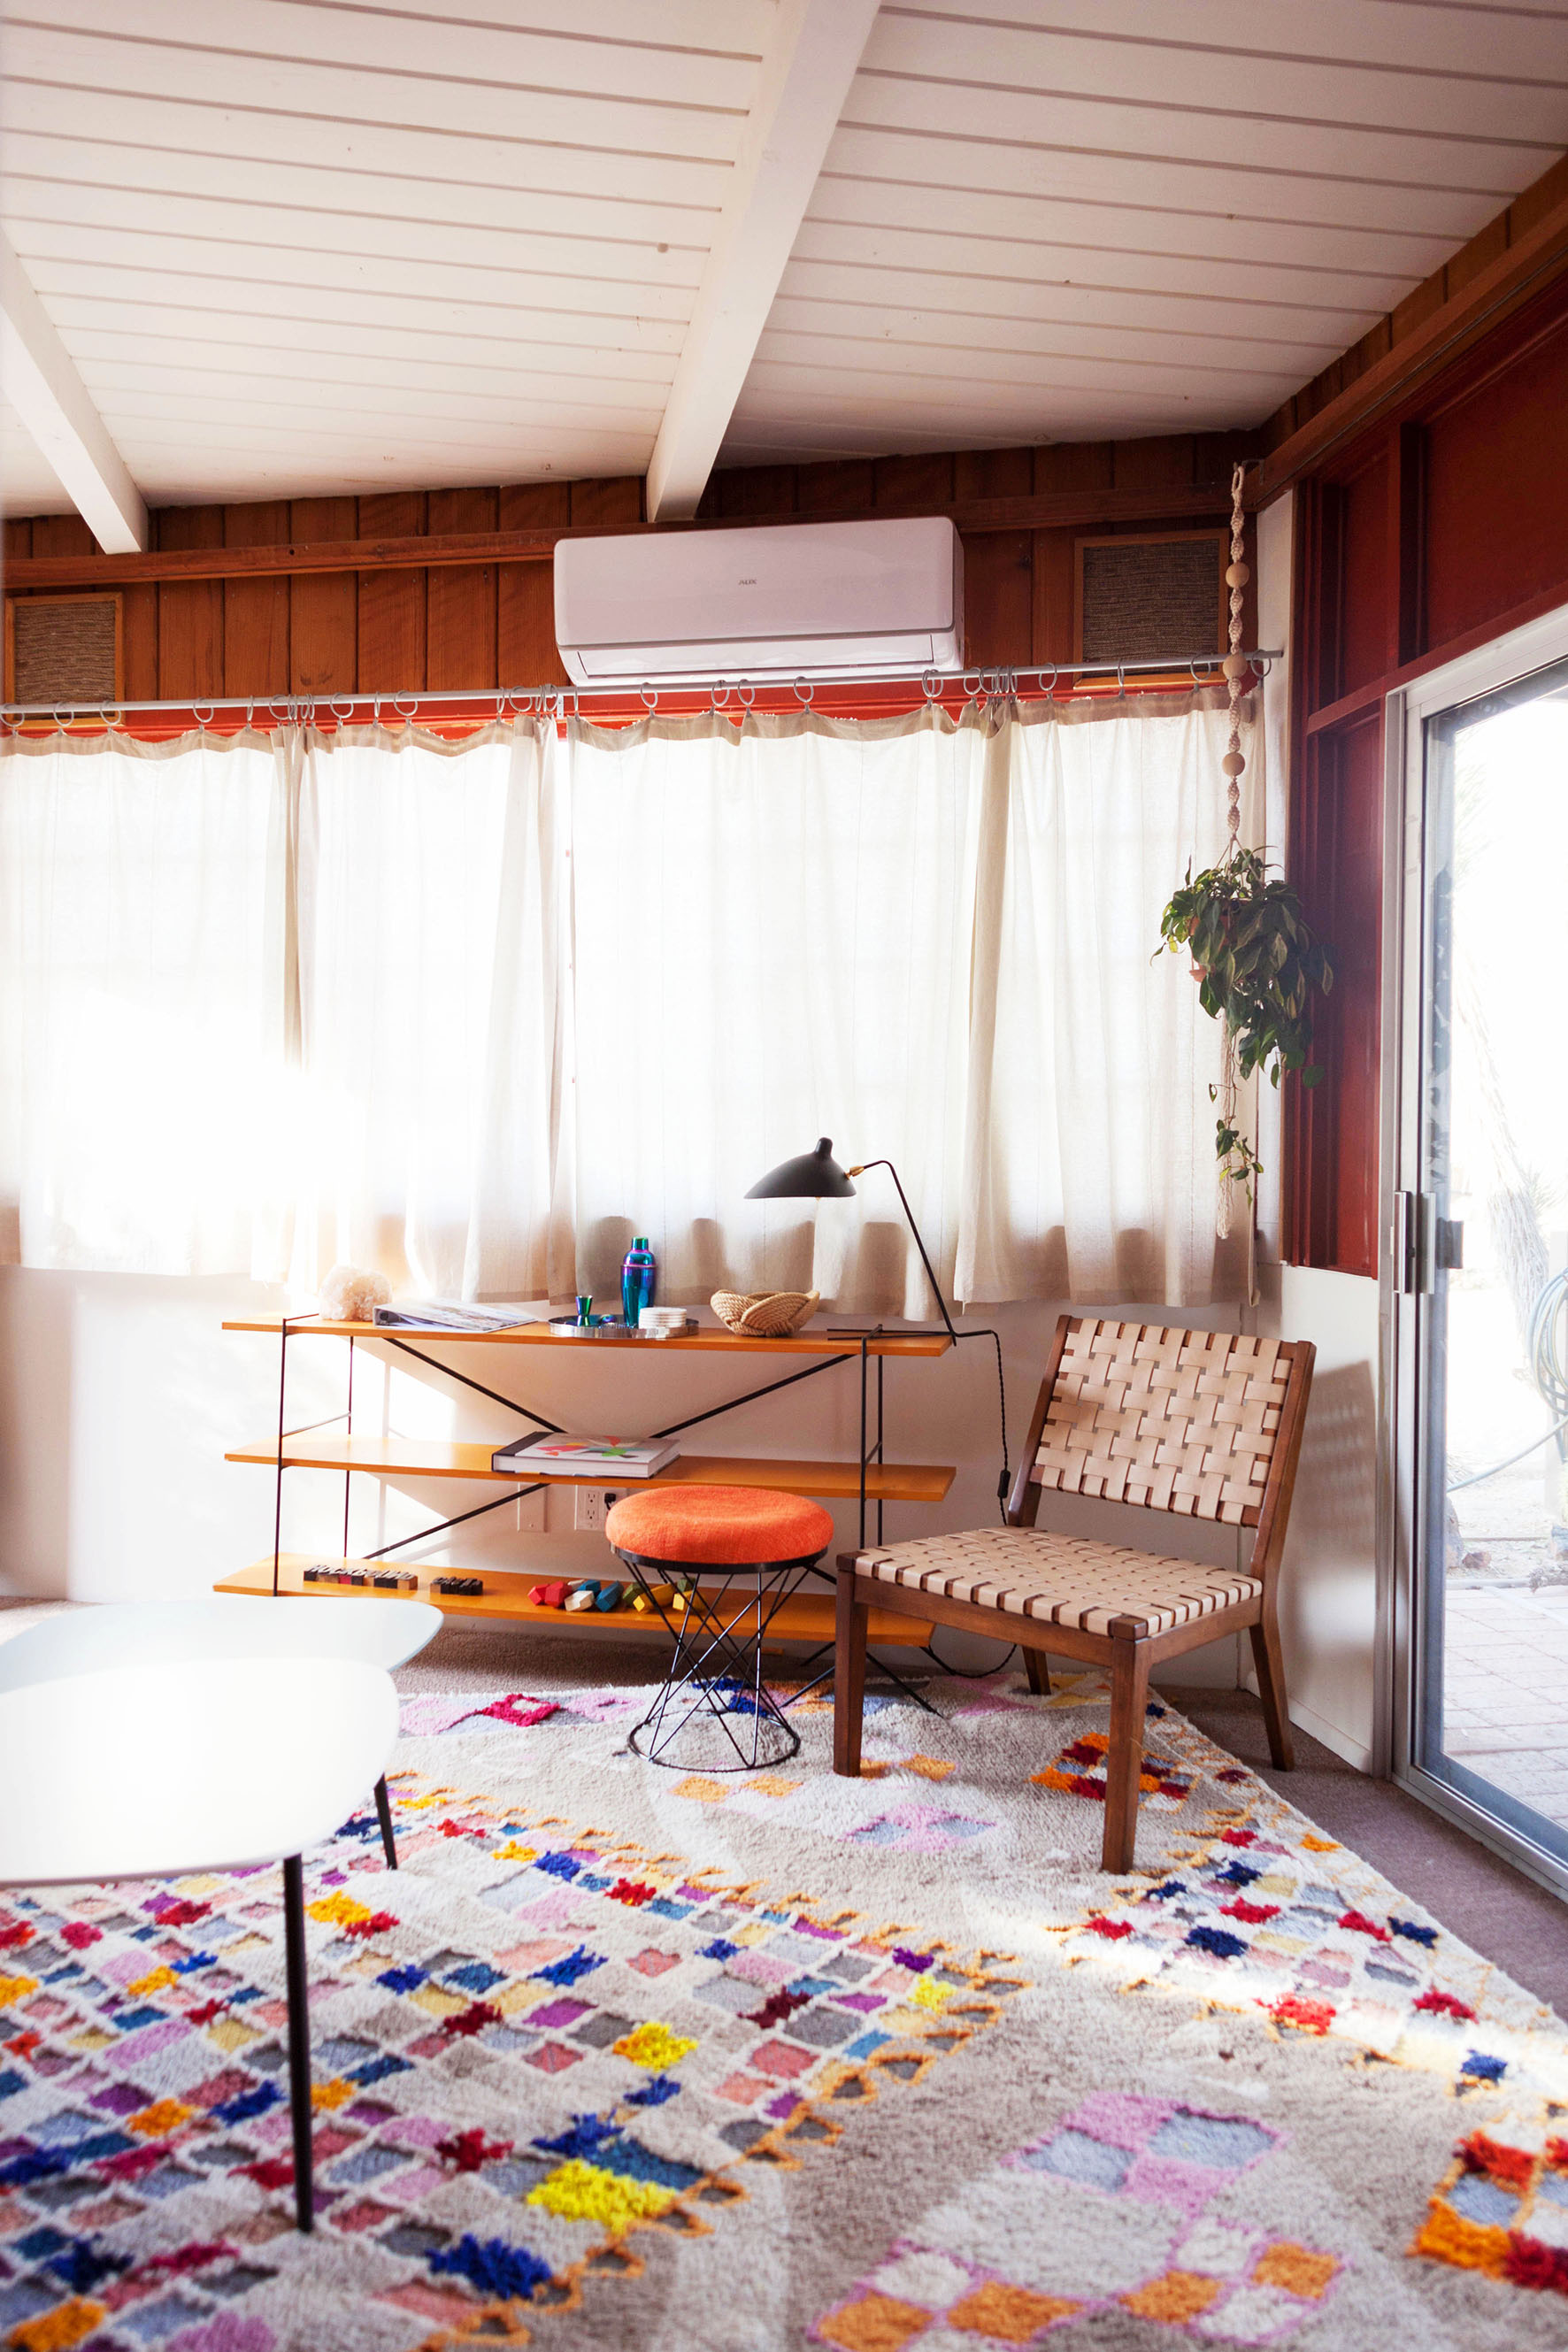
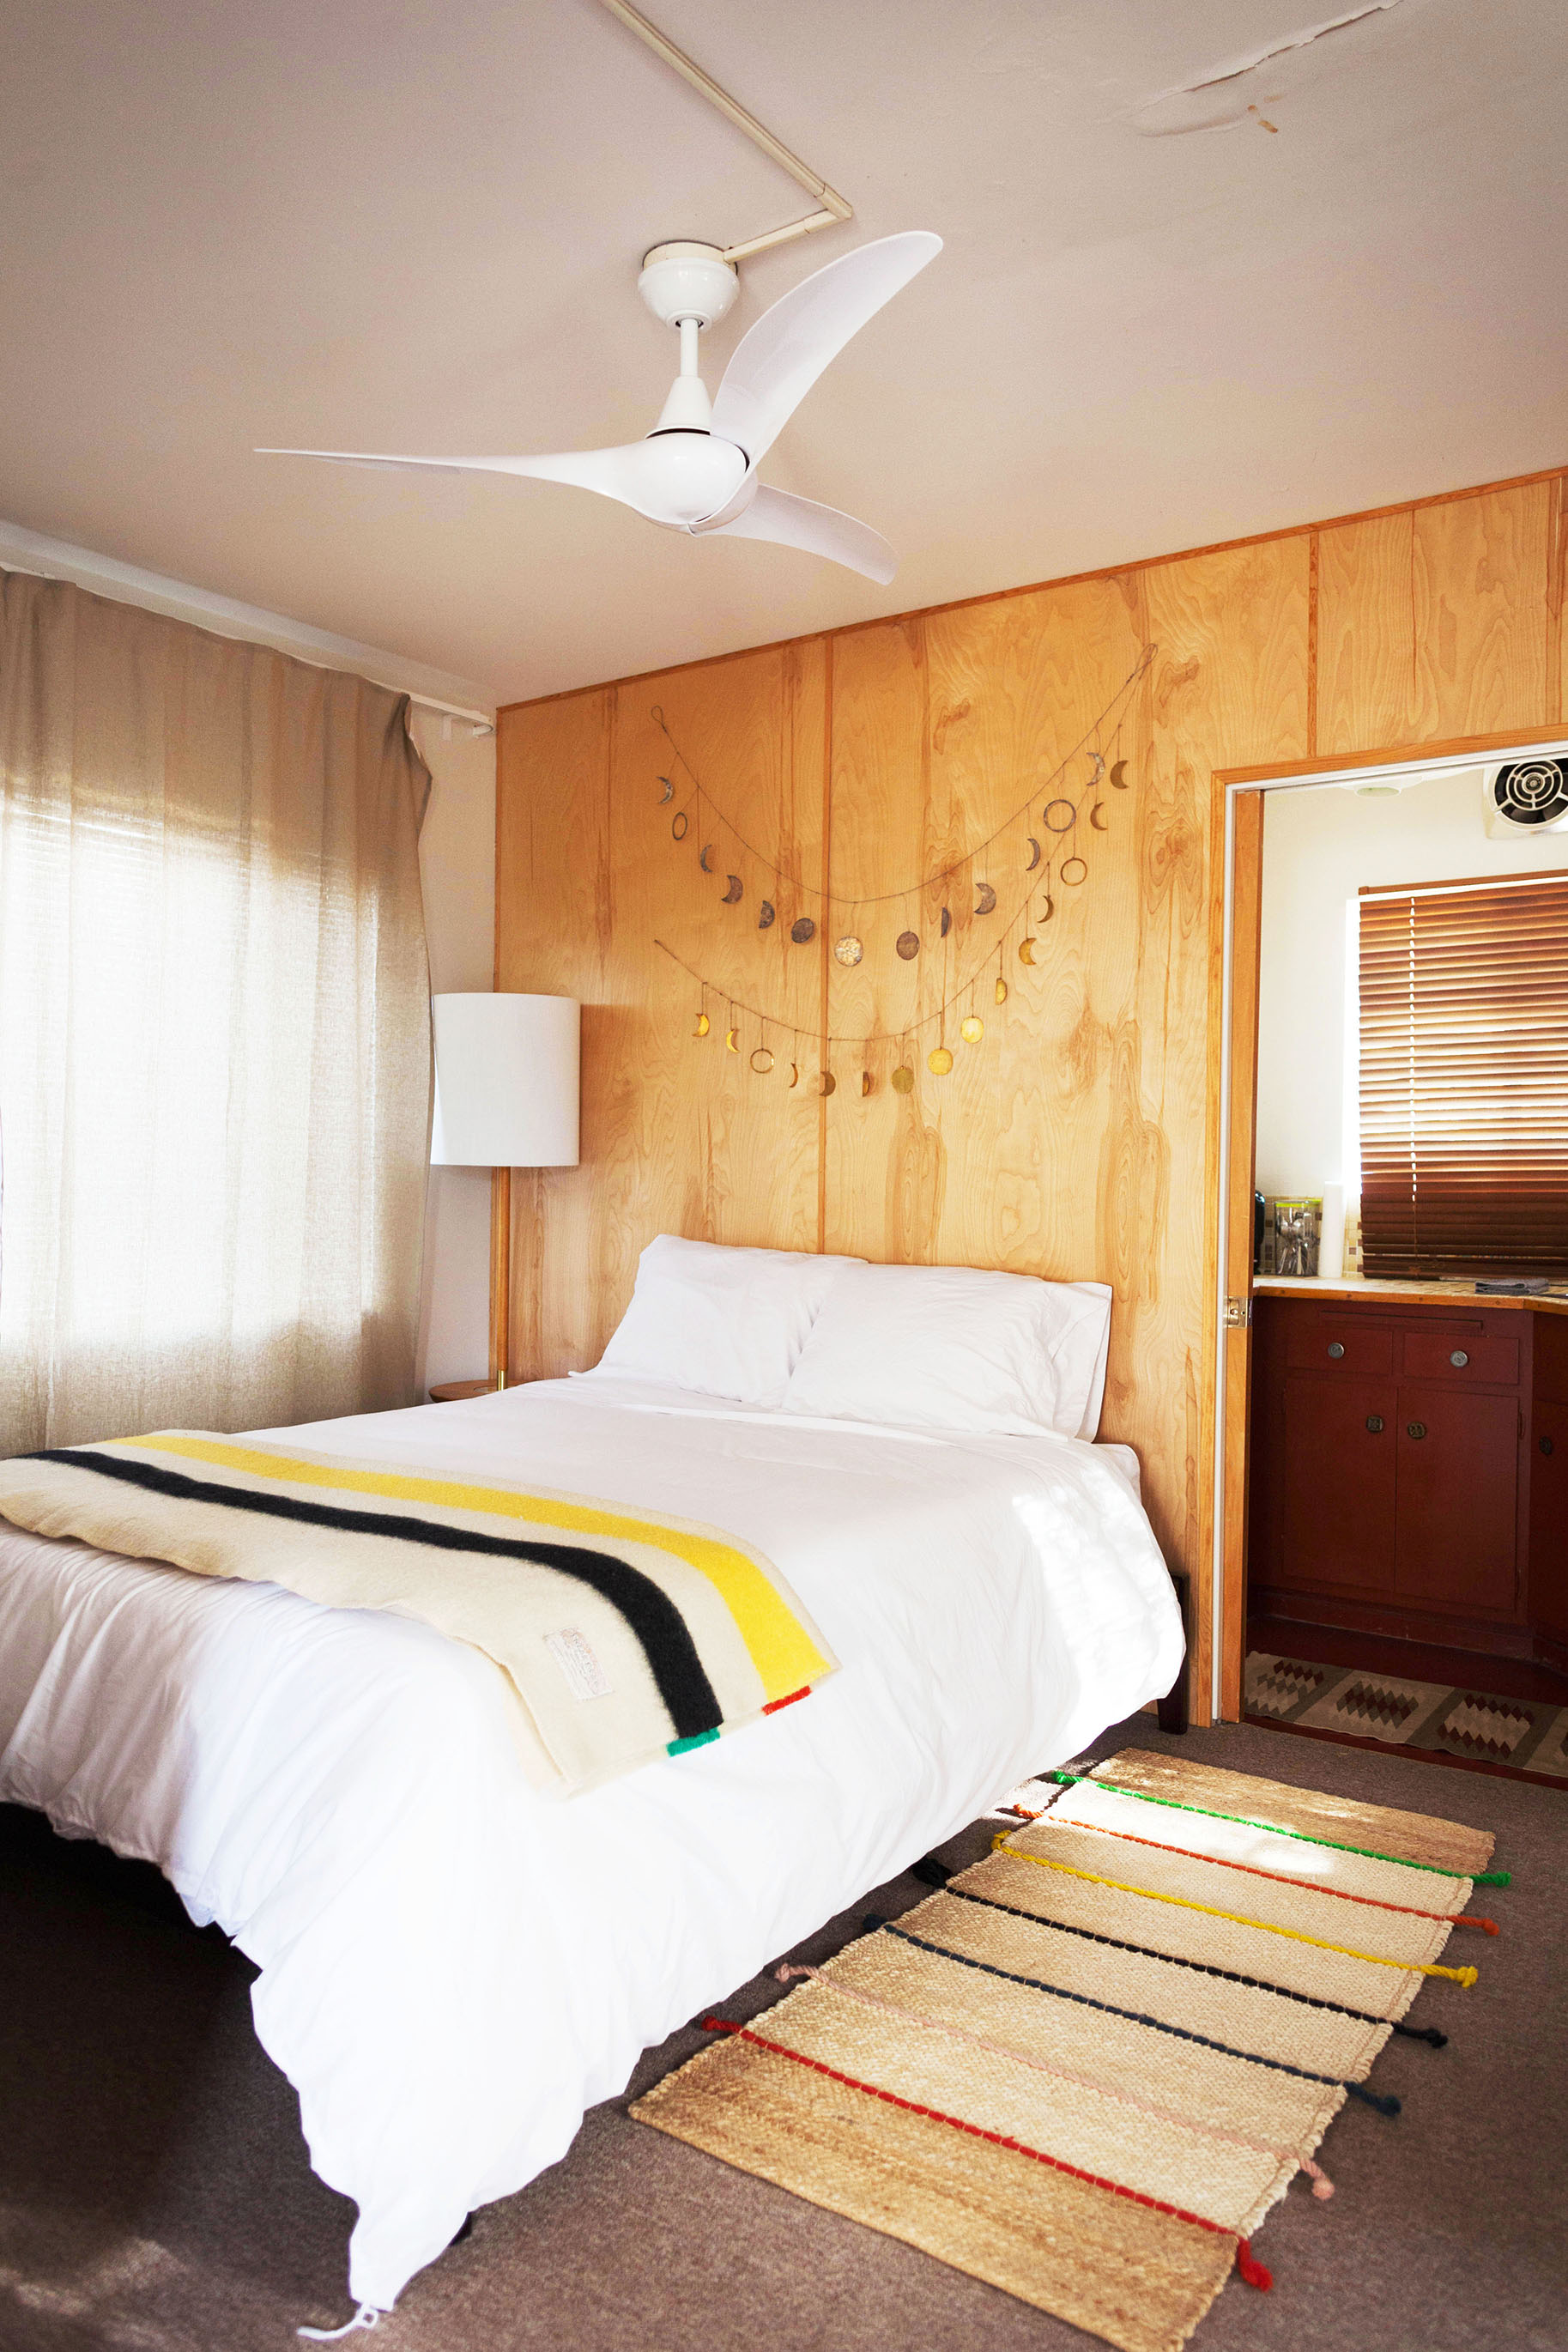
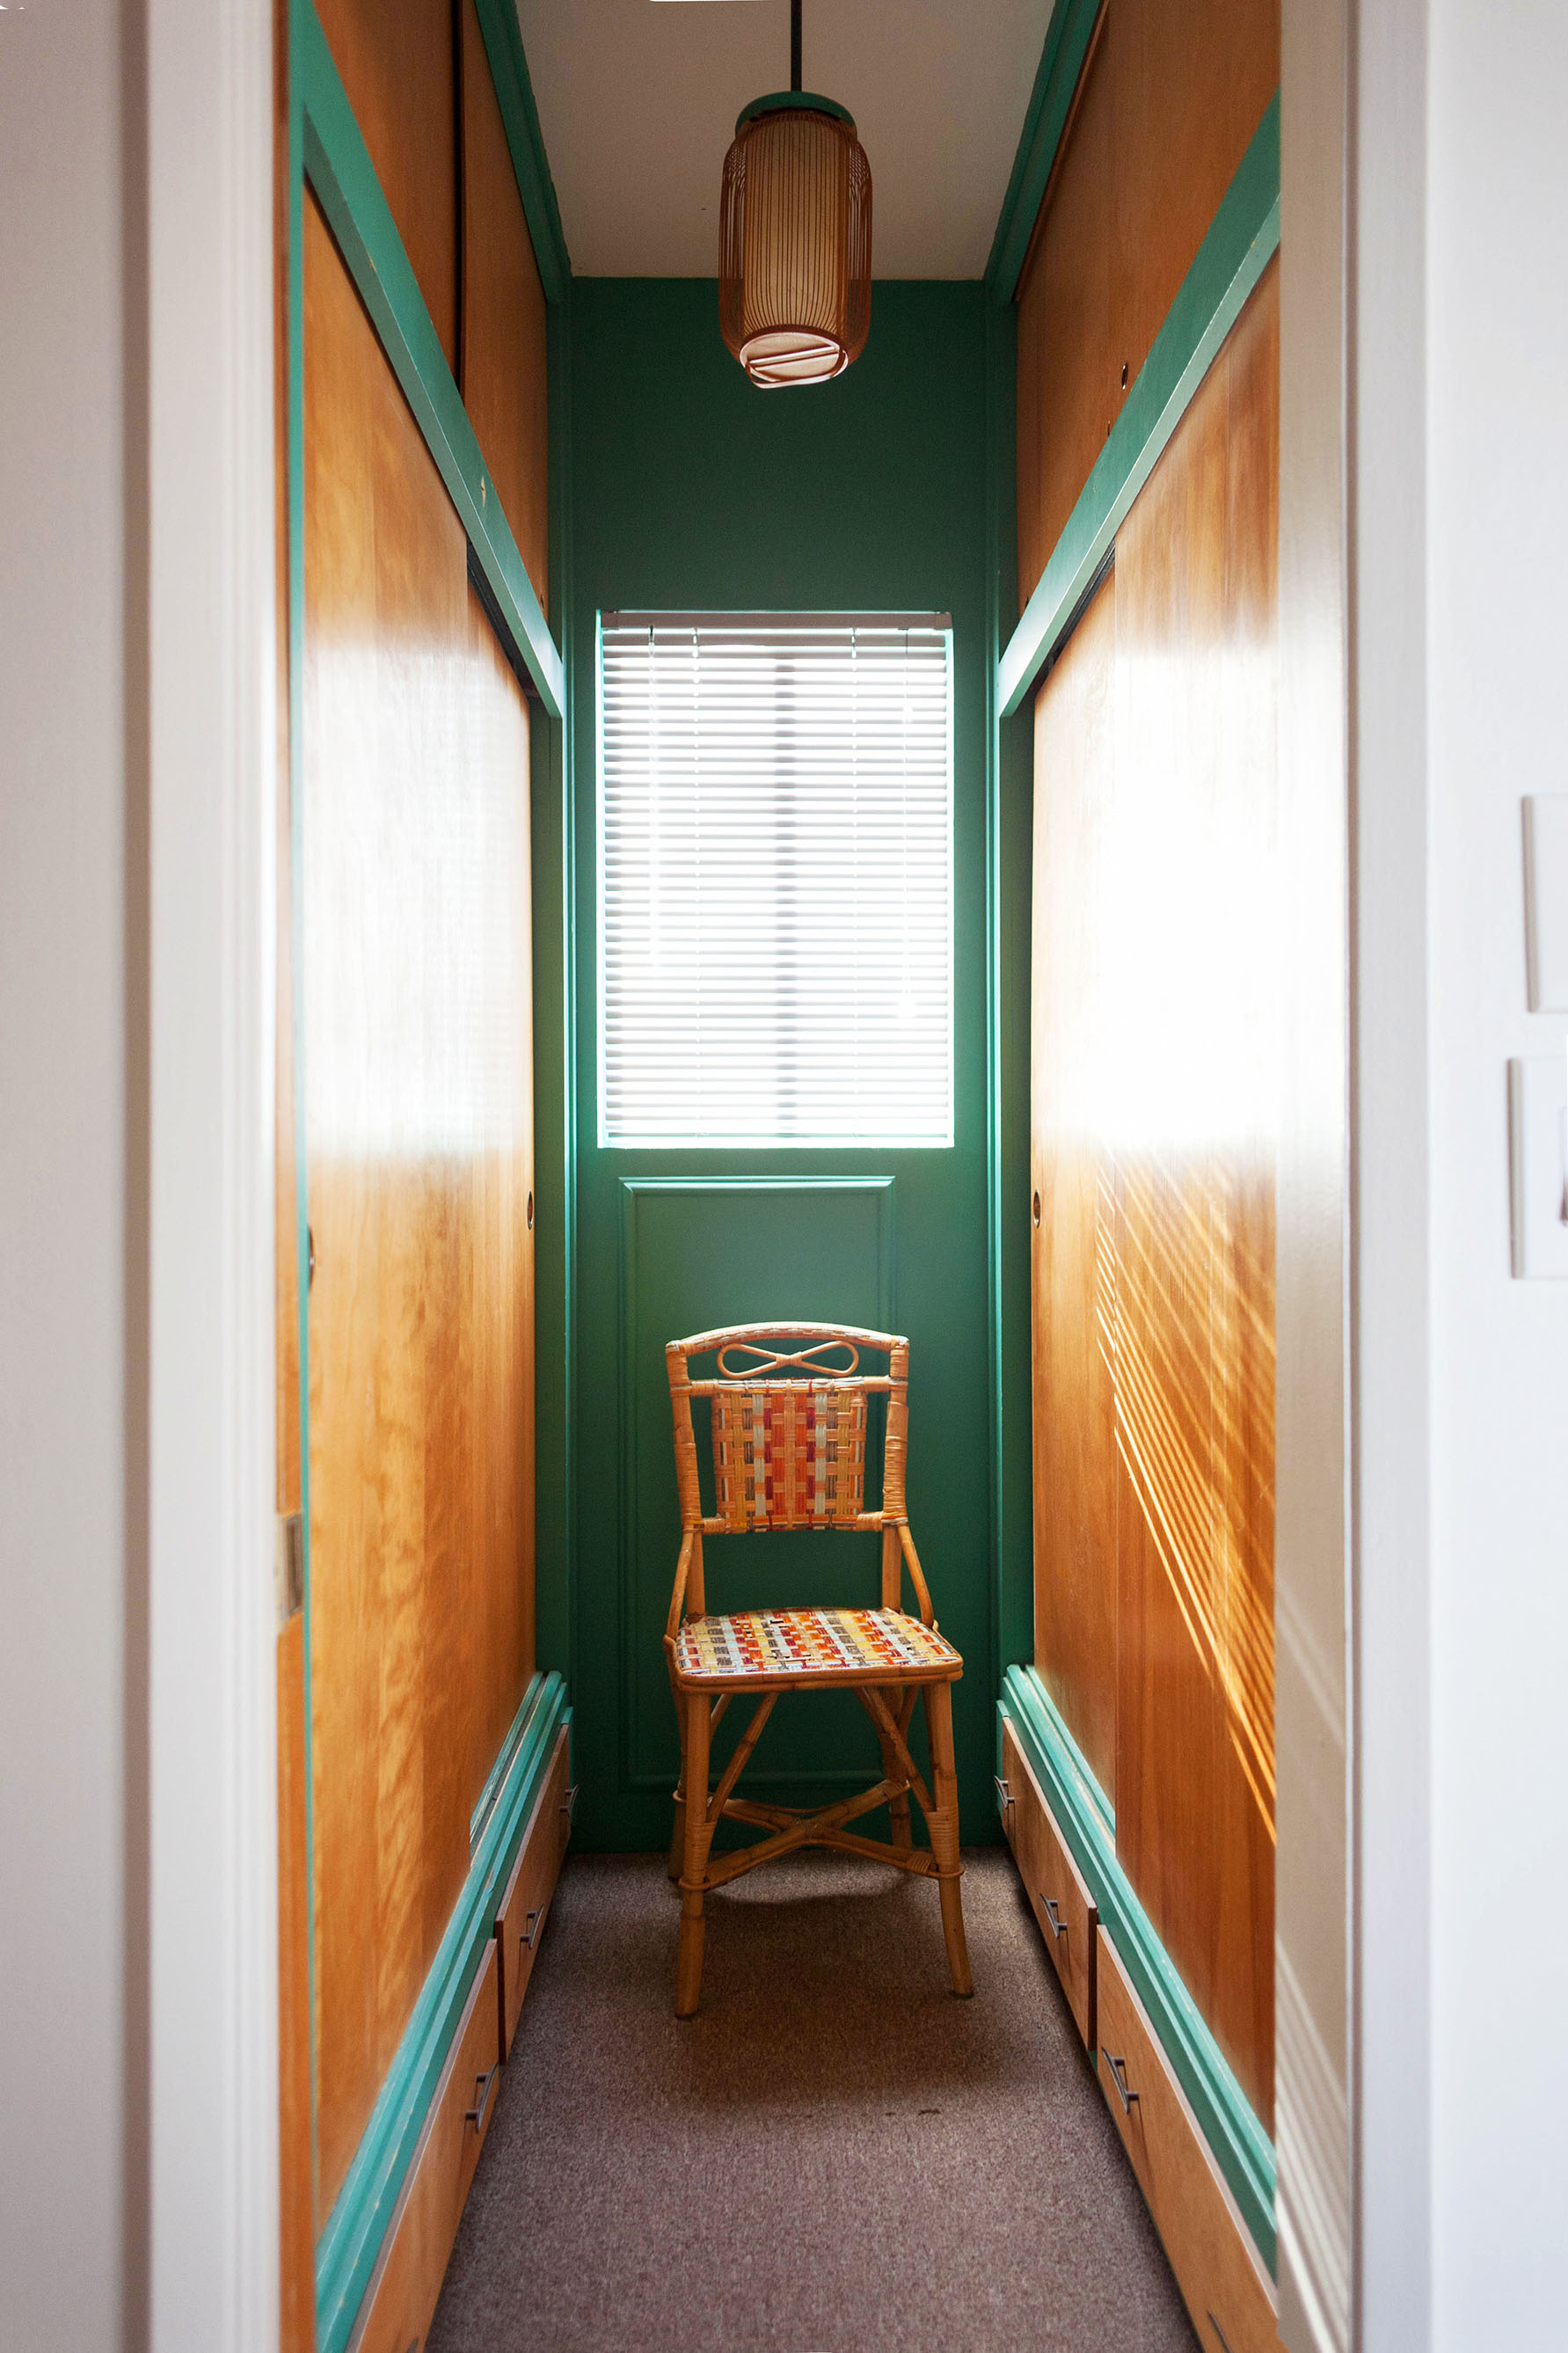
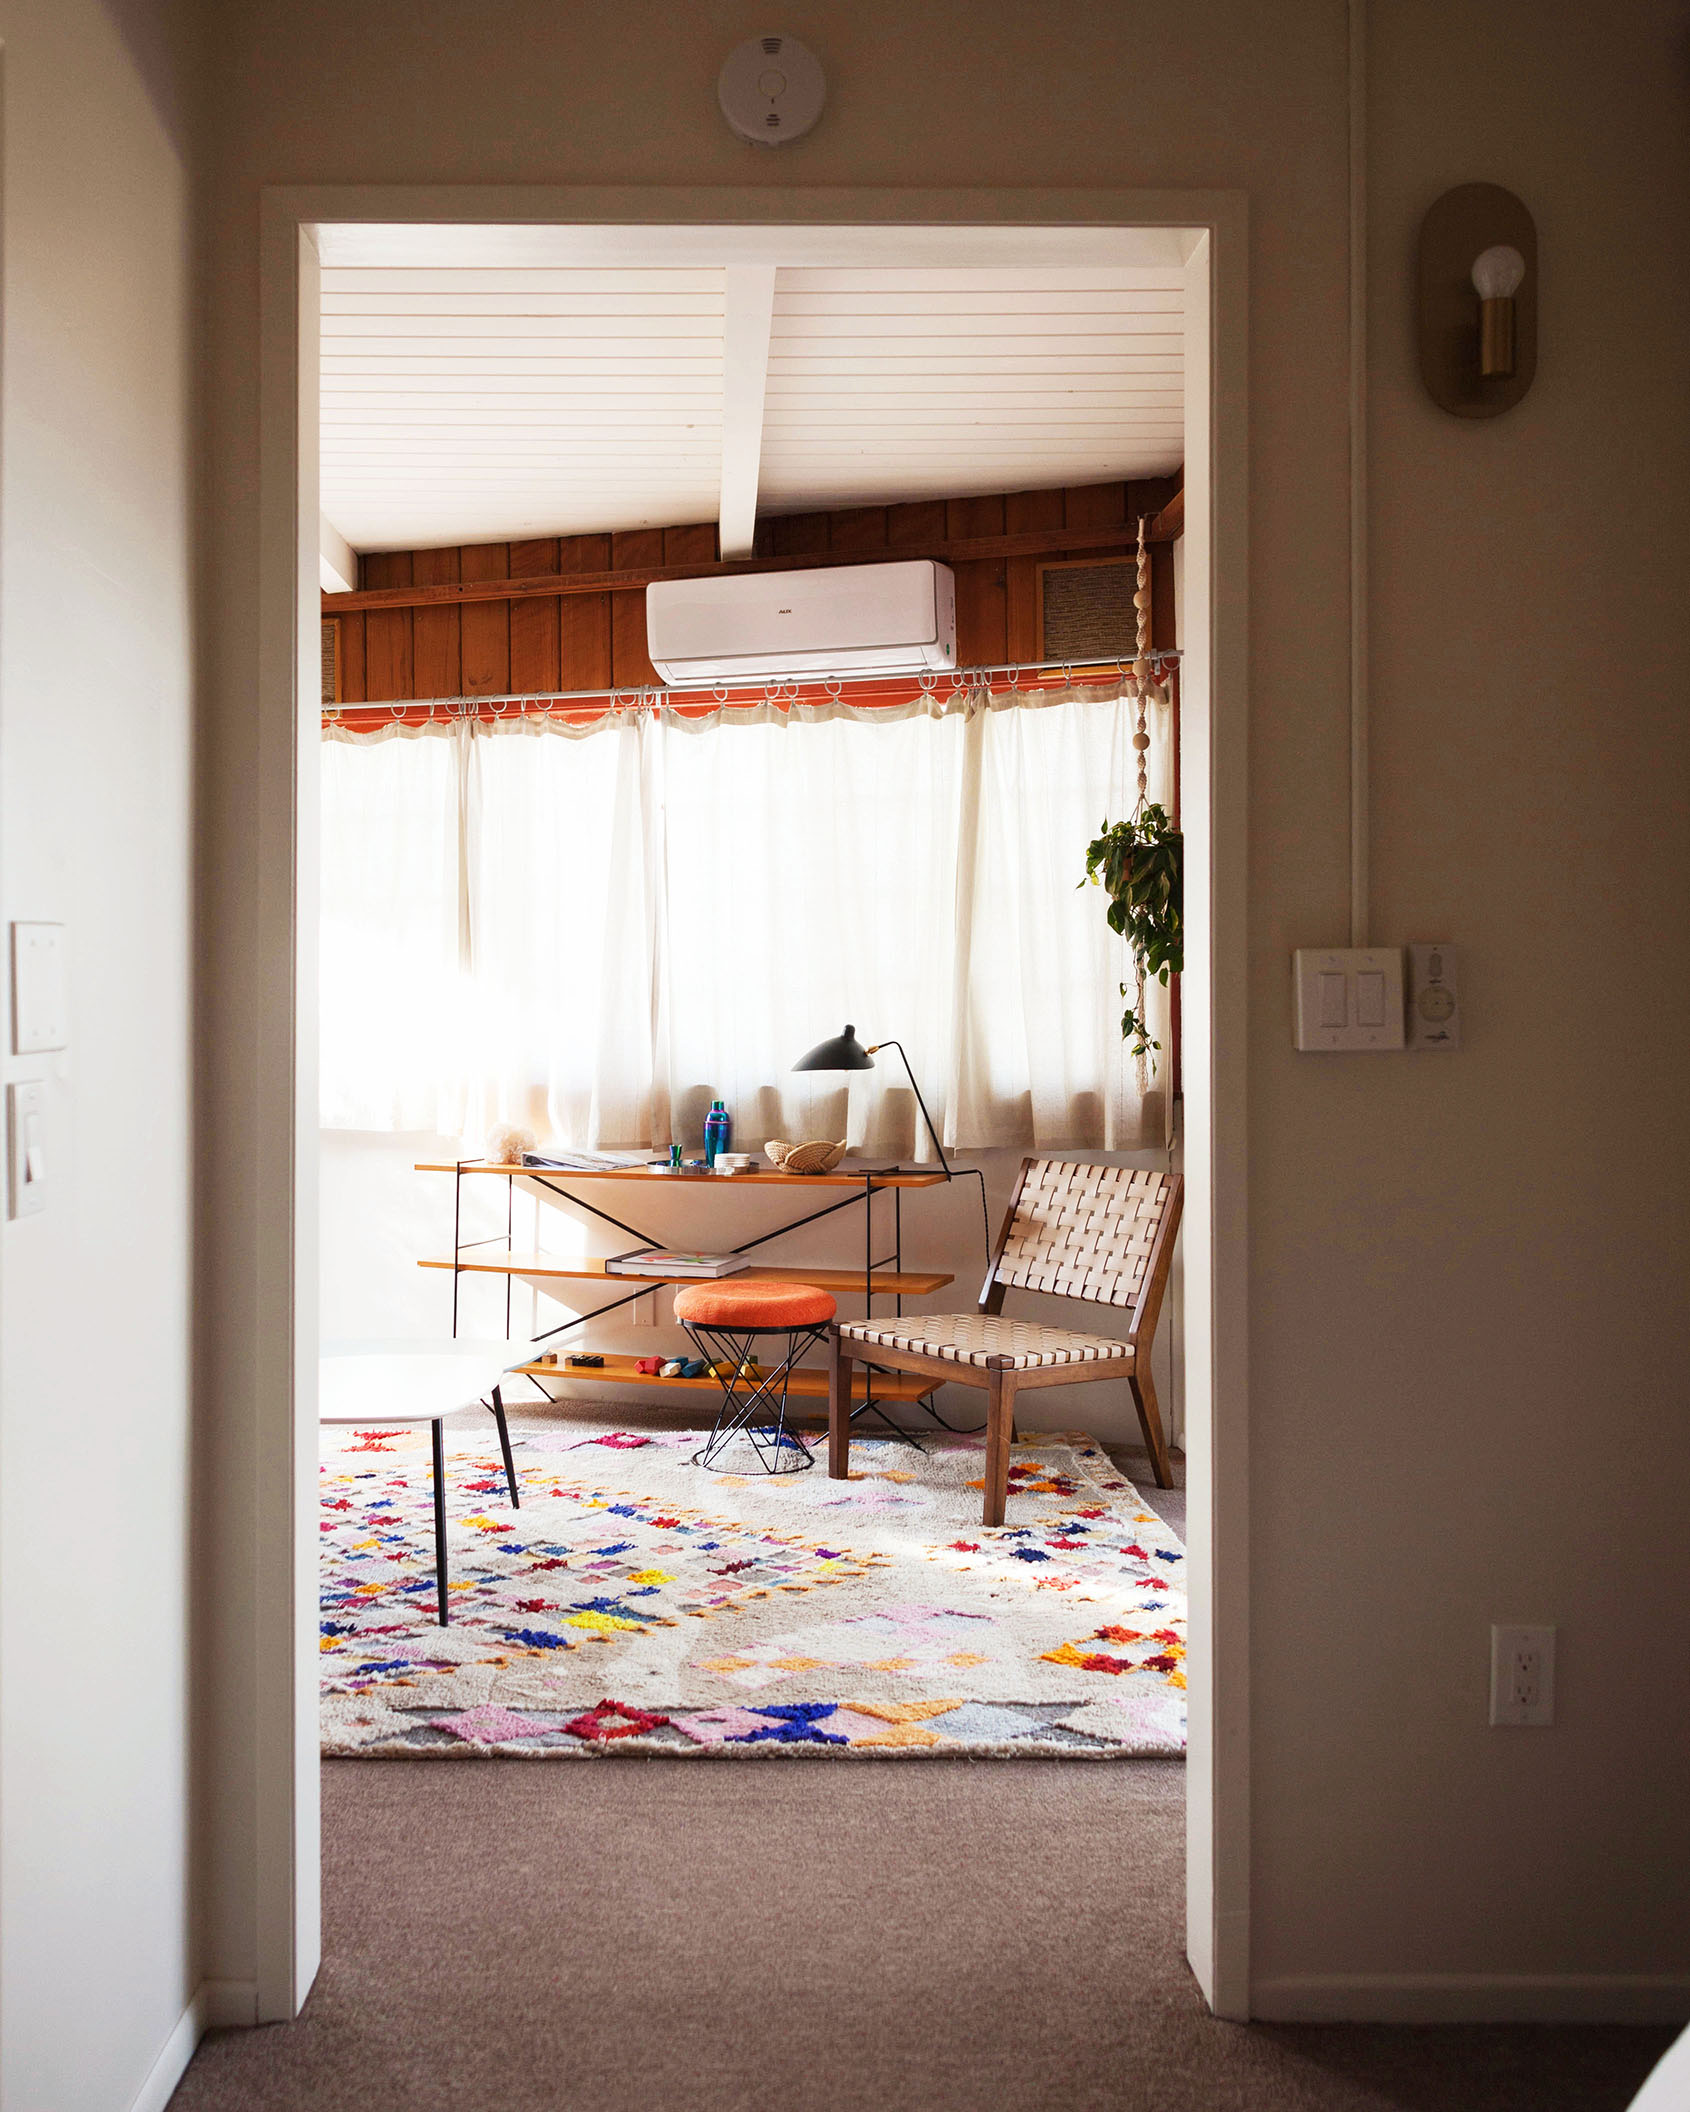
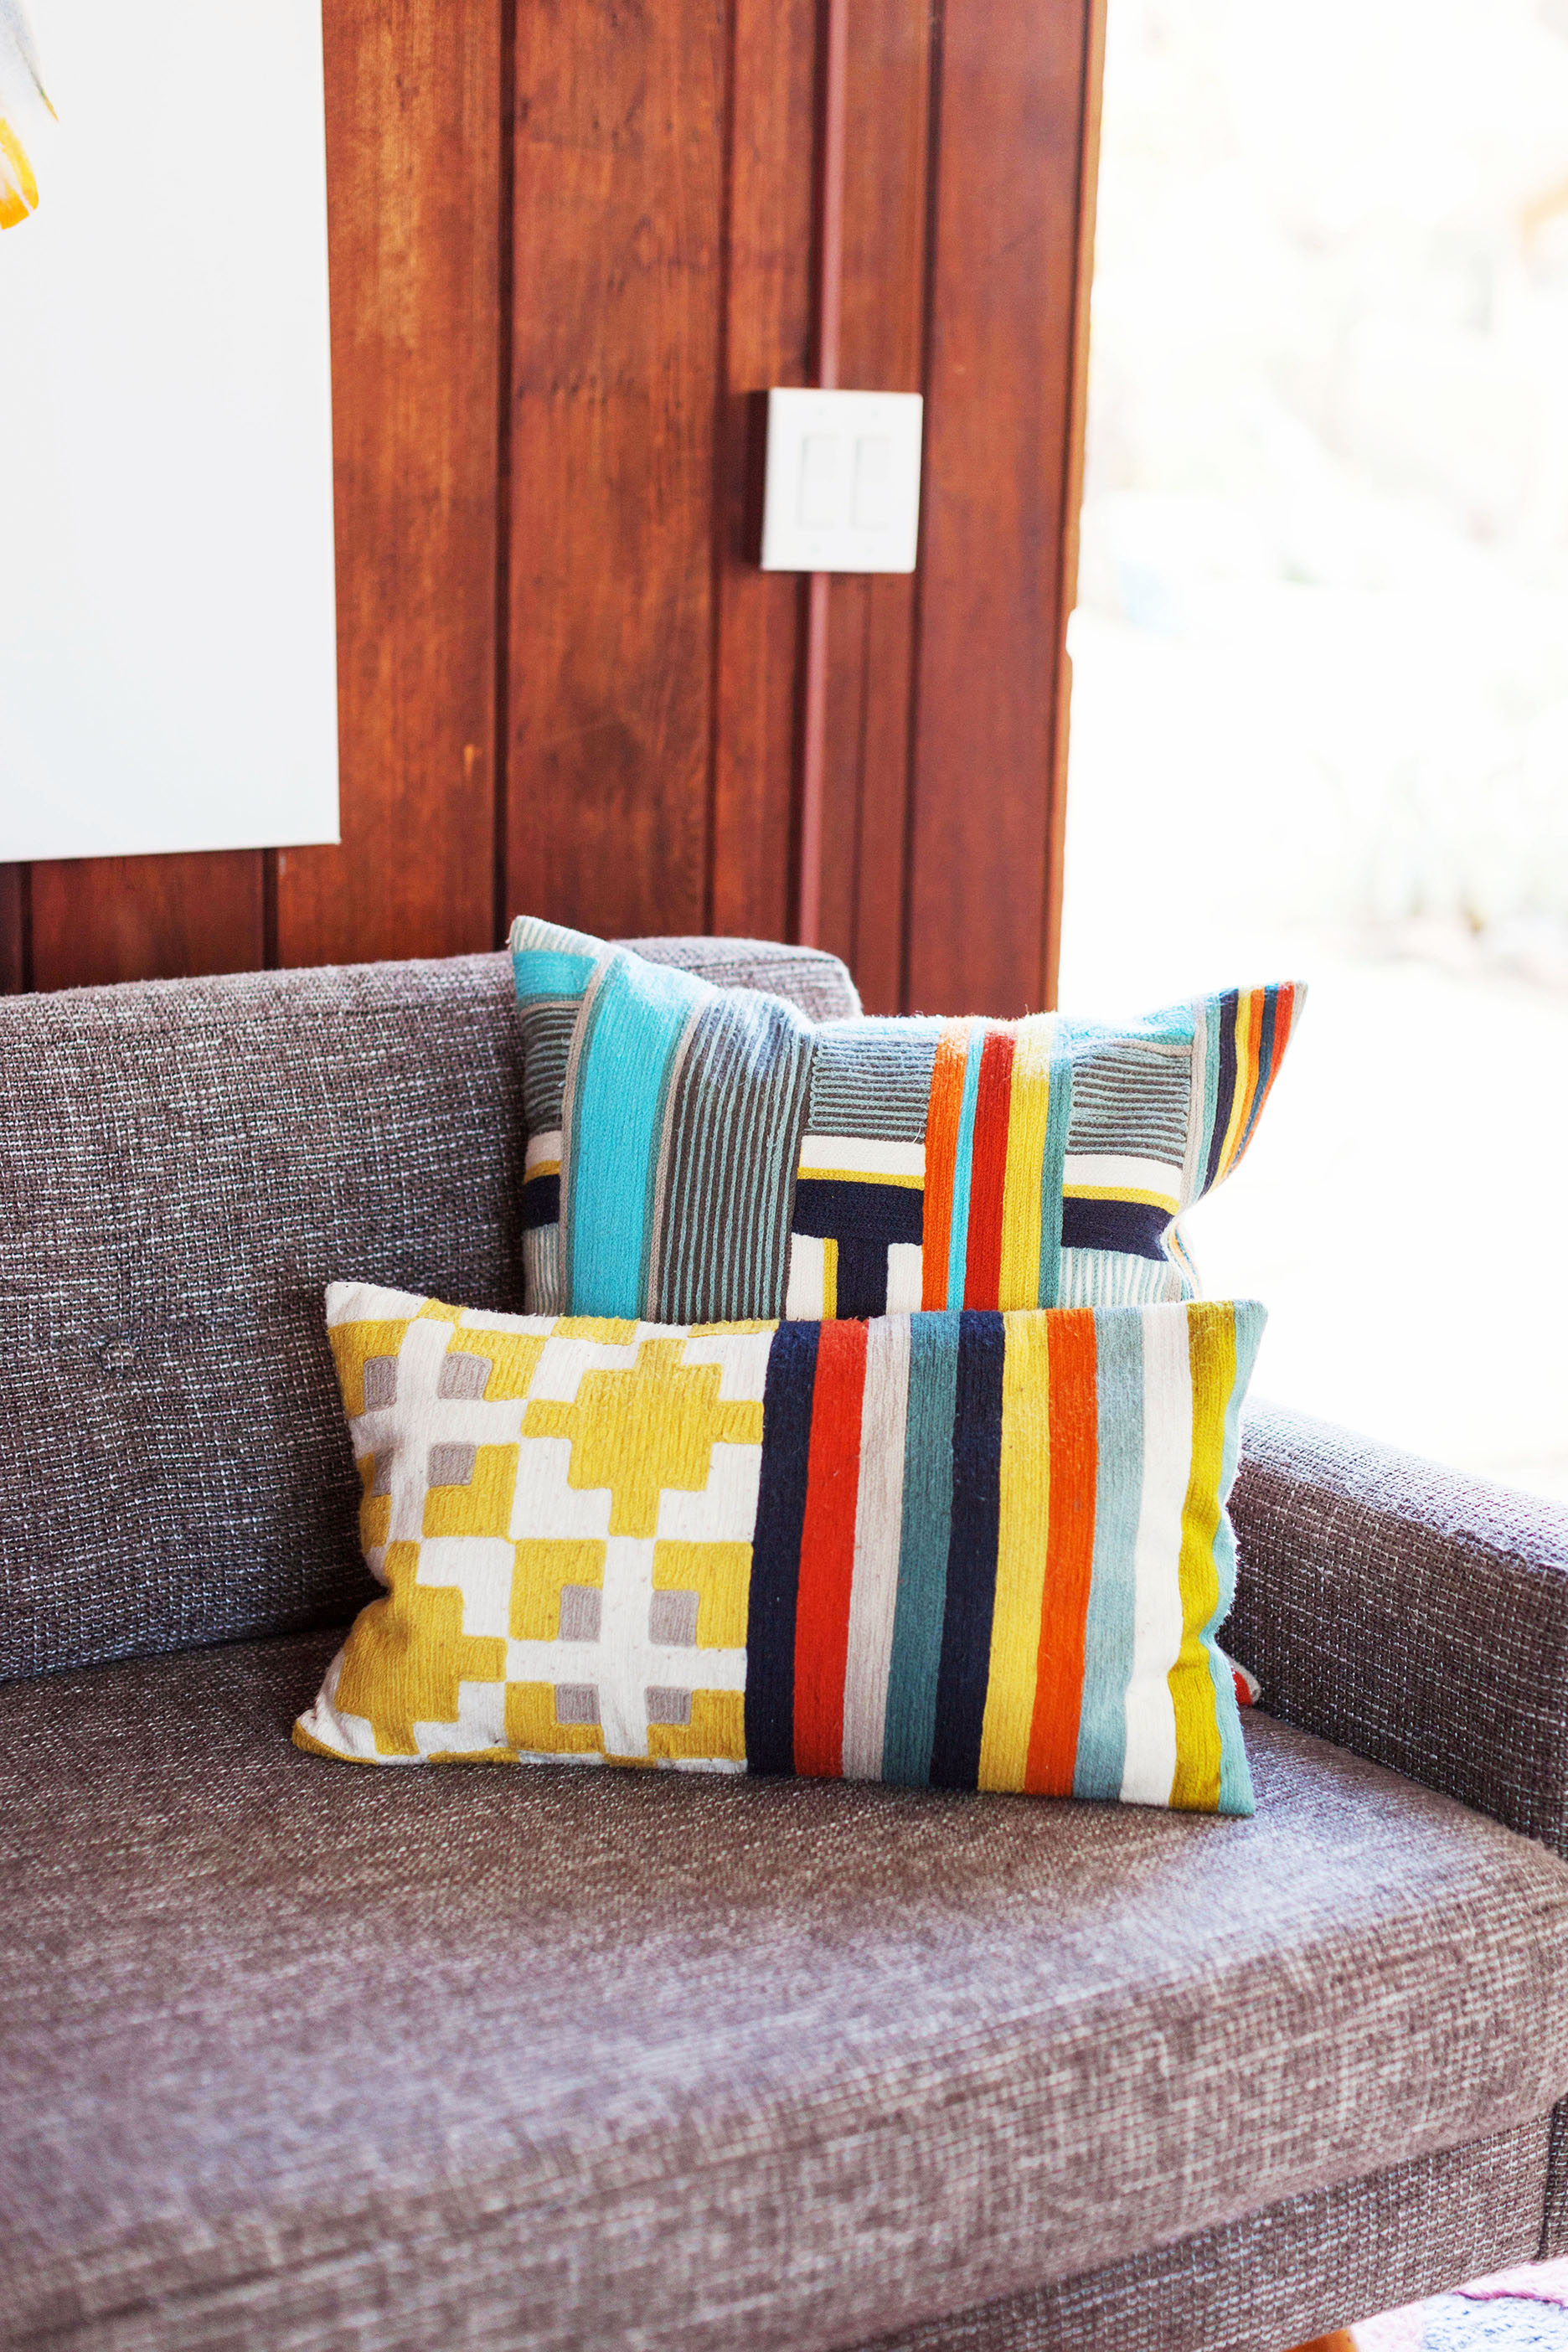
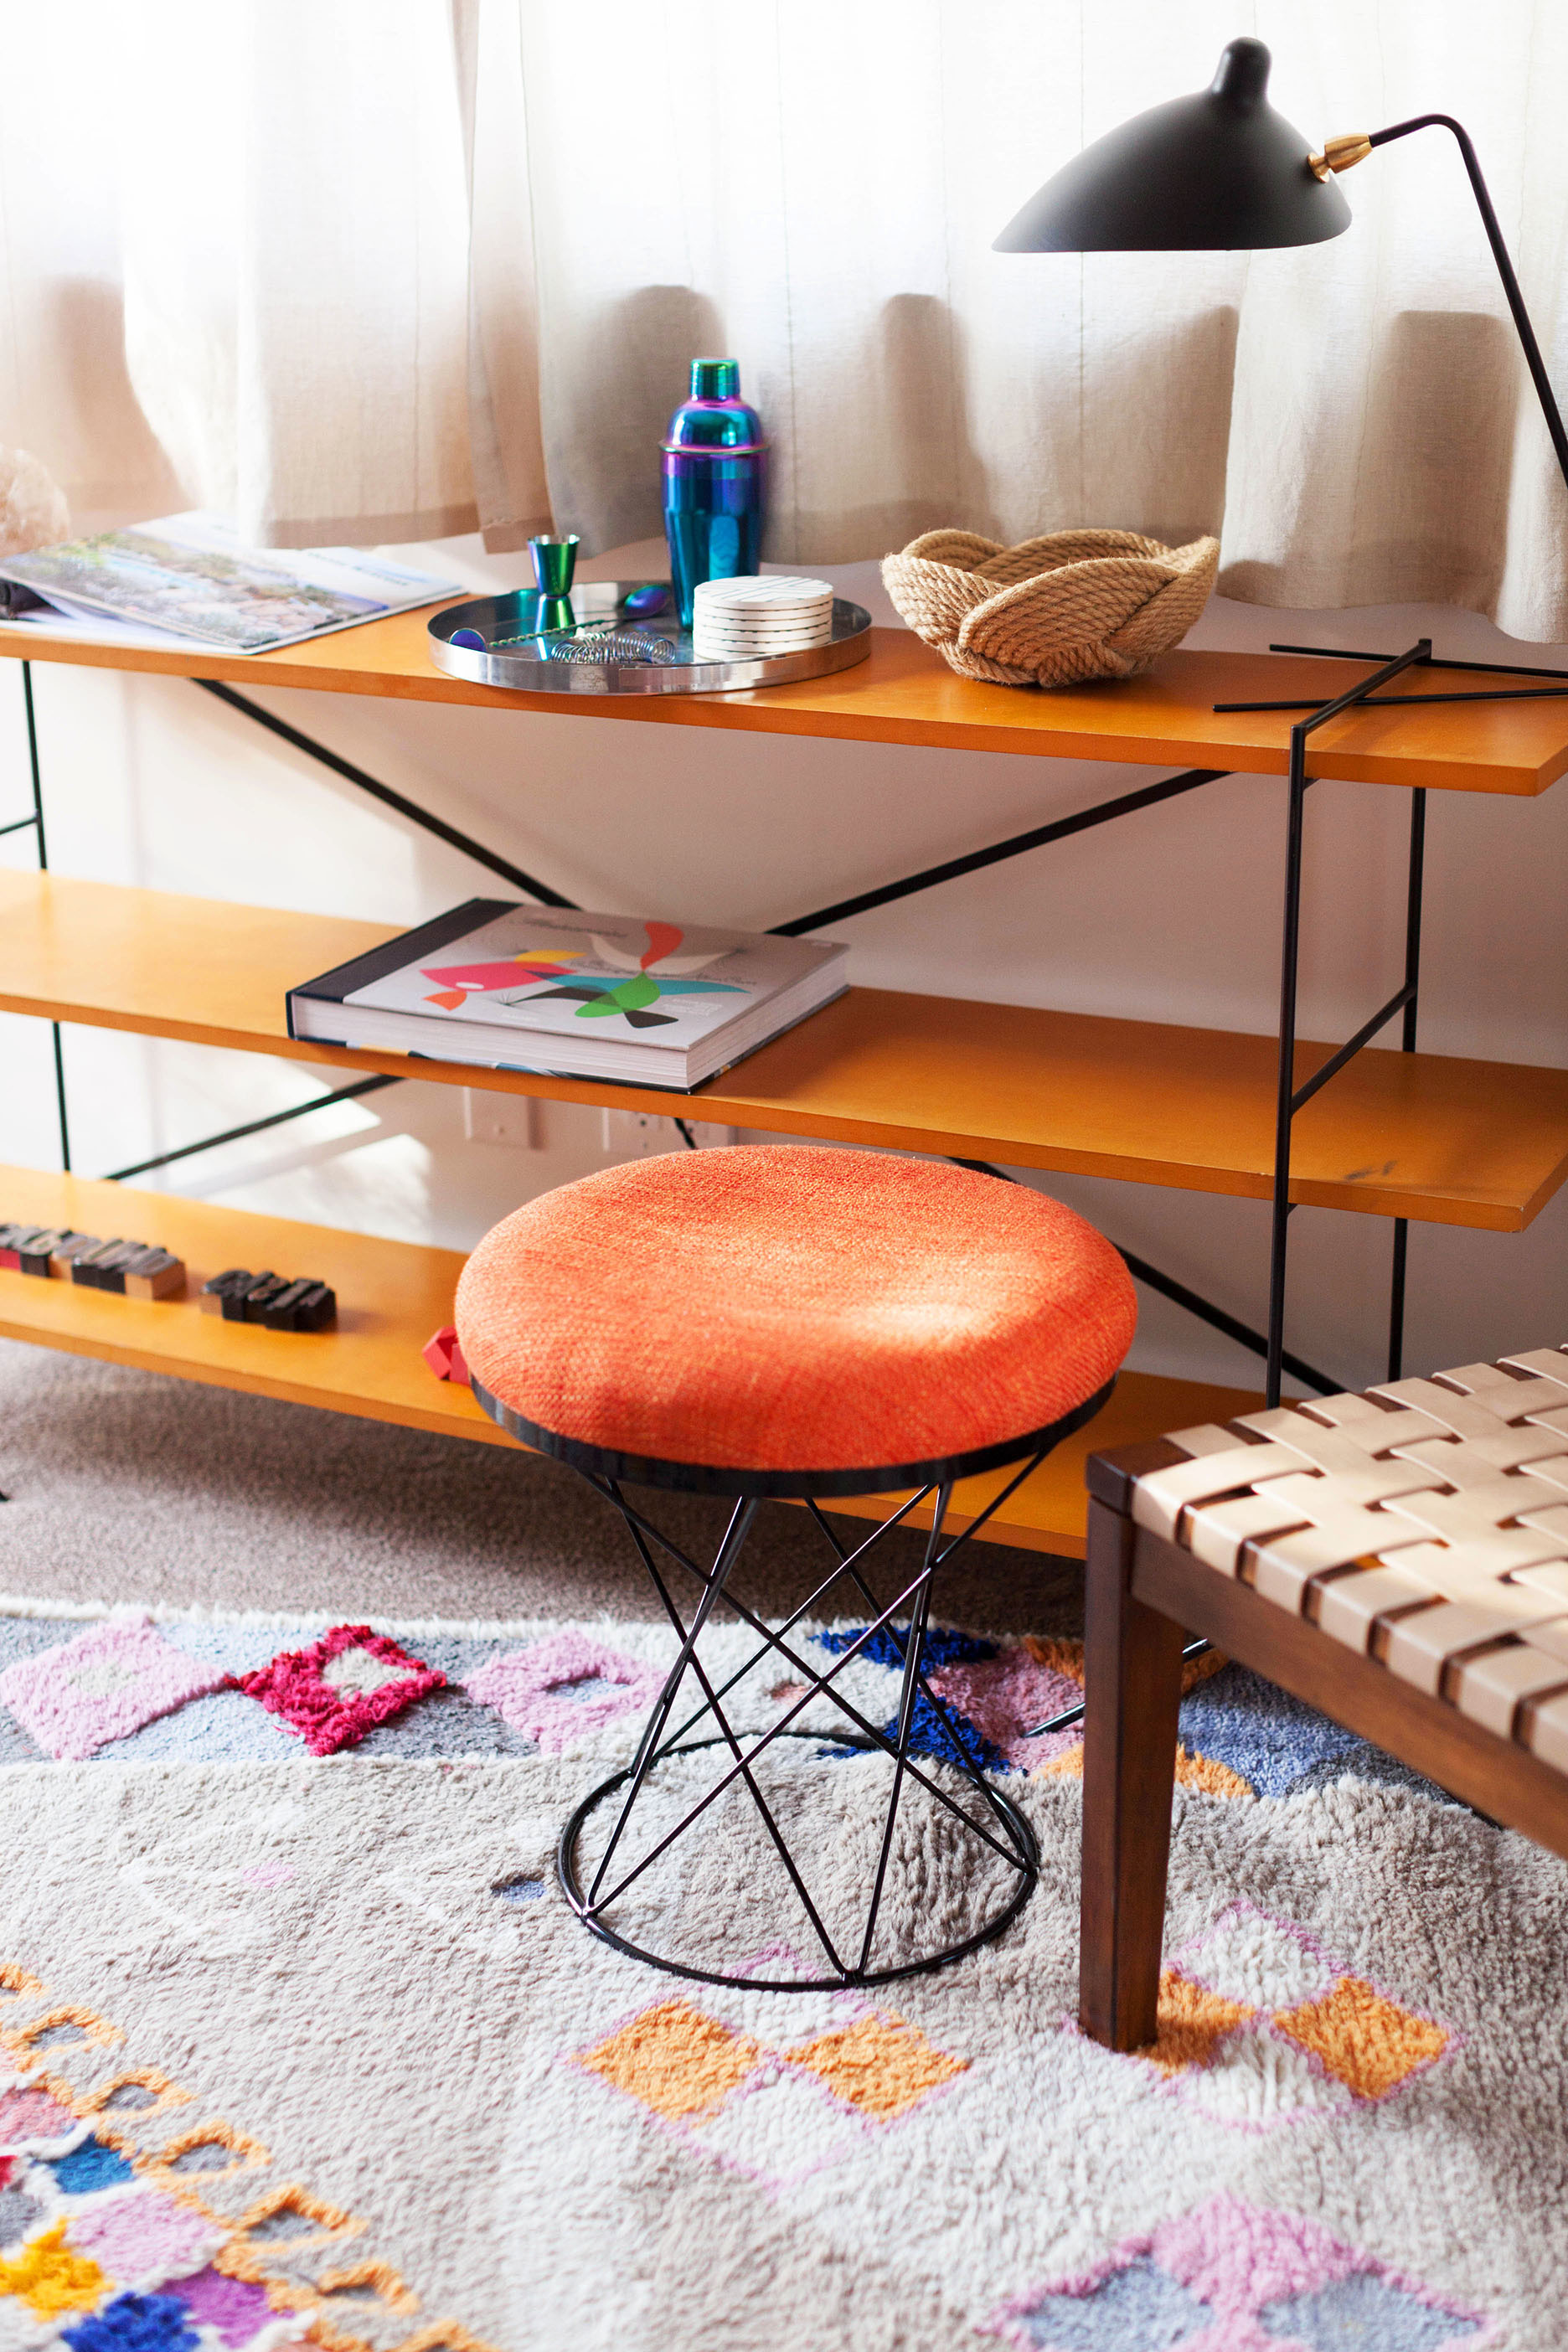
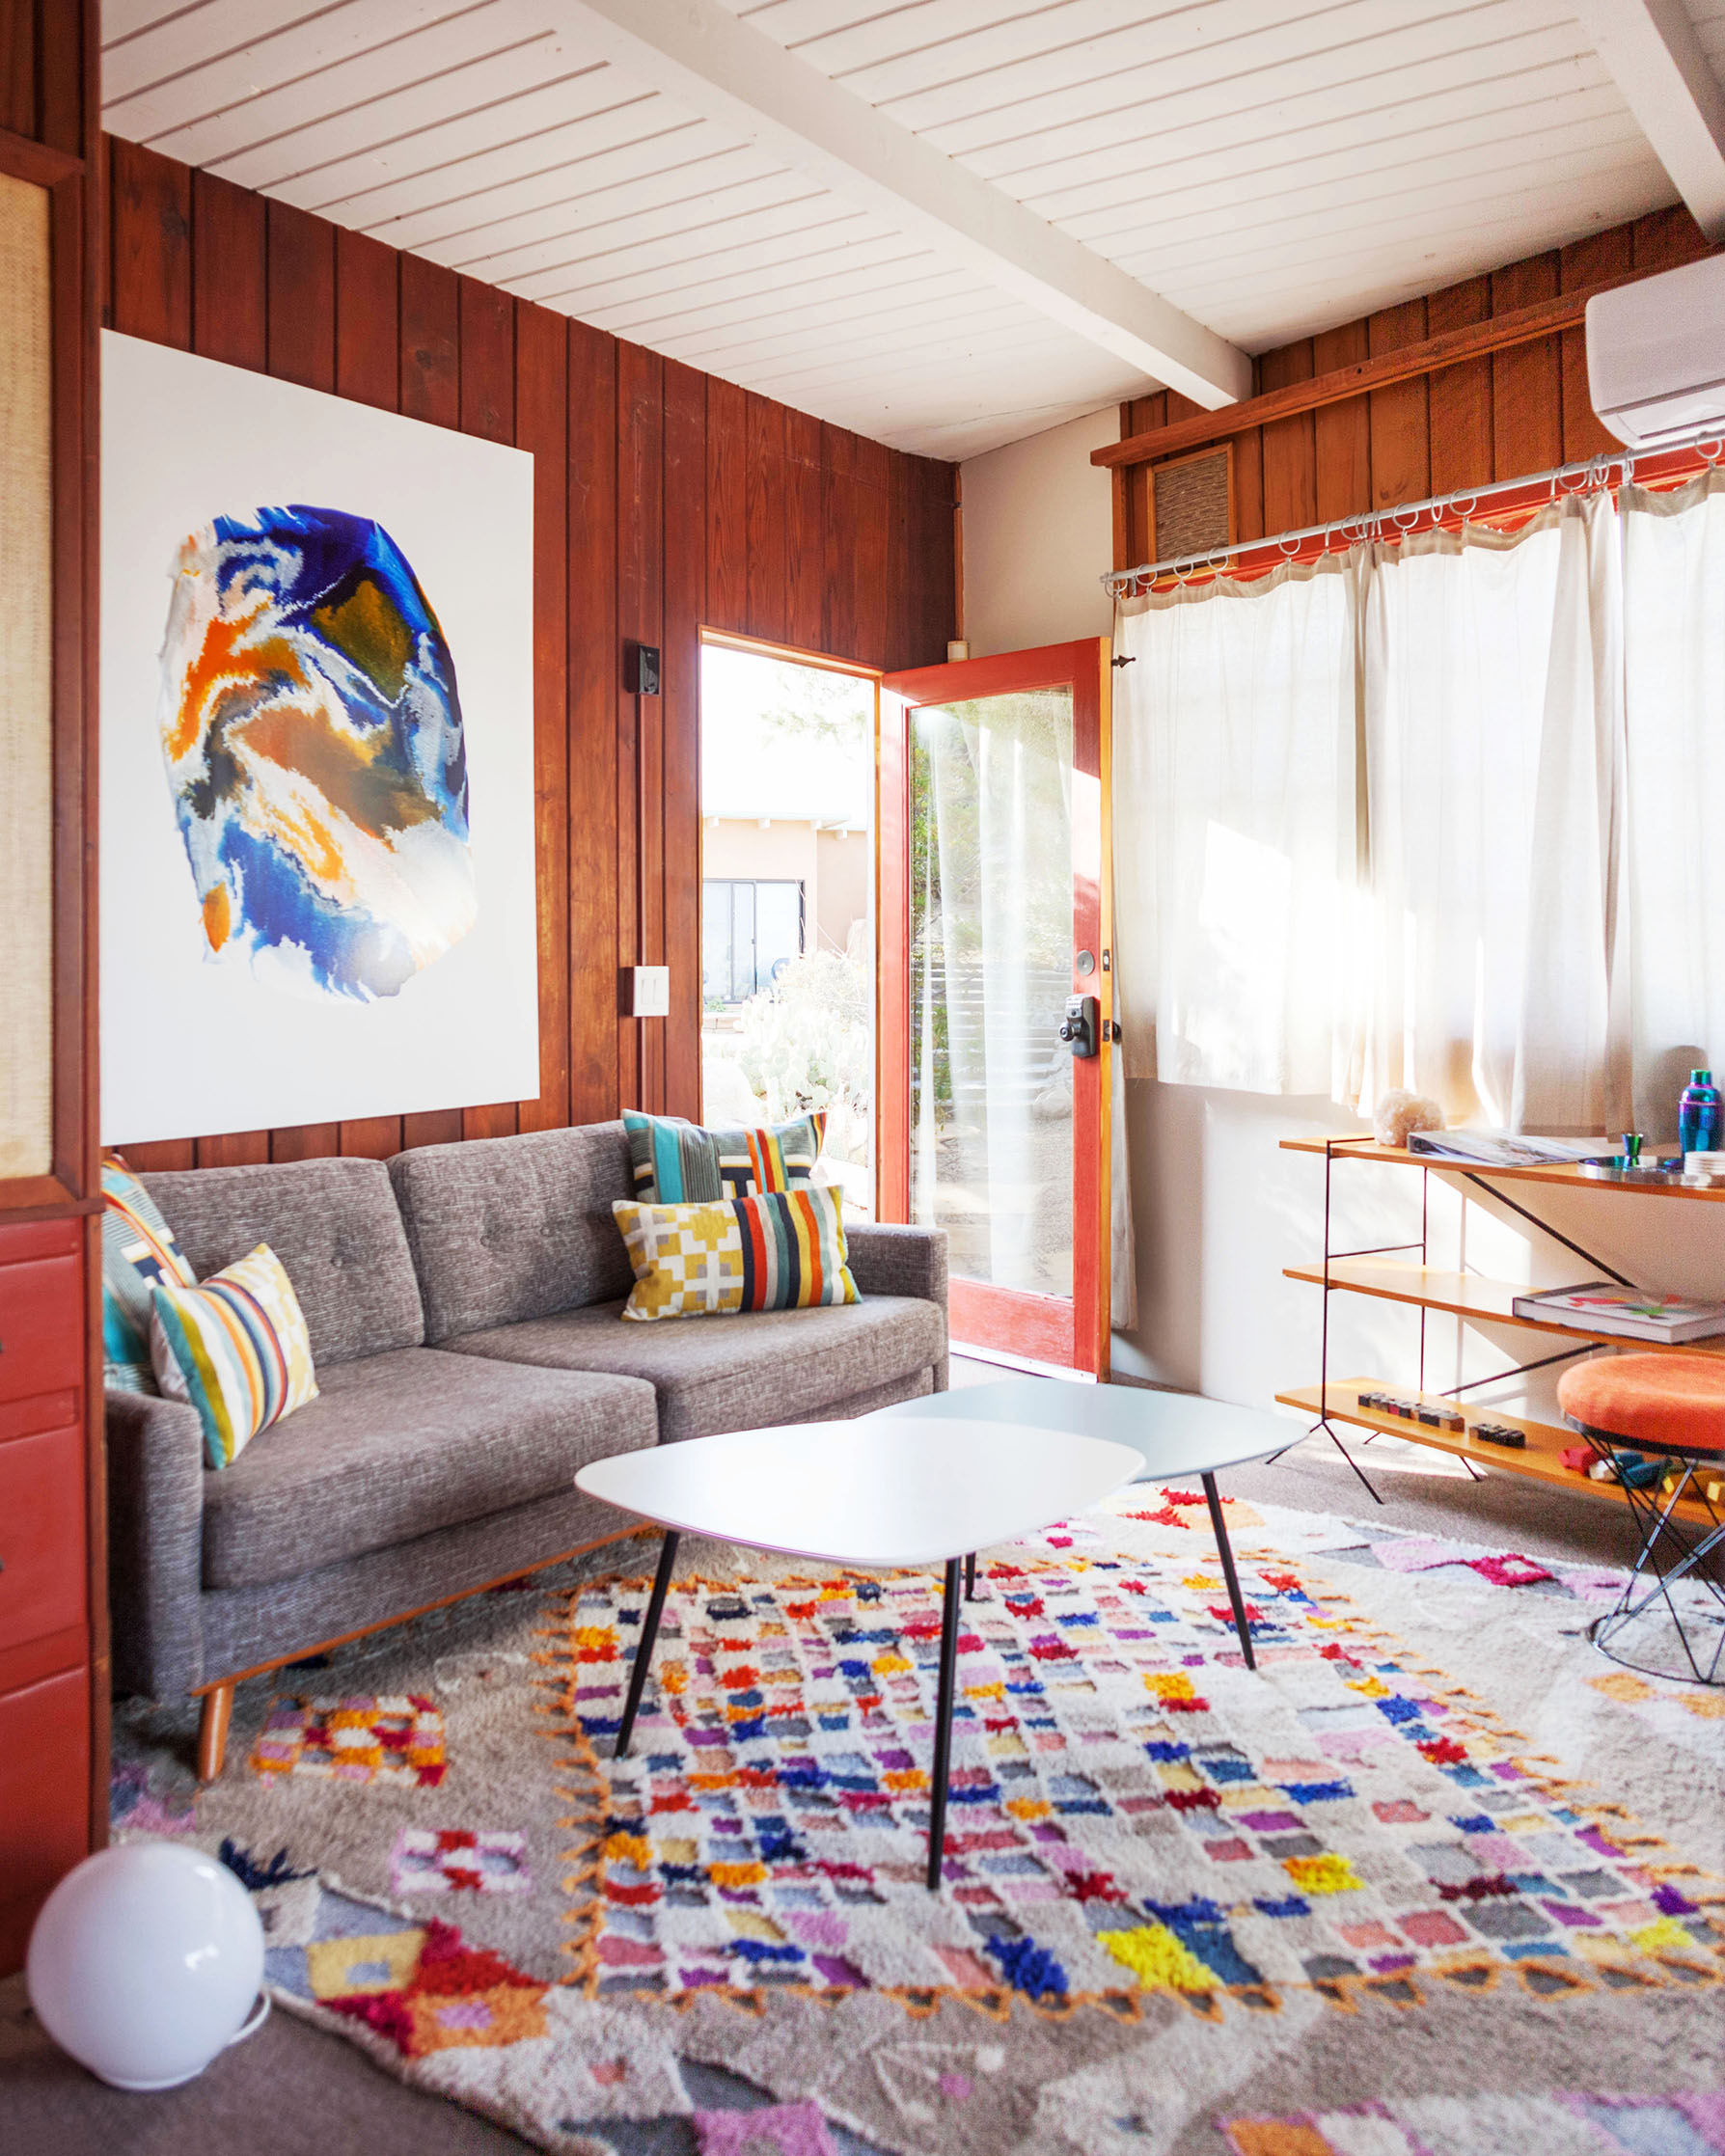
The casita is adorably decorated with colorful mid-century flair and has one bedroom, a small kitchen, and bathroom. 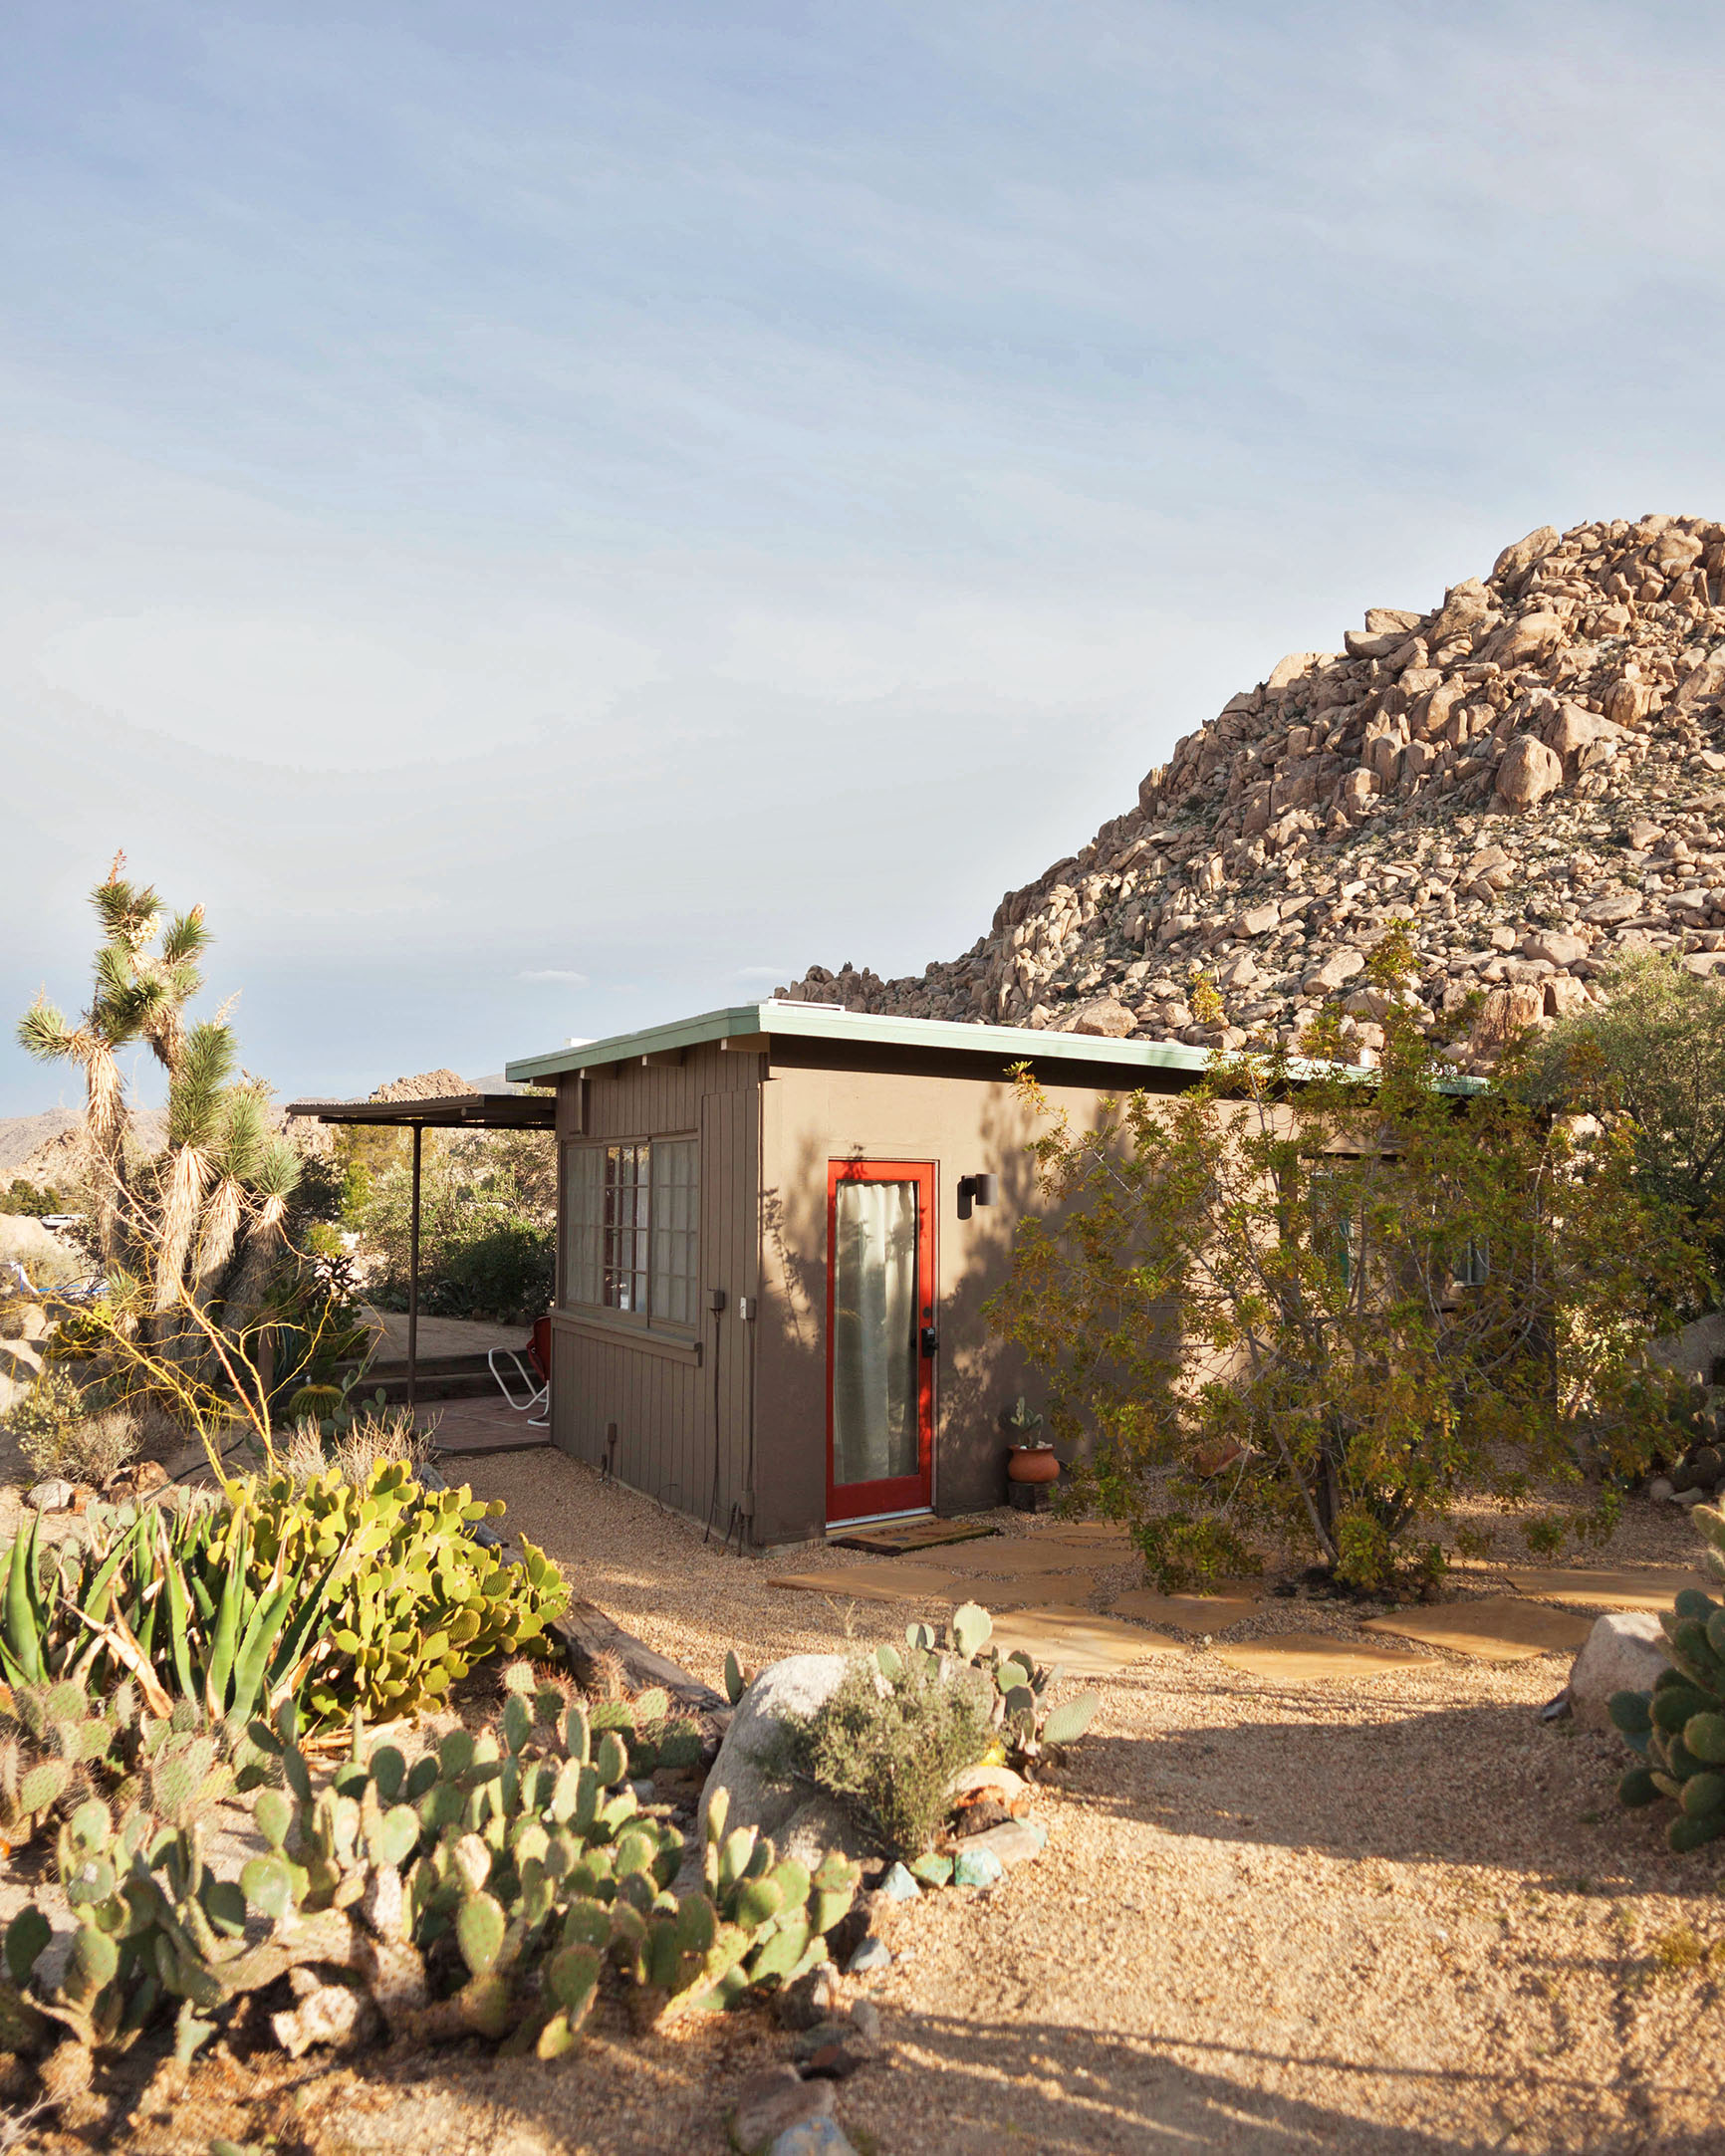

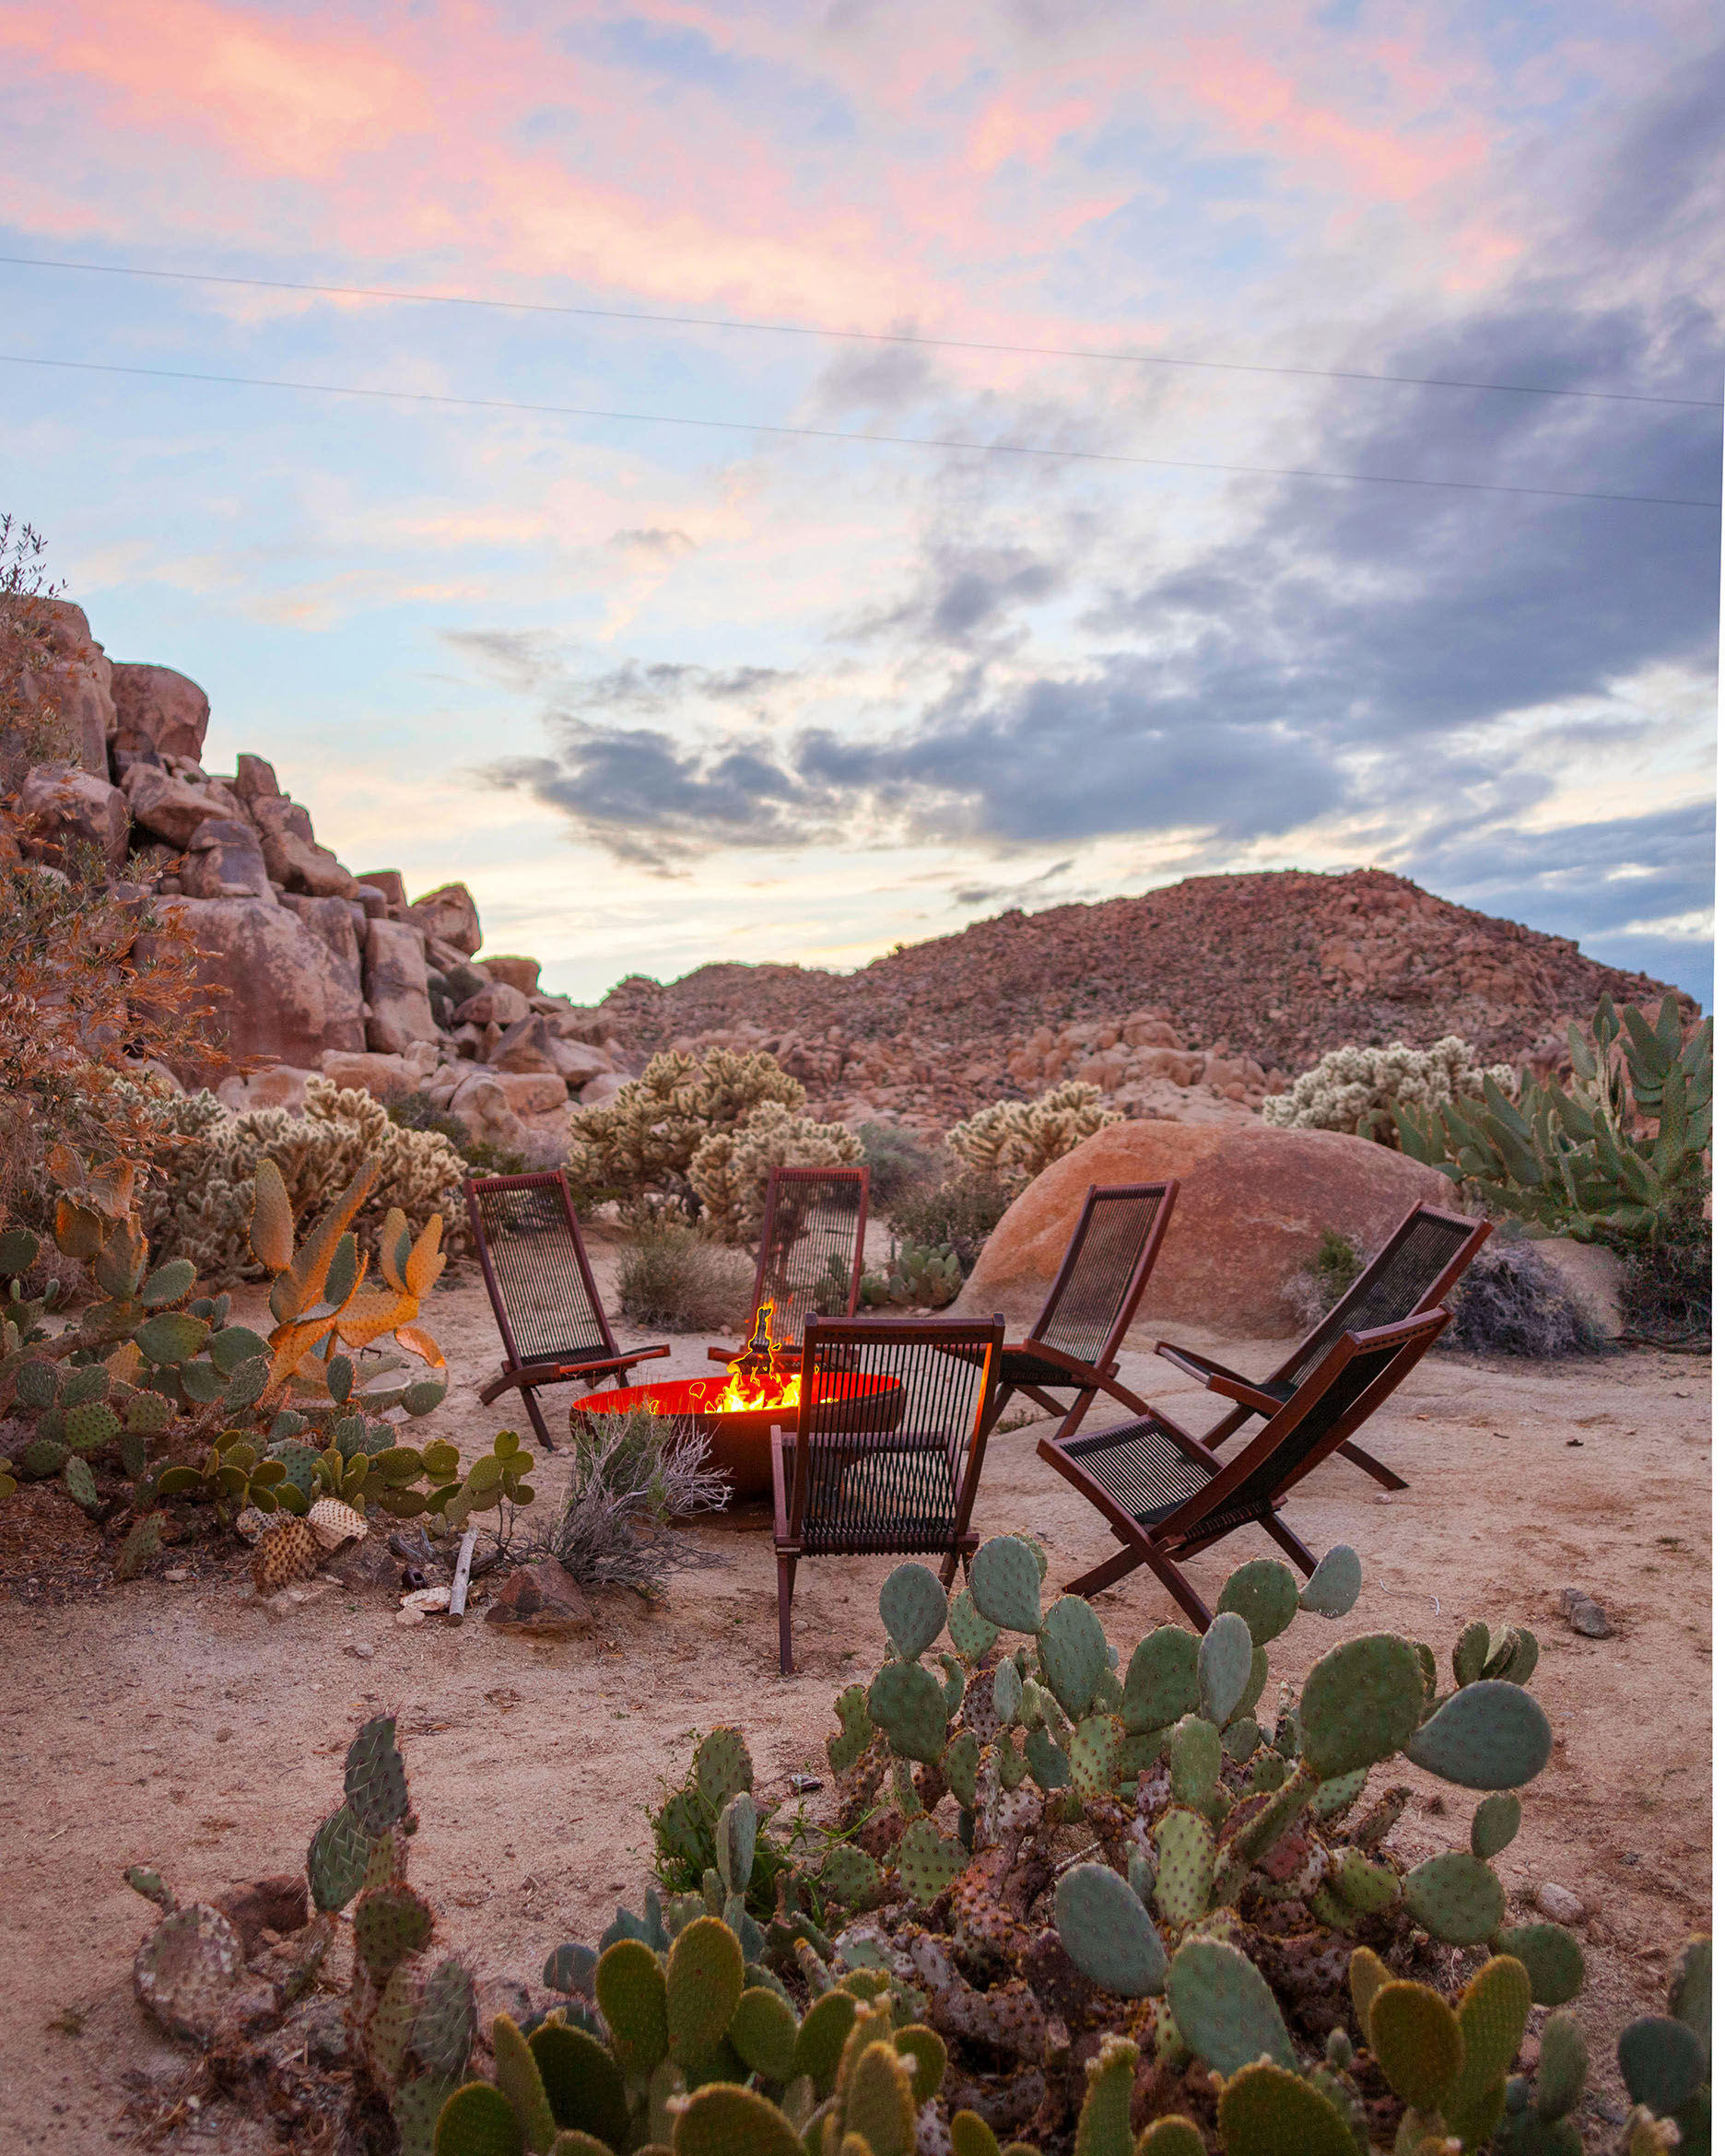
The property has a large pool and newly installed 14 foot hot tub! It has a fire pit and a ton of little spots for exploring and photo ops. They even provide a collection of hats to get you in the Joshua Tree state of mind.
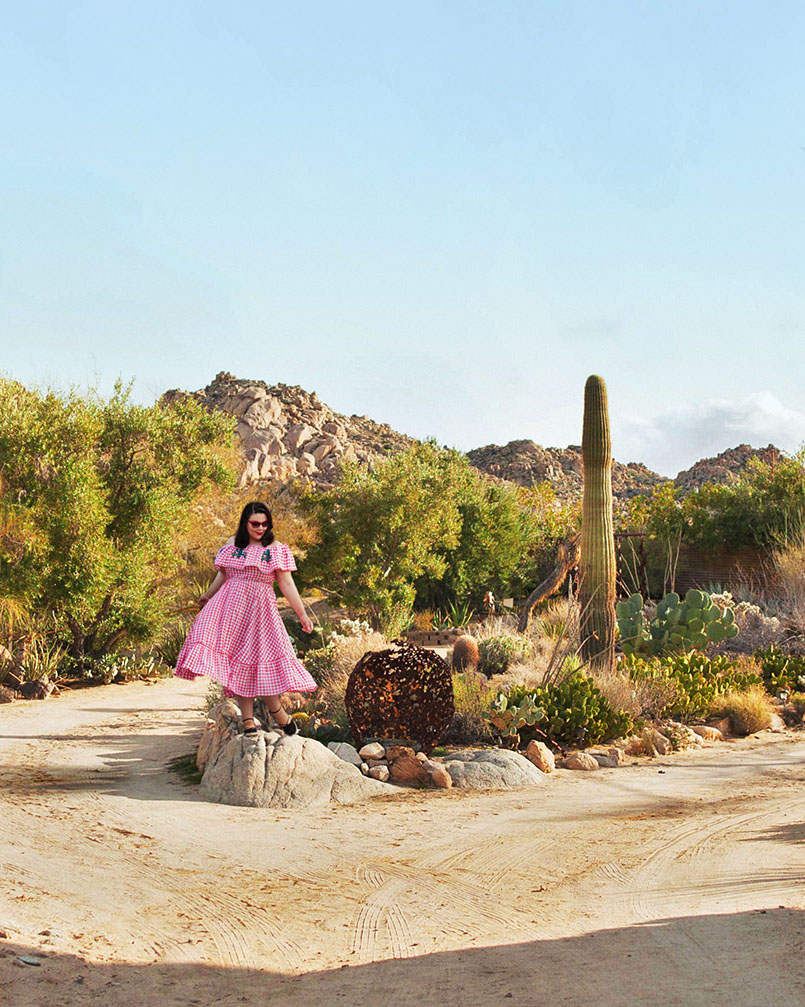
The estate feels isolated and private, but is close to all of the conveniences of the small town like shopping and restaurants.
Our stay was amazing and we definitely felt at home. It was particularly cold and rainy while we were there, so we cozied up next to the fire and had the most relaxing two days ever. We flew kites, sat by the fire pit telling stories, soaked in the tub, made lasagna and pancakes. We didn’t even change out of our pajamas for most of the time we were there. It was glorious. (Check out my Instagram highlight.)
I can’t wait to stay there again and make use of that brand new hot tub!
Click here to book your stay and be sure to follow them on Instagram @rockboundoasisretreat!

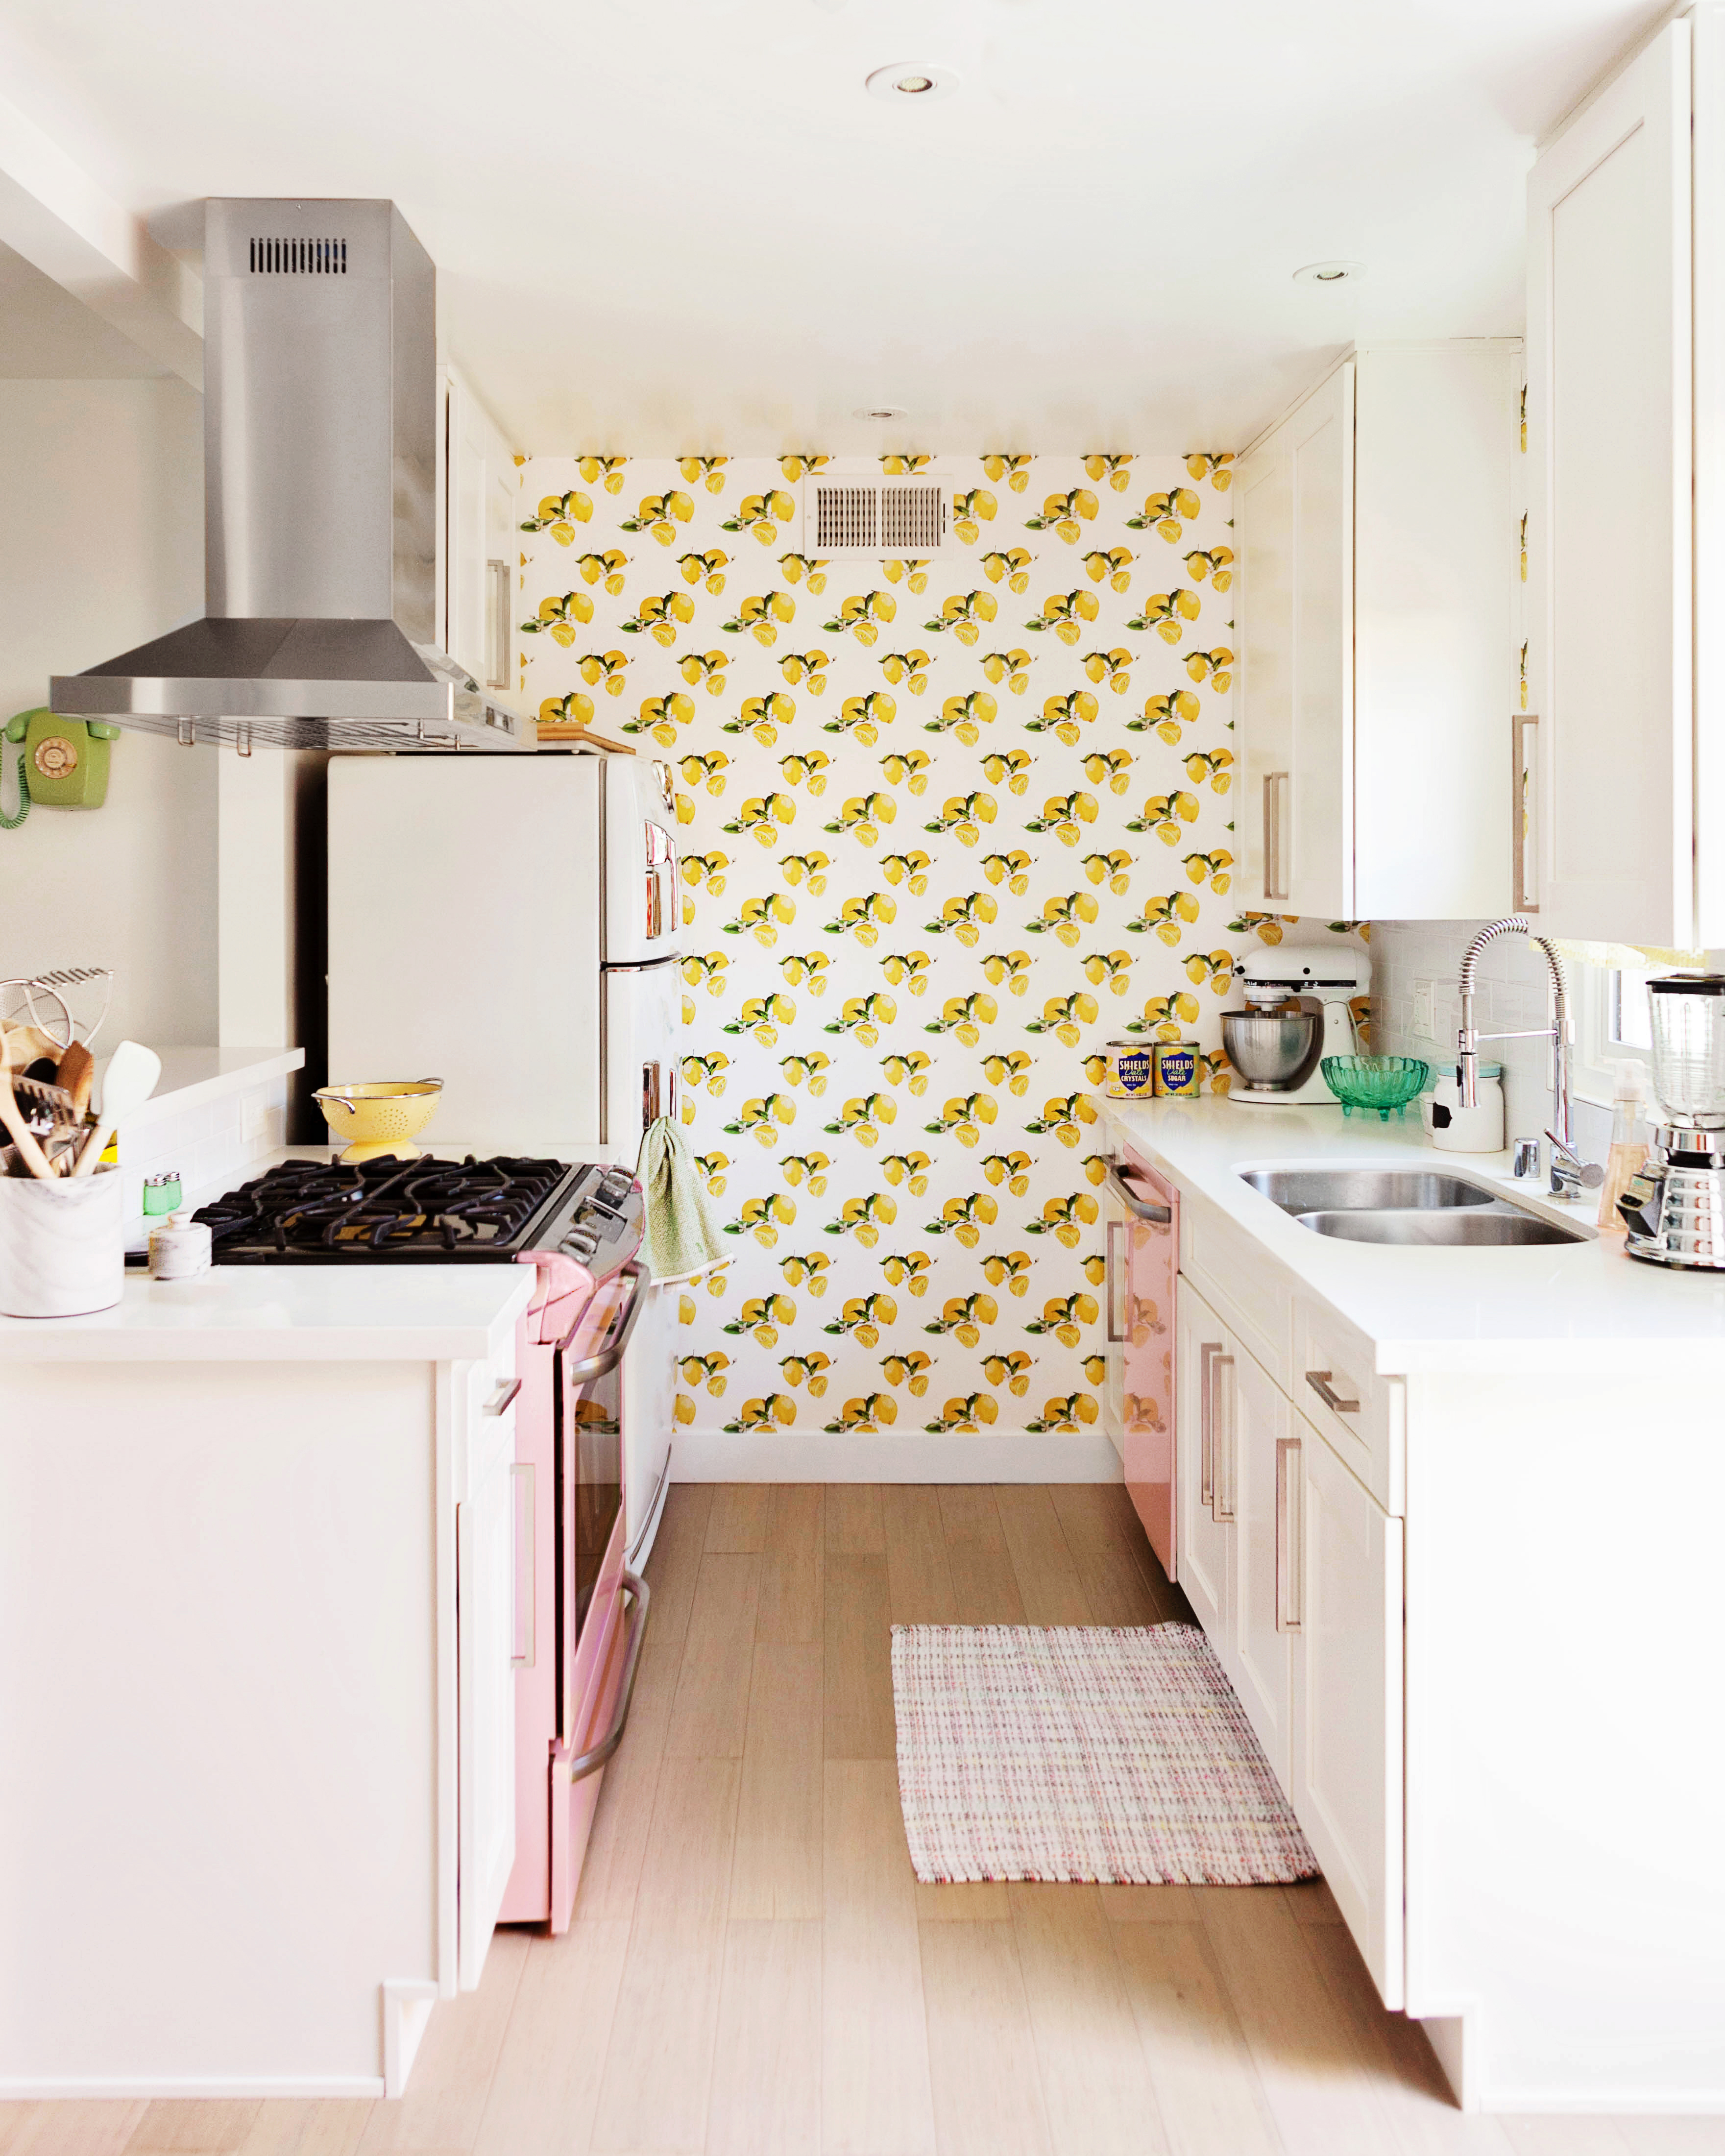
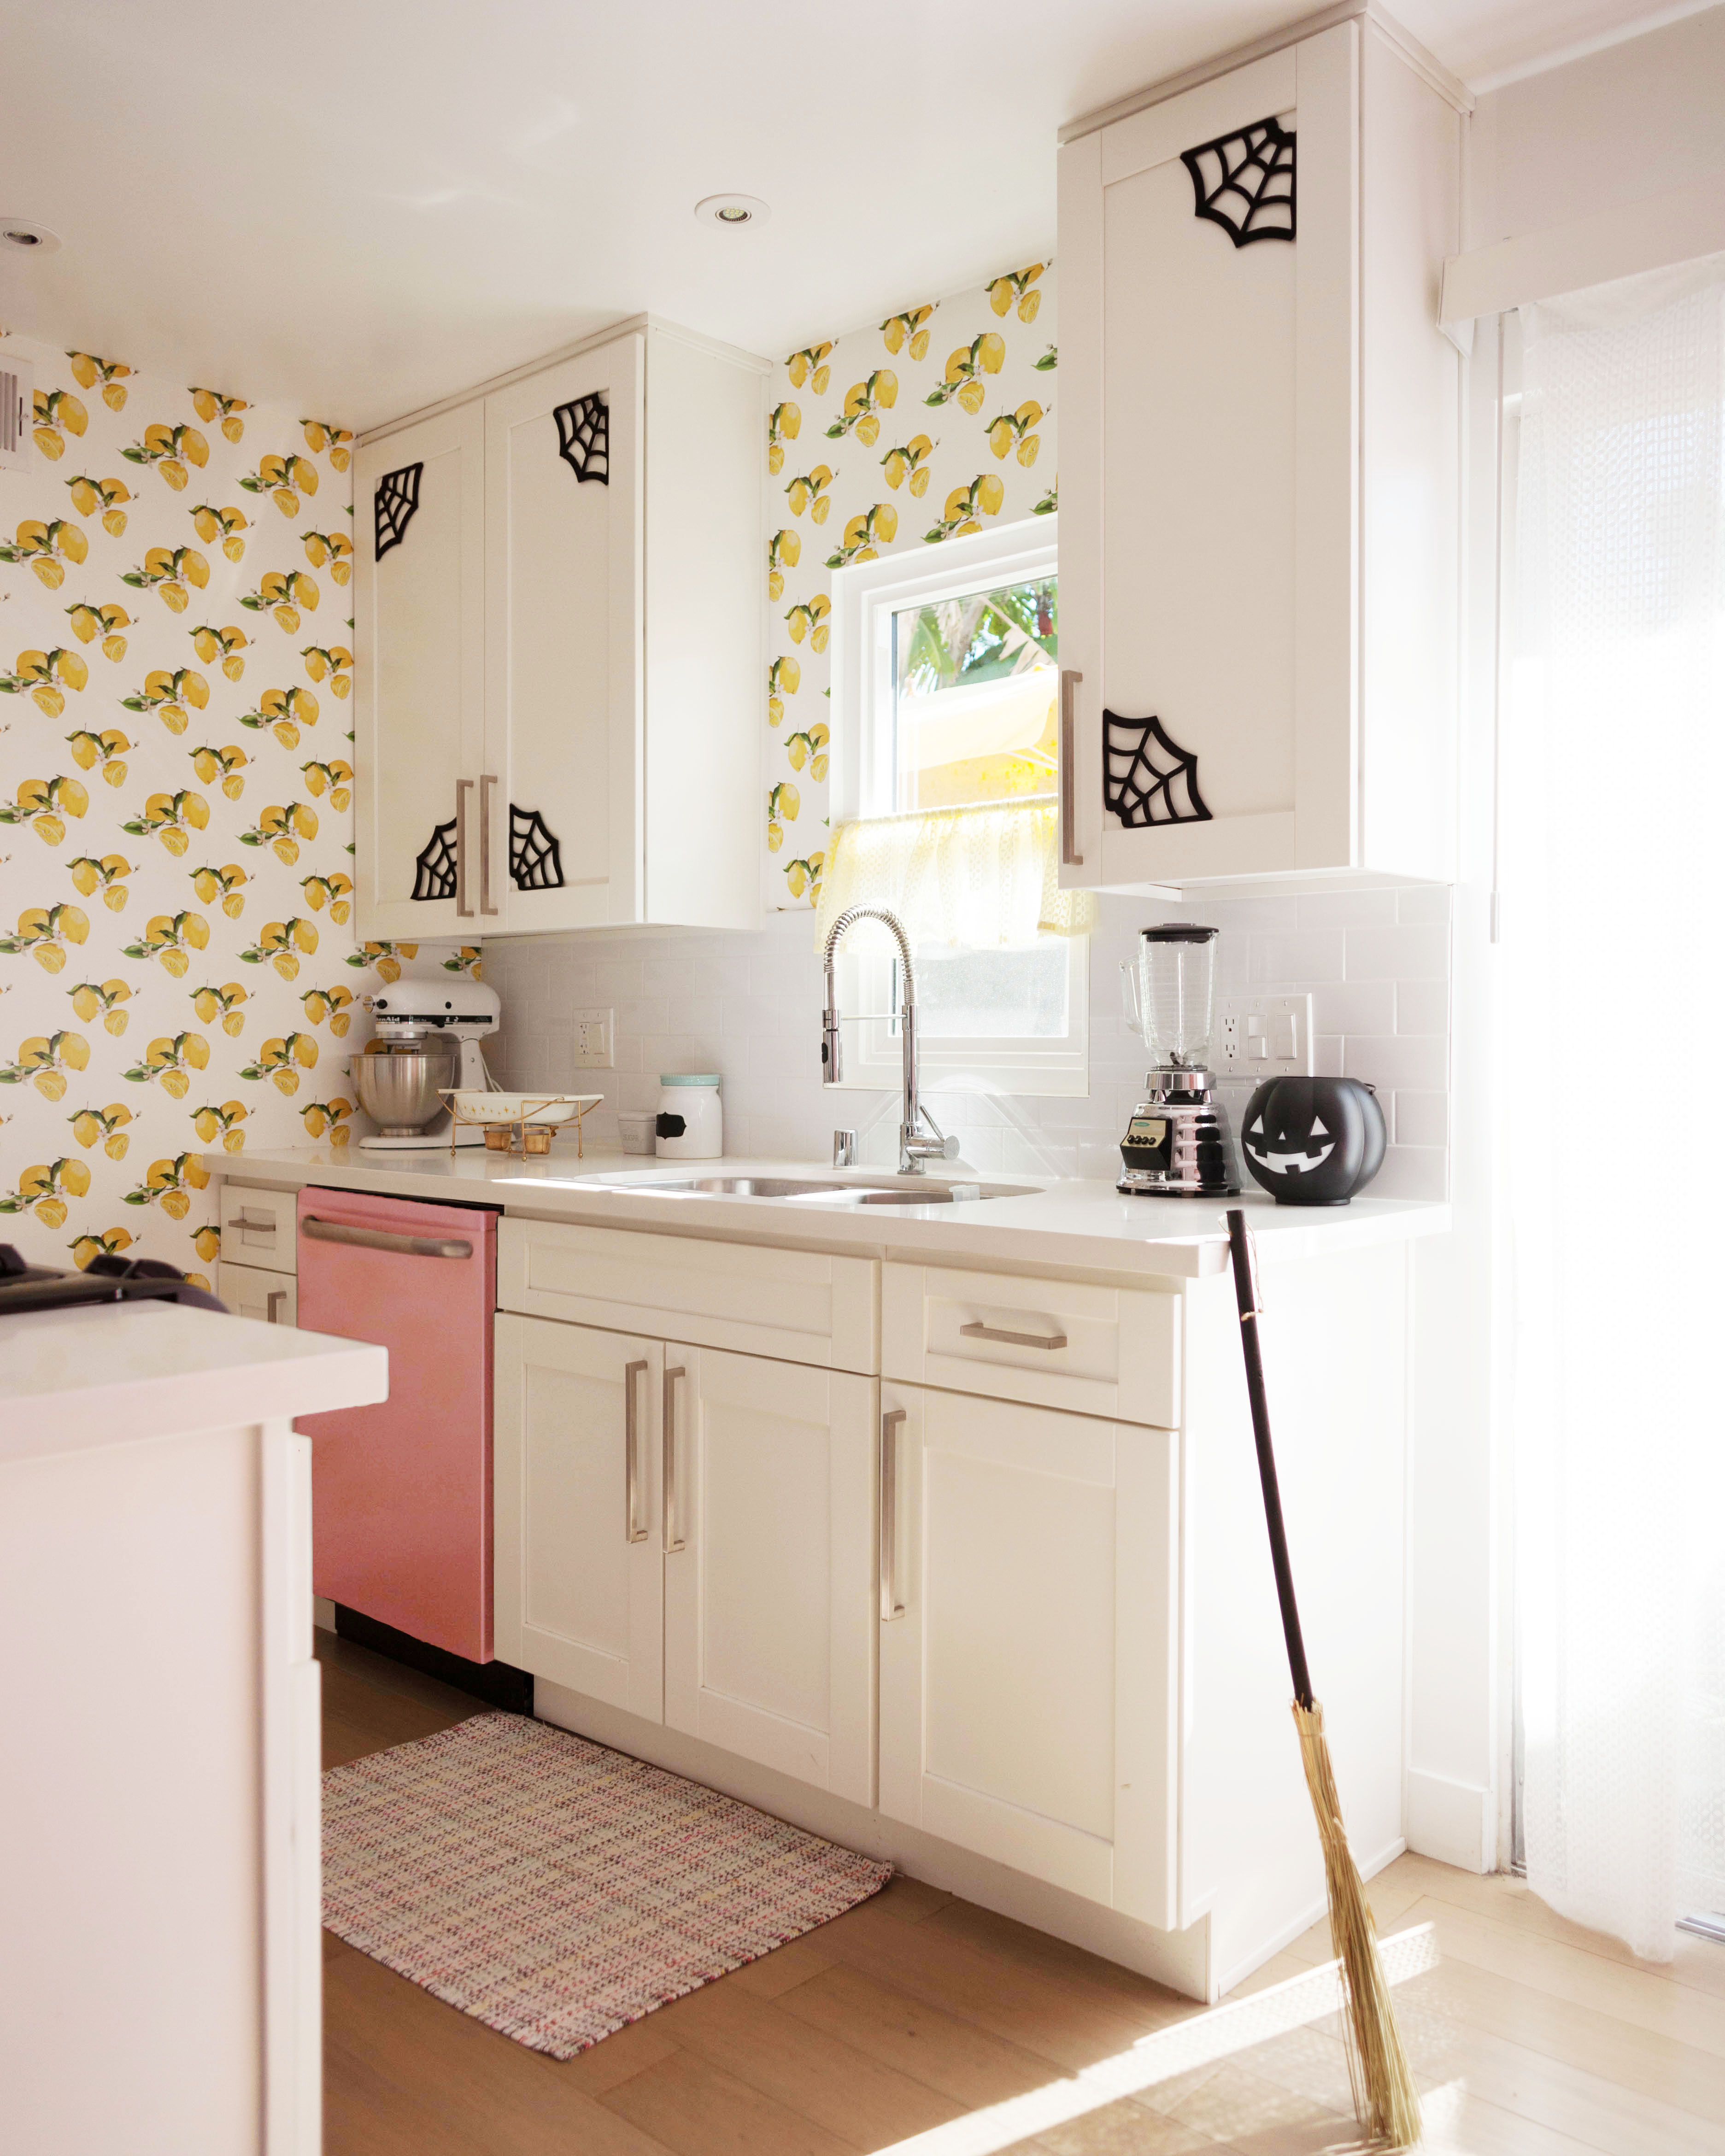
I’m a renter so anything I do in my apartment has to be put back to its original condition when I move out. Because of this (as you may have noticed from the rest of my apartment) temporary wallpaper has basically become my best friend. I even covered my modern refrigerator in a cute retro blue before I brought in my vintage GE. Unfortunately, temp wallpaper isn’t ideal for stoves because of the whole ‘they get hot’ thing. Even though my oven door never gets hot to the touch, I wanted to be safe. I reallllly wanted a pink stove, but none of the vintage ones I was finding could fit in my kitchen. Besides it was already a pain in the ass to swap out the refrigerator. I looked for a solution similar to peel and stick wallpaper and that’s when I thought of heat wrap vinyl!

I wrapped the vinyl around all of the door edges and replaced the screws and handles.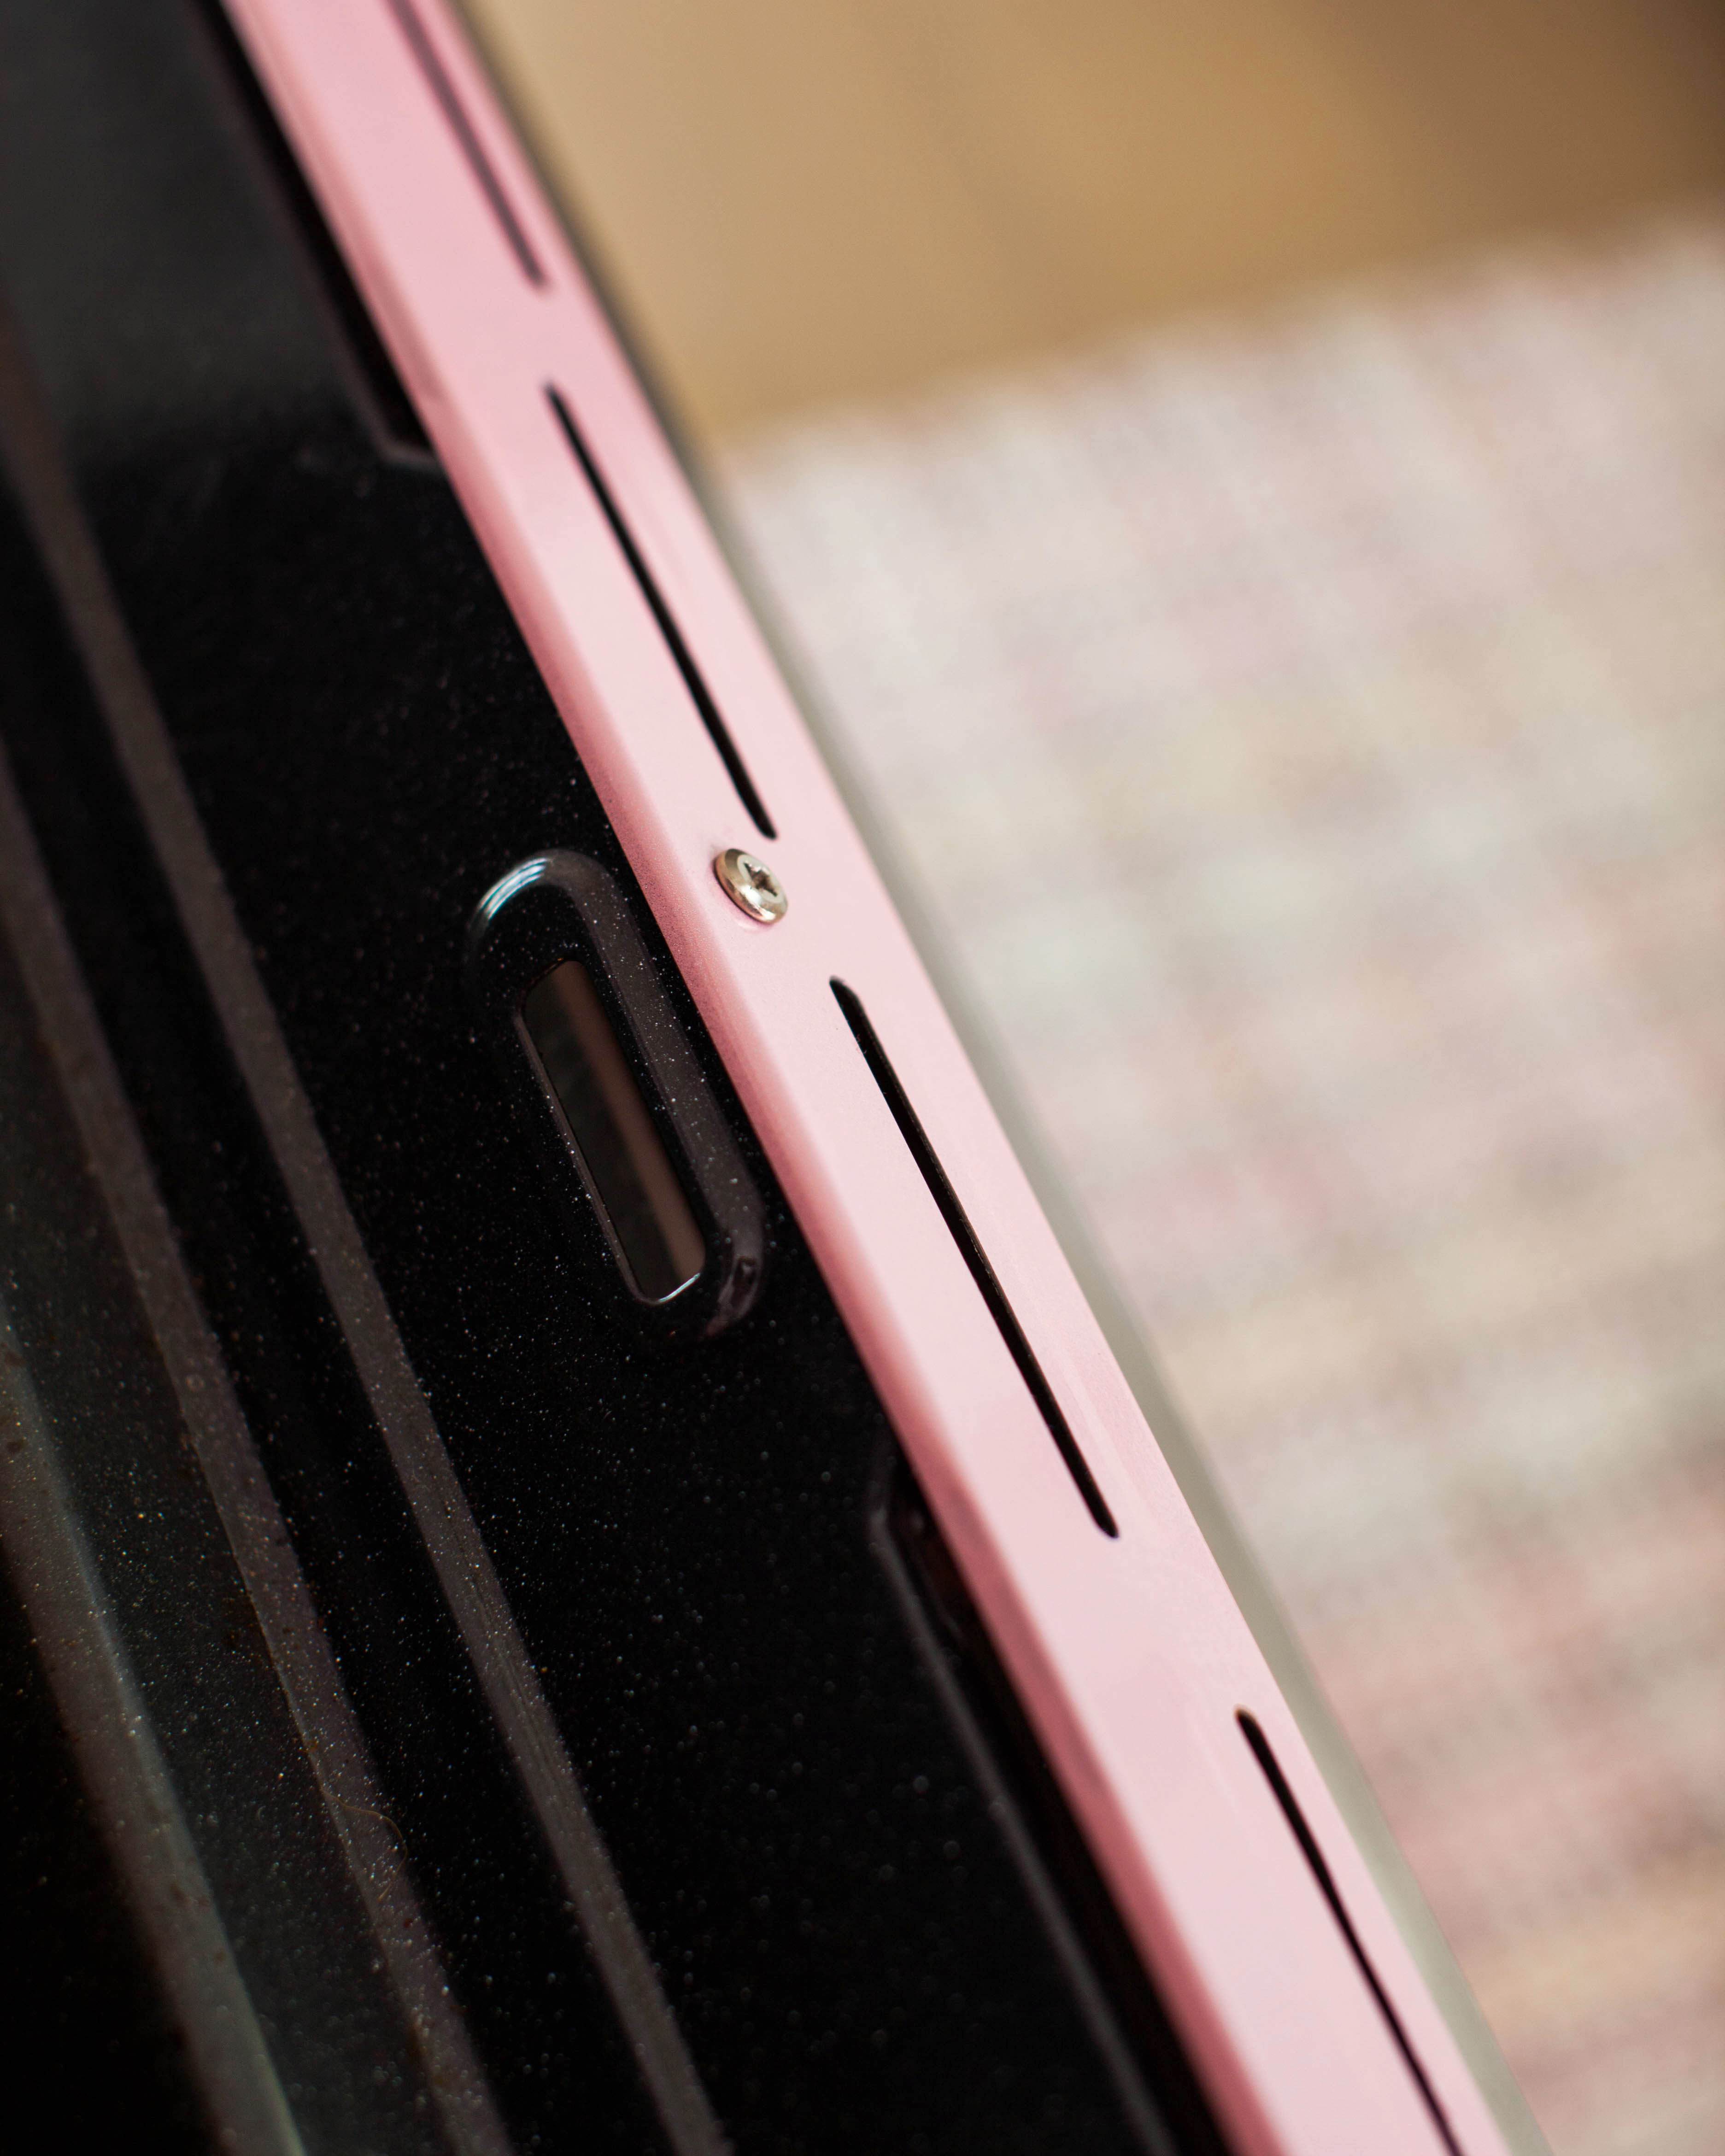
I made sure to cover the sides too! I didn’t cover the cooktop because it most probably would burn and melt, being so close to the fire and all. I used the same method to cover the front of my dishwasher.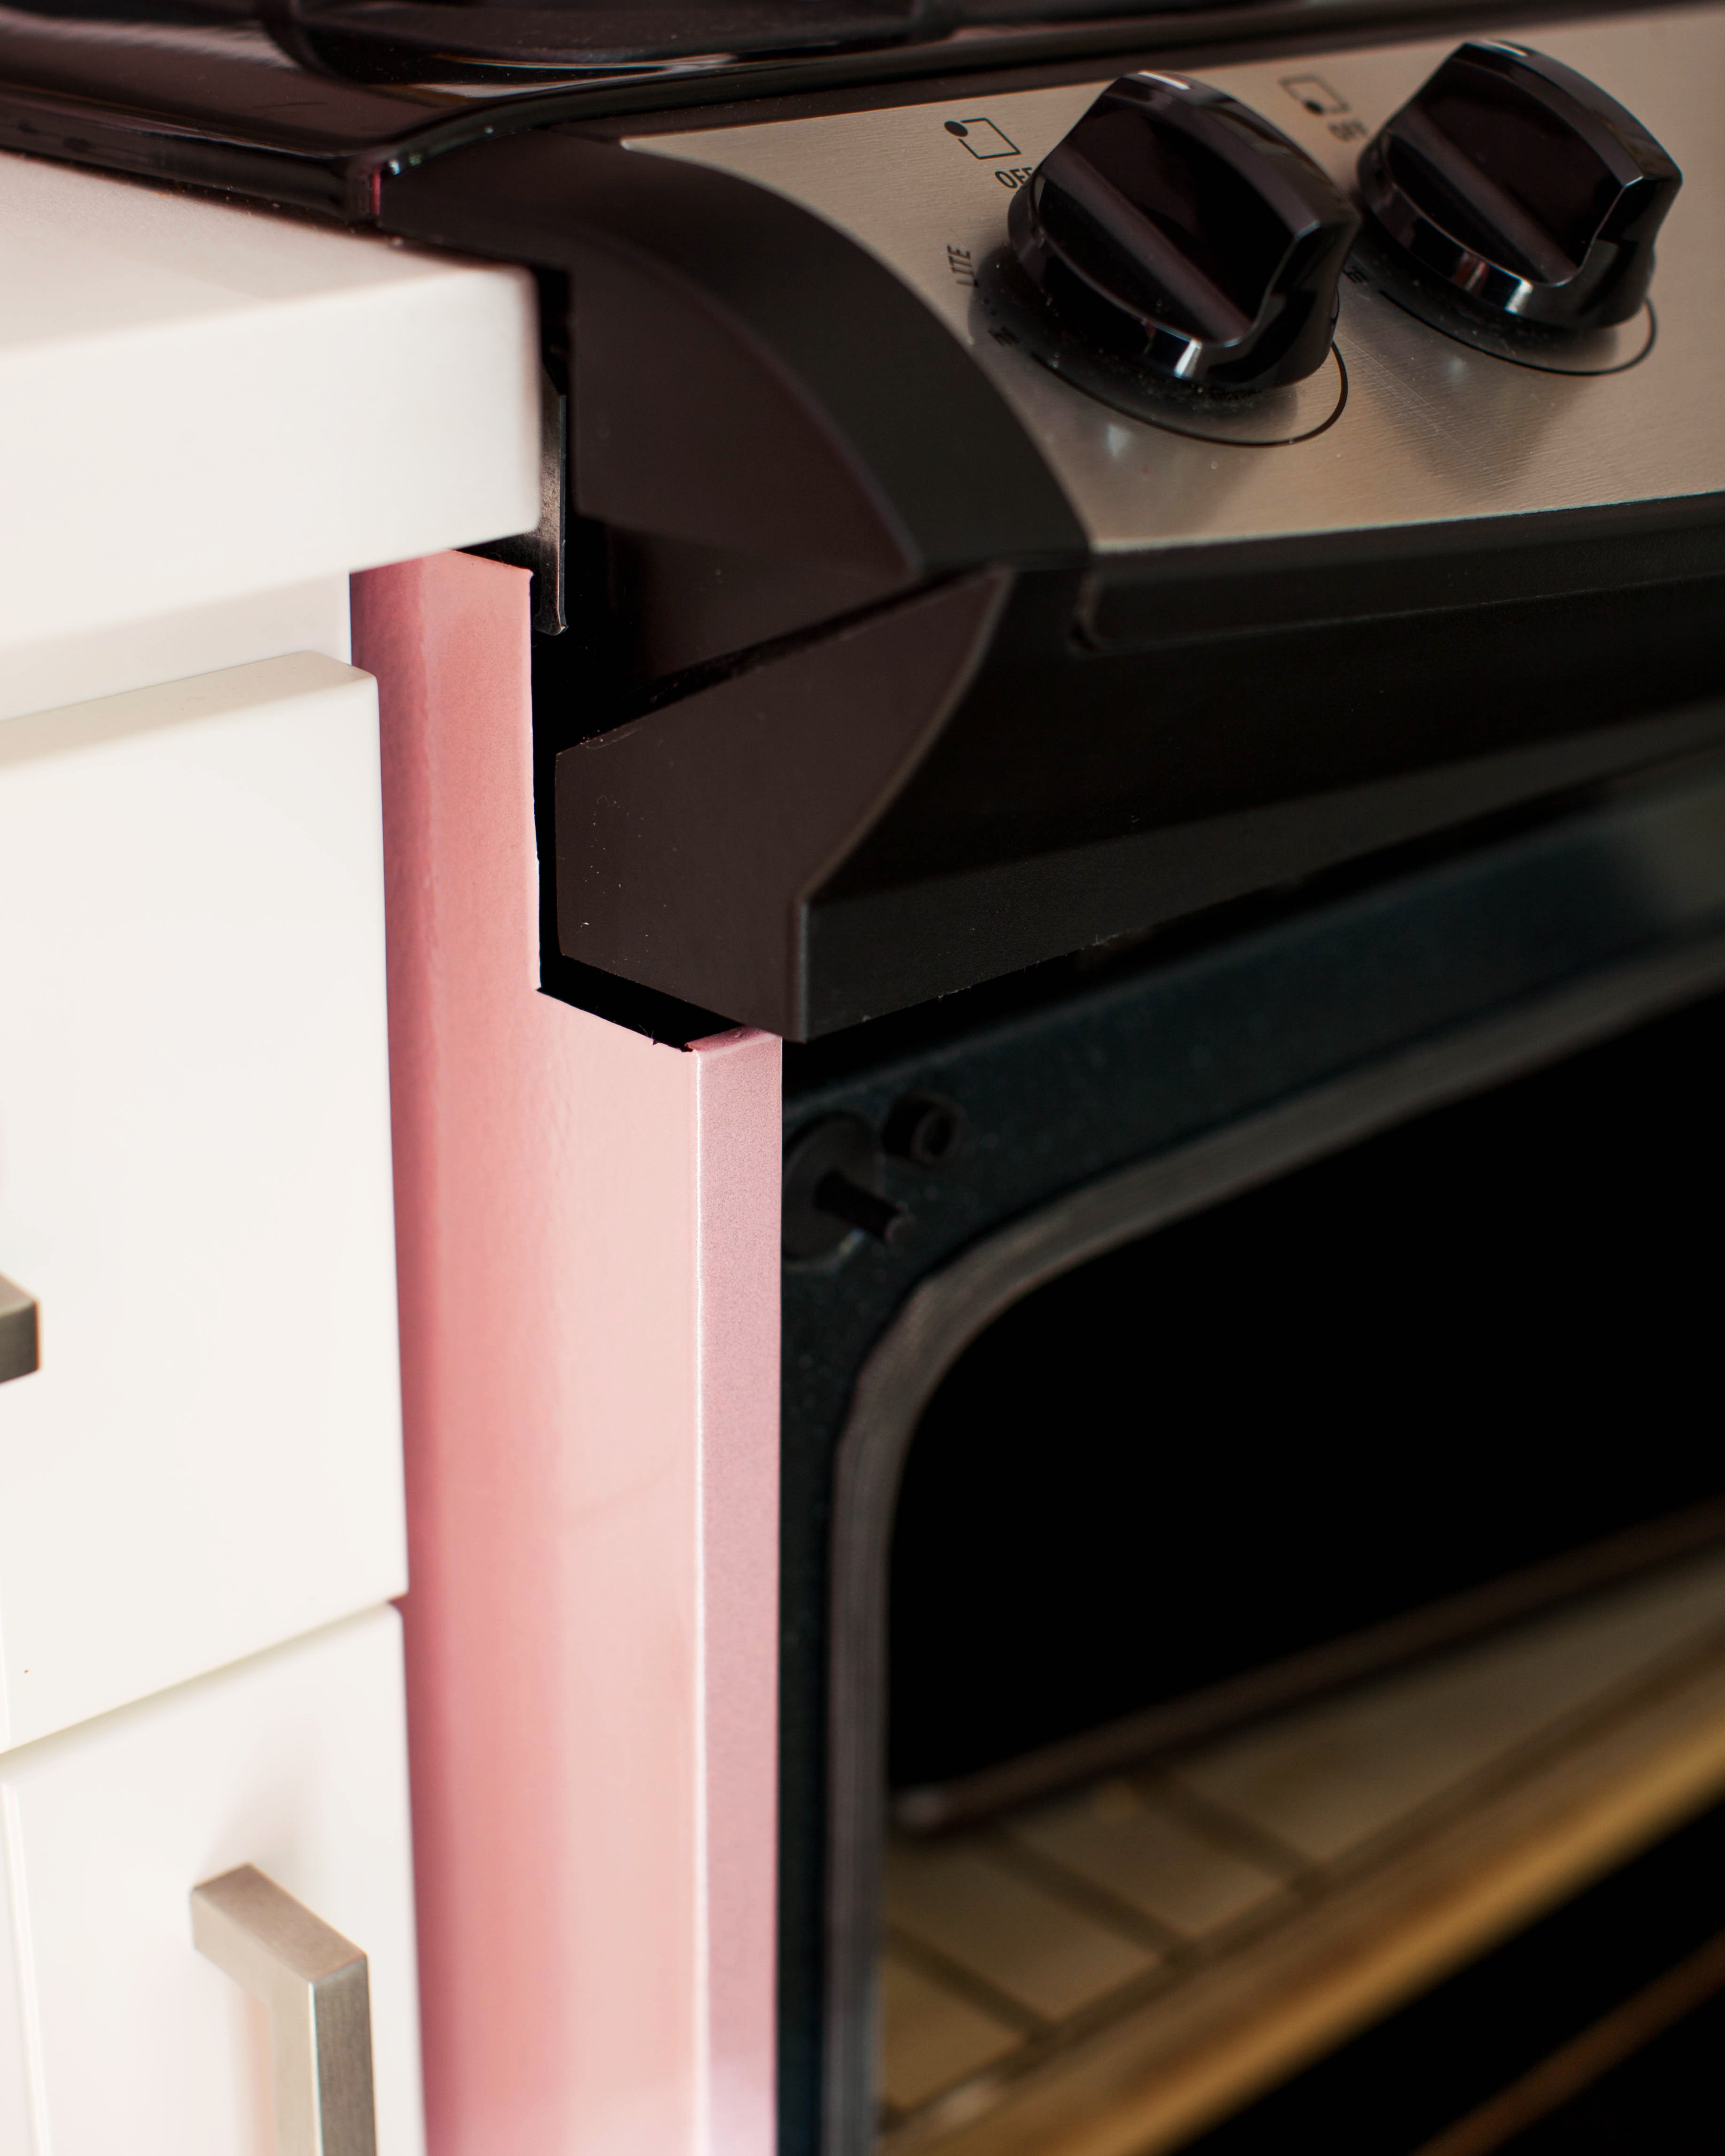
And here’s the final result!
It took a lotttt of patience, but once I got into the groove it went on a lot faster and smoother. It’s very easy to clean and has held up really well. Even with JV cranking the oven to ungodly temperatures when he’s baking bread. When I’m ready to move out I’ll just peel it off and be good to go. Yay!
{Update: We moved and it peeled off clean! I used a little rubbing alcohol and stainless steel cleaner to buff out any markings left behind and the appliances looked brand new.}

I was setting up for a house guest this week and realized I’ve shown you our little home office/guest bedroom, but I’ve never actually shown you what it looks like when it’s used as a bedroom! Honestly part of the reason is that I hadn’t found any bedding I really liked until now.
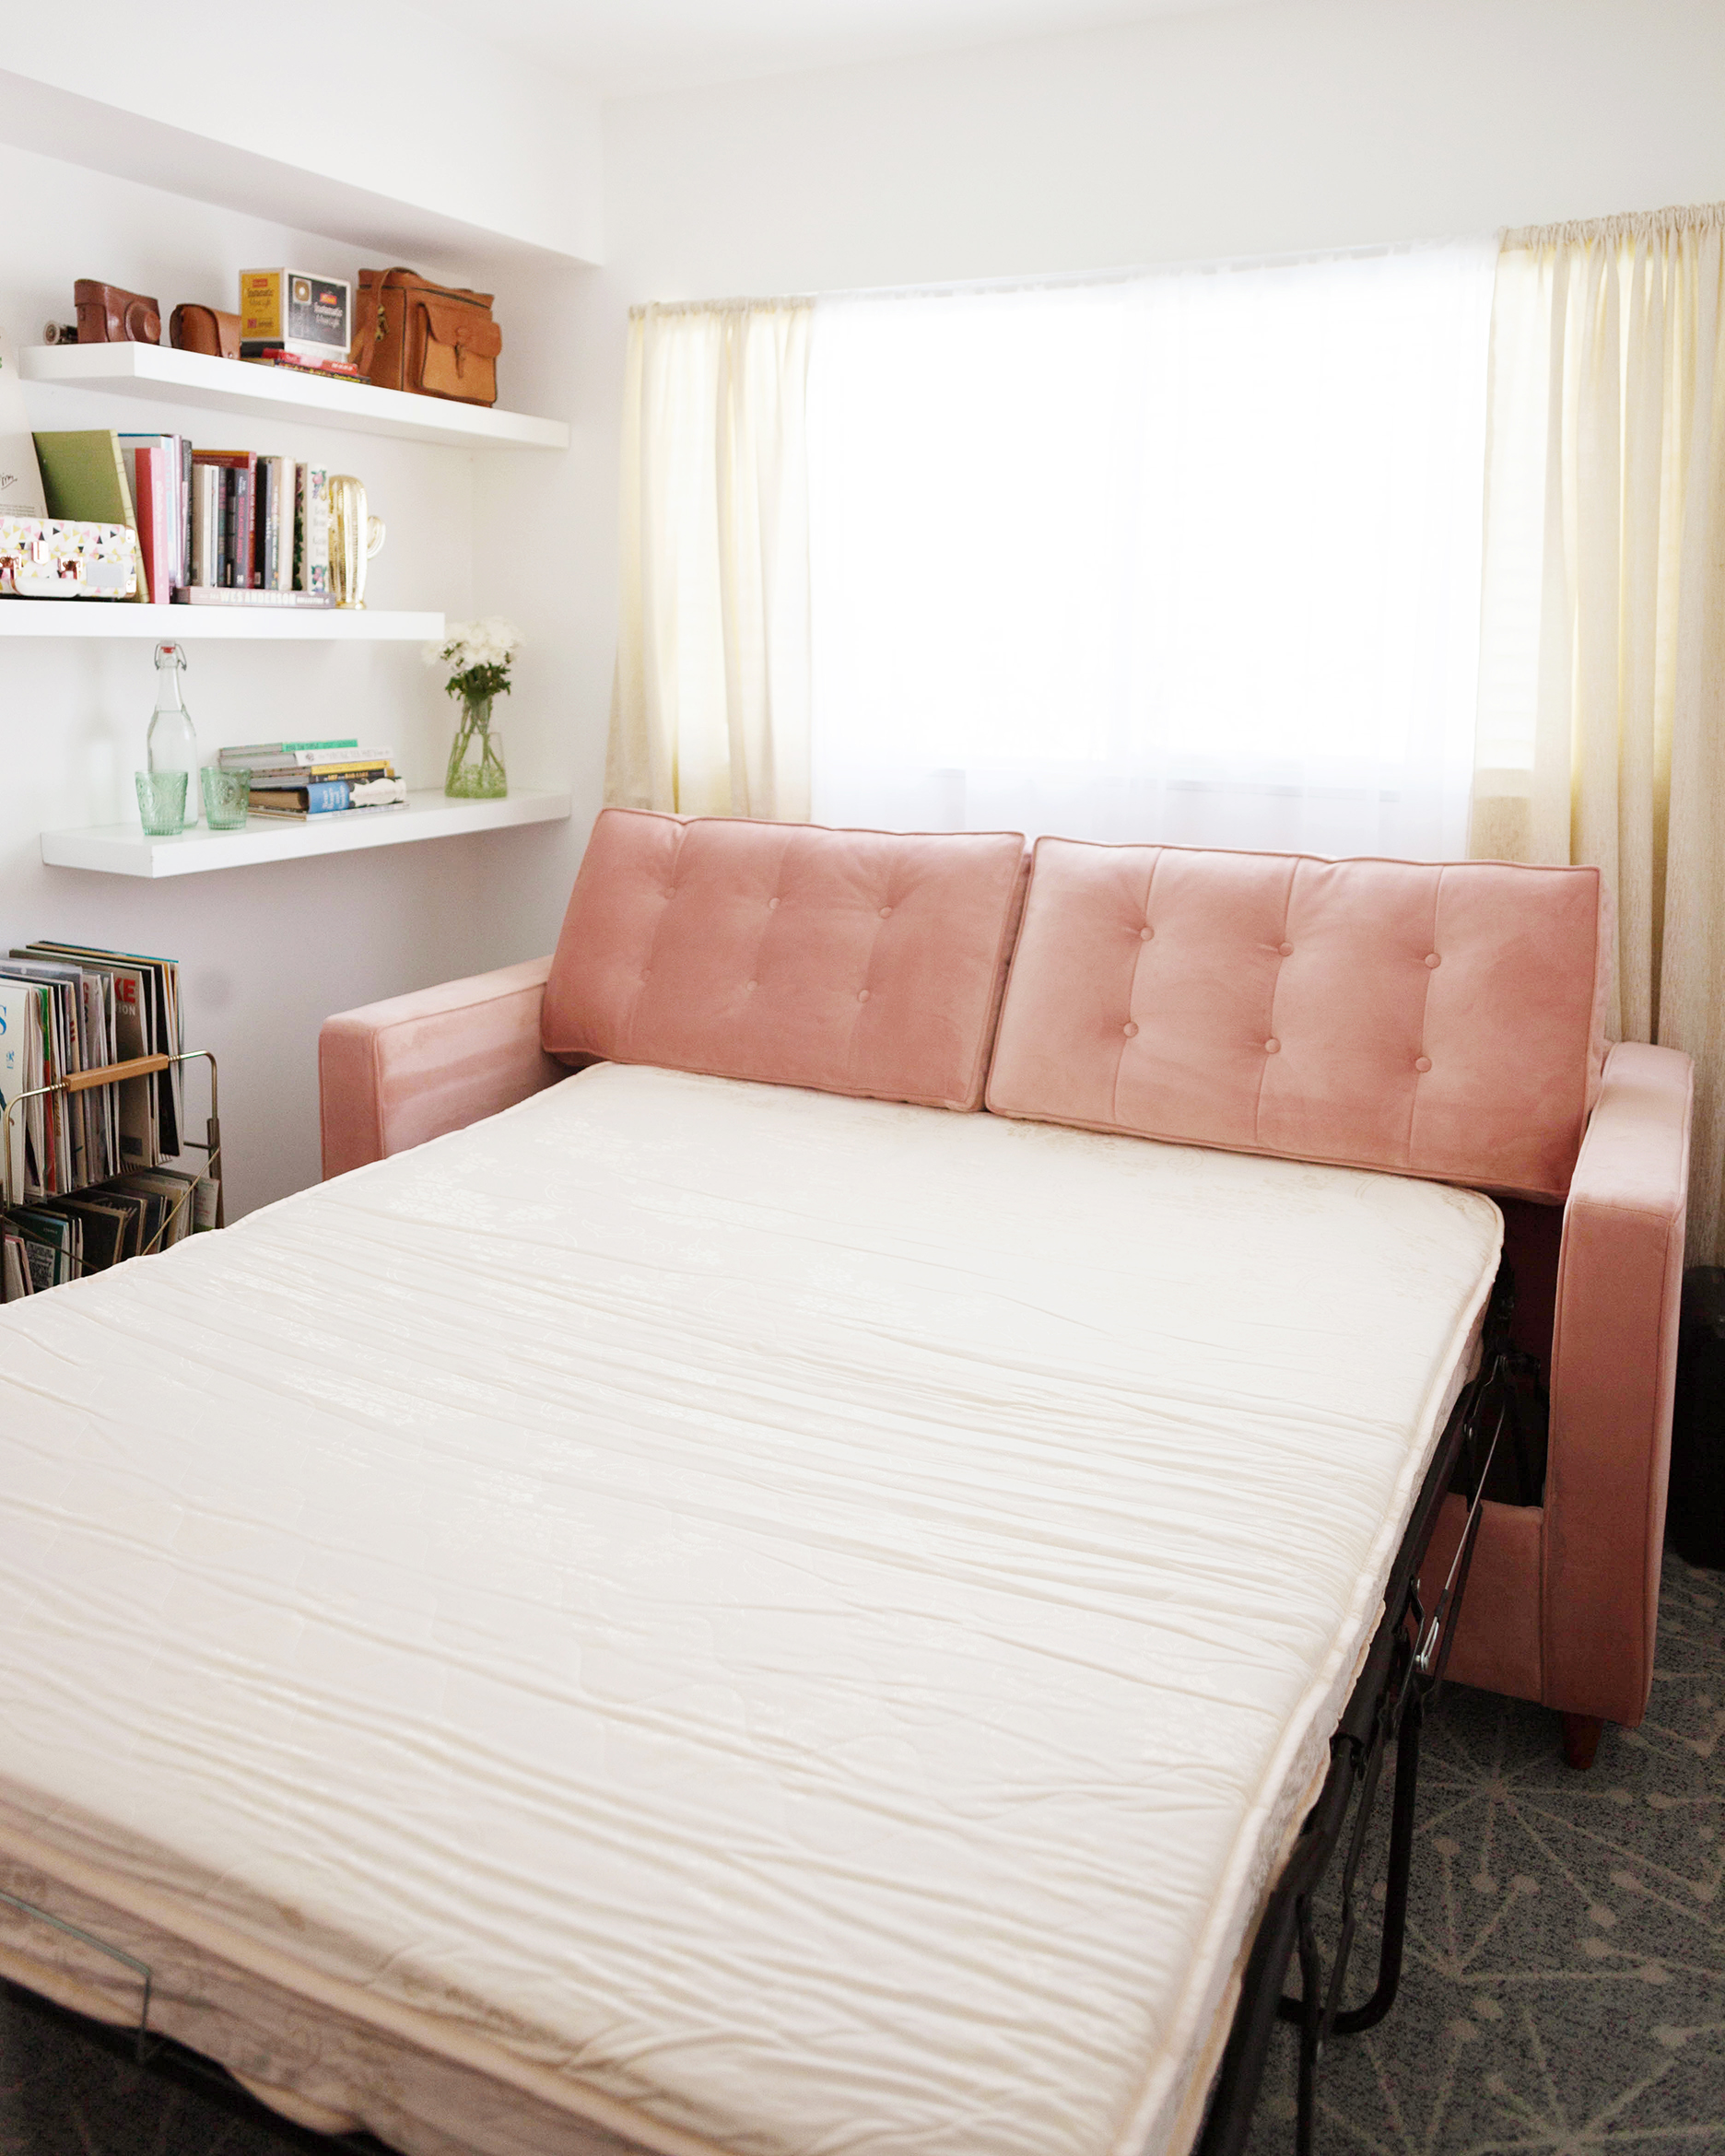
When Cstudio Home asked if I wanted to try some of their bedding the timing couldn’t have been more perfect. I fell in love with their Ticking Marks Organic Percale Duvet Cover Set for its mid-century vibe and ocre yellow color! 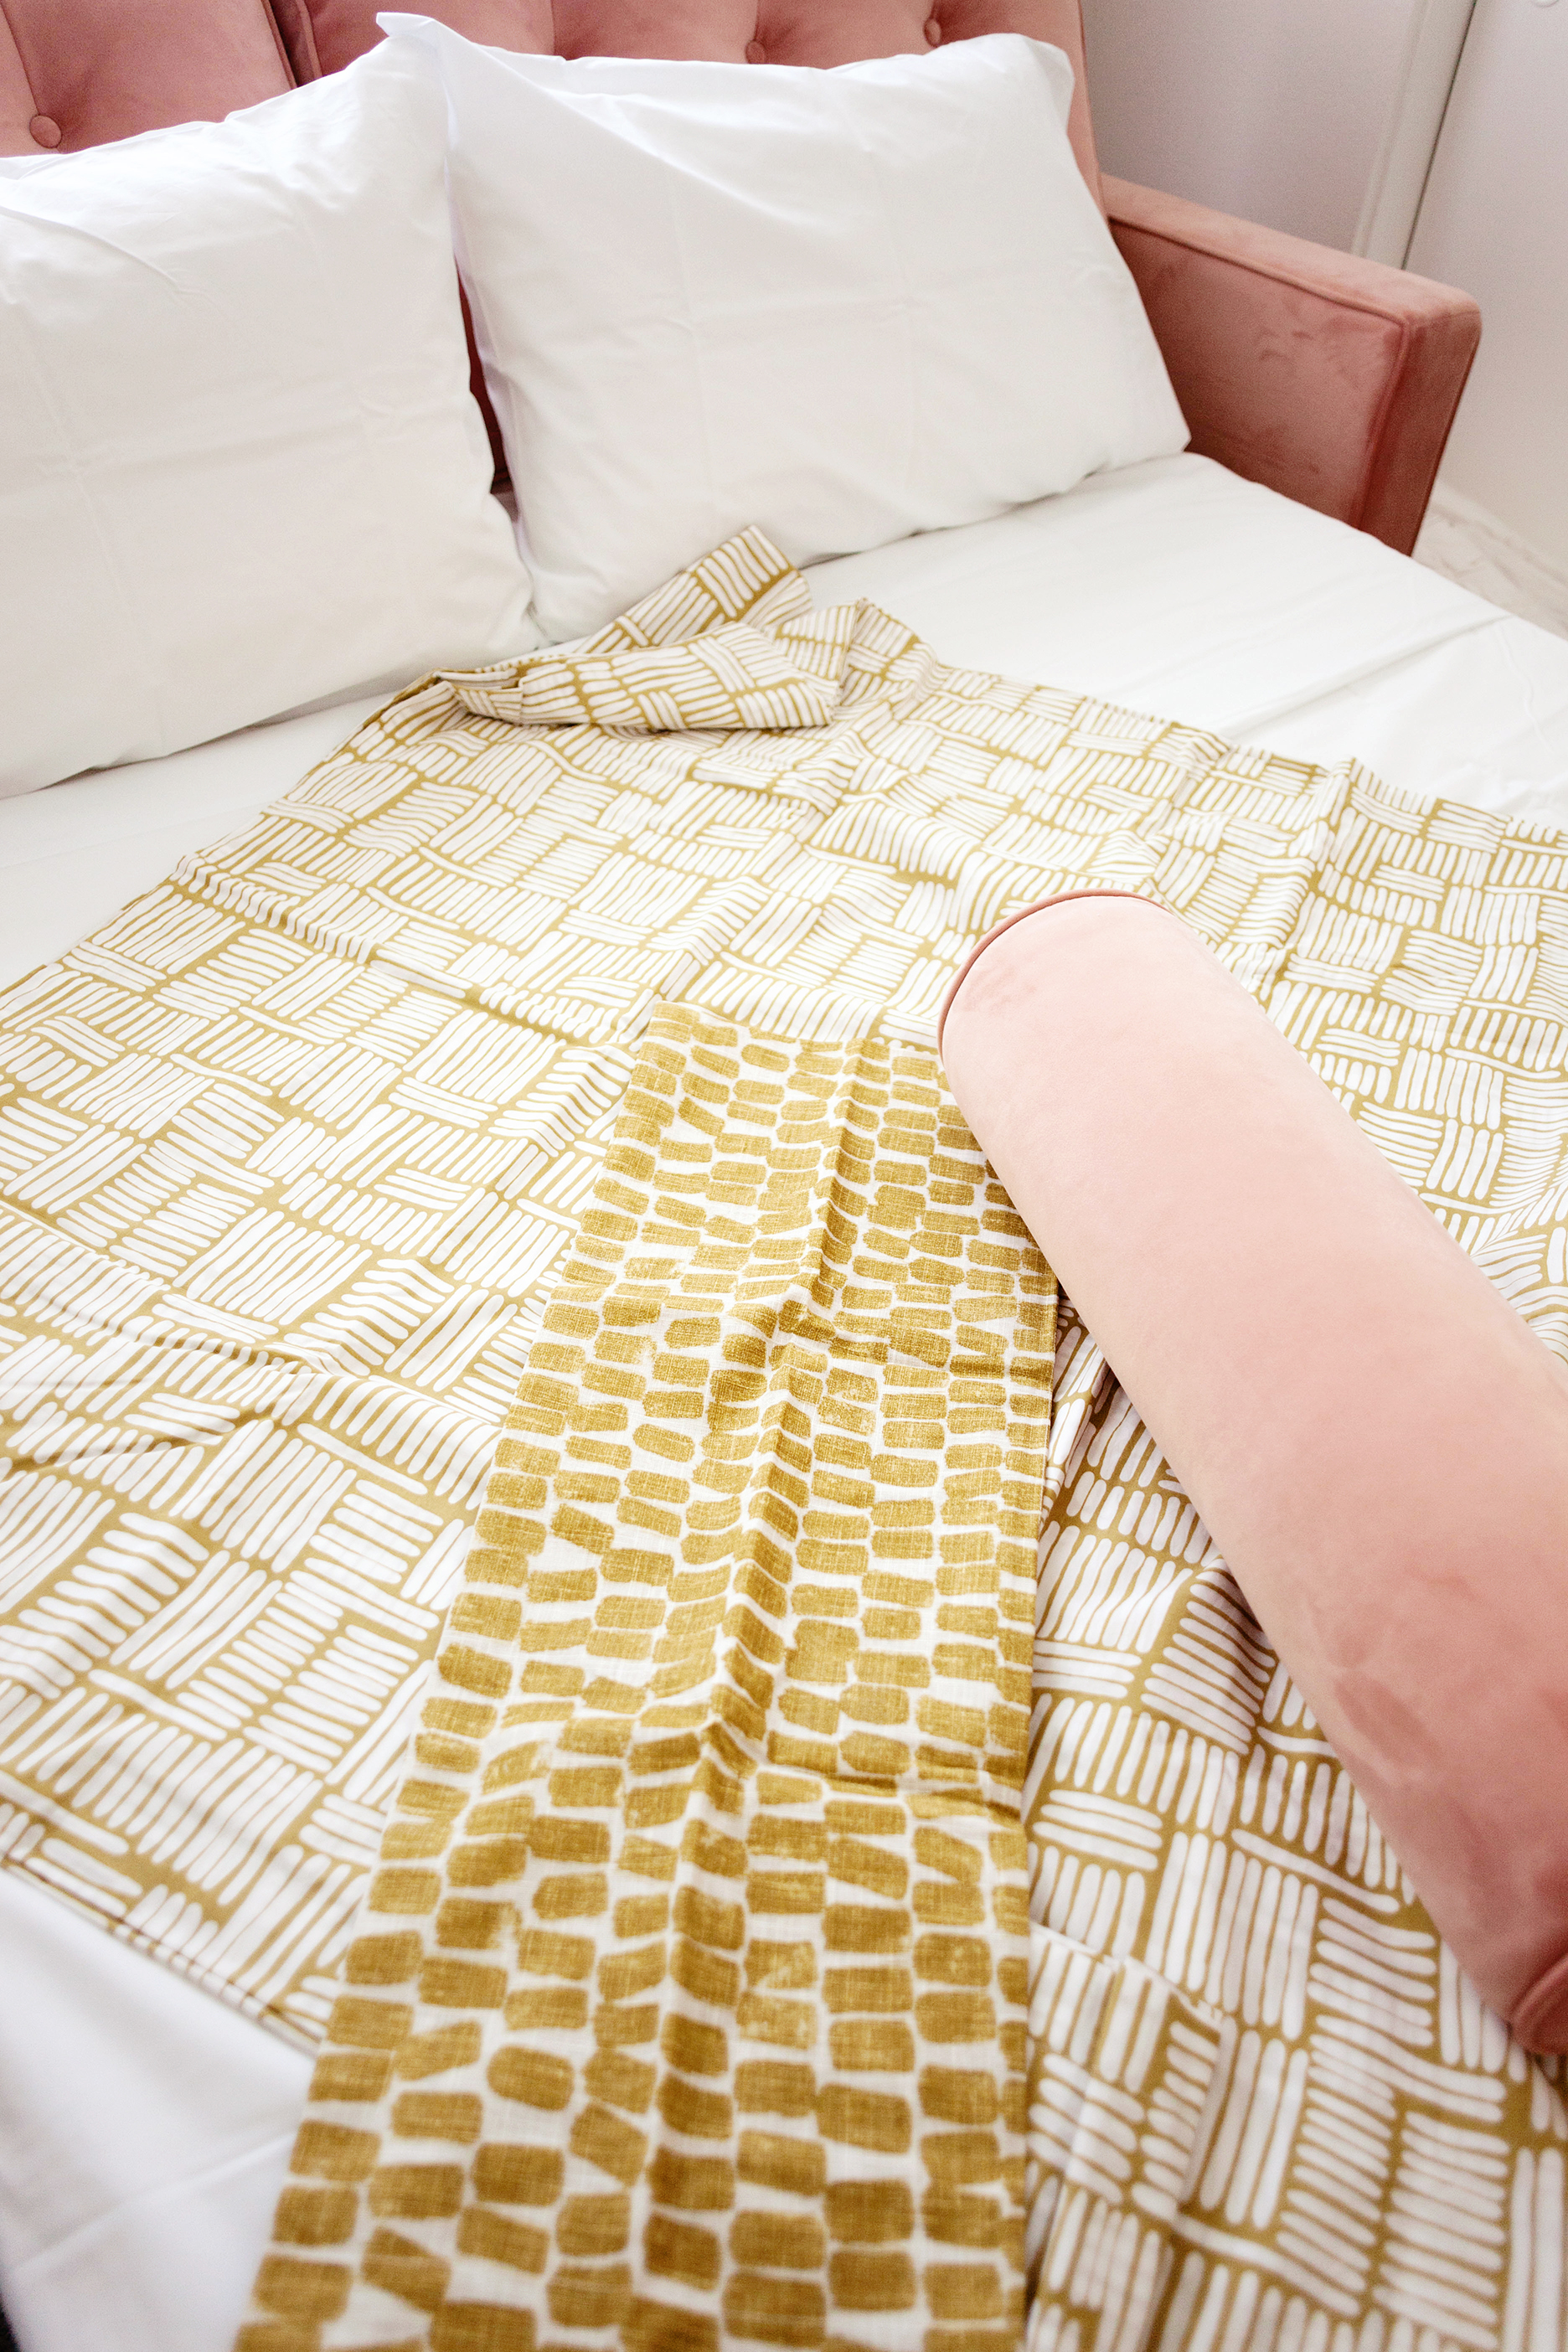
 I thought it would look really great against the pink of our sofa and the greyish blue tone in our carpet.
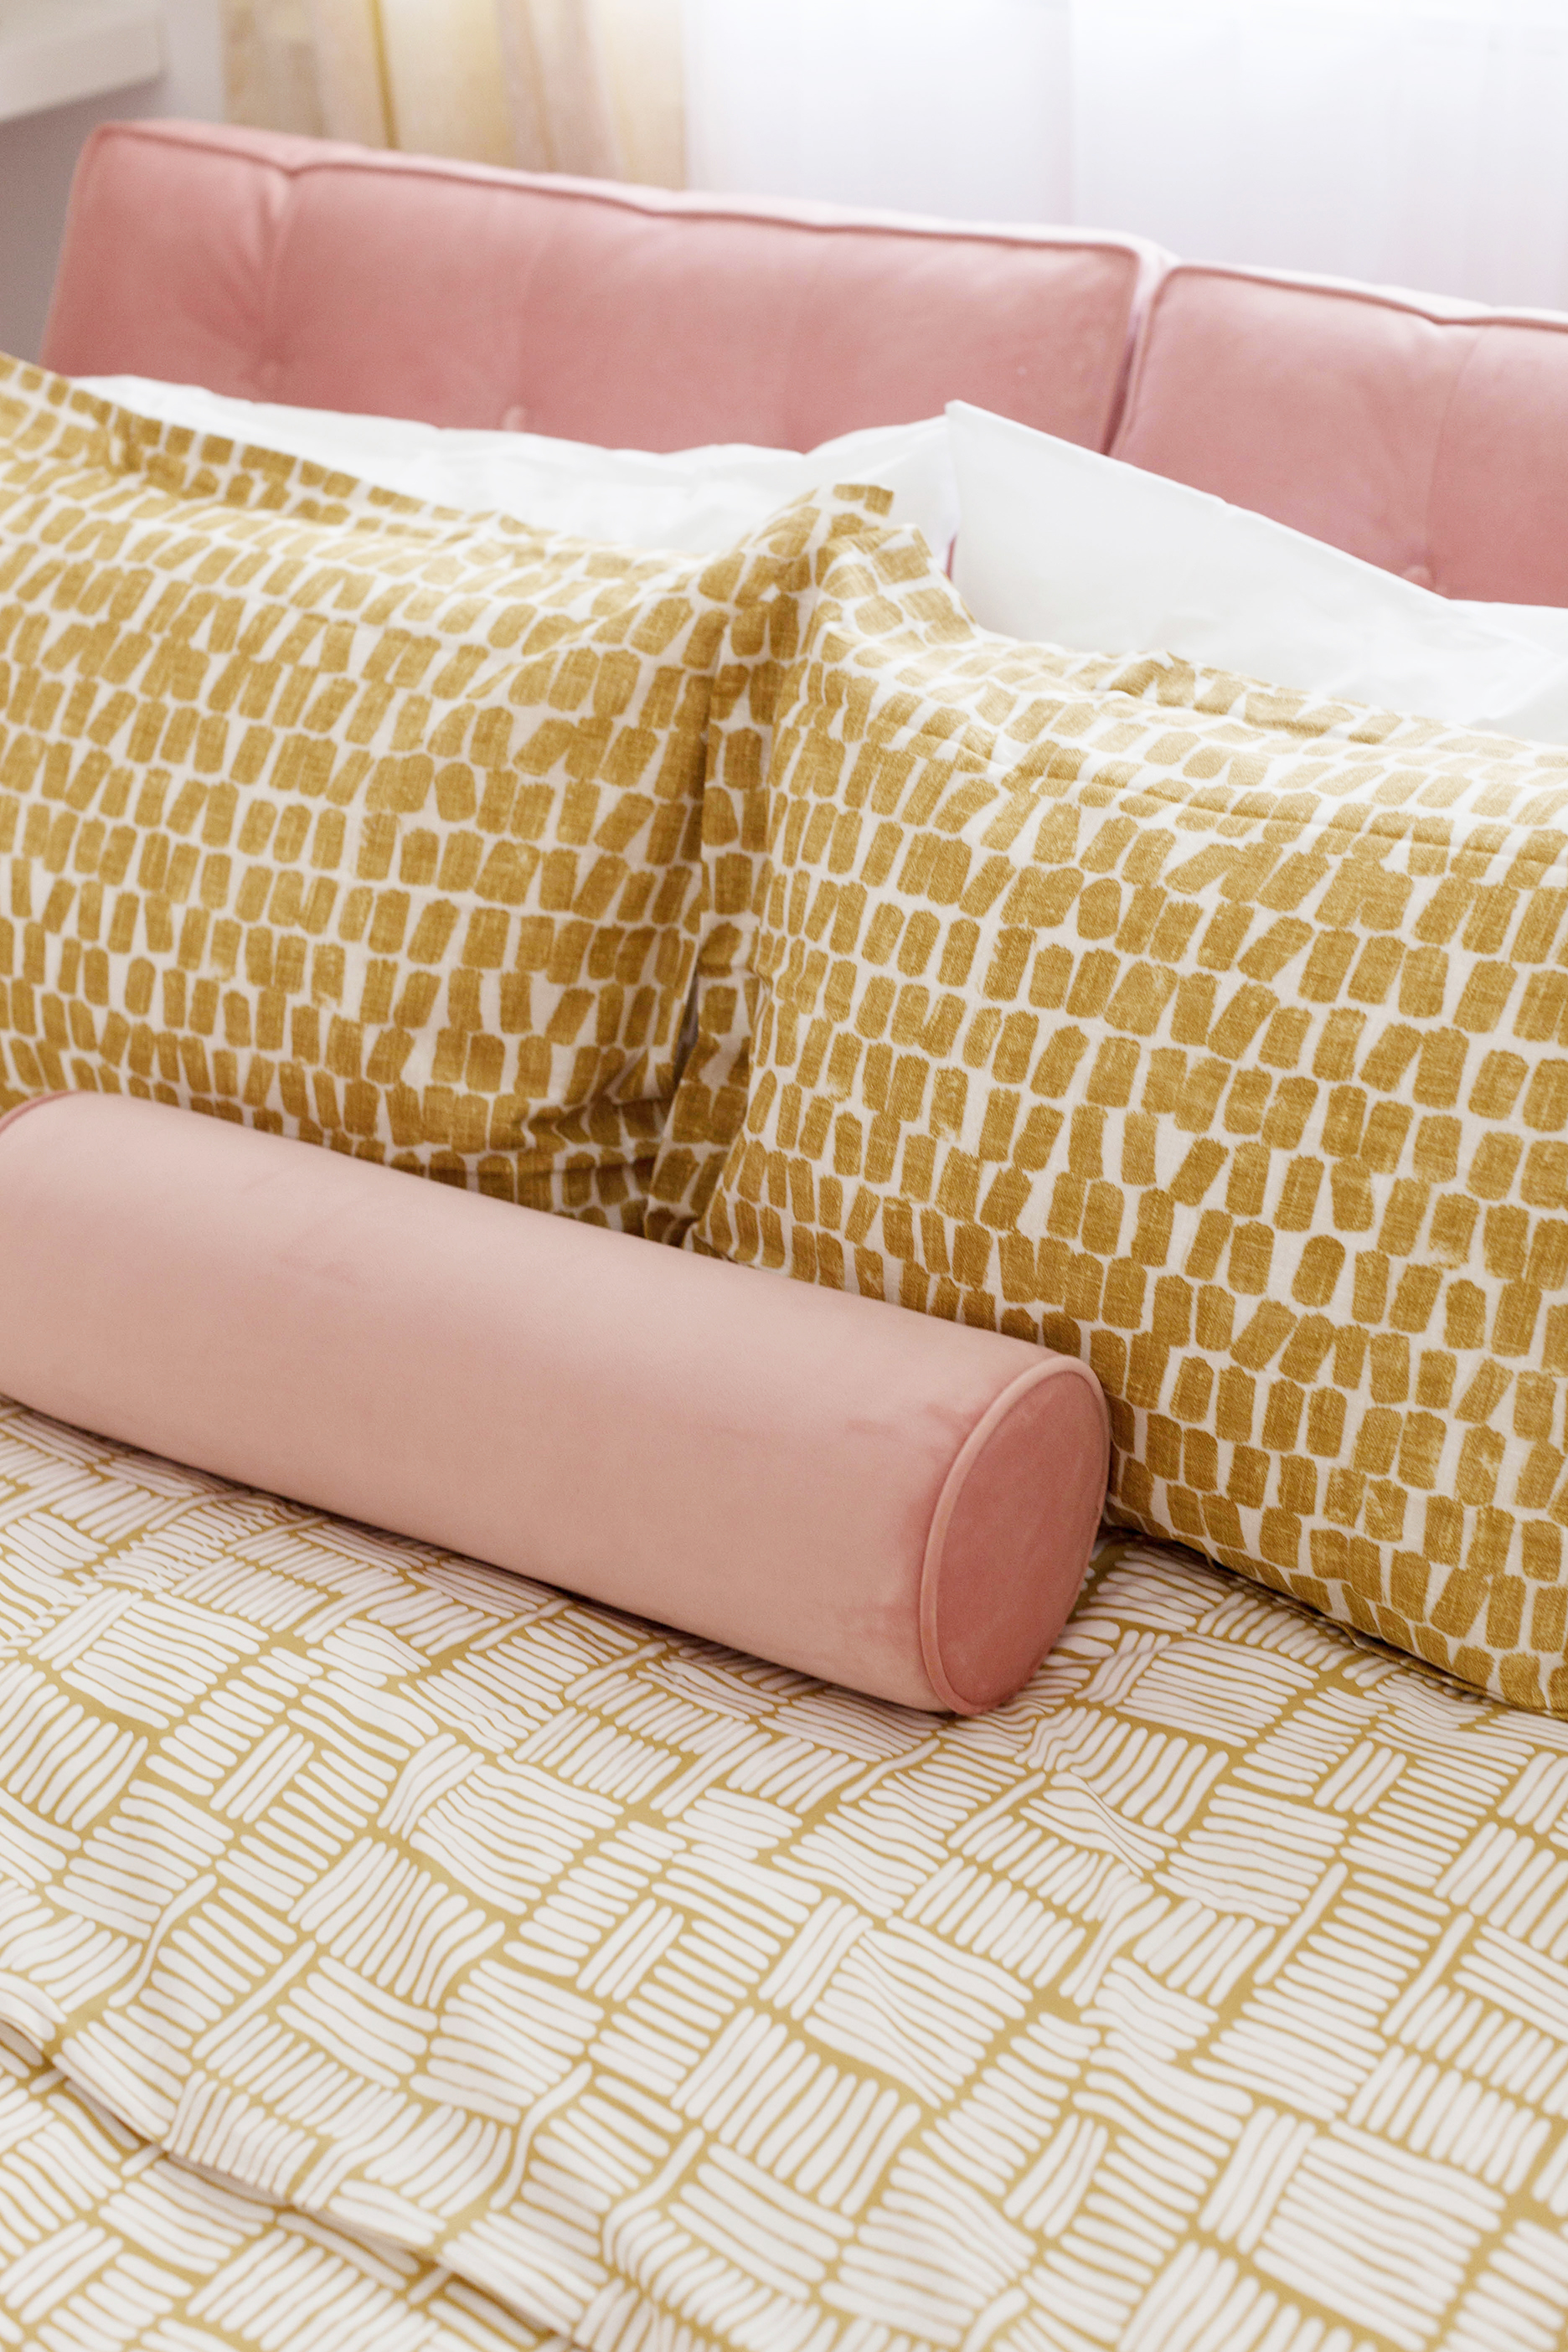 I didn’t want to add more color, but I did want to add more pattern and texture so I went with the Randall Shams in the same hue! The pattern and texture of the fabric also feels very vintage and luxe which I absolutely love.
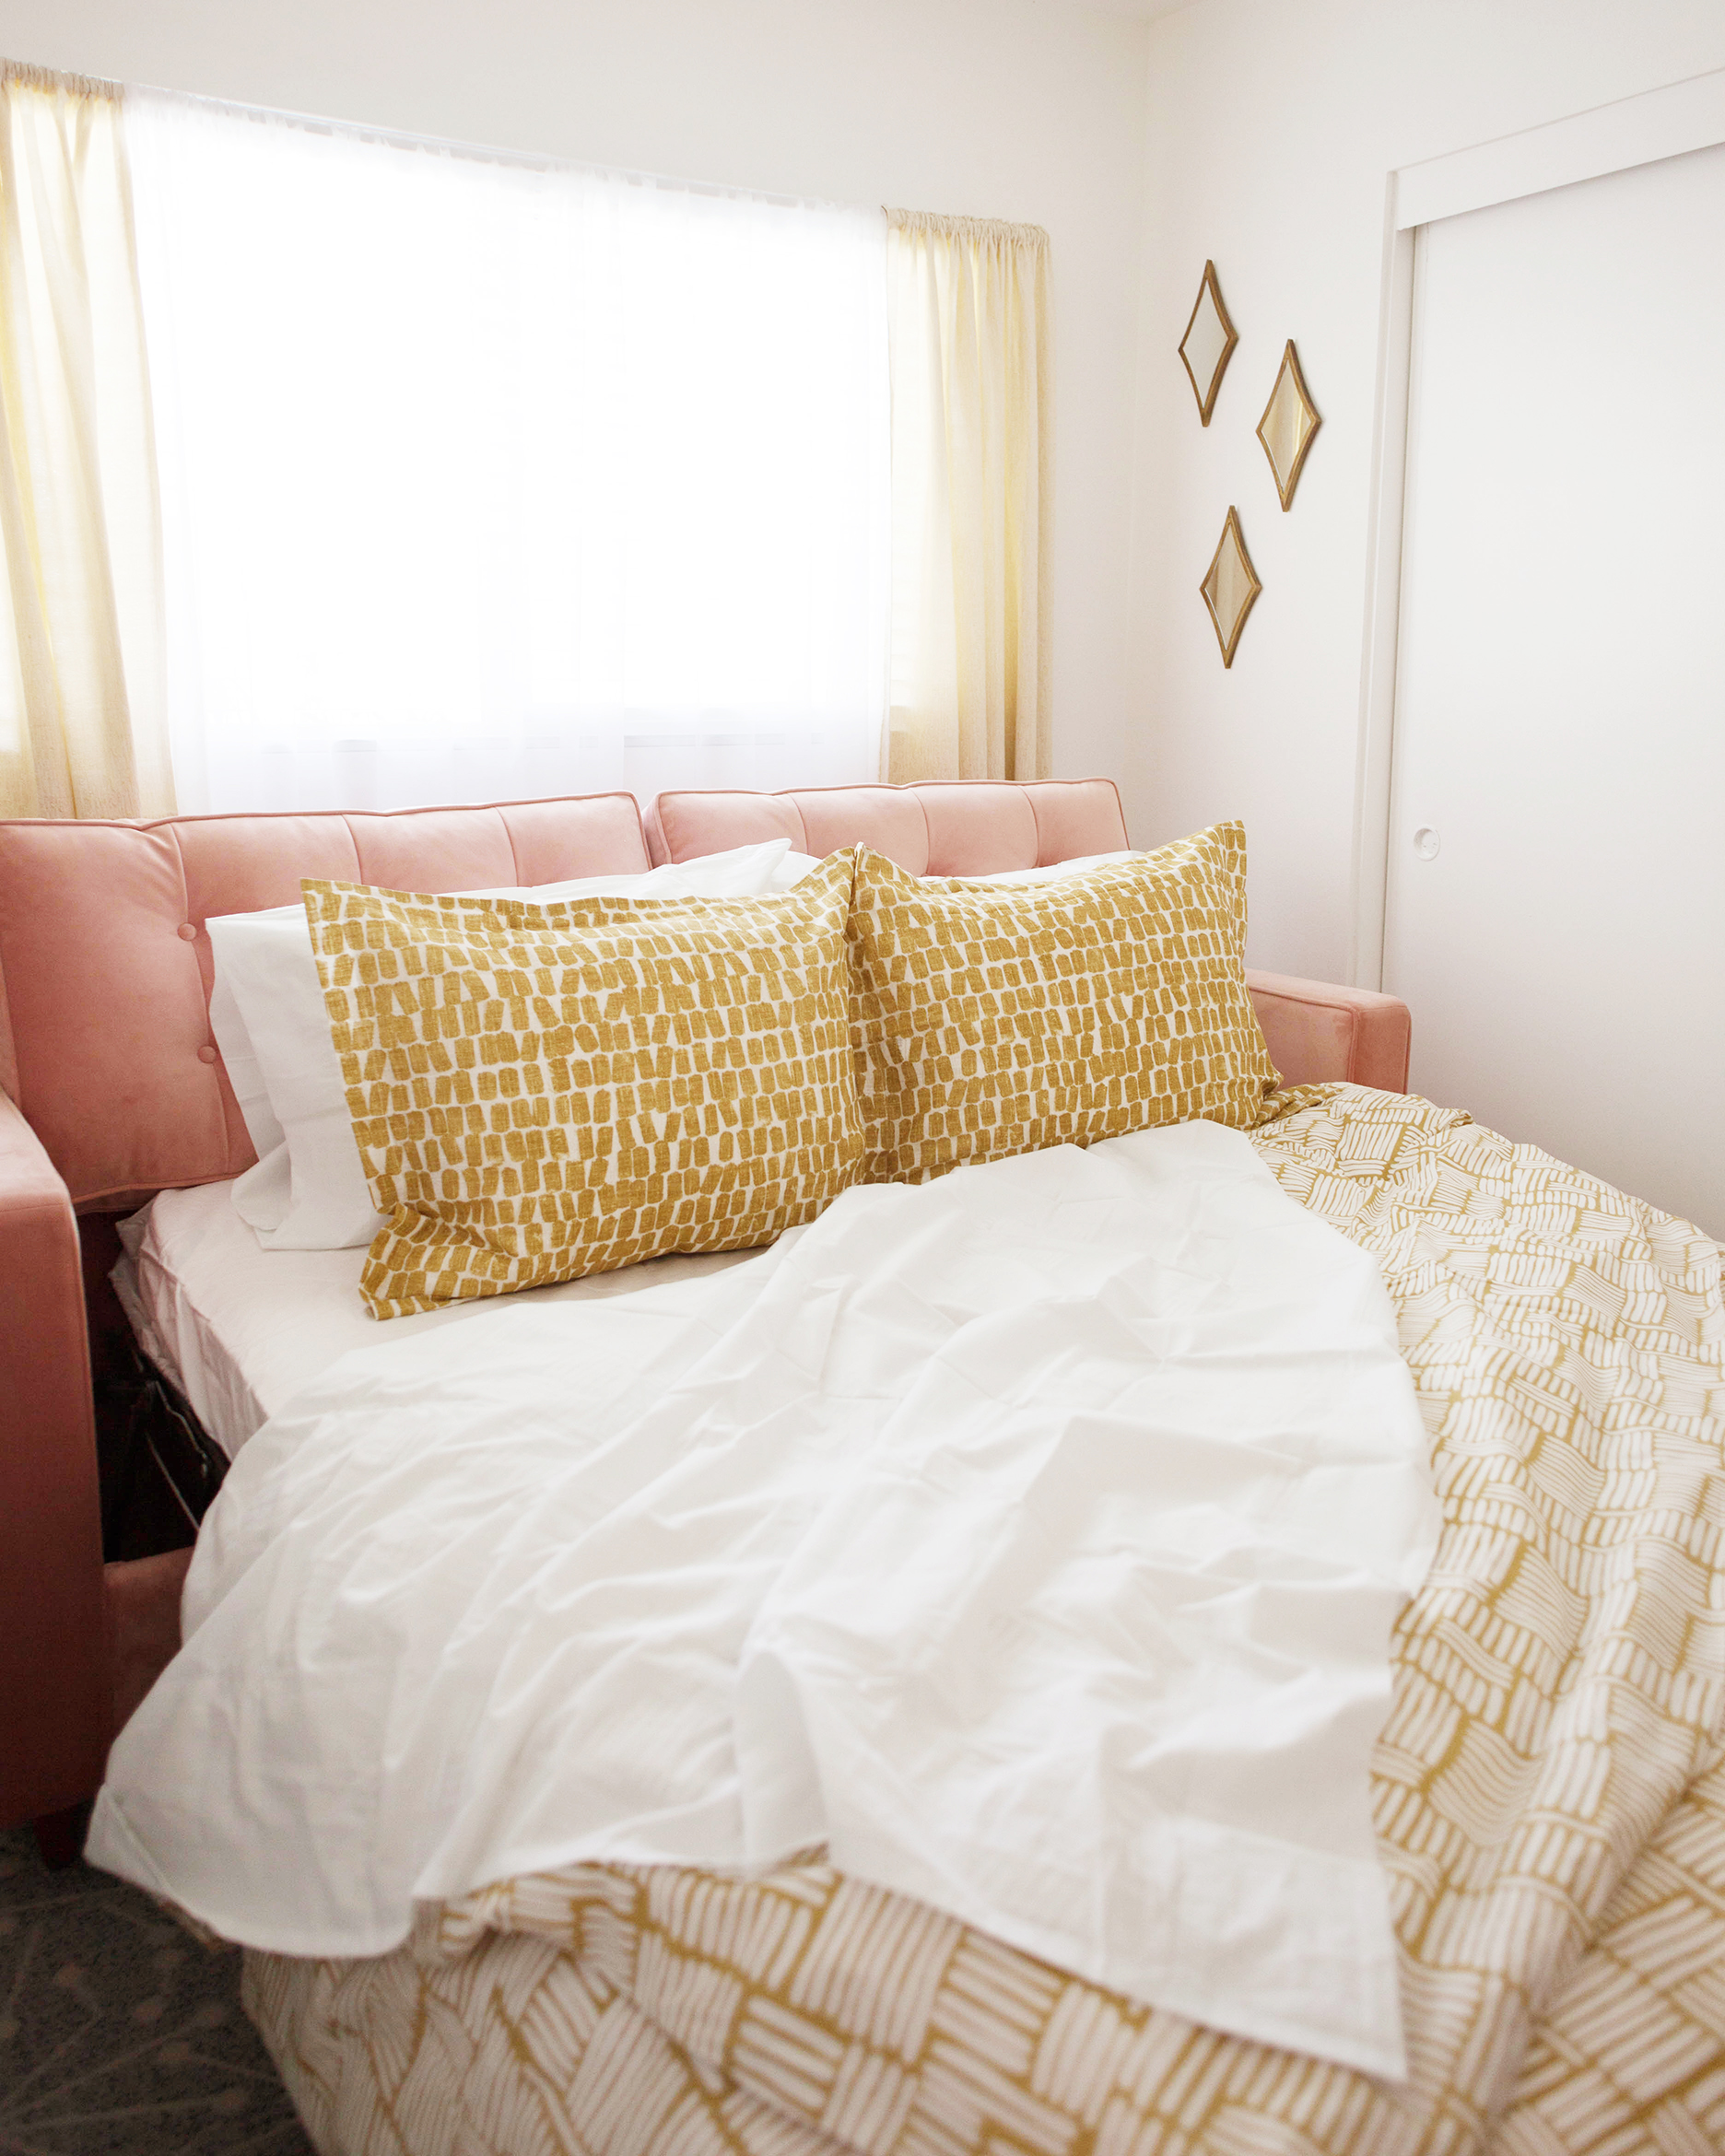 There’s nothing I love more than crisp white sheets and the Organic Percale Sheet Set is exactly that! Don’t you just want to dive right into this bed? I doooo!!
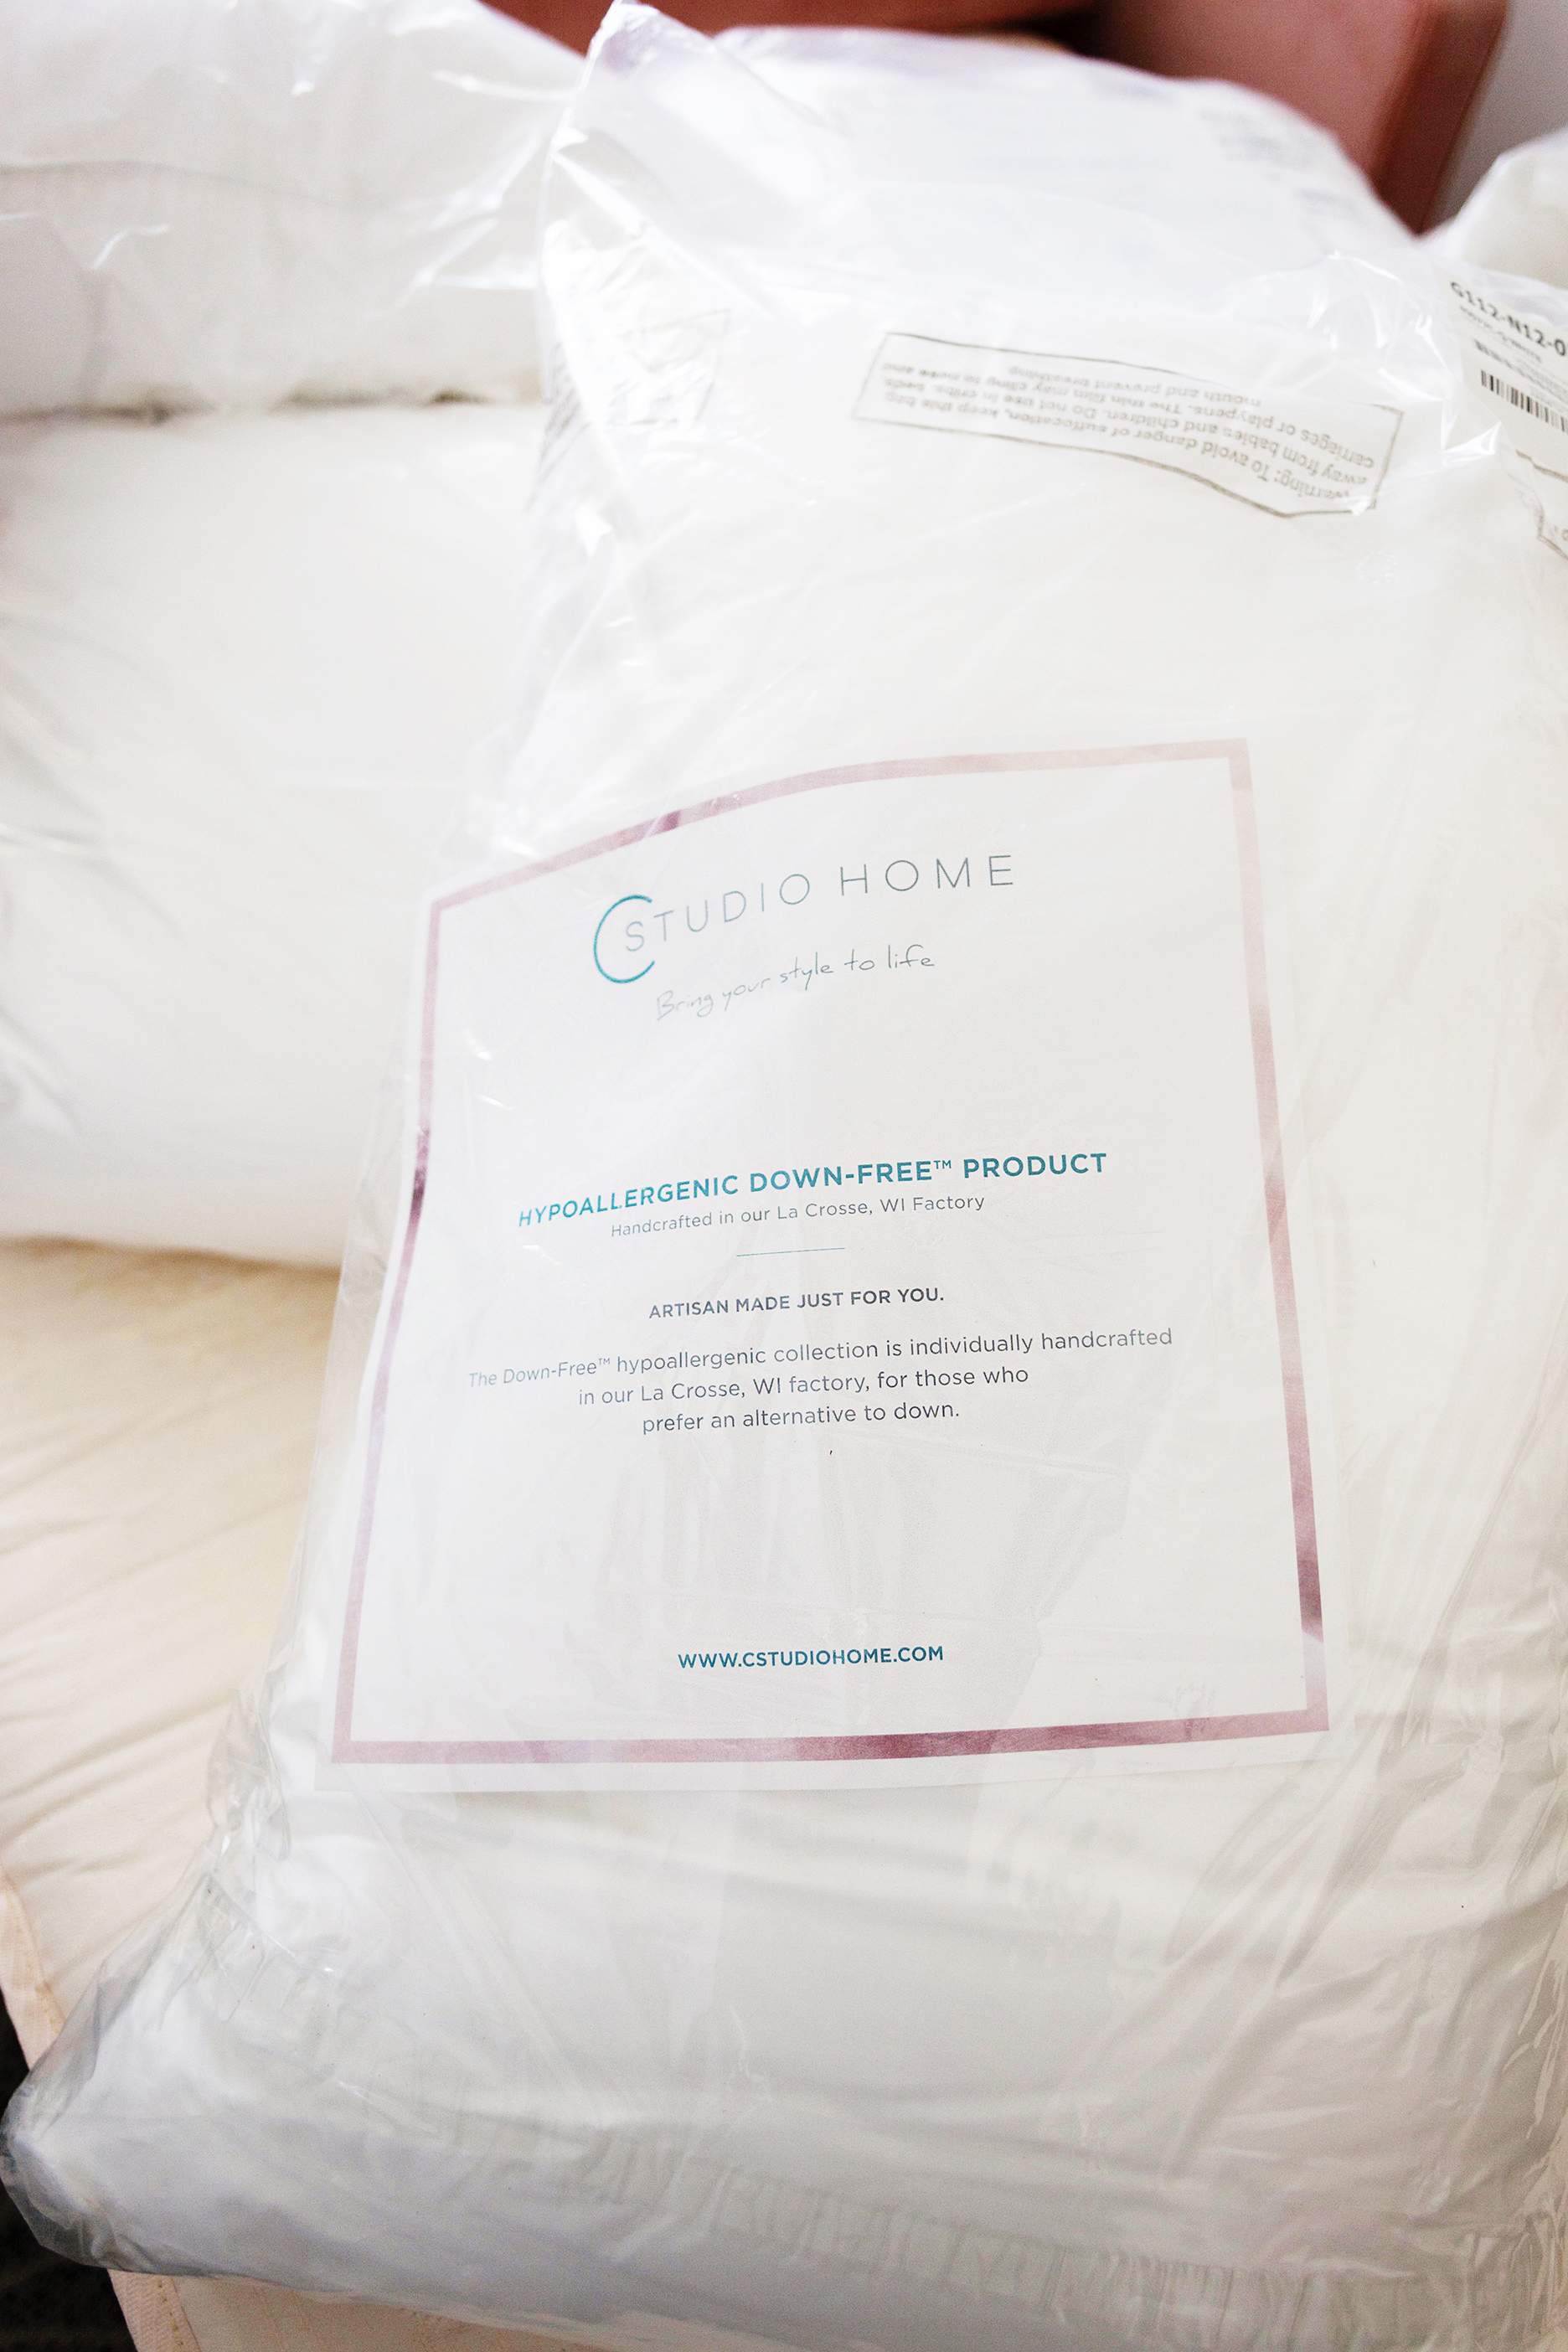
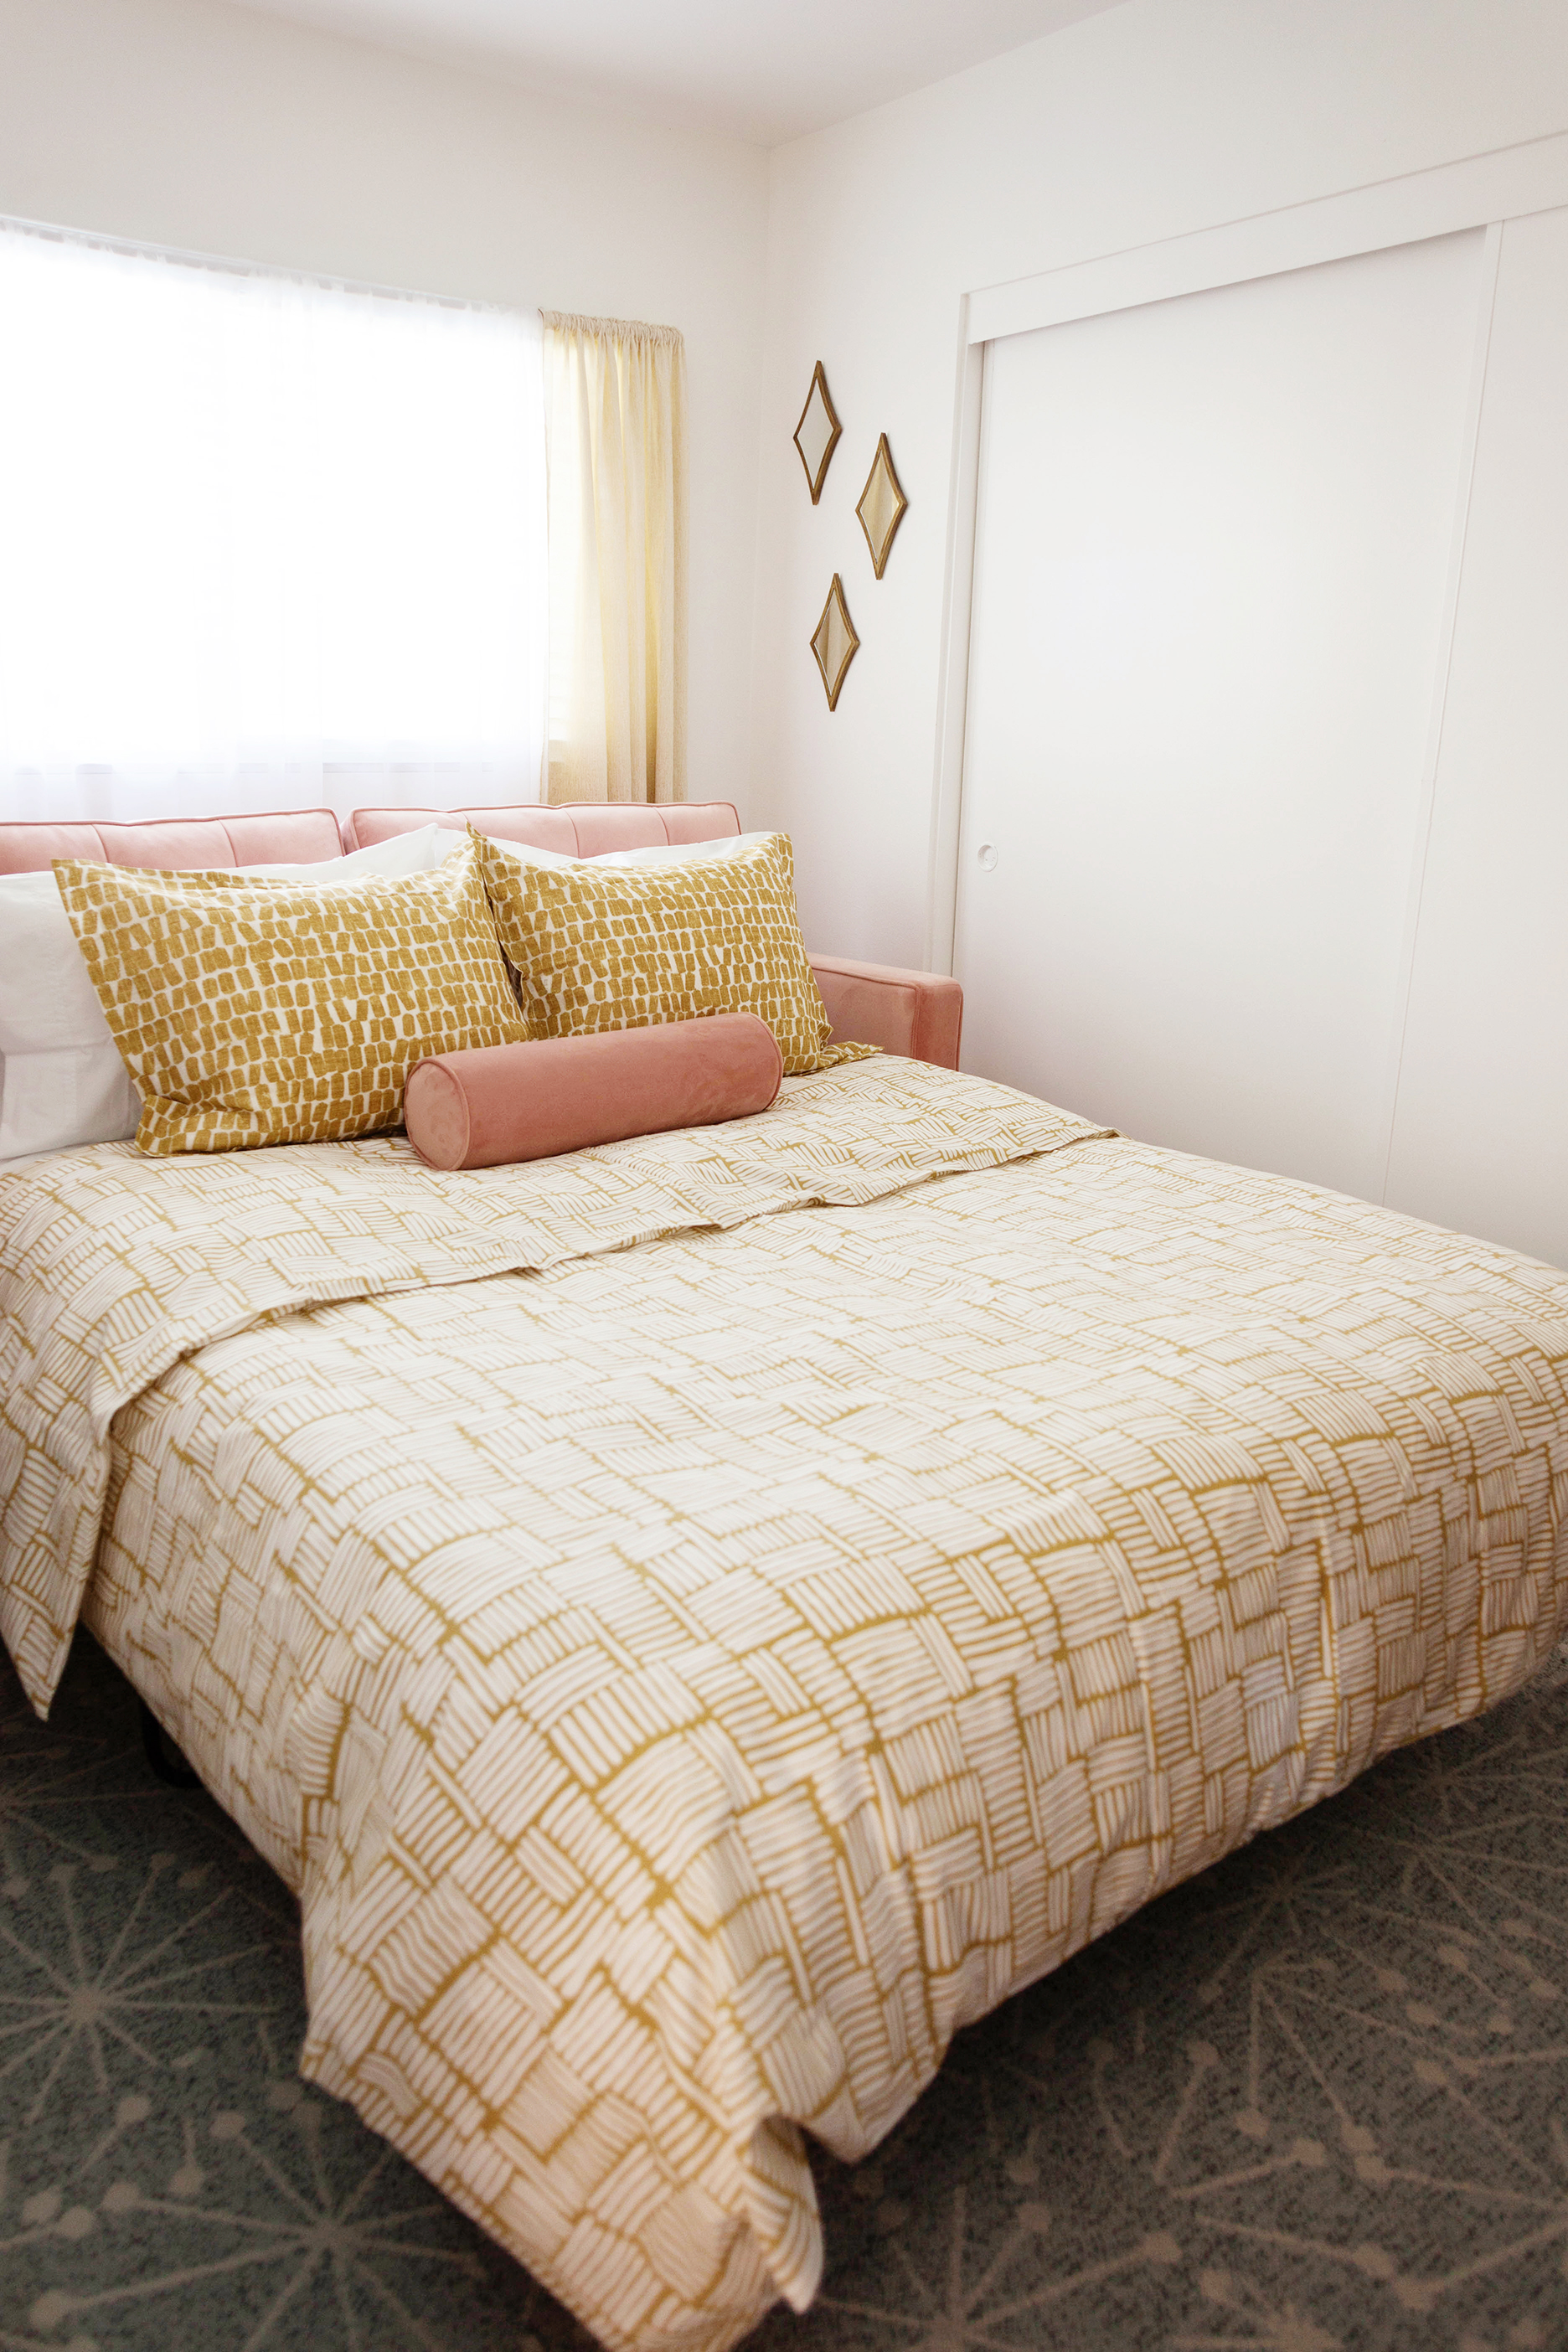 I wanted this bed to not only look good, but also feel good. I used 2 sets of pillows in two different firmness levels – medium and firm – so my guests could choose which feels more comfortable to them. For the duvet I wanted something light enough for desert summer nights but warm enough for winter as well. I also needed it to be easy to store away when not in use. I chose the Cstudio Home Responsible Down Standard Comforter and its exactly what I hoped for.
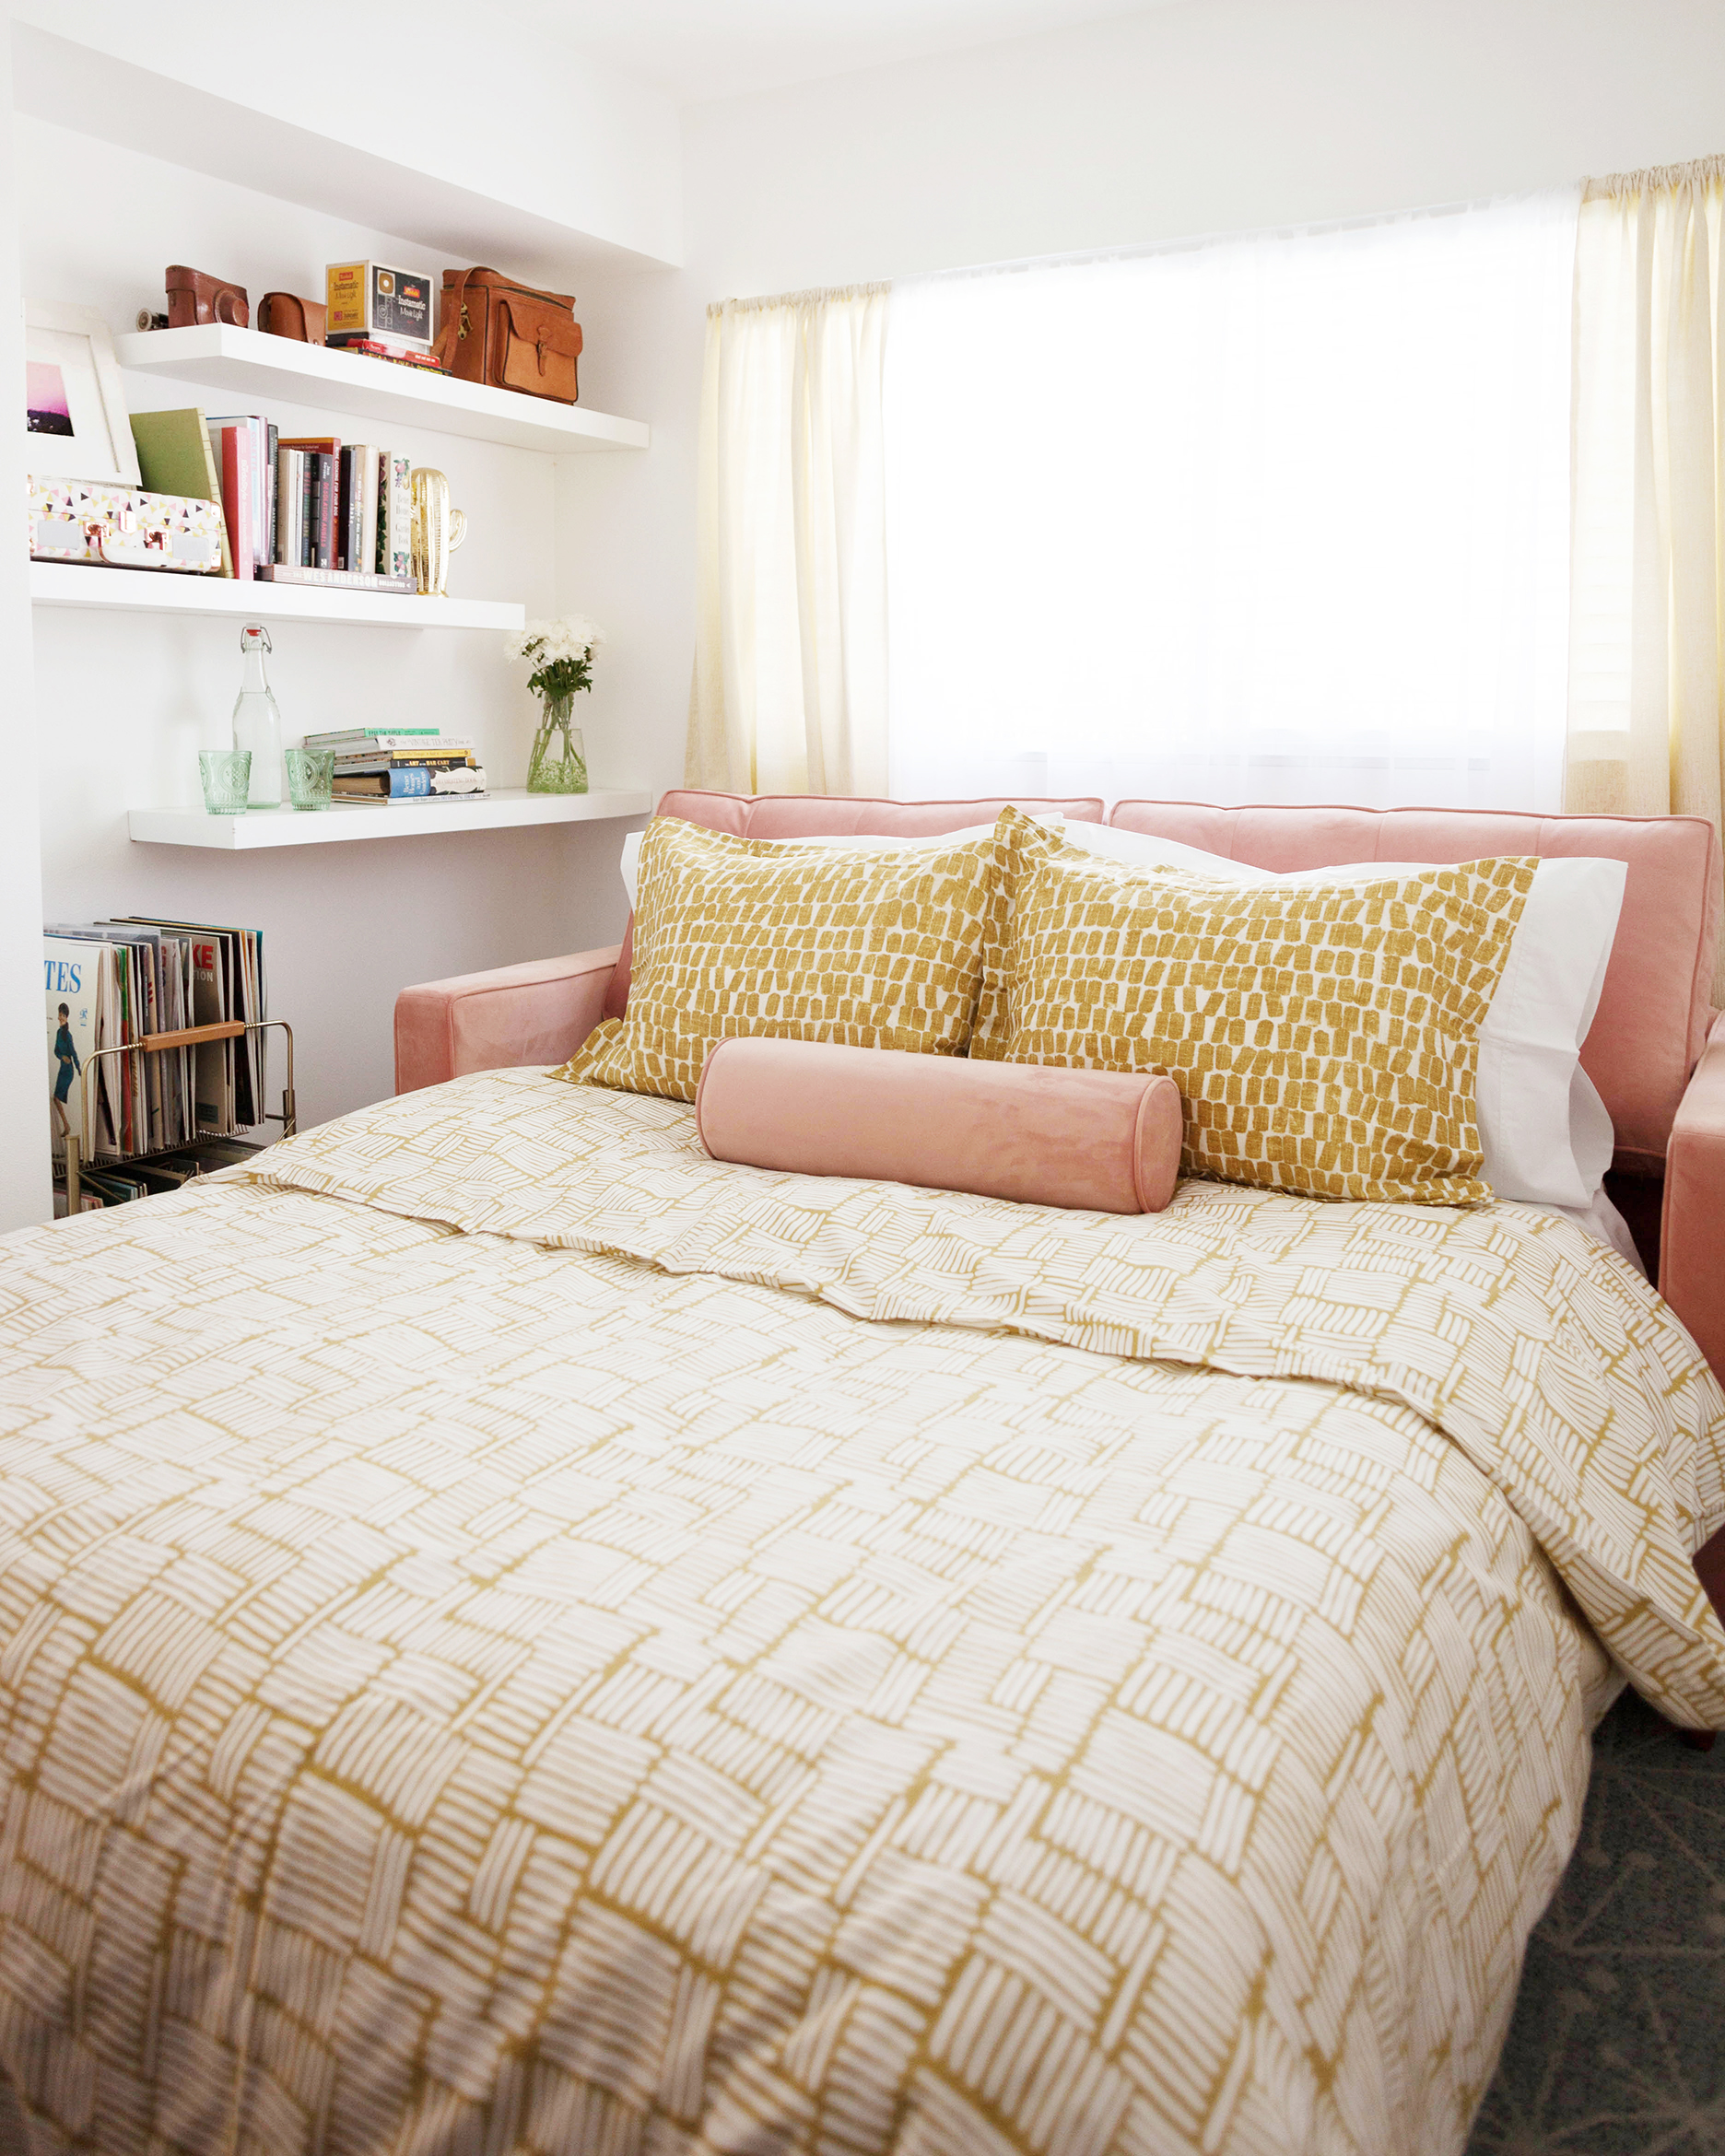 The whole set up feels like a nice hotel suite which is always my goal when I set up for guests. Hey, I might just sleep in here myself tonight!
This post was sponsored by Cstudio Home.

When I was gathering decorations for my space age tree I knew I wanted to try and find some vintage or retro style colorful sputnik ornaments. Unfortunately my search game up empty for exactly what I was looking for in my price range, so I got crafty with an easy DIY version.
I gathered everything I needed from my local craft store including:
Mini wooden dowels
Metallic round beads (the dowels should fit perfectly into the bead)
Glitter Styrofoam Ball Vase Filler
Metallic washi tape
Metallic embroidery thread
Craft glue

First create a loop with a piece of embroidery thread and insert both ends through the bead opening. Next, insert the mini wooden dowel into the bead opening. This should hold the thread in place.
Then wrap the wooden dowel in metallic washi tape. The best way to do this is cut strips the length of the dowel and wrap it lengthwise like you’re rolling a j….nevermind you get the idea ;).
Finally dip the end of the dowel into craft glue and insert the dowels into the styrofoam ball in a sputnik type pattern.
 You’ll end up with ornaments like this!
Told you it was easy! Get creative with colors and patterns! Be sure to tag me at @melodrama or use the hashtag #krysmasgram on Instagram to show me your creations!
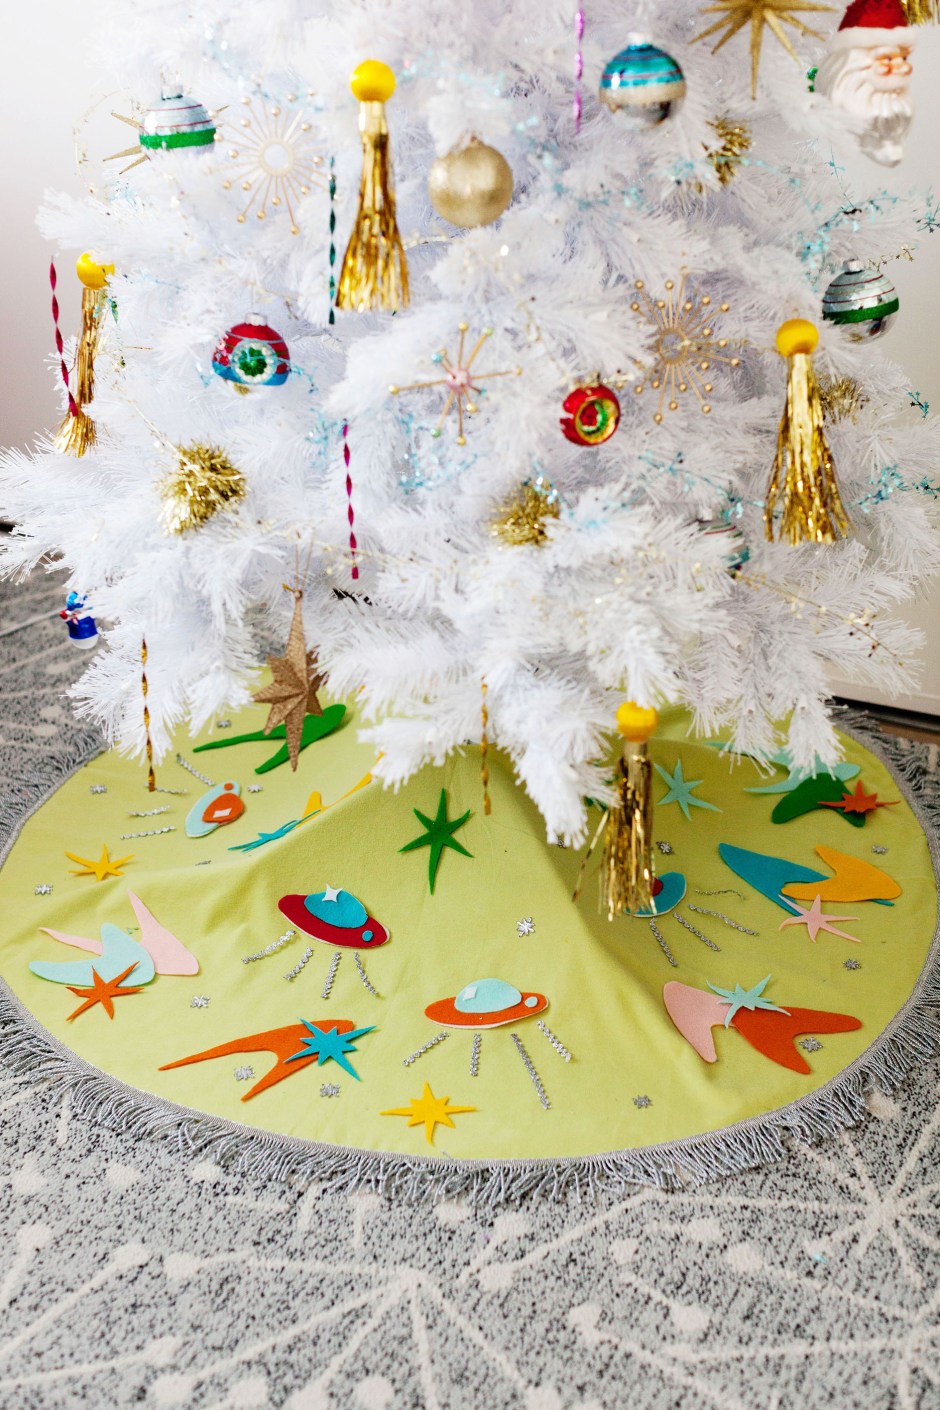
One of my favorite things to do each year is make new no-sew felt tree skirts. They’re super easy and fun to make and don’t require any skills except being able to use scissors and glue. You can see past tutorials with measurements and instructions here and here.
This year I needed something to match my office’s retro space age theme, so I used flying saucers and atomic shapes like boomerangs and starbursts.
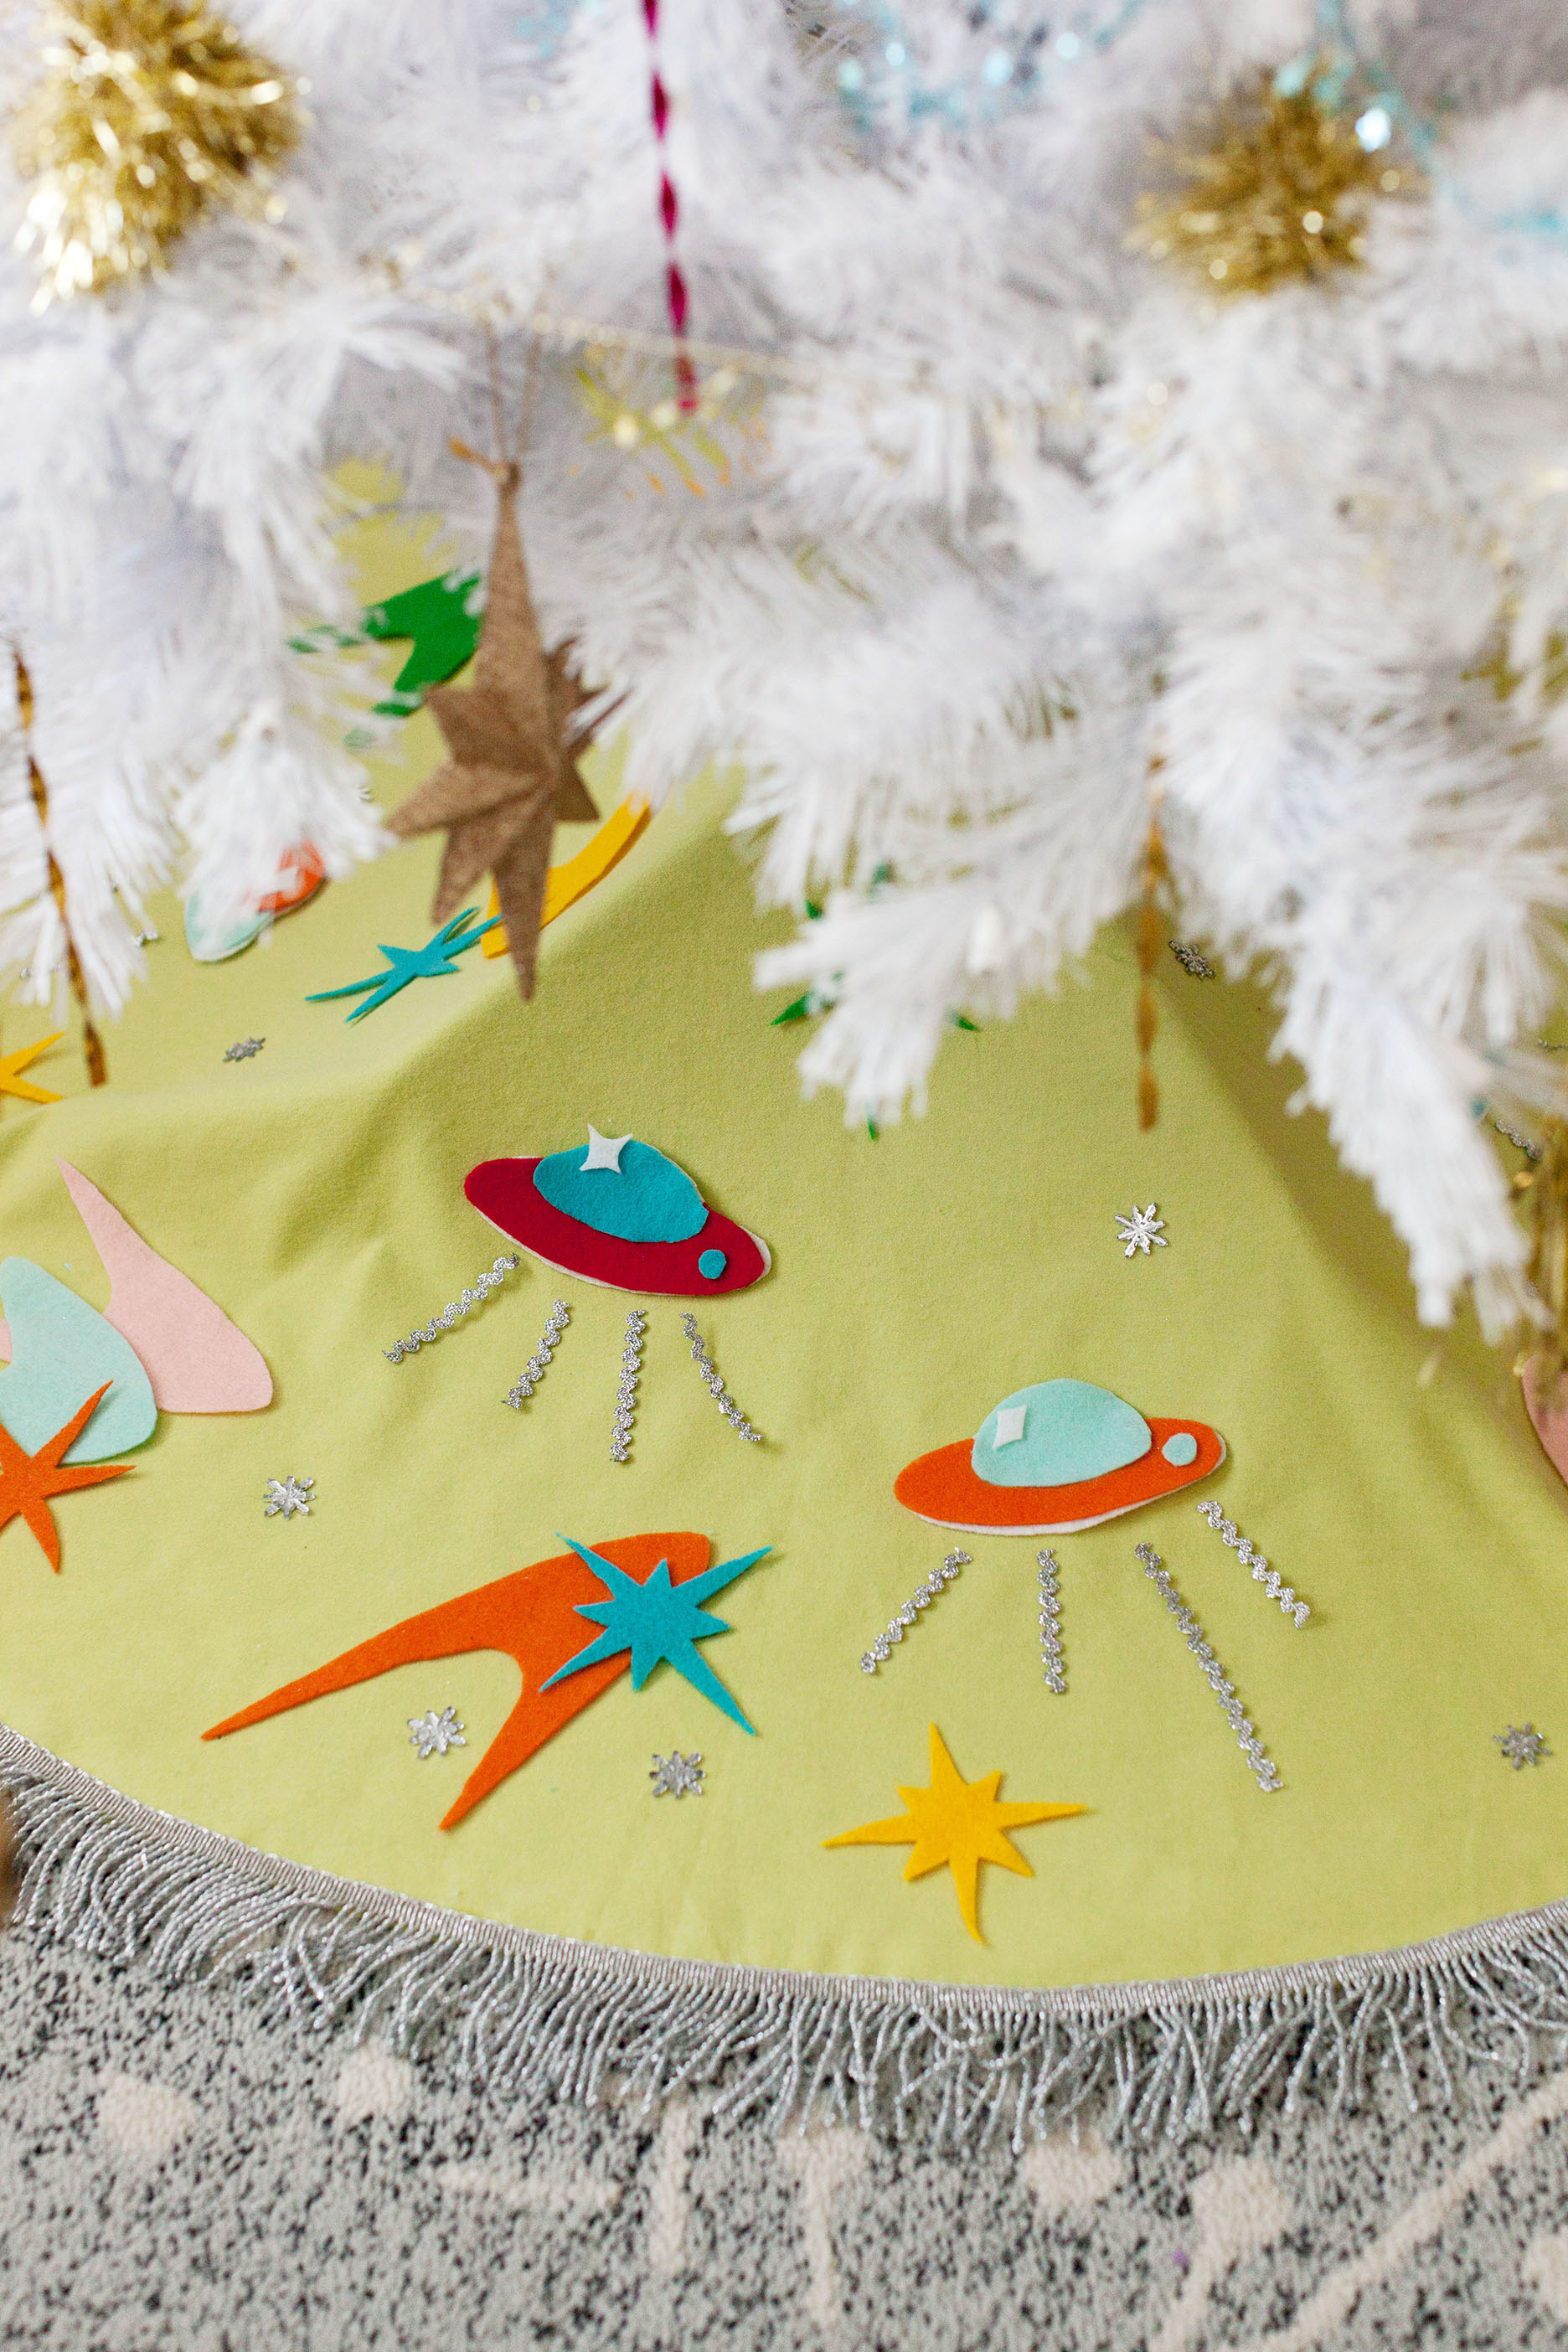
I used the method detailed here to cut my skirt out of green felt. Then I cut my shapes out of sheets of different colored felts. I used silver metallic rick rack to add rays to my flying saucers and shiny snowflake starburst buttons for a little extra shine. I finished off the edges with silver metallic fringe! I always use standard craft glue to adhere all of it.
Here are the shapes I used to make your felt cutting life a little easier! Print on a standard piece of paper. (Opt to scale to fit paper on your print settings if possible.)
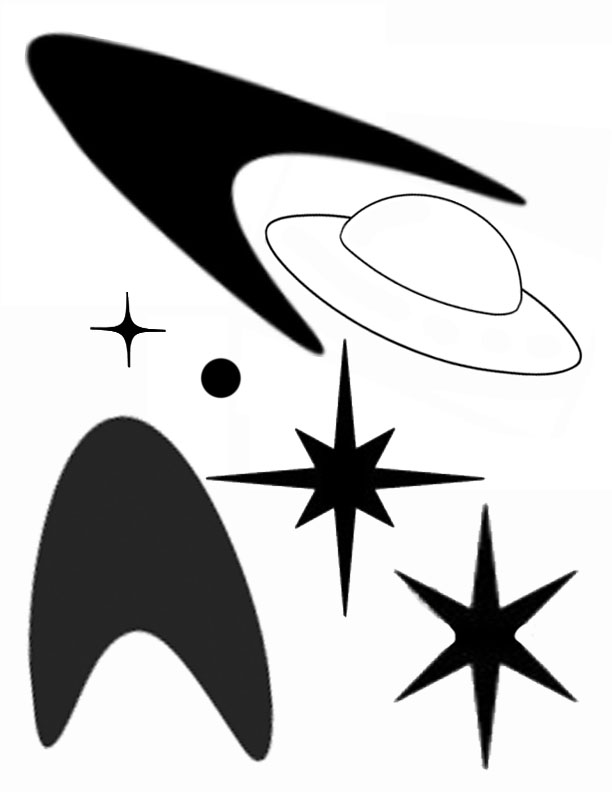
Tada! 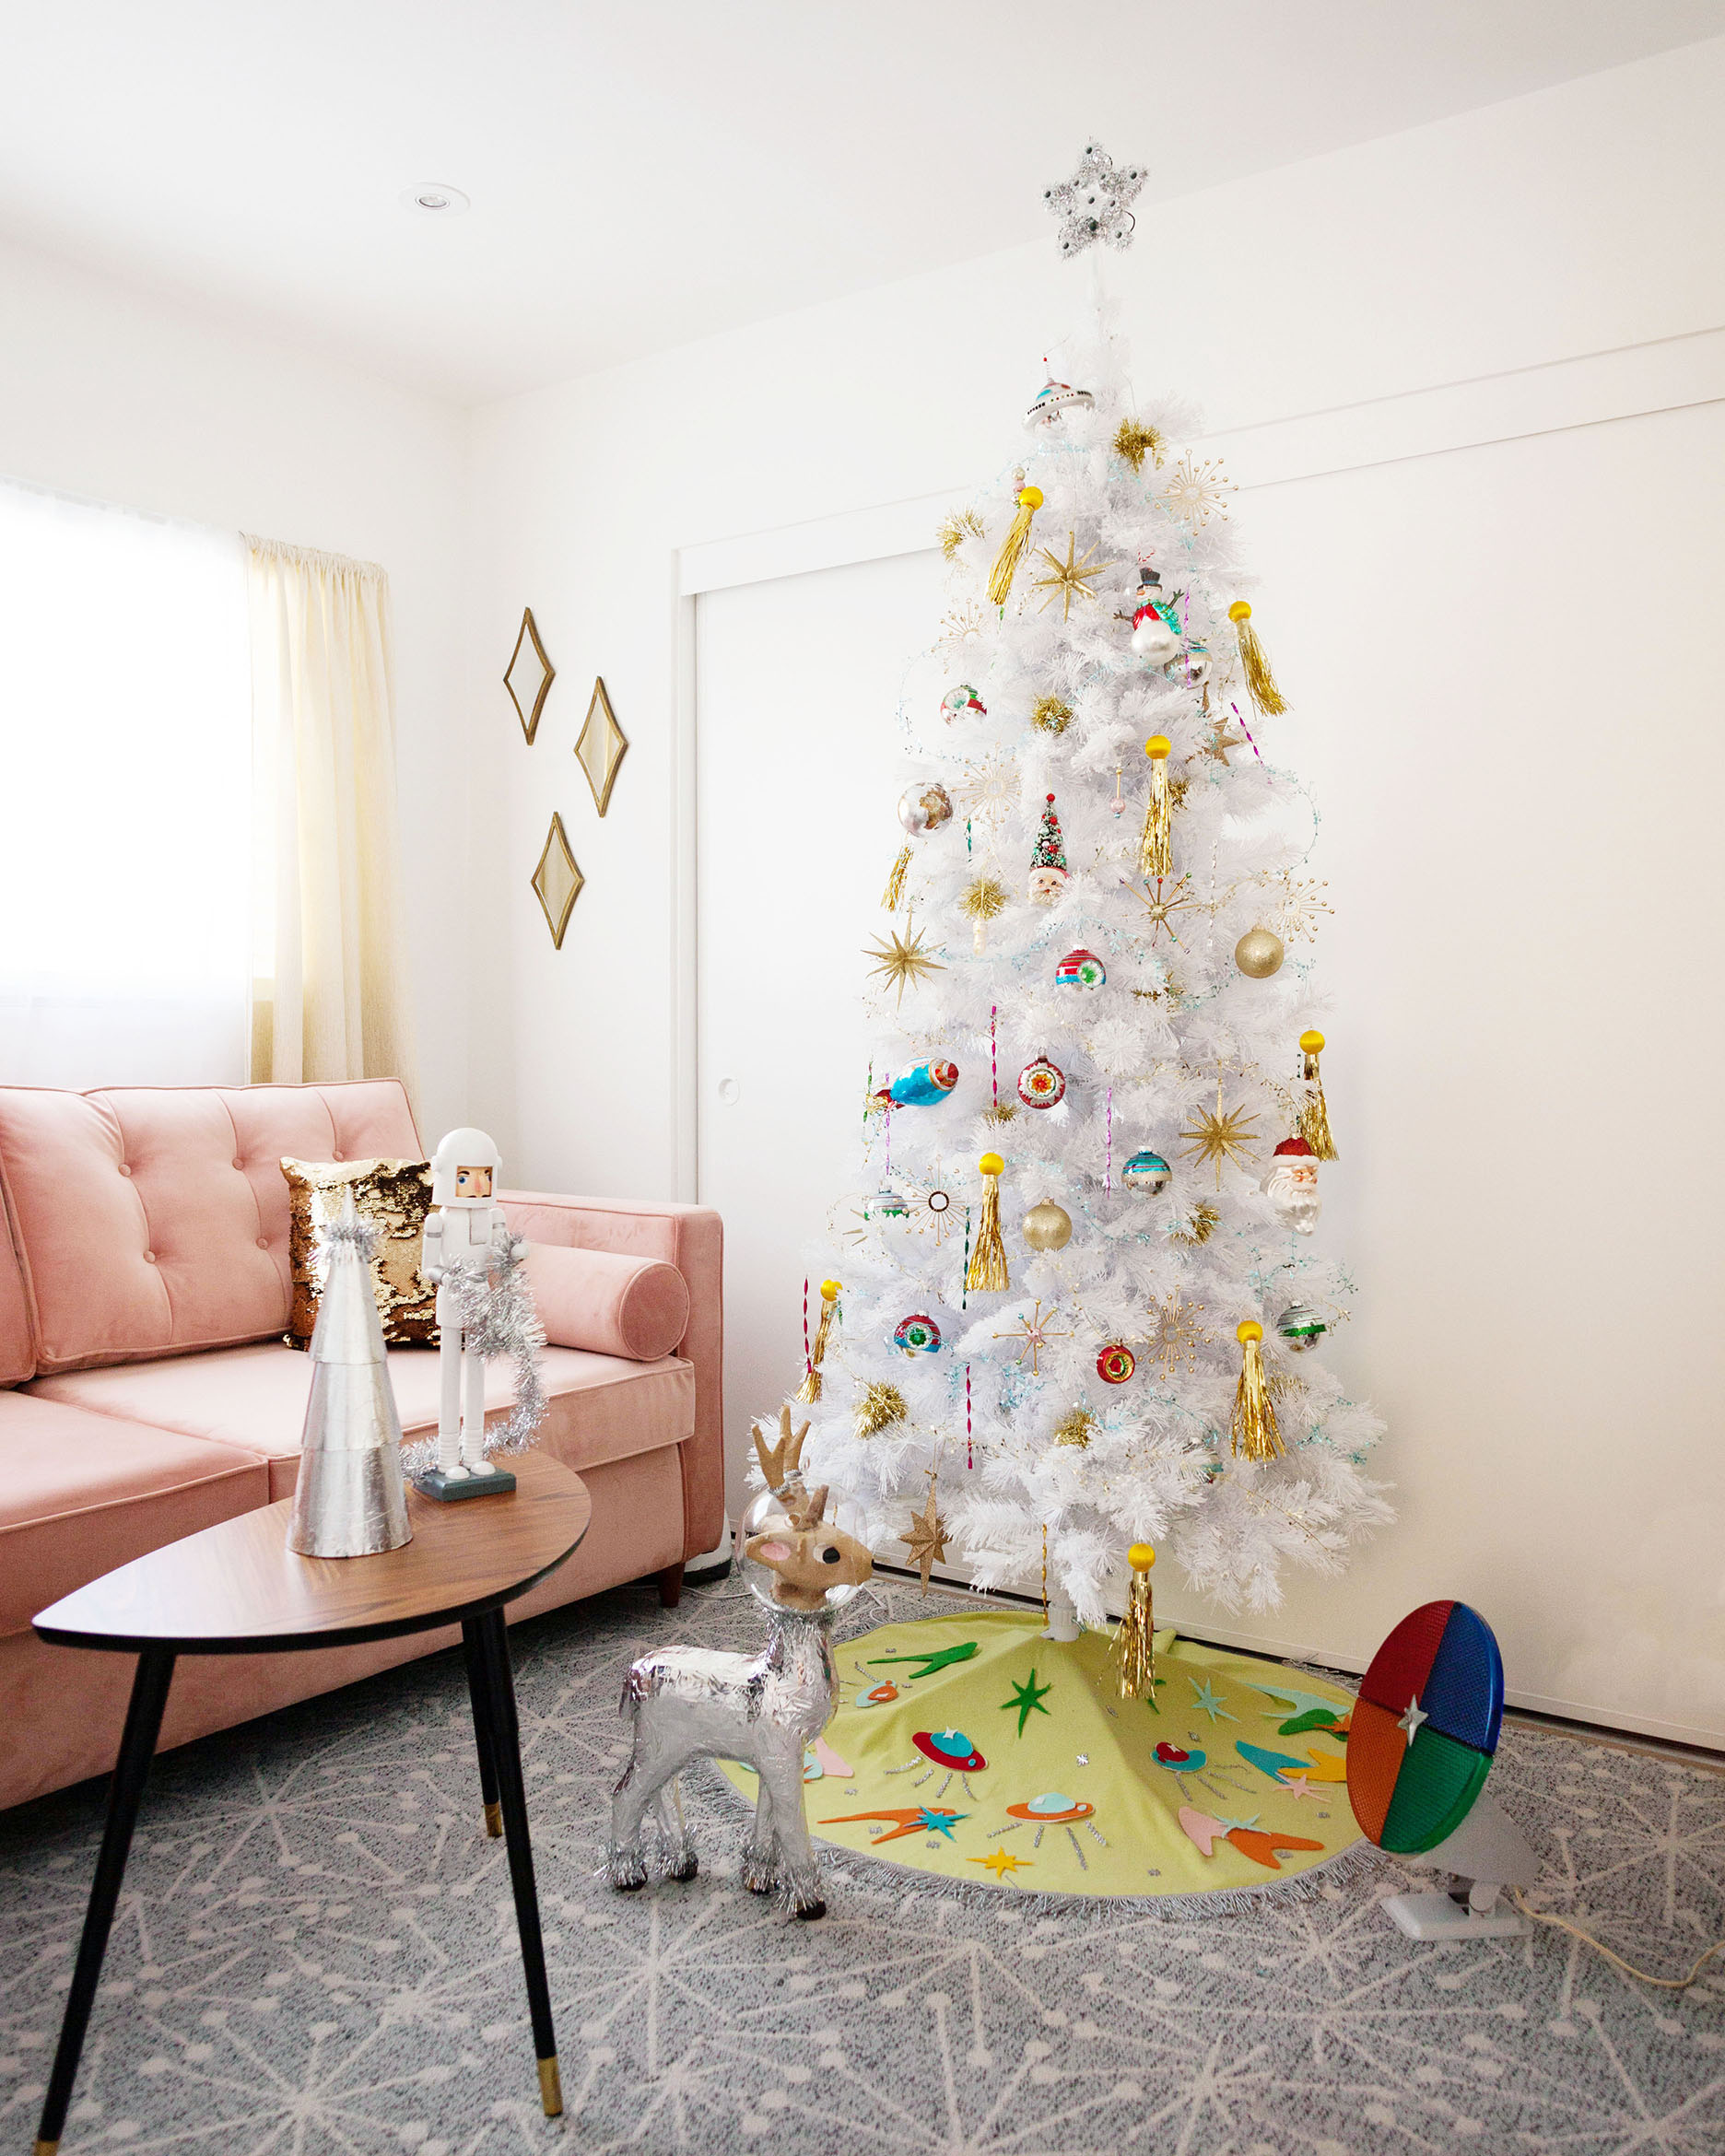
Make sure to tag @melodrama or use the hashtag #krysmasgram on Instagram to show me your creations!
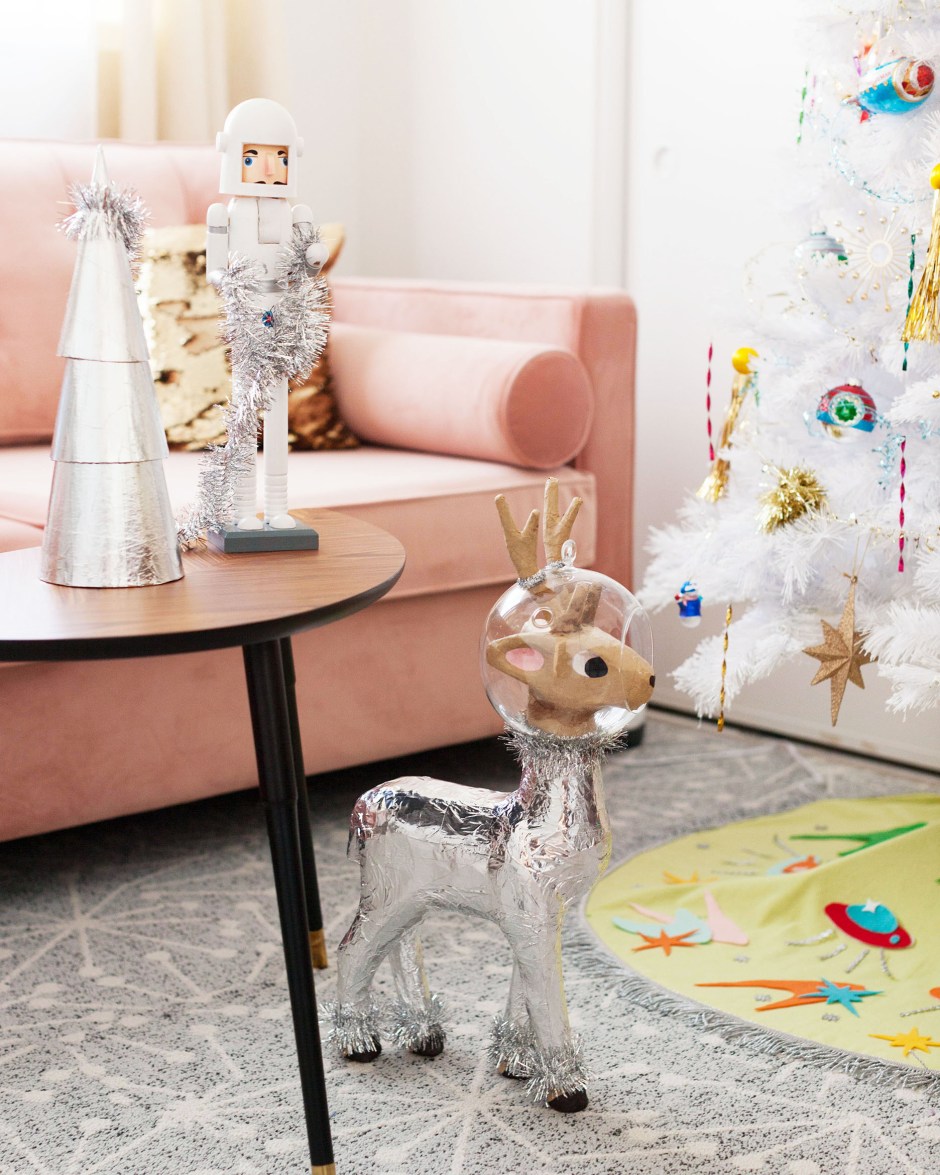
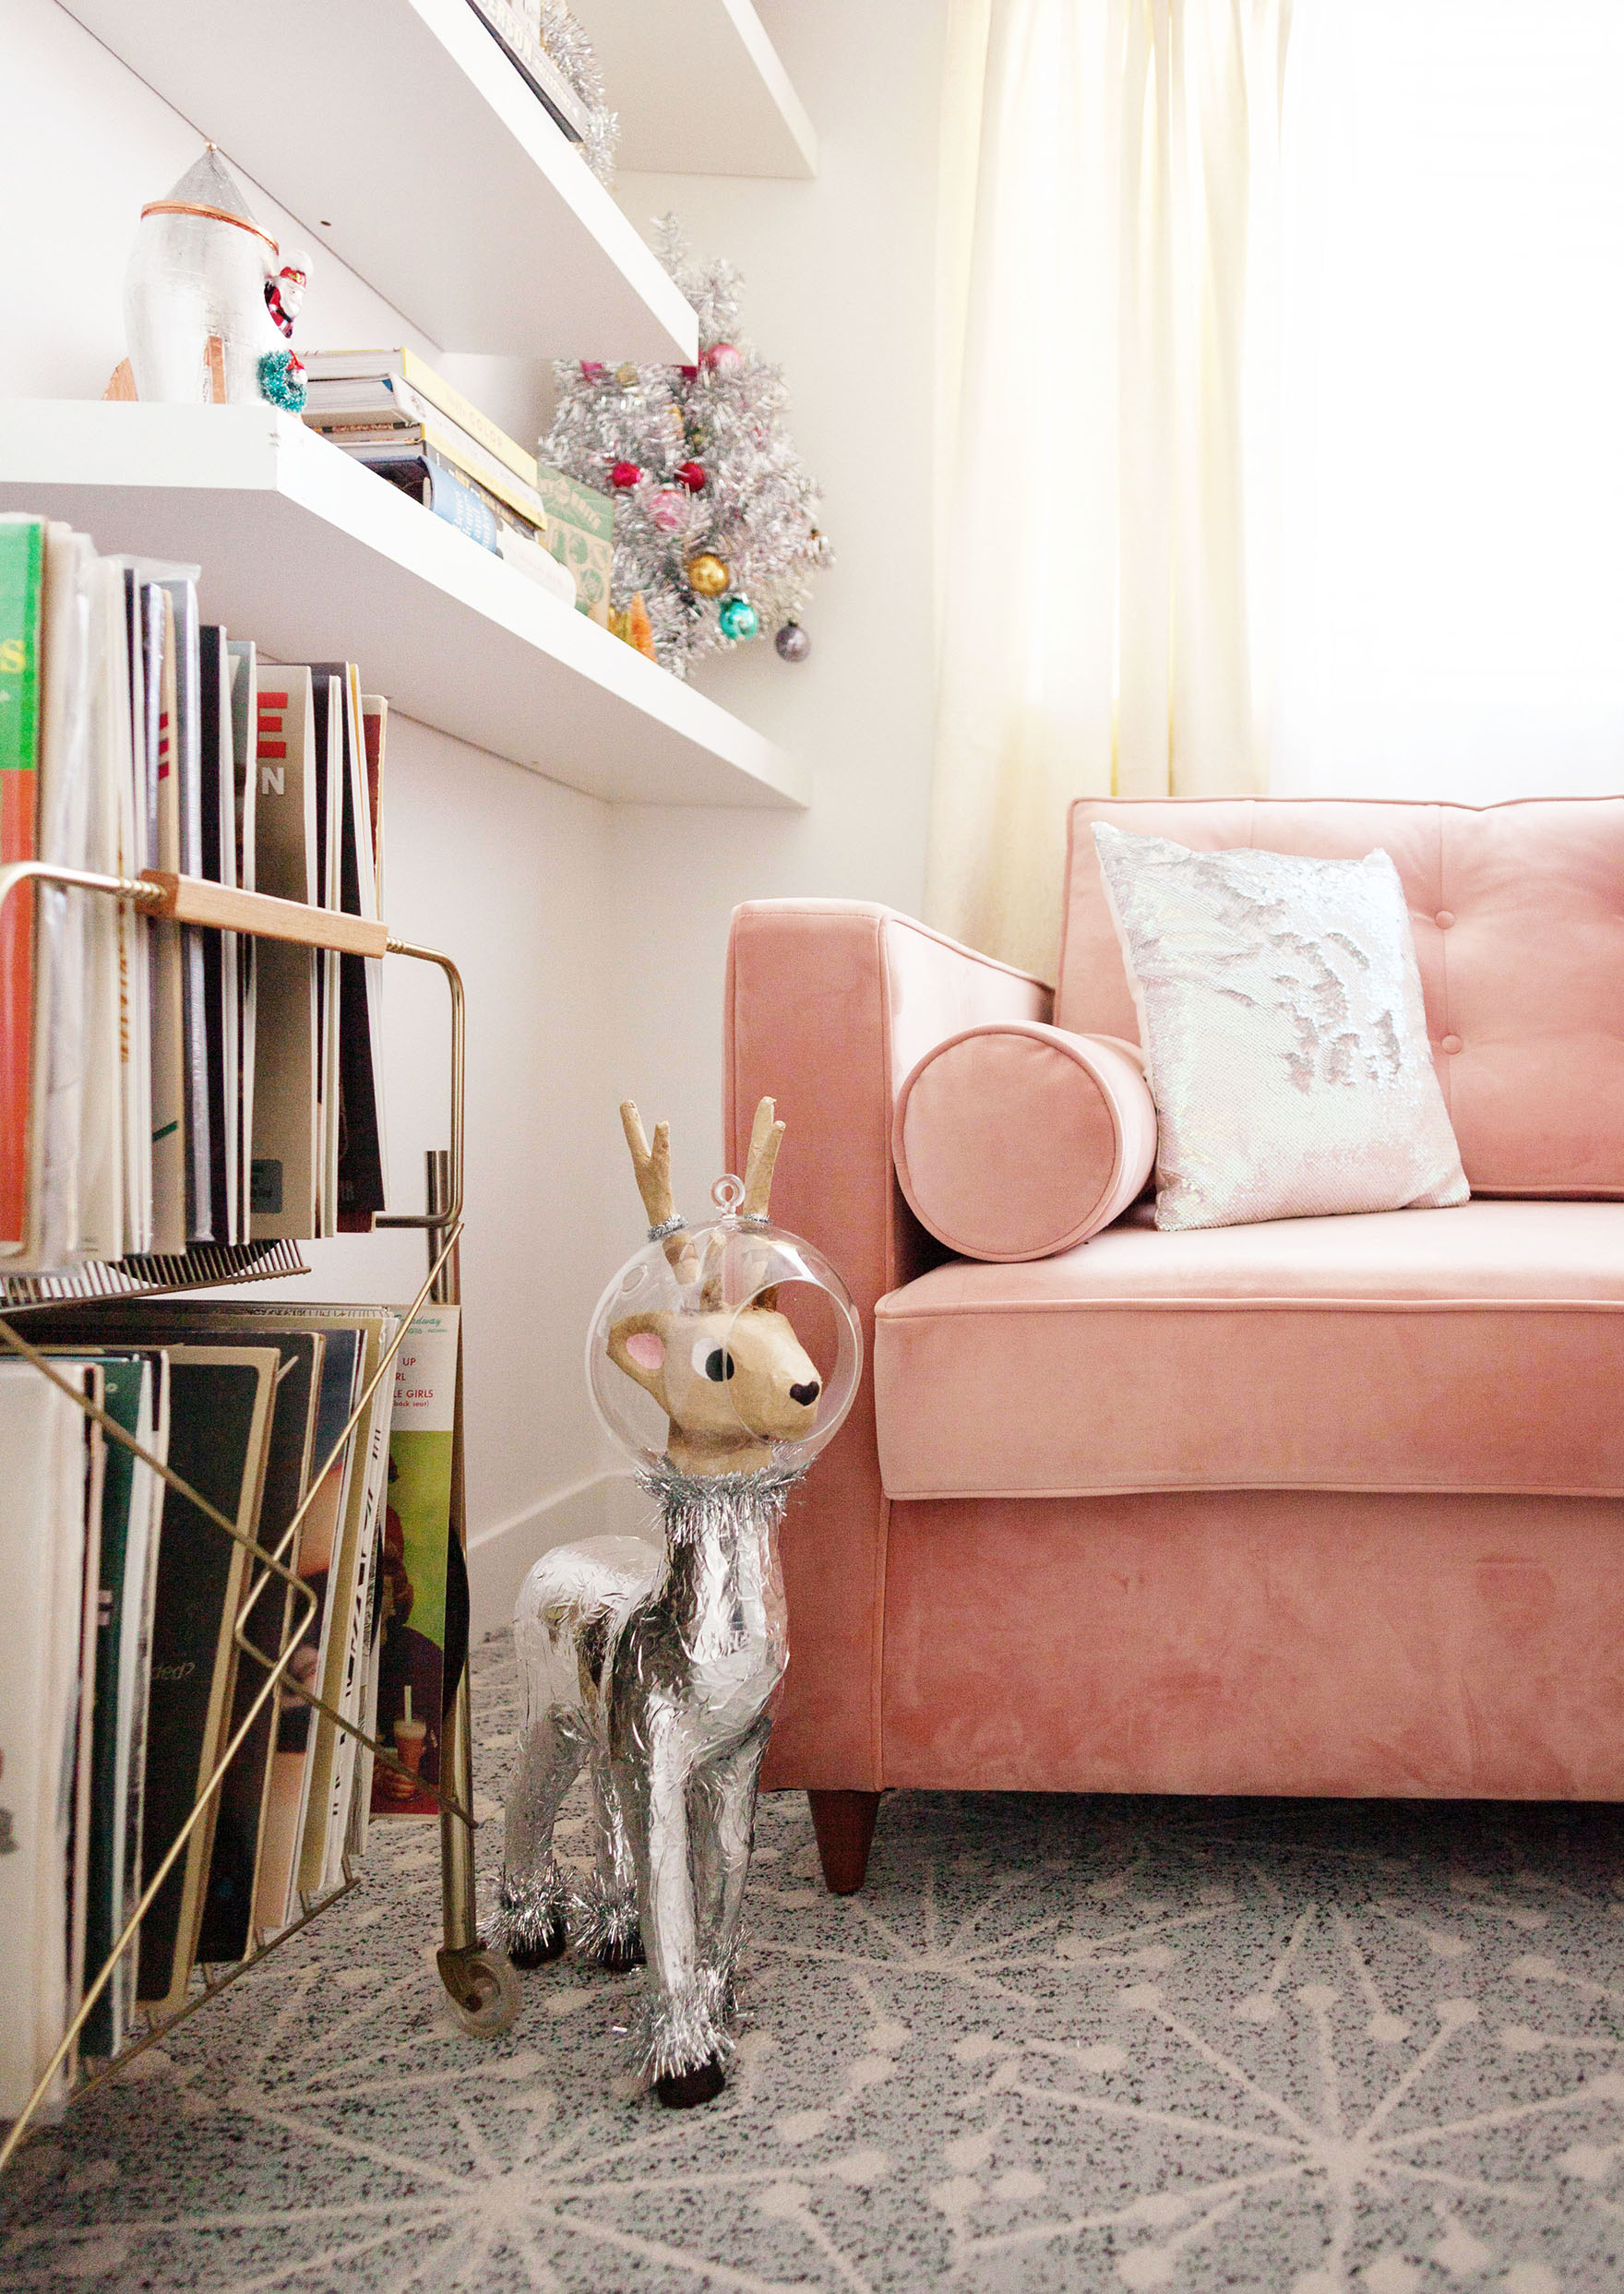
As you saw from my previous post I went full on atomic space age for my home office. I had to do a few DIYs to make it exactly what I wanted it to be, but my favorite is probably this astrodeer!
This project required some Frankenstein style surgery, but I’m really thrilled with the way it turned out. Here’s what I did!
Supplies
Paper Mache Deer
6.5″ Round Glass Terrarium
Aluminum Foil Tape
Utility Blade
Hot Glue
Craft Glue
Silver Tinsel Garland
Silver Tinsel Stems
Craft paper or paper bags
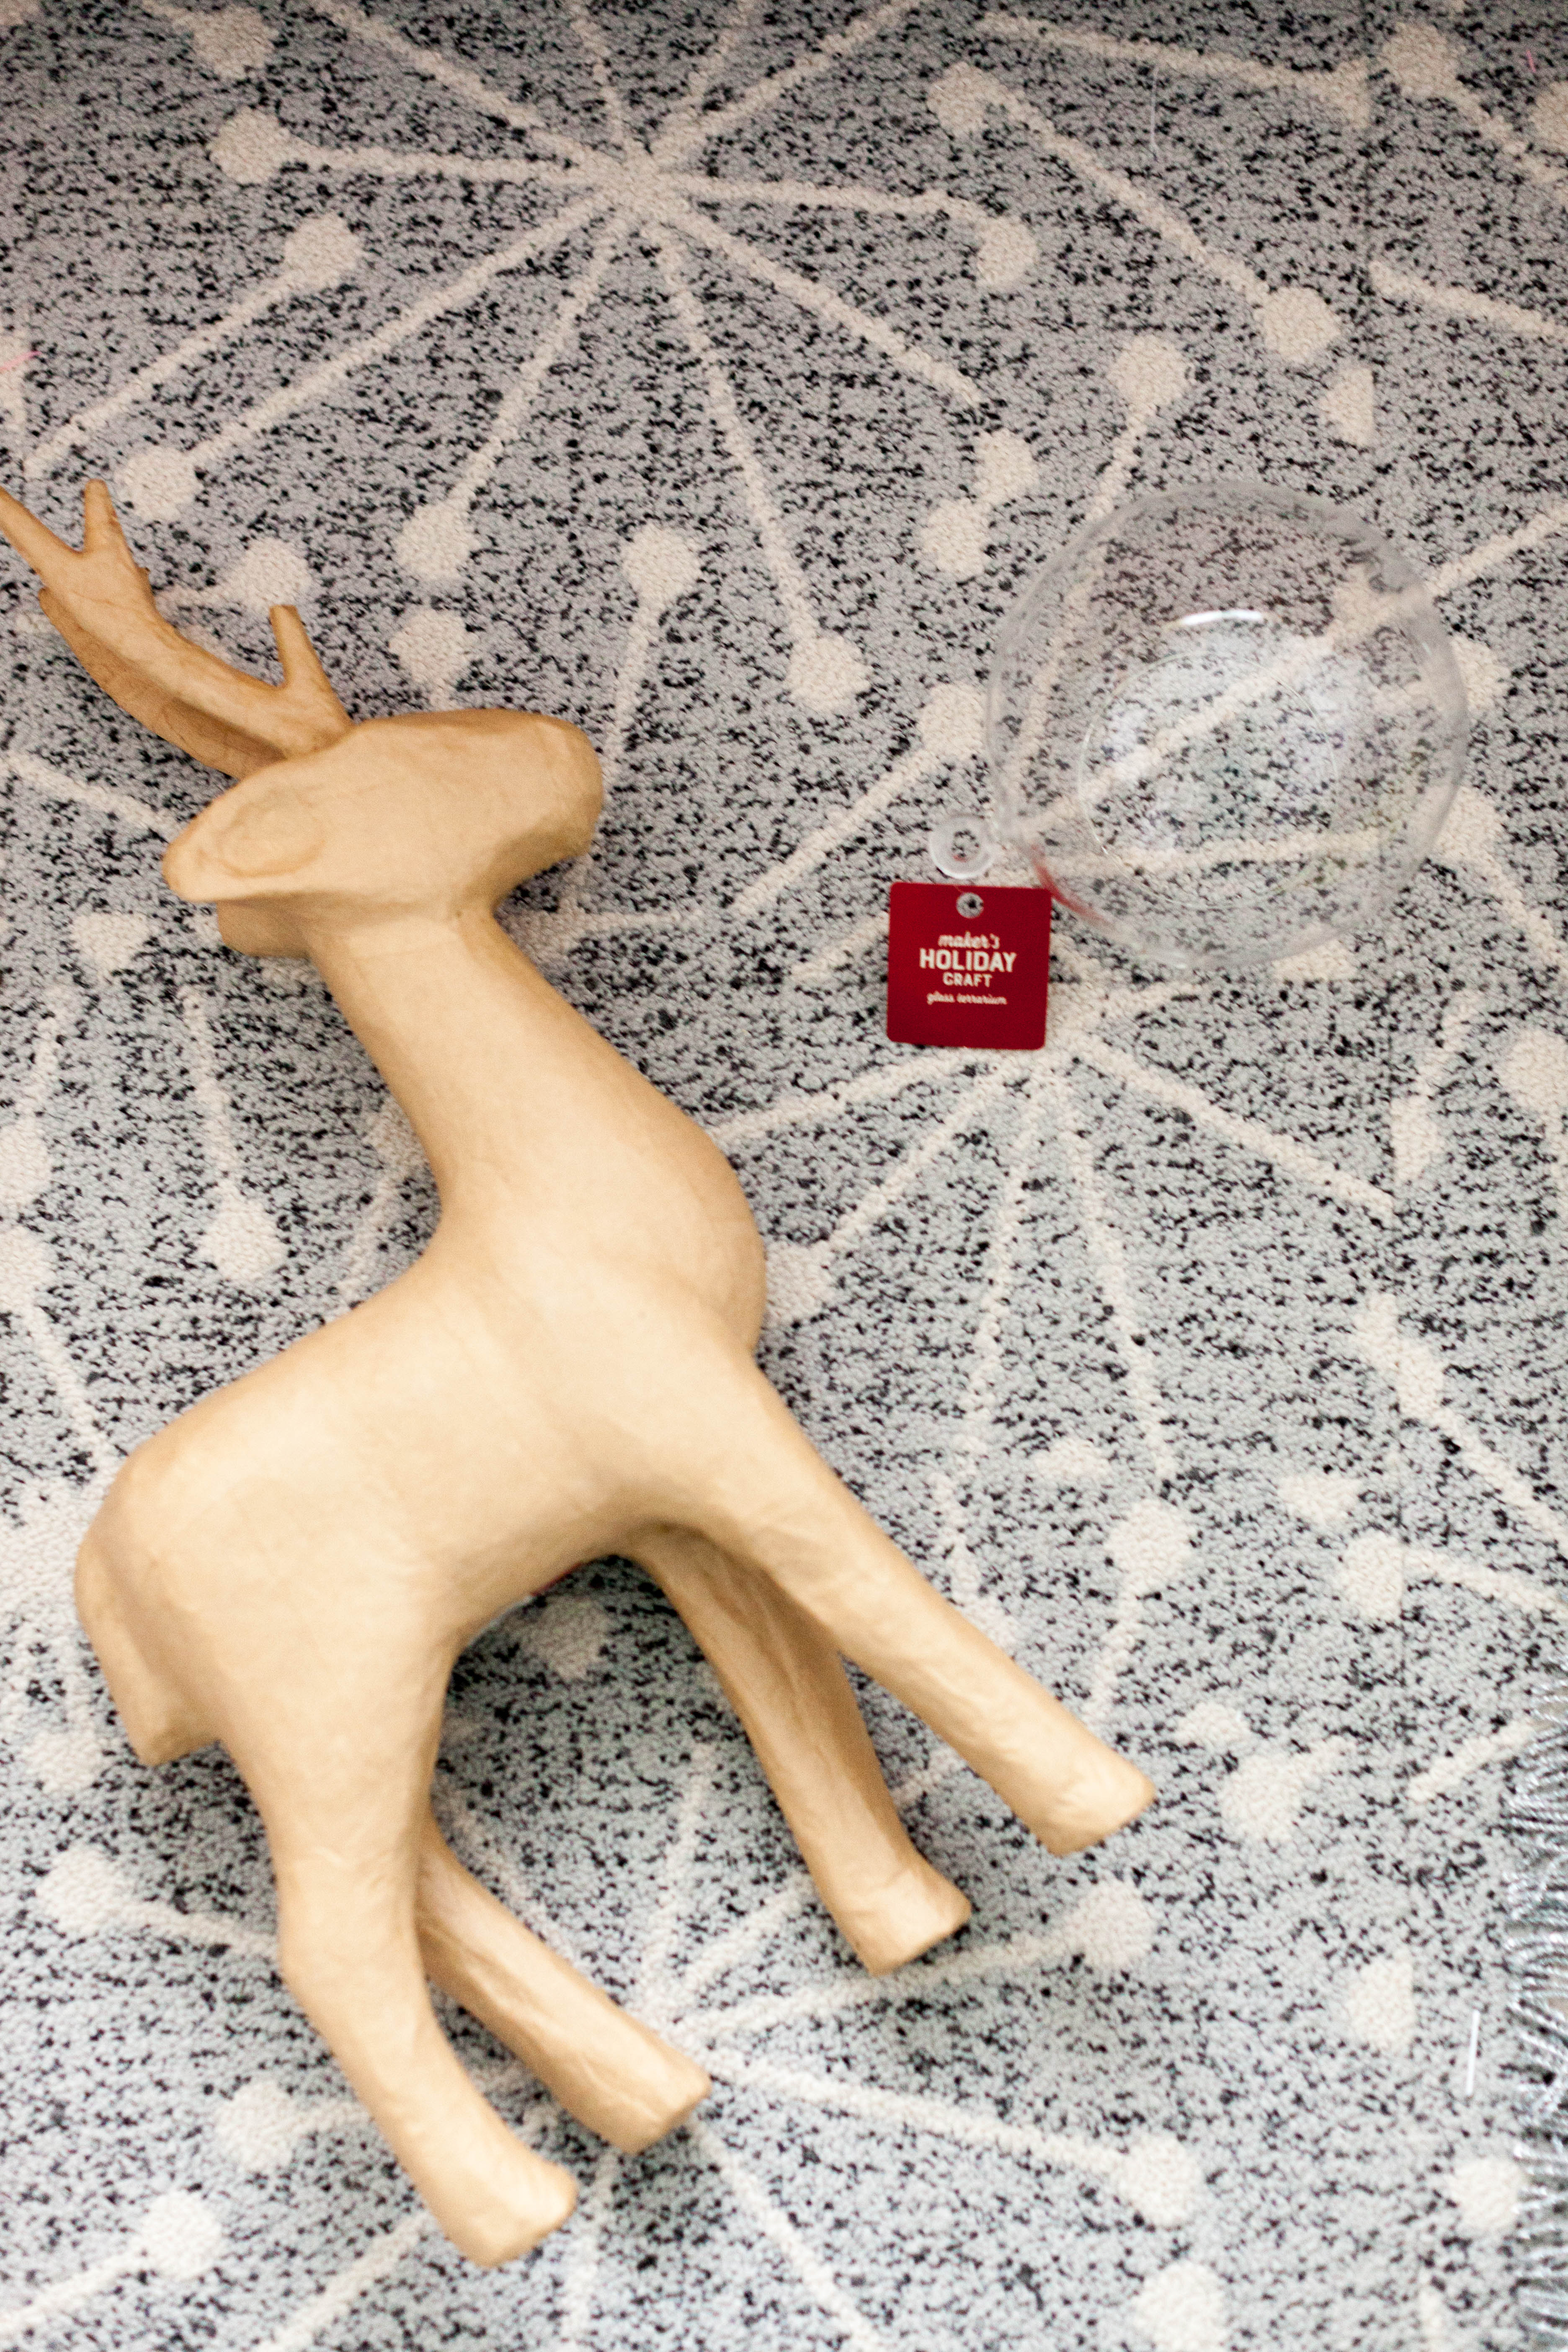 Ok I’m going to admit right now I didn’t take process photos because I’m the worst and I wasn’t even sure it was going to work, BUT luckily it’s a pretty straight forward process. (Note: I’m going to make one for a friend so I’ll try to update this post with photos when I do!)
In order to get the deer’s head into the terrarium, but still have the helmet in the position I wanted, I had to make cuts on the points shown below.
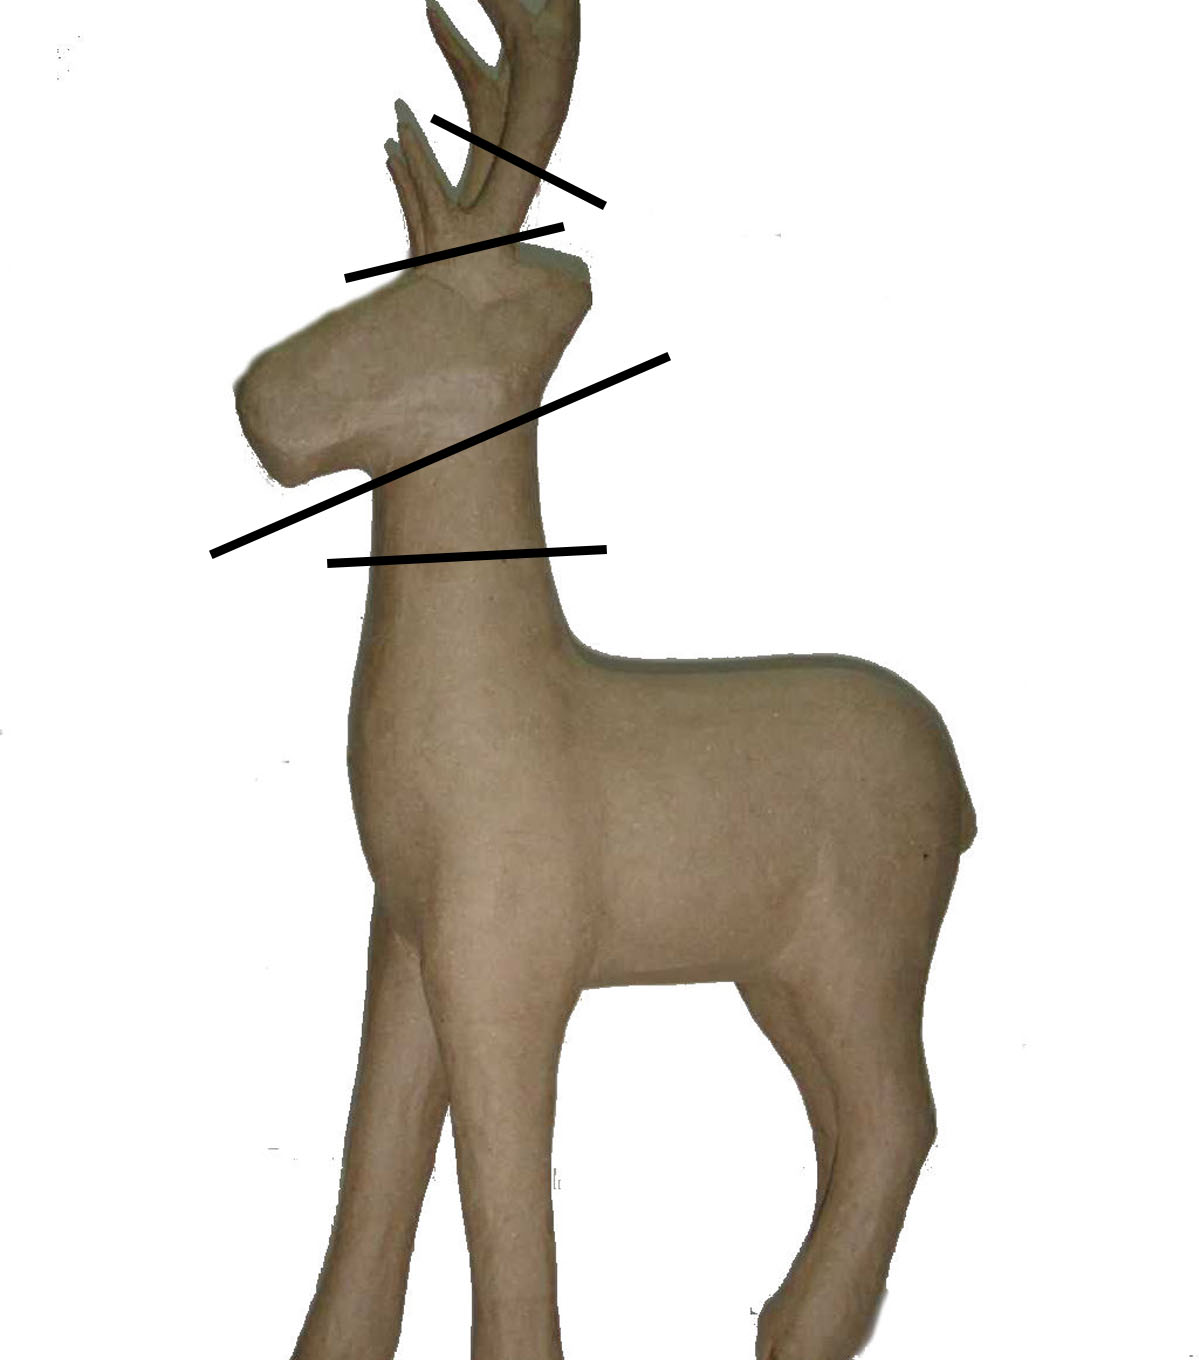
I added paper ears and eyes and placed the head in the terrarium. Once the head was in the terrarium (from here on known as the helmet) I reattached the bottom part of the antlers, and the upper part of the neck with craft glue and used chopsticks to help get where I had trouble reaching. Once it was dry, I used wet strips of paper bag and glue to cover the cut seams.
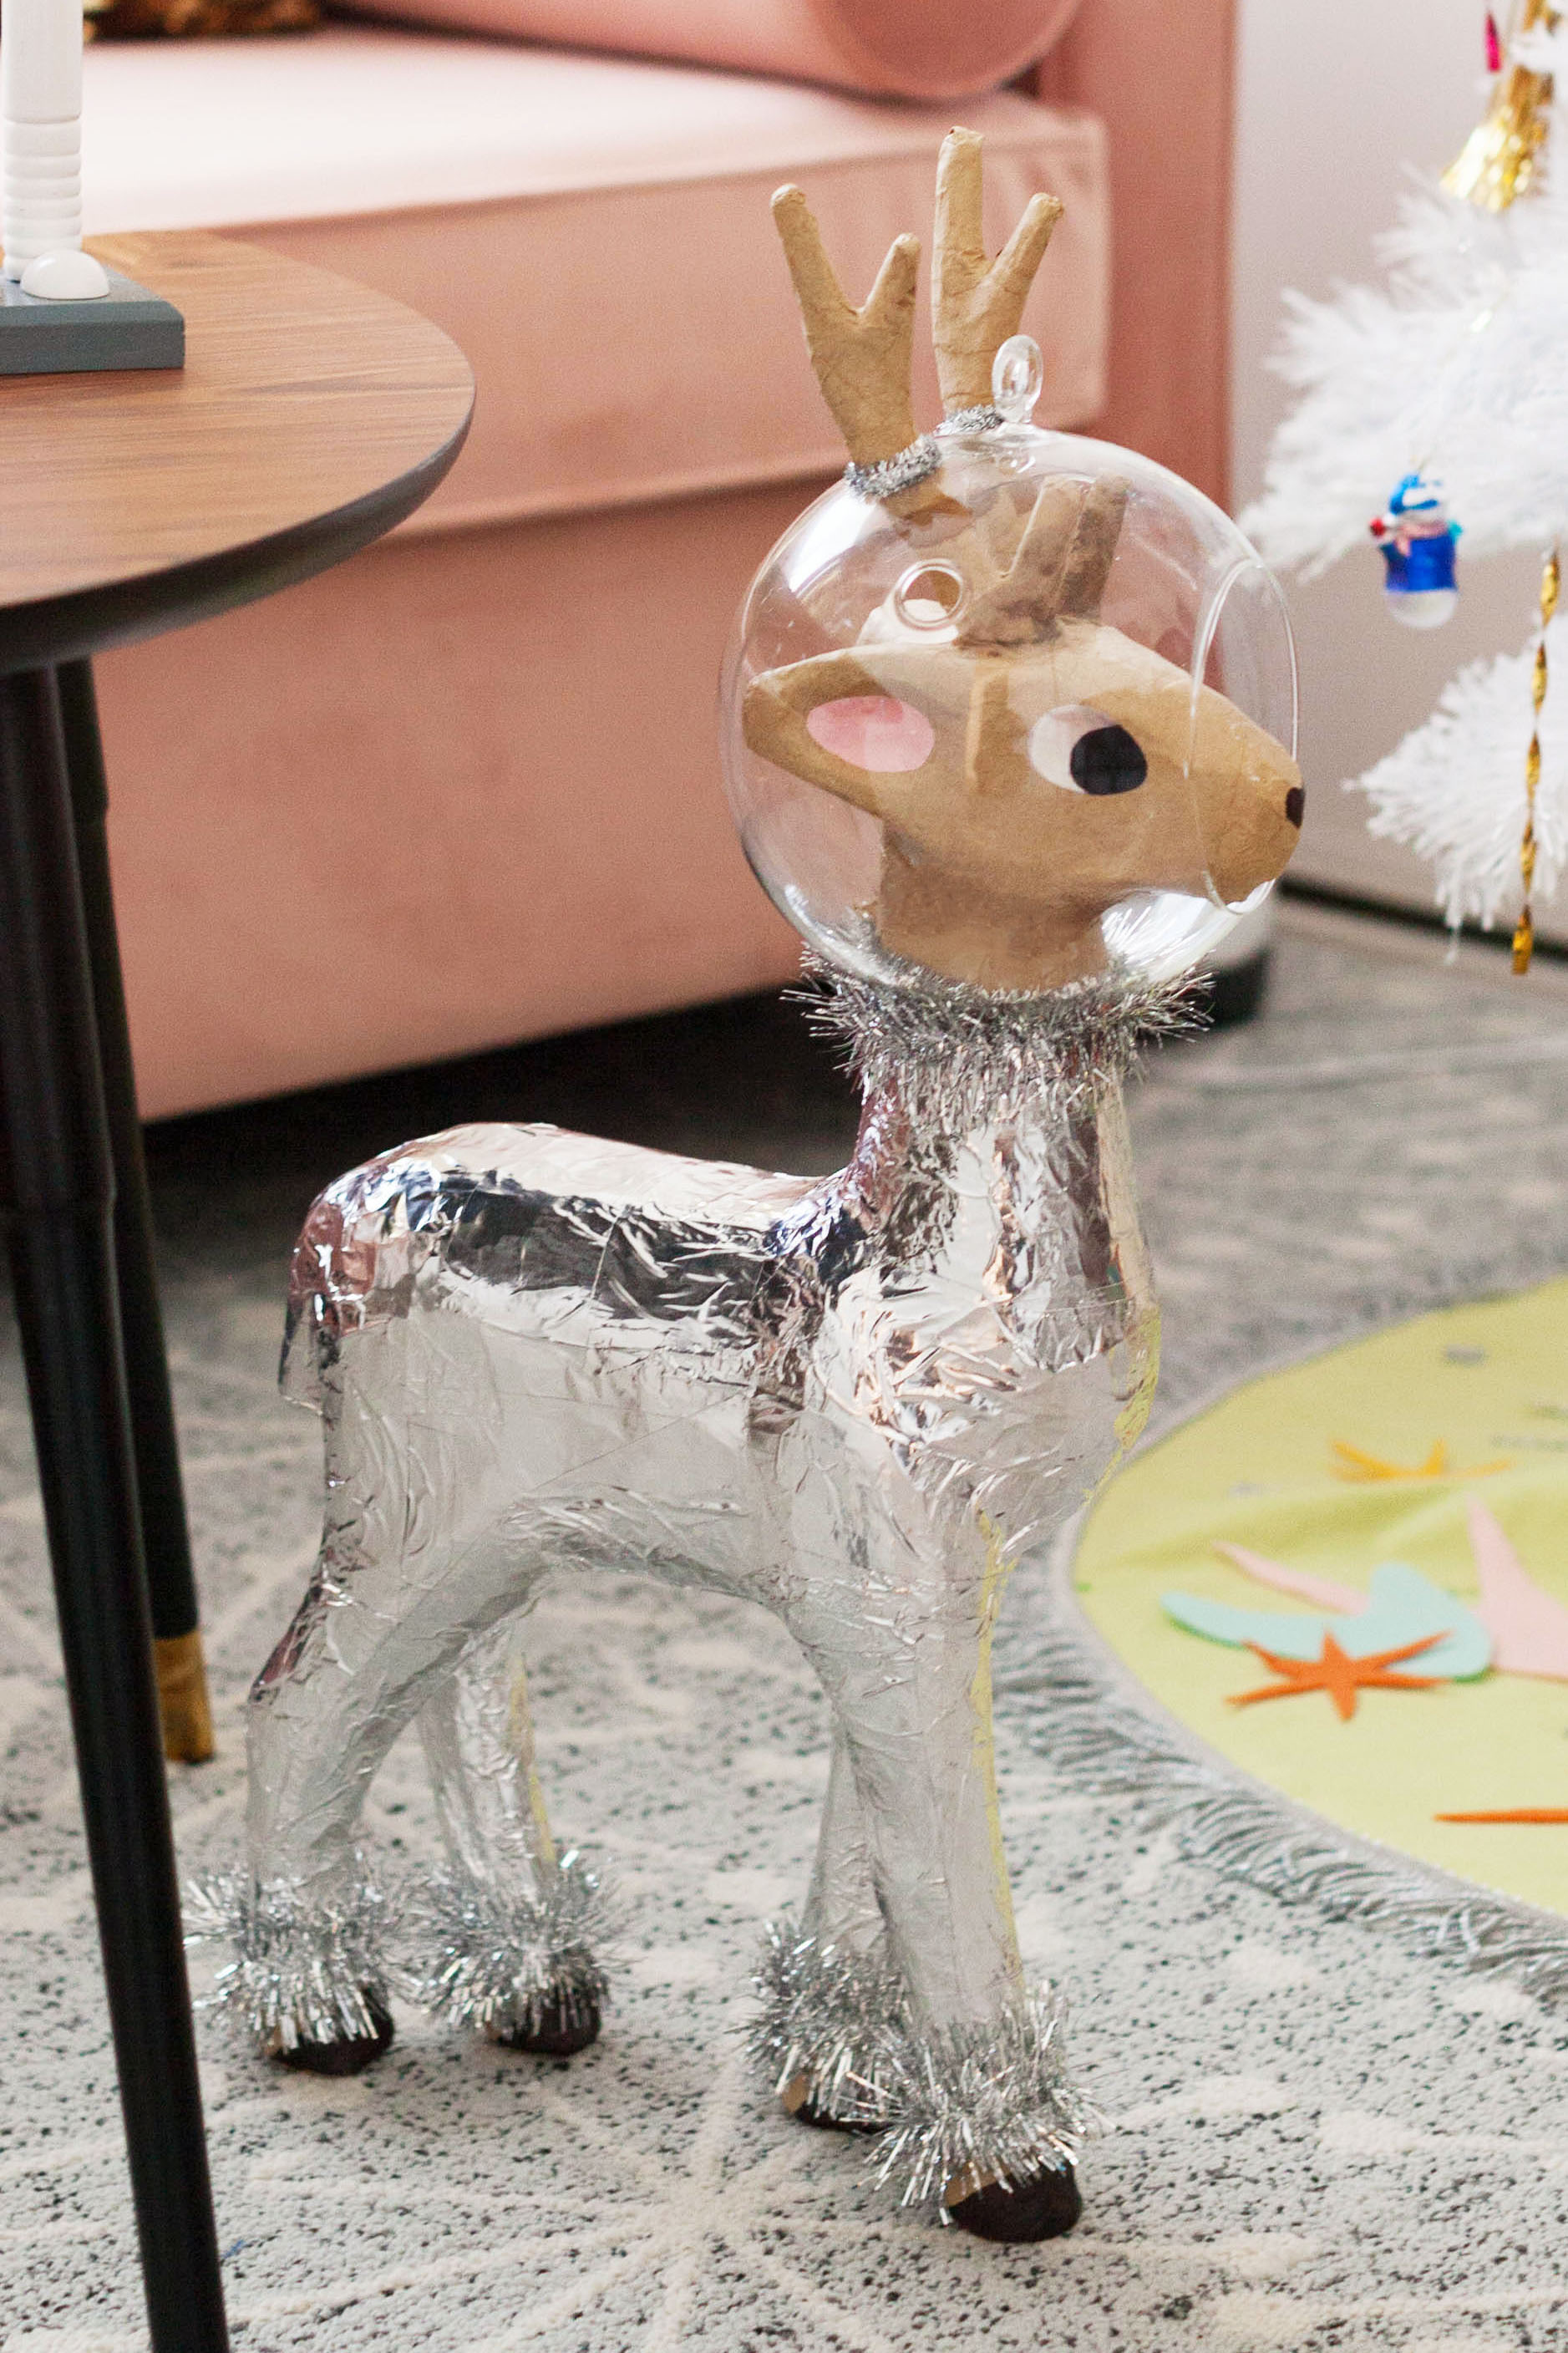
Then I used hot glue to attach the rest of the antler to the top of the helmet, and the helmet to body. I used a black sharpie to draw on the hooves and a nose, then I covered the body in foil tape, and covered all the glue joints with tinsel wire and garlands.
There it is! My new spacey pet. Isn’t he a cutie?
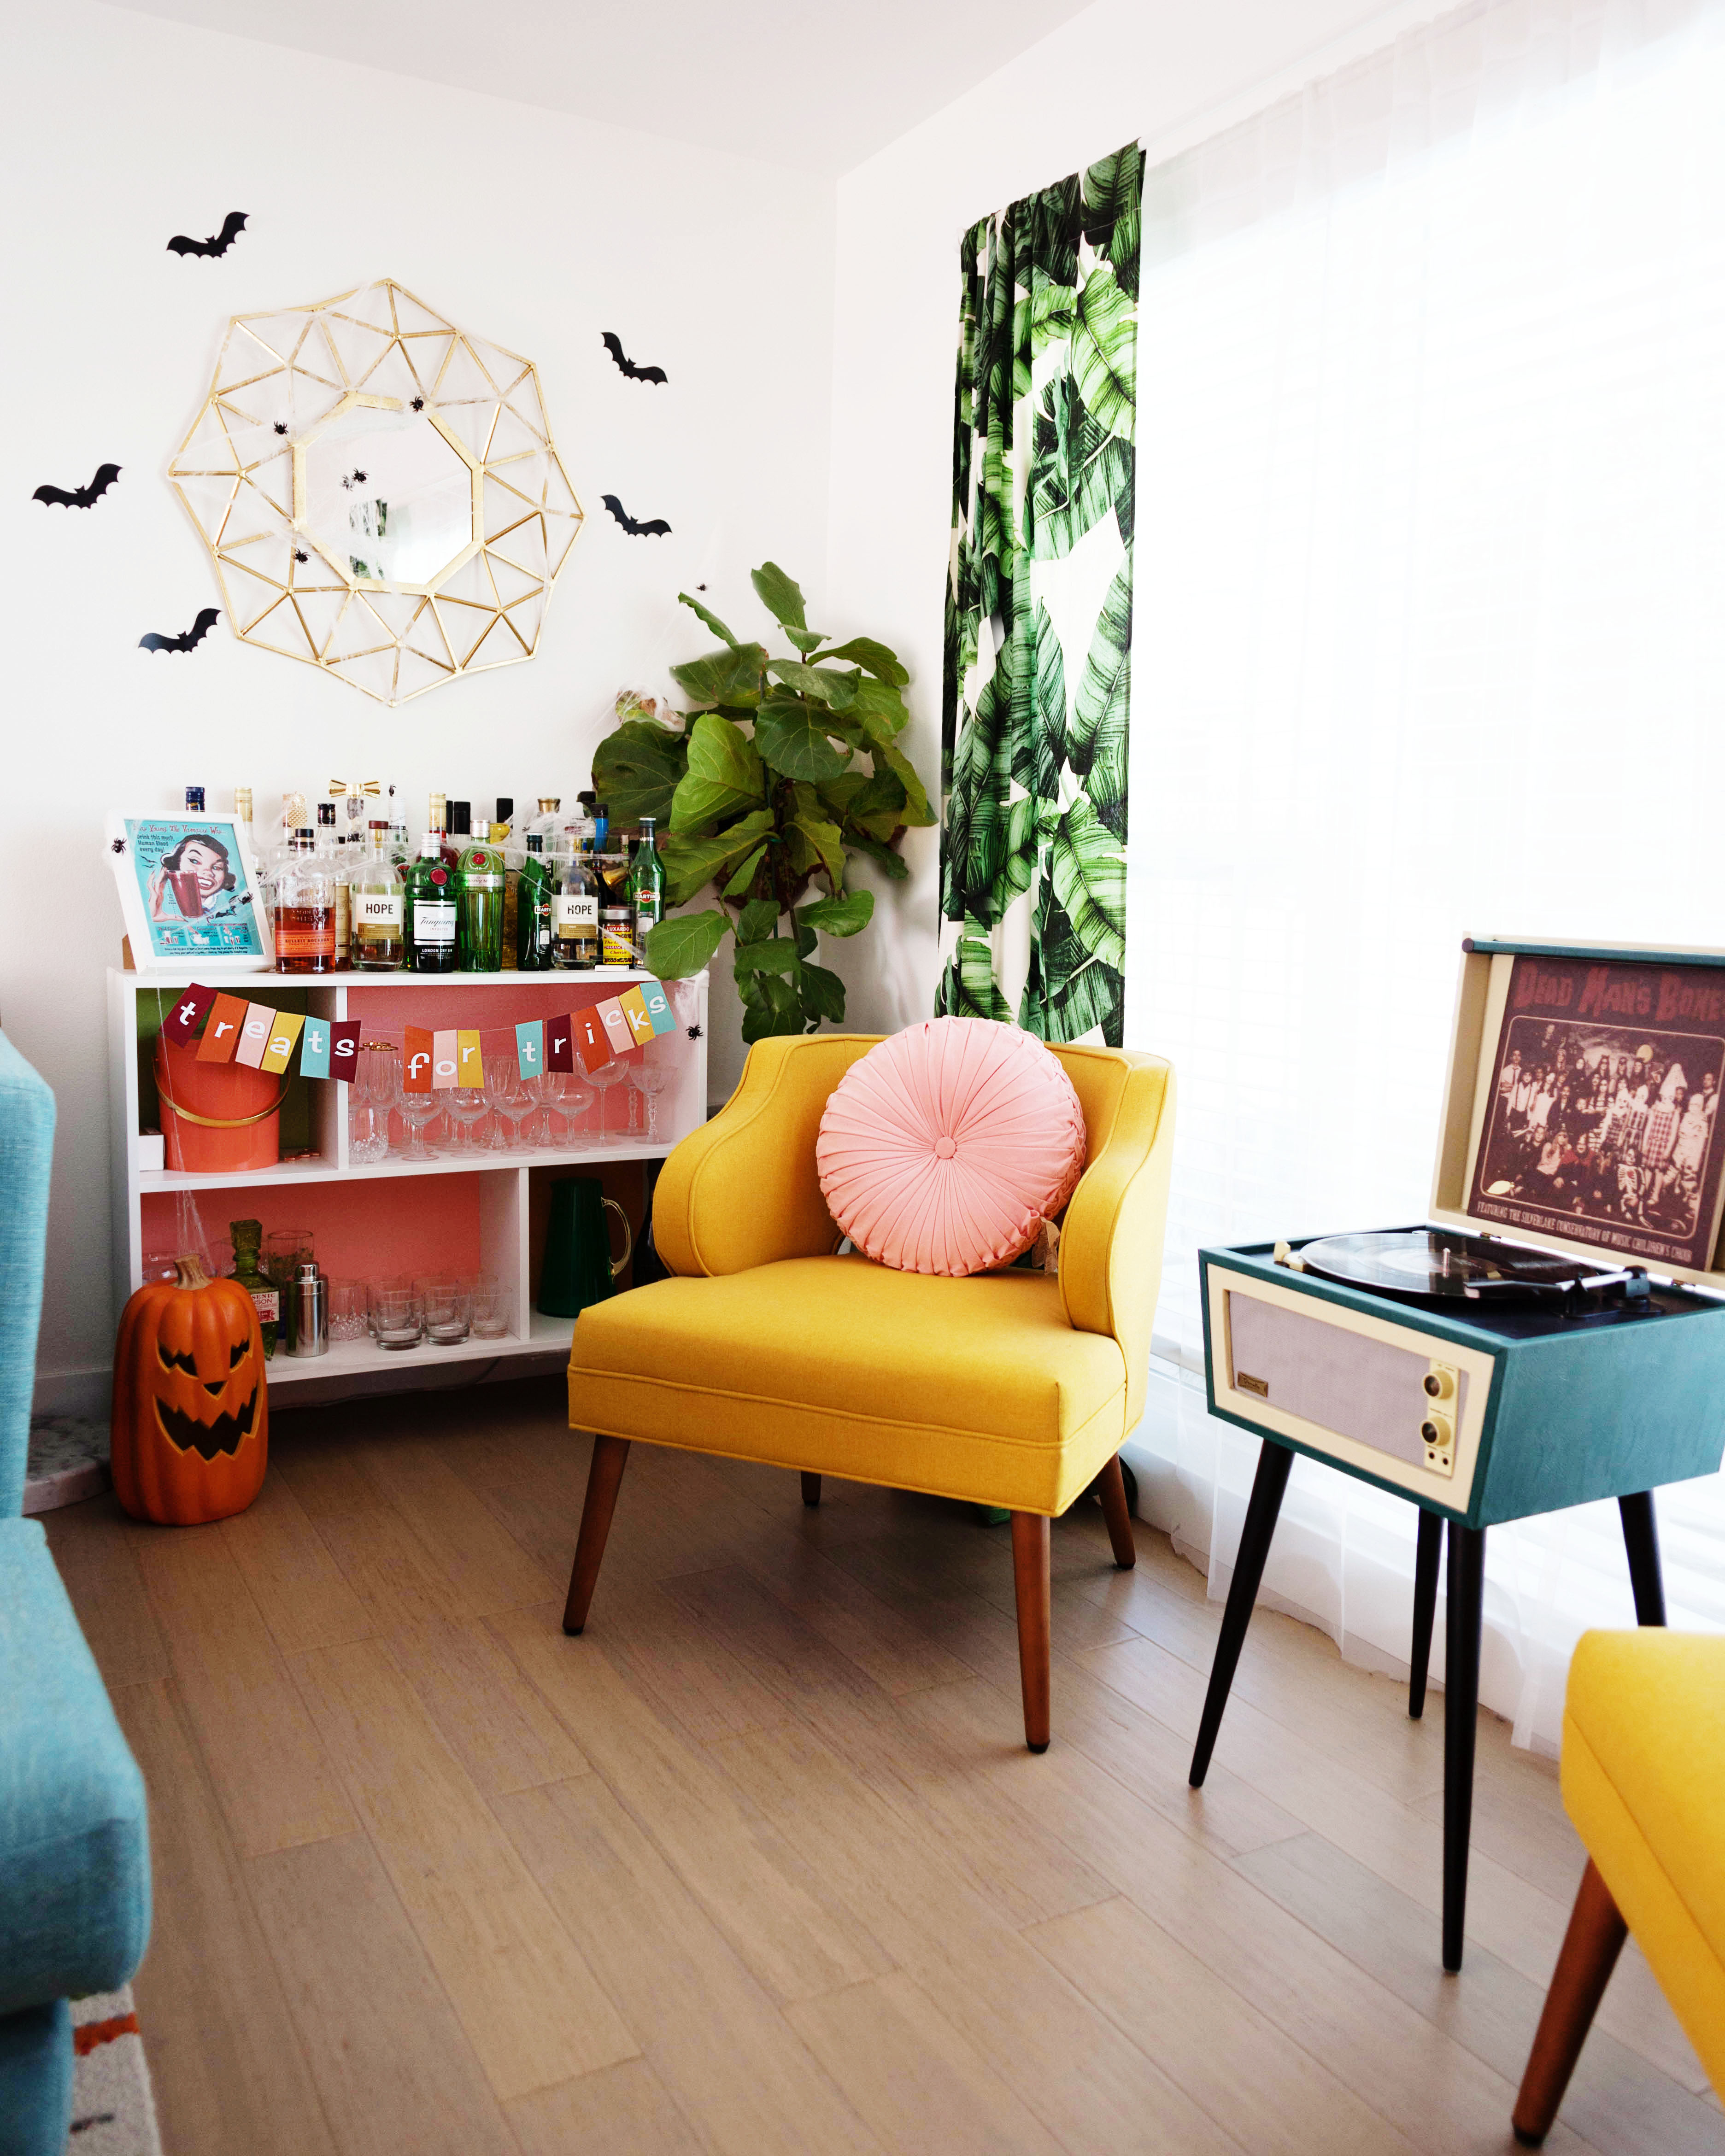
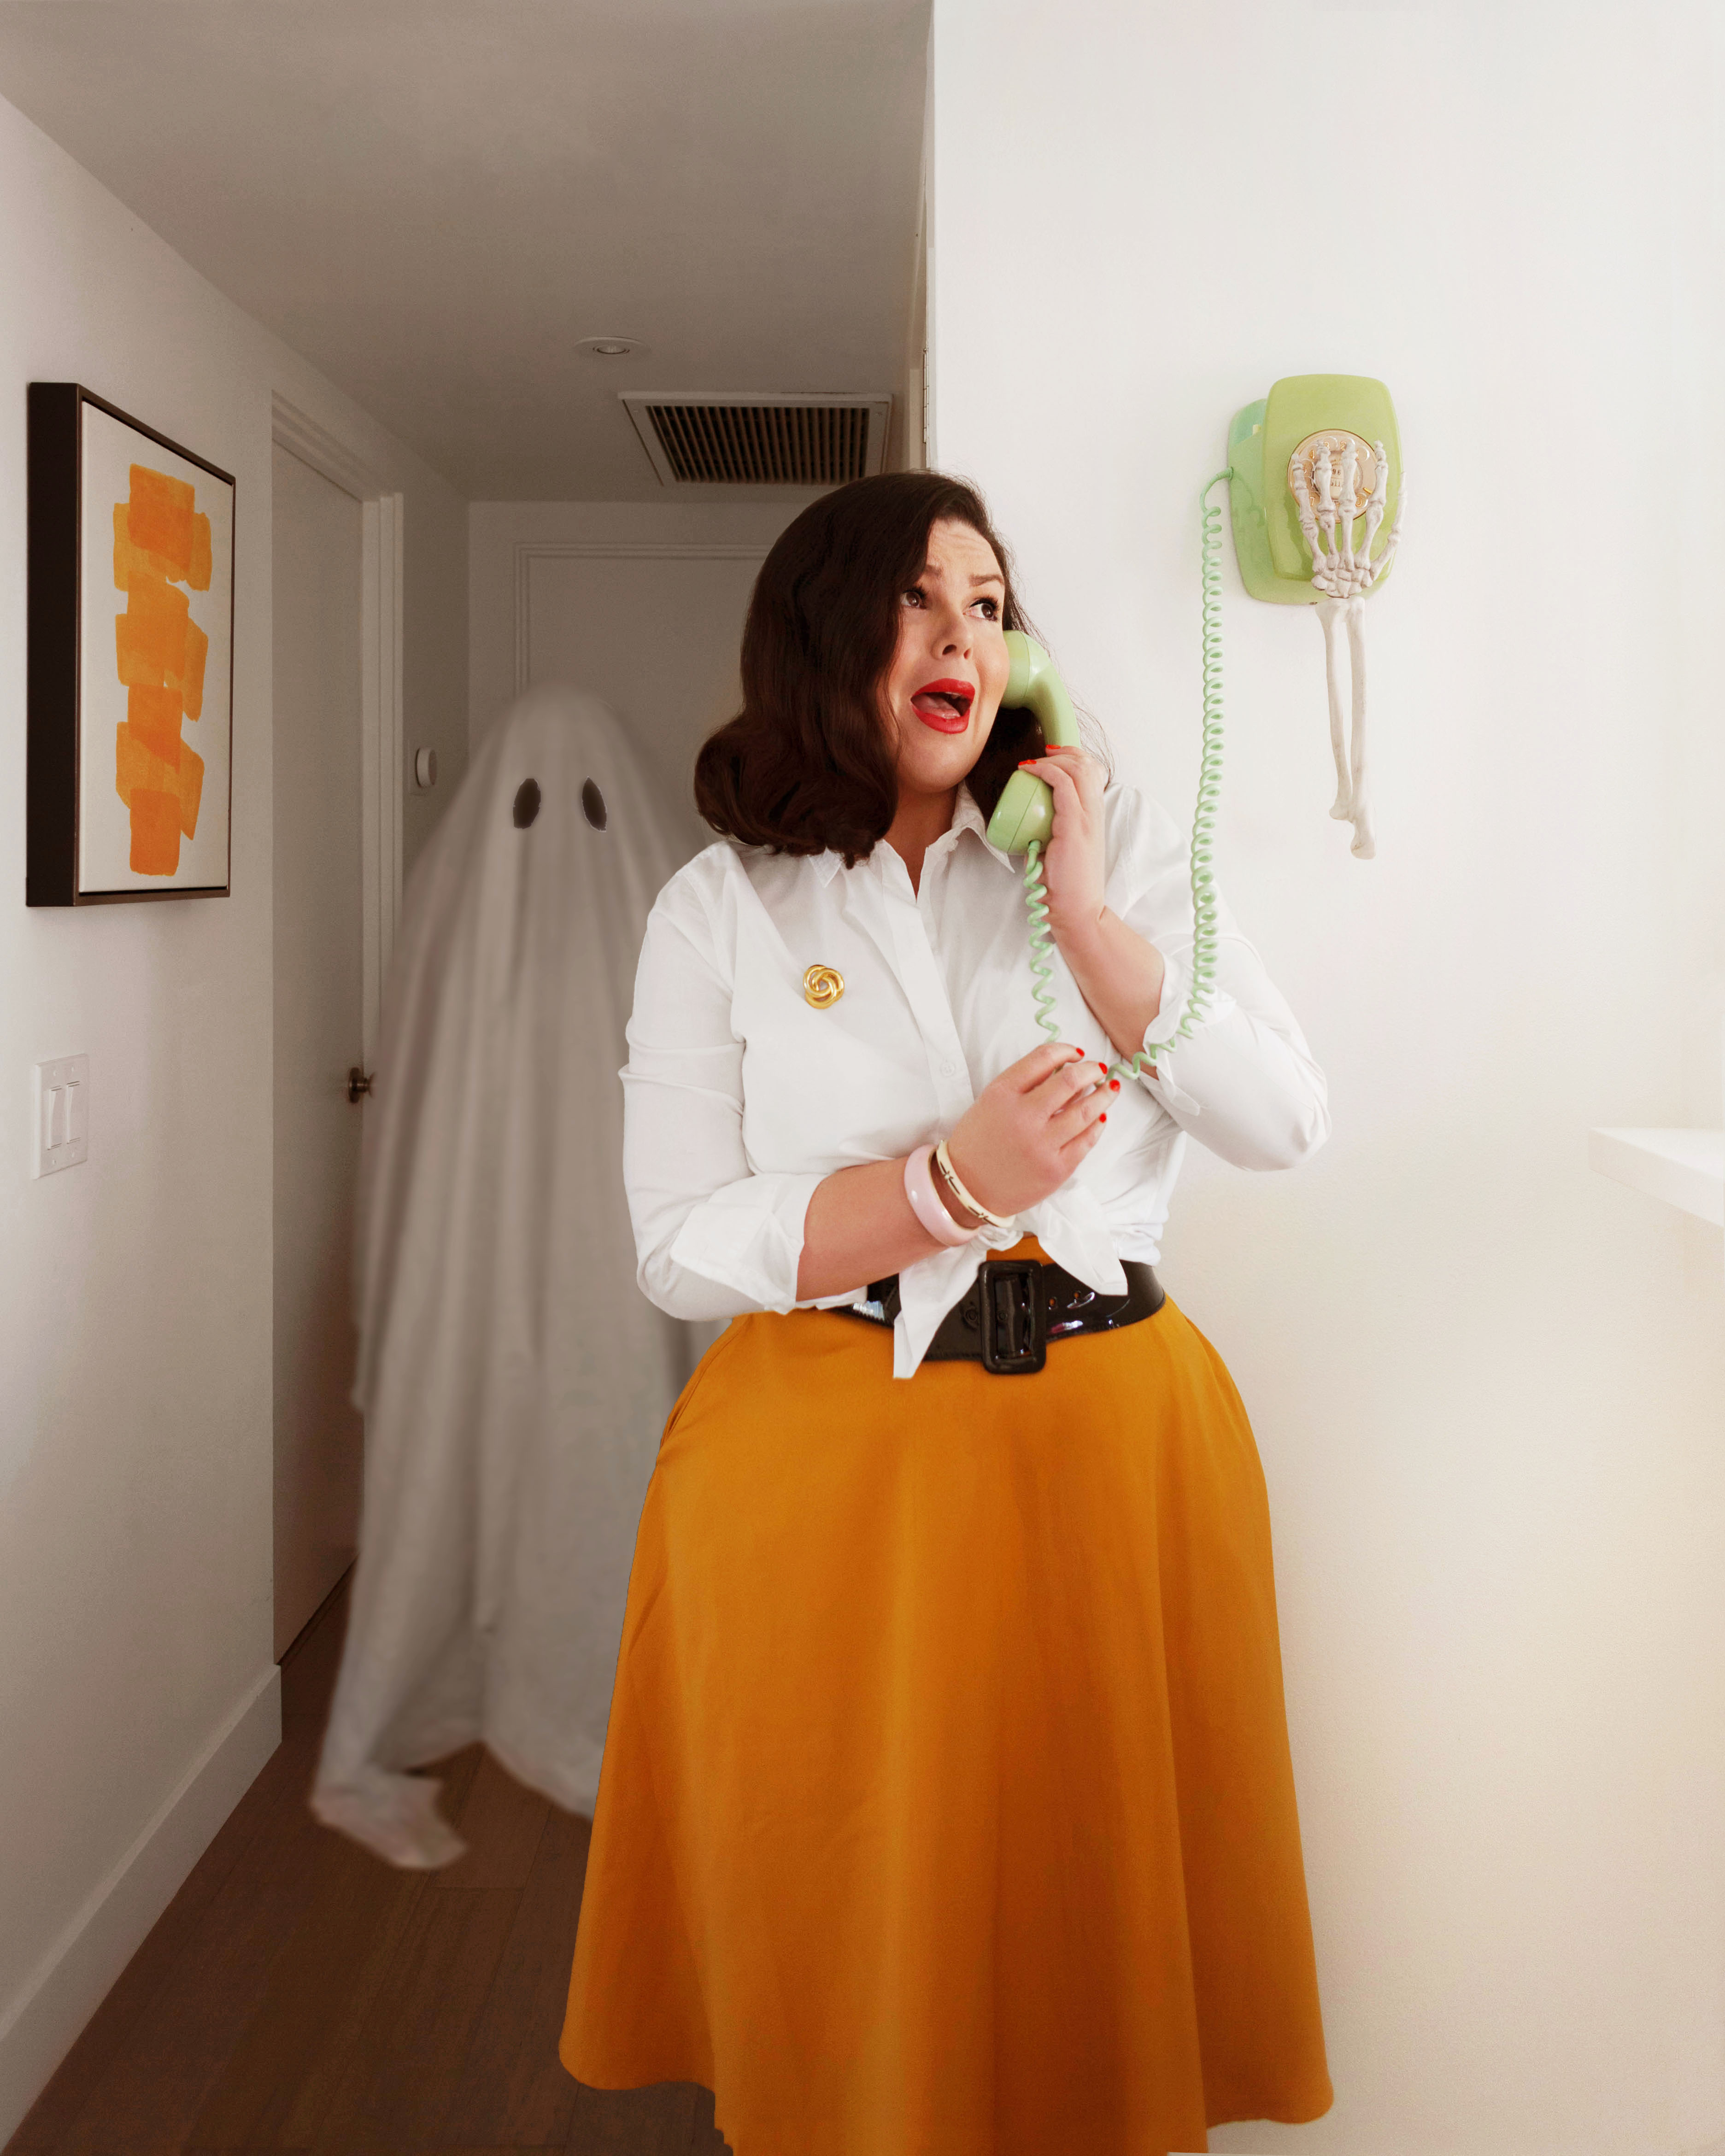
Hey, Ghosts and Ghouls! Tomorrow is Halloween and I wanted to show you this year’s decor. I used a few DIY projects like my dip dyed pumpkins and a DIY banner for our bar, and some cut up spiderweb placemats for the kitchen cabinets and bedroom. And of course all the classic stuff like cob webs, spiders, bats, jack o lanterns, and bones!
I’ll just let the photos show you. Happy Melodramaween!
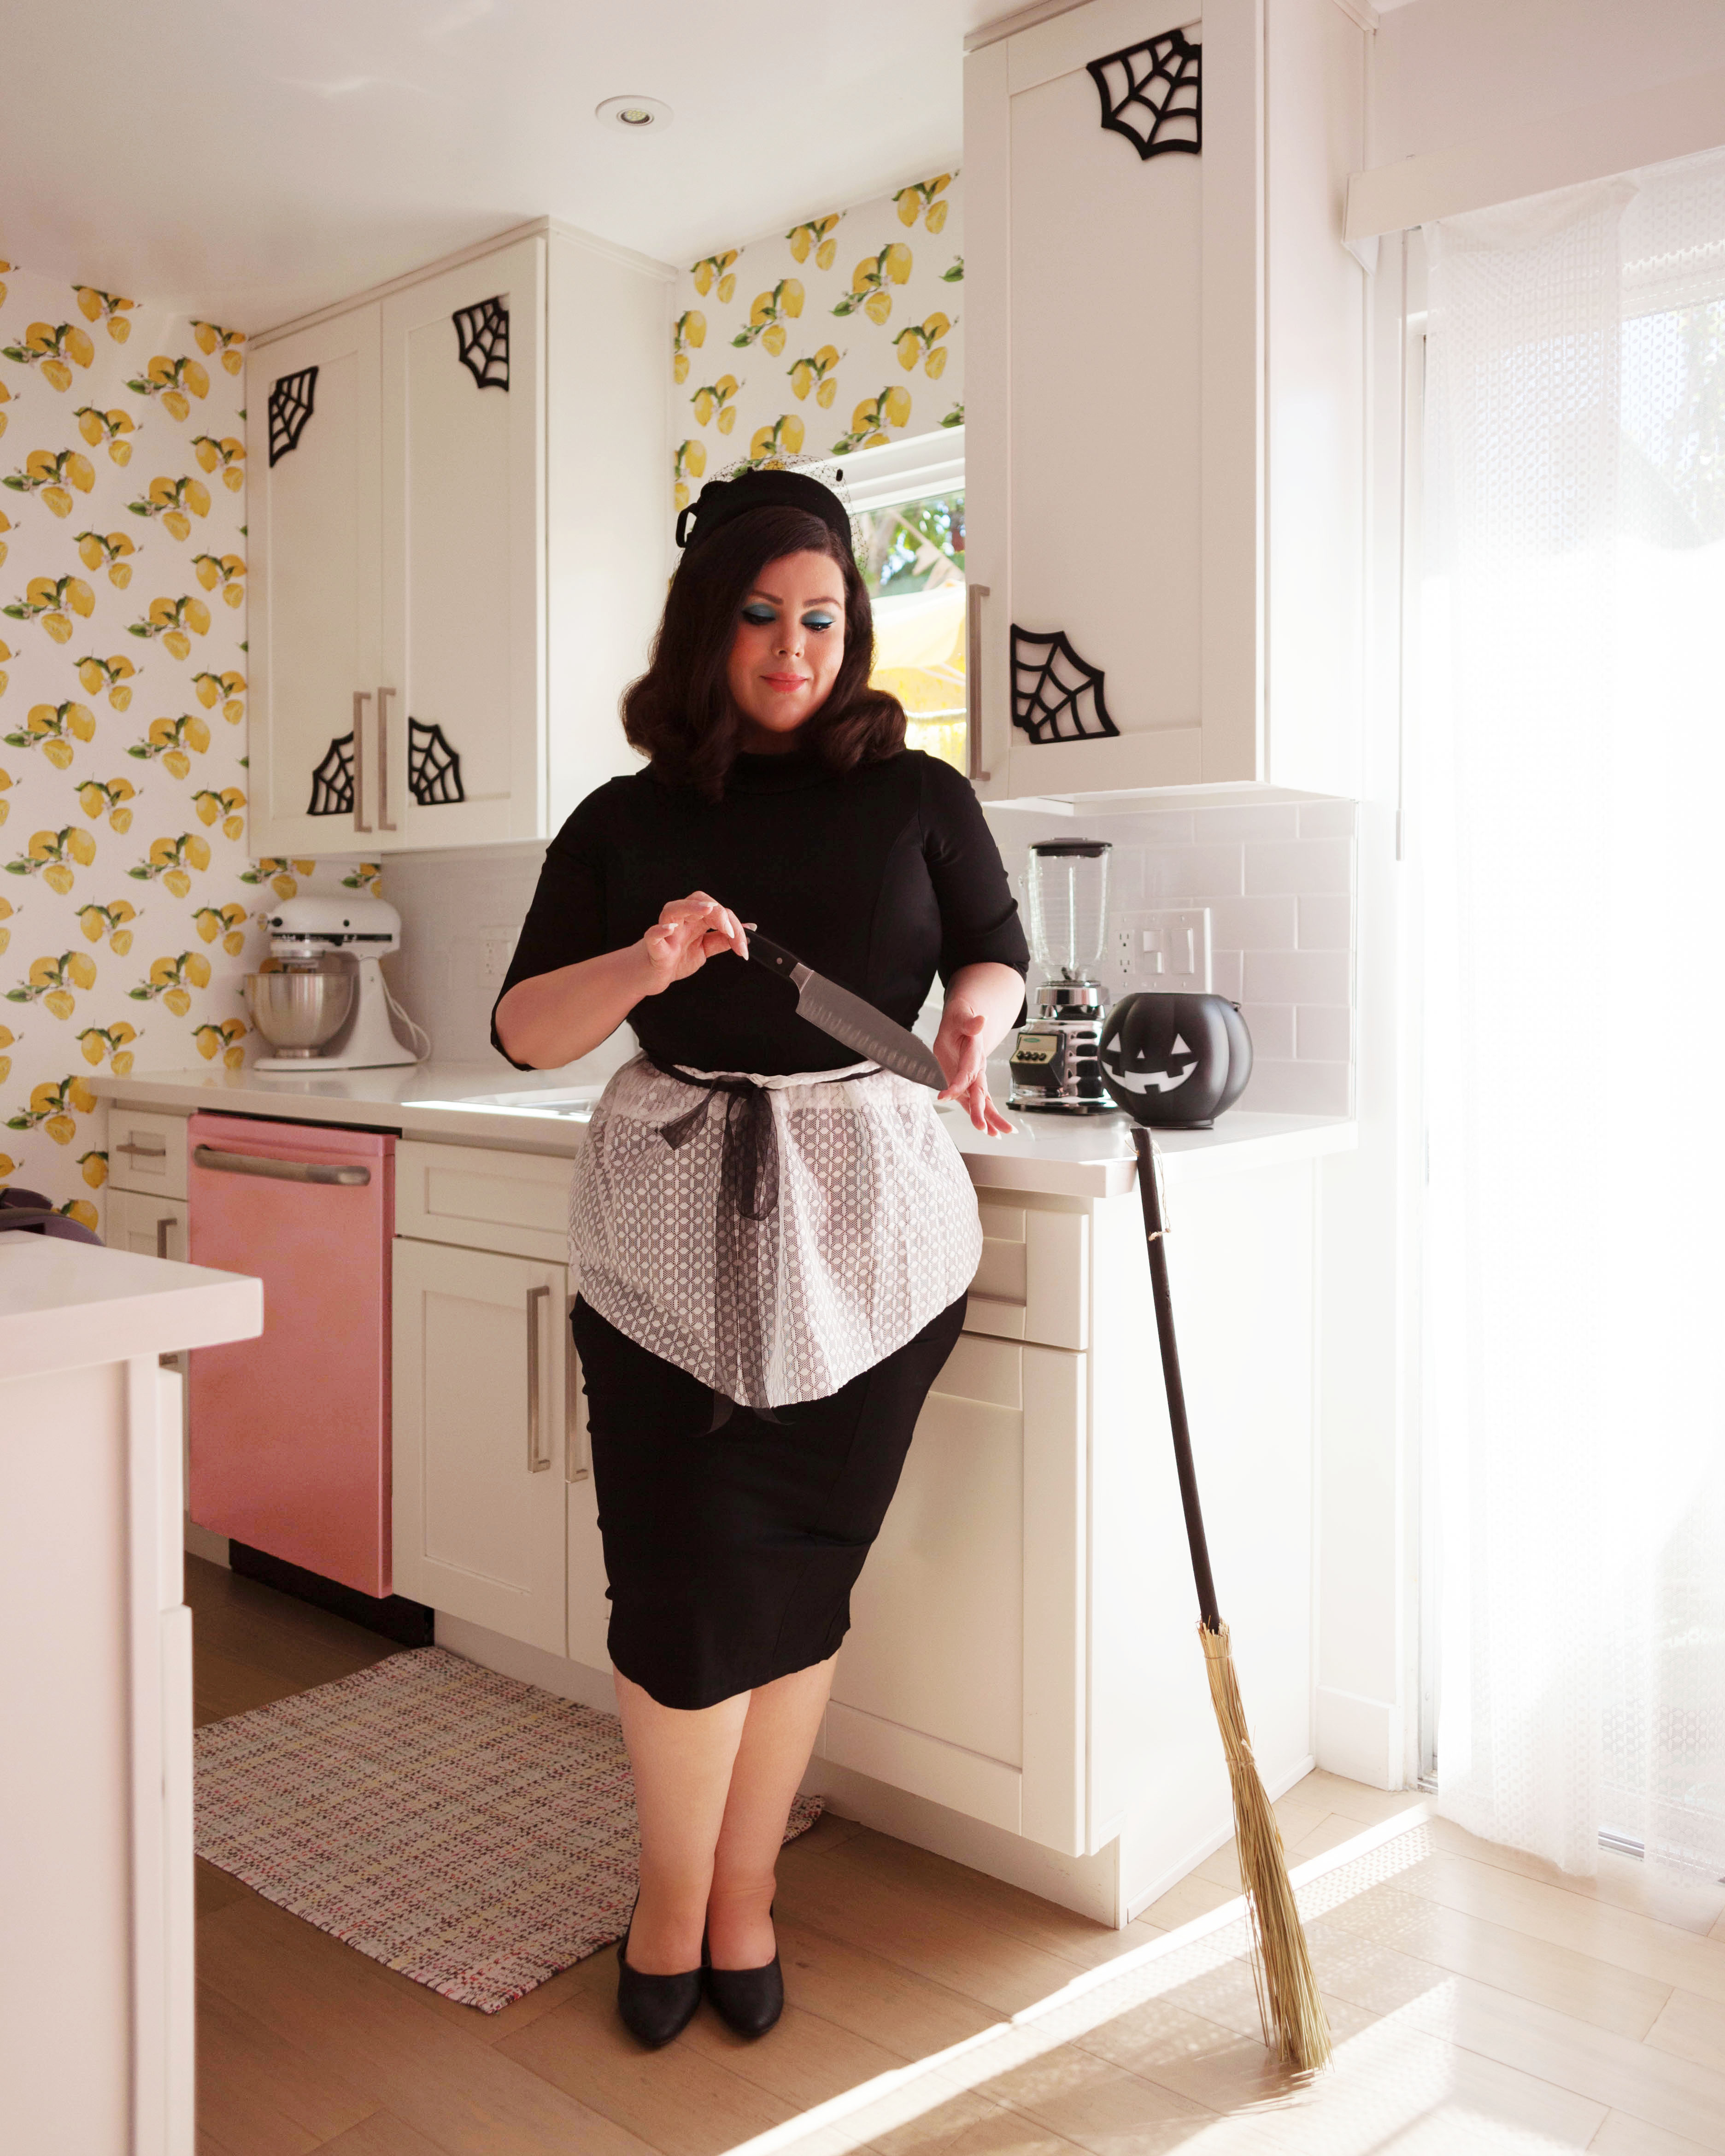
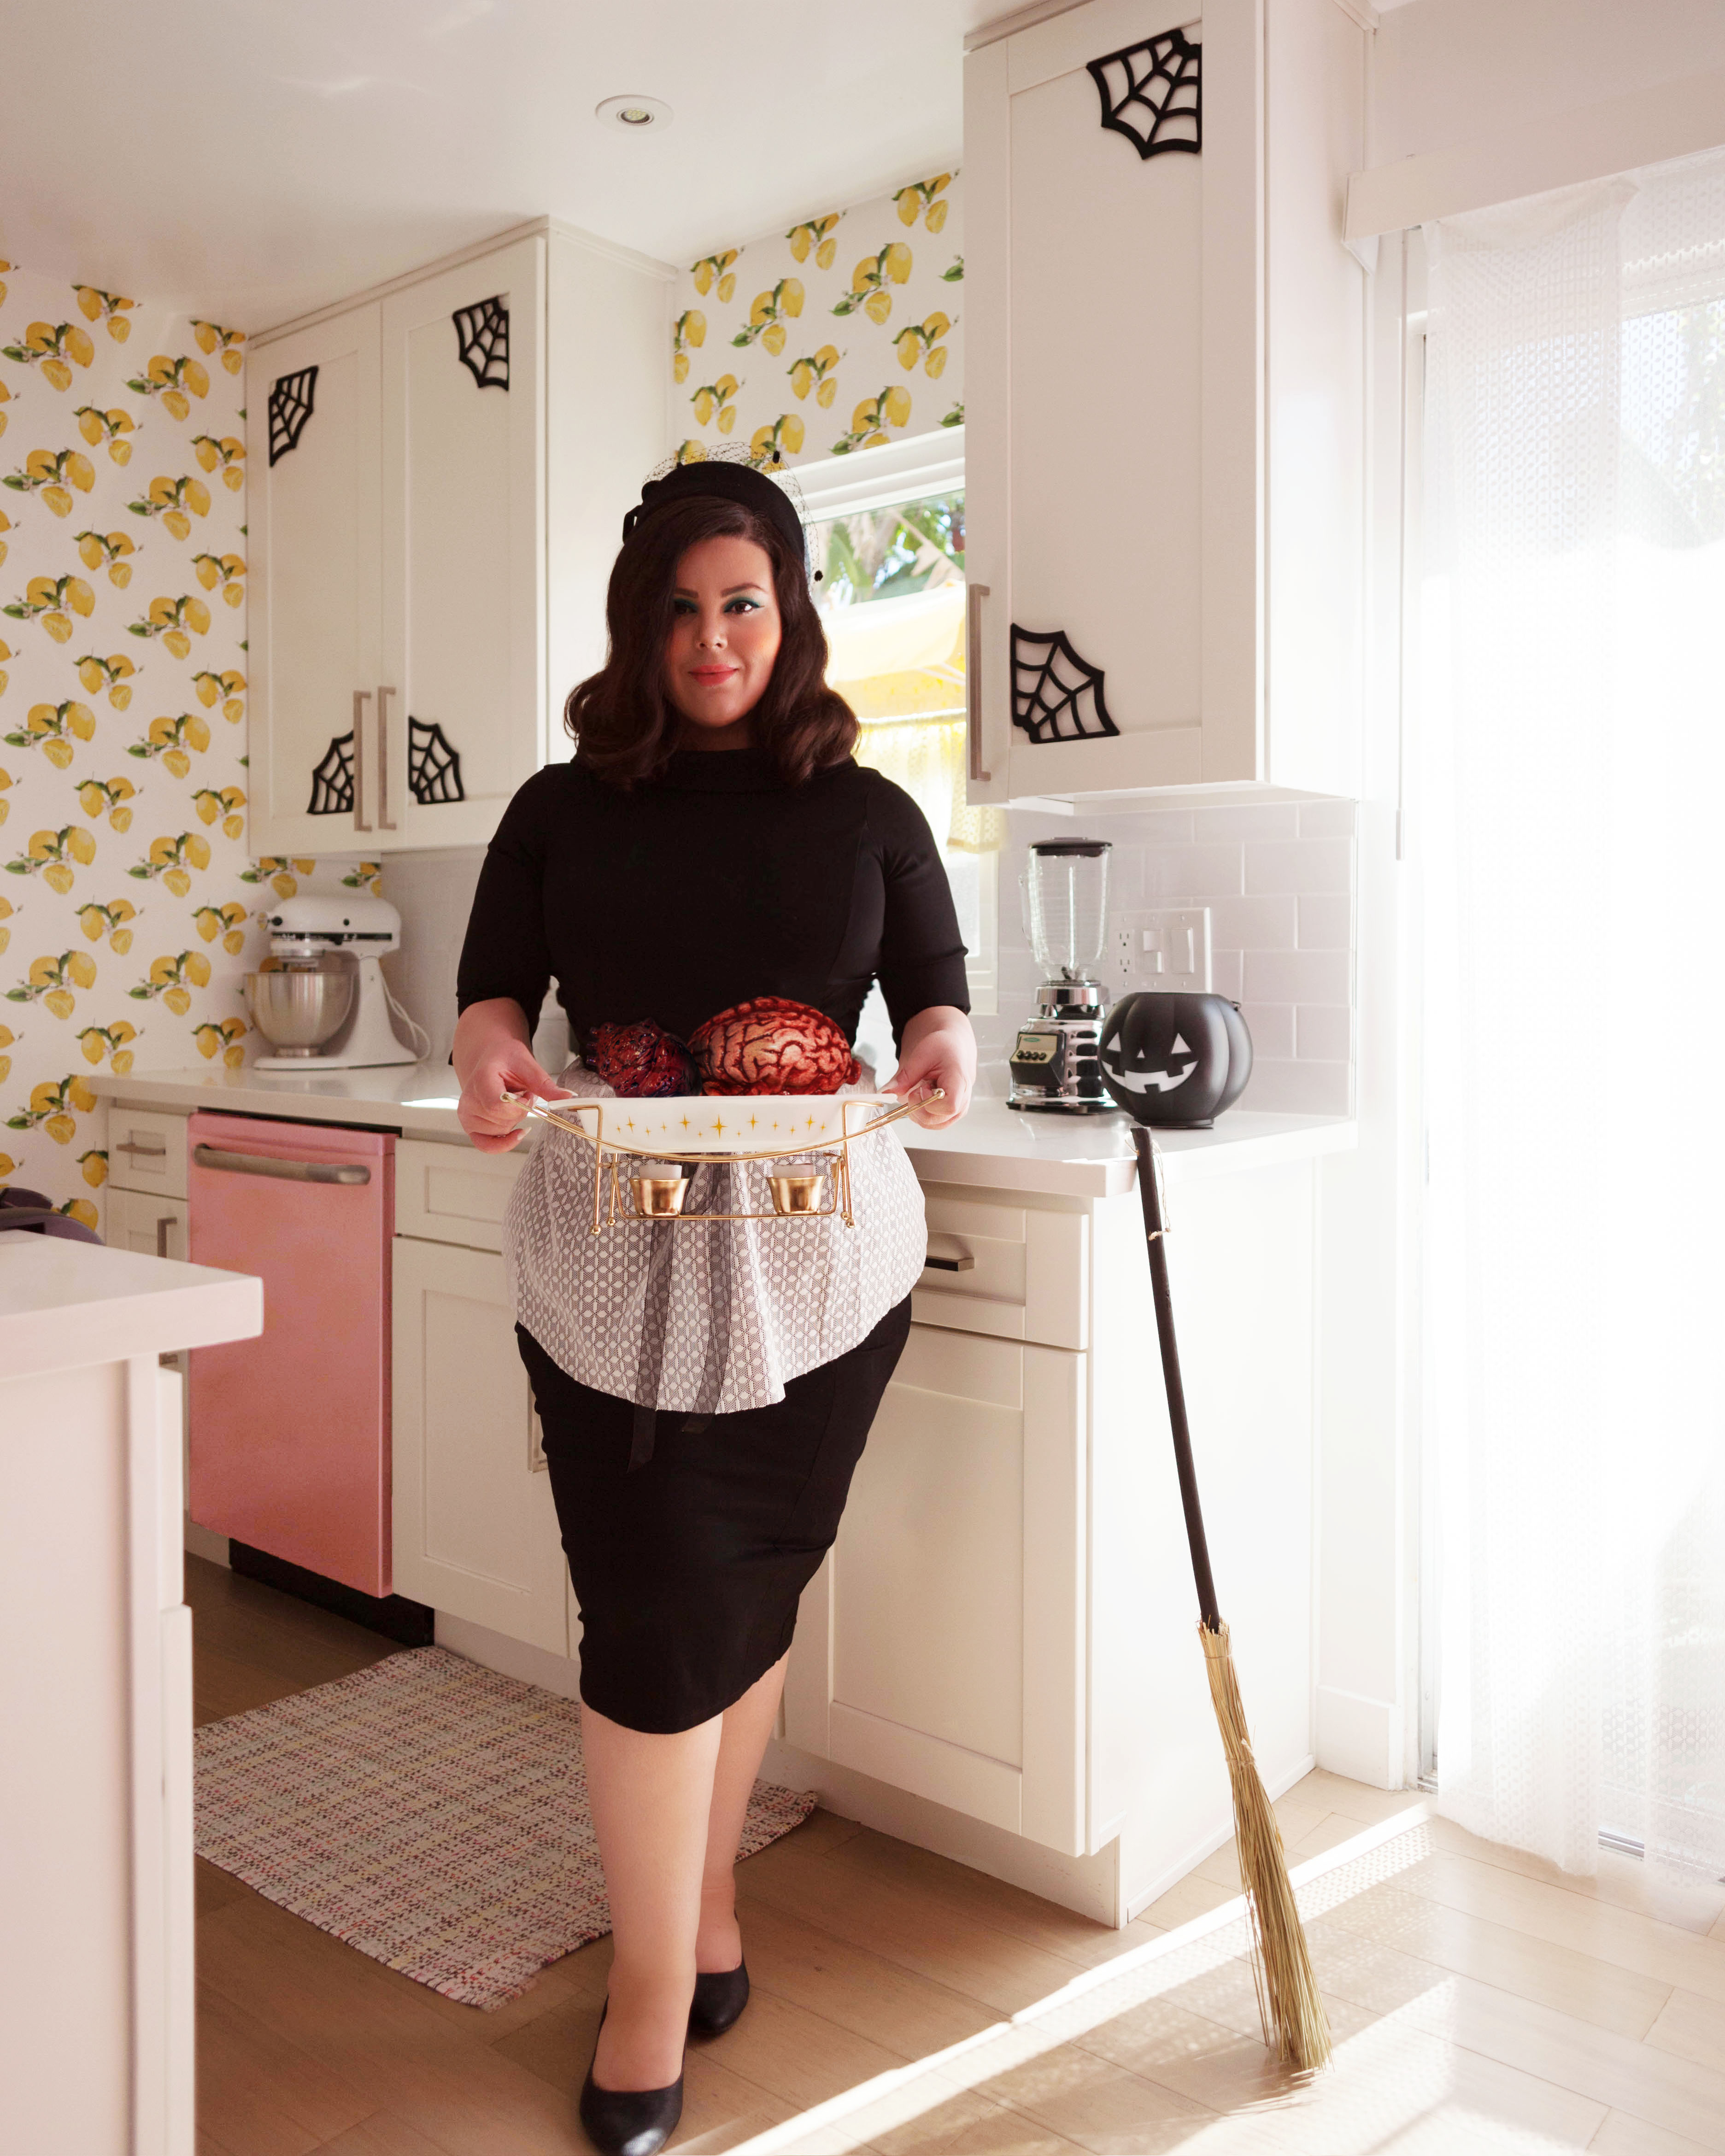
Happy Halloween!

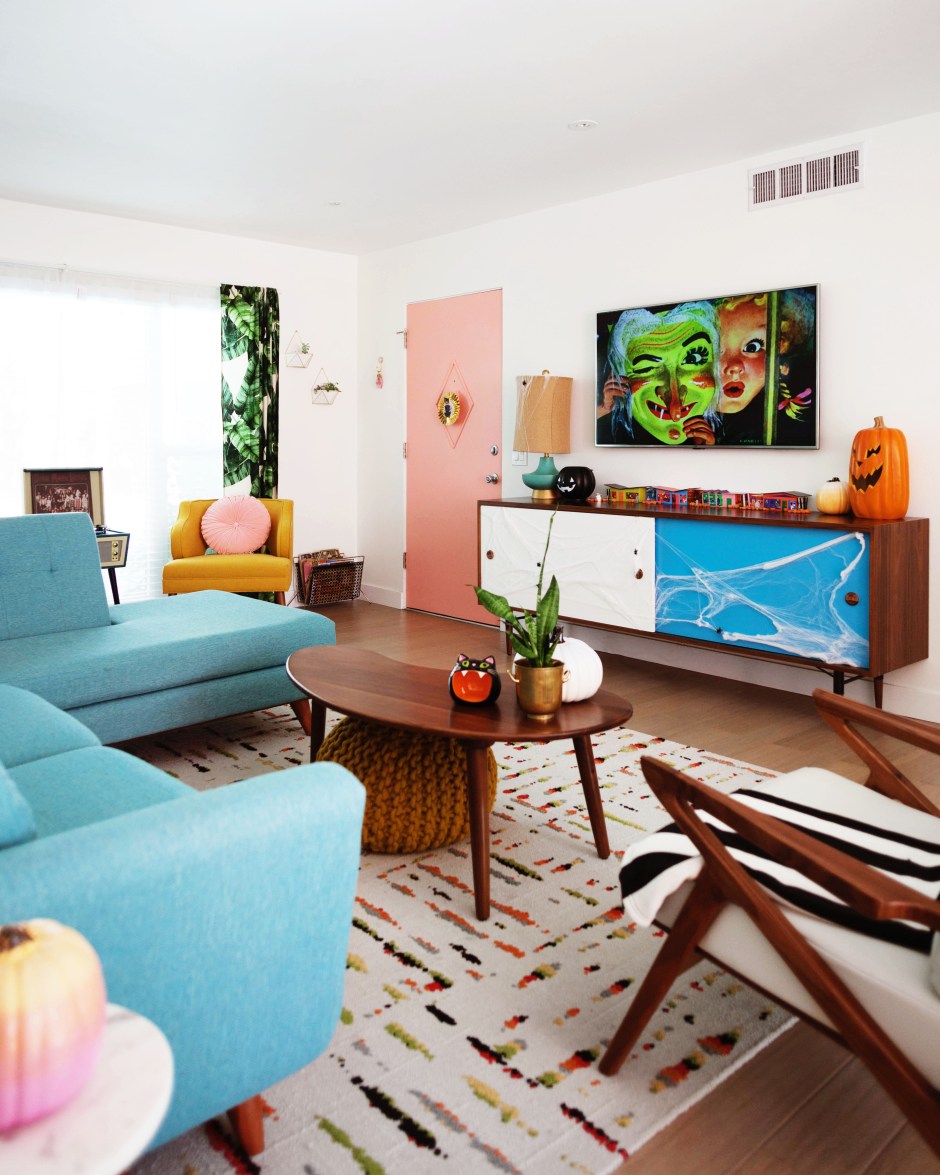
How is it possible that I haven’t done a full post about our living room yet?? I’m the worst! Now that we’re coming up on our one year anniversary in this apartment (whoa already?), I figured now would probably be as good a time as ever!
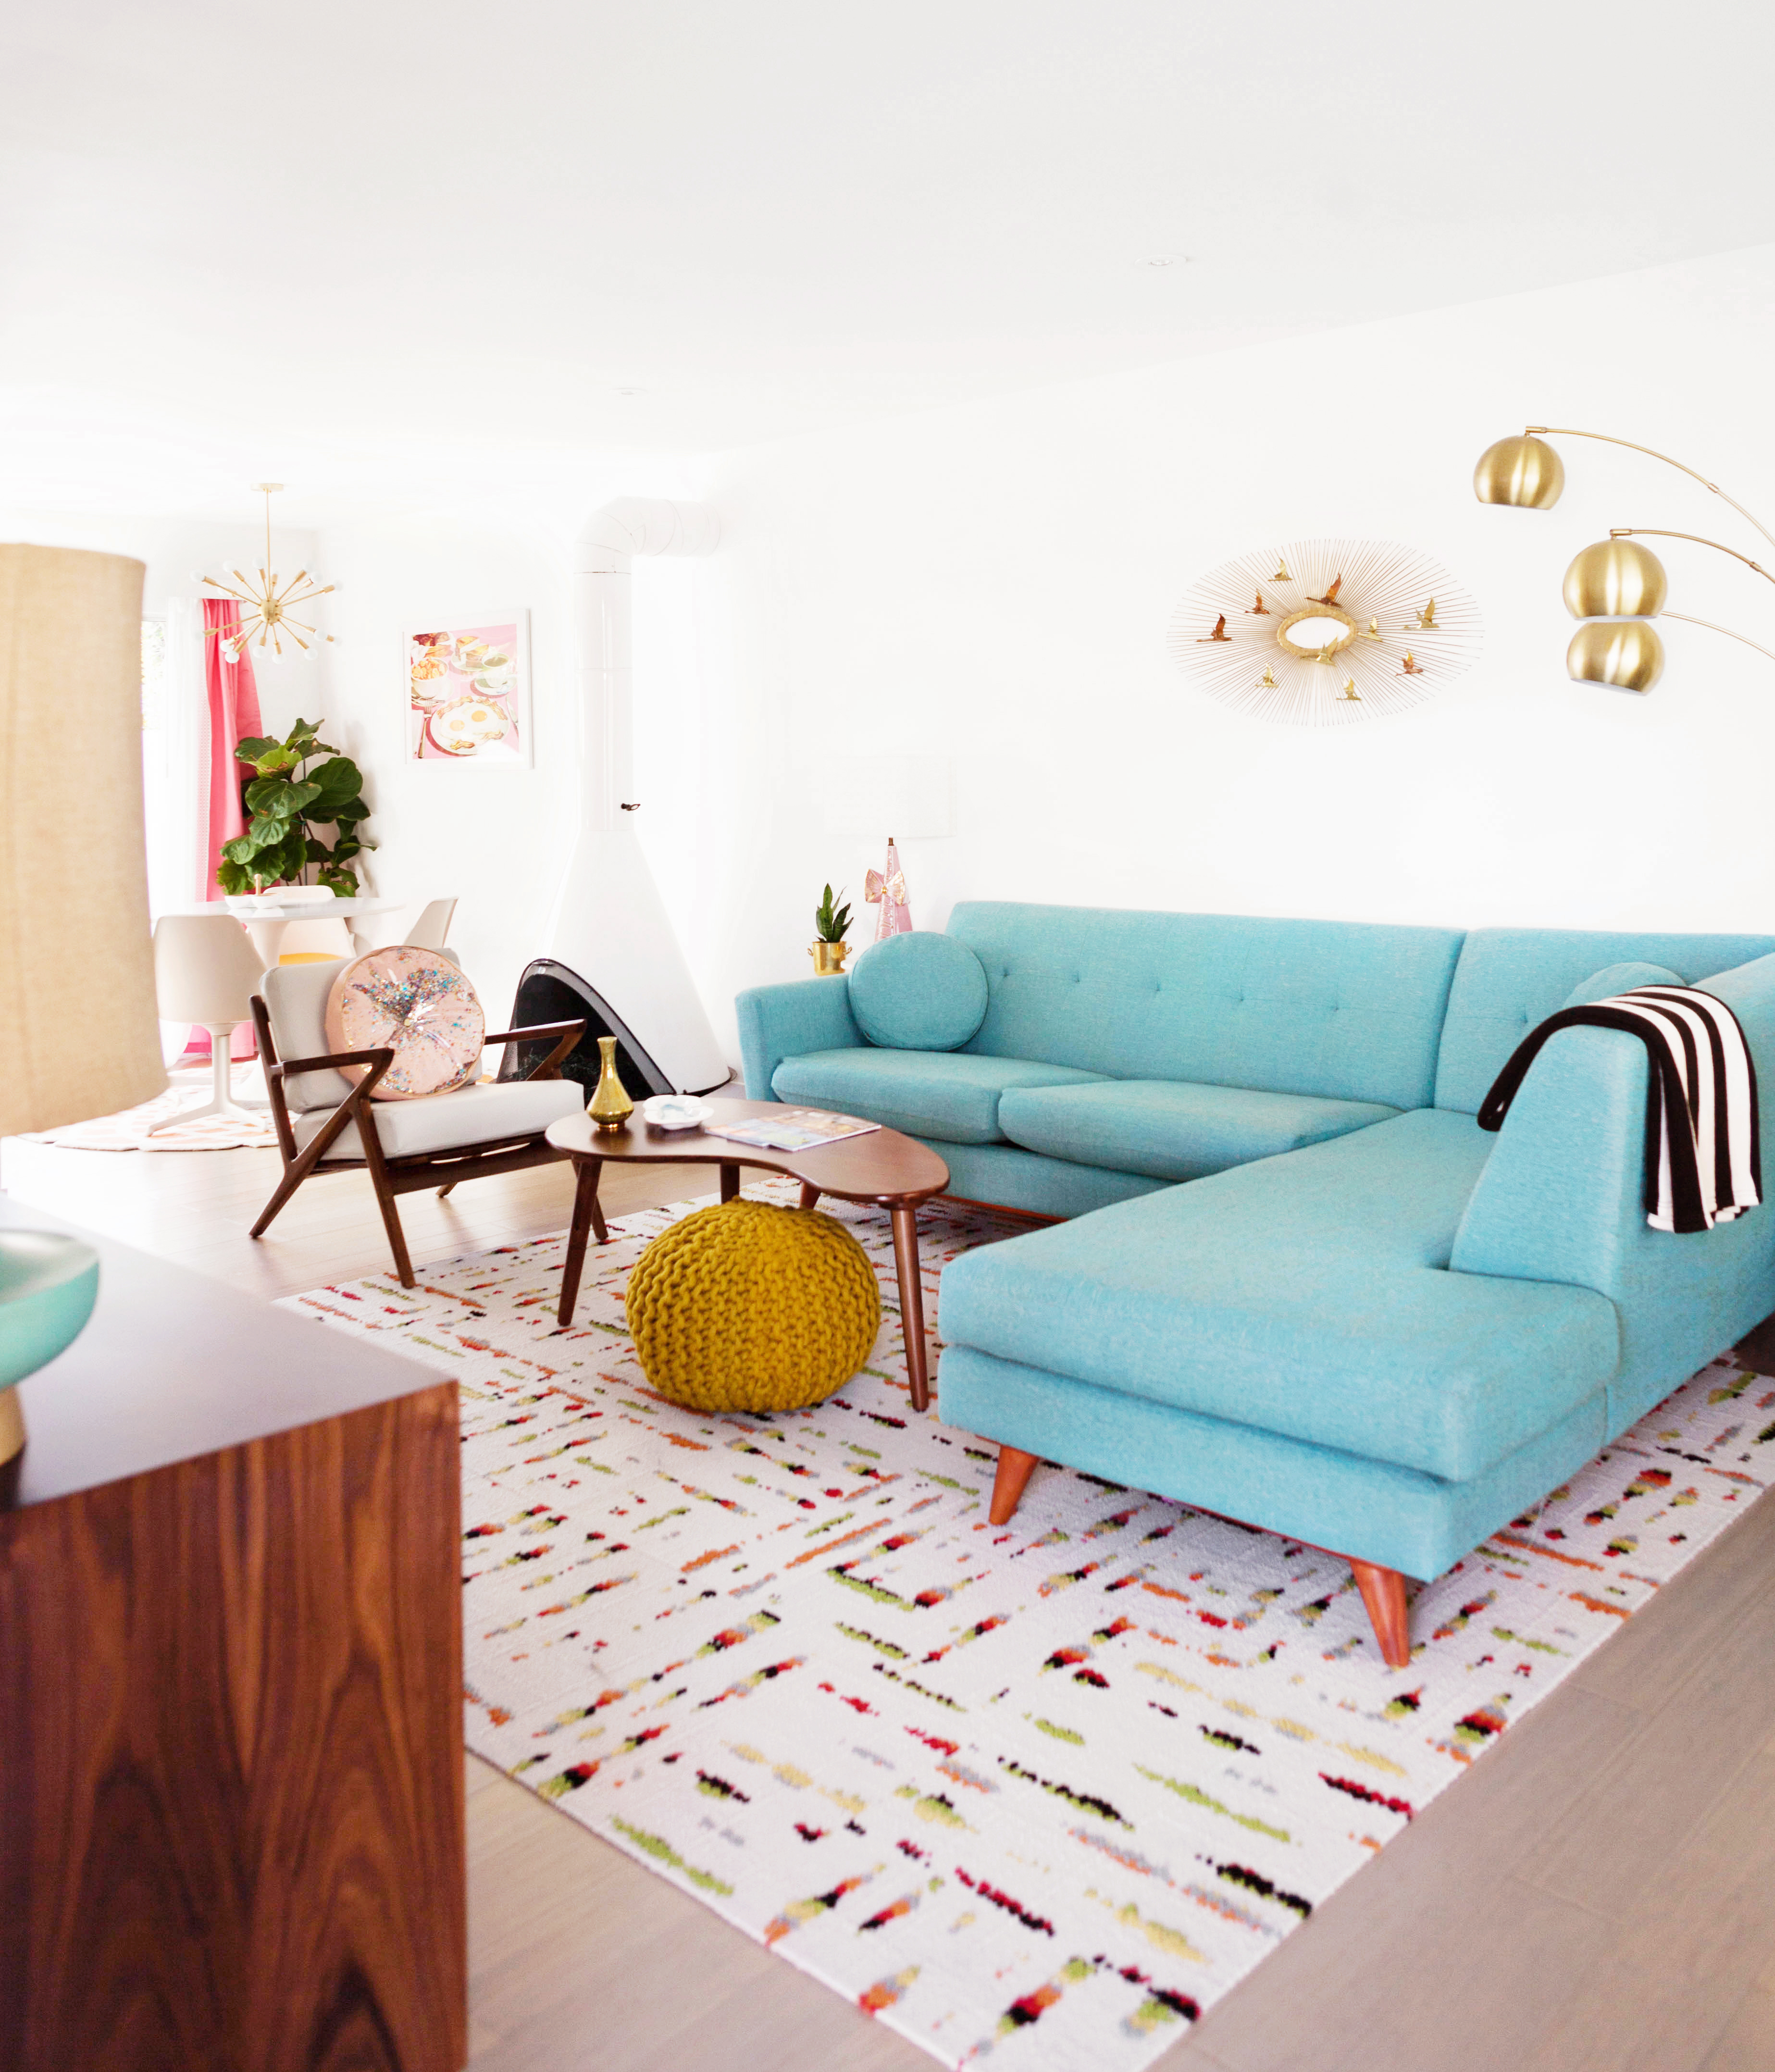
Welcome to our mid-century inspired living room!
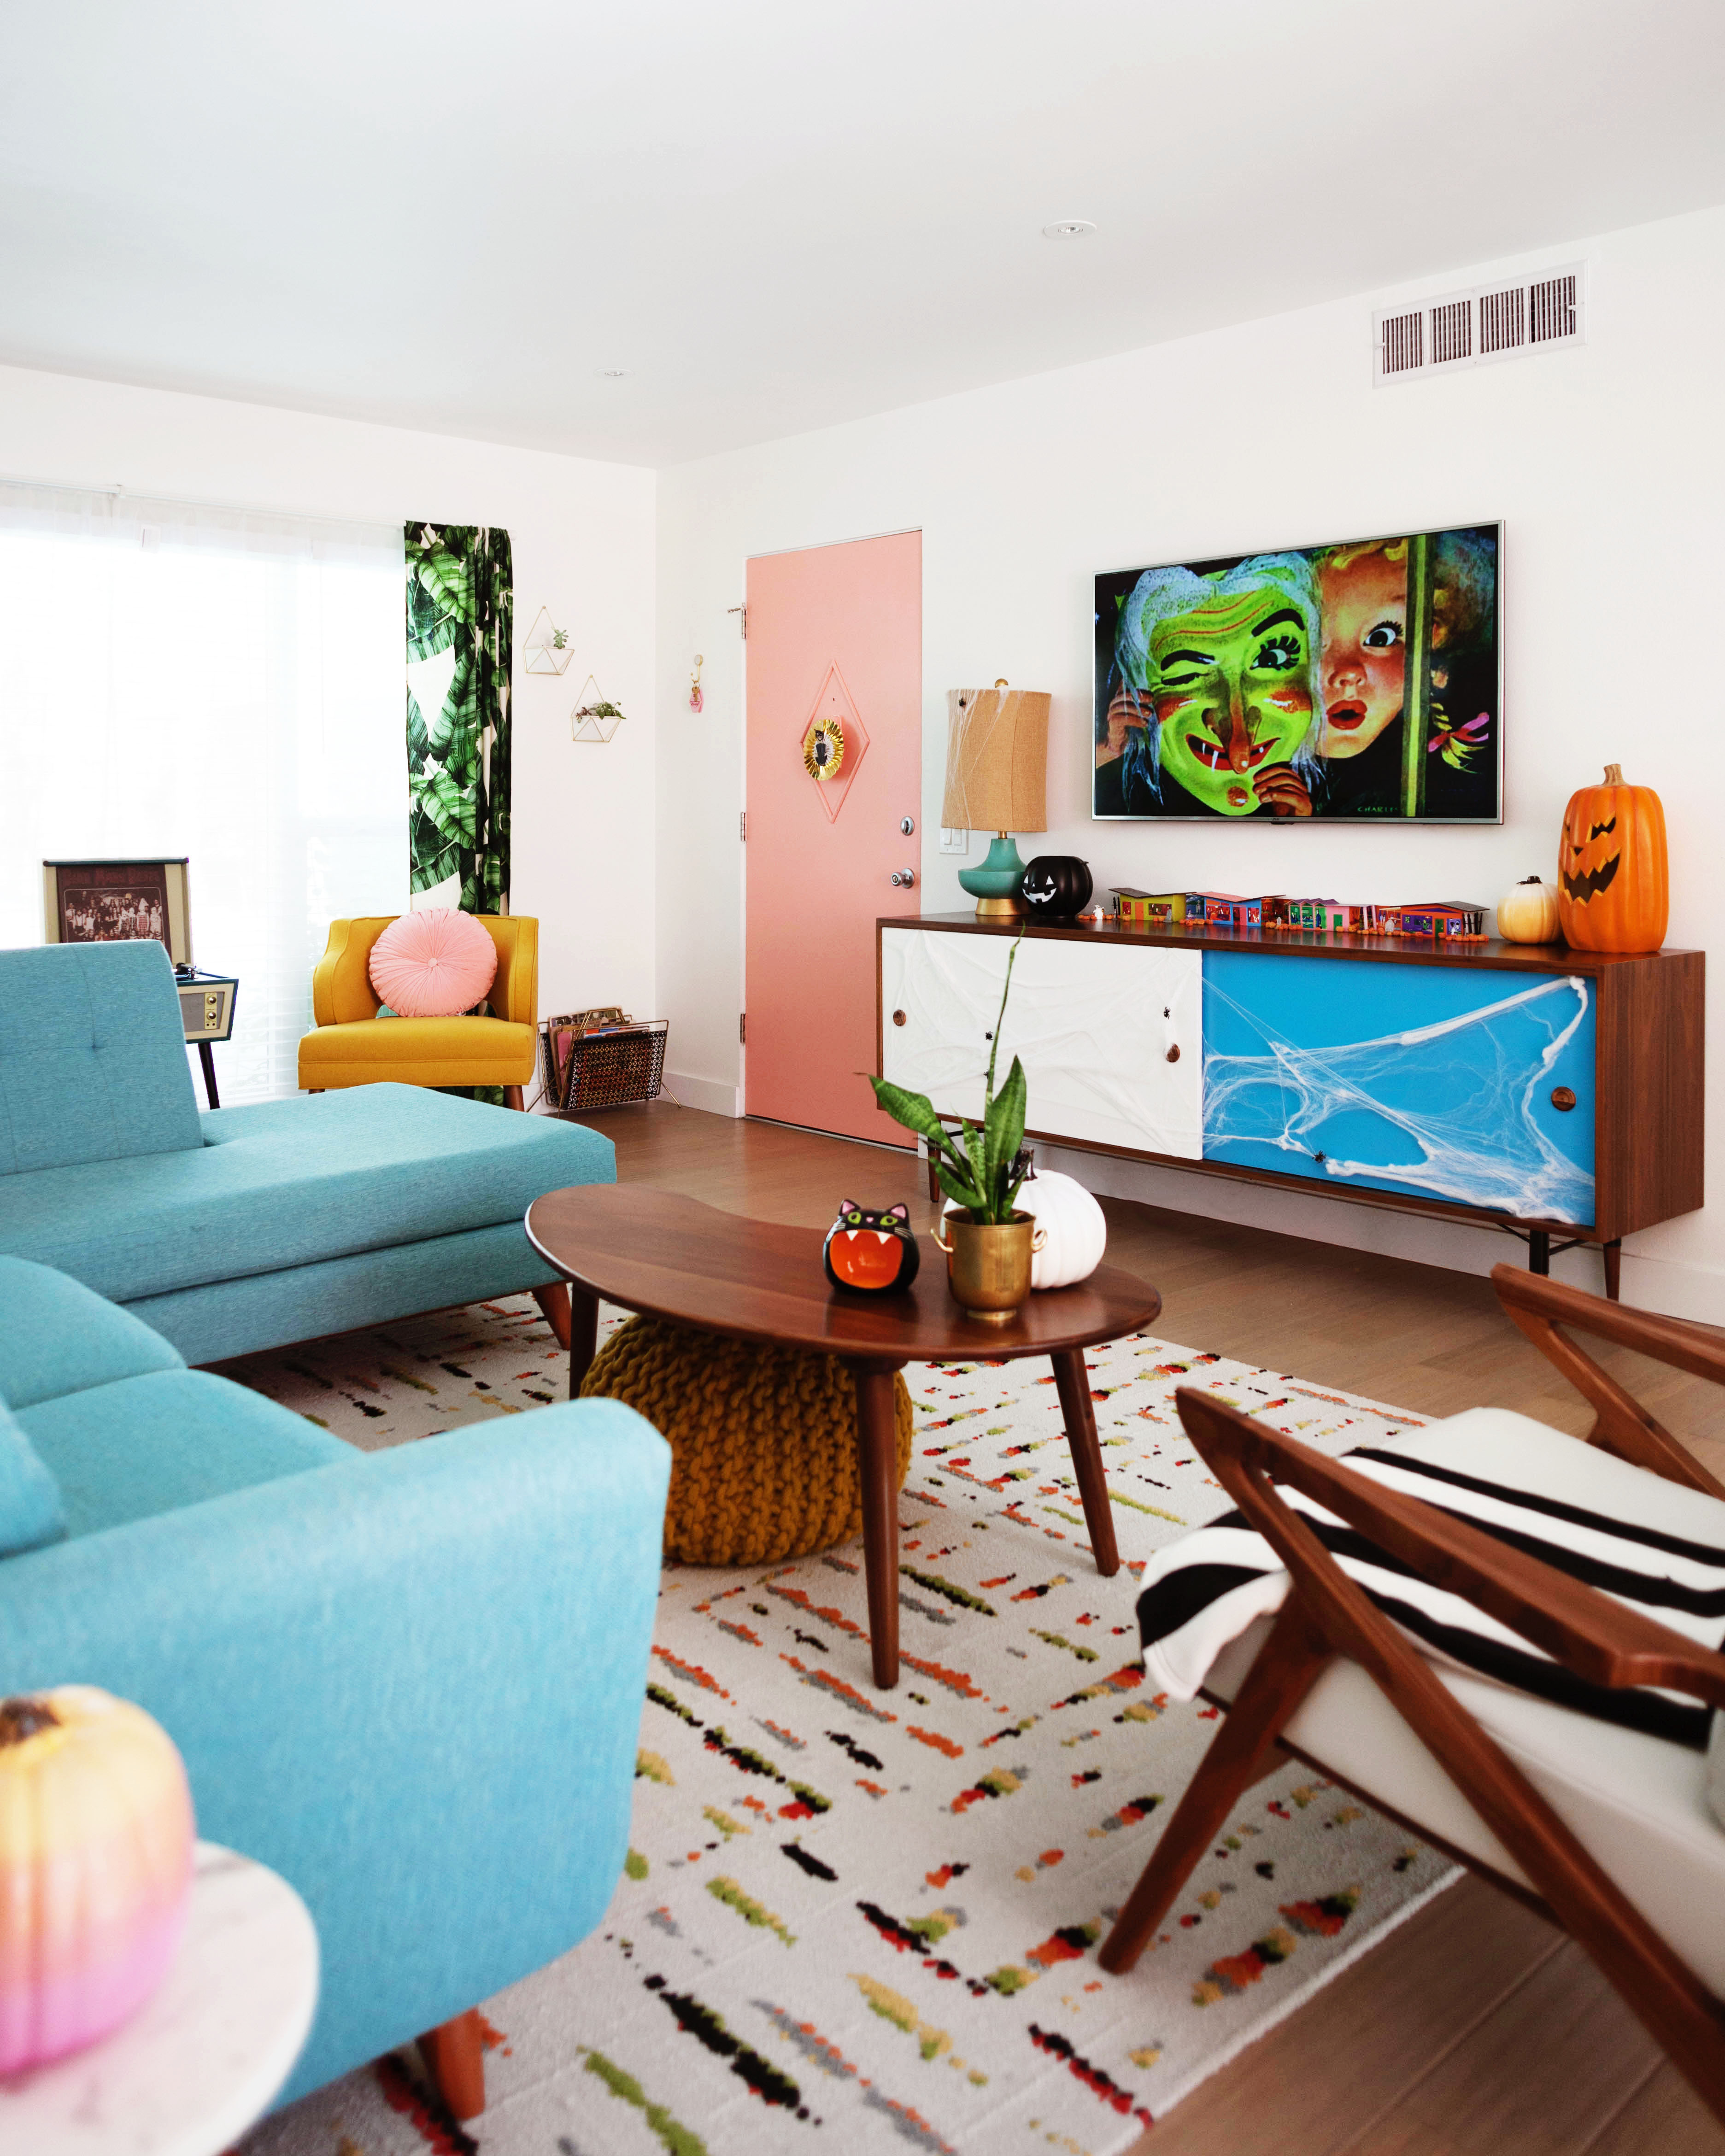
When you walk through our orange front door you’re greeted by all of my favorite retro inspired colors.
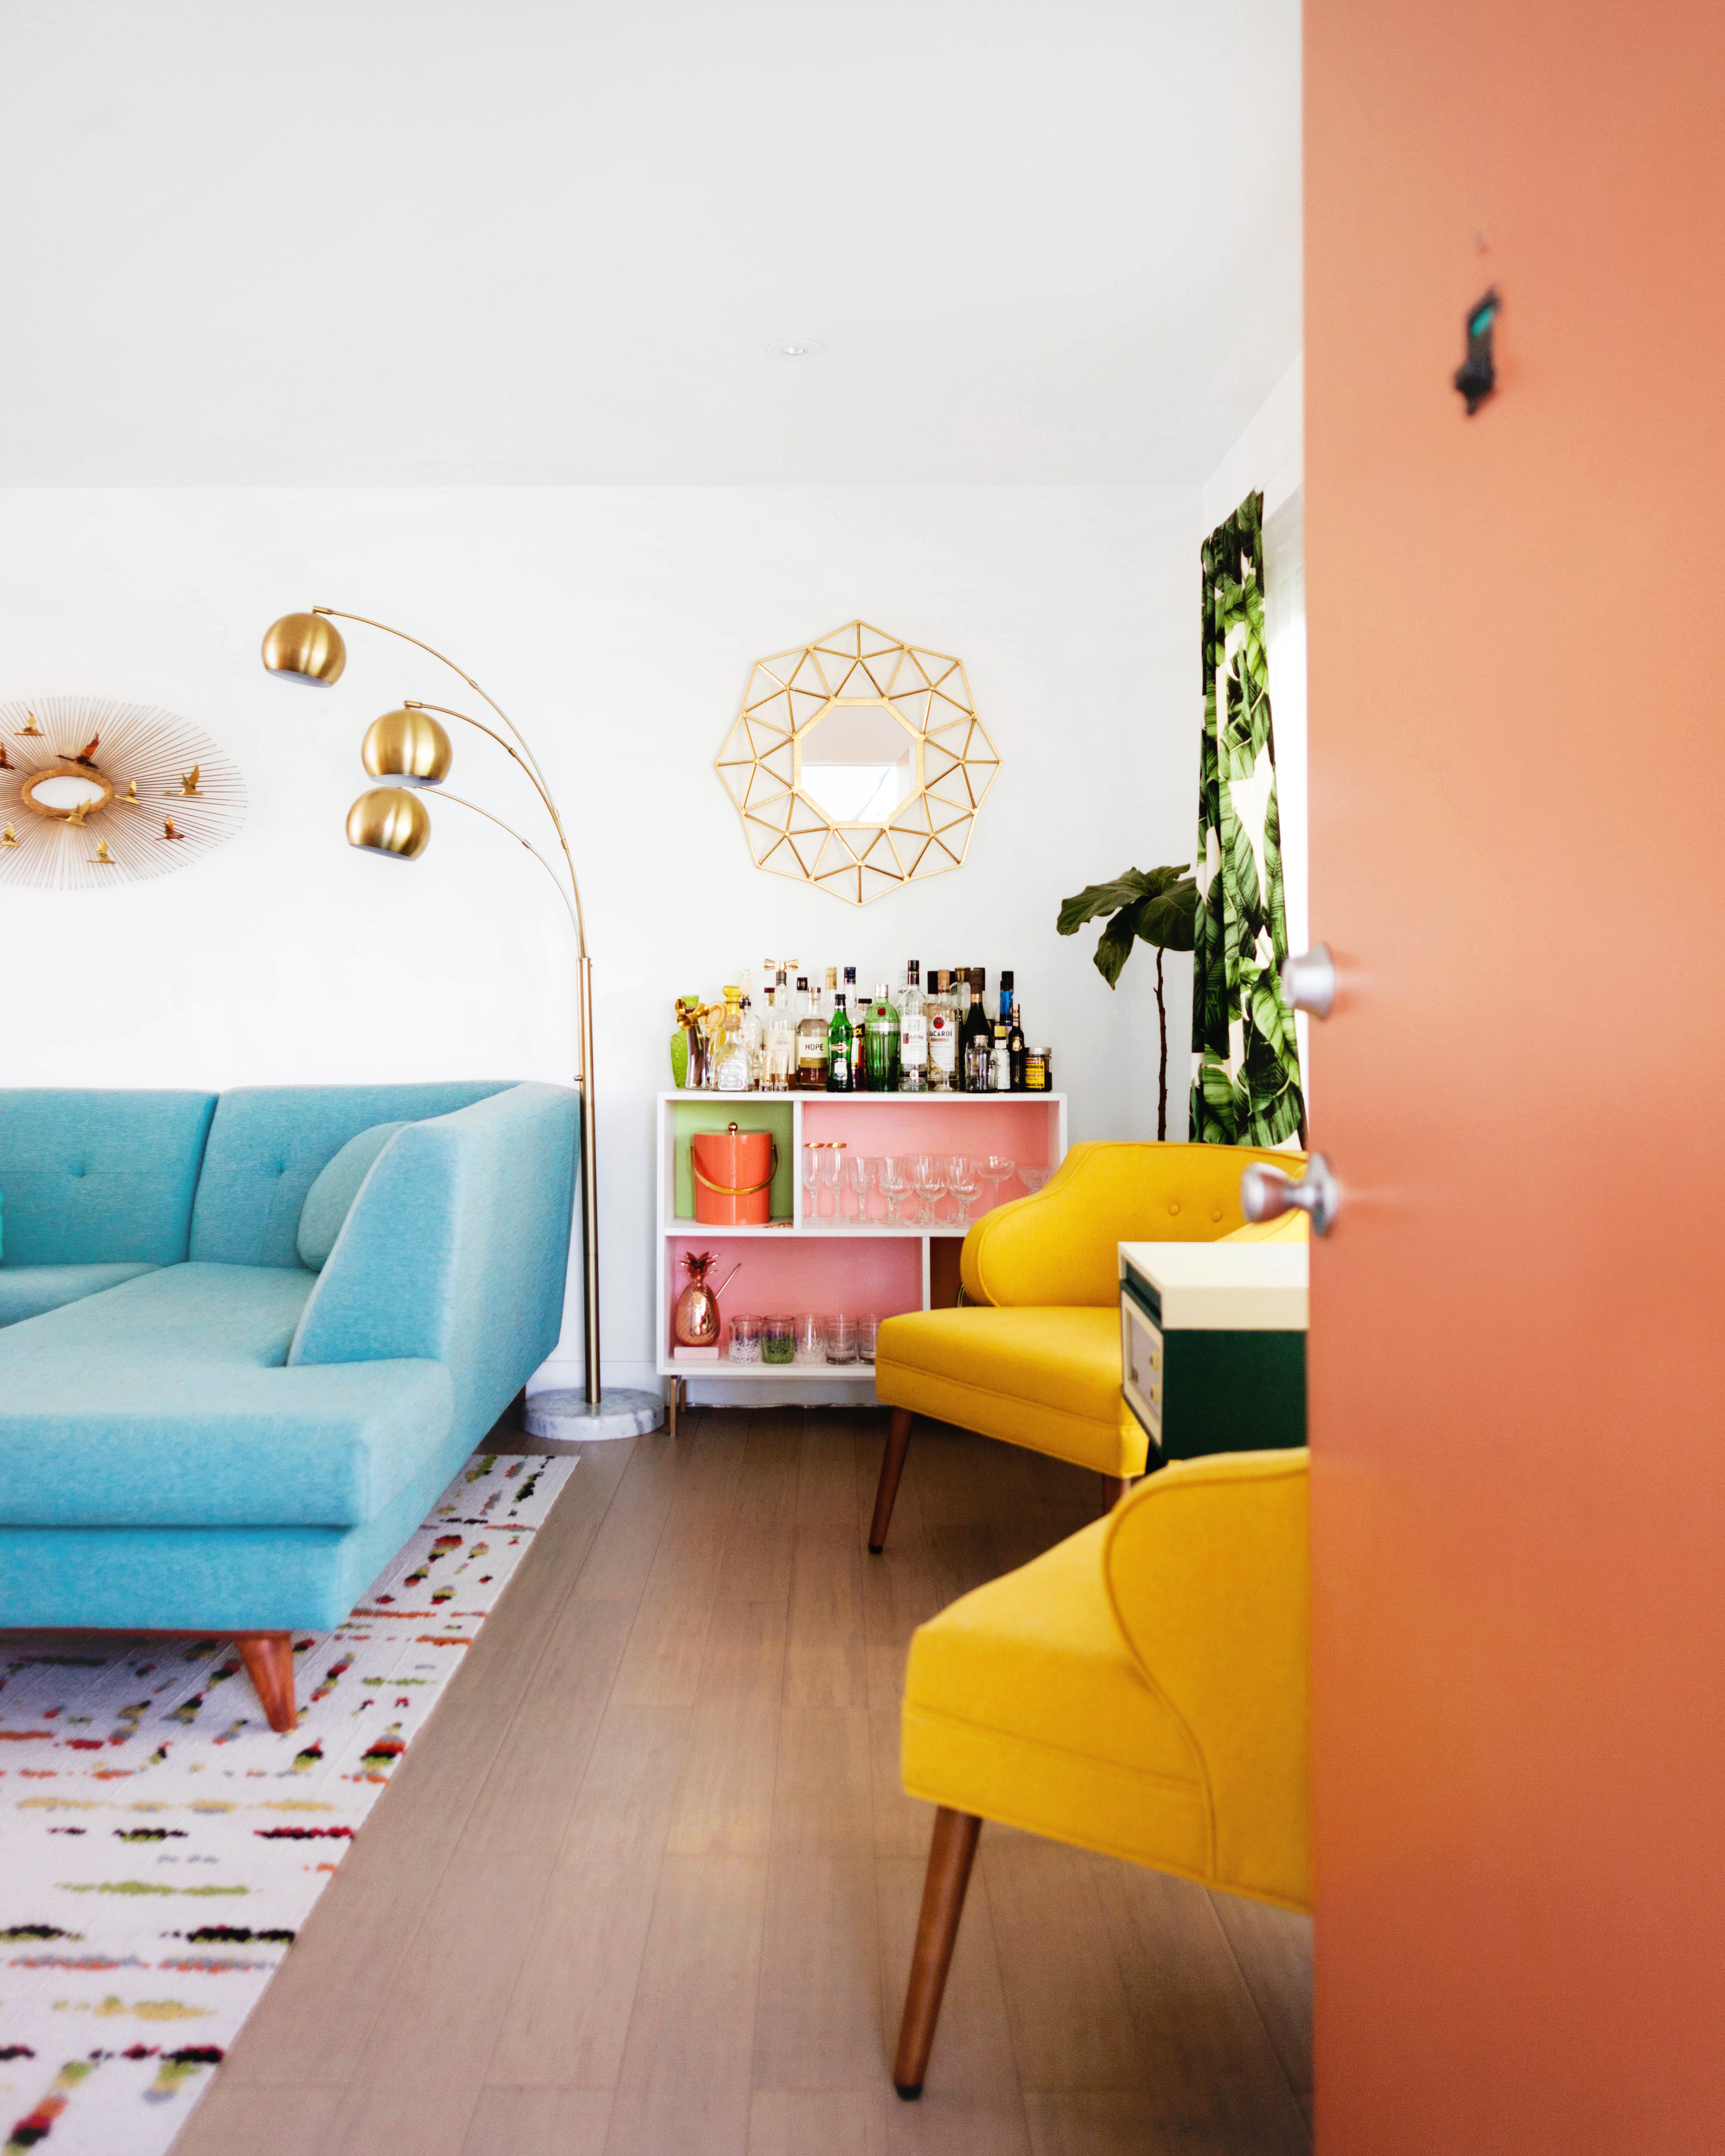
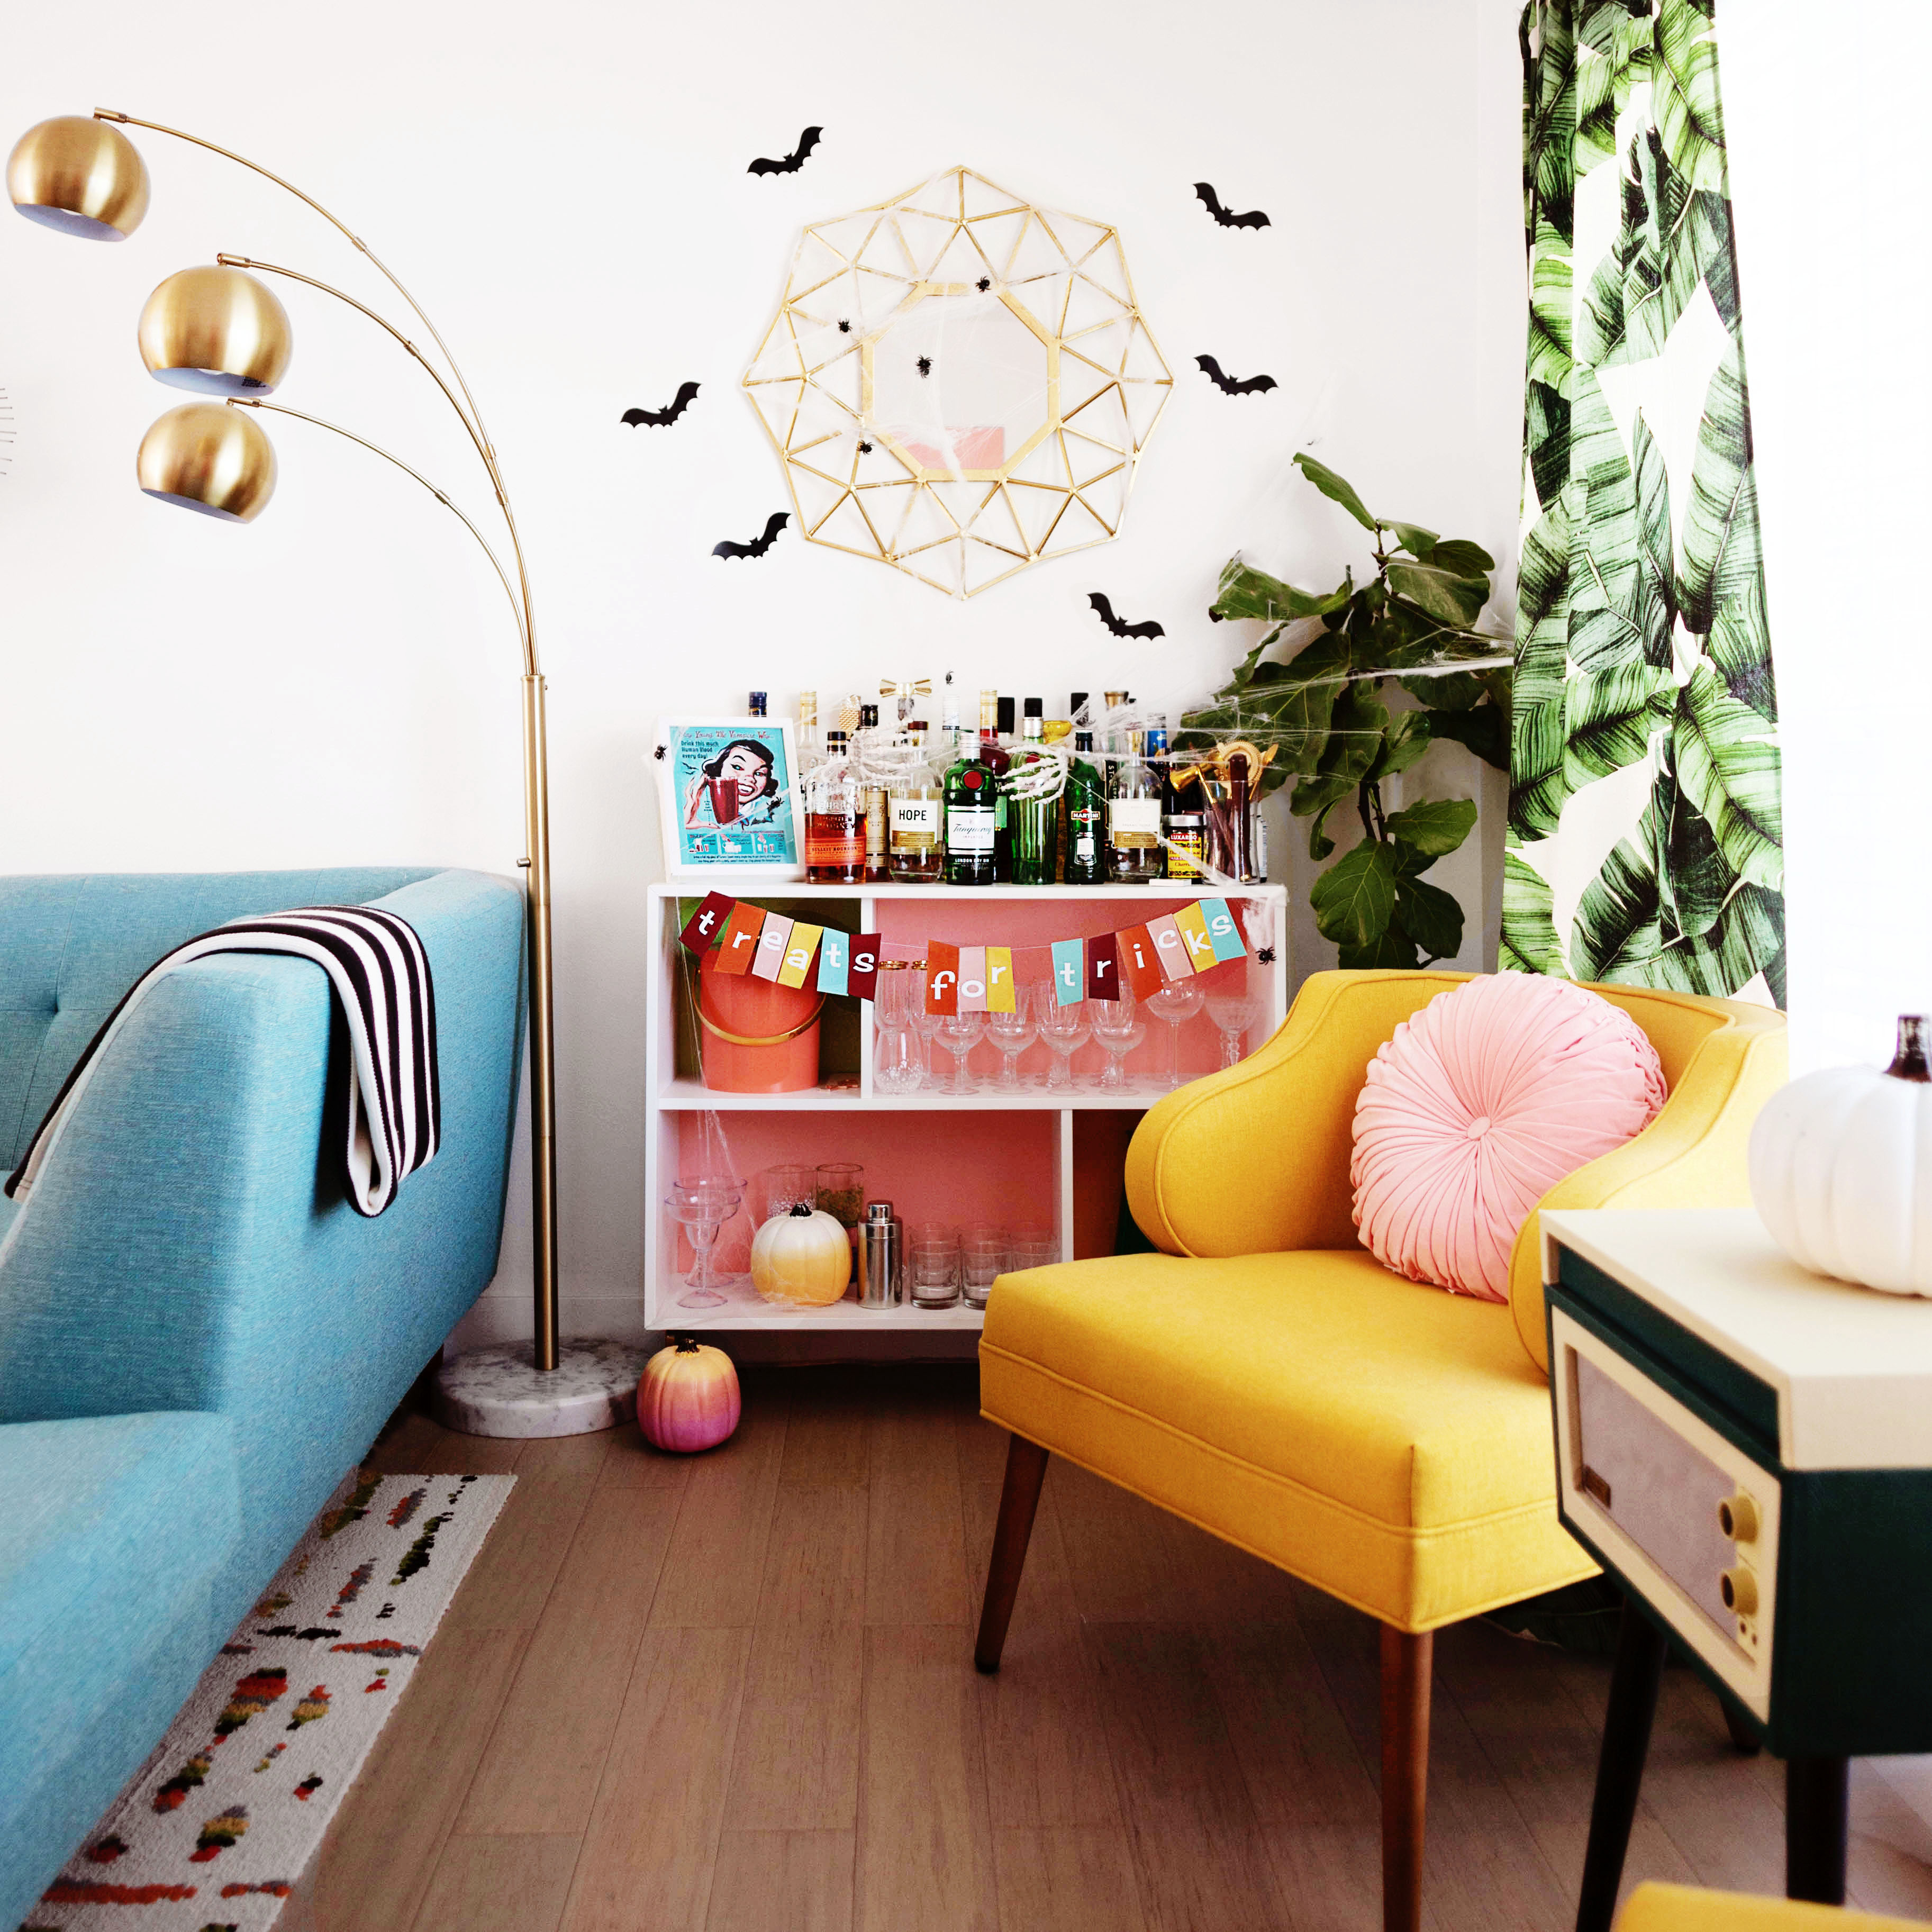
This is what we jokingly refer to as the cocktail corner. The bar is an IKEA bookshelf that I painted and use to store our liquor and vintage cocktail glass collection.
The yellow chairs are from World Market. The color and scale fit the space perfectly which was something I wasn’t having luck with when searching for a true vintage set. I got these on sale for an amazing price so I couldn’t pass them up. In between them is a standing record player.
The mirror above the bar is a score from Home Goods that we had in our last apartment and was originally just going to be used as a place holder, but it worked so great here we decided to keep it.
The 3 orb floor lamp is from Target’s Project 62 line.
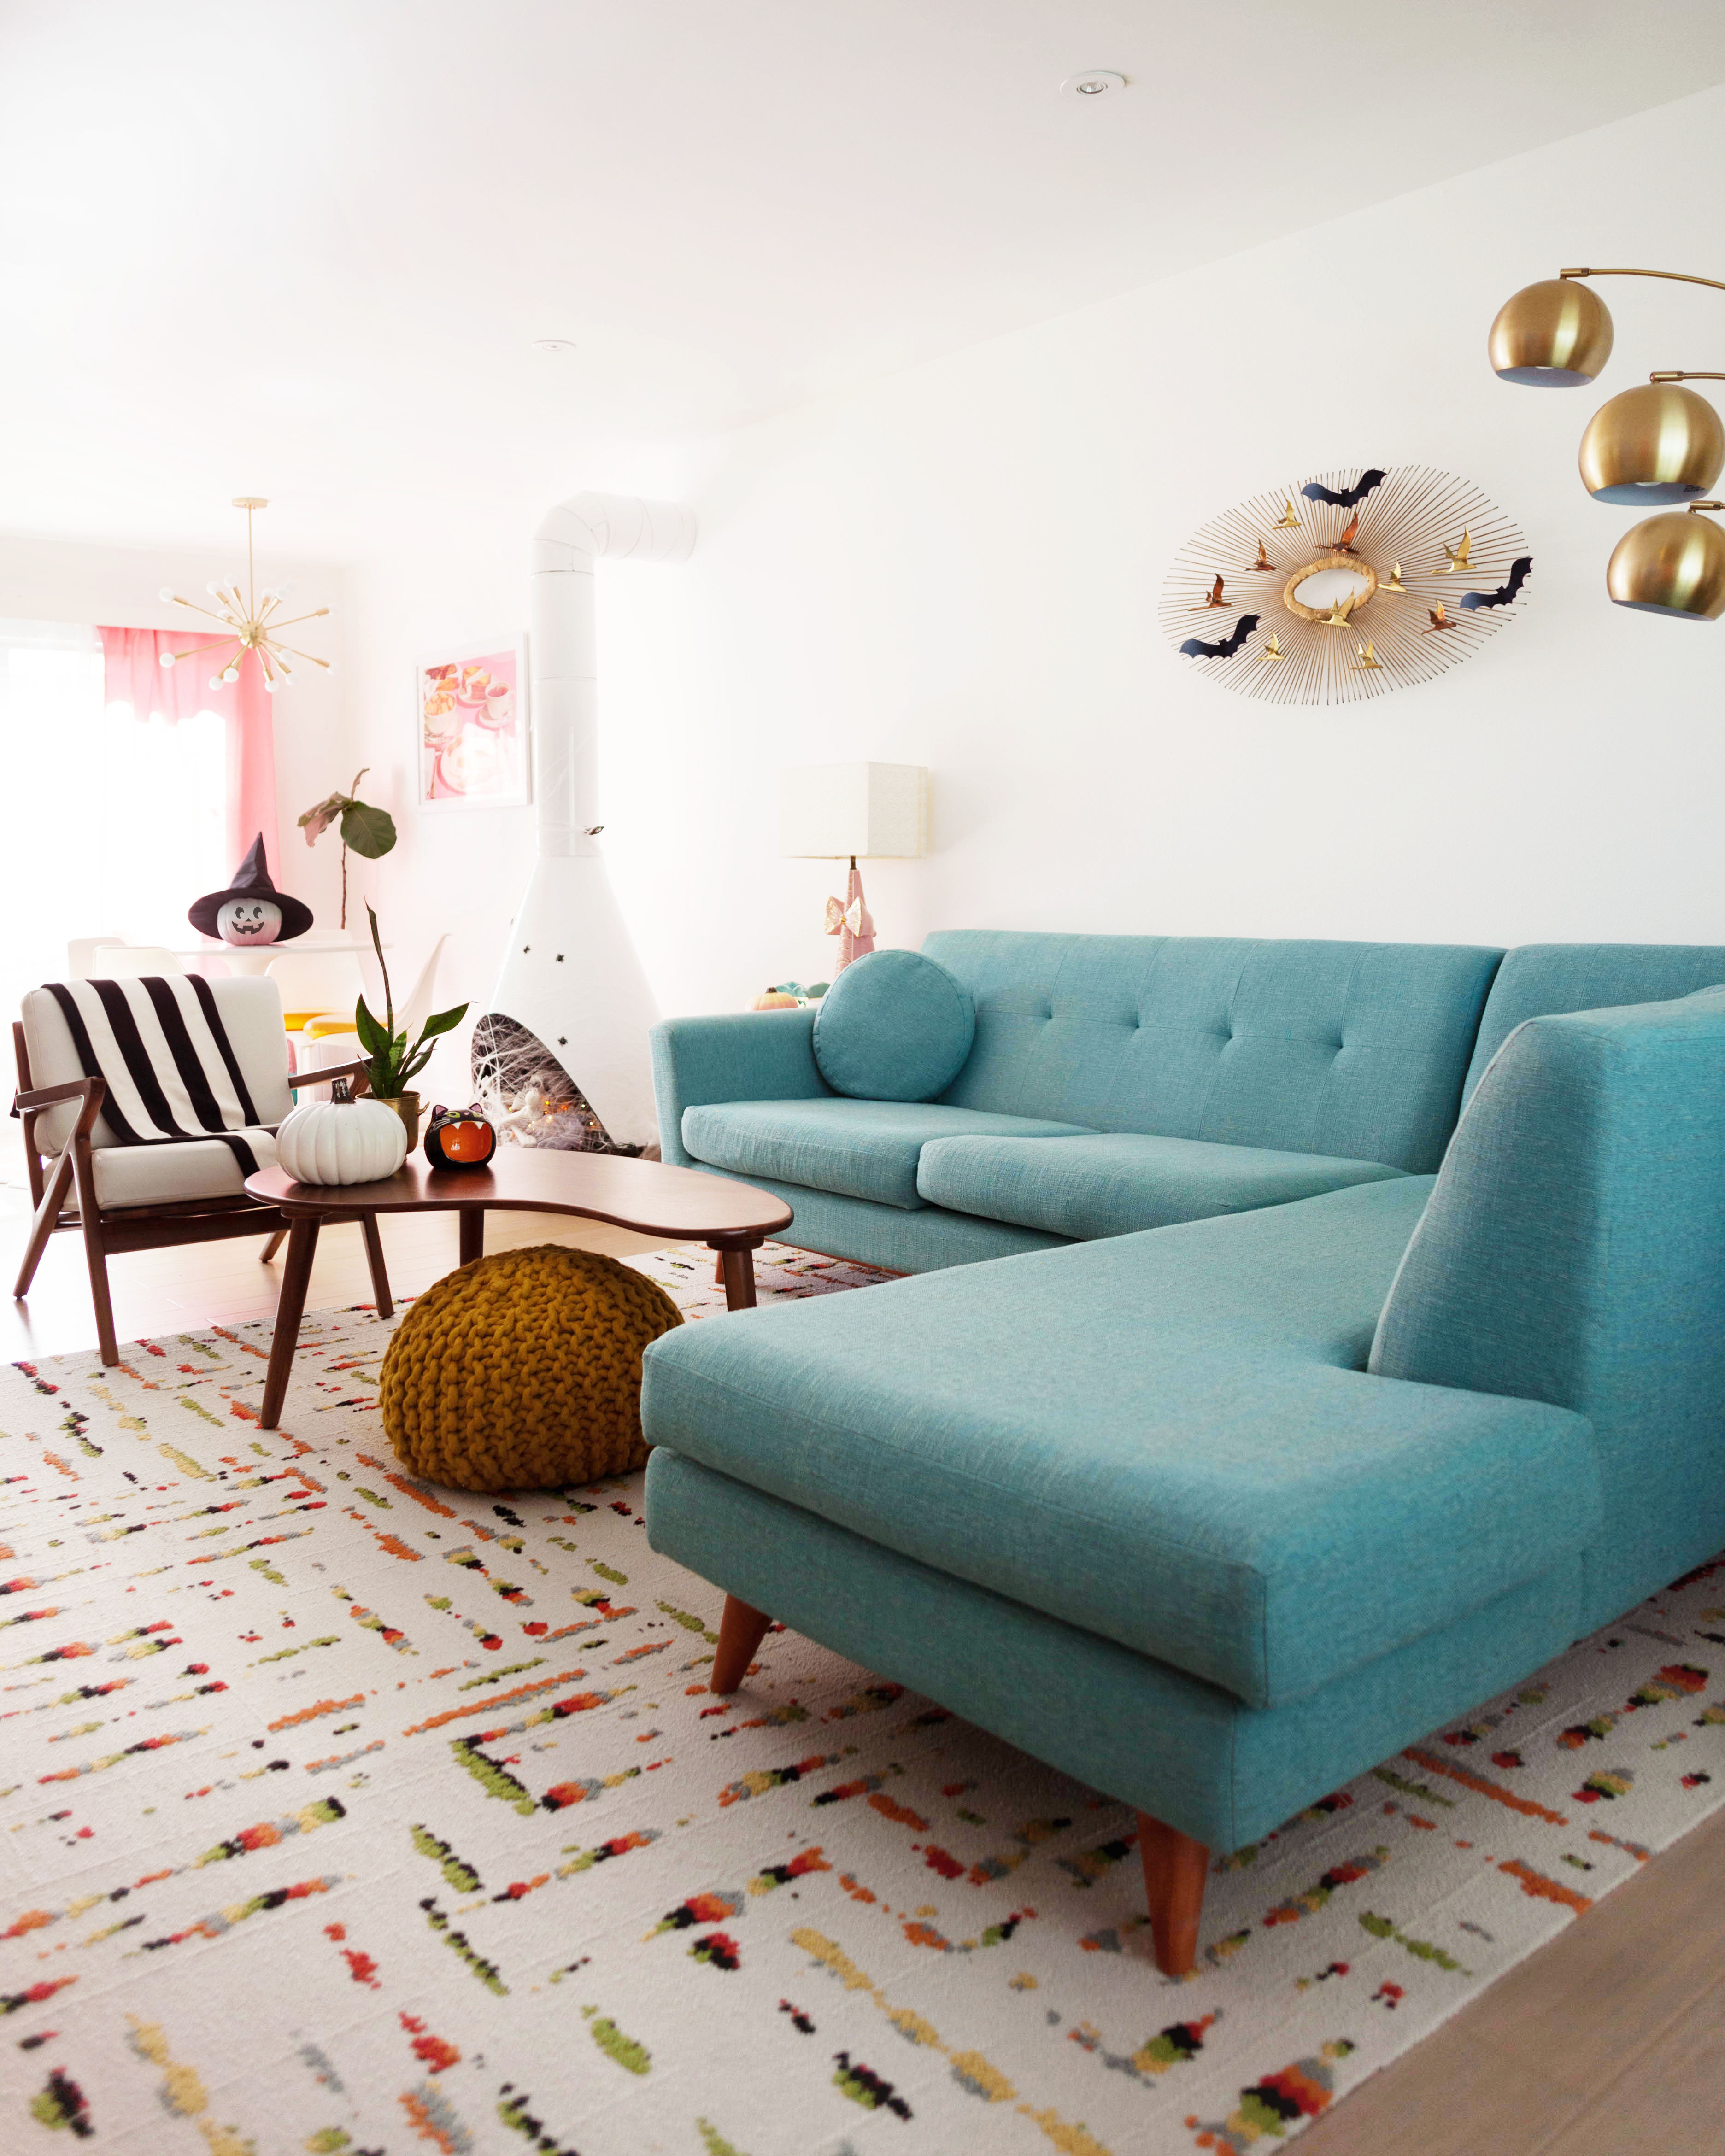
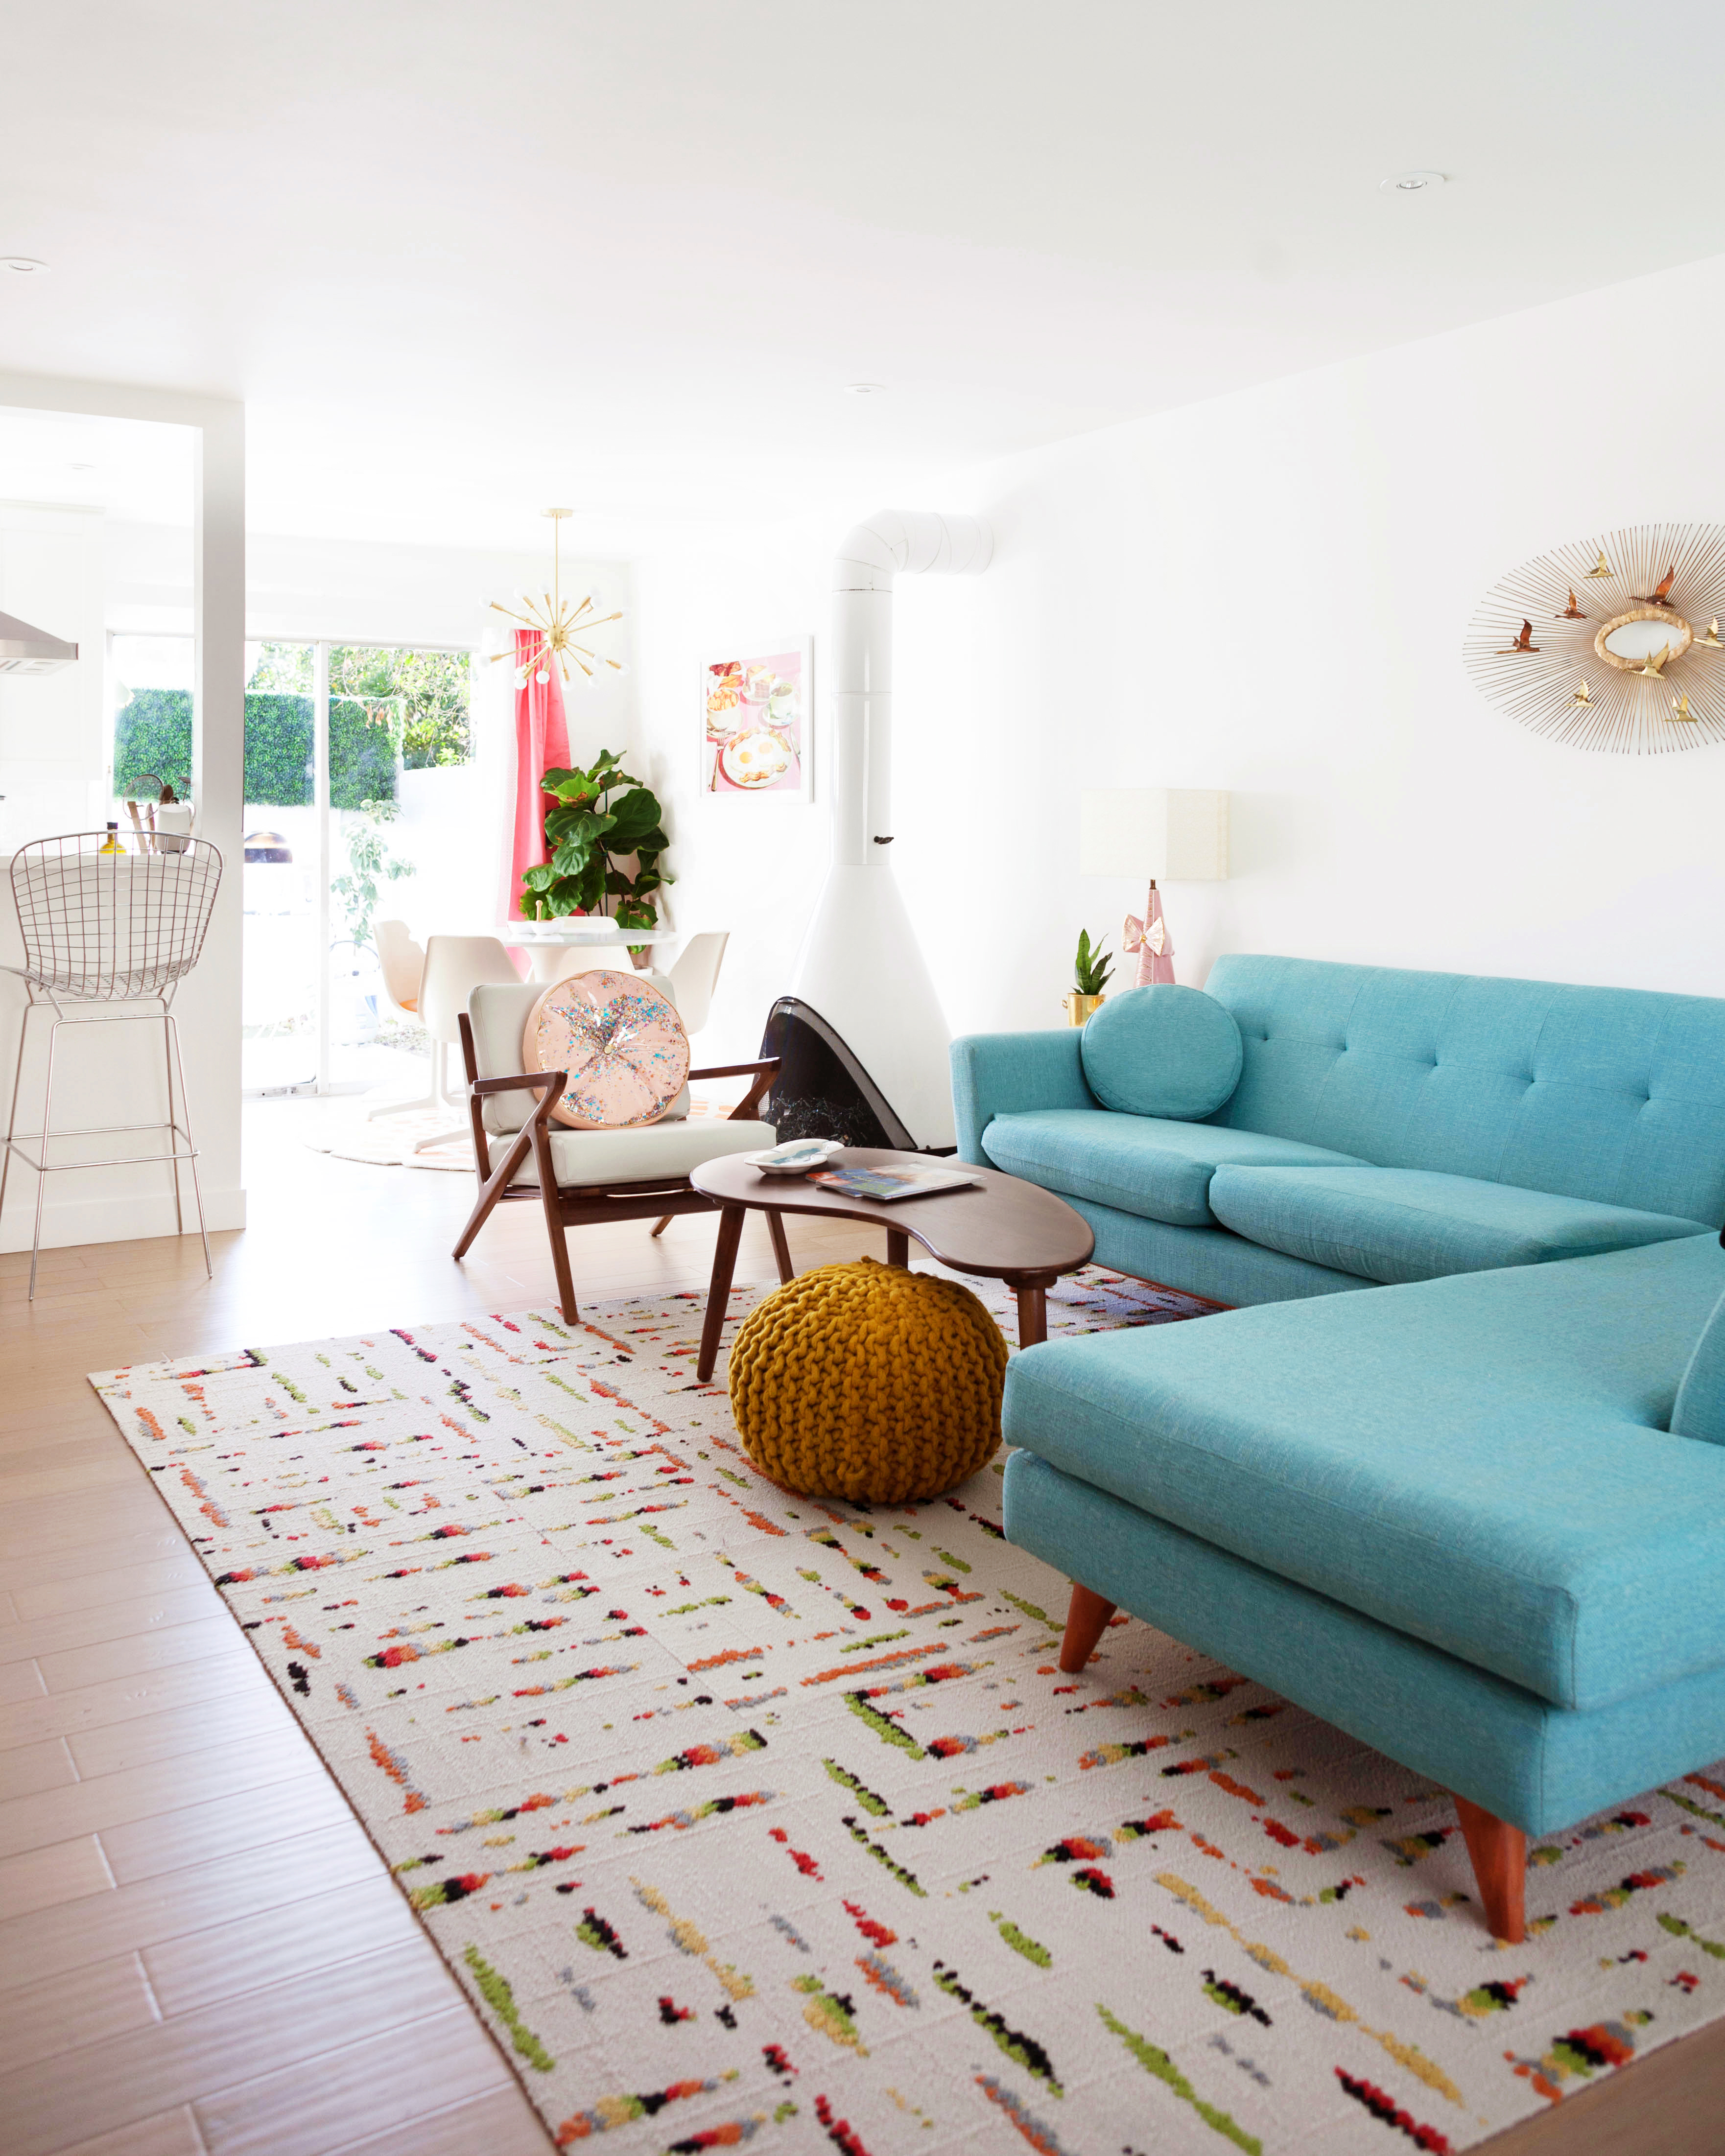
To the left of the cocktail corner is our main conversation area where we hang out and watch tv. Because we have an open concept living space I wanted to create different areas within the room that felt separate but still connected. While a few friends are listening to a record and having a drink by the cocktail corner, more could be hanging out here, and something else could be going on over at the dining table. It makes the room feel bigger and more functional this way.
A sectional is perfect for this type of layout. Last year I was lucky to collaborate with one of my favorite mid-century inspired furniture manufacturers, Joybird, so a lot of our furniture is from there. I love Joybird because you can customize each style with different configurations, wood finishes, and fabrics. For our sectional we chose the Hughes Bumper Sectional in Notion Thunderbird with medium toned wood legs.
 The kidney shaped coffee table, knitted pouf, and accent chair are also from Joybird.
I wanted to pull together all of the colors from the room so I chose multi-colored carpet tiles from Flor. These are great if you have pets or children and need to be able to wash your rug easily.
The curvy metal Bertoia barstools are a score from Craigslist.
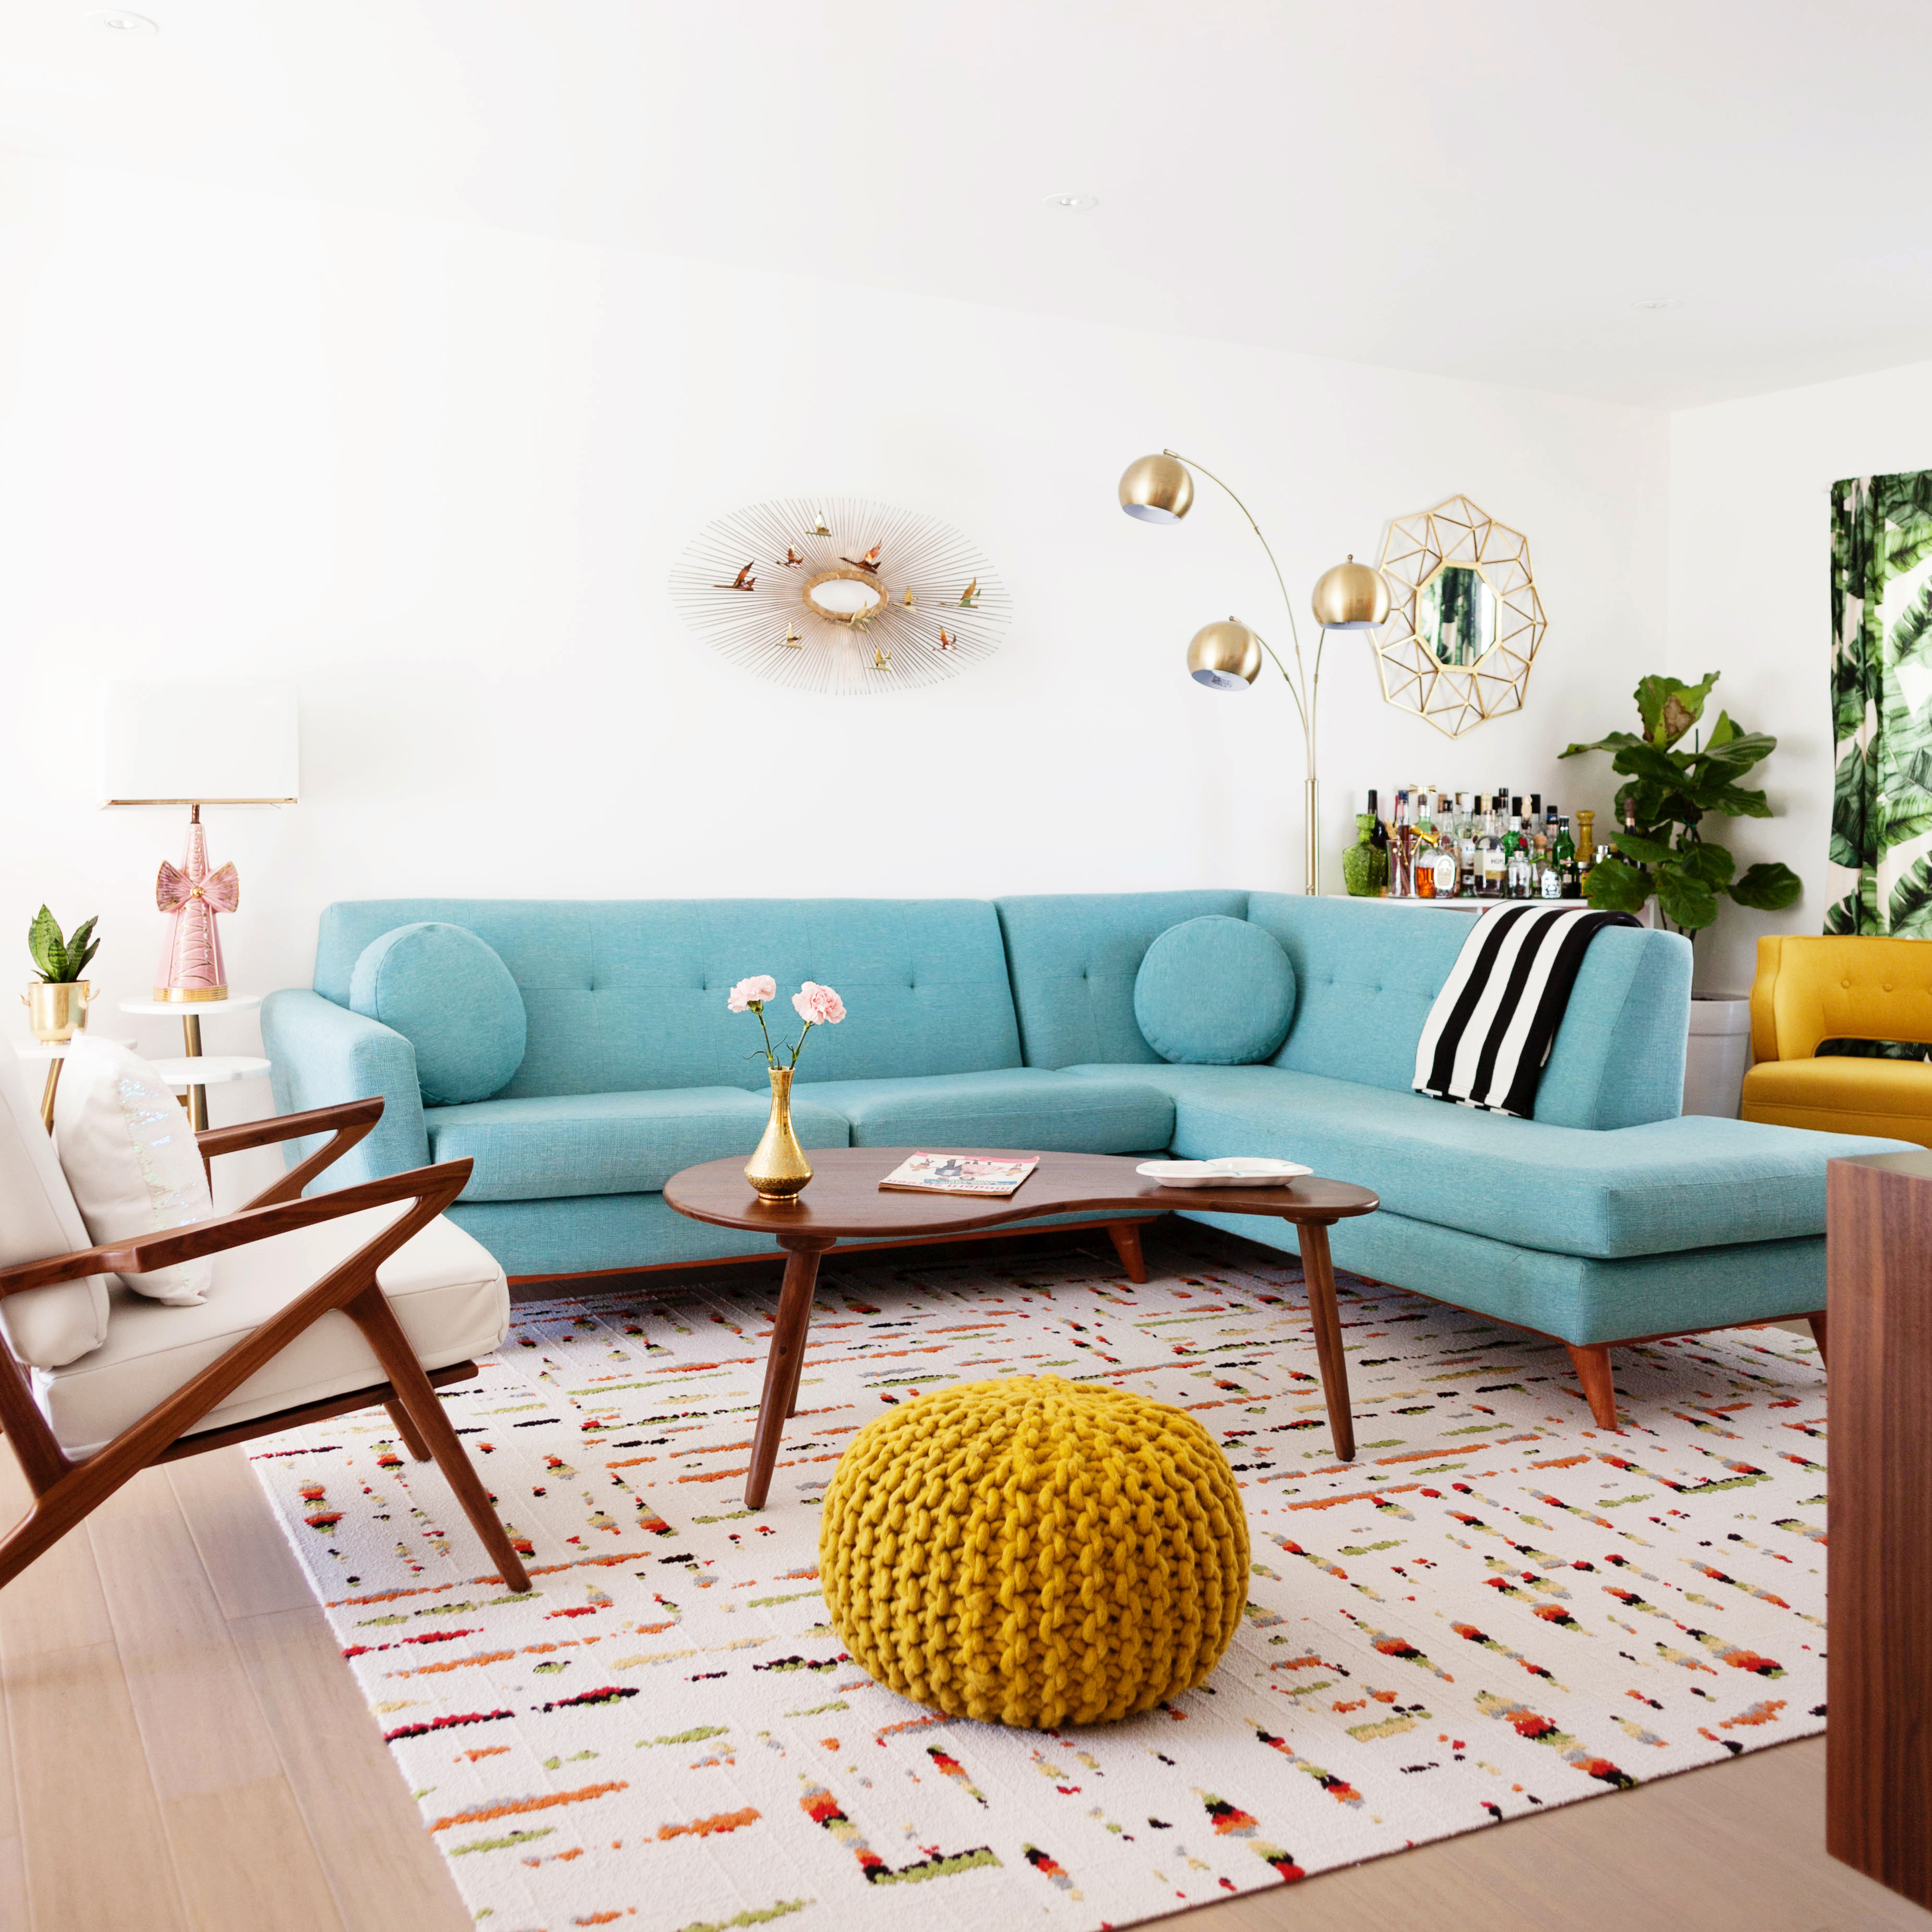 The vintage Curtis Jere brass sculpture above the sofa was in bad shape when I found it at the Long Beach Flea Market but with a lot of patience I was able to fix it up and make it look great again. The Stangl Pottery vase on the coffee table is another vintage score from Long Beach.
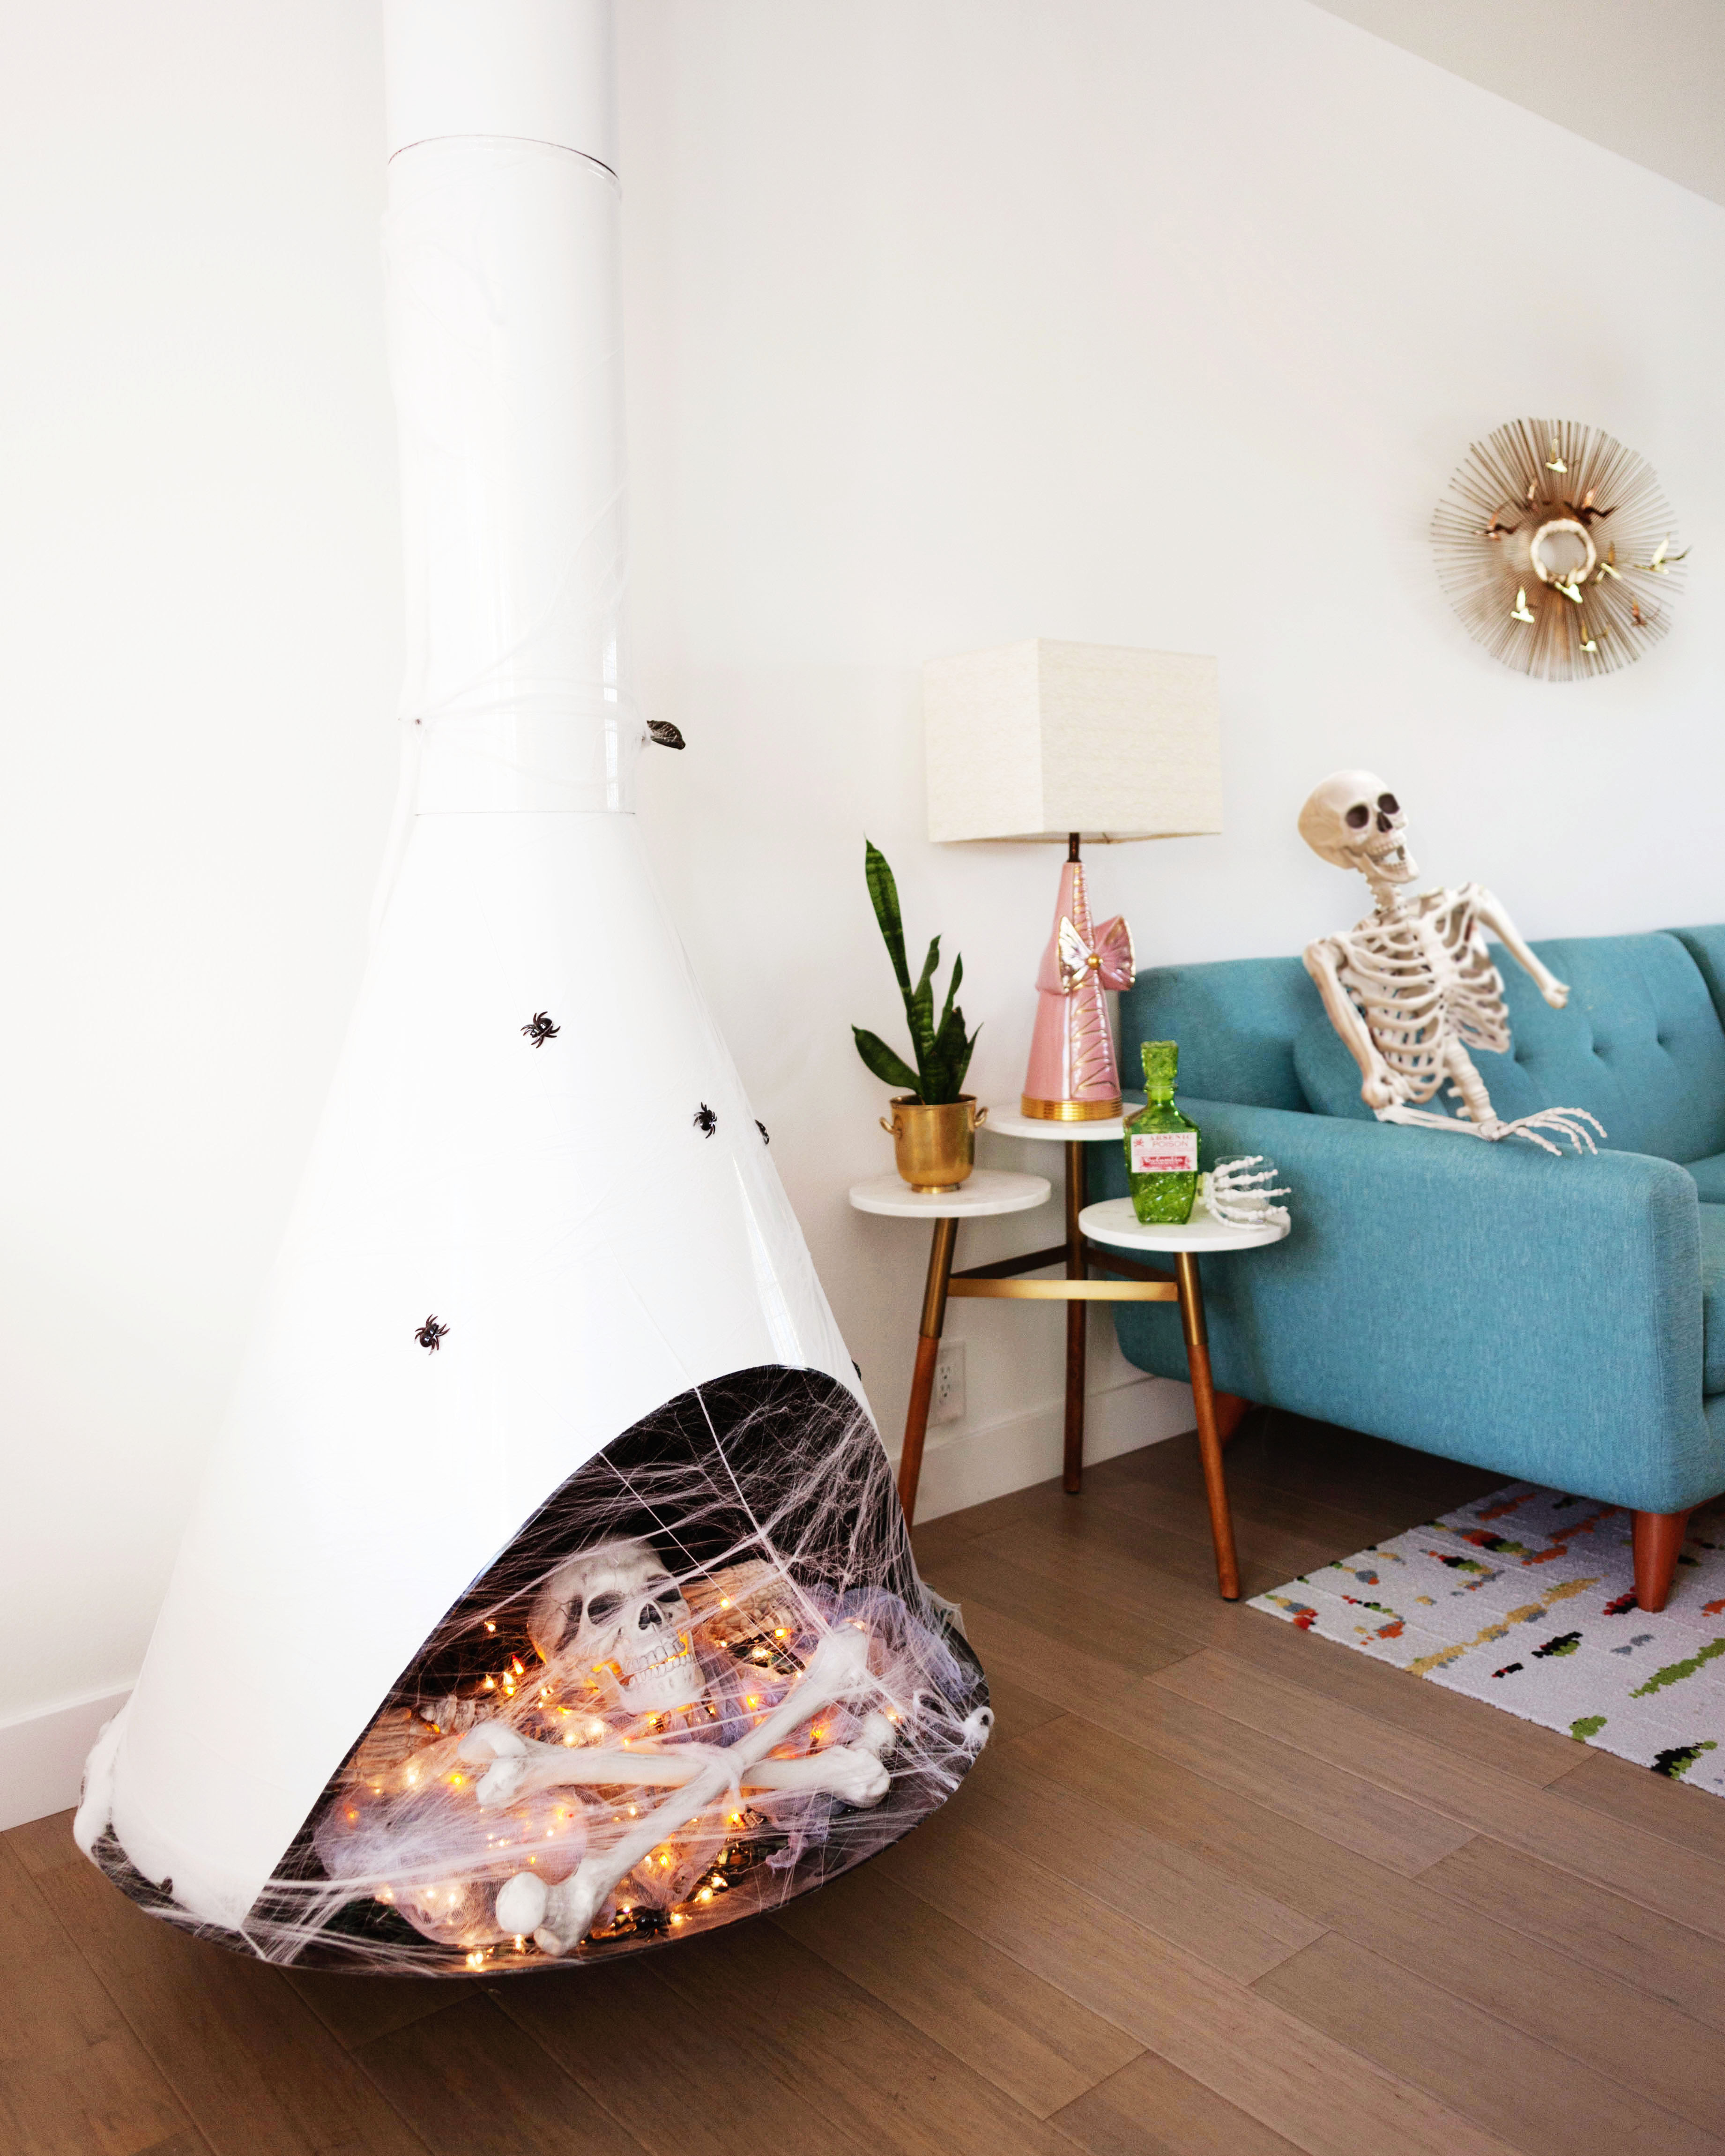
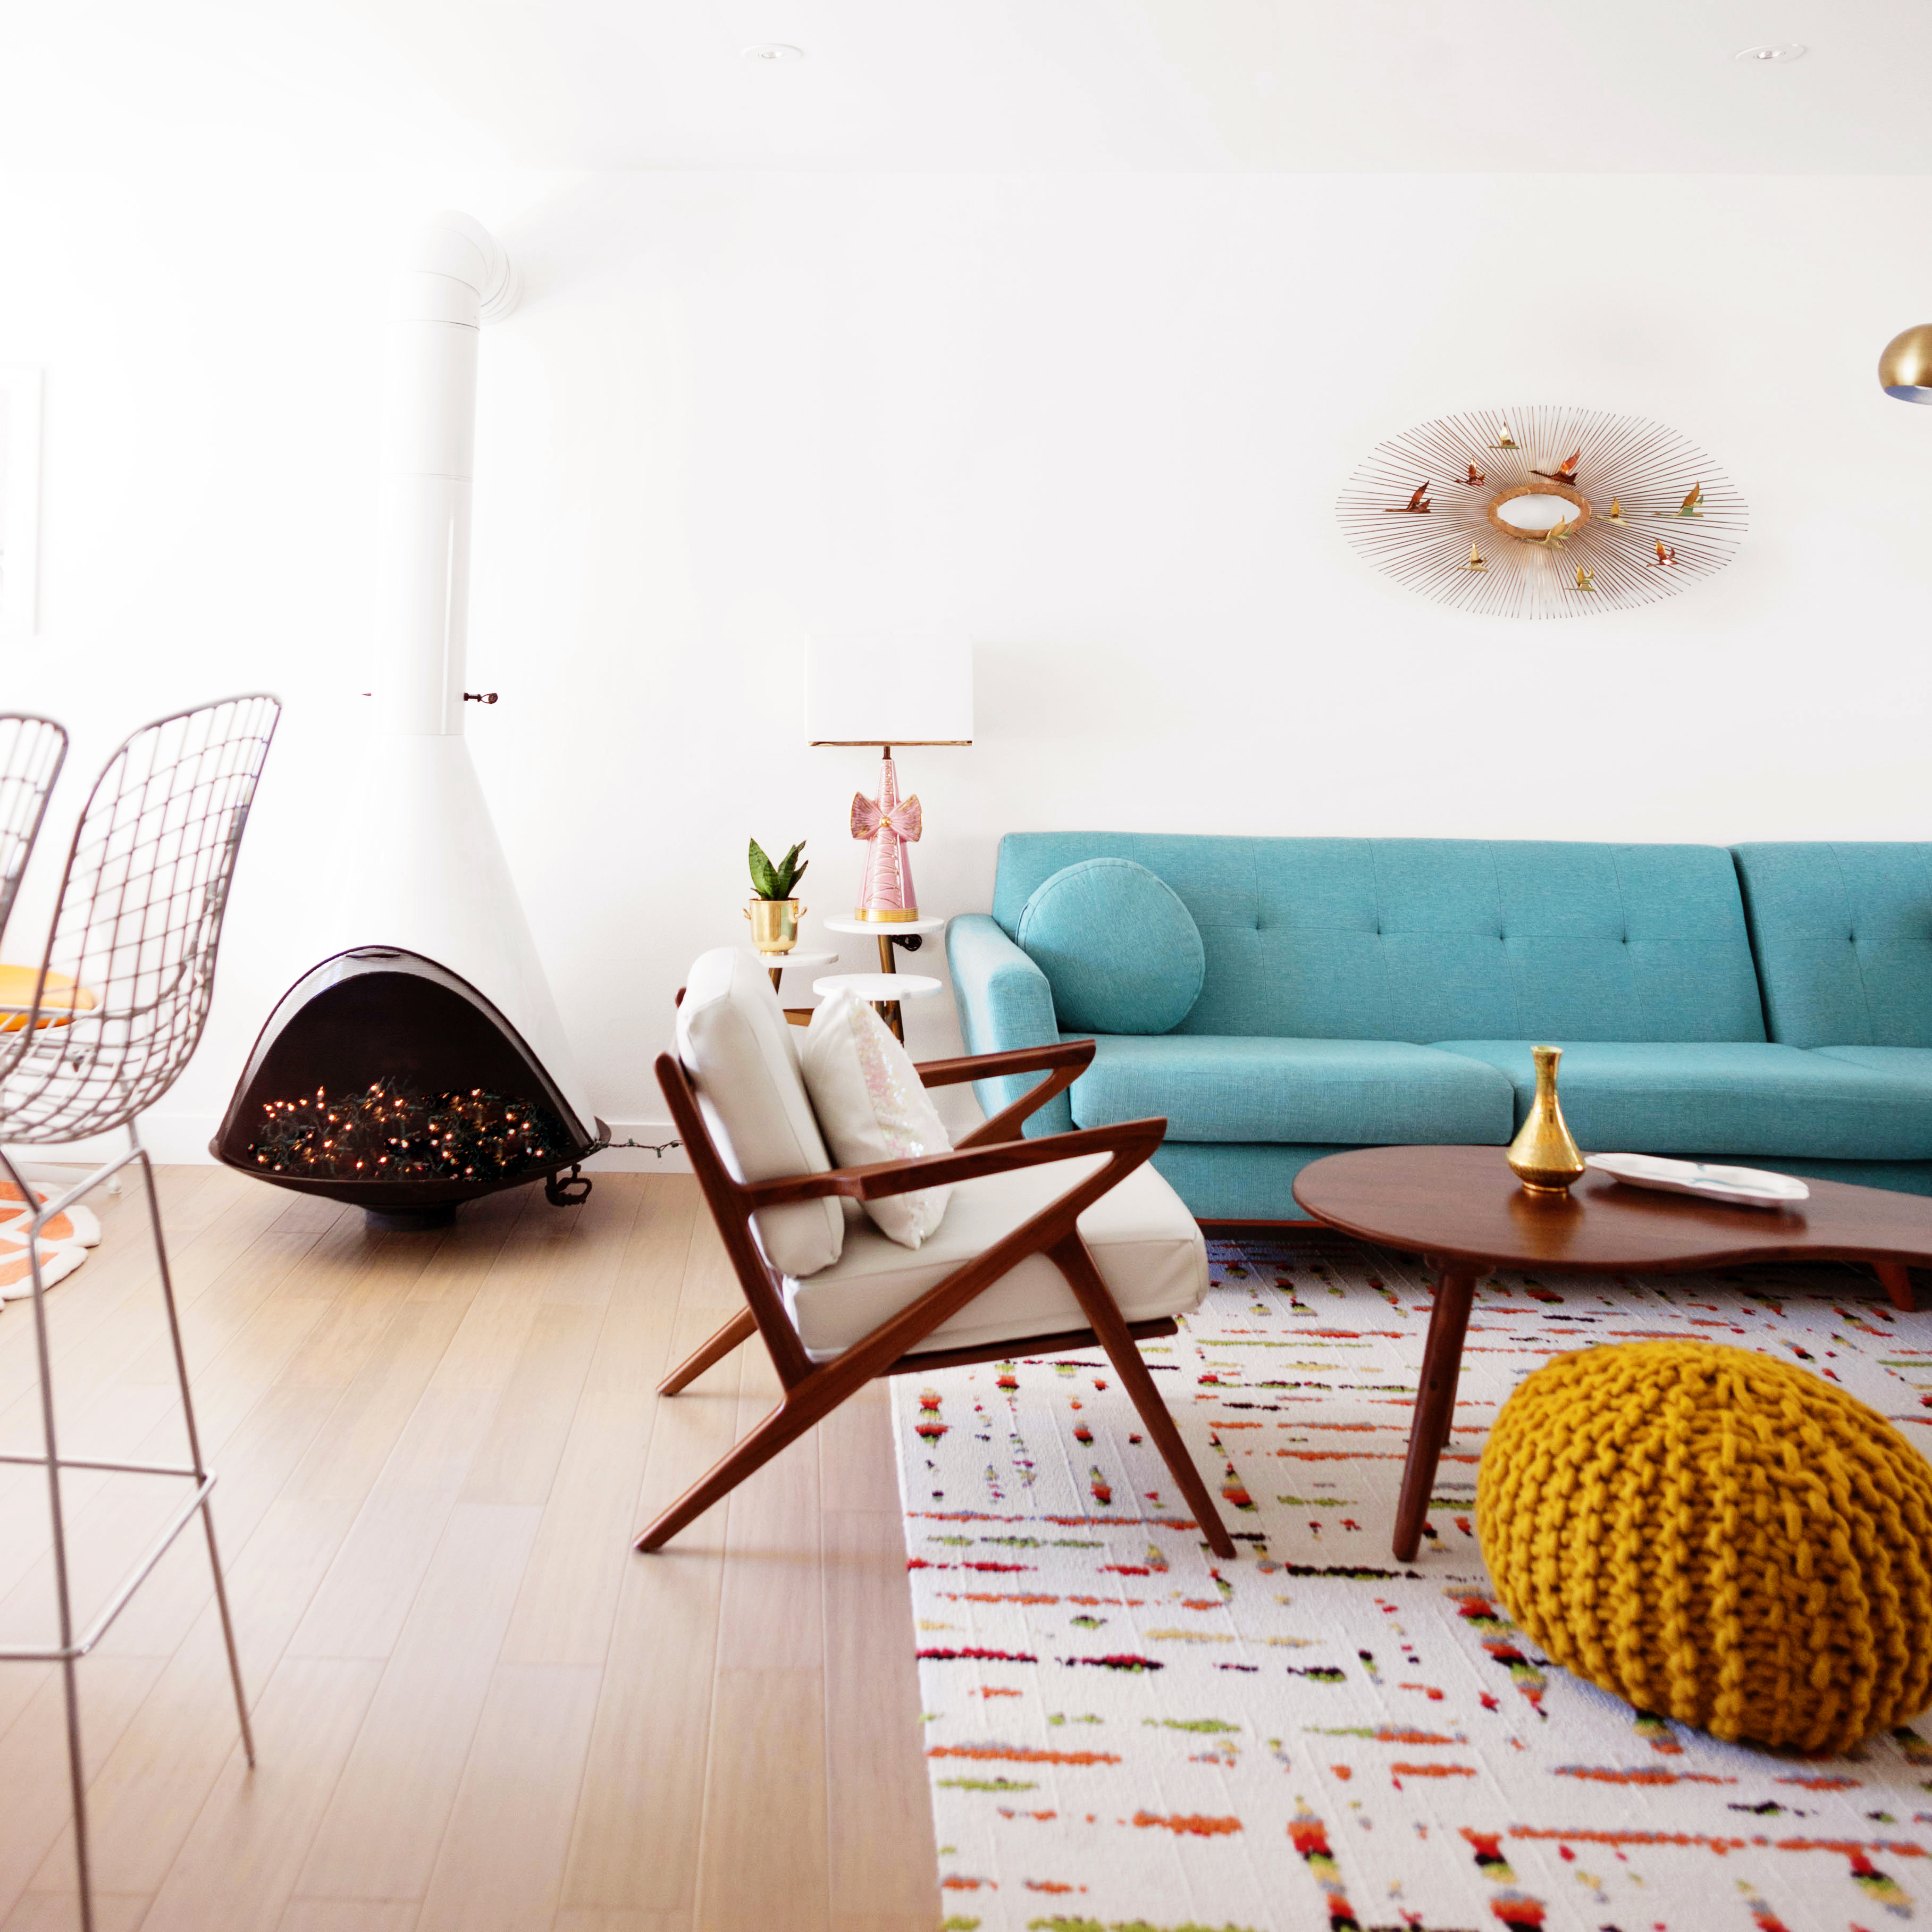 We added the conical fireplace to give the space a little more architectural detail. I found it on Craigslist and picked it up from the house it had been in since 1960. It doesn’t function in here but it has a little electric log and is stuffed with twinkle lights for ambience.
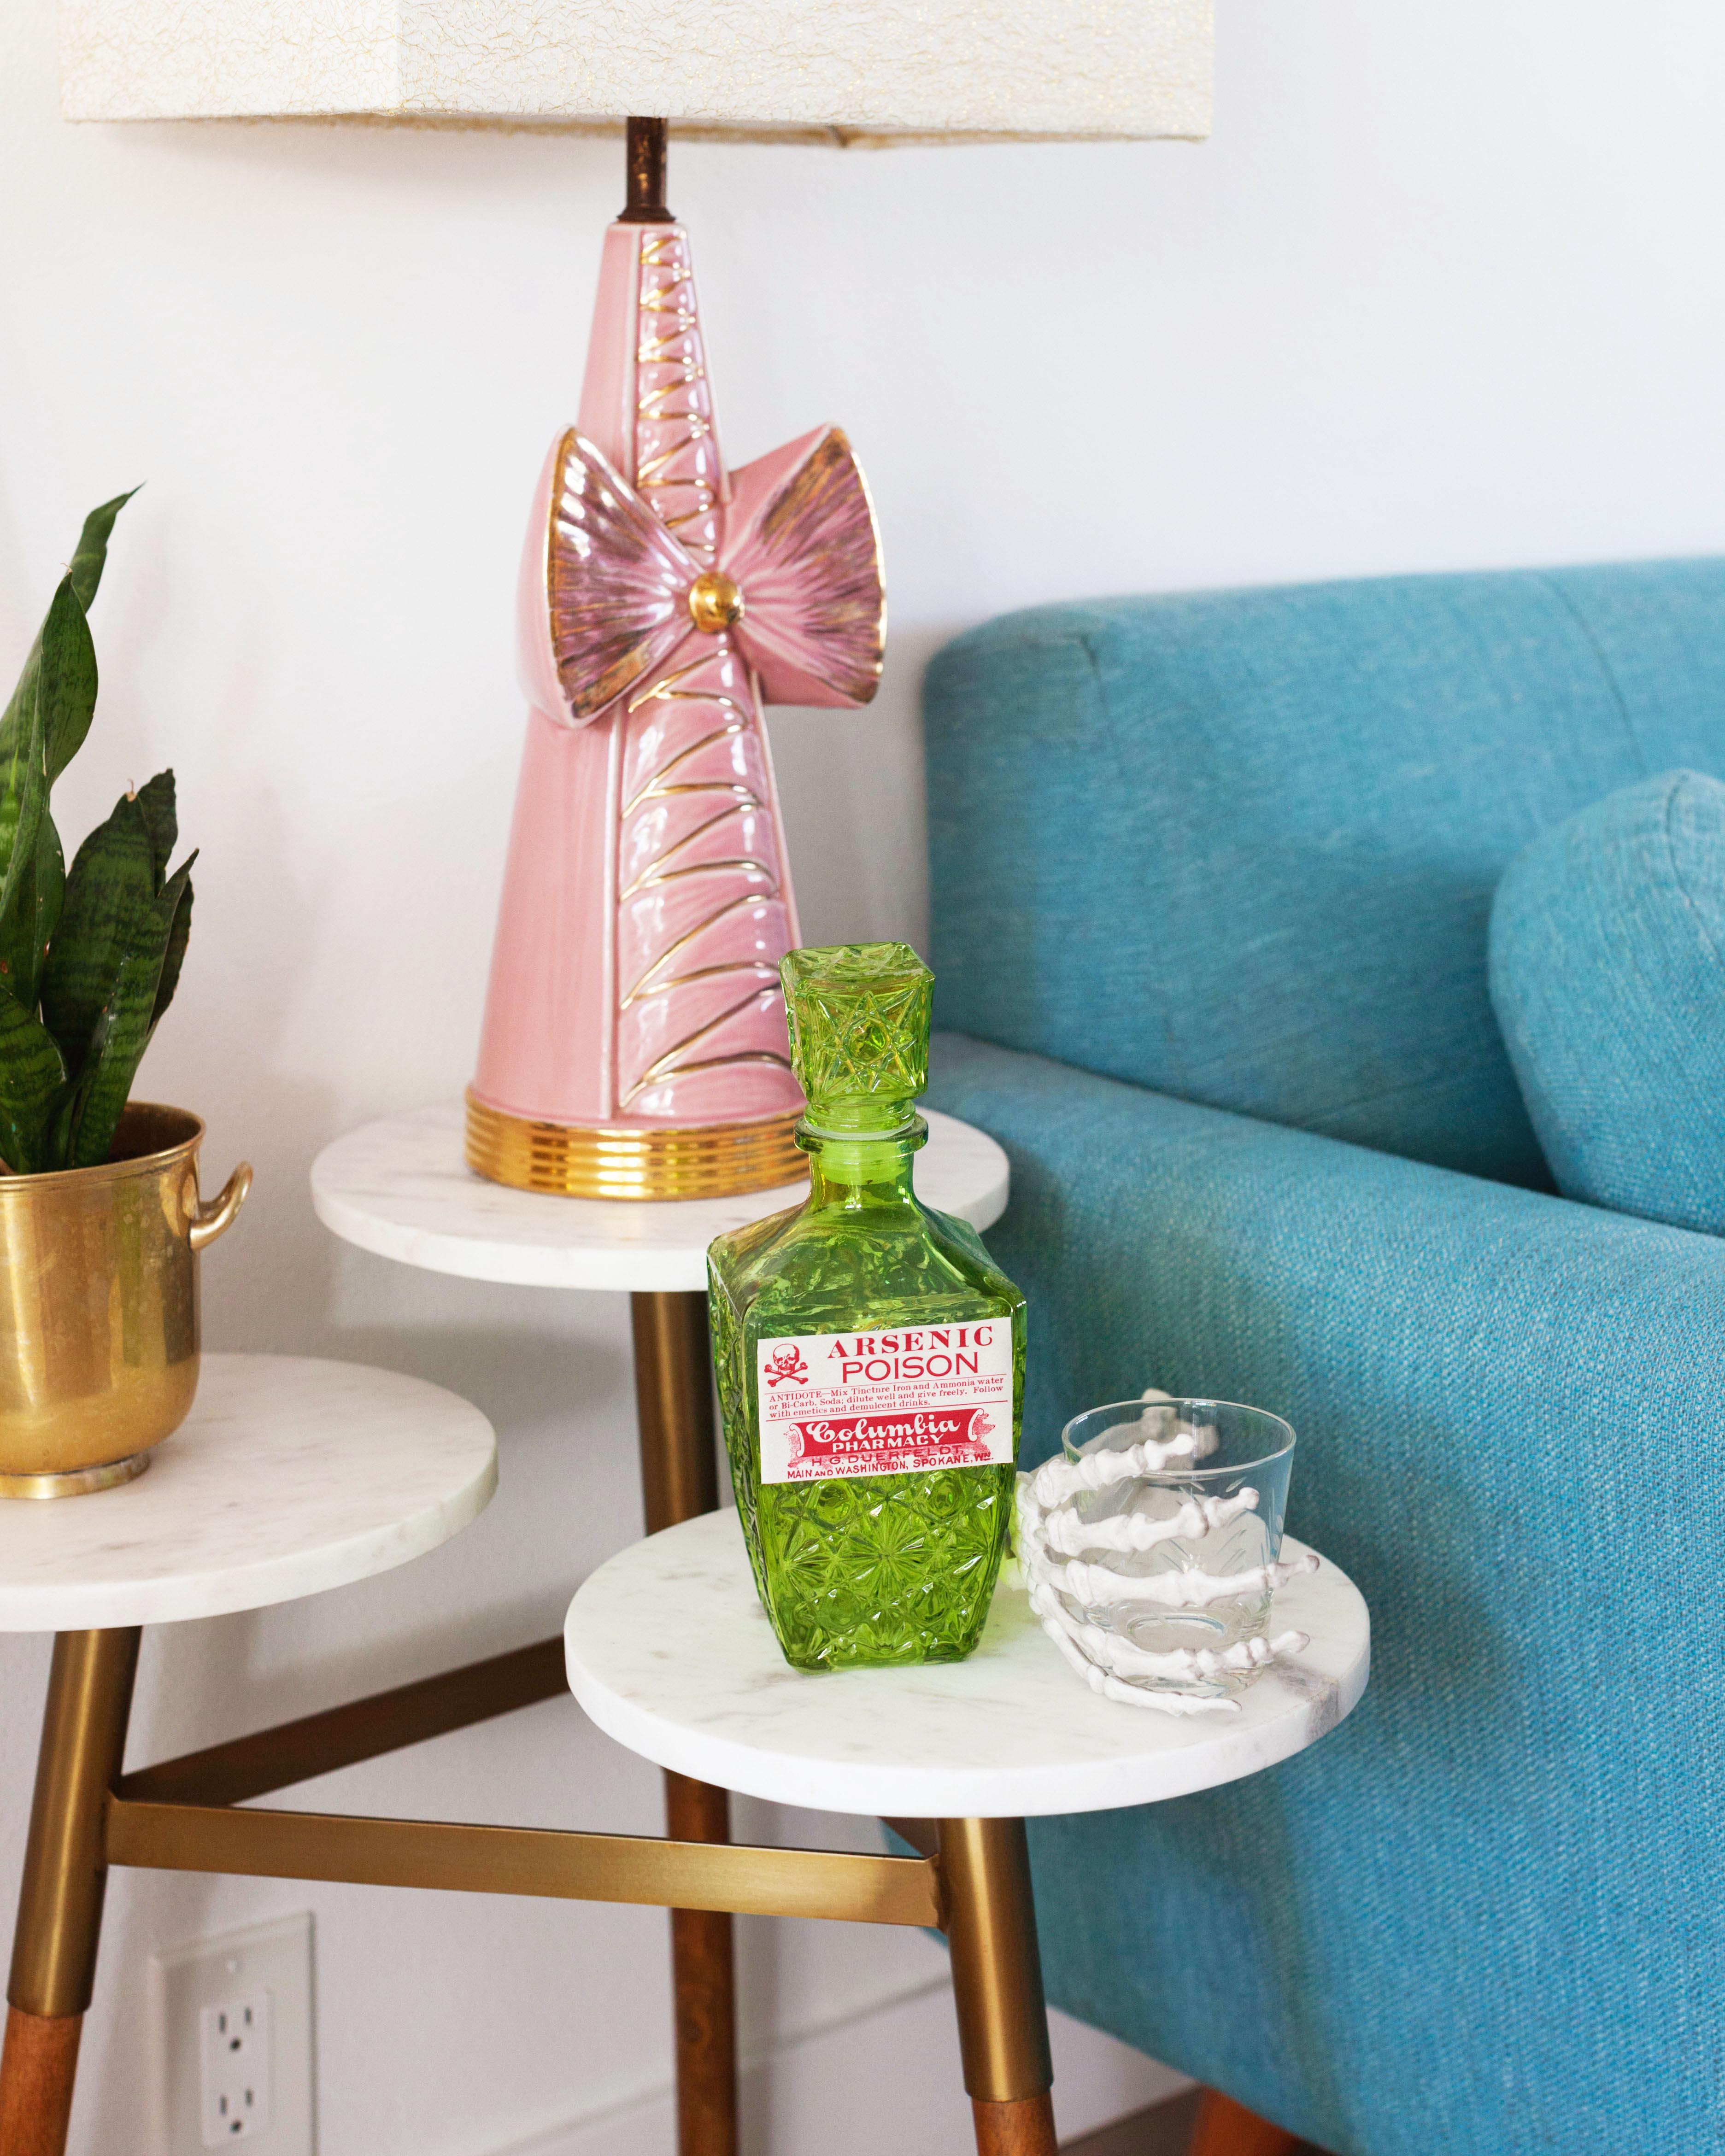
The adorable pink bow lamp is from a shop called RetrOKC in Oklahoma City. I found it while on a cross-country road trip last year.
The 3-tier marble side table and lamp shade are both from Target’s Project 62.
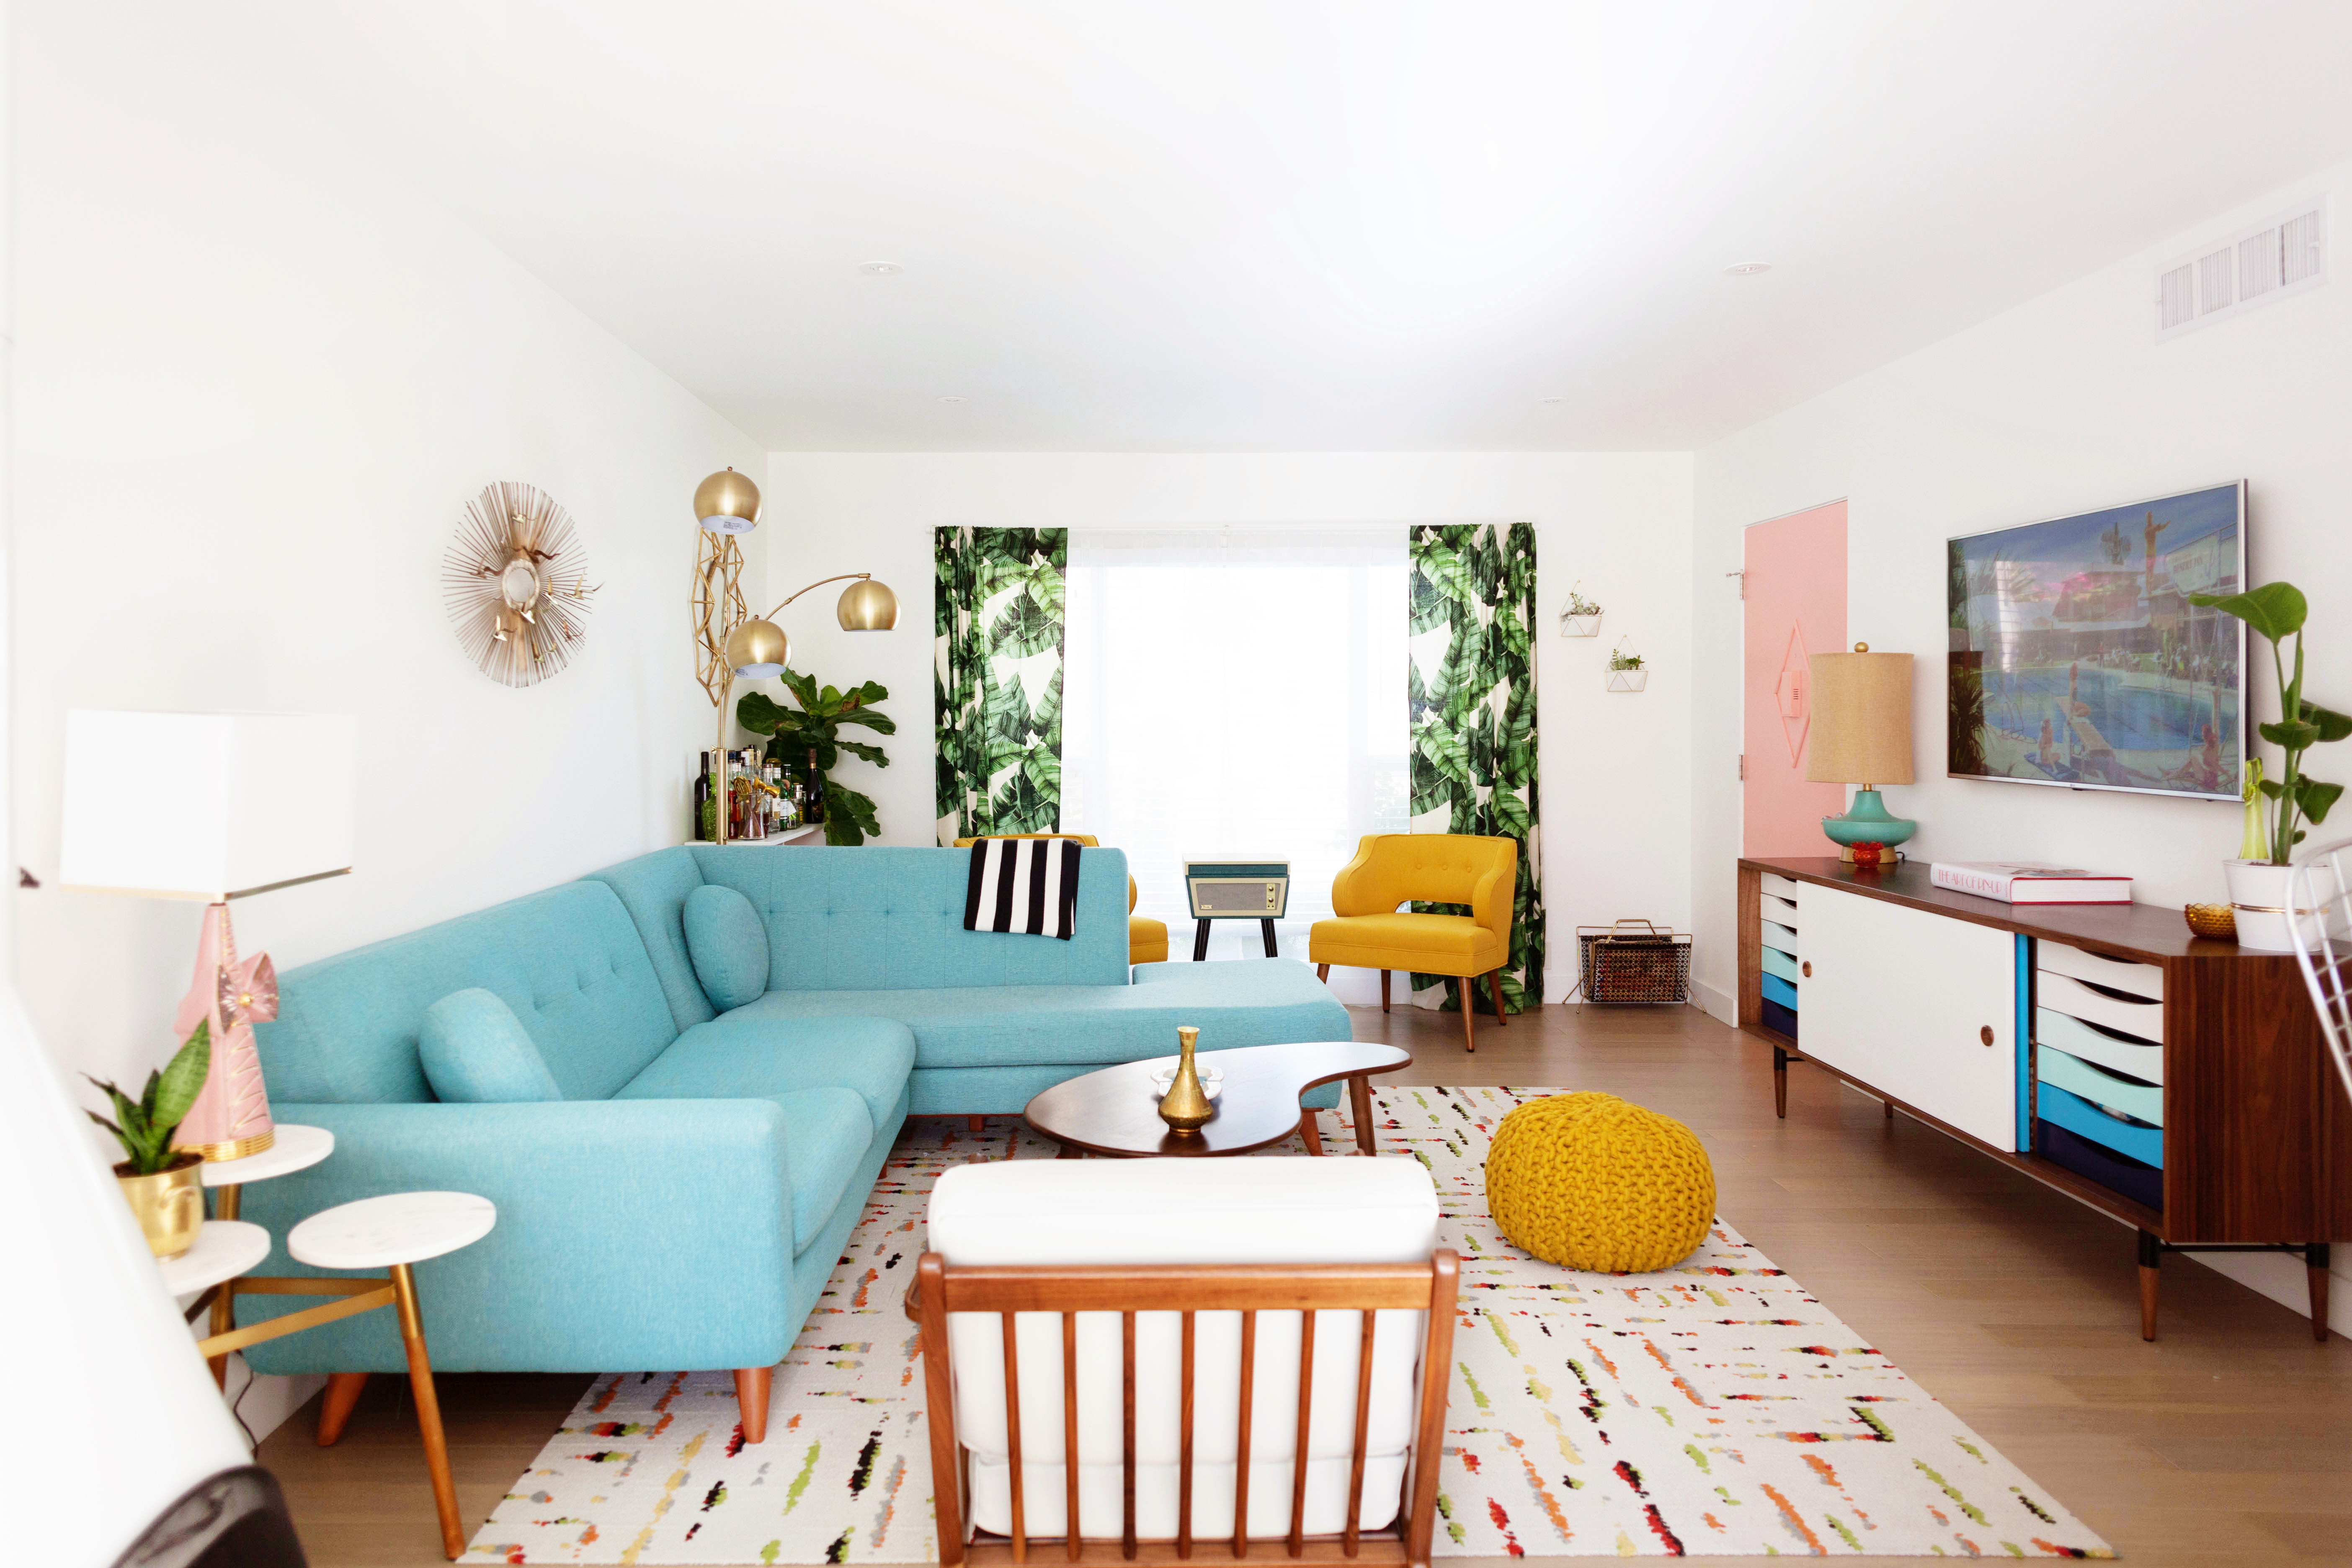
Here’s a wide view of the entire space. The palm print curtains are from H&M Home.

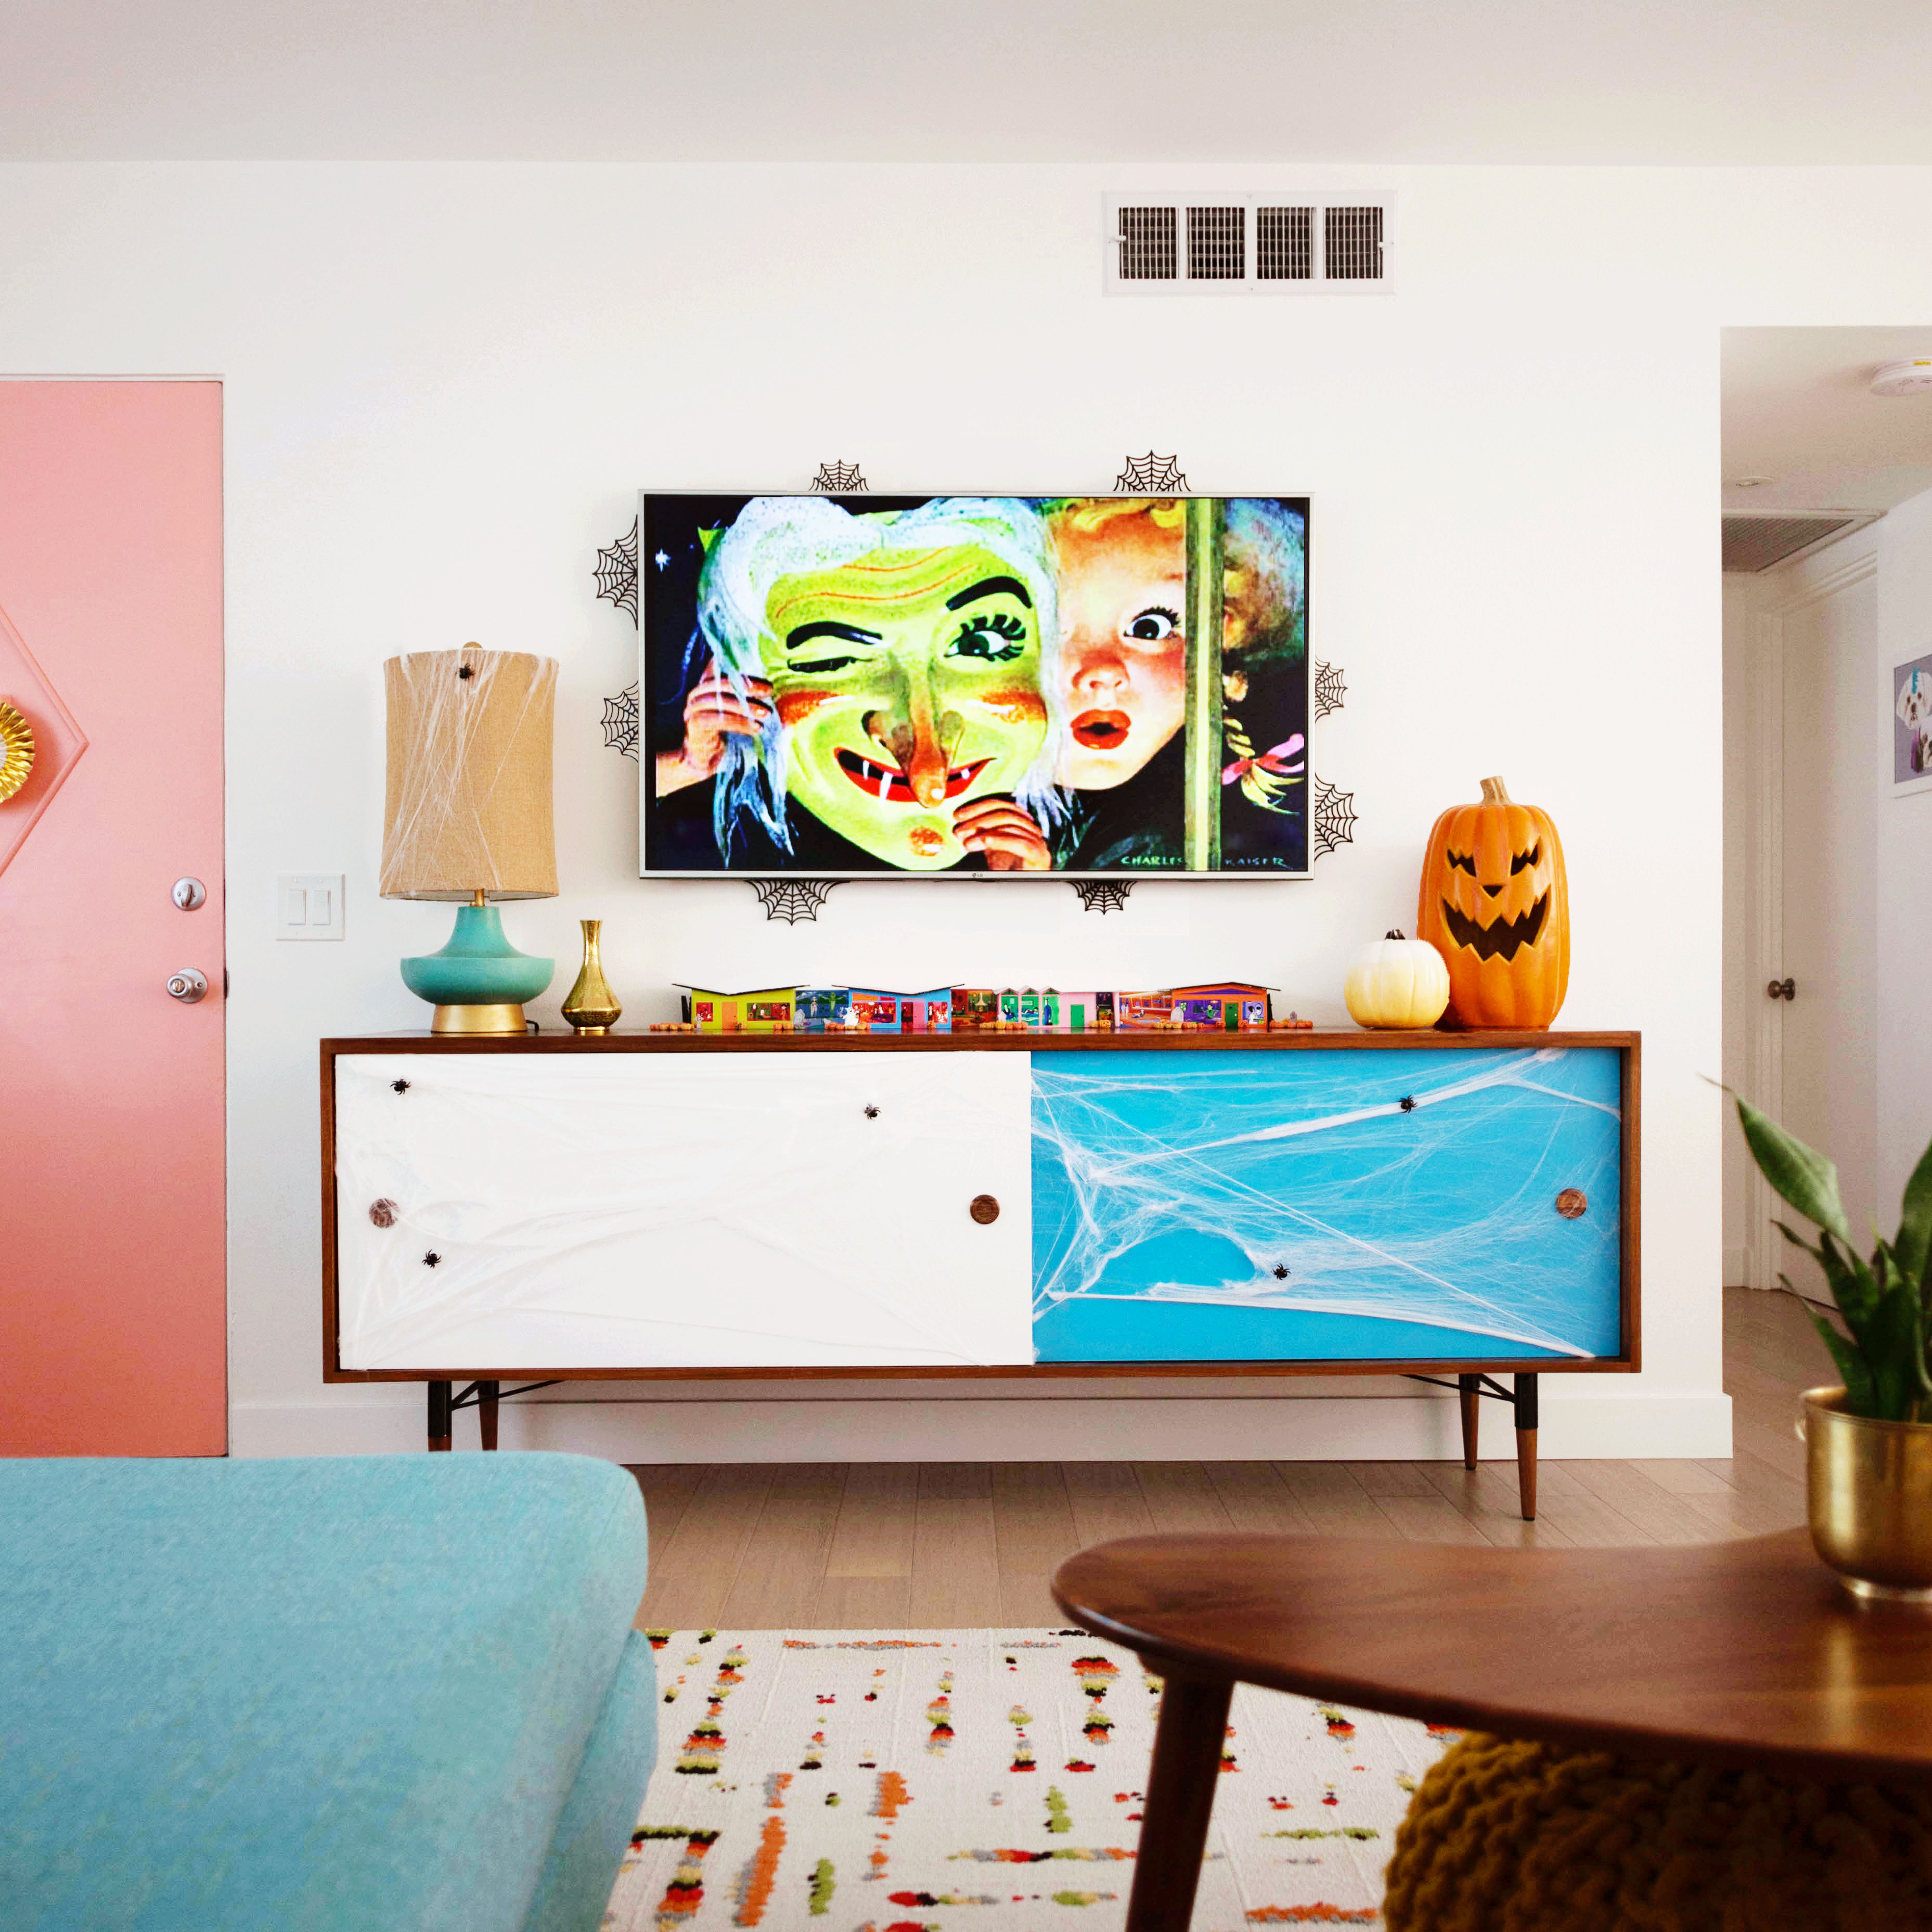
The credenza is from Joybird as well, with our TV mounted above it. We opted for an ultra-slim television mounted on a low-profile base so it can double as artwork when the TV is in stand-by mode. Most modern televisions and streaming devices have a screen saver mode that allows you to choose custom artwork or photographs to display. The lamp is from Joybird and the glassware is vintage.
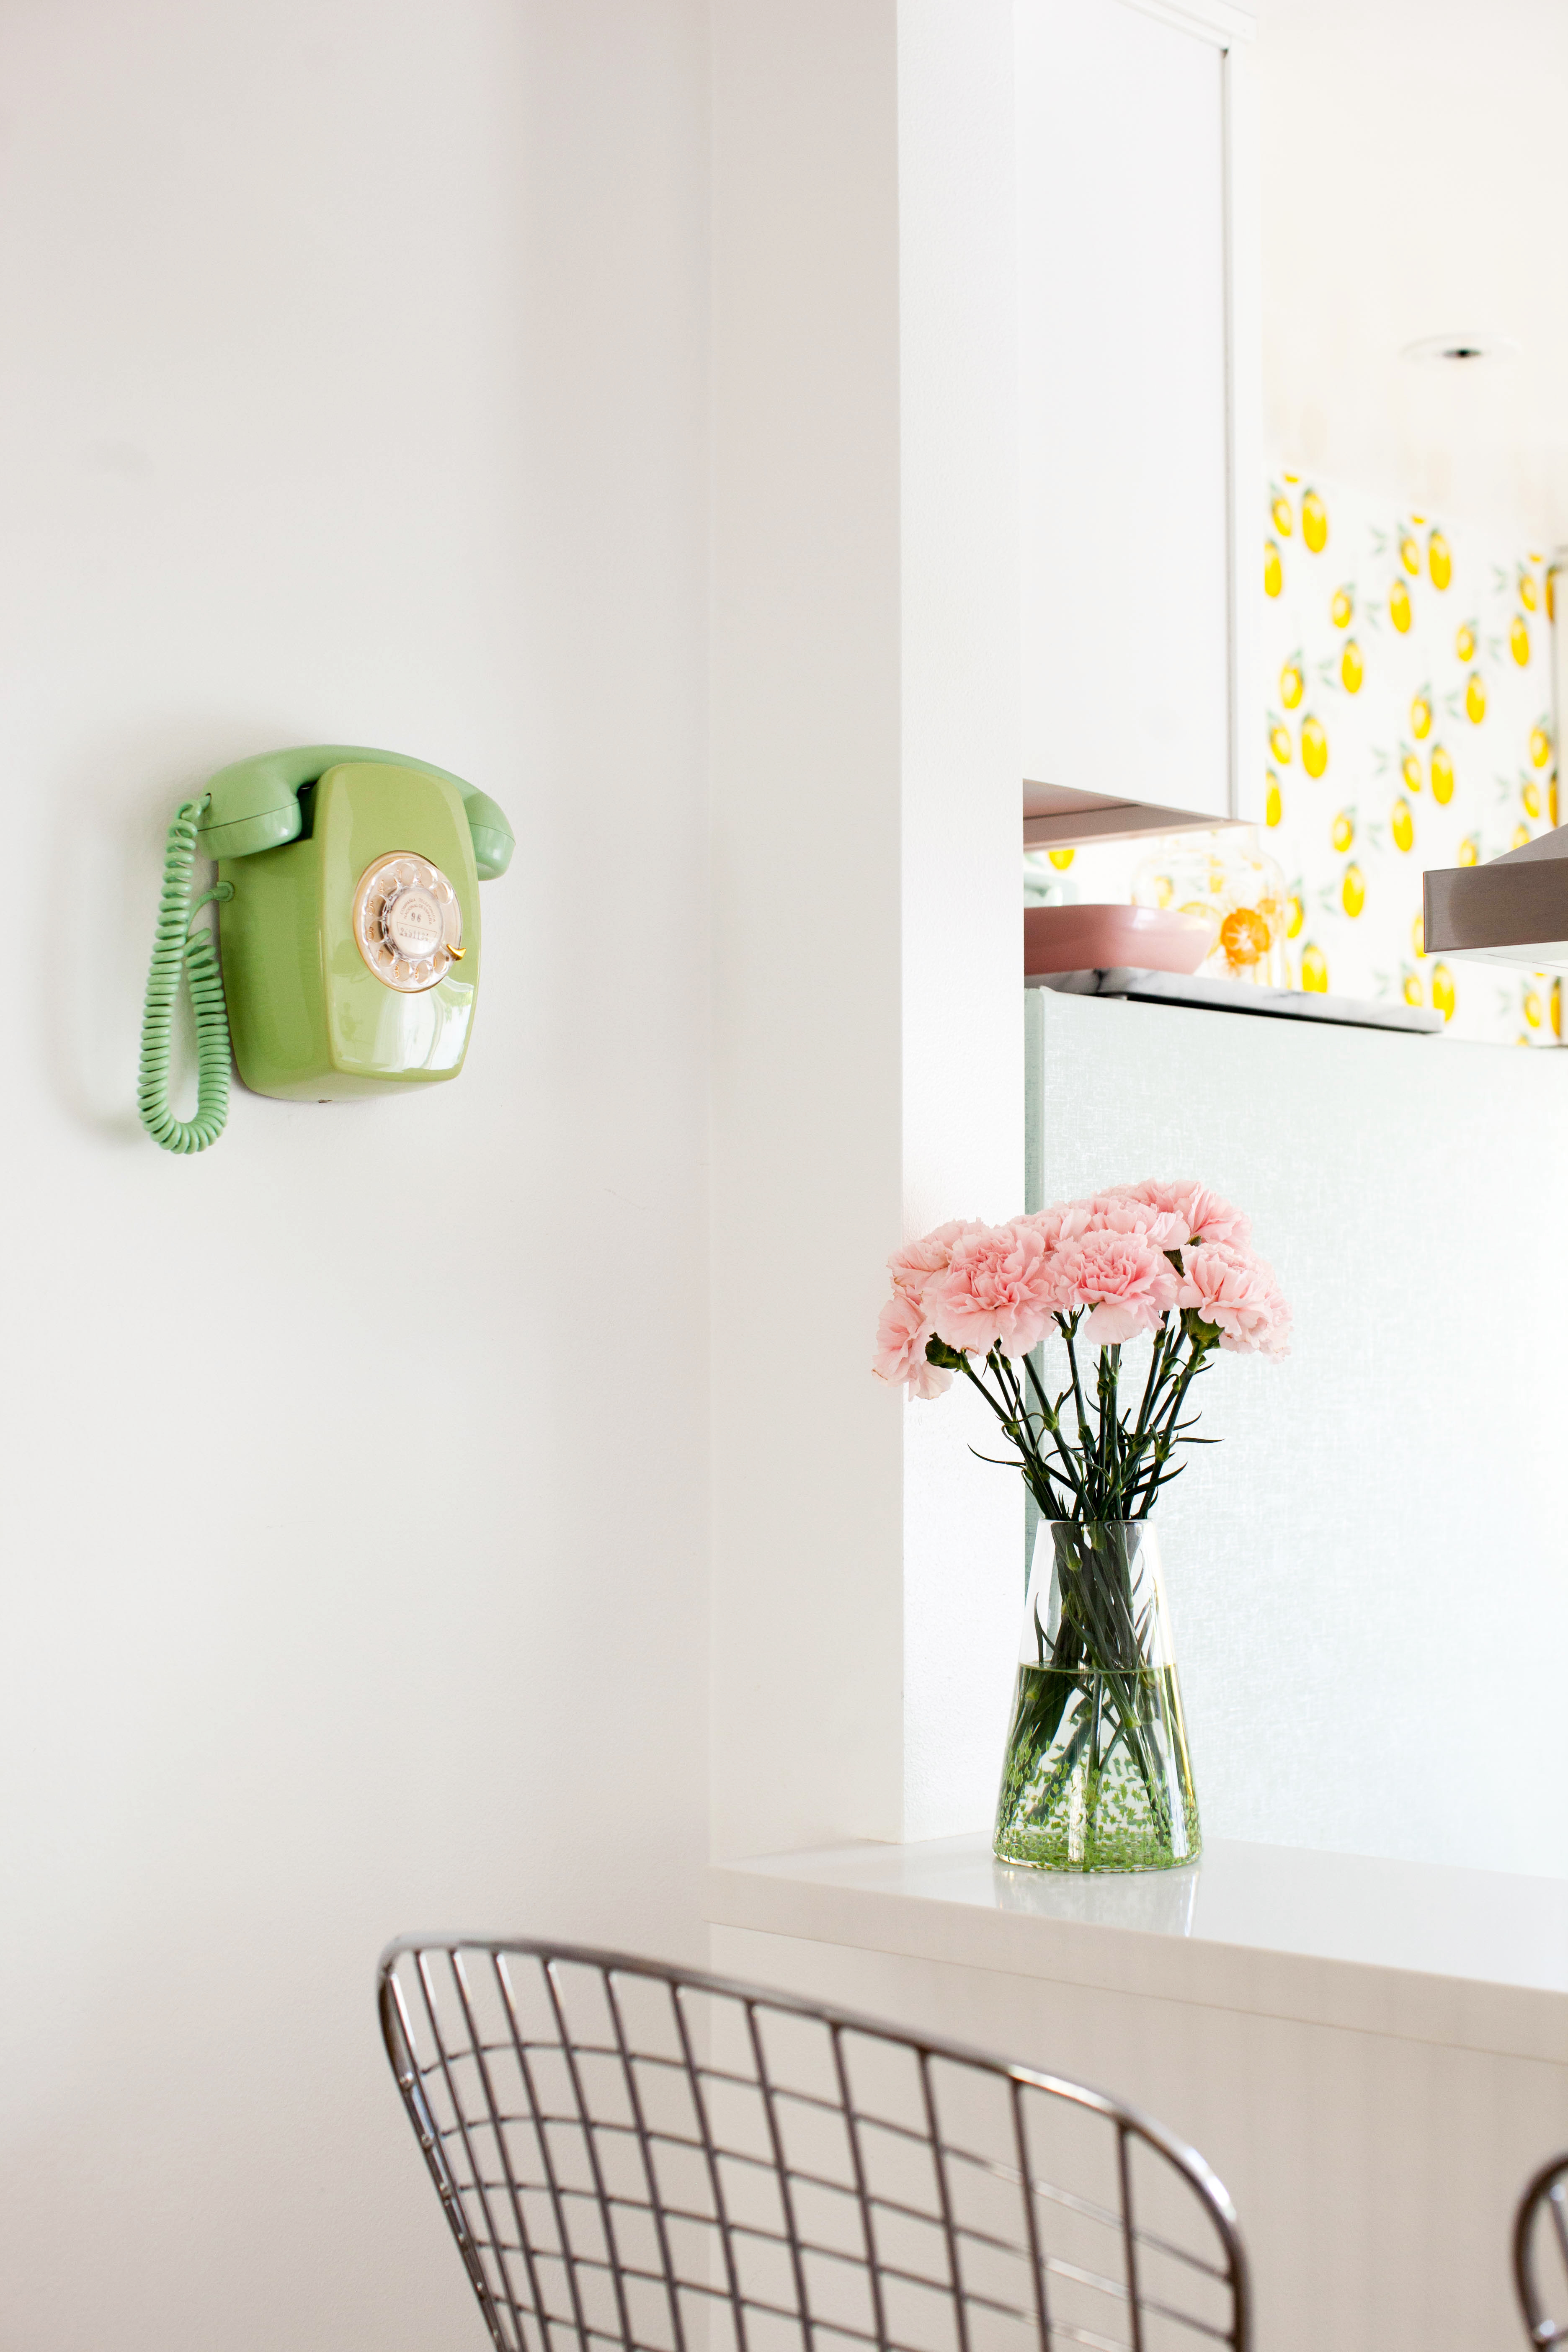 I try to add little moments around each room to give every corner a touch of character. I used a vintage rotary phone and vase from Baigelman Glass to add some color to this area by our breakfast bar.
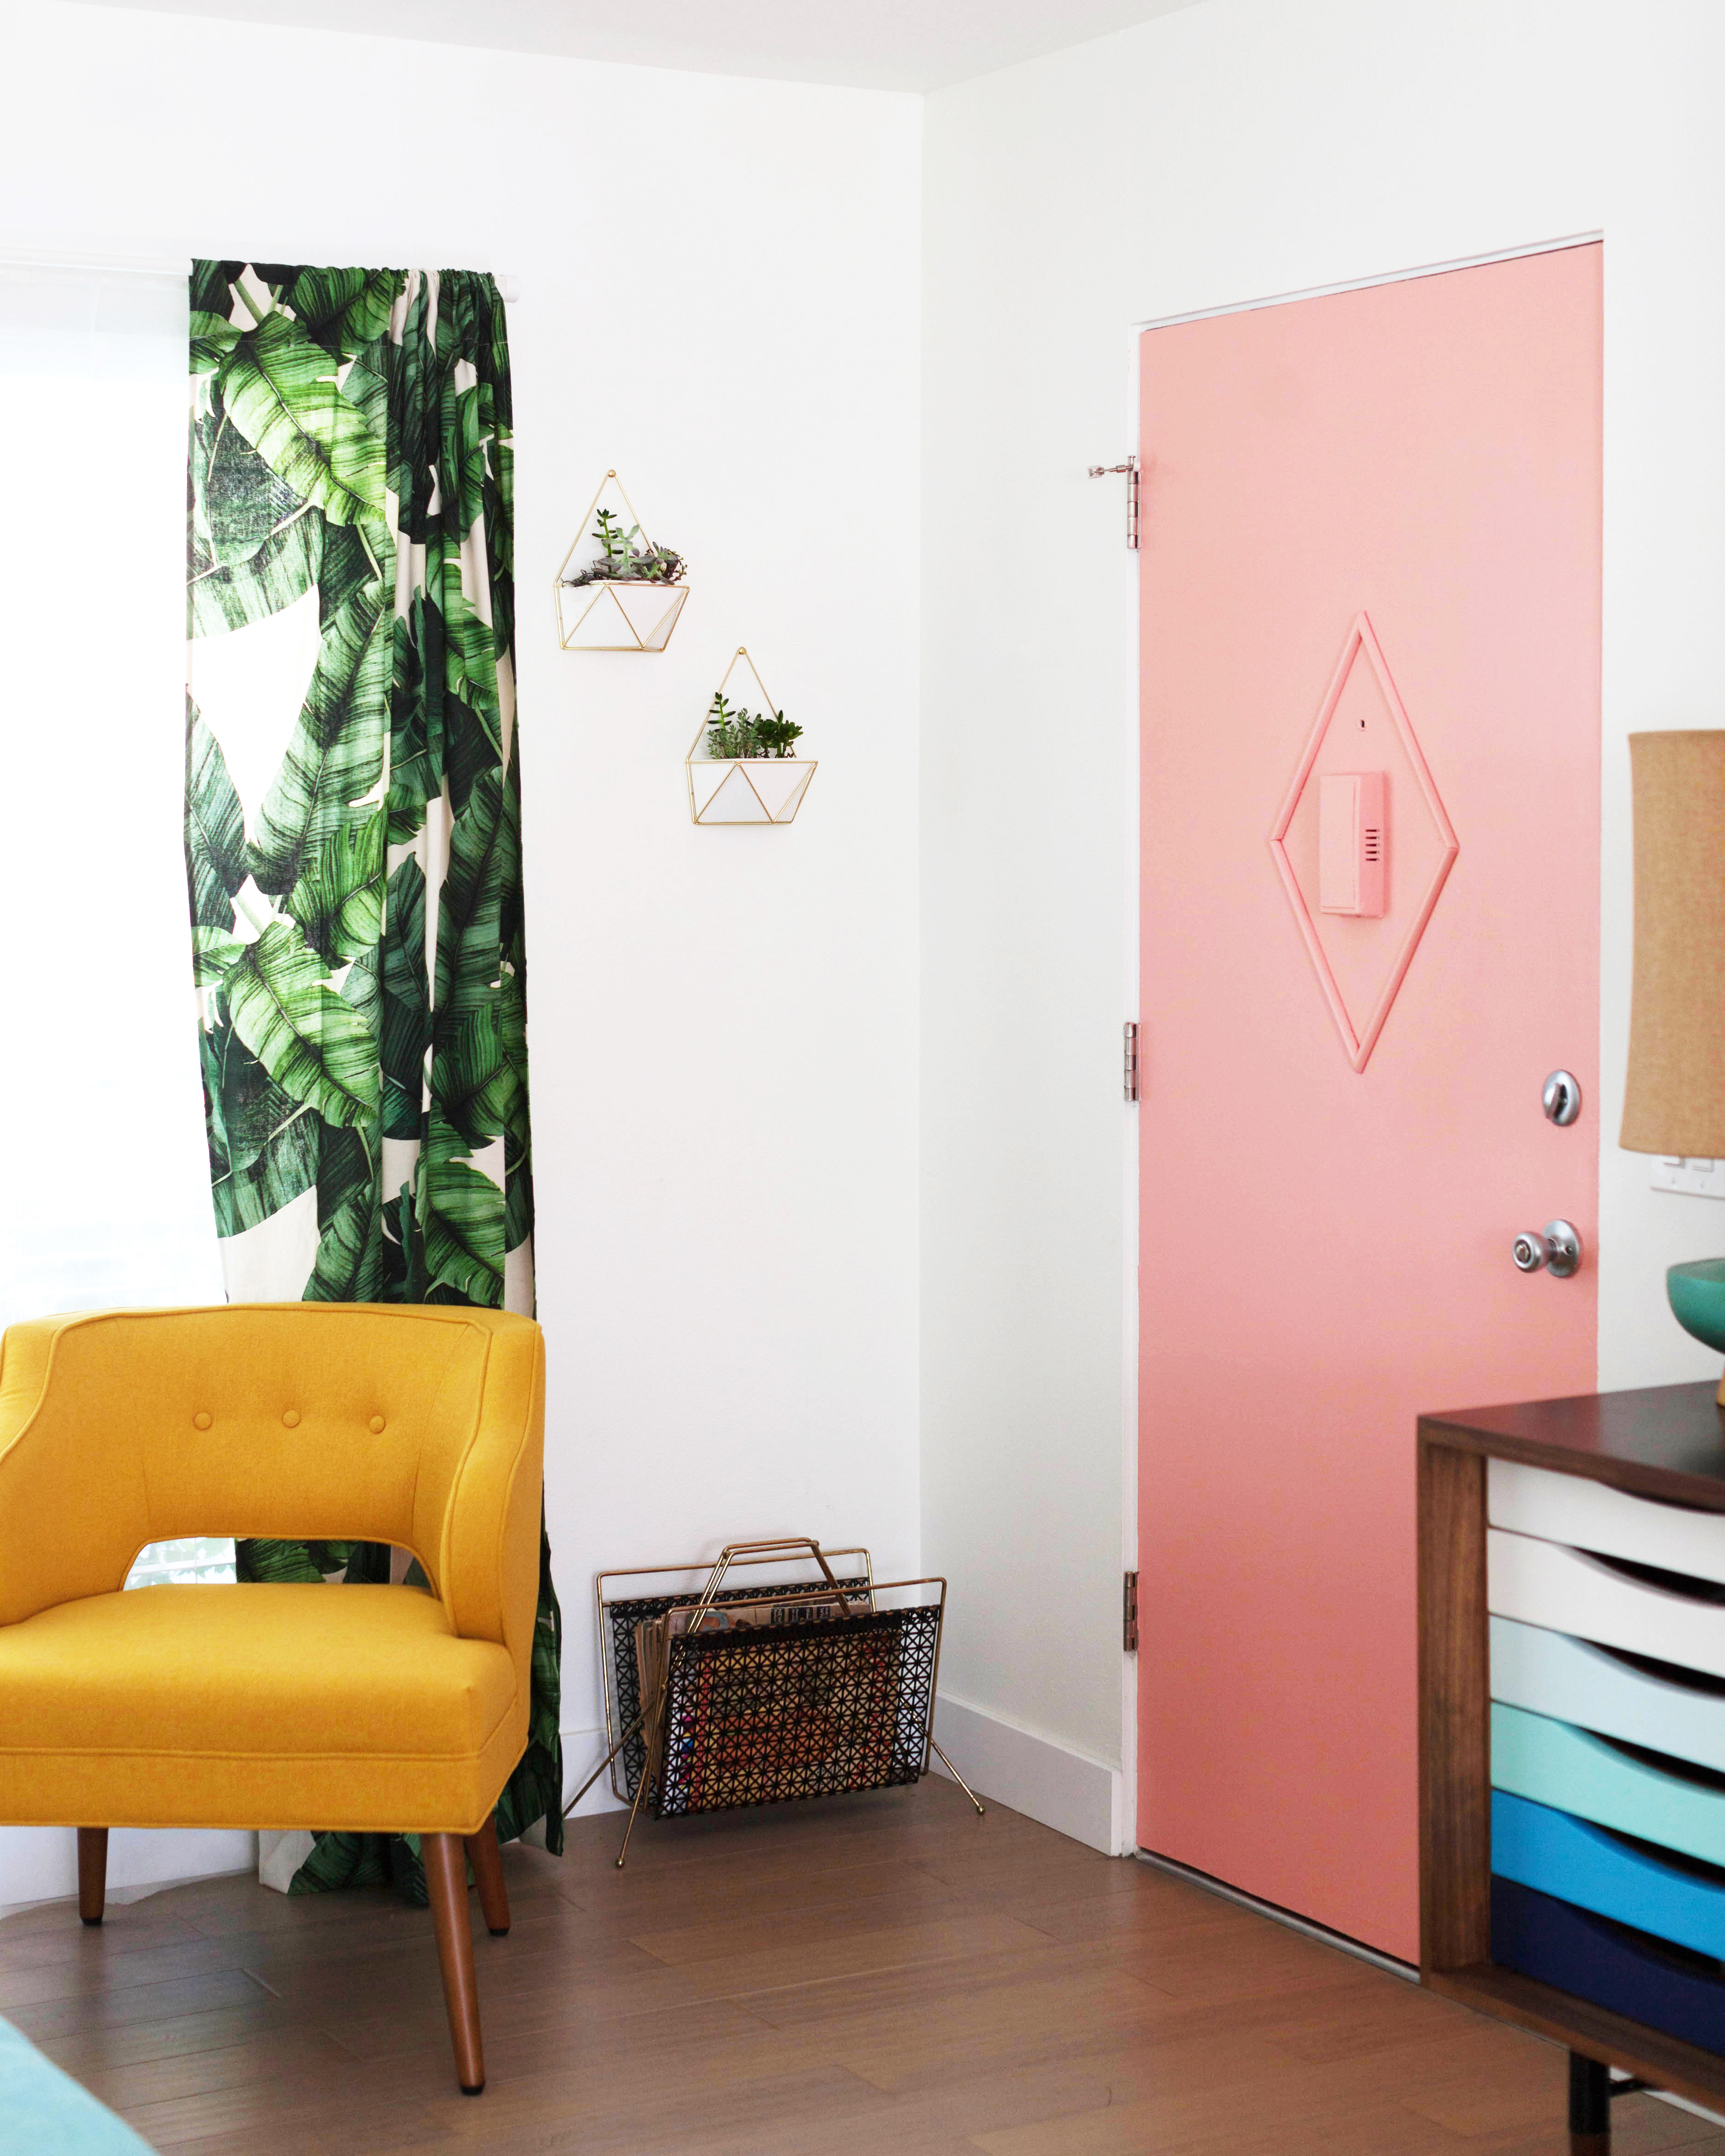 To this corner I added wall hanging planters and a vintage magazine stand filled with home decor magazines from the 50s and 60s. And lastly I painted the front door a peachy pink (Peach Punch from Valspar to be exact) and added a little bit of retro detail with wood molding!
That’s the whole shebang! Thanks for stopping by!
If you’ve been following the blog over the years you will know that I LOOOOVE to use dye to transform home decor. I’ve dyed curtains, rugs, bedding, and even my sofa! My go-to dye has always been Rit because it’s inexpensive and easily accessible. Luckily Rit heard about what a fan I am and asked me to be one of this year’s brand ambassadors so stay tuned for more projects!
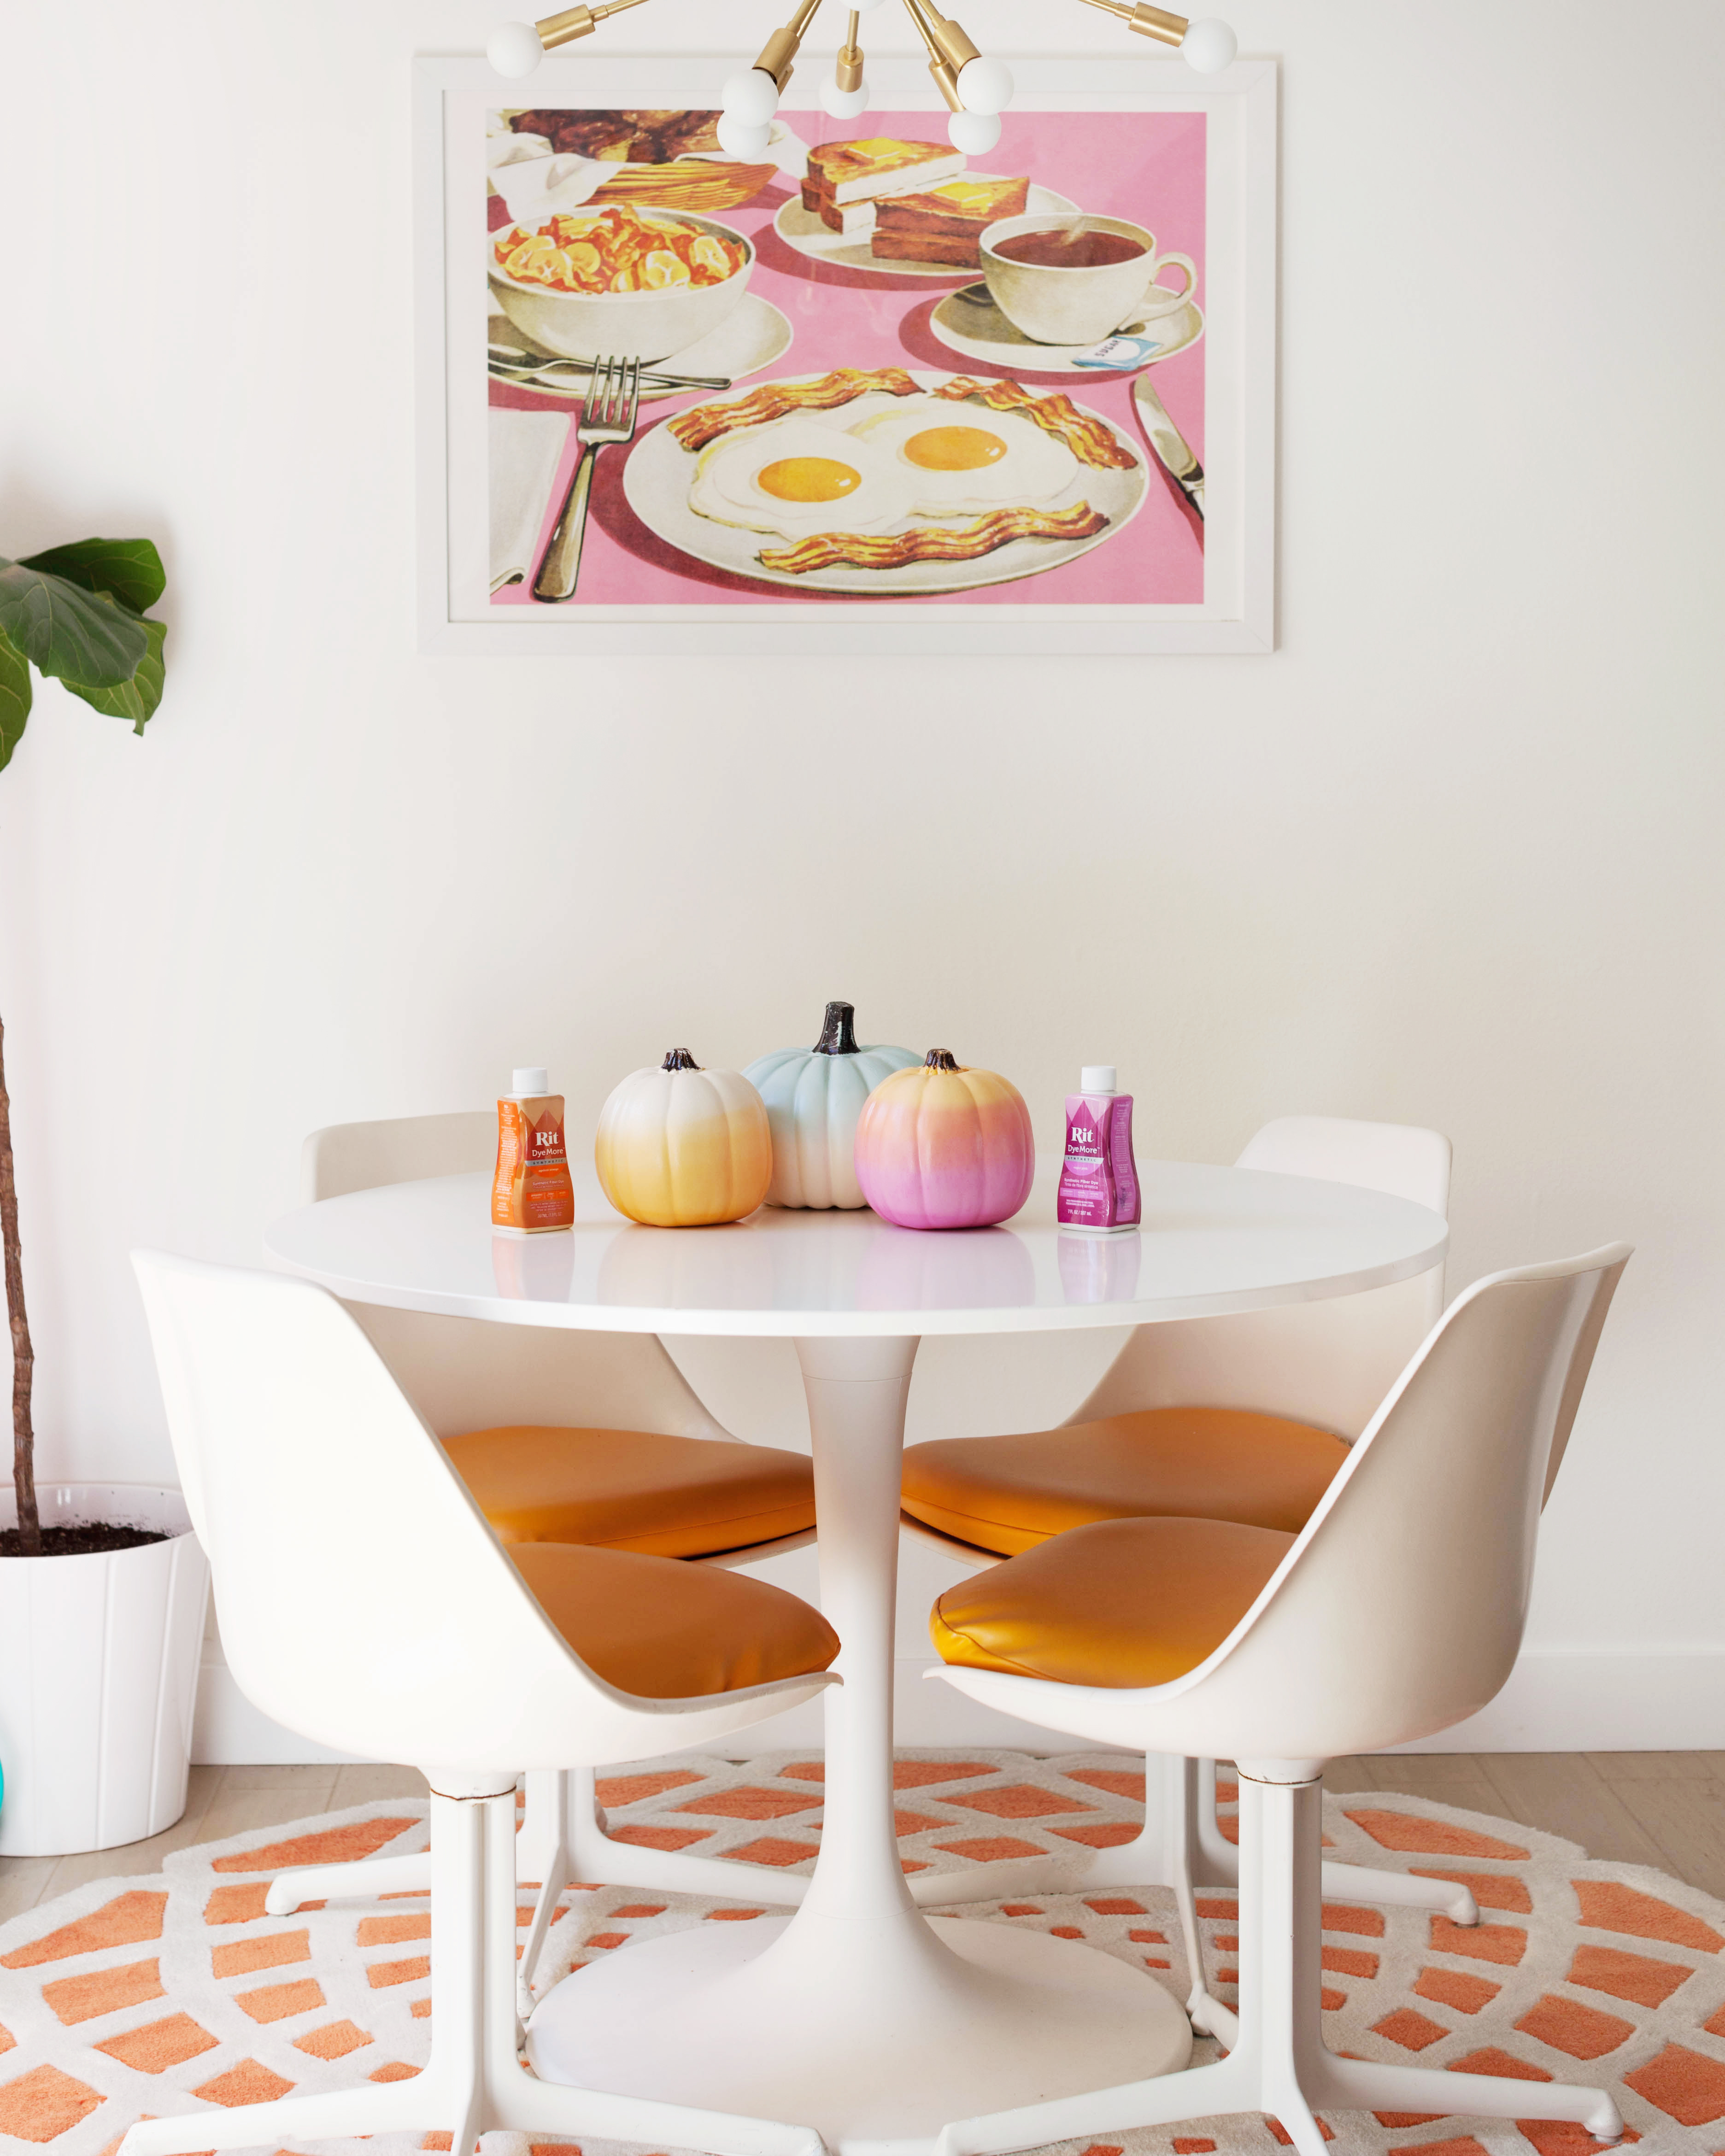
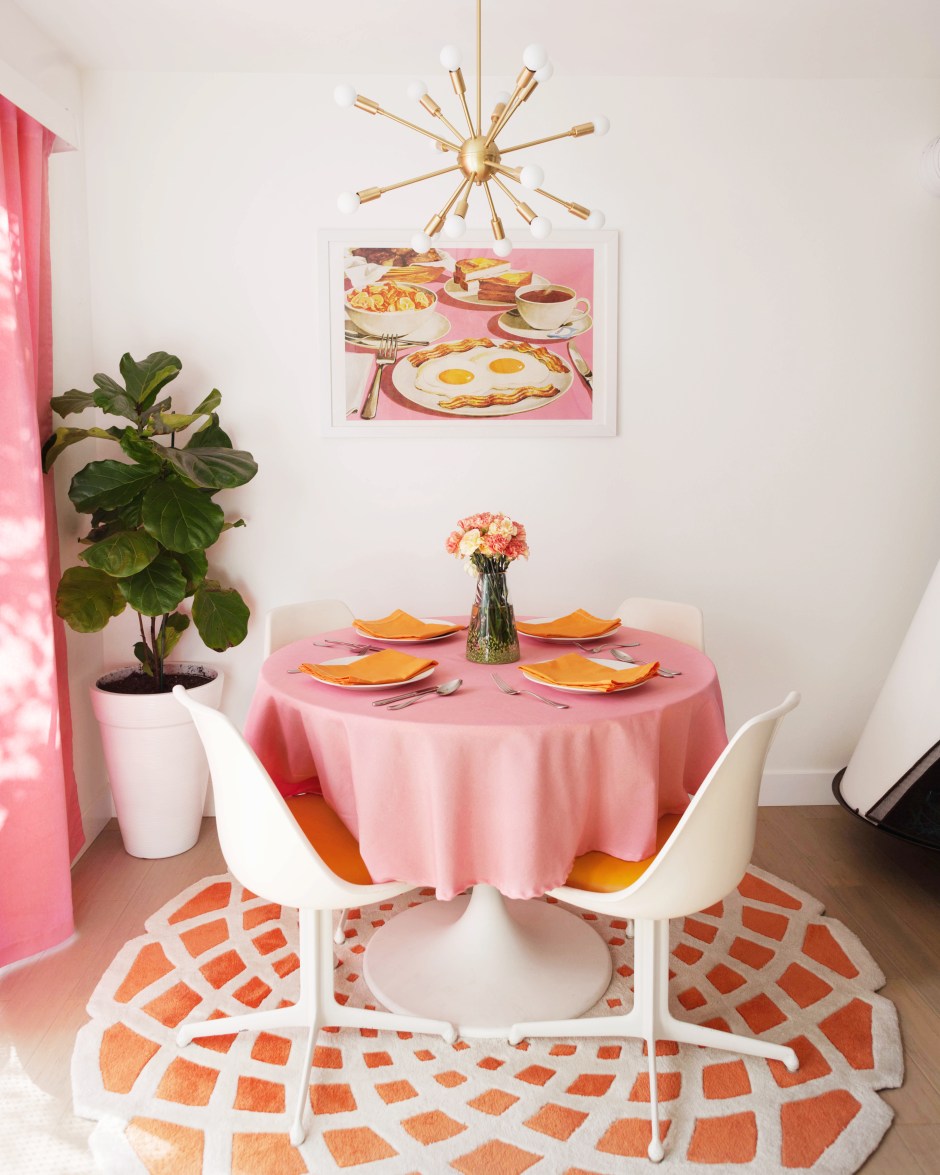
This year is special because it’s Rit’s 100 year anniversary! To celebrate we teamed up to recreate one of their adorable vintage ads from 1962. This project was especially fun for me since I’m obsessed with mid-century advertisements and even keep a collection of them for inspiration.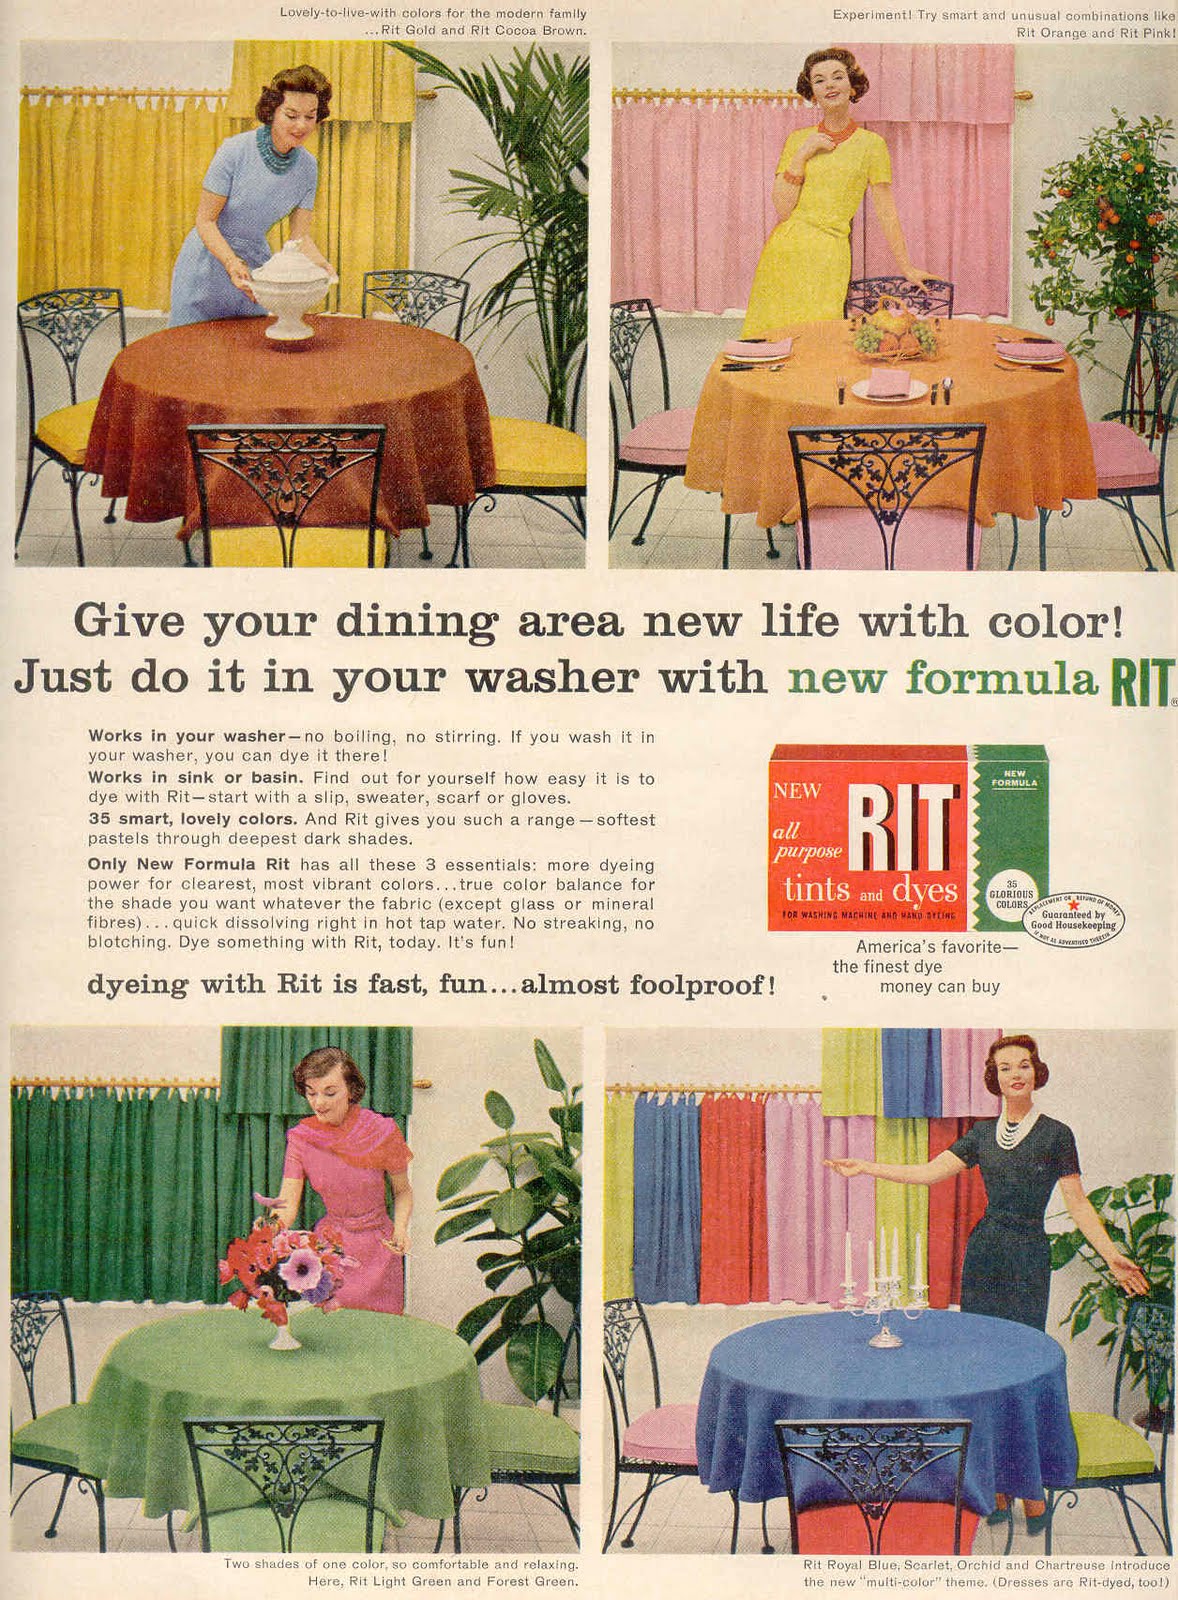
I picked this one because the dining room set up reminded me a lot of my own, particularly the top right corner version. I already planned on dyeing curtains to match my artwork, so I went all-in and dyed a tablecloth and cloth napkins as well. 
For the vibrant pink tablecloth and curtain I used a 50/50 mix of Rose Quartz and Petal Pink, and for the orange napkins I used a 50/50 mixture of Tangerine and Golden Yellow. 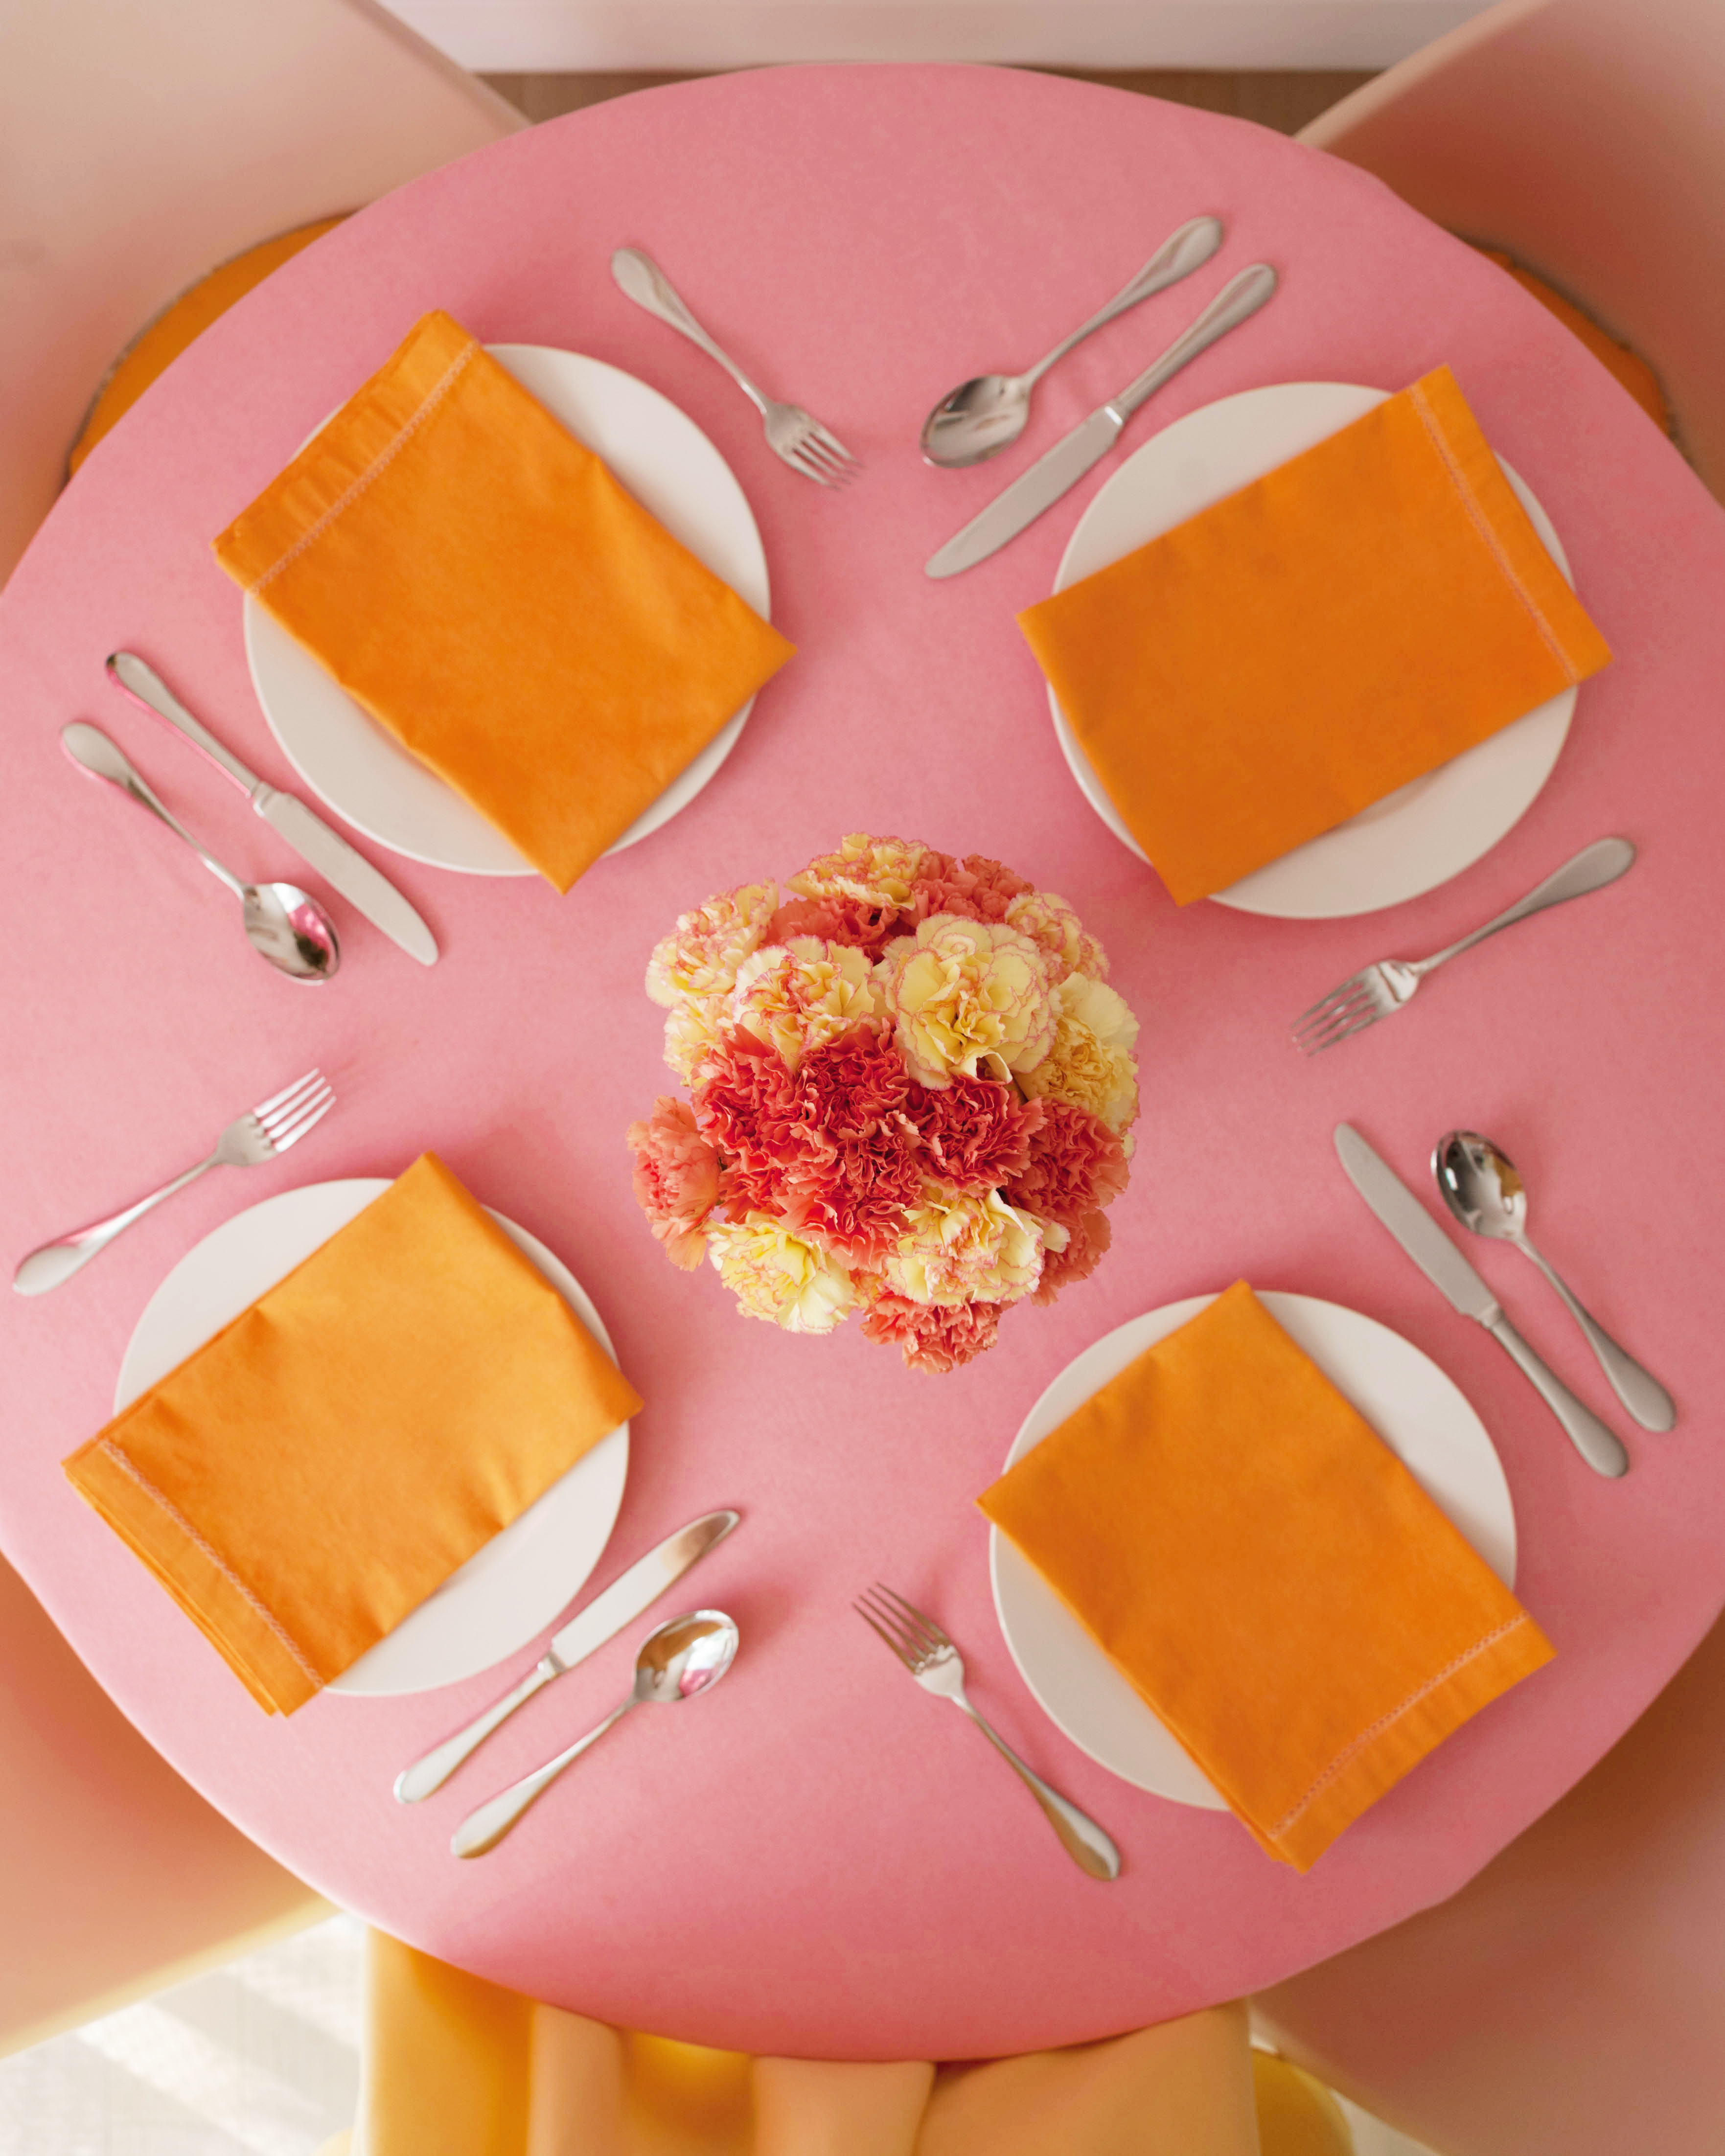 I just mixed those up with hot water and a little dish soap right in my sink basin. I then soaked them in Rit’s dye fixative and rinsed with cold water. Easy peasy!
 I love how everything ties together with the artwork and my vintage Burke chair pads. Now I just need to throw a little dinner party with a Jell-o salad and few cocktails ;).
