Ok, I’m going to make this super quick because I was supposed to post this a year ago, BUT that’s ok, because now I can tell you it has held up super well over the last 11 months.

I’m a renter so anything I do in my apartment has to be put back to its original condition when I move out. Because of this (as you may have noticed from the rest of my apartment) temporary wallpaper has basically become my best friend. I even covered my modern refrigerator in a cute retro blue before I brought in my vintage GE. Unfortunately, temp wallpaper isn’t ideal for stoves because of the whole ‘they get hot’ thing. Even though my oven door never gets hot to the touch, I wanted to be safe. I reallllly wanted a pink stove, but none of the vintage ones I was finding could fit in my kitchen. Besides it was already a pain in the ass to swap out the refrigerator. I looked for a solution similar to peel and stick wallpaper and that’s when I thought of heat wrap vinyl!

Update: my friend Cyn, a very talented set designer, used car wrap vinyl on her apartment’s vintage wall ovens and made a video tutorial for Instagram that you can watch here!

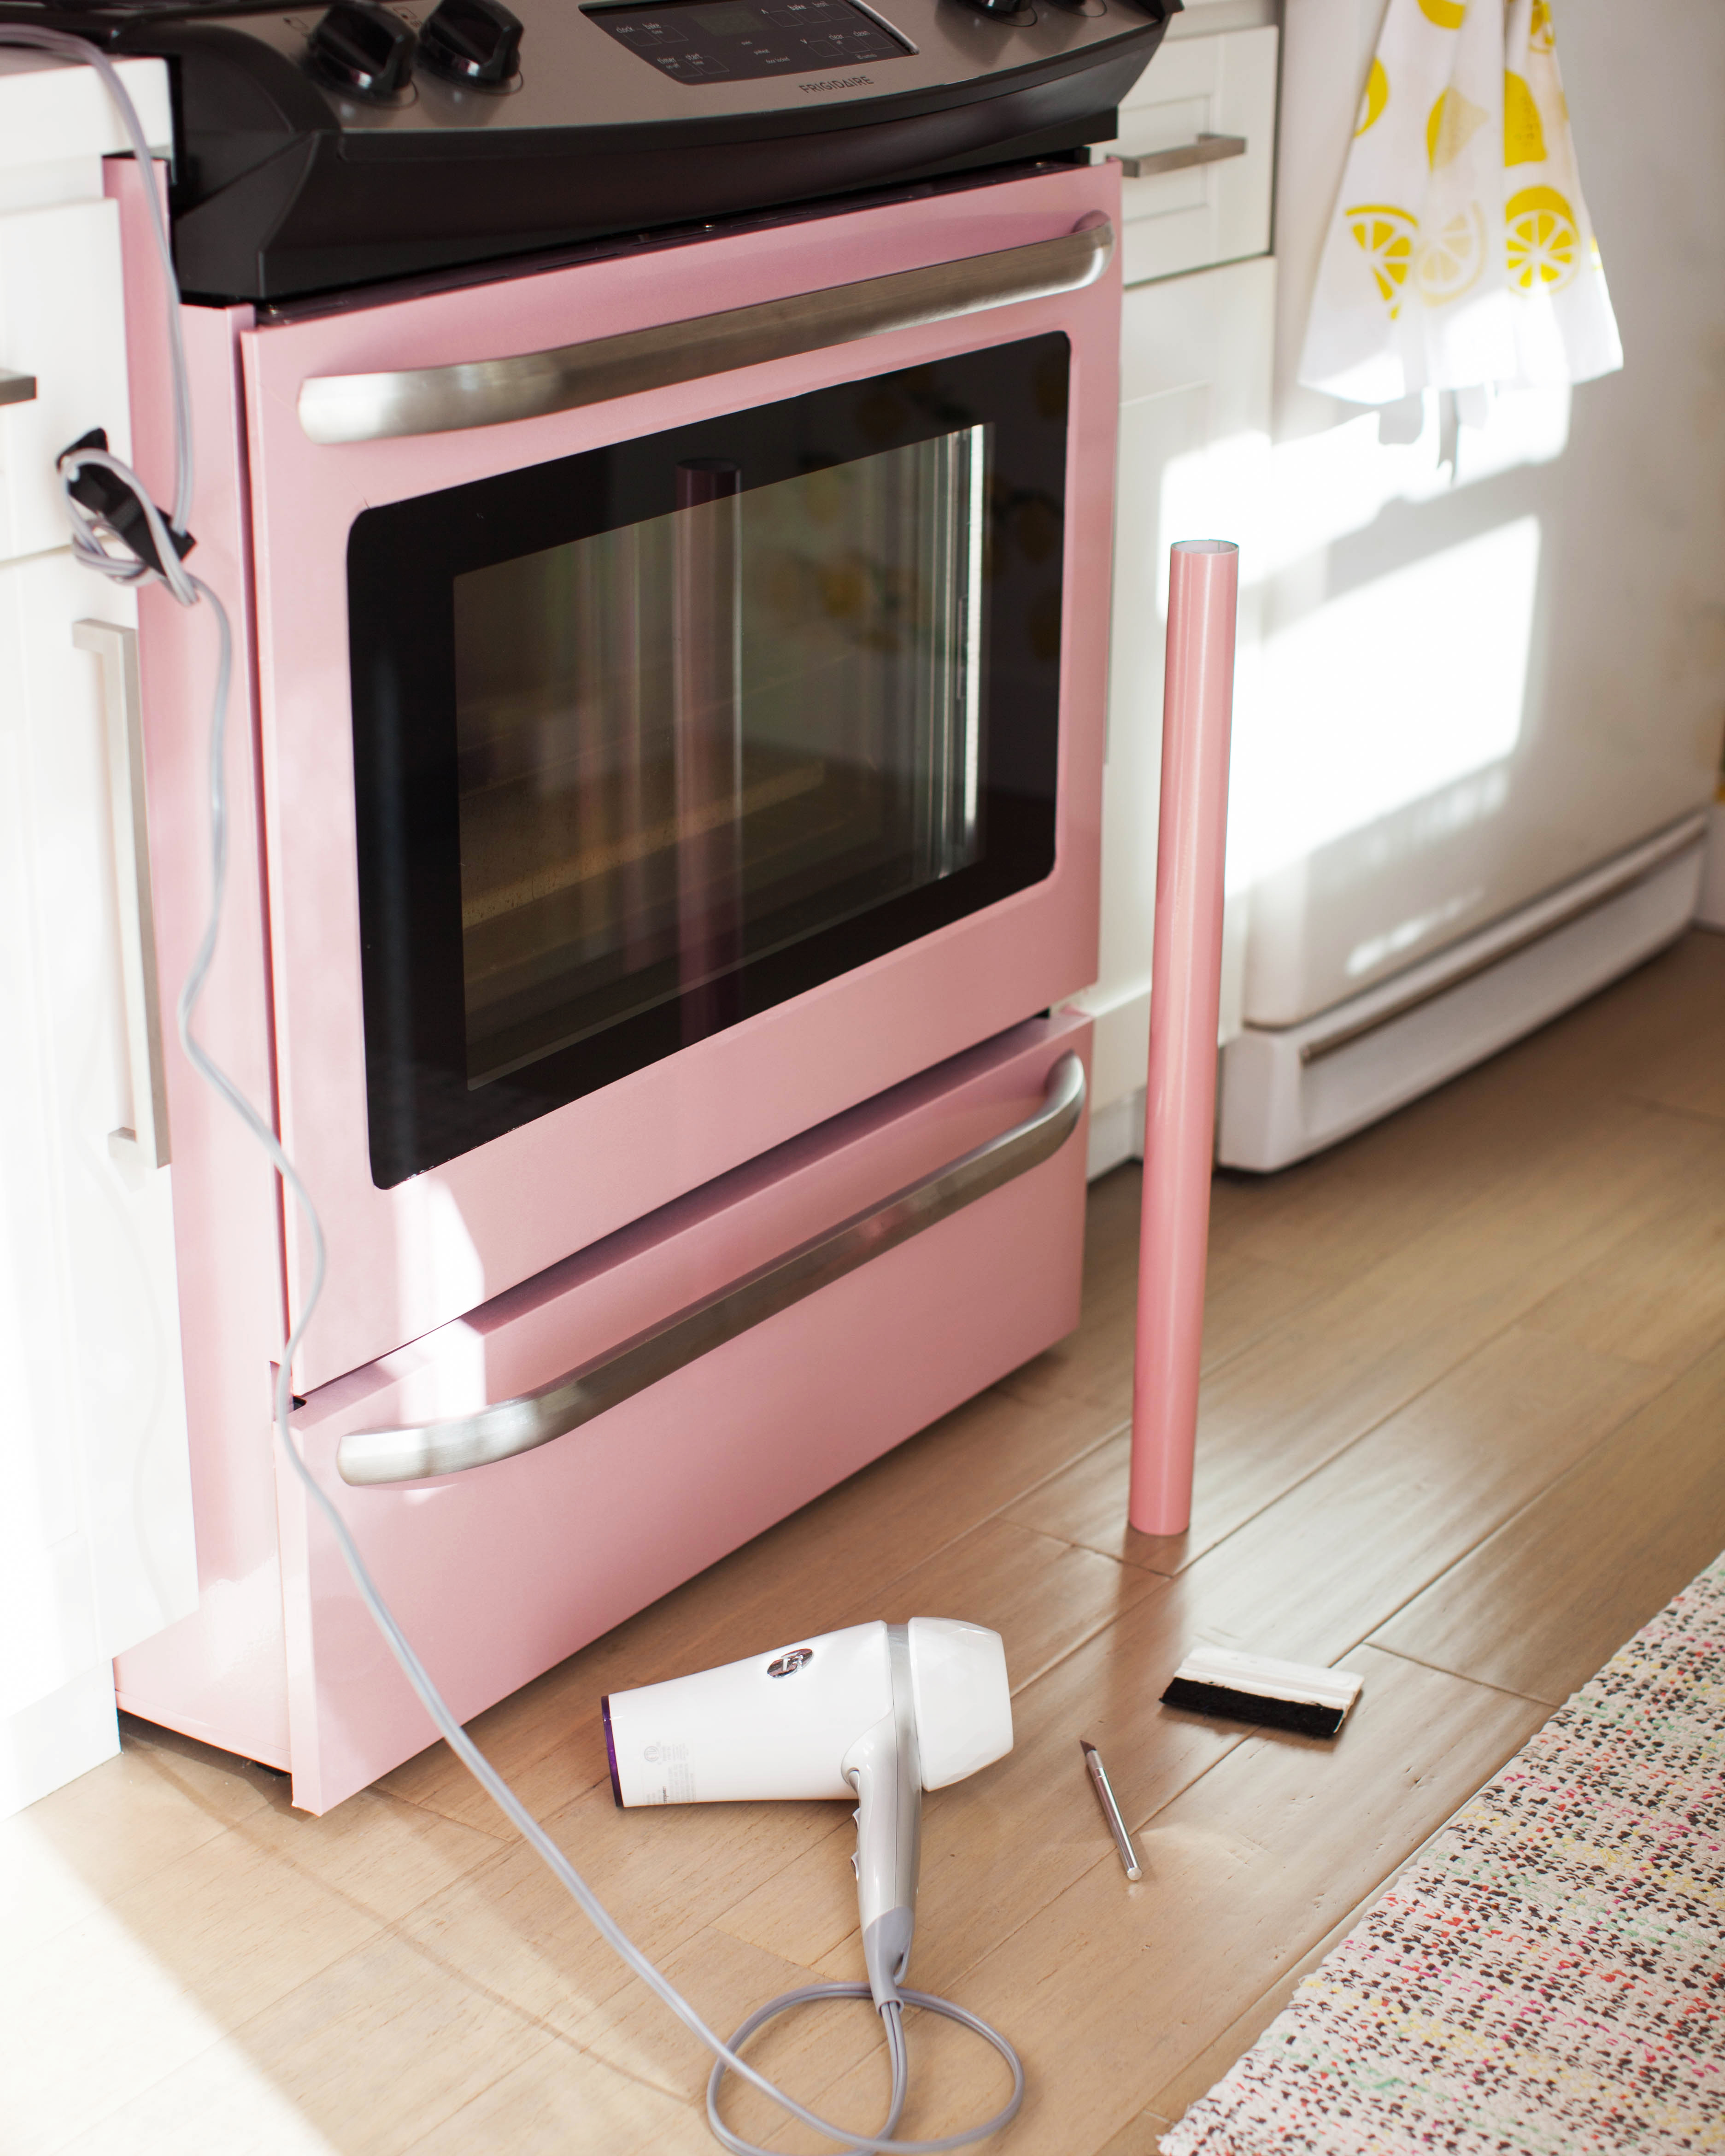
DIY Colored Appliances.jpgAnyway, I looked online and found a shimmery vinyl (you can find several brands and colors online) and set out with my hair dryer, a squeegee, and an exact-o knife to bring a little color to my kitchen.

The good news is this stuff is very forgiving! Look up some heat wrap or car wrap tutorials and you’ll see, its super pliable and molds to the curviest of shapes with the application of heat. It also has no or little adhesive so it peels off clean.

I took off all the handles and applied the vinyl as flat as I could to the front of the stove doors while smoothing and stretching as needed while applying heat from my hair dryer. Then I used heat and the corner of my squeegee to press and mold the vinyl into the curves and crevices around the glass window. I cut around the edges with a blade to remove the excess.
DIY Pink Stove .jpg

I wrapped the vinyl around all of the door edges and replaced the screws and handles.DIY Colored Stove

I made sure to cover the sides too! I didn’t cover the cooktop because it most probably would burn and melt, being so close to the fire and all. I used the same method to cover the front of my dishwasher.DIY Pink Stove

And here’s the final result!

DIY Colored Appliances

It took a lotttt of patience, but once I got into the groove it went on a lot faster and smoother. It’s very easy to clean and has held up really well. Even with JV cranking the oven to ungodly temperatures when he’s baking bread. When I’m ready to move out I’ll just peel it off and be good to go. Yay!

{Update: We moved and it peeled off clean! I used a little rubbing alcohol and stainless steel cleaner to buff out any markings left behind and the appliances looked brand new.}


20 responses to “DIY: Here’s How I Colored My Appliances with Heat Wrap Vinyl”

  1. Jaymi L Gottfried Avatar
    Jaymi L Gottfried

    I have been waiting so patiently for this post! Vinyl??? Mind blown! I have a gas cook top, do you think I could wrap that?

  2. […] toen ik dat hoorde, mijn vriend Krys van Melodrama bedekte haar apparaten met auto vinyl, dacht ik – ik wil dat proberen! Mijn super saaie en […]

  3. Lornel Mitchell Avatar

    Looks amazeballs. I love it!

  4. […] Don’t be afraid of used appliances! Image: Melodrama […]

  5. hollywood303 Avatar
    hollywood303

    I’ve never thought of doing this, but I love it! I’m totally taking on this project in my kitchen. Thank you!

  6. Floranet Avatar

    It’s nice when you see such a great work! Continue writing

  7. tiffinykaroll Avatar

    So I finally tackled this project today on my dishwasher and love the result. Question: did you use heat after it was all finished to seal it down? And did you use heat the entire time or only when you got a bubble or wrinkle you needed to warm up to smooth out?

  8. Ronnda Stapleton Avatar
    Ronnda Stapleton

    I am planning on doing this, too! My question is, how did you deal with the vents at the top of the door on your oven? Did you slice them, and use heat to push them in? Thanks so much! 🙂

  9. RNB Avatar
    RNB

    How much (sq ft) did you use?

  10. […] resurfacing can transform other parts of the kitchen as well, like linoleum floors or appliances. These projects take a bit more planning and may require more upkeep because they cover […]

  11. […] resurfacing can rework different components of the kitchen as nicely, like linoleum floors or appliances. These tasks take a bit extra planning and will require extra maintenance as a result of they cowl […]

  12. Rakhinationwide Avatar

    Loved your post. Best wishes from my side.

  13. Kathy Avatar
    Kathy

    Your kitchen looks amazing! Love the pink 🌸. Thanks for sharing this info. I am looking to cover my appliances until I can afford new ones. 🙂

  14. Heidi Avatar
    Heidi

    Hi, Wondering if this would hold up during the winter in an unheated cottage?

    1. Ronnda Avatar
      Ronnda

      If you use car wrap vinyl, I am sure it would be fine since cars are exposed to all types of conditions. 🙂

  15. Eric Goeken Avatar
    Eric Goeken

    What brand of heat wrap did you get or any details about that product? There are a lot of options when looking for these rolls, but not sure what is best.

  16. Kelly Avatar
    Kelly

    Where do I find this vinyl in different colors?

  17. Carol Avatar
    Carol

    I looked up heat wrap vinyl it’s kinda expensive. (On my budget) is there any cheaper alternative? Has anyone tried anything?

  18. Chuck C Avatar
    Chuck C

    Really interesting! We have older black appliances and one died. But black is the new orange, and is usually much more expensive (with much longer lead time) than stainless steel. Wrapping the fridge doors could be a real alternative.

  19. Ella Avatar
    Ella

    car wrapping Vinyl said heat to 225f…how does it work on the stove?

Leave a comment

Website Powered by WordPress.com.