

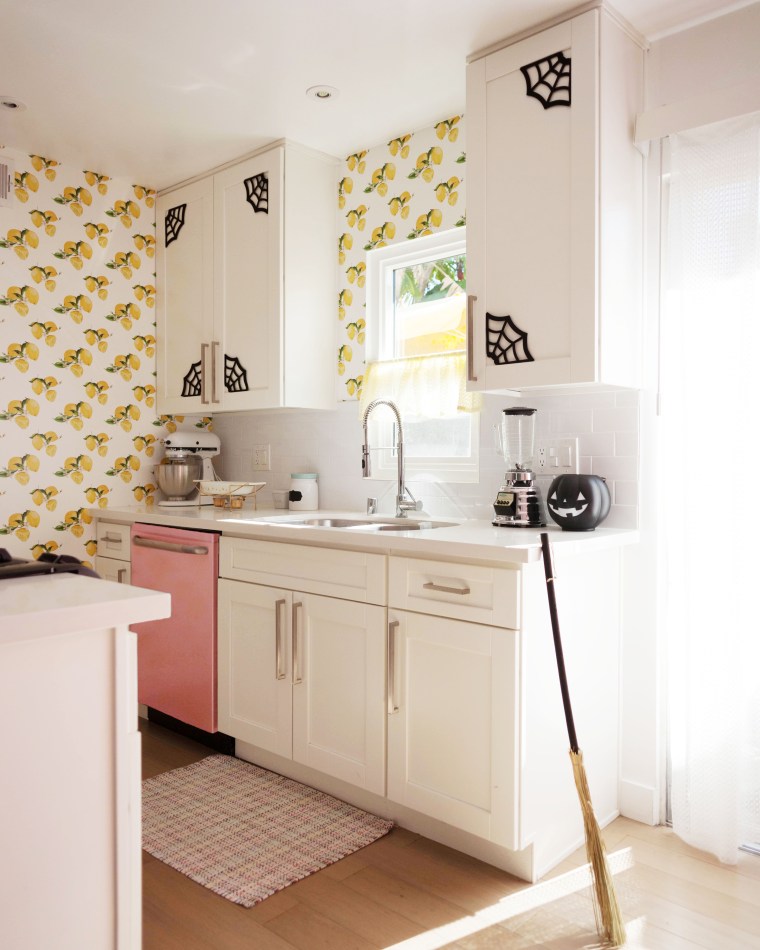
I’m a renter so anything I do in my apartment has to be put back to its original condition when I move out. Because of this (as you may have noticed from the rest of my apartment) temporary wallpaper has basically become my best friend. I even covered my modern refrigerator in a cute retro blue before I brought in my vintage GE. Unfortunately, temp wallpaper isn’t ideal for stoves because of the whole ‘they get hot’ thing. Even though my oven door never gets hot to the touch, I wanted to be safe. I reallllly wanted a pink stove, but none of the vintage ones I was finding could fit in my kitchen. Besides it was already a pain in the ass to swap out the refrigerator. I looked for a solution similar to peel and stick wallpaper and that’s when I thought of heat wrap vinyl!
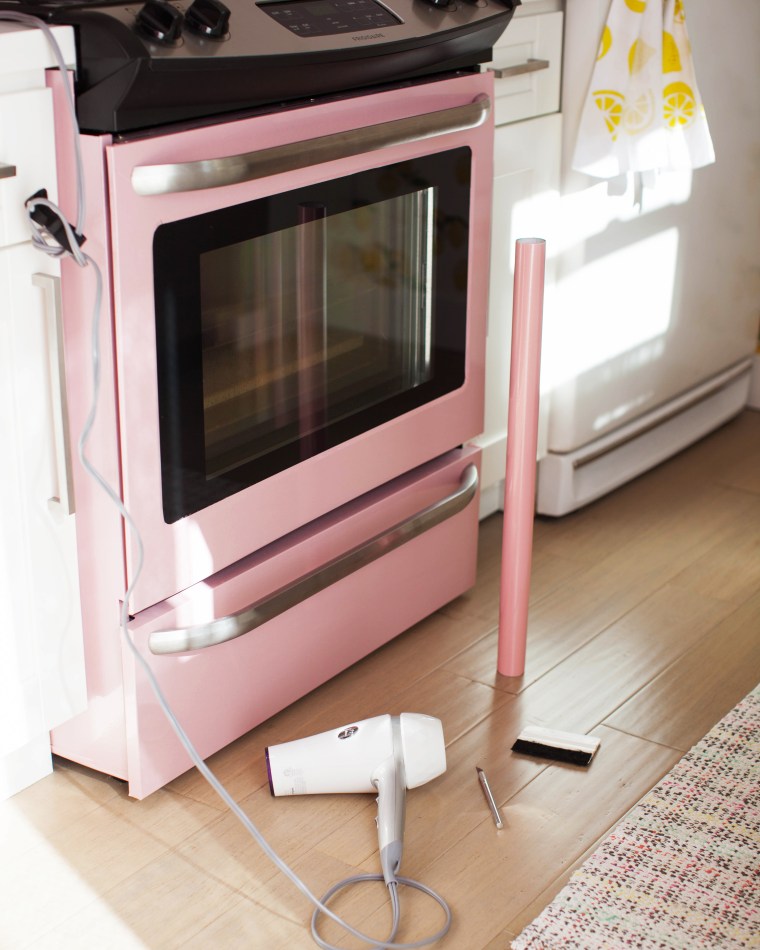
I wrapped the vinyl around all of the door edges and replaced the screws and handles.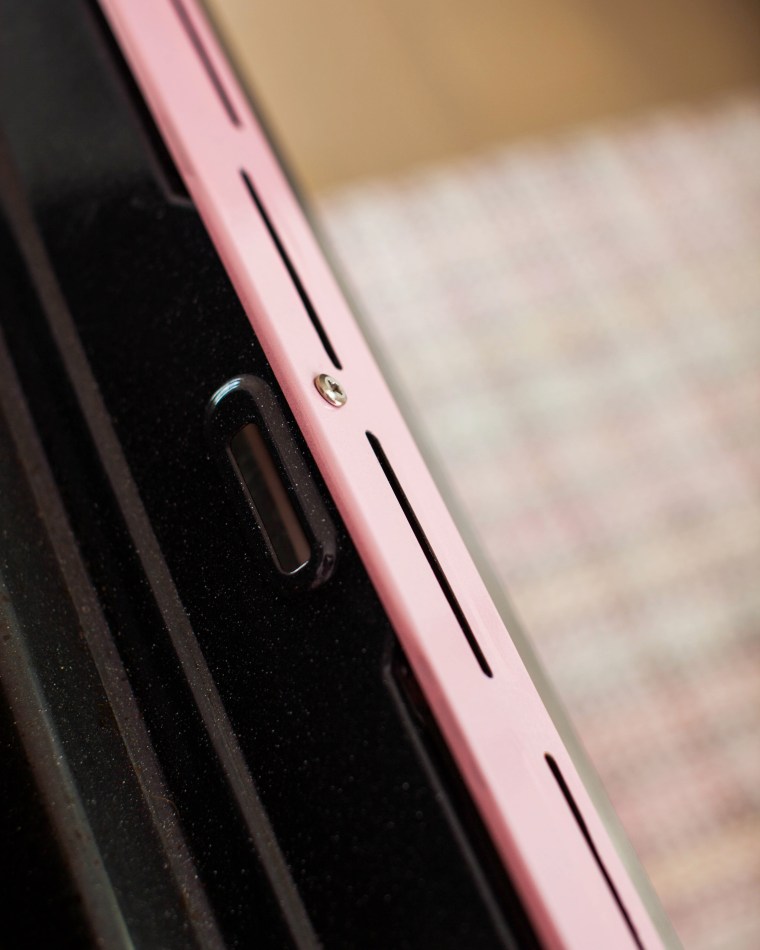
I made sure to cover the sides too! I didn’t cover the cooktop because it most probably would burn and melt, being so close to the fire and all. I used the same method to cover the front of my dishwasher.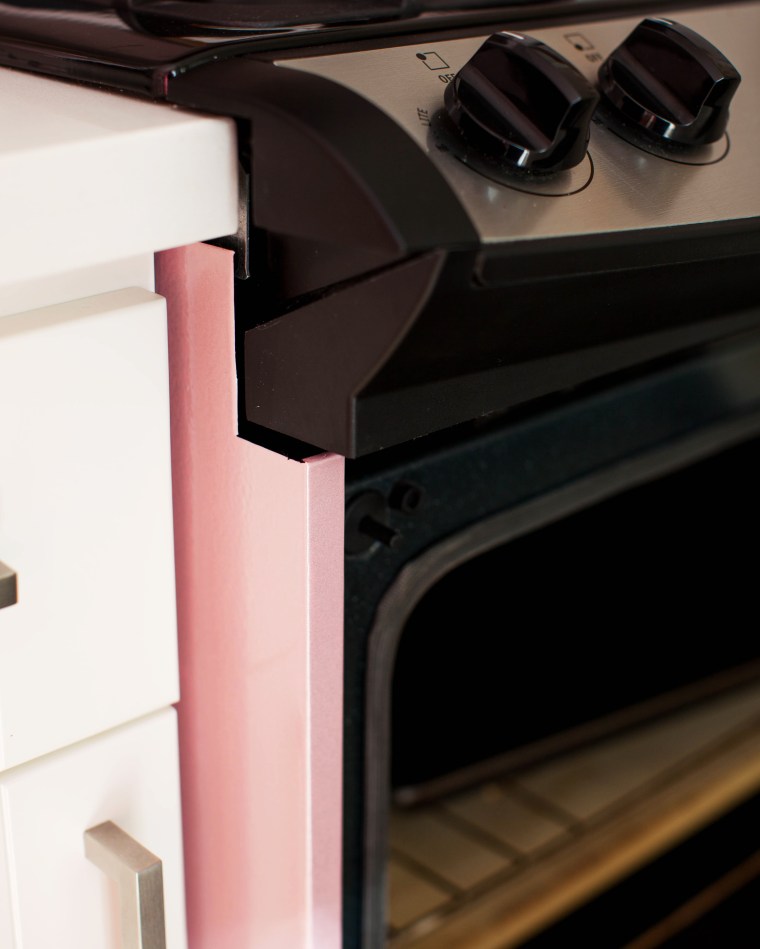
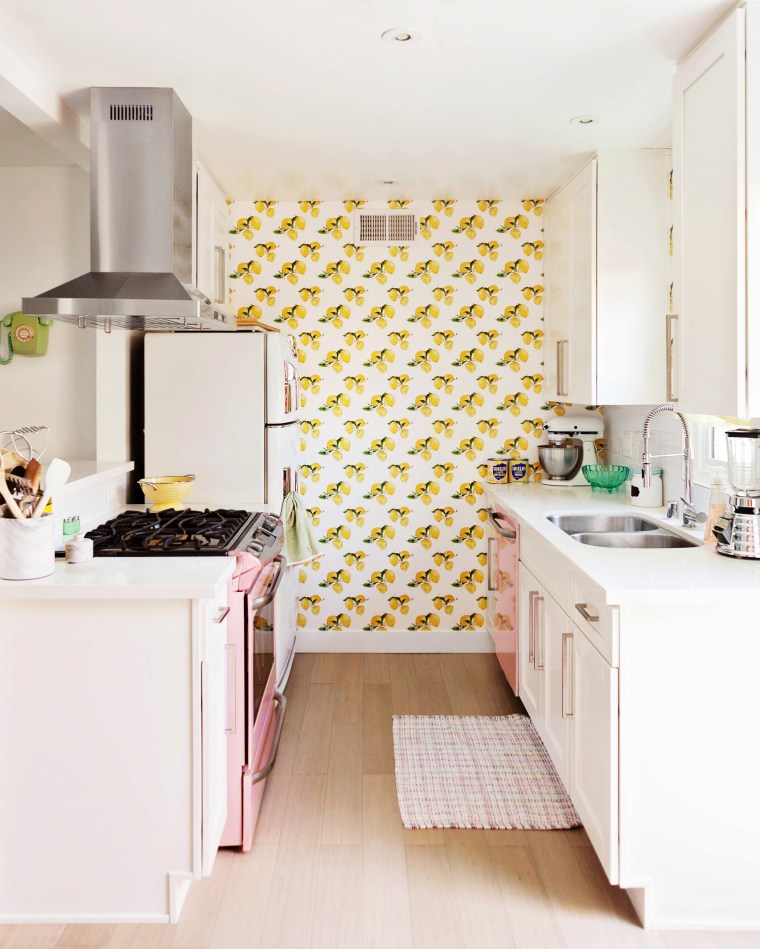
And here’s the final result!
It took a lotttt of patience, but once I got into the groove it went on a lot faster and smoother. It’s very easy to clean and has held up really well. Even with JV cranking the oven to ungodly temperatures when he’s baking bread. When I’m ready to move out I’ll just peel it off and be good to go. Yay!
{Update: We moved and it peeled off clean! I used a little rubbing alcohol and stainless steel cleaner to buff out any markings left behind and the appliances looked brand new.}
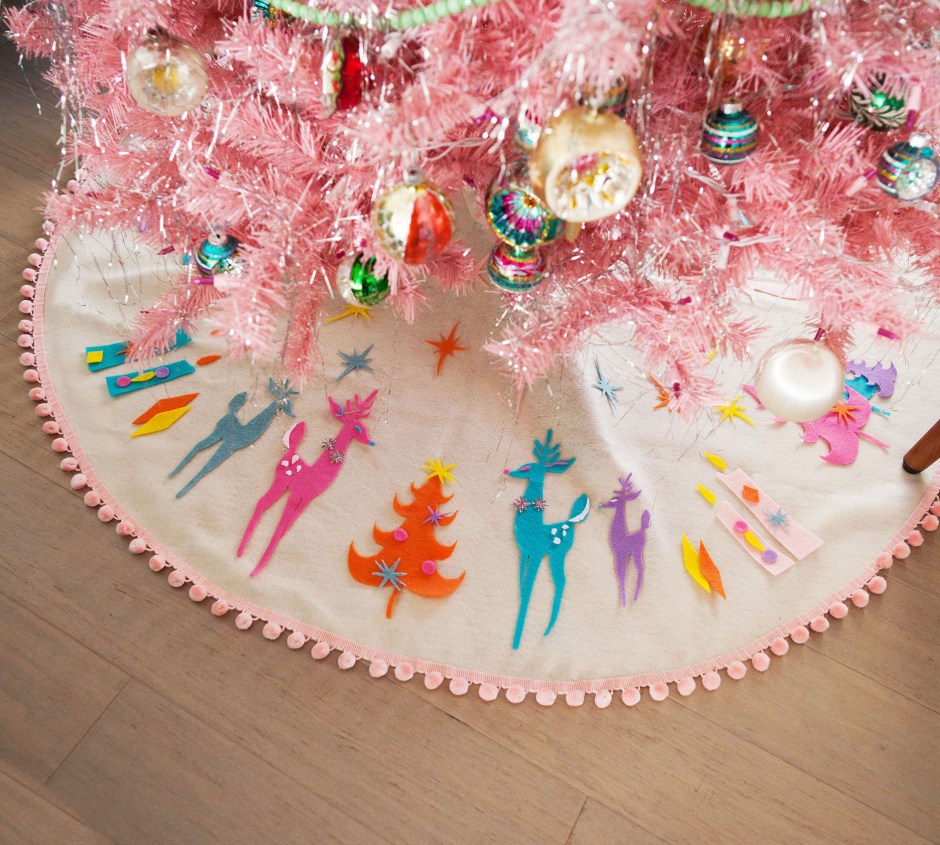
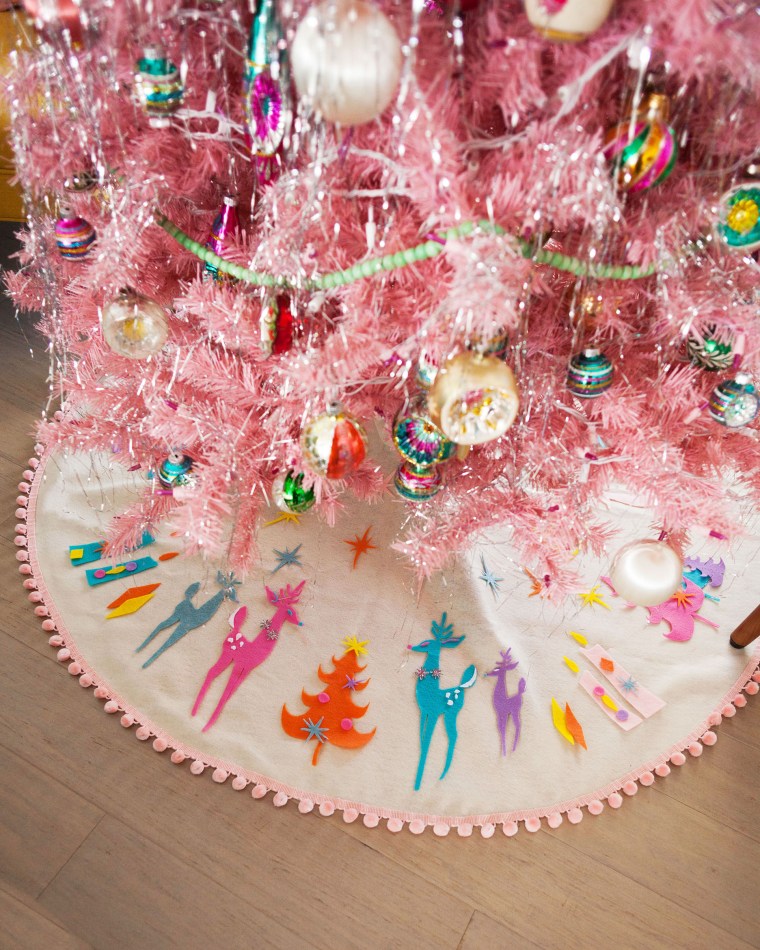

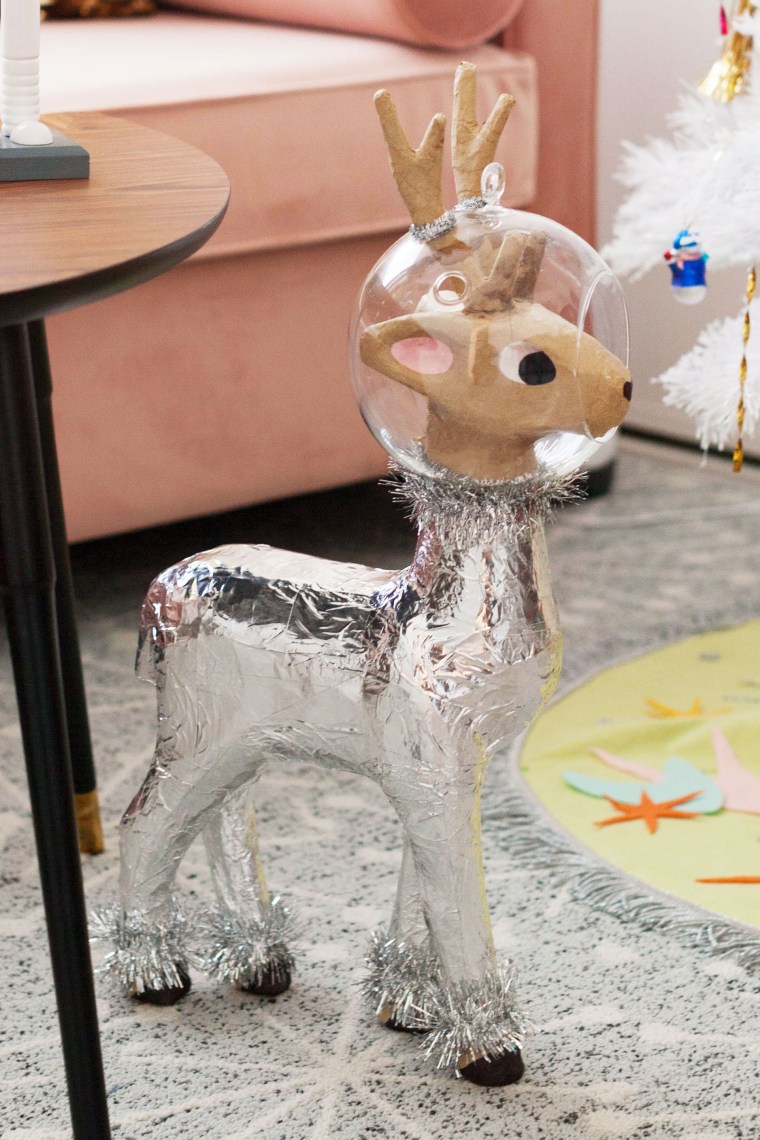
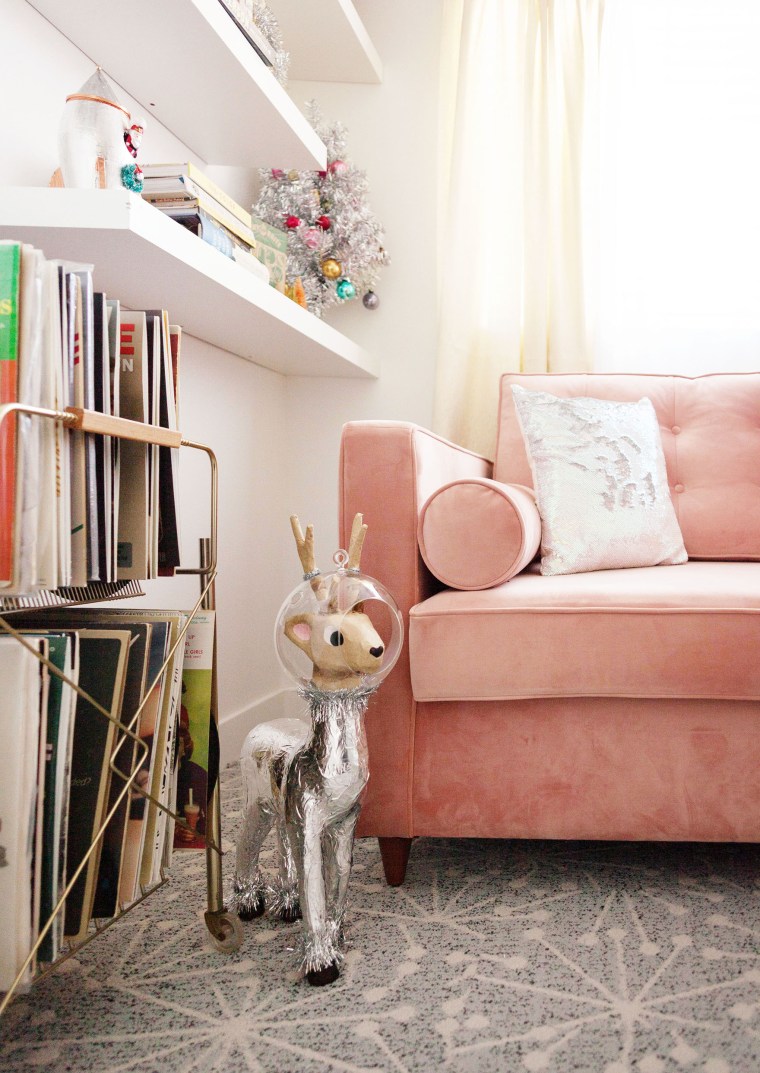
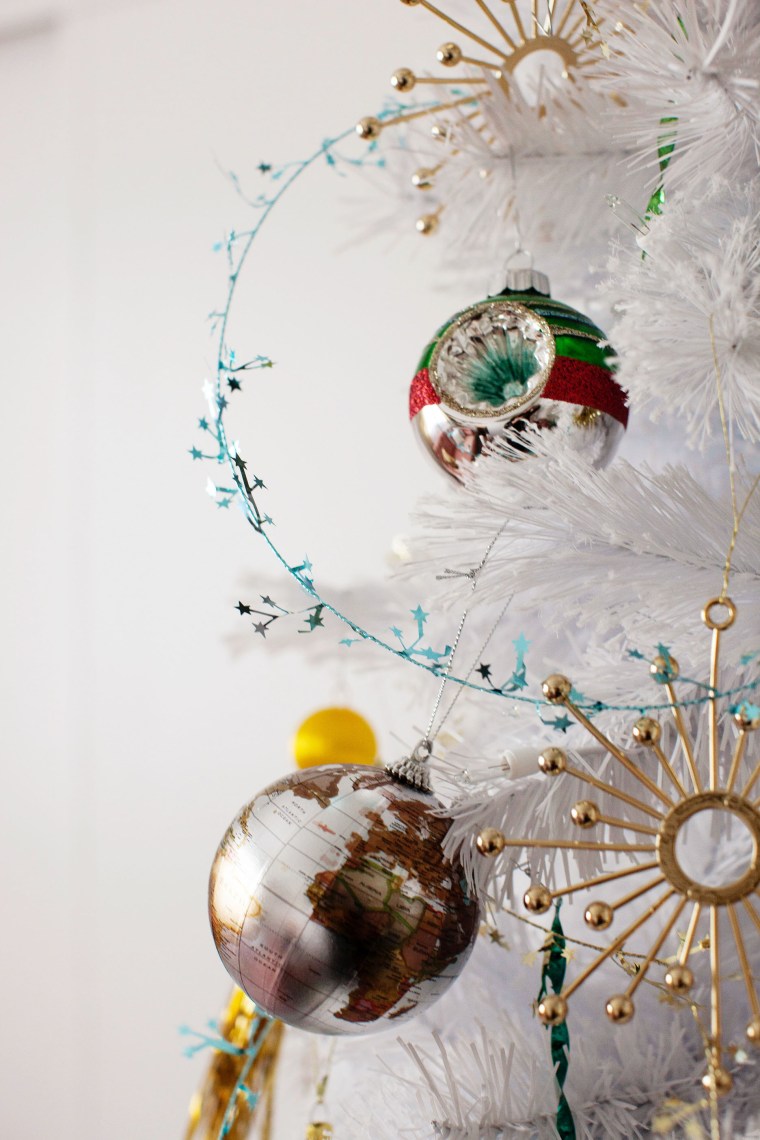
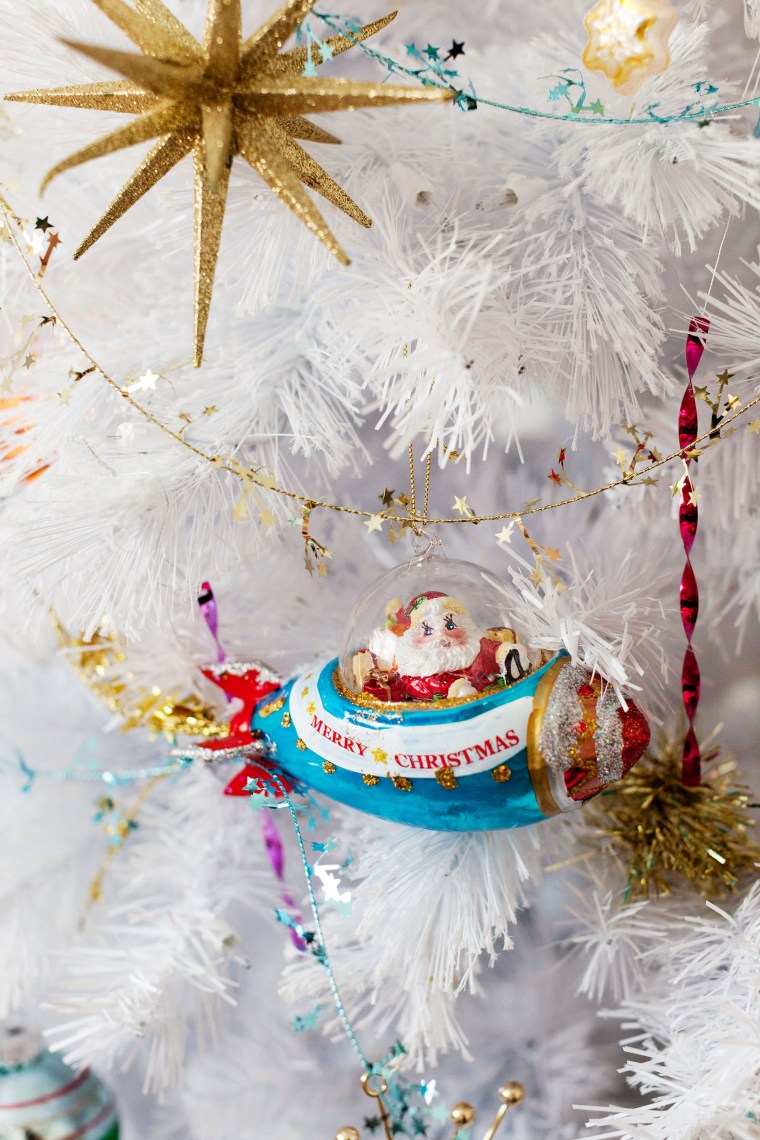
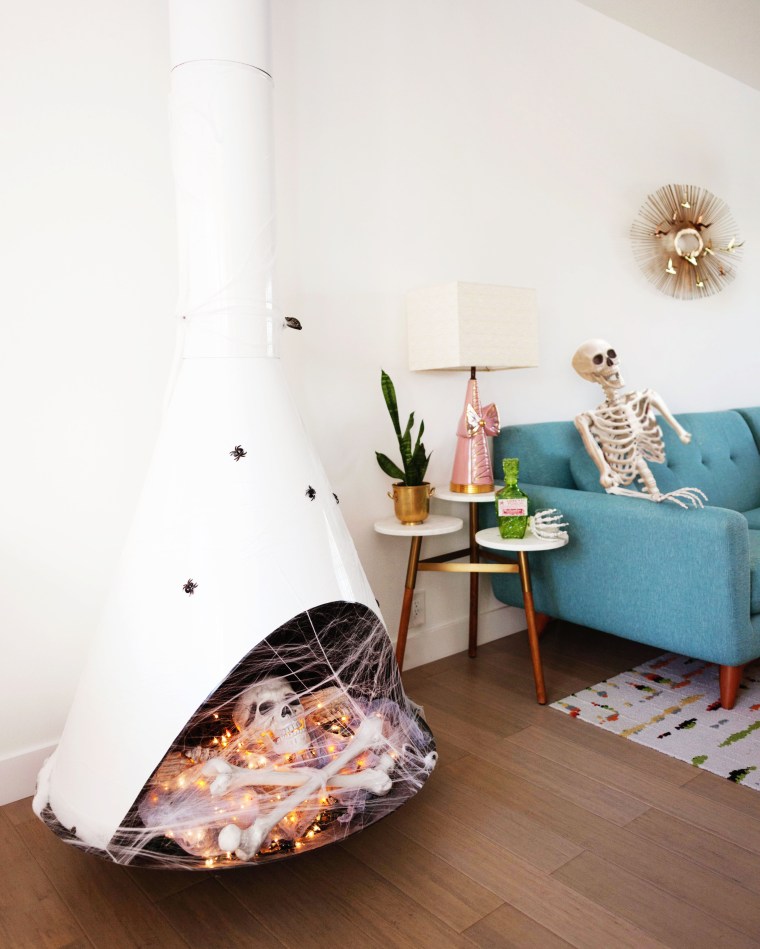
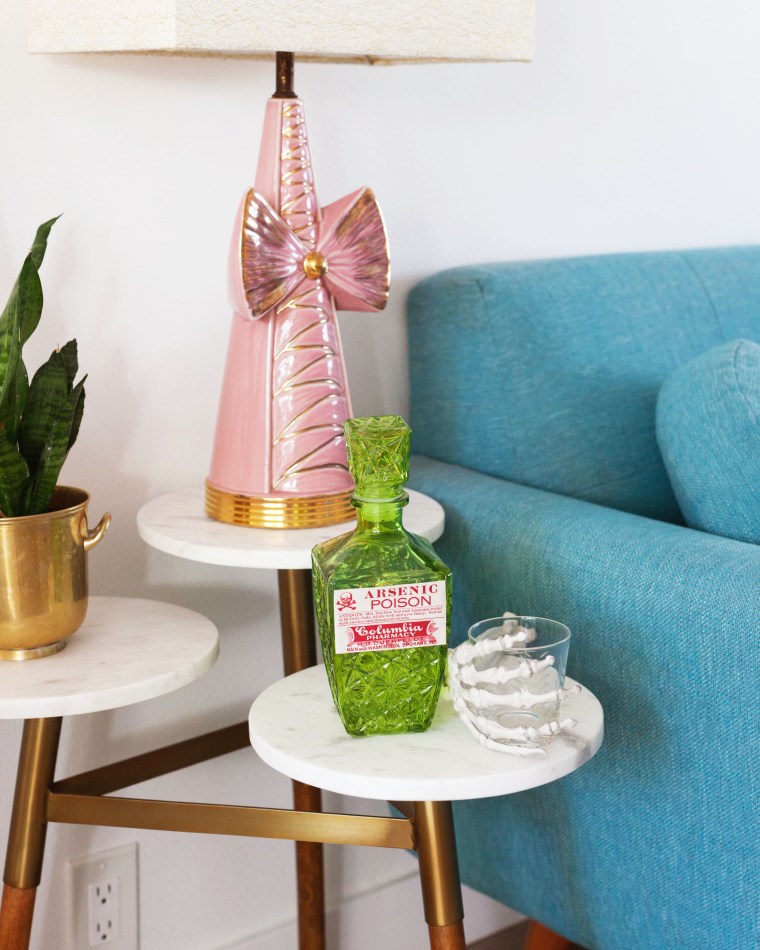
 You’ll end up with ornaments like this!
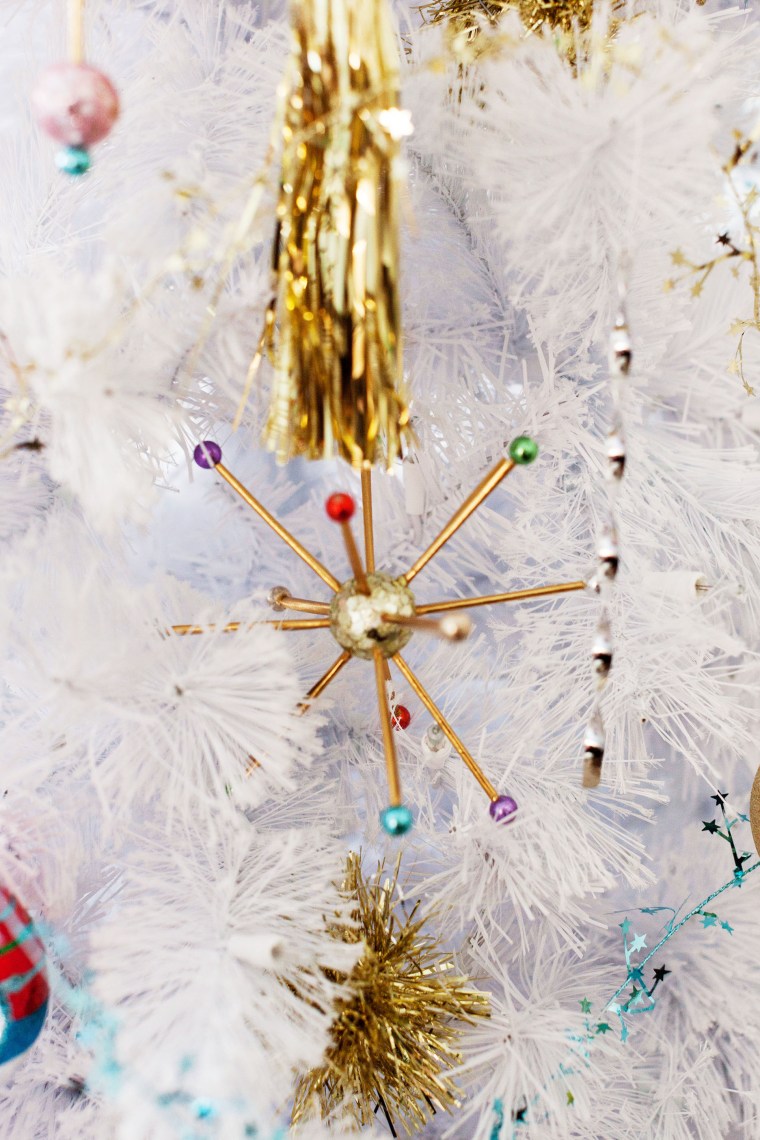

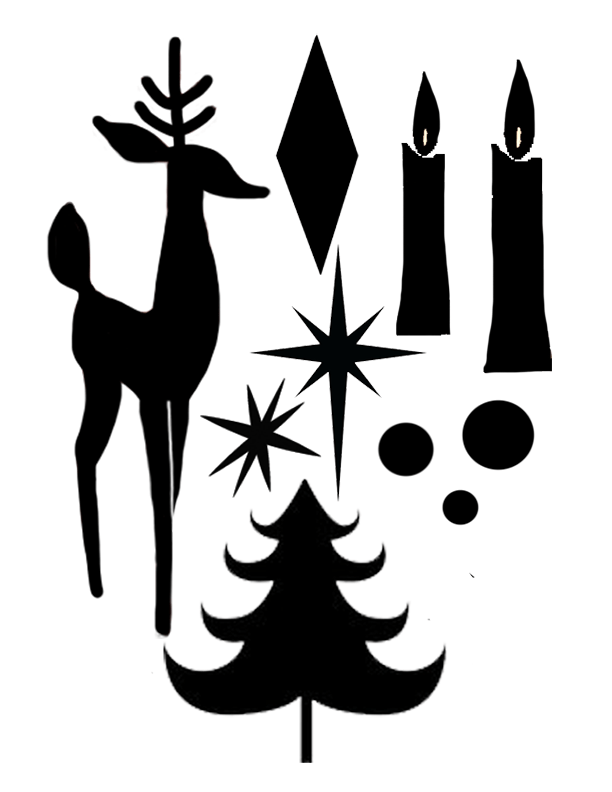
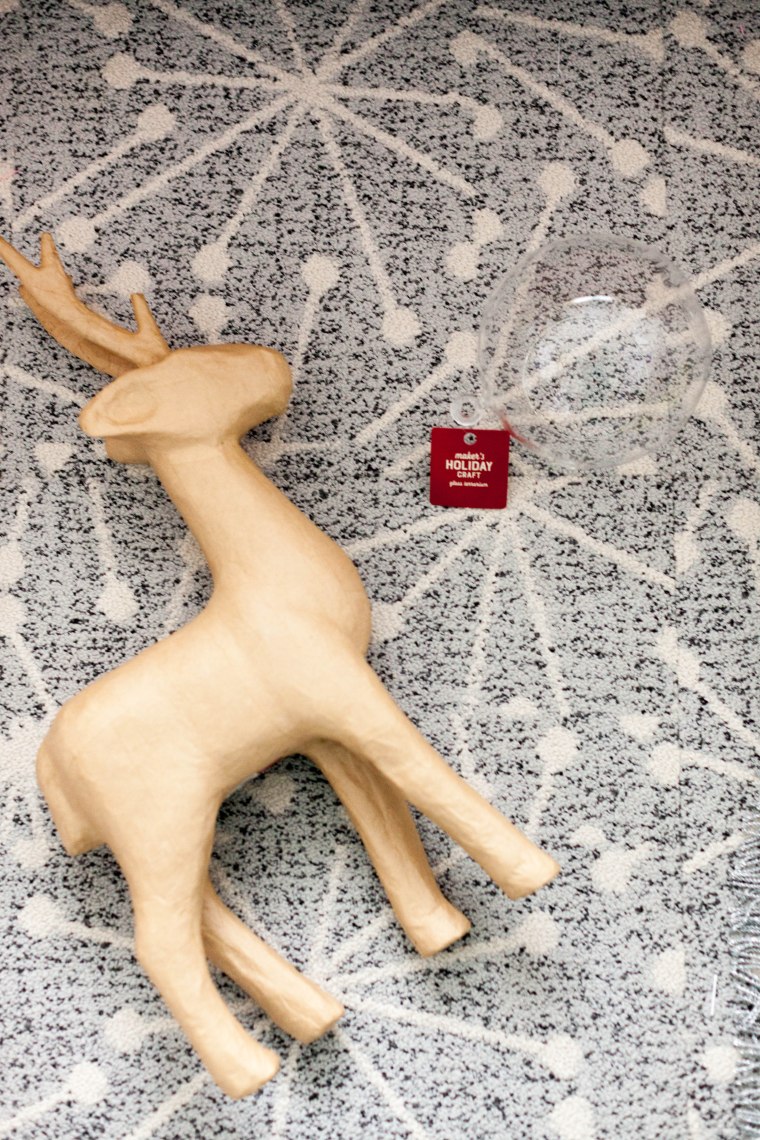 Ok I’m going to admit right now I didn’t take process photos because I’m the worst and I wasn’t even sure it was going to work, BUT luckily it’s a pretty straight forward process. (Note: I’m going to make one for a friend so I’ll try to update this post with photos when I do!)
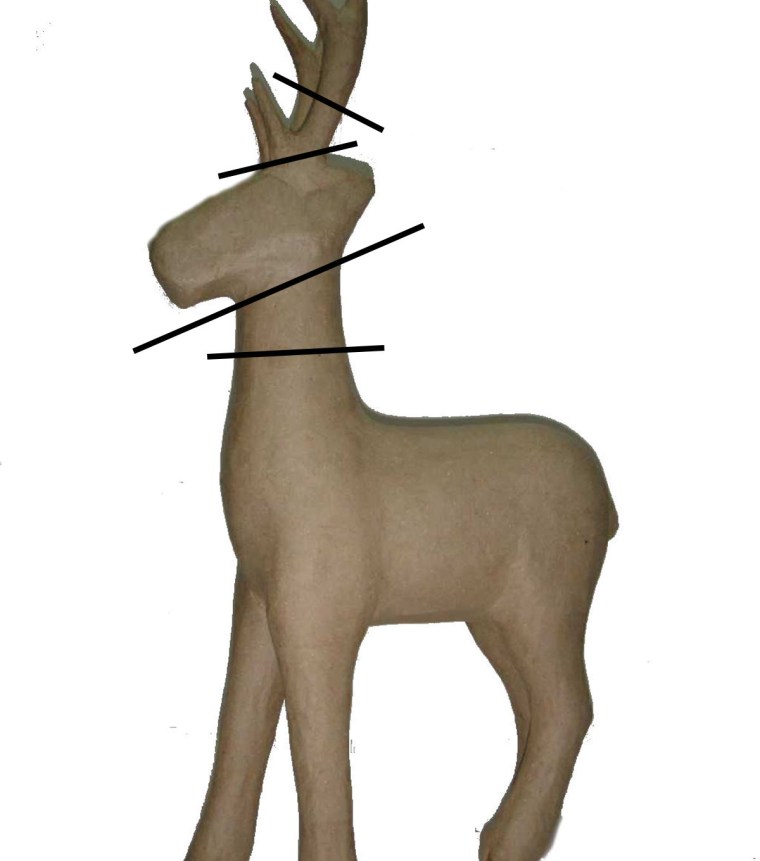
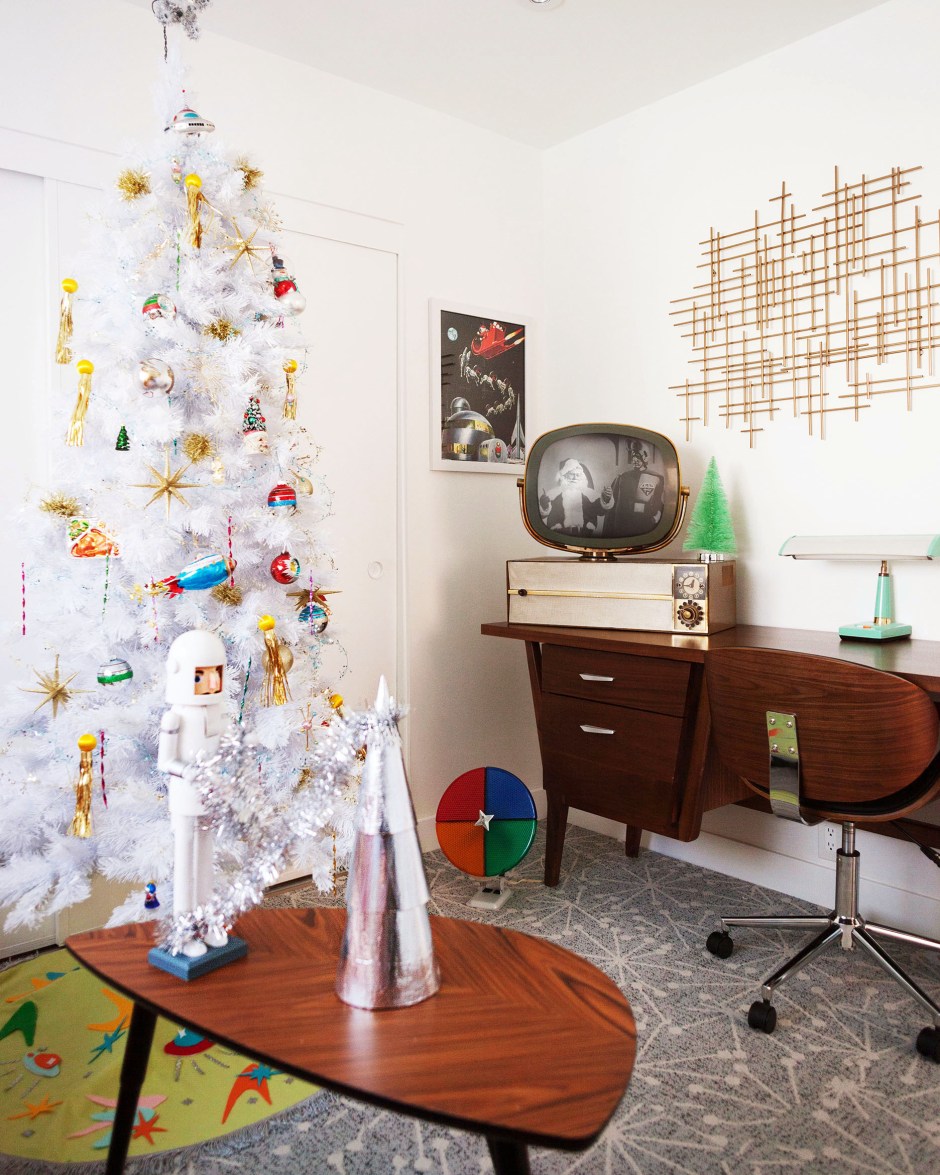
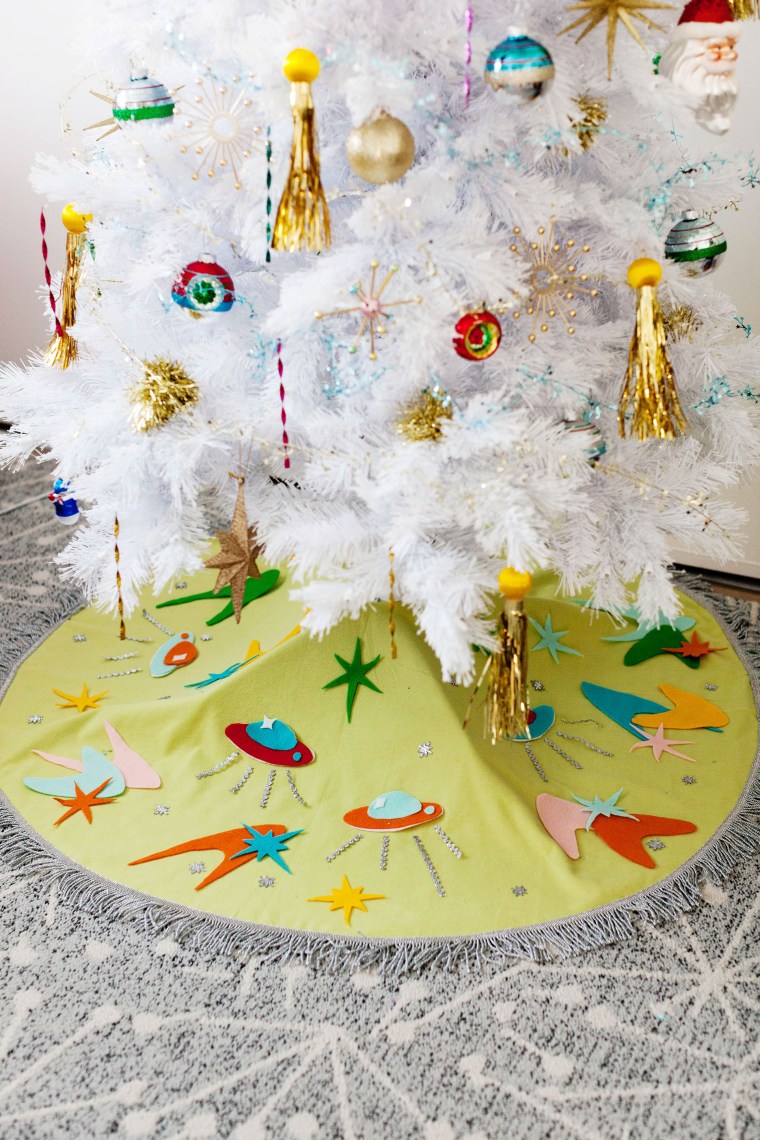
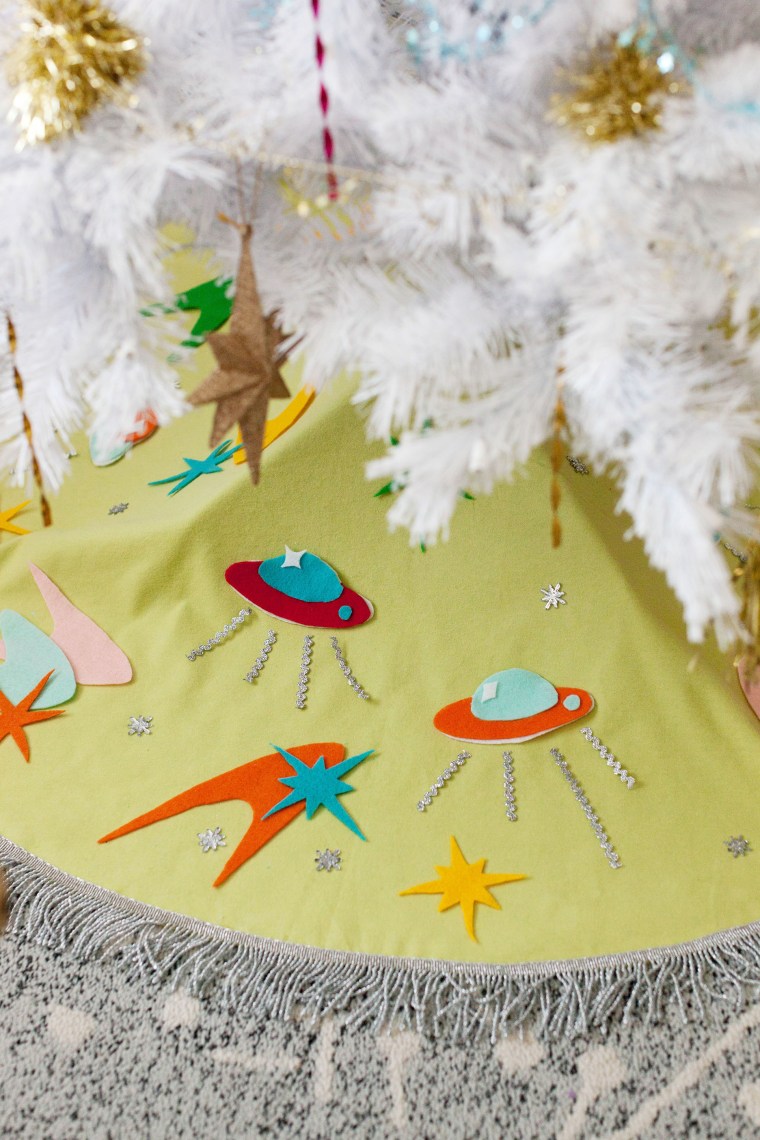
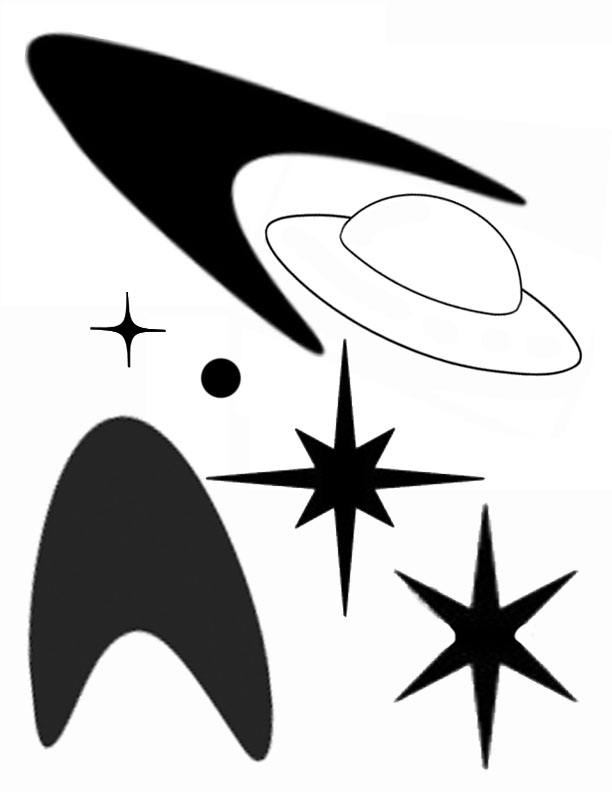
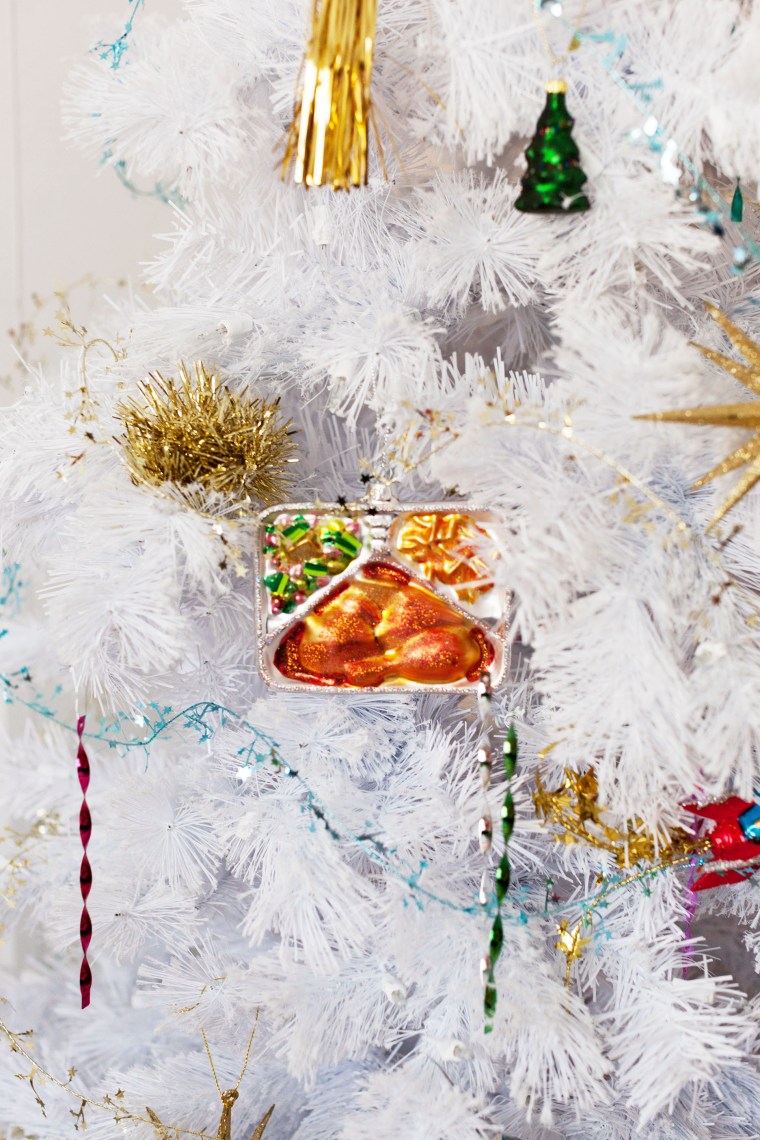
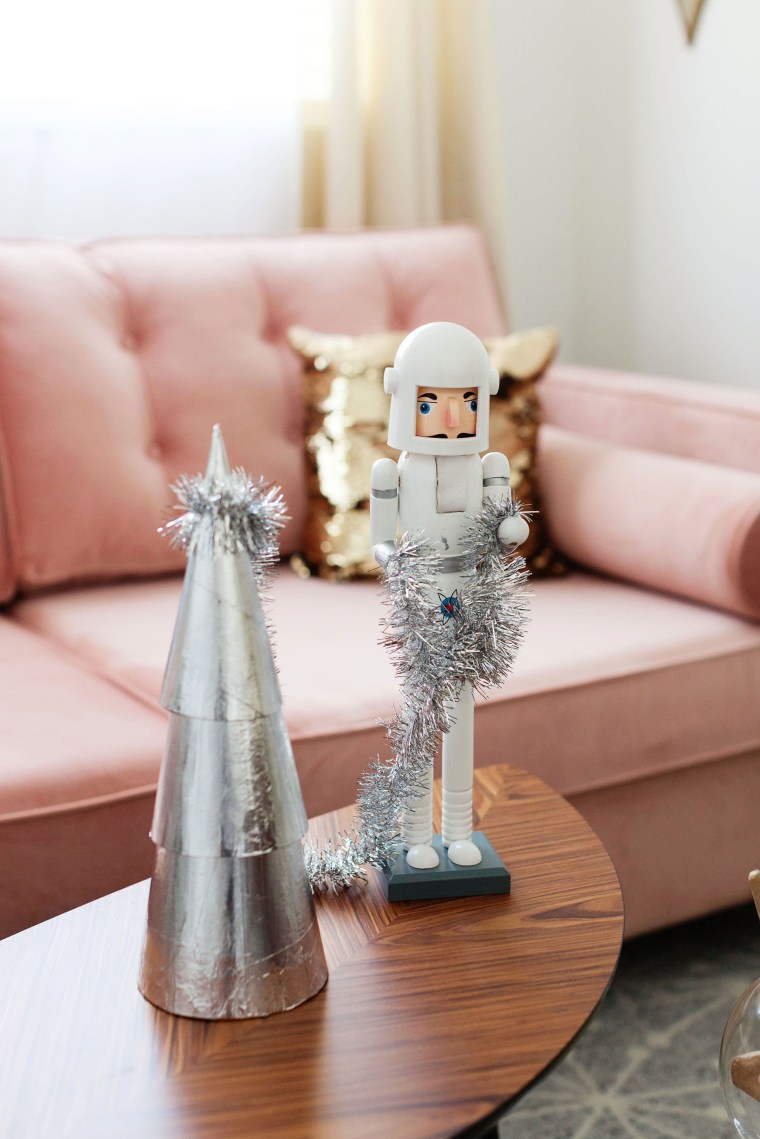
 Of course I used some of my vintage reflector ornaments and threaded ball fringe comets.
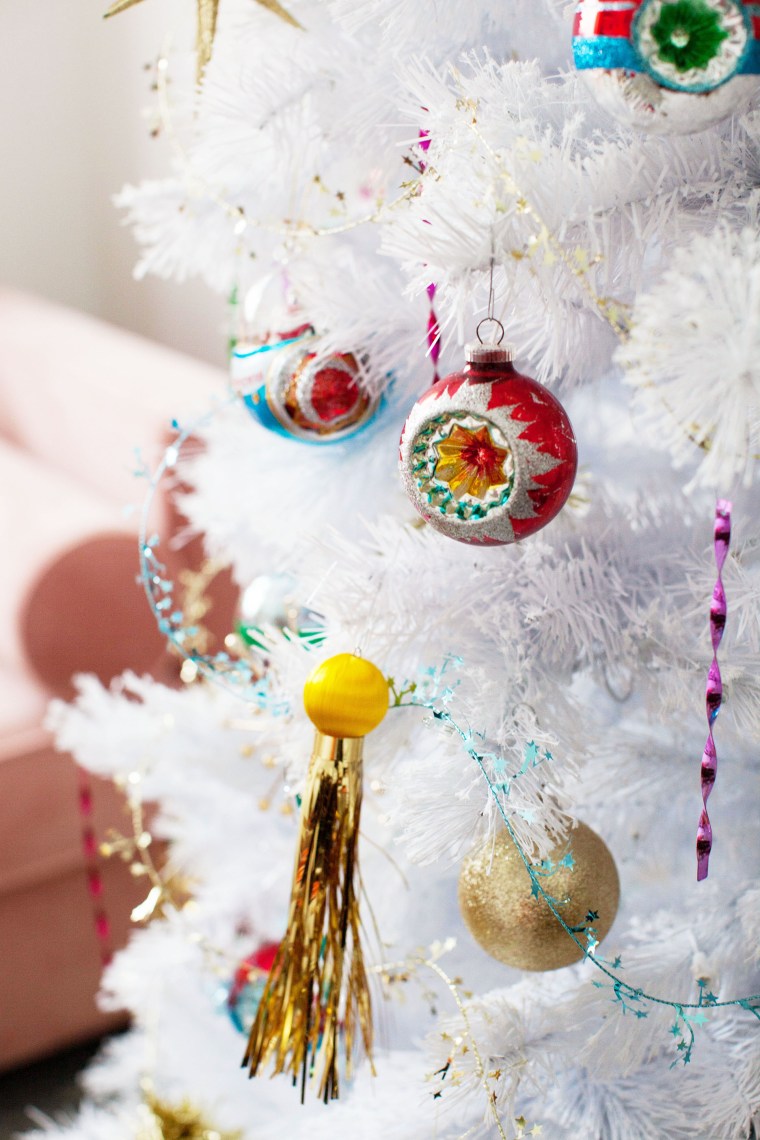 I found a few fitting ornaments at Michaels like a flying saucer, rocket Santa, and an aluminum tray TV dinner (space age technology!).
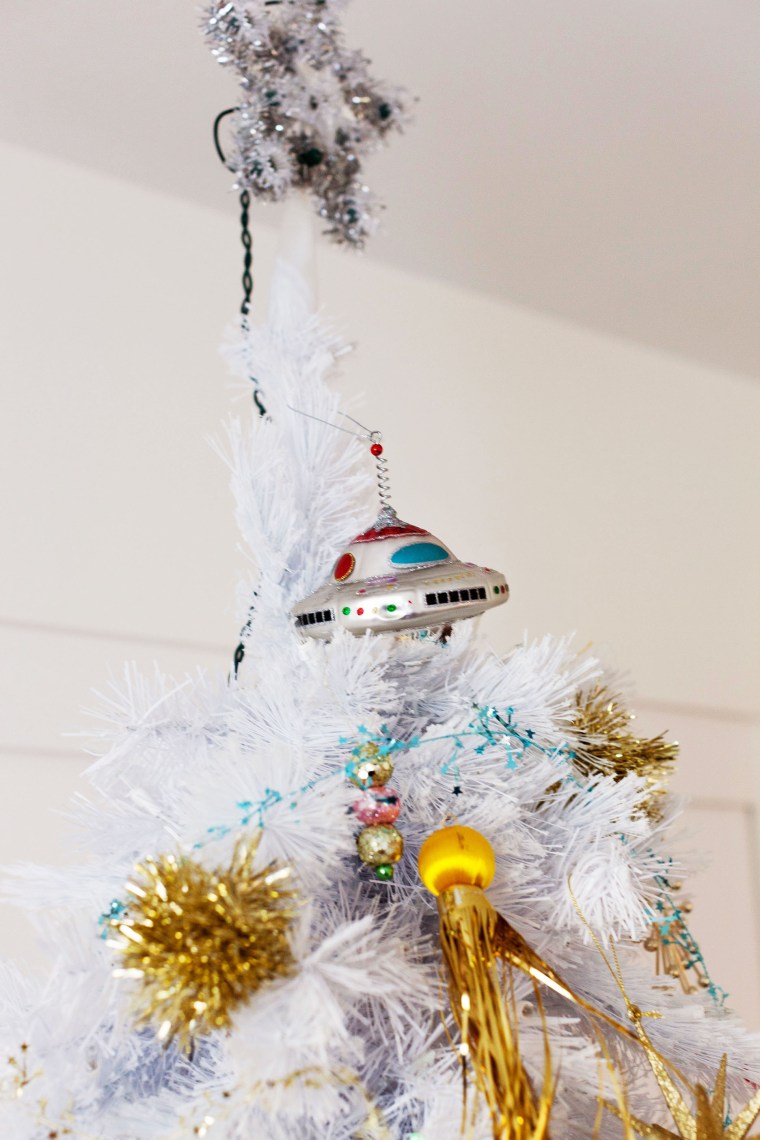
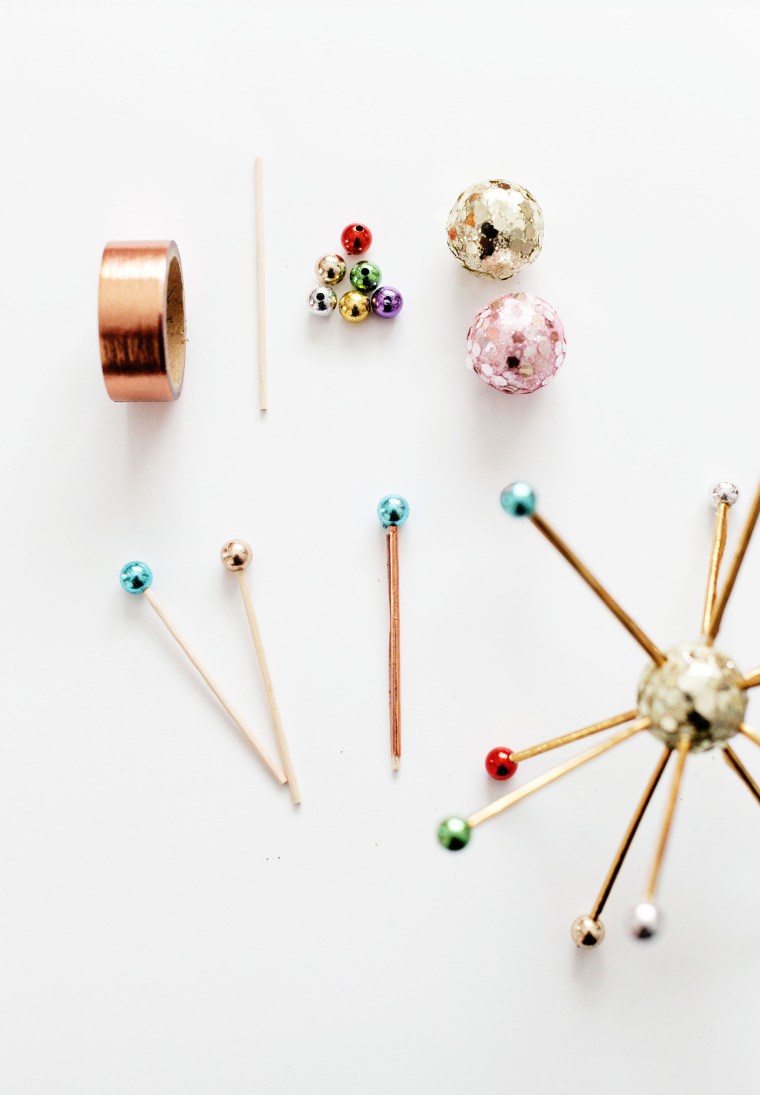
 I also made colorful sputnik ornaments (look for those in an upcoming post!)
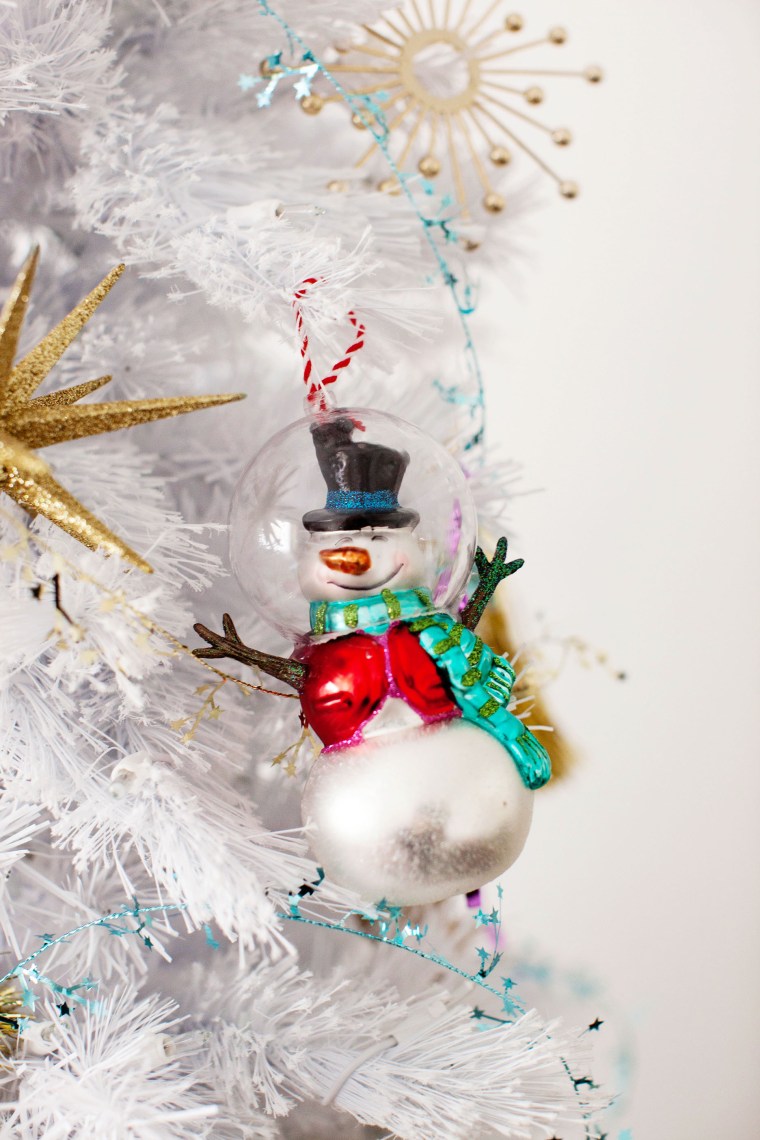
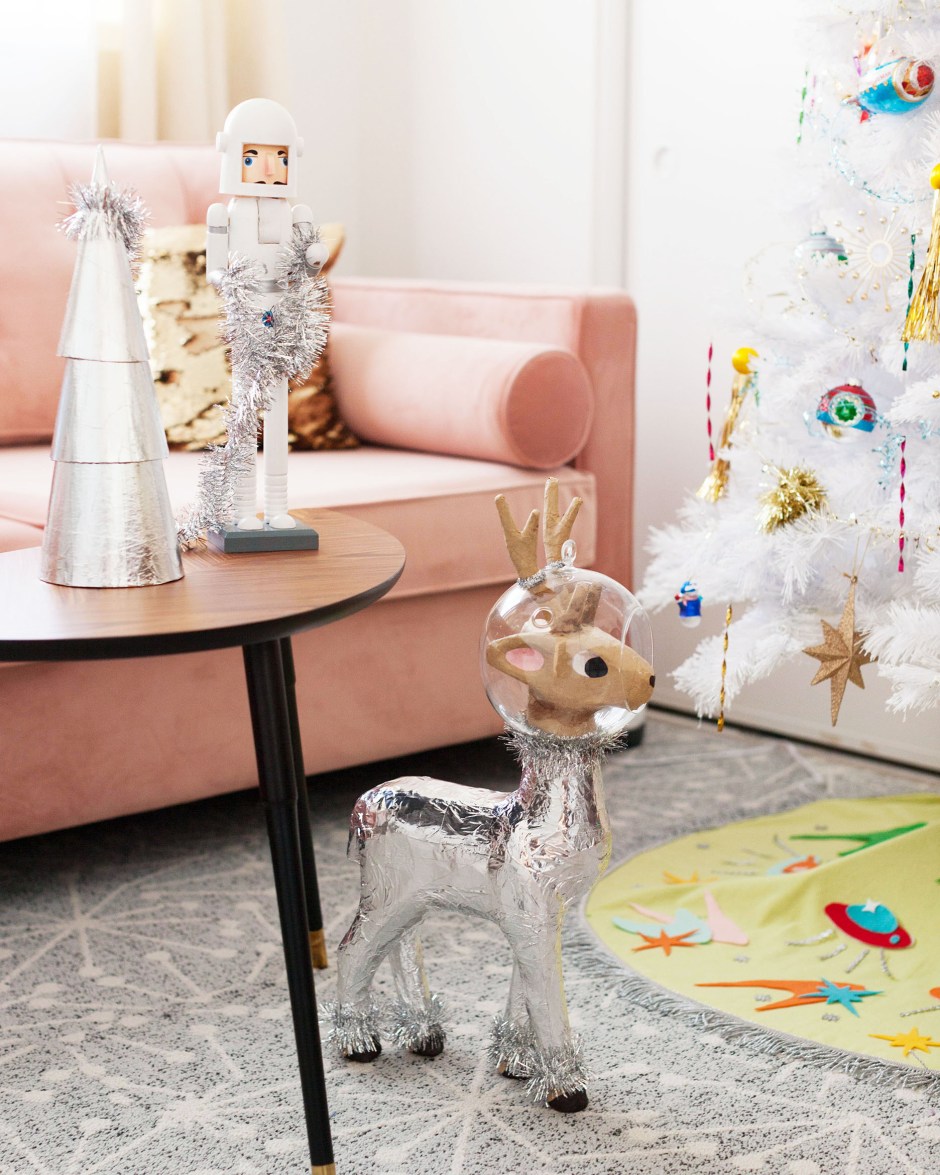
 Another rocket Santa! Made out of a bird feeder, metallic tape, and mini ornaments.
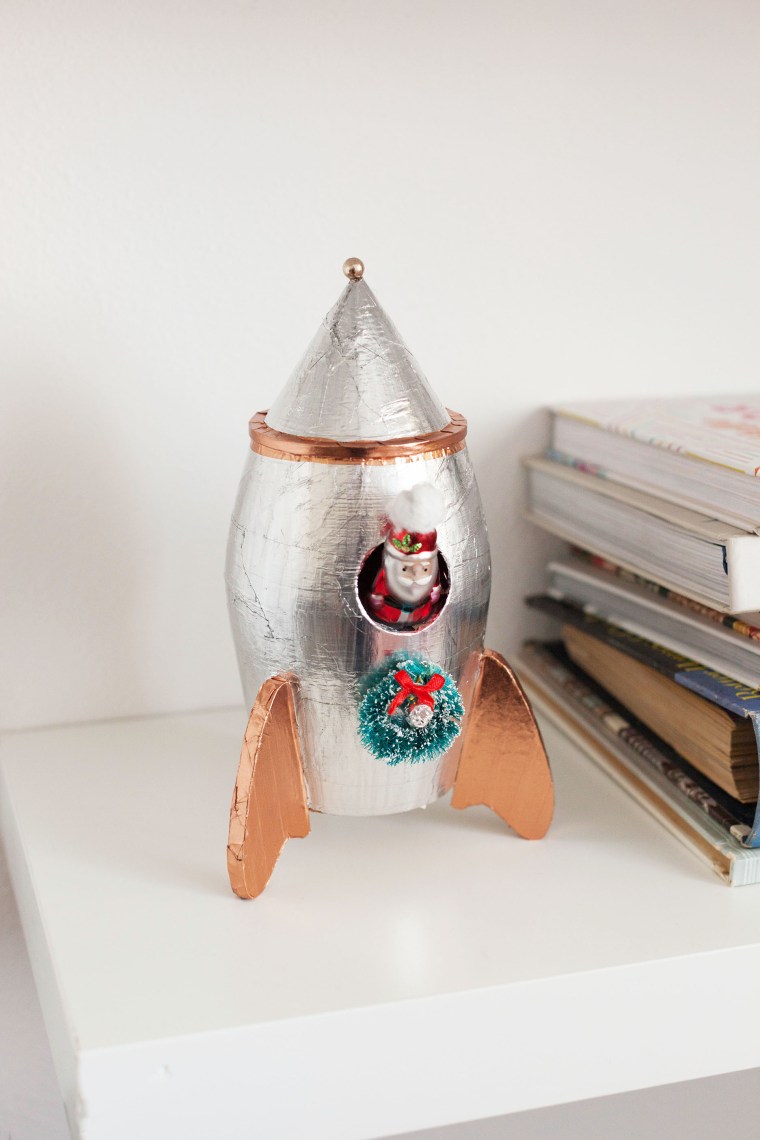

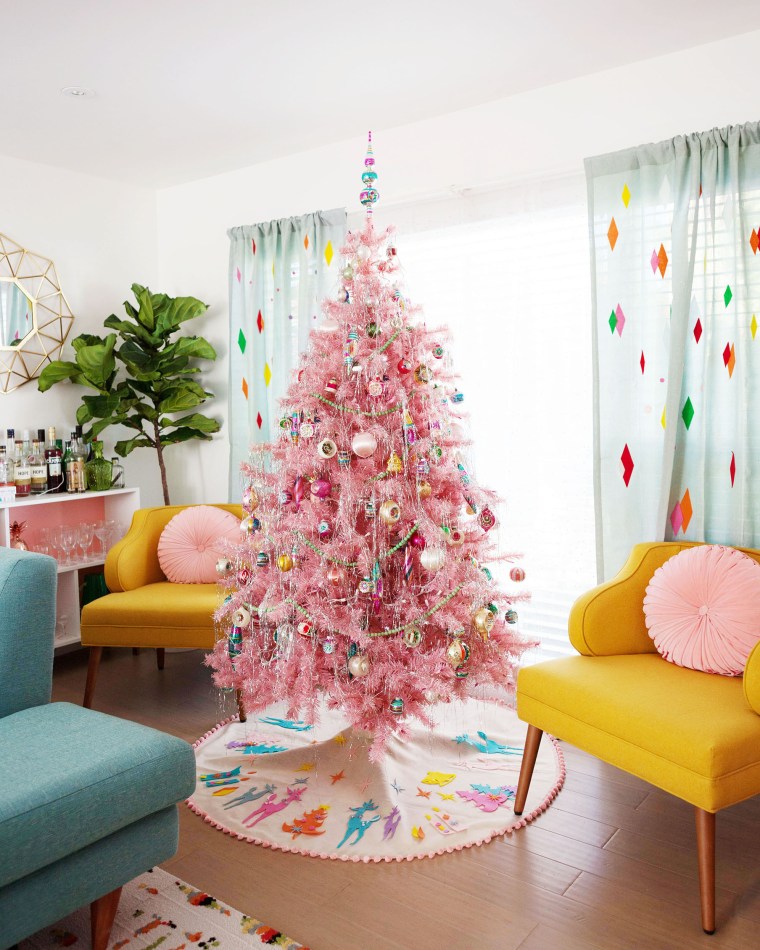
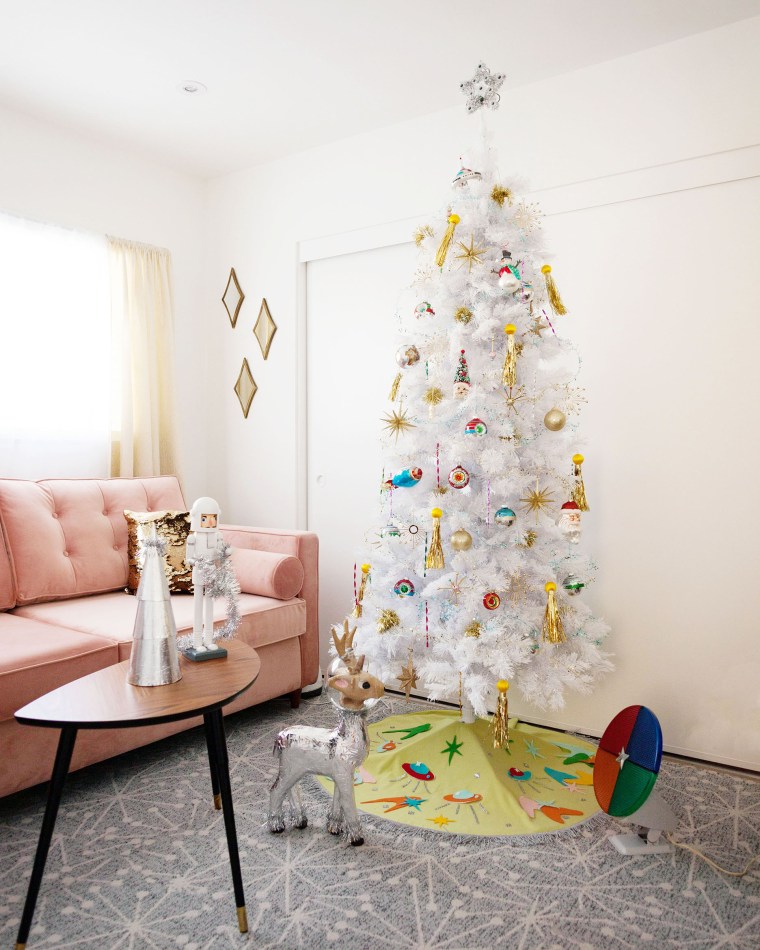
 Looks pretty good over by our 1960 Philco Predicta.


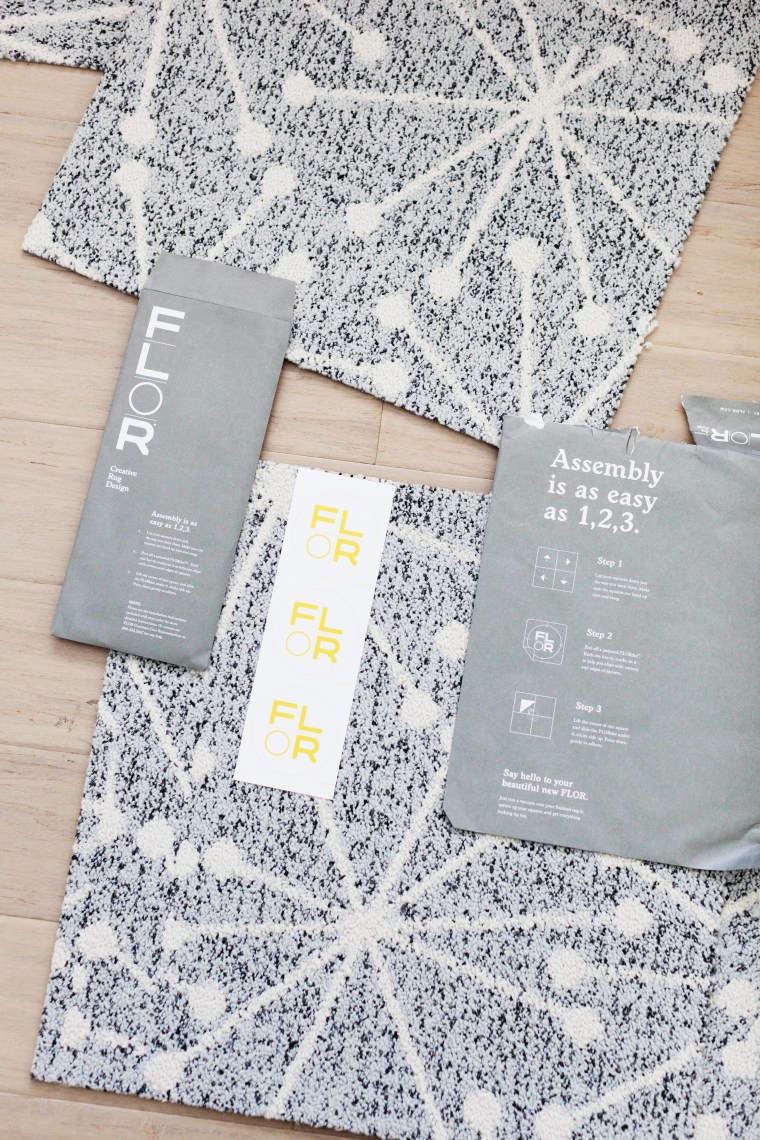 The cool thing about FLOR squares is that you can customize a rug to fit your needs. You can mix and match colors and patterns to create something truly unique, or you can just go with one all over pattern like I’ve done. They’re easy to cut and they simply stick together using the included FLORdots stickers.
 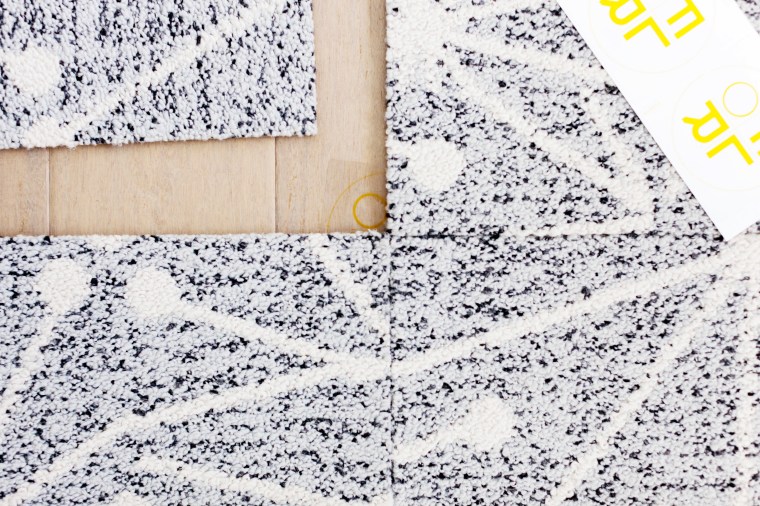 The stickers hold the corners of the tiles together and only stick to the backing of the carpet squares. Nothing actually sticks to your floor underneath so you don’t have to worry about ruining it or having to deal with sticky residue underneath. Plus, when we move we can just stack them up and take them with us to the next place.
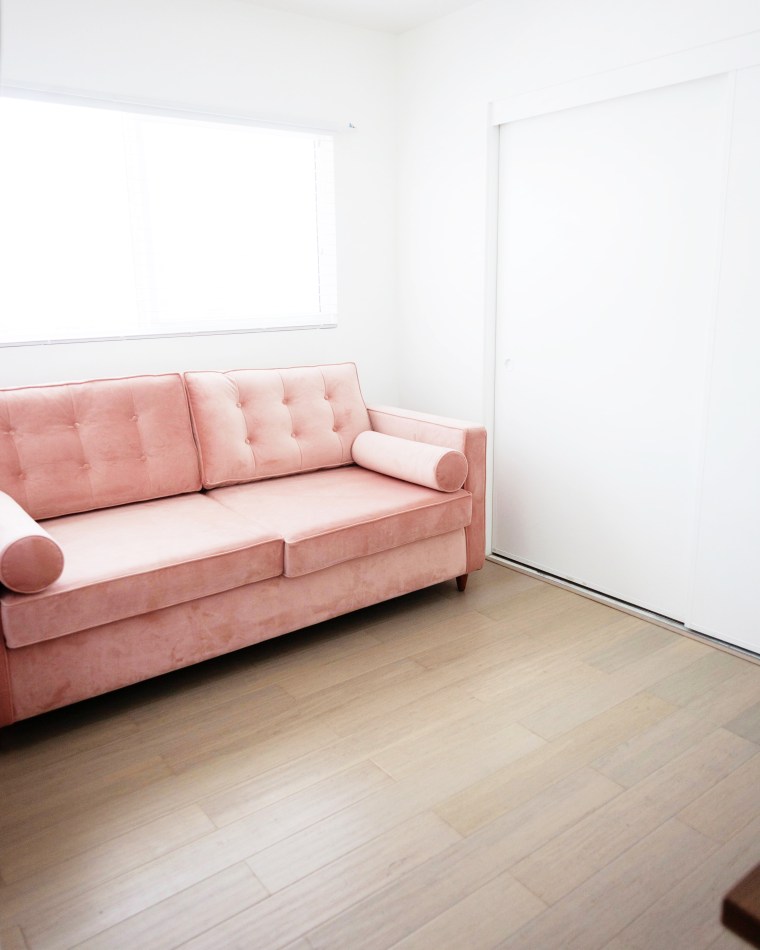
 First I laid out the squares to make sure I was happy with the placement. Any parts that need trimmed are easily cut with a utility knife or box cutter.
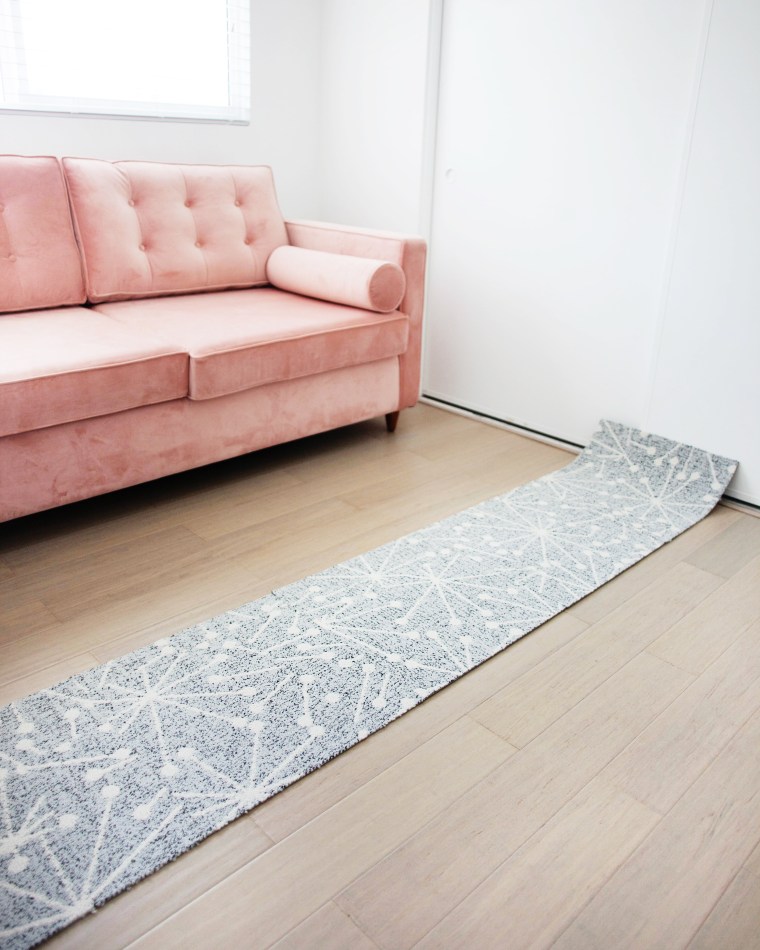 This room is tiny so I decided to do the entire thing. Once I was happy with the placement I easily applied the stickers to the corners to hold it all together and voila!
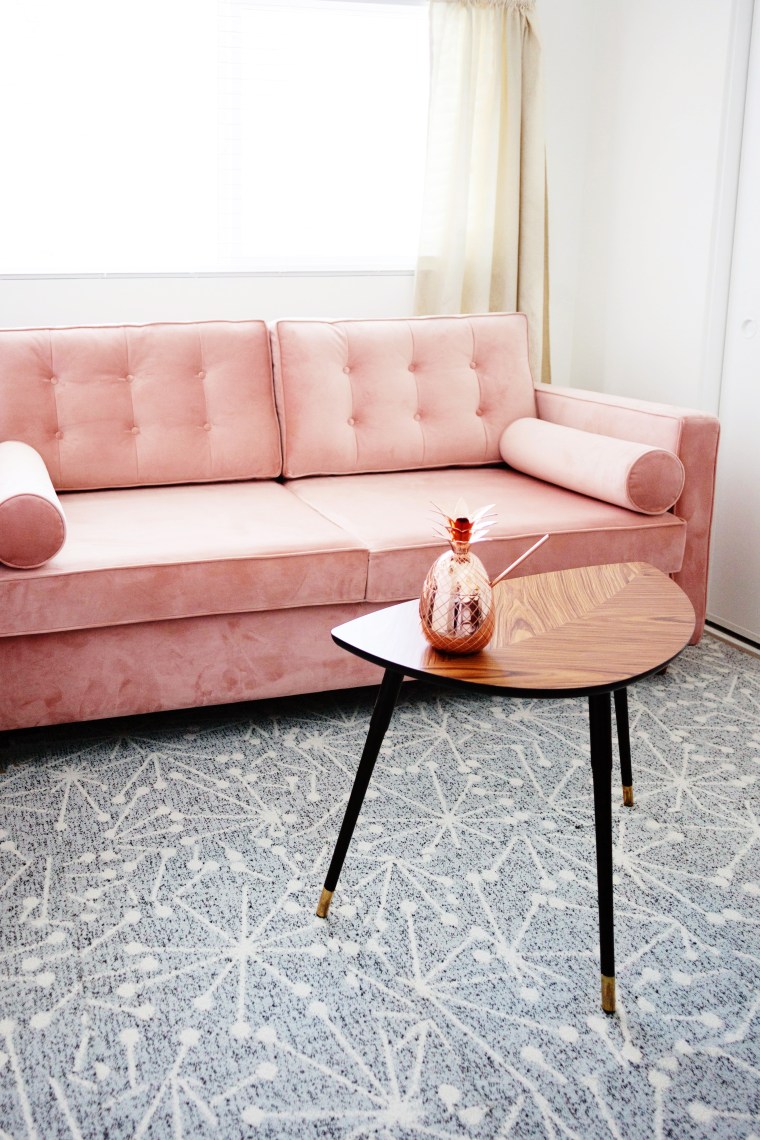
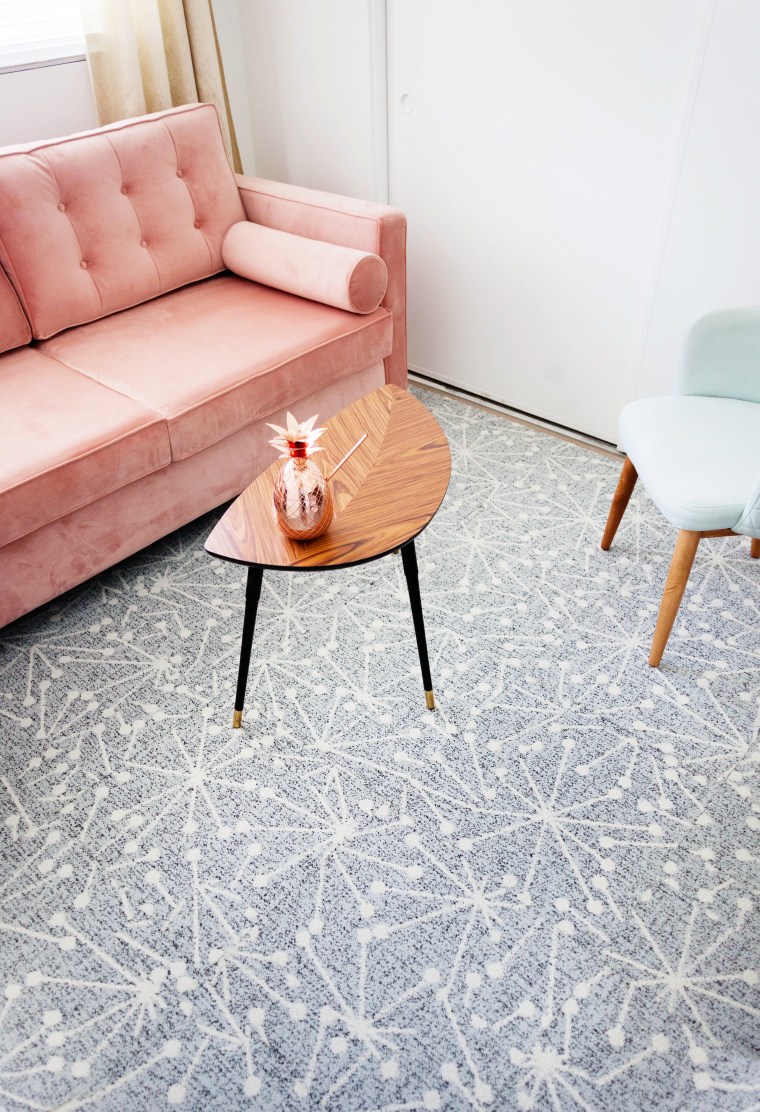
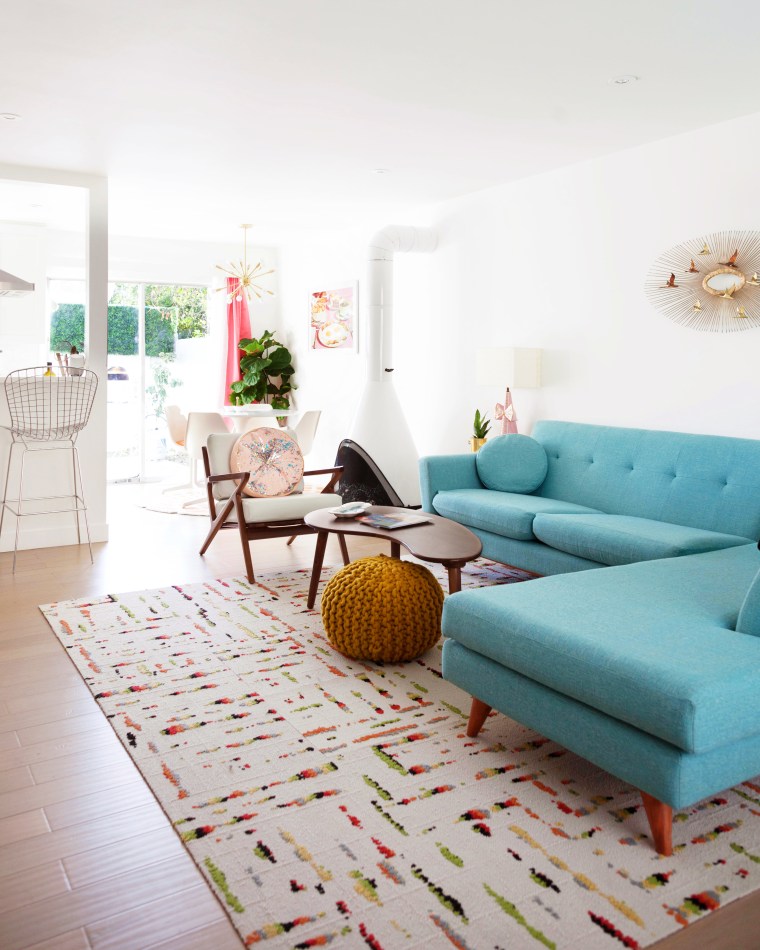
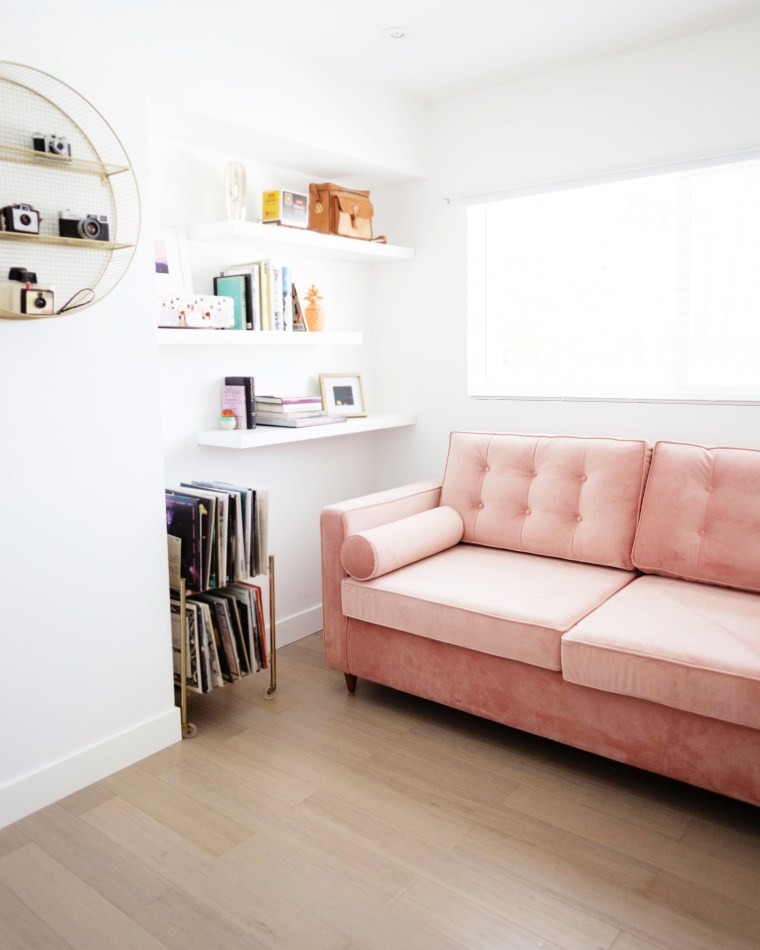
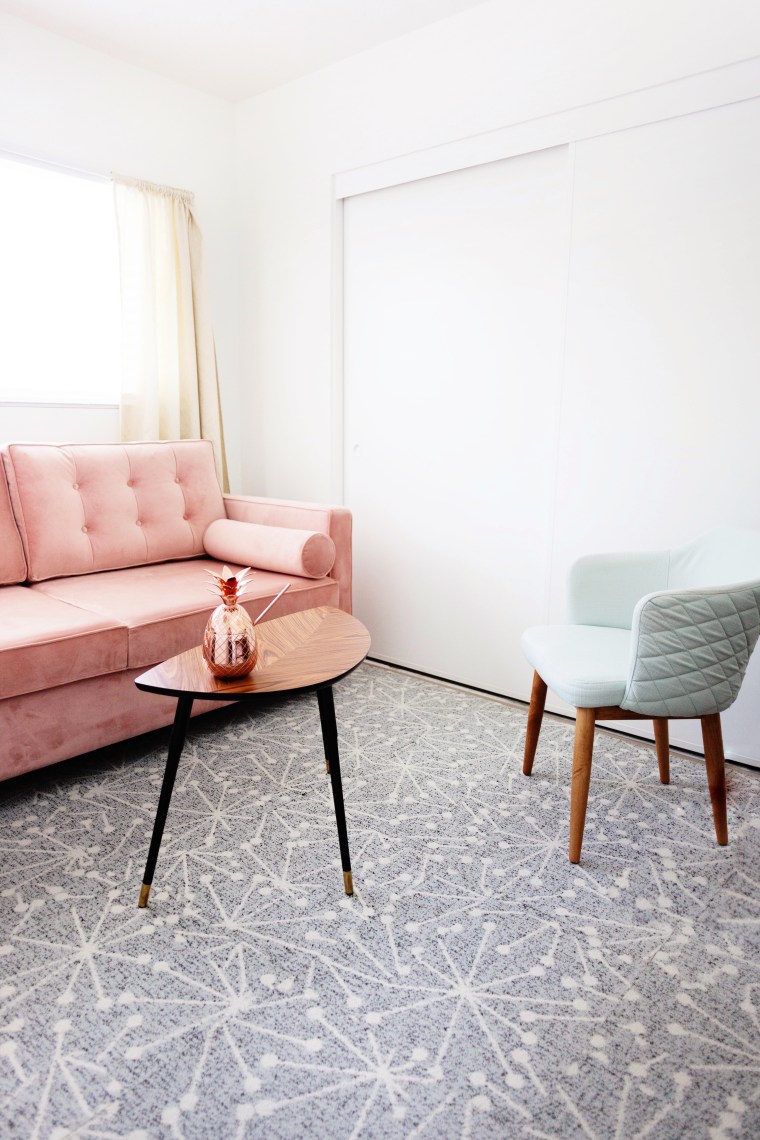 Tada! I think it definitely makes the room feel more put together and adds some much needed pattern. I love the way the blue-grey looks against the blush pink velvet of our sleeper sofa, and the black and gold of the table. Bonus, it’s perfect for home office use because it immediately eliminated any awkward phone echo!
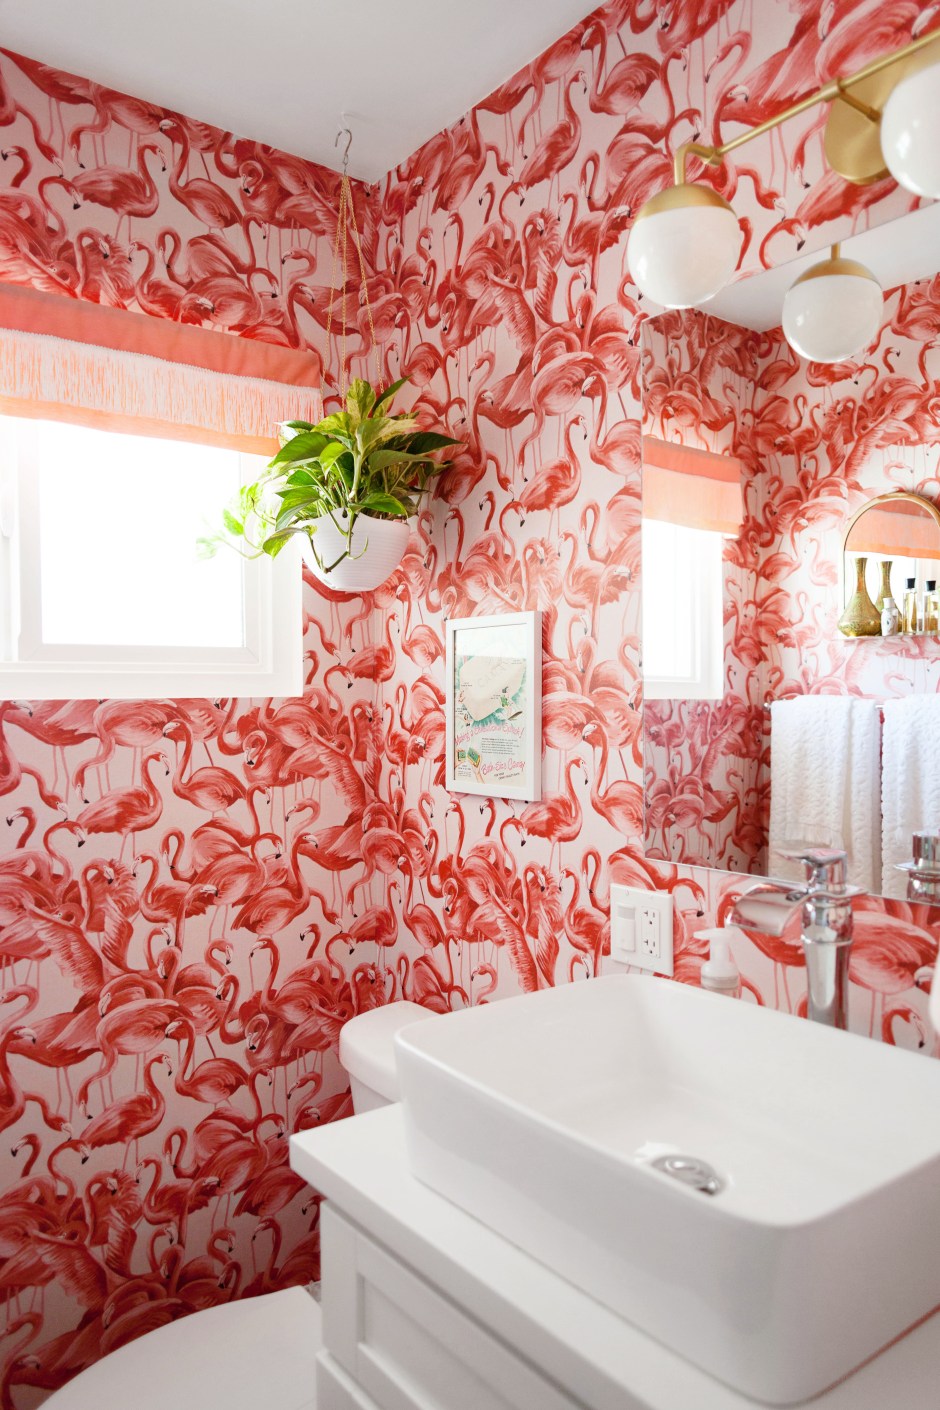
 And here’s the new new!
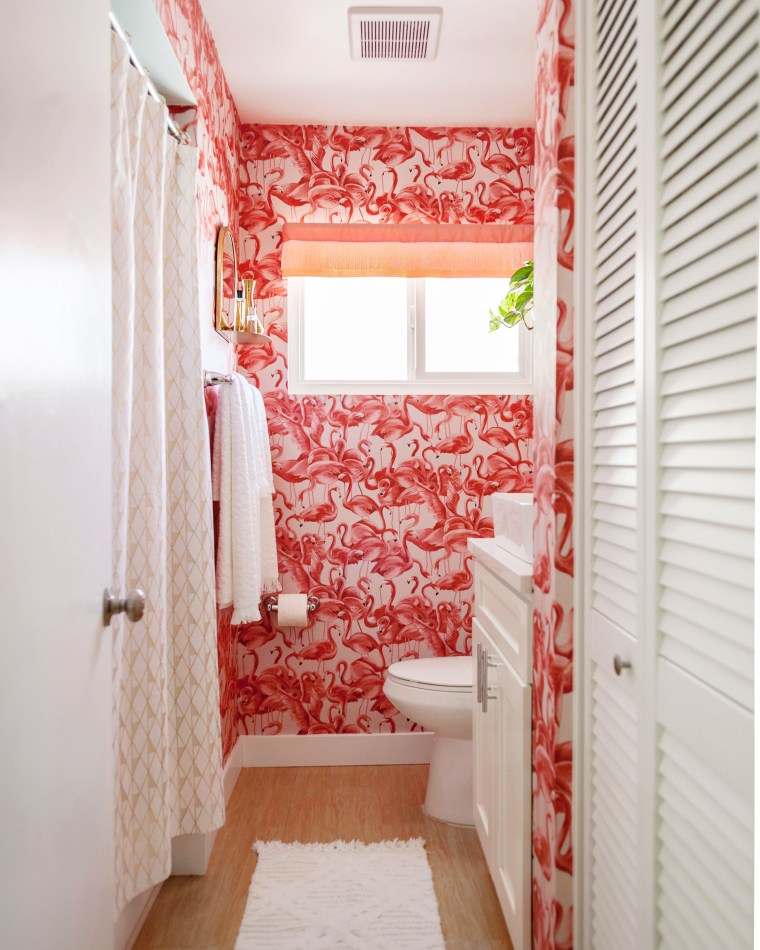 It’s kind of crazy how it makes the room feel bigger. I thought it might feel closed in with so much pattern on the walls, but nope! It works. The print is so lovely. It’s a lovely mix of soft pink and reddish pink that looks amazing against white and gold. As always it was easy to work with and very forgiving. You can refer to my previous post for installation tips that work for me.
  I also added a few new accessories.
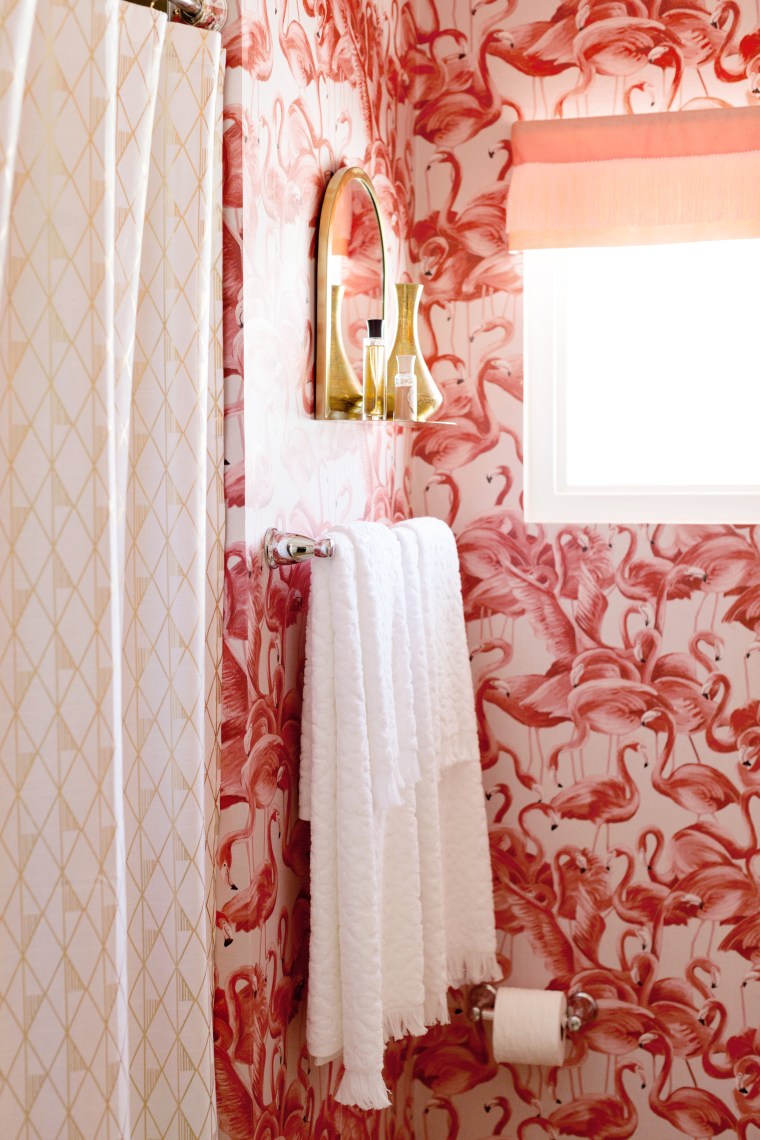
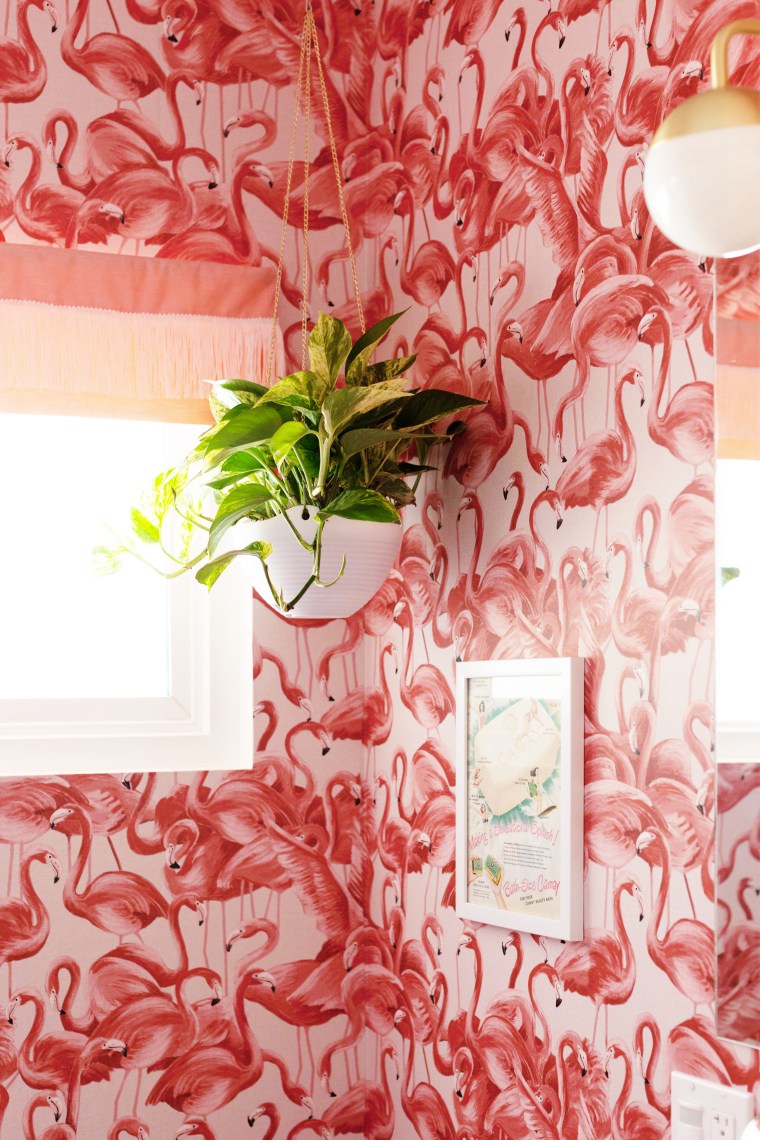 I got this hanging planter on Amazon and changed out the original chain with one from the jewelry making section at Jo-Ann.
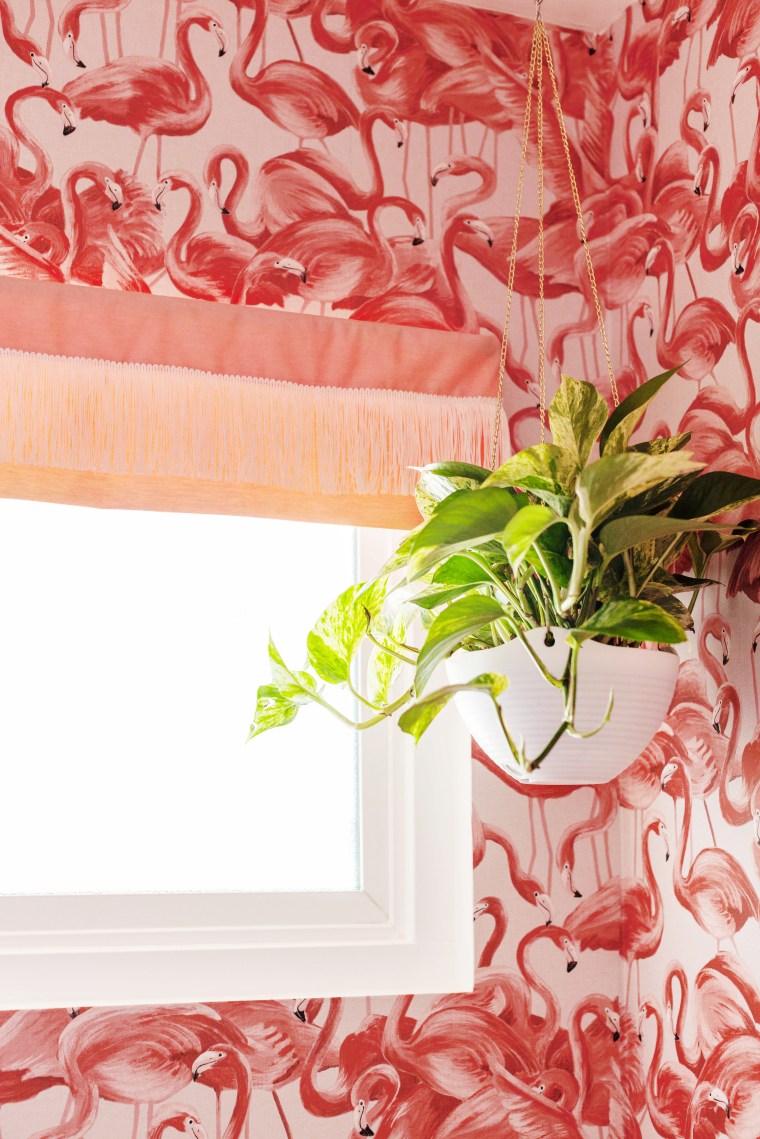 I kept the original window valance and shortened it in order to let more light in. I loved the fringe on the new towels and rug so I added some chainette fringe to tie it all together.
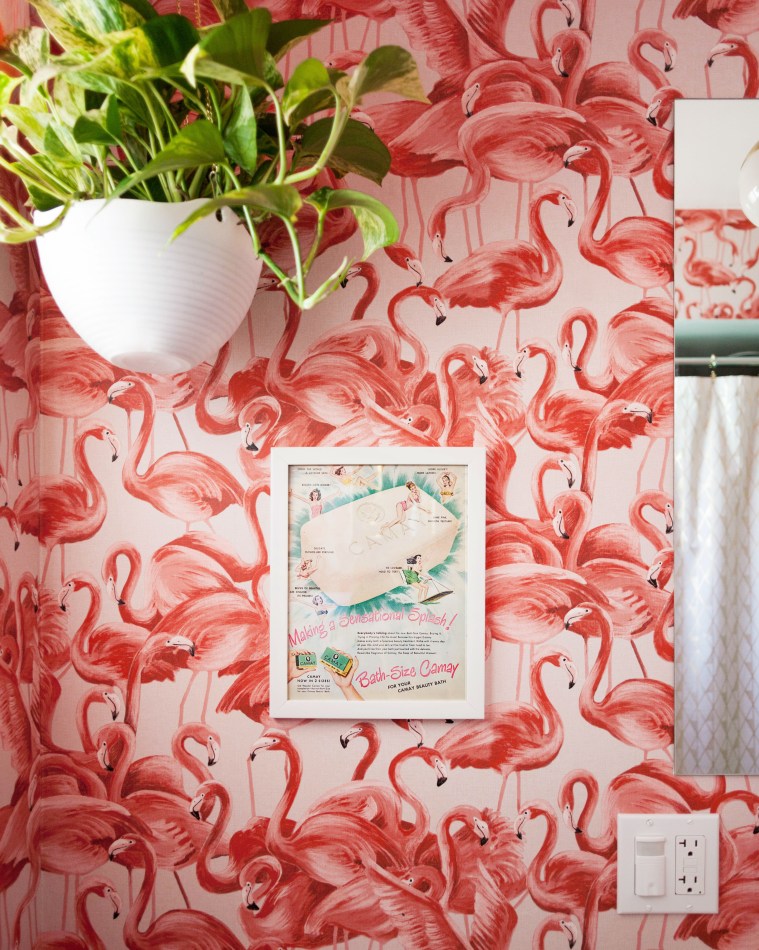 Above the toilet I removed a badly installed towel rack and replaced it with a cute framed vintage Camay Soap ad.
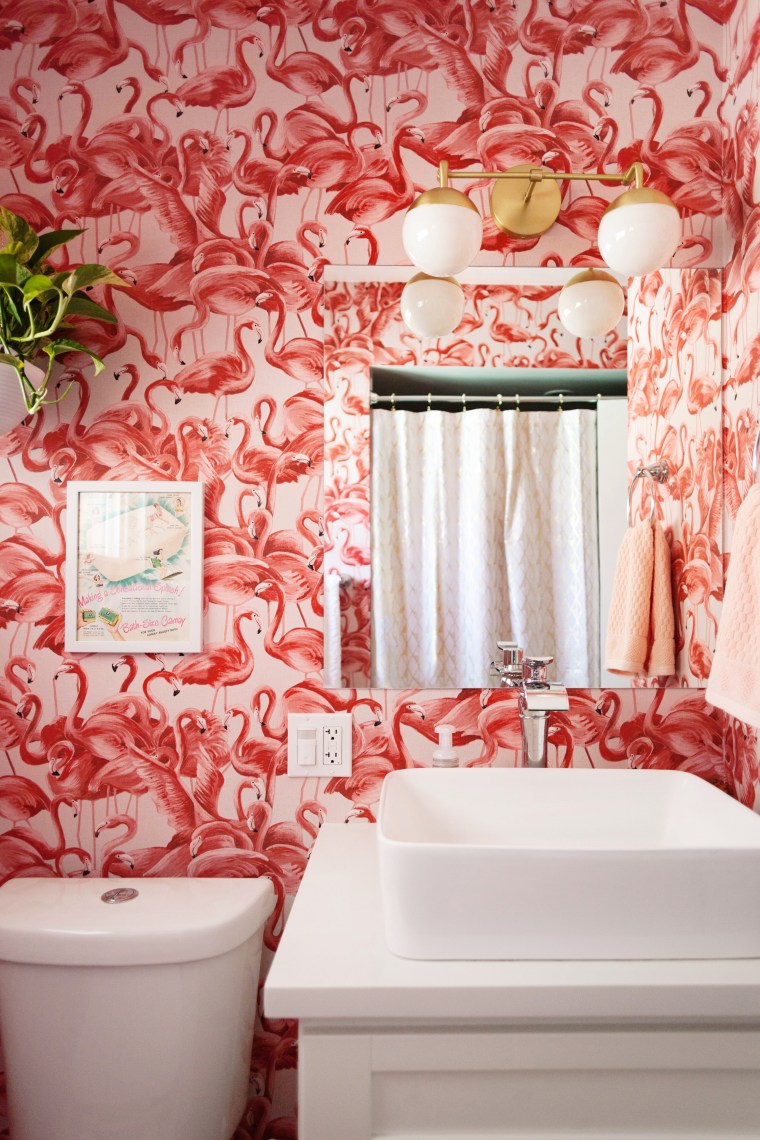 I replaced the light fixture with a new mid-century inspired
 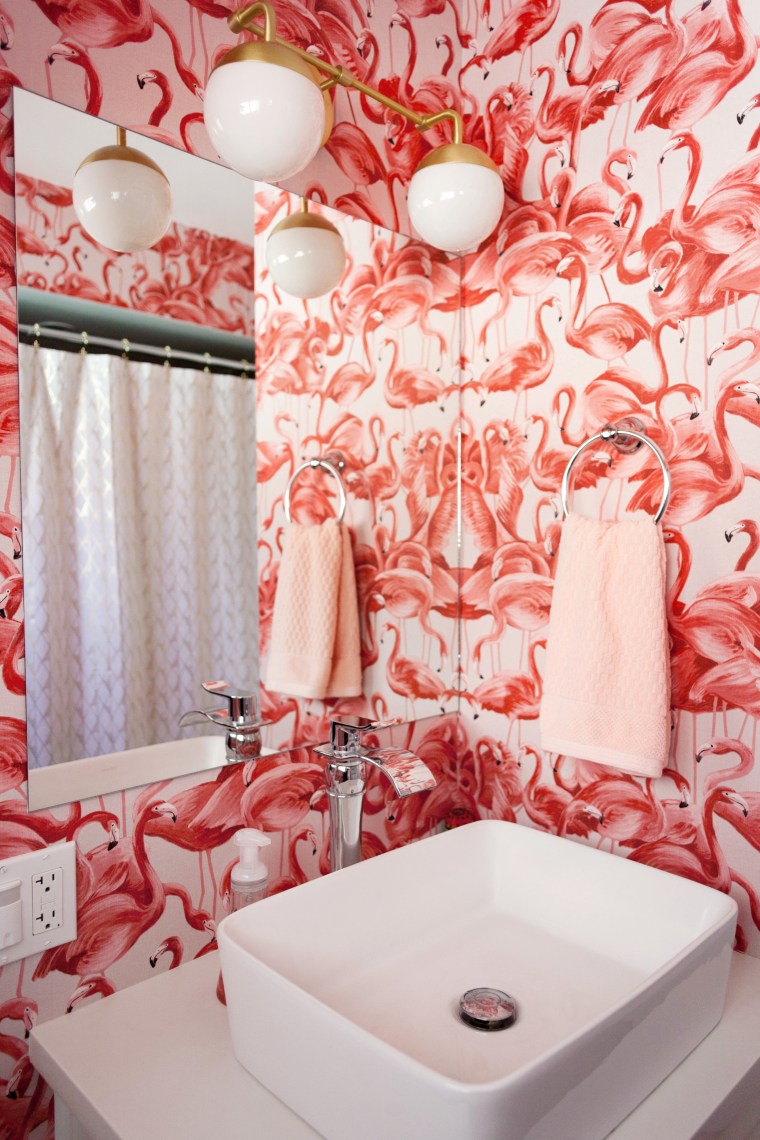 I personally like mixing metals so I went with brass, of course.
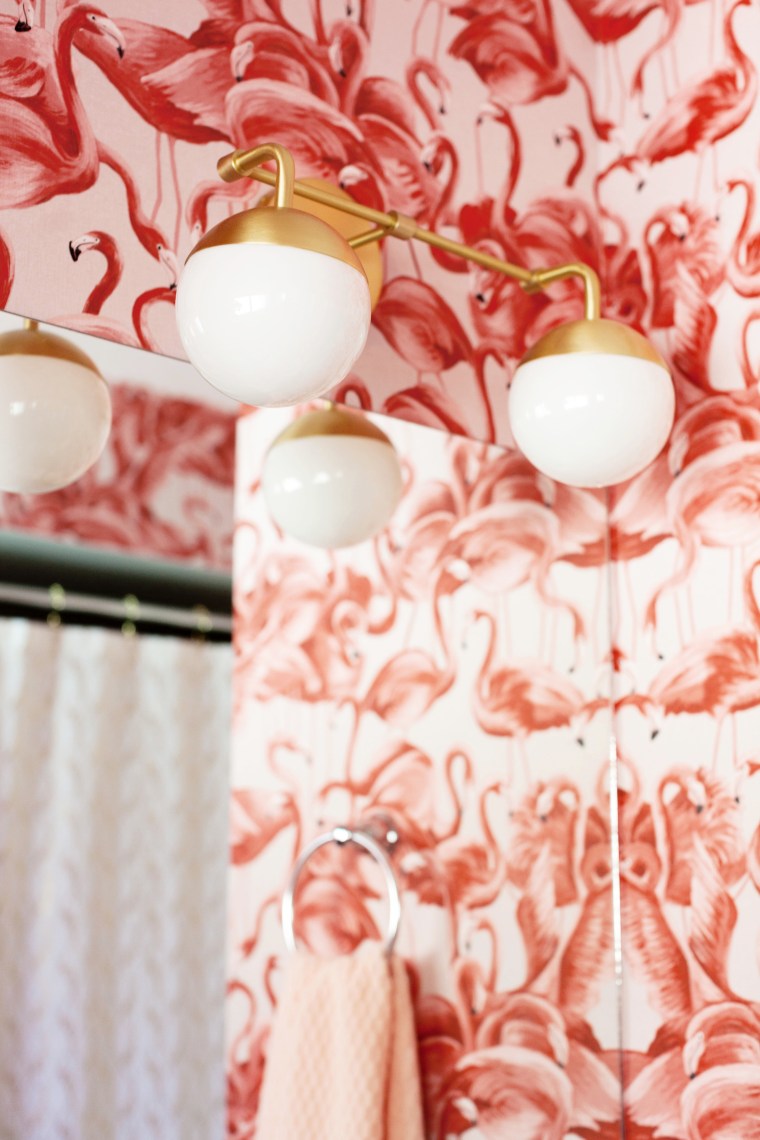
 Over on the other wall I picked up a brass mirror/shelf from Target’s Project 62 line and a new metallic gold and white geometric shower curtain from Project 62 as well.
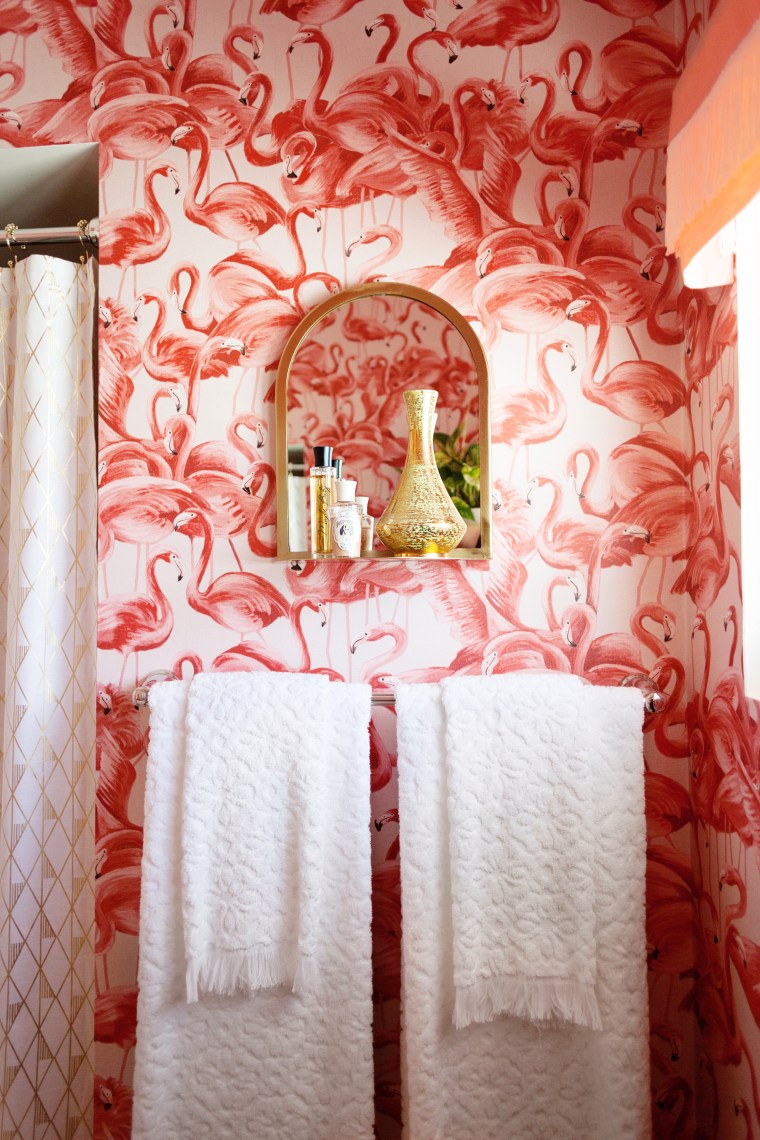 The new “fancy towels” (you know, the kind you’re not allowed to use), are from Target’s Opalhouse line. I love the texture and fringe.
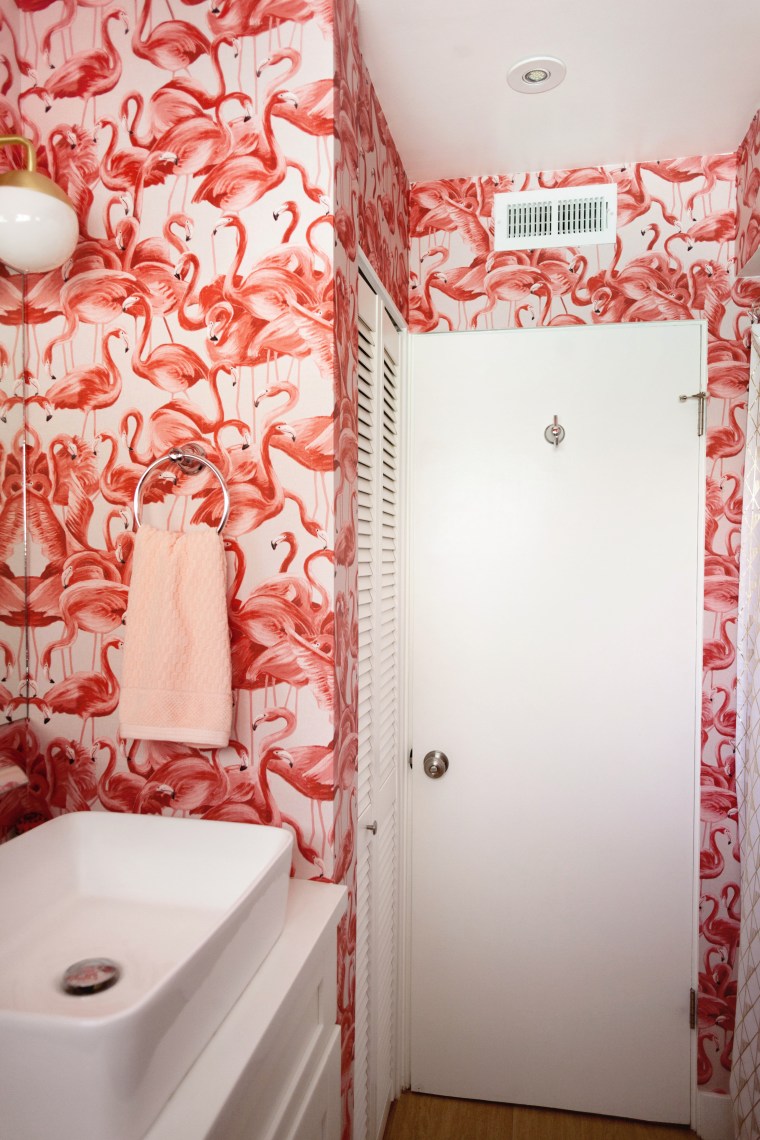 I followed the wallpaper all the way around the room, meeting the last seam in the most inconspicuous corner. Everything is reflected in the mirrors so it’s all pretty much visible from every view point, which was intentional and I’m glad it worked out.
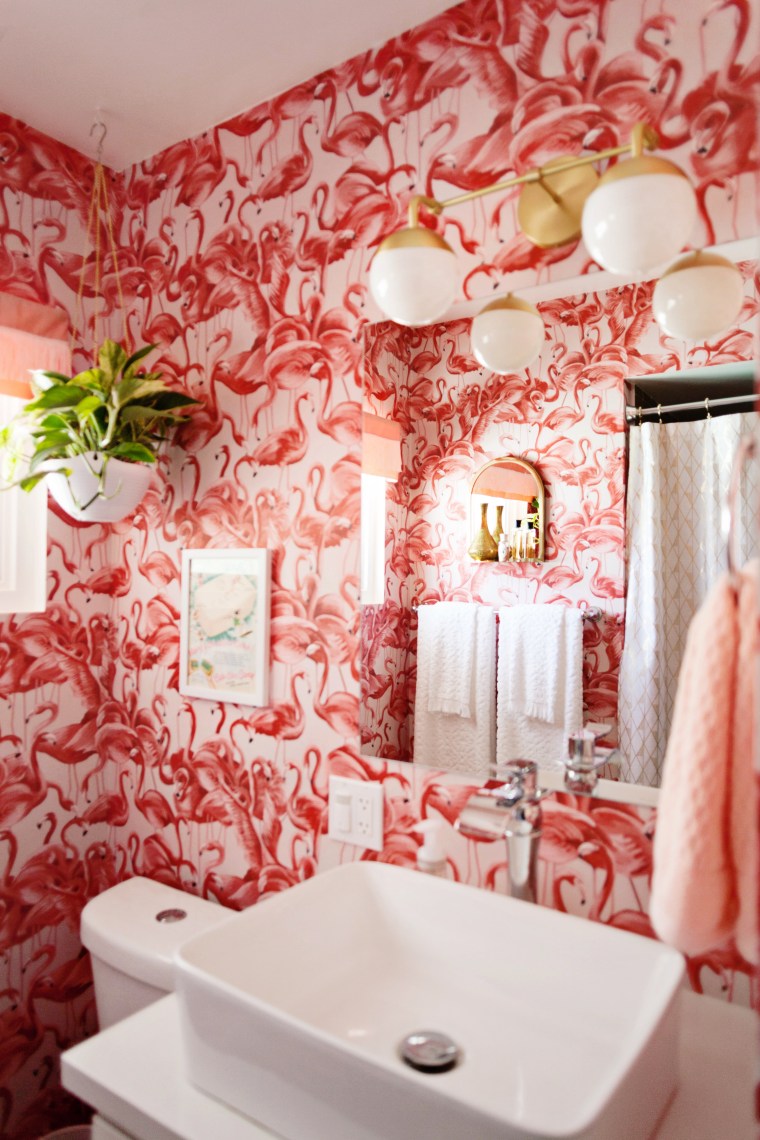 There it is! This year’s new bathroom look. I looooove the way it all came together. Yay!
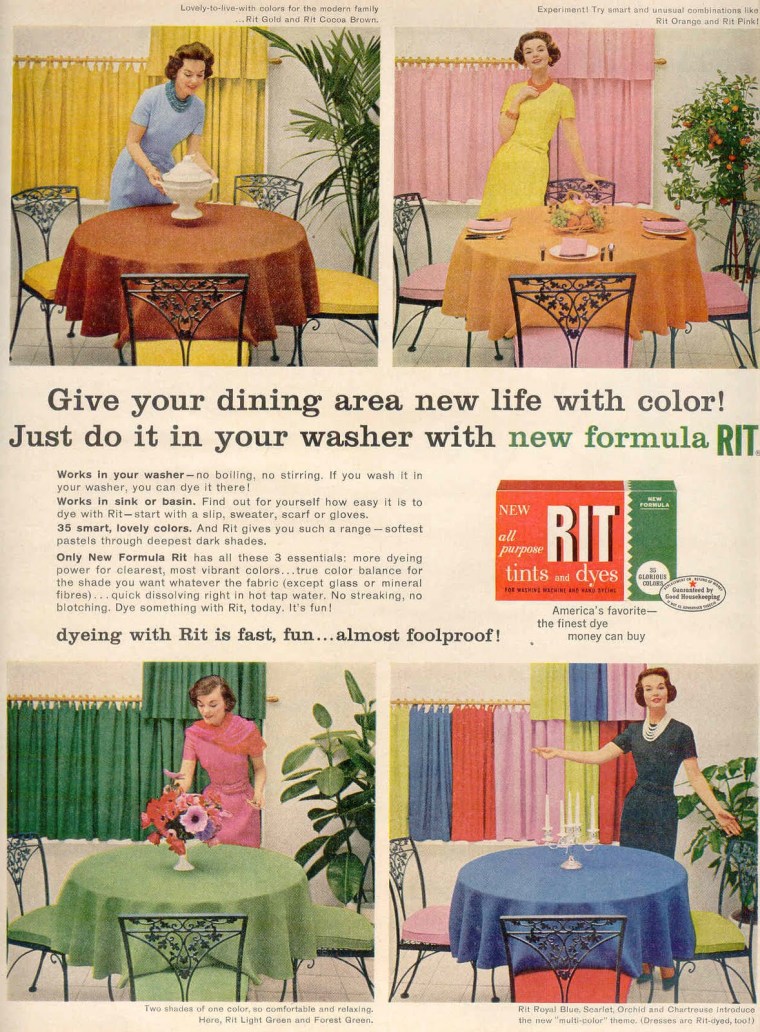
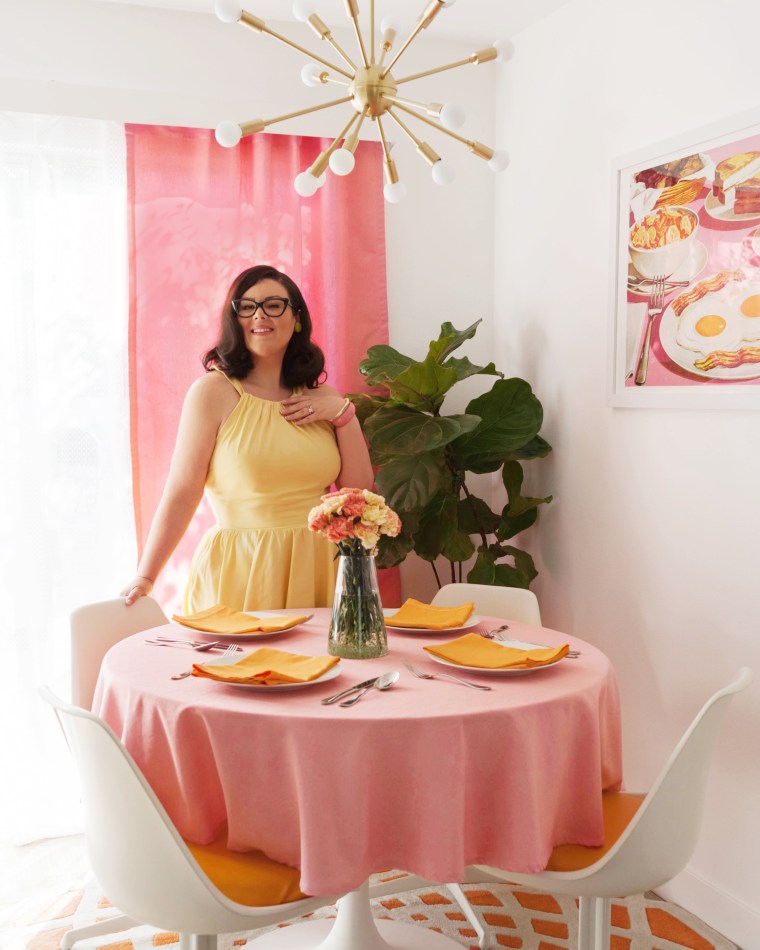
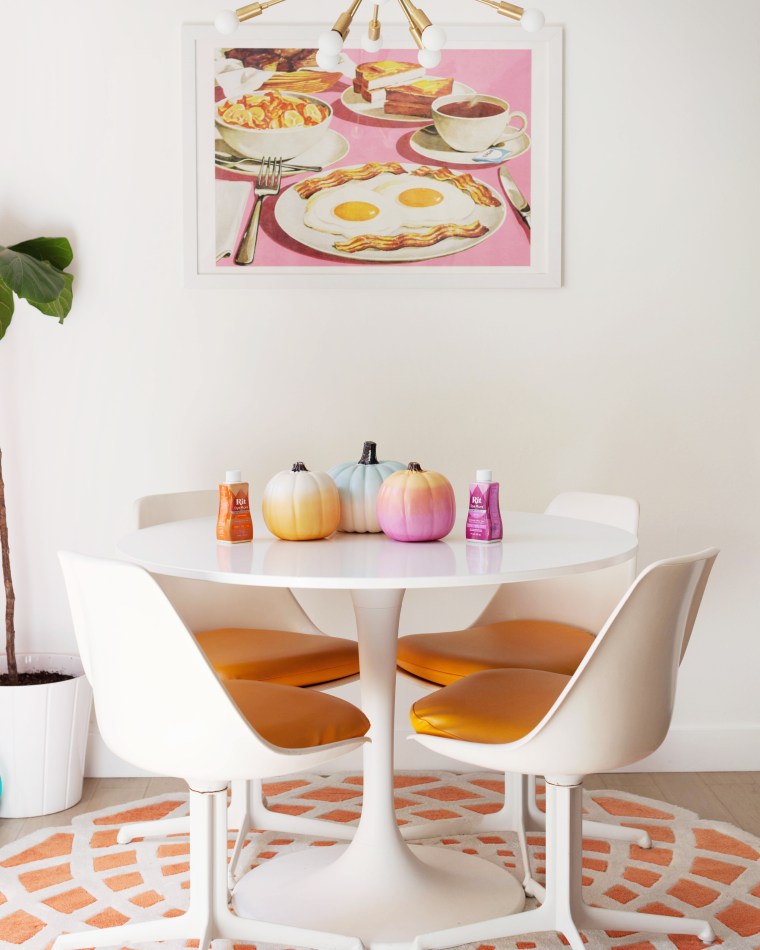
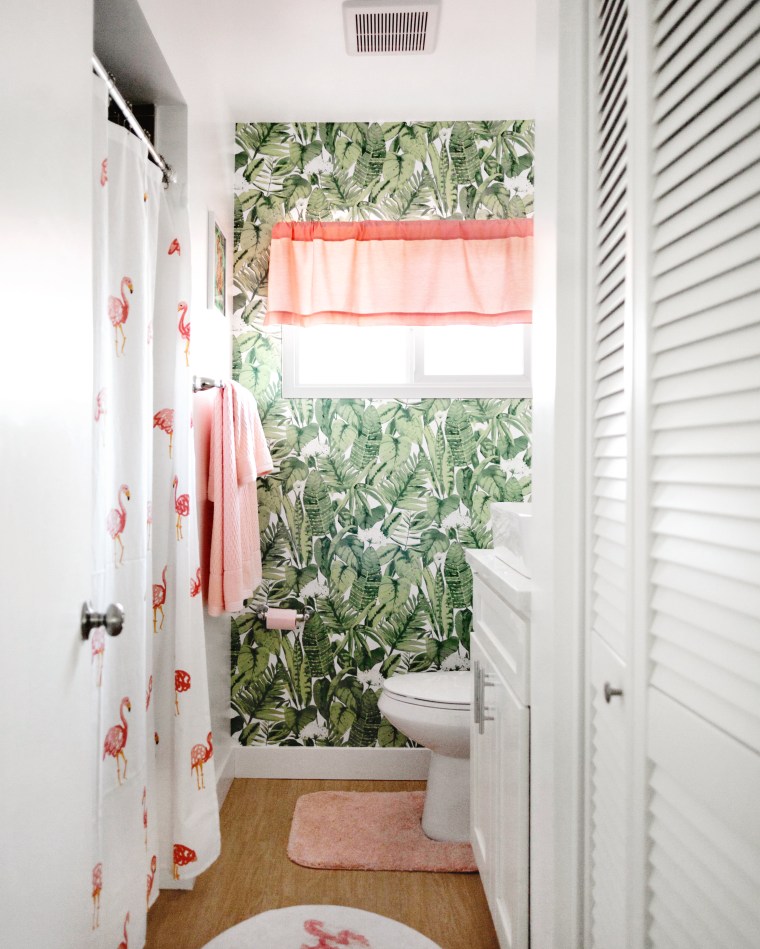
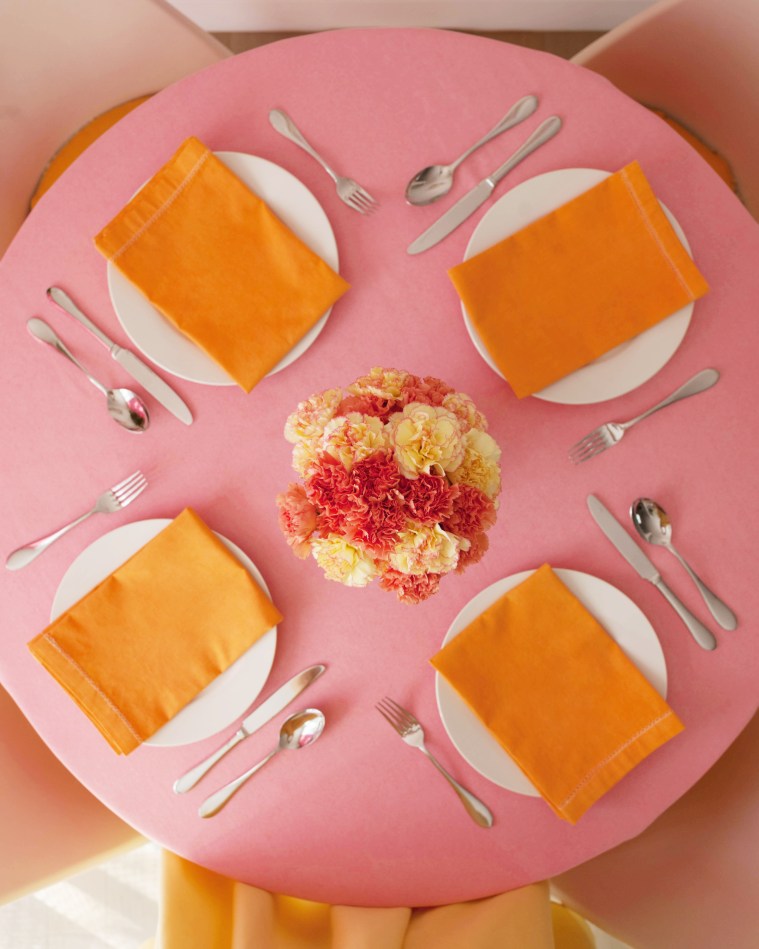 I just mixed those up with hot water and a little dish soap right in my sink basin. I then soaked them in Rit’s dye fixative and rinsed with cold water. Easy peasy!
 I love how everything ties together with the artwork and my vintage Burke chair pads. Now I just need to throw a little dinner party with a Jell-o salad and few cocktails ;).