Stay tuned!
Stay tuned!

I’m a renter so anything I do in my apartment has to be put back to its original condition when I move out. Because of this (as you may have noticed from the rest of my apartment) temporary wallpaper has basically become my best friend. I even covered my modern refrigerator in a cute retro blue before I brought in my vintage GE. Unfortunately, temp wallpaper isn’t ideal for stoves because of the whole ‘they get hot’ thing. Even though my oven door never gets hot to the touch, I wanted to be safe. I reallllly wanted a pink stove, but none of the vintage ones I was finding could fit in my kitchen. Besides it was already a pain in the ass to swap out the refrigerator. I looked for a solution similar to peel and stick wallpaper and that’s when I thought of heat wrap vinyl!

I wrapped the vinyl around all of the door edges and replaced the screws and handles.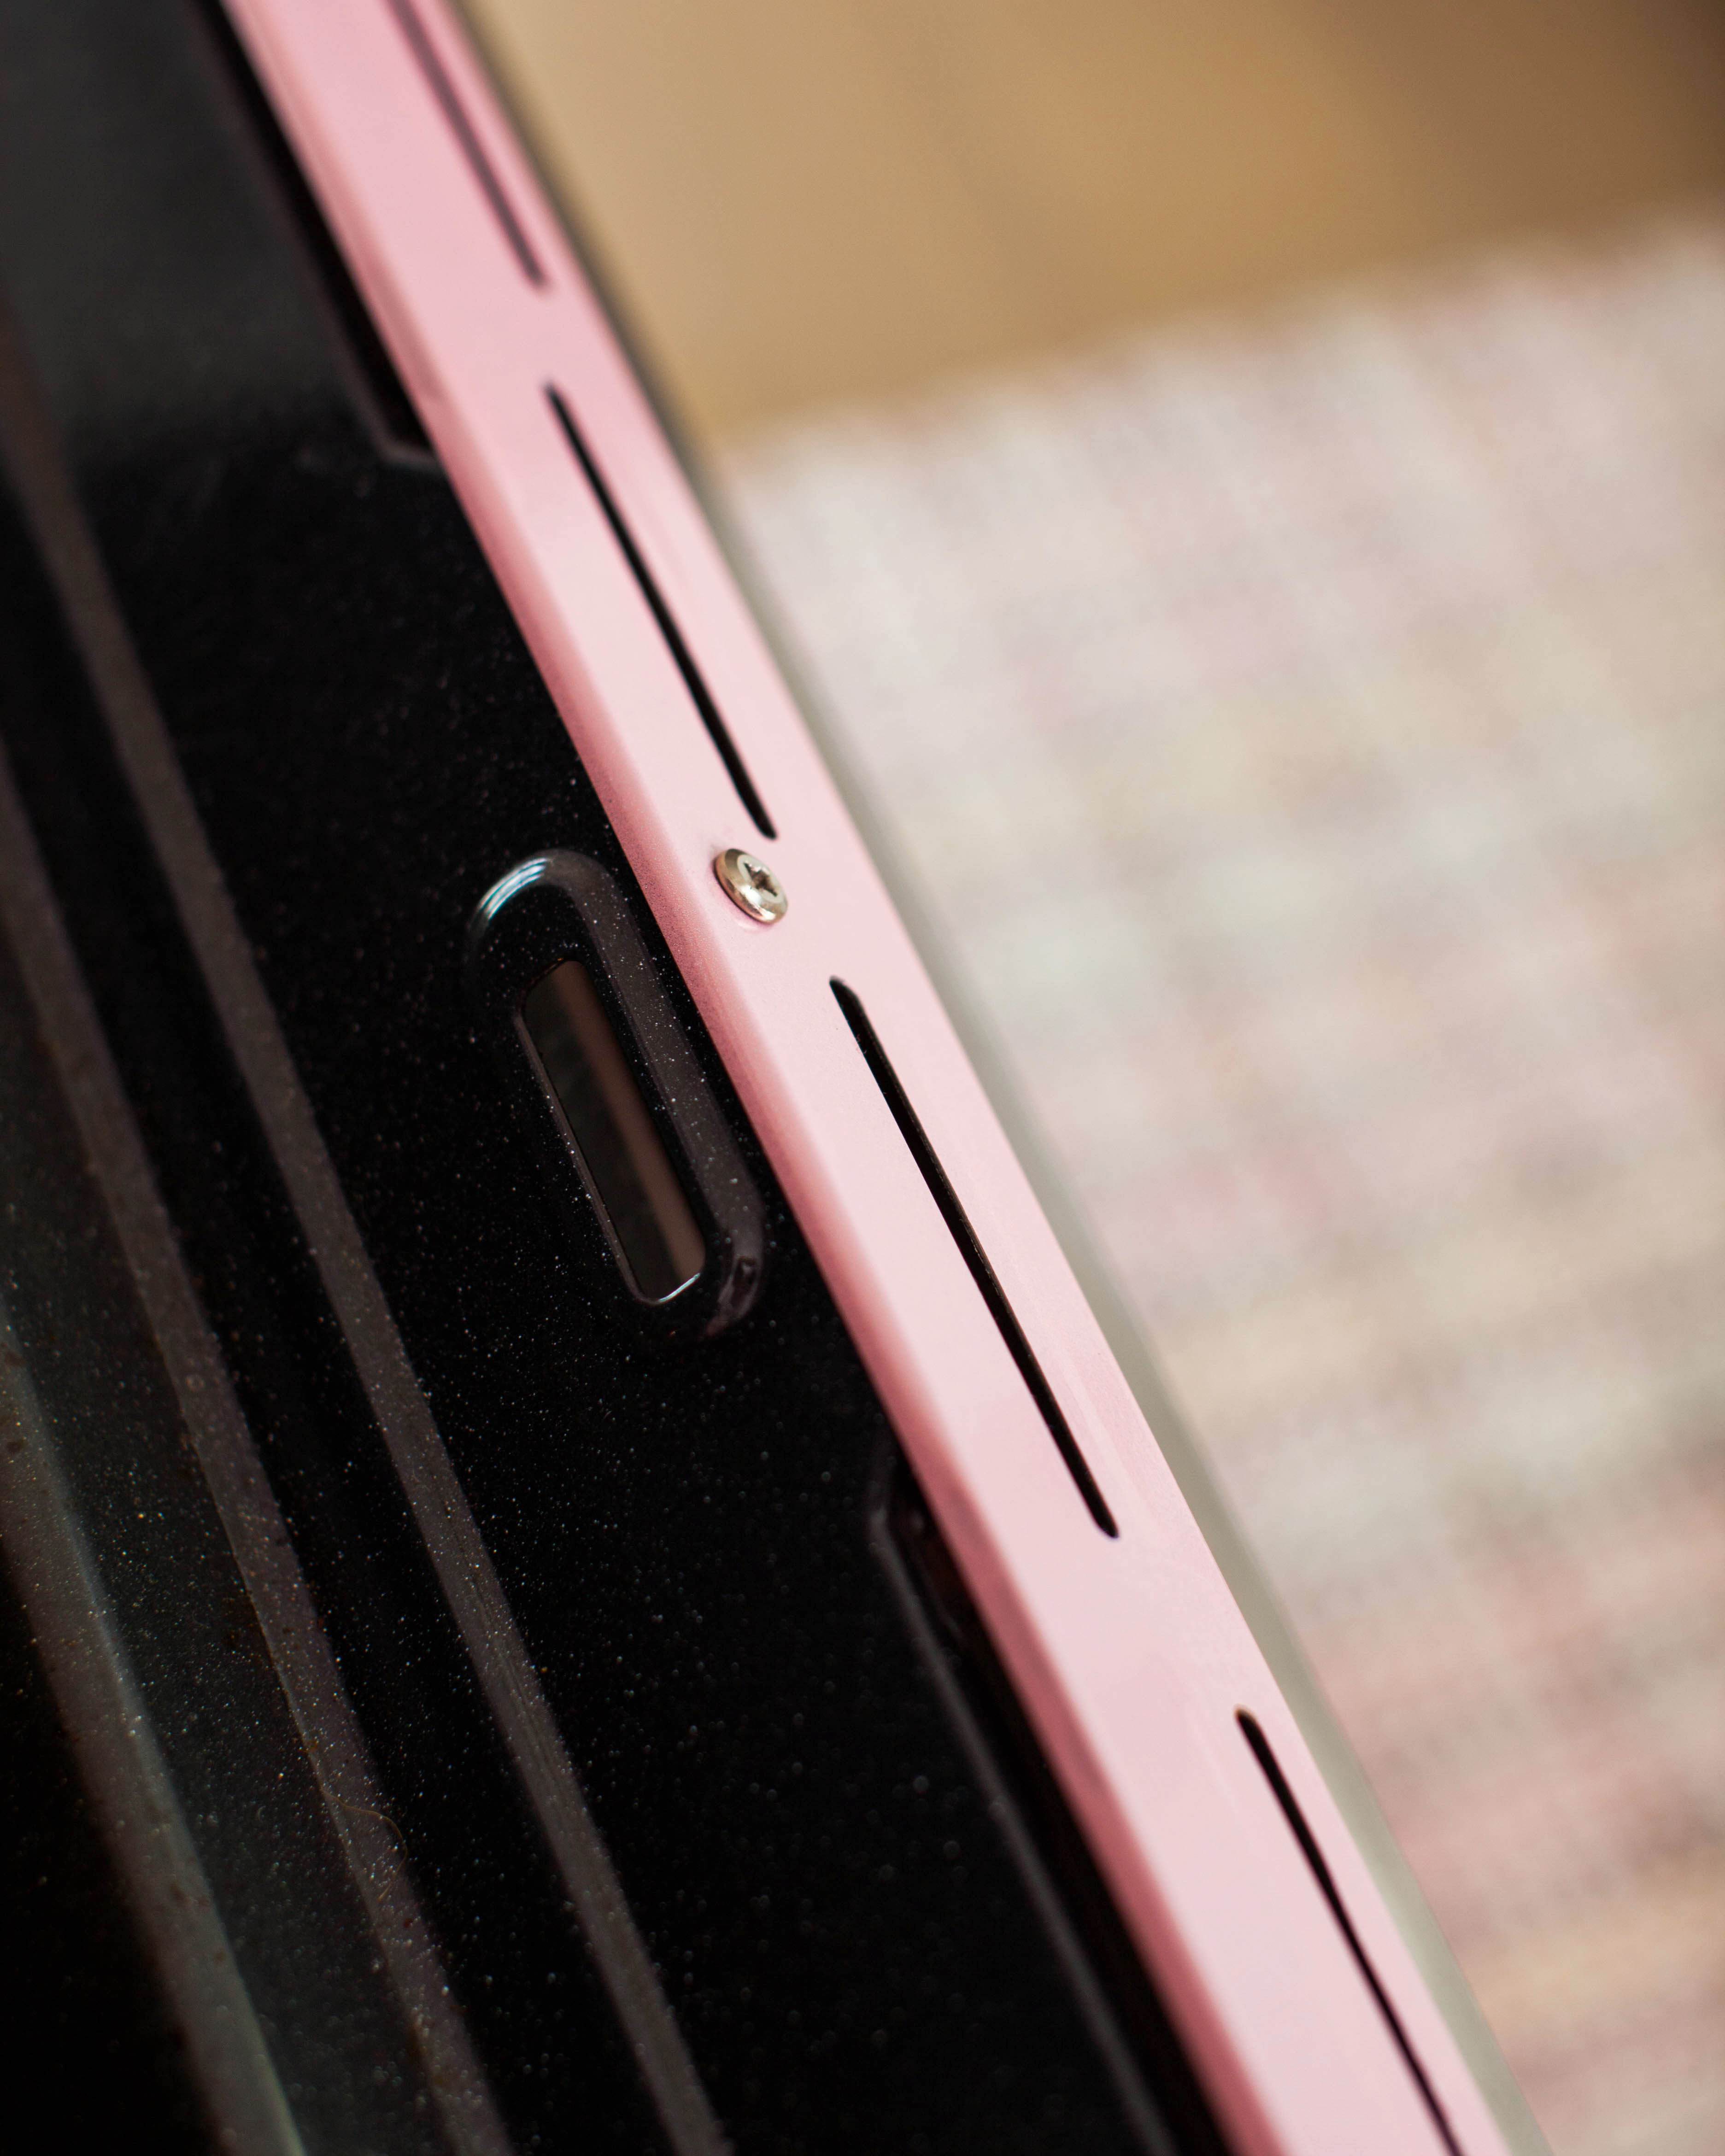
I made sure to cover the sides too! I didn’t cover the cooktop because it most probably would burn and melt, being so close to the fire and all. I used the same method to cover the front of my dishwasher.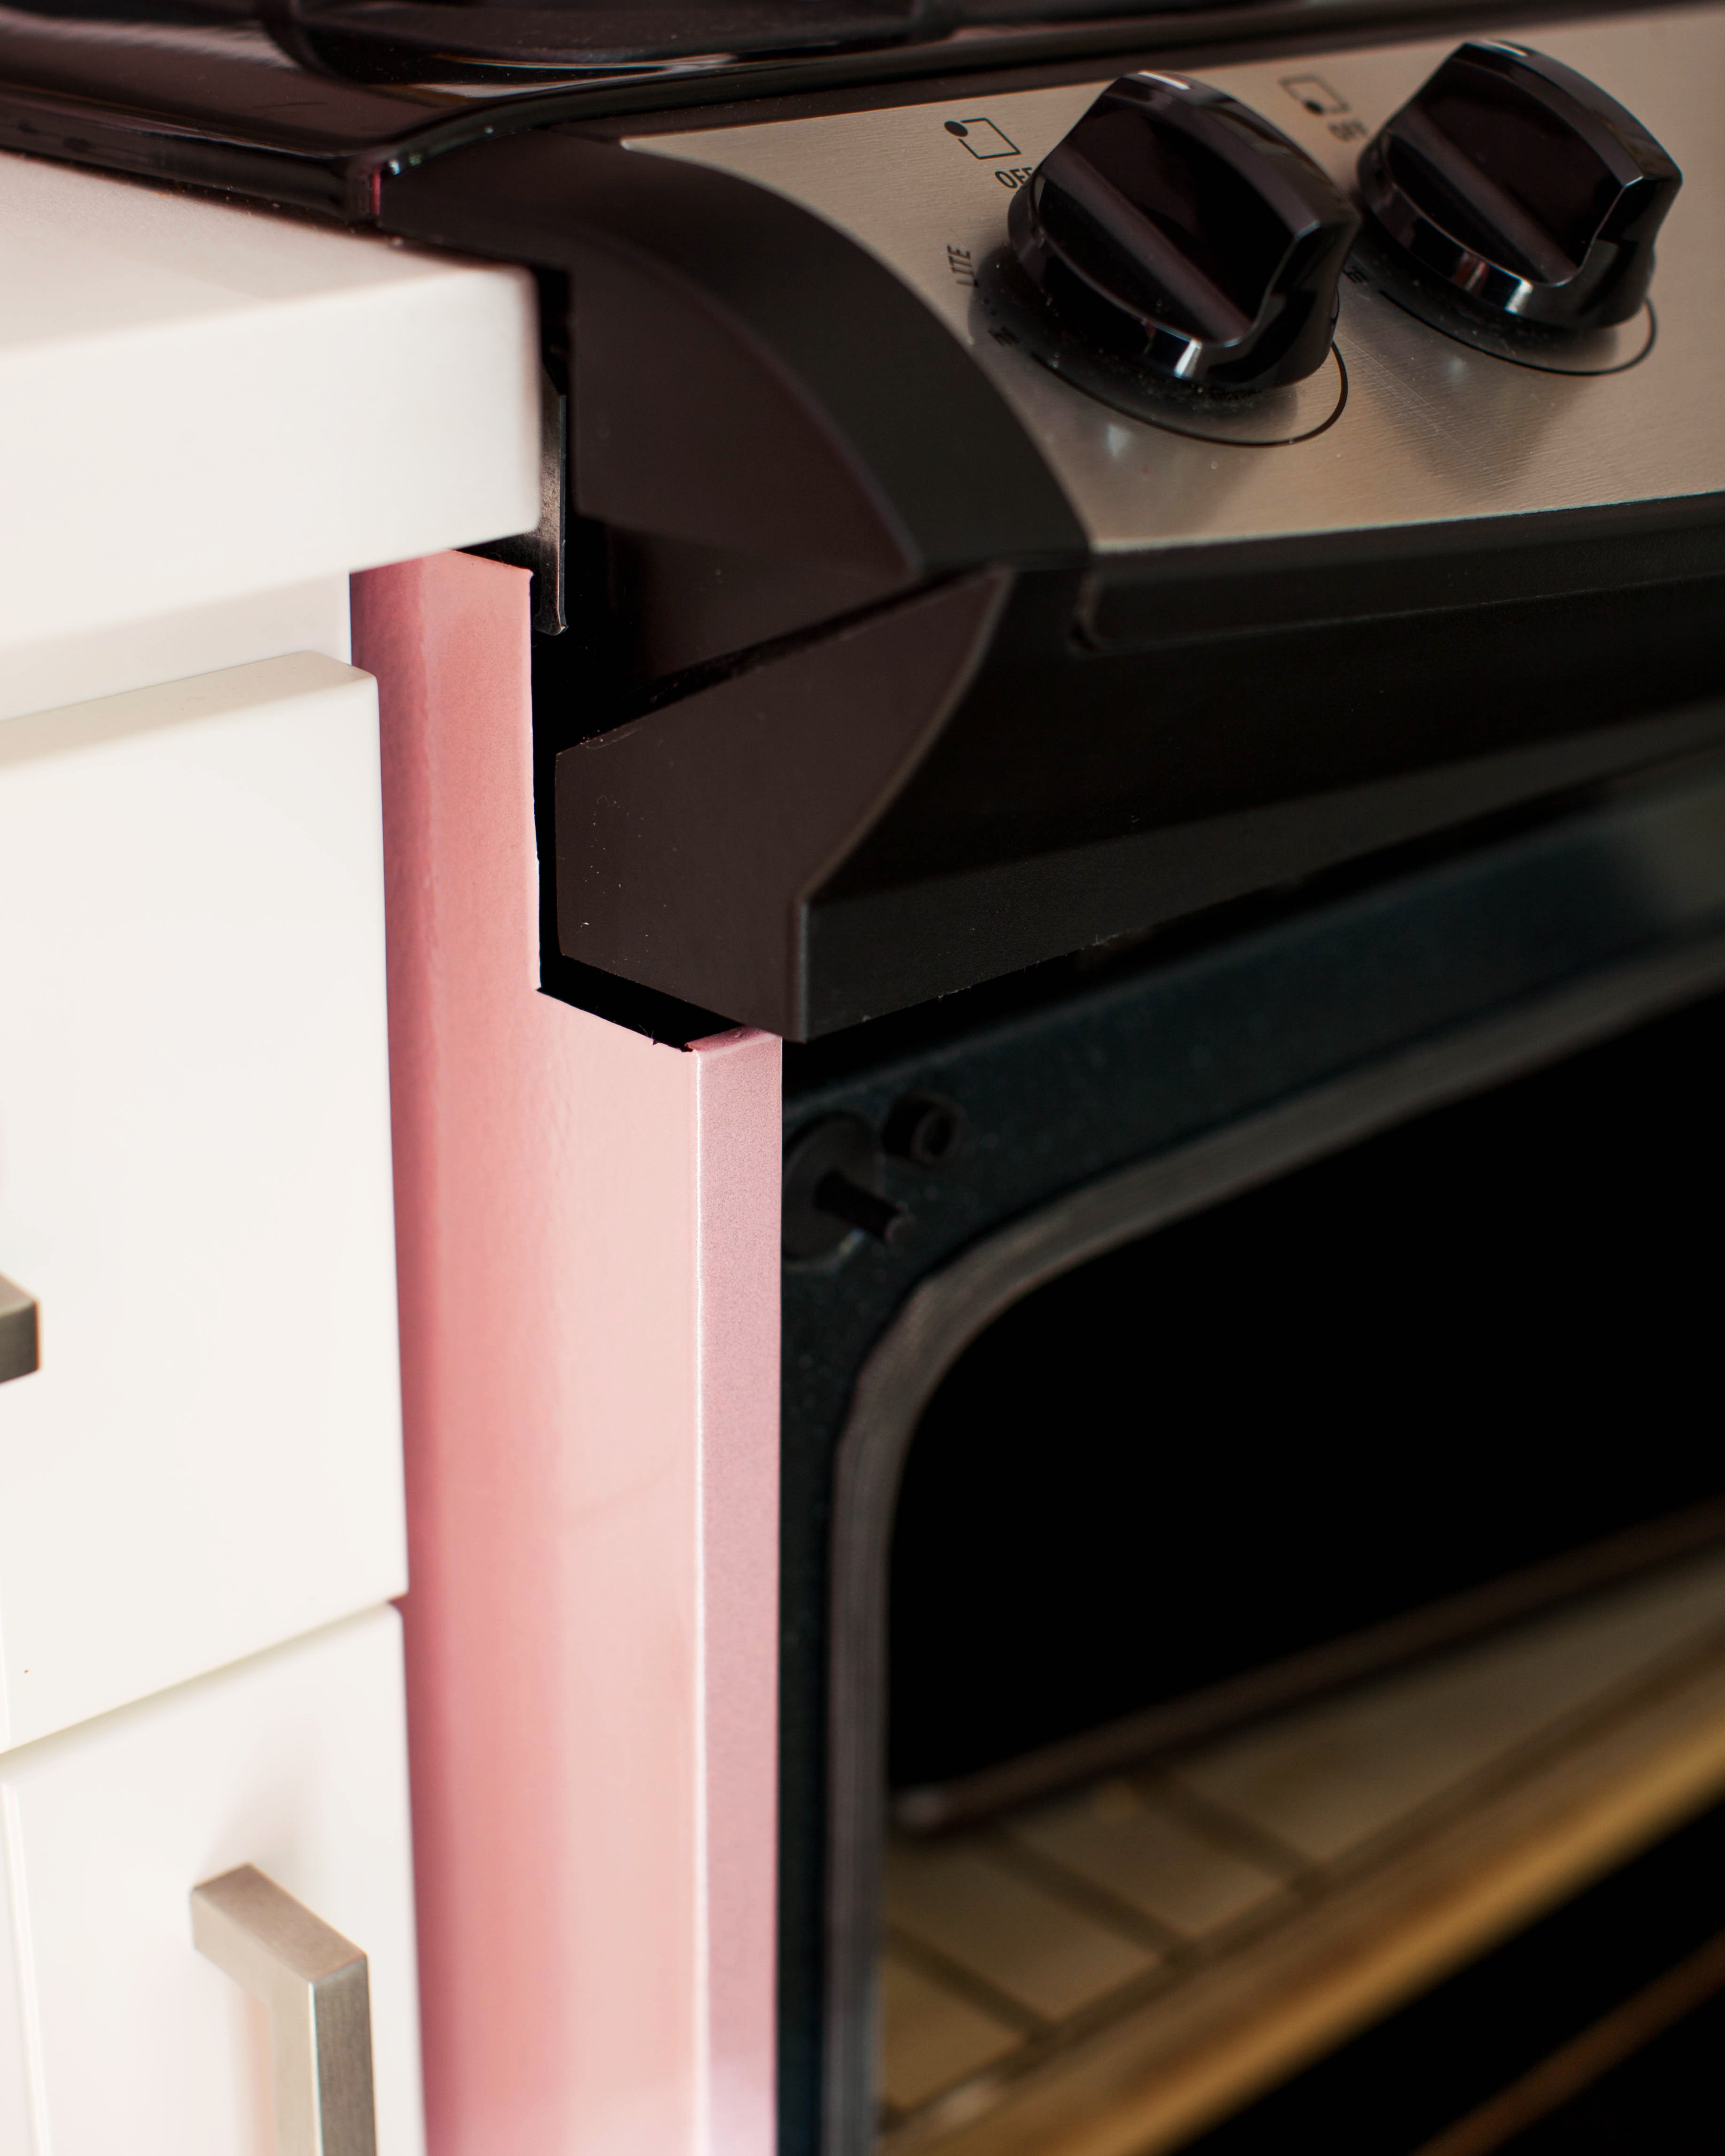
And here’s the final result!
It took a lotttt of patience, but once I got into the groove it went on a lot faster and smoother. It’s very easy to clean and has held up really well. Even with JV cranking the oven to ungodly temperatures when he’s baking bread. When I’m ready to move out I’ll just peel it off and be good to go. Yay!
{Update: We moved and it peeled off clean! I used a little rubbing alcohol and stainless steel cleaner to buff out any markings left behind and the appliances looked brand new.}

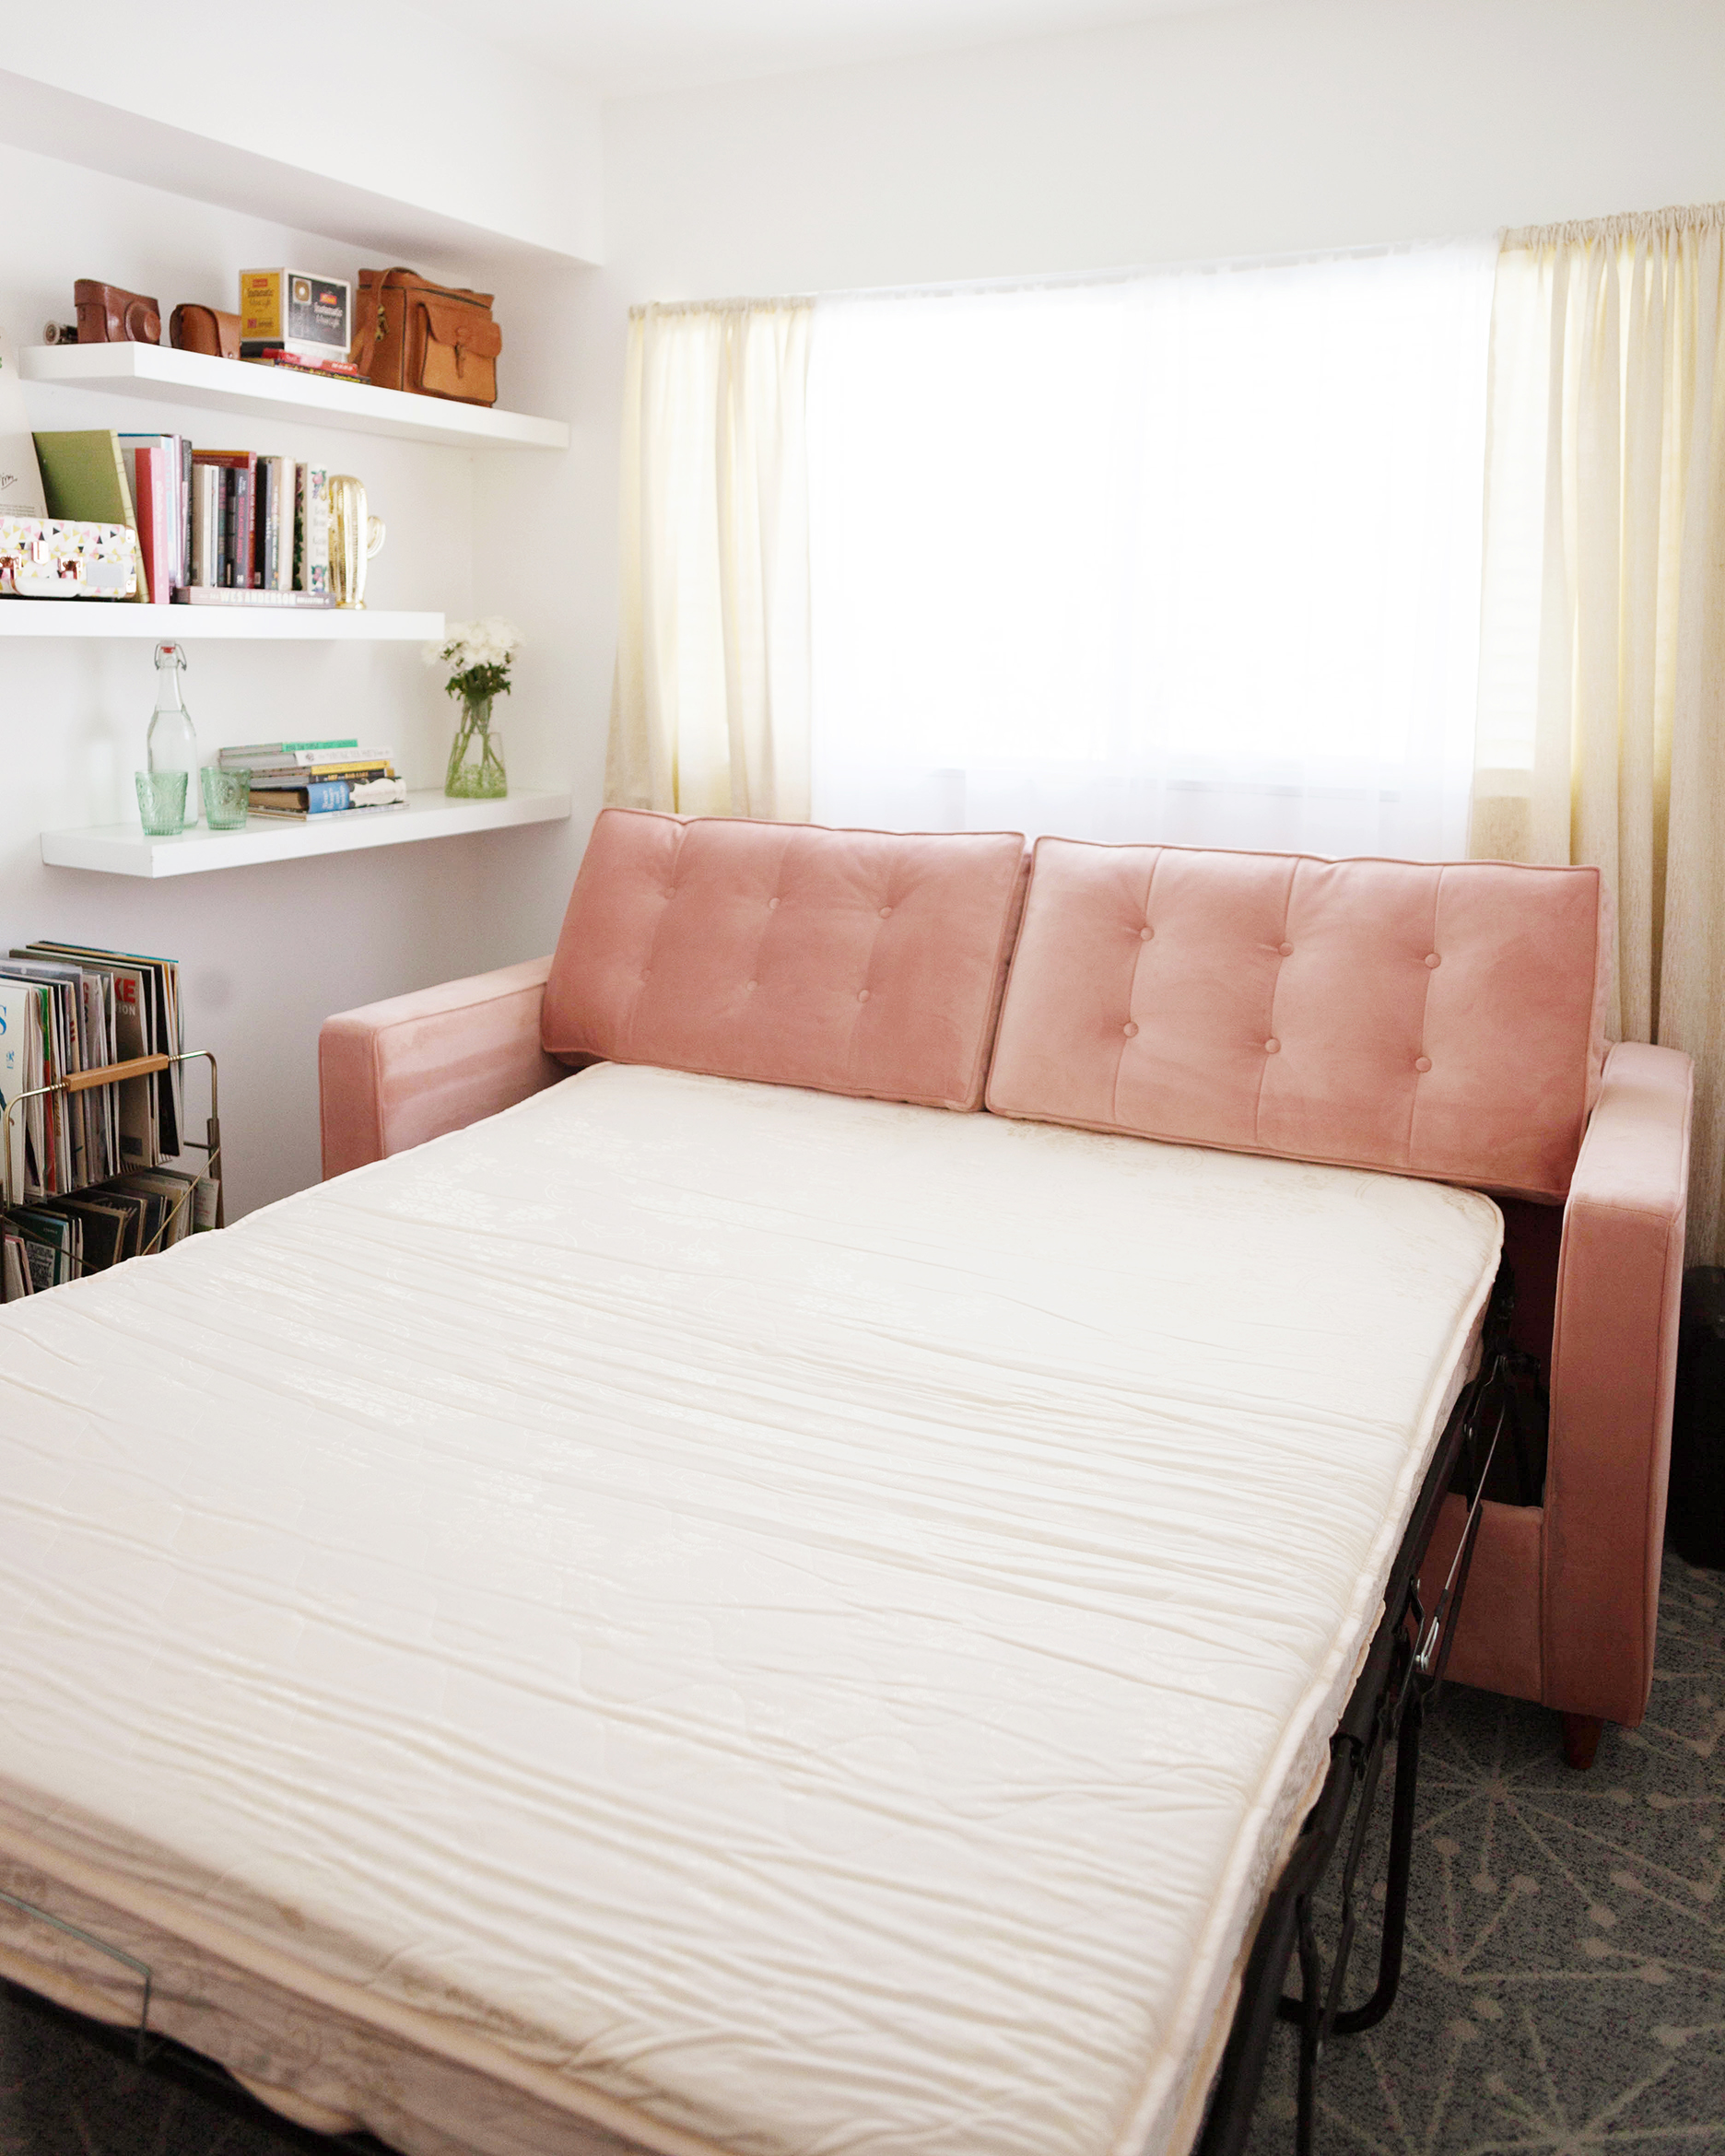
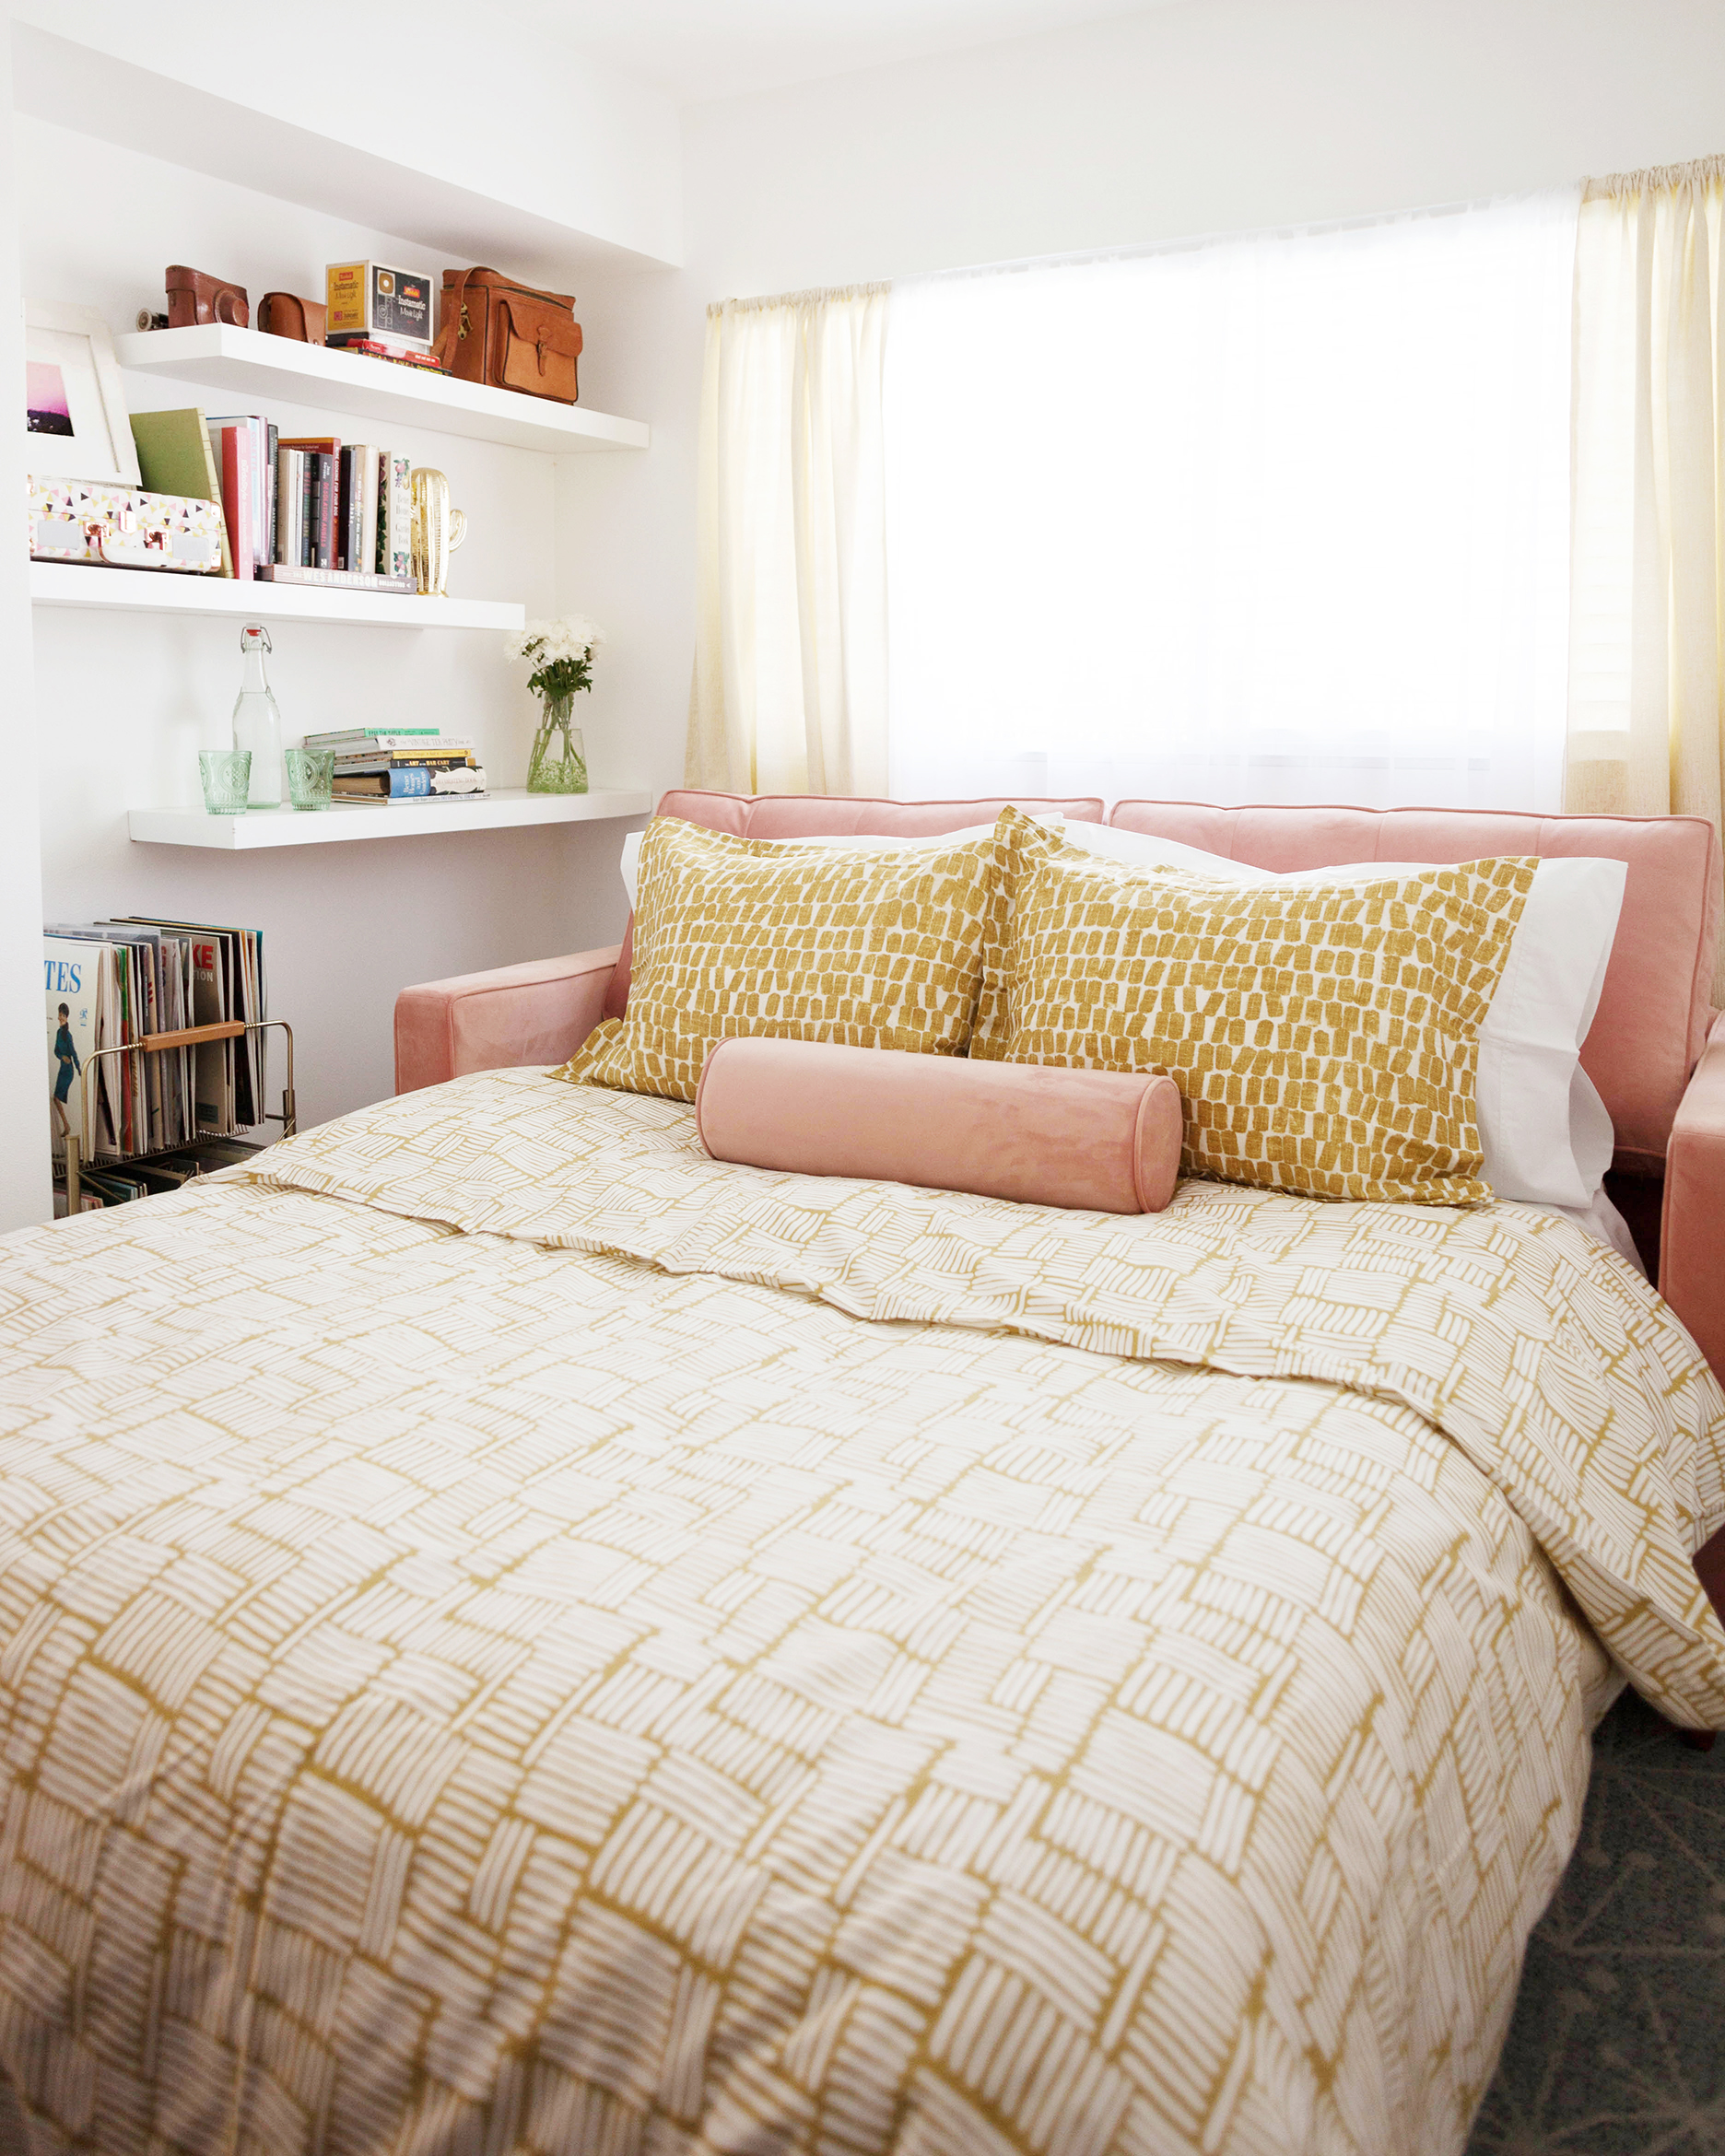
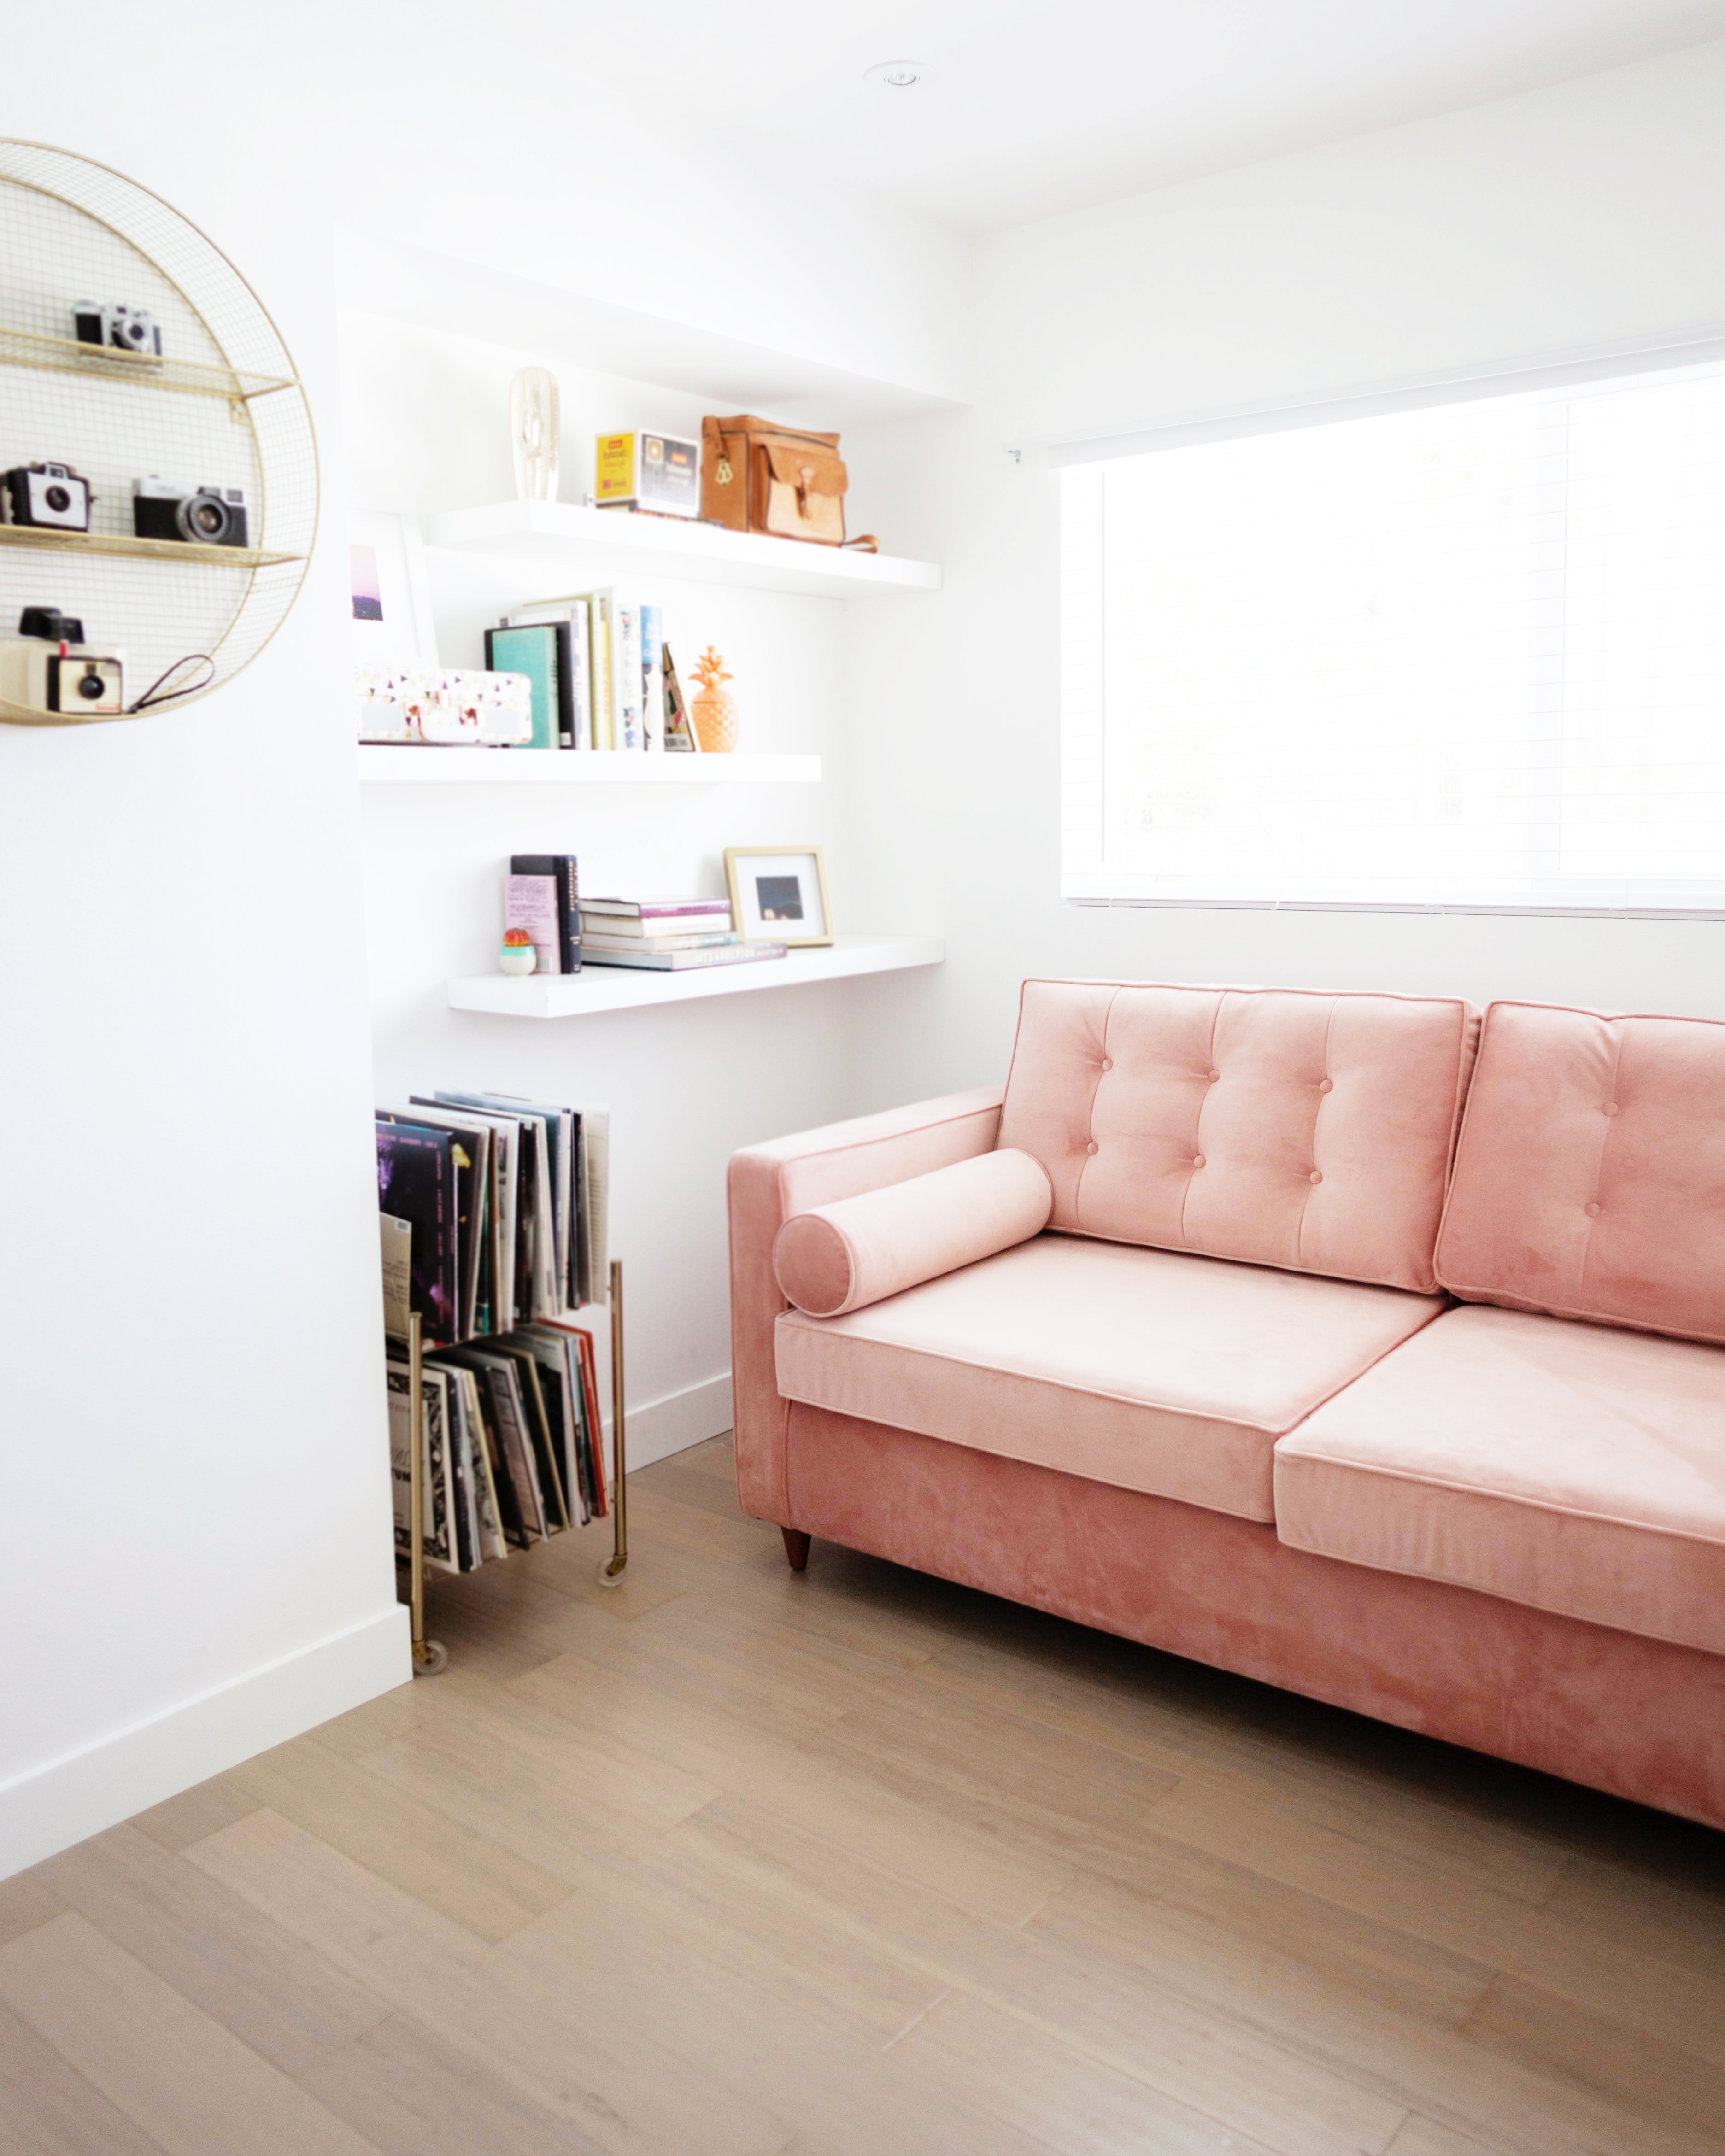
I was setting up for a house guest this week and realized I’ve shown you our little home office/guest bedroom, but I’ve never actually shown you what it looks like when it’s used as a bedroom! Honestly part of the reason is that I hadn’t found any bedding I really liked until now.
When Cstudio Home asked if I wanted to try some of their bedding the timing couldn’t have been more perfect. I fell in love with their Ticking Marks Organic Percale Duvet Cover Set for its mid-century vibe and ocre yellow color! 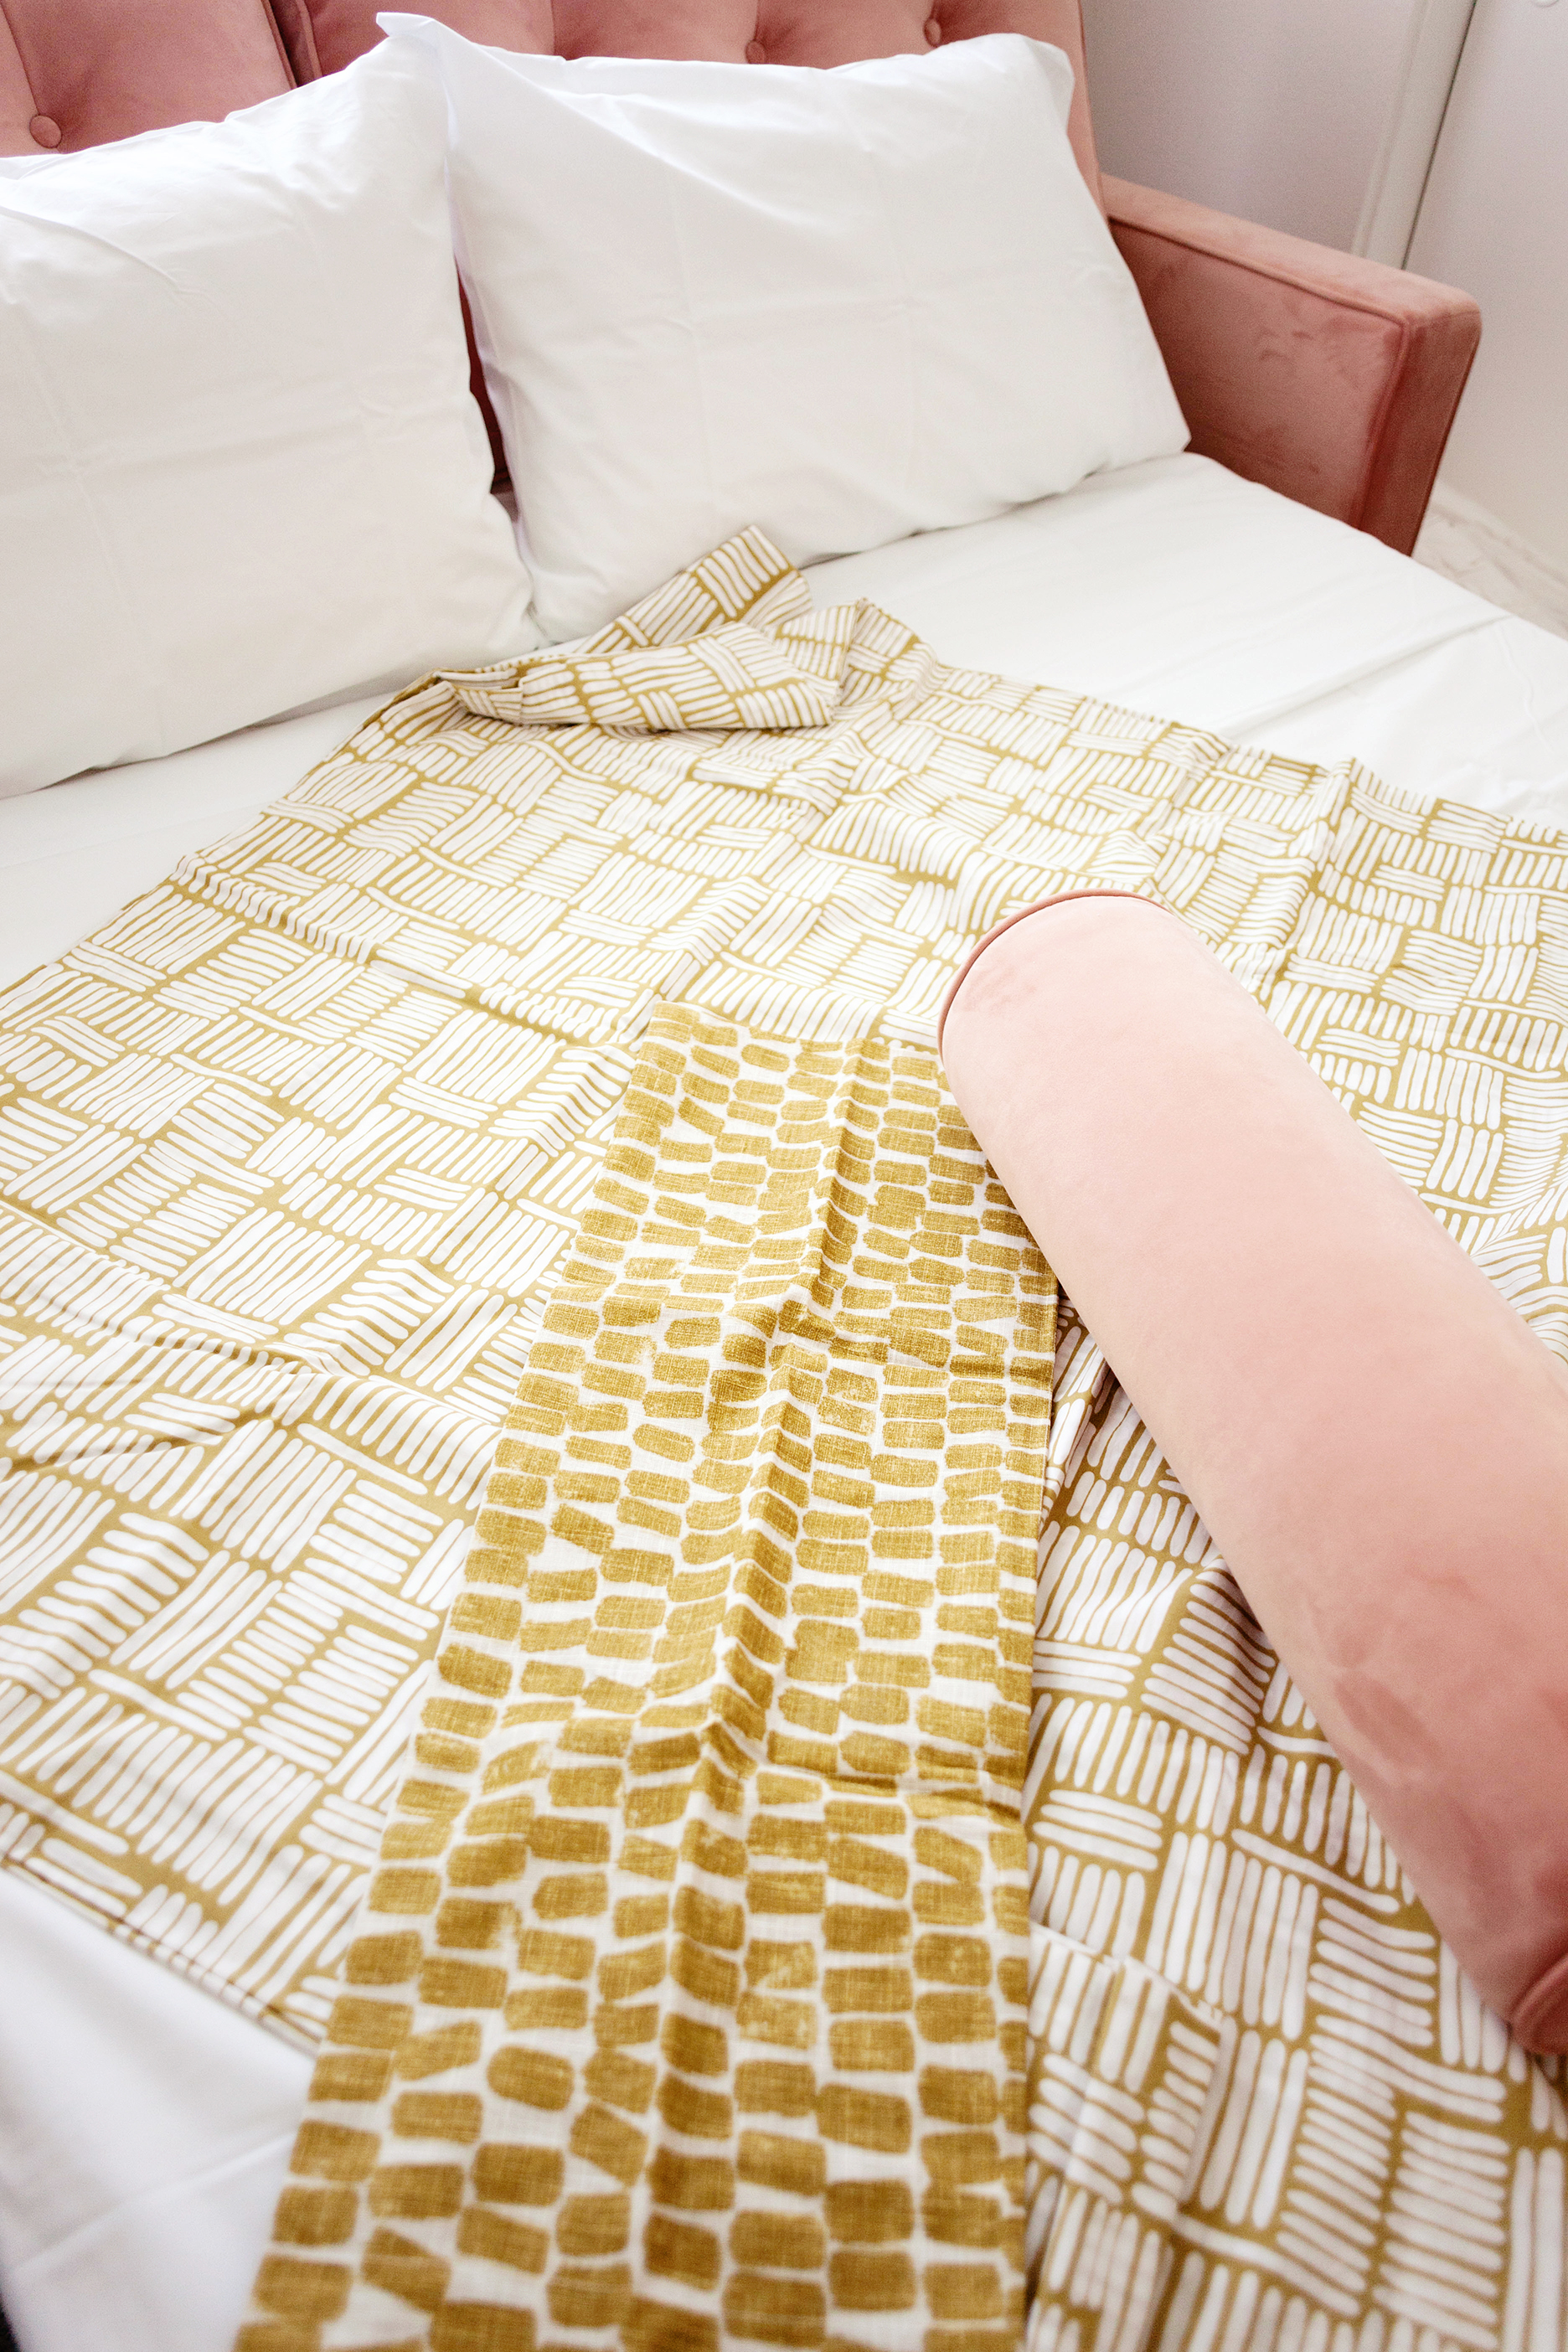
 I thought it would look really great against the pink of our sofa and the greyish blue tone in our carpet.
 I didn’t want to add more color, but I did want to add more pattern and texture so I went with the Randall Shams in the same hue! The pattern and texture of the fabric also feels very vintage and luxe which I absolutely love.
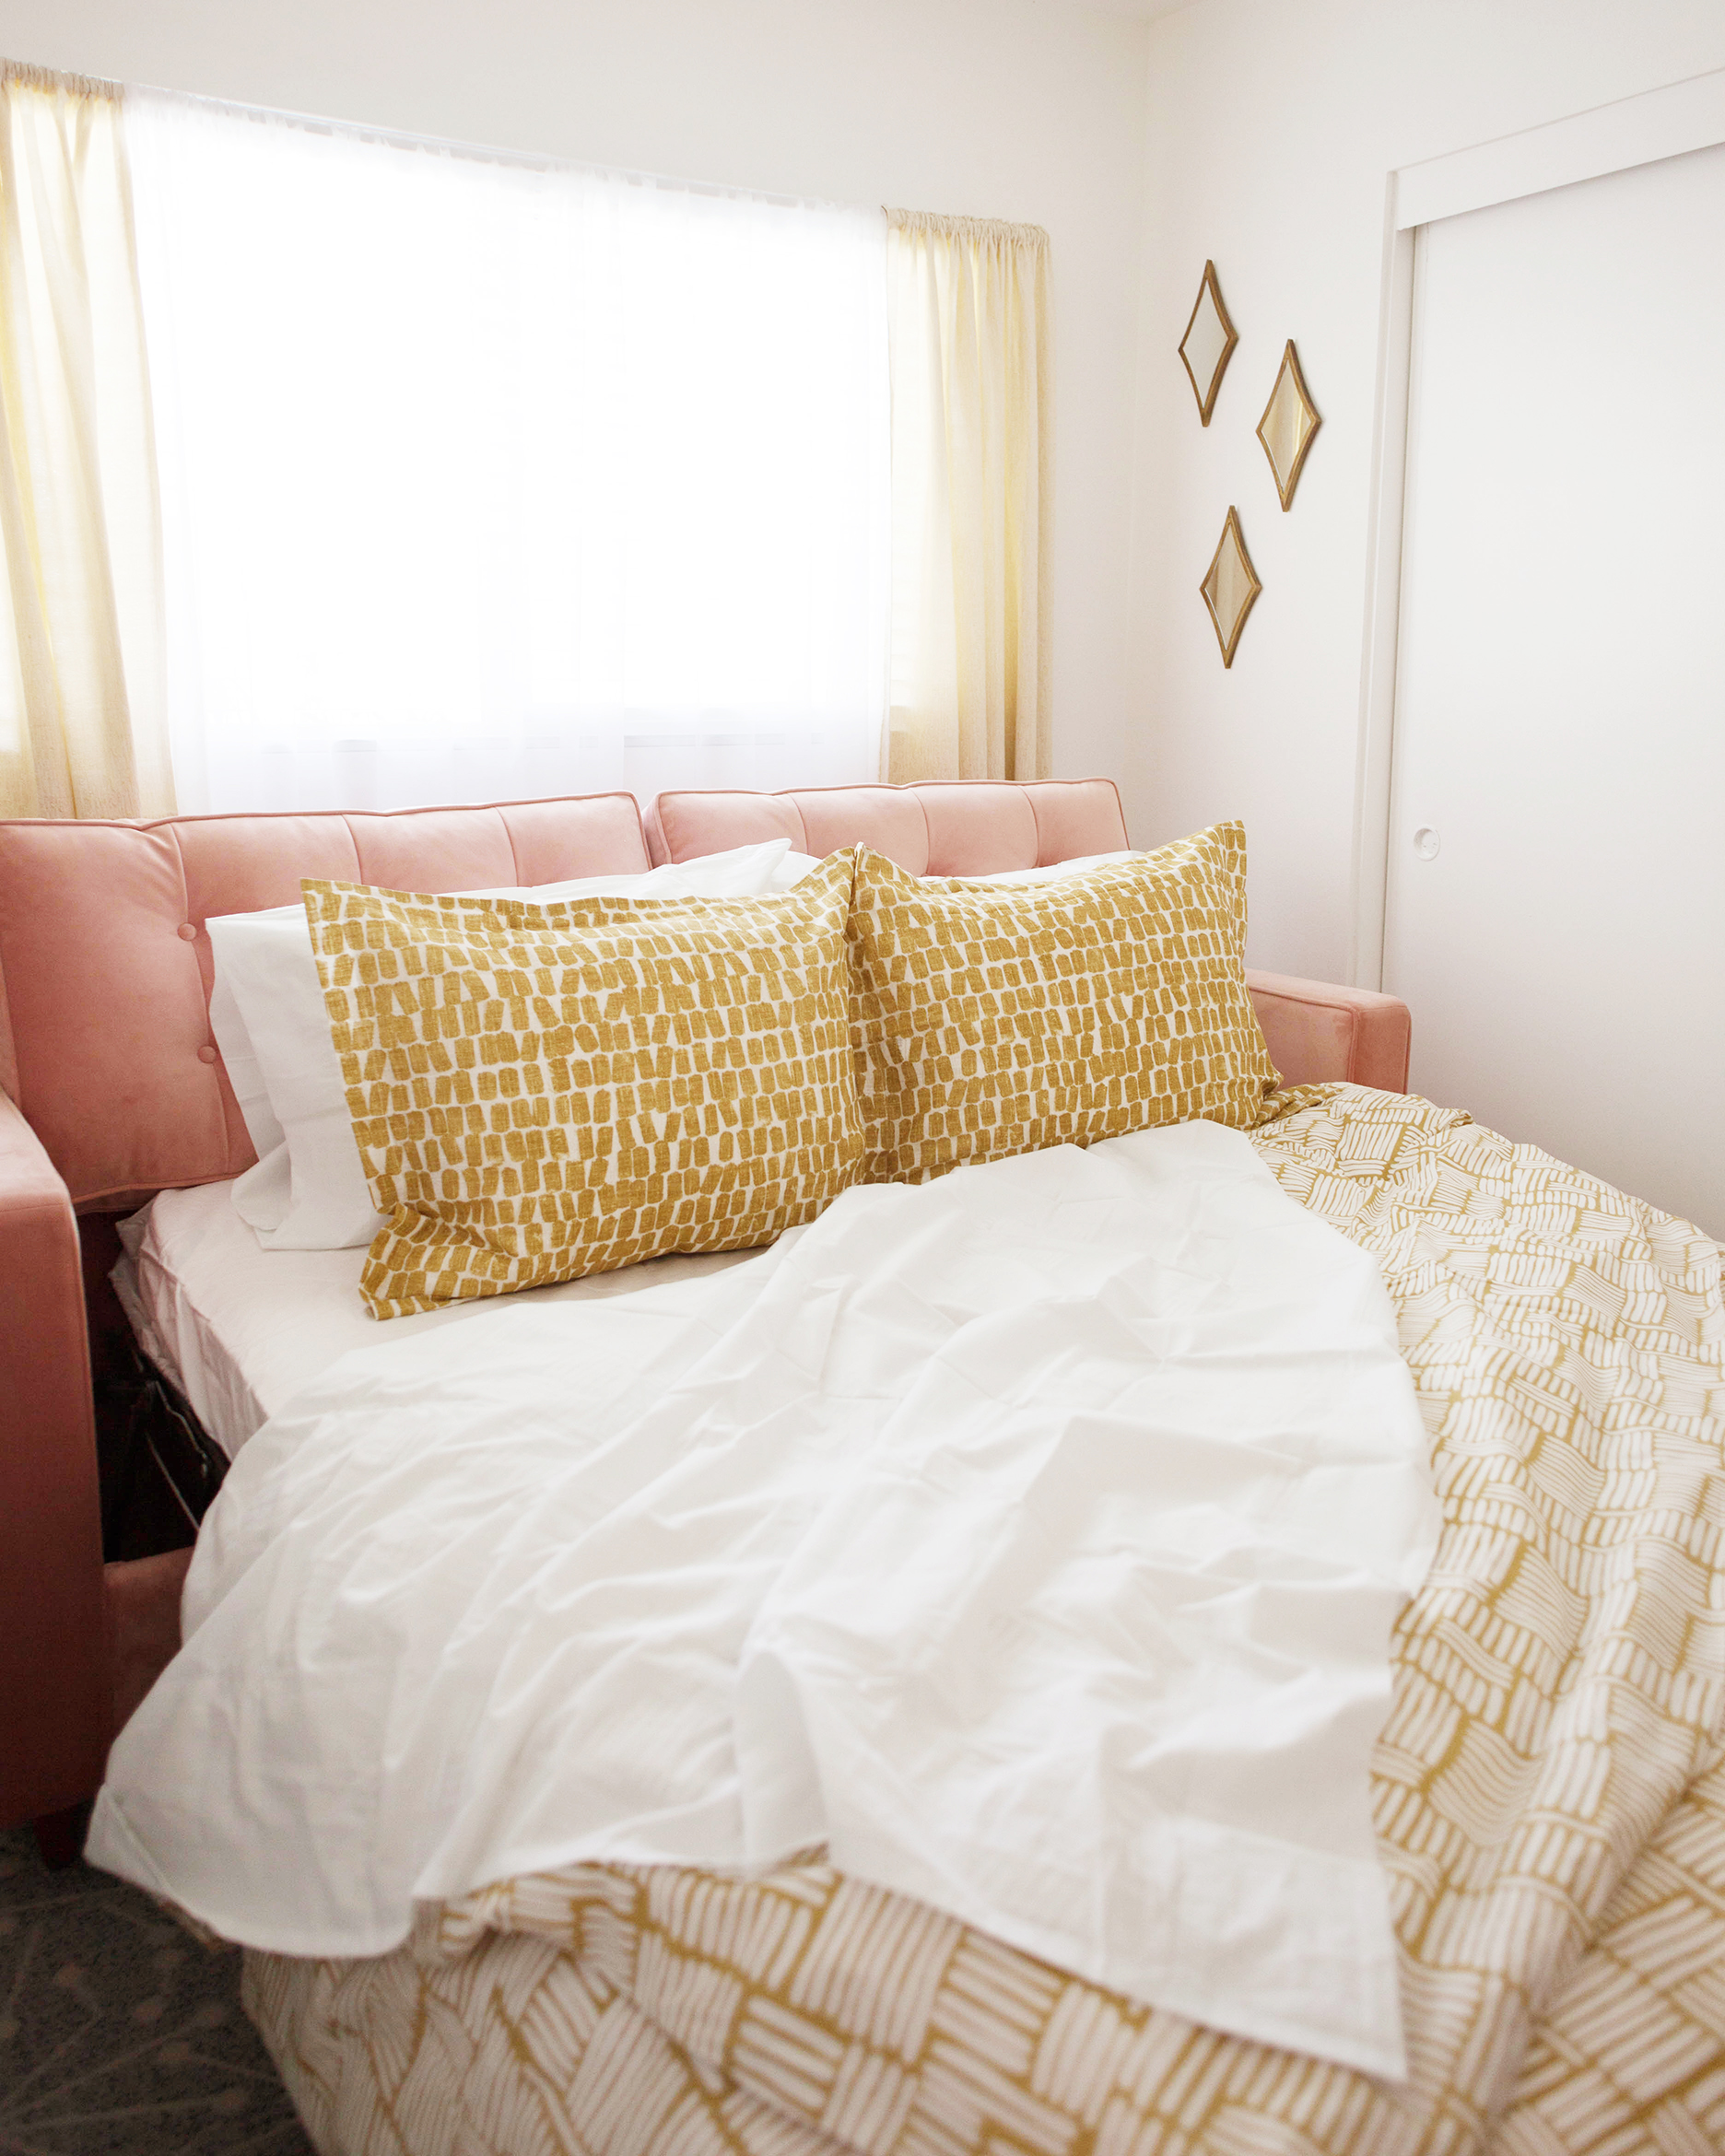 There’s nothing I love more than crisp white sheets and the Organic Percale Sheet Set is exactly that! Don’t you just want to dive right into this bed? I doooo!!
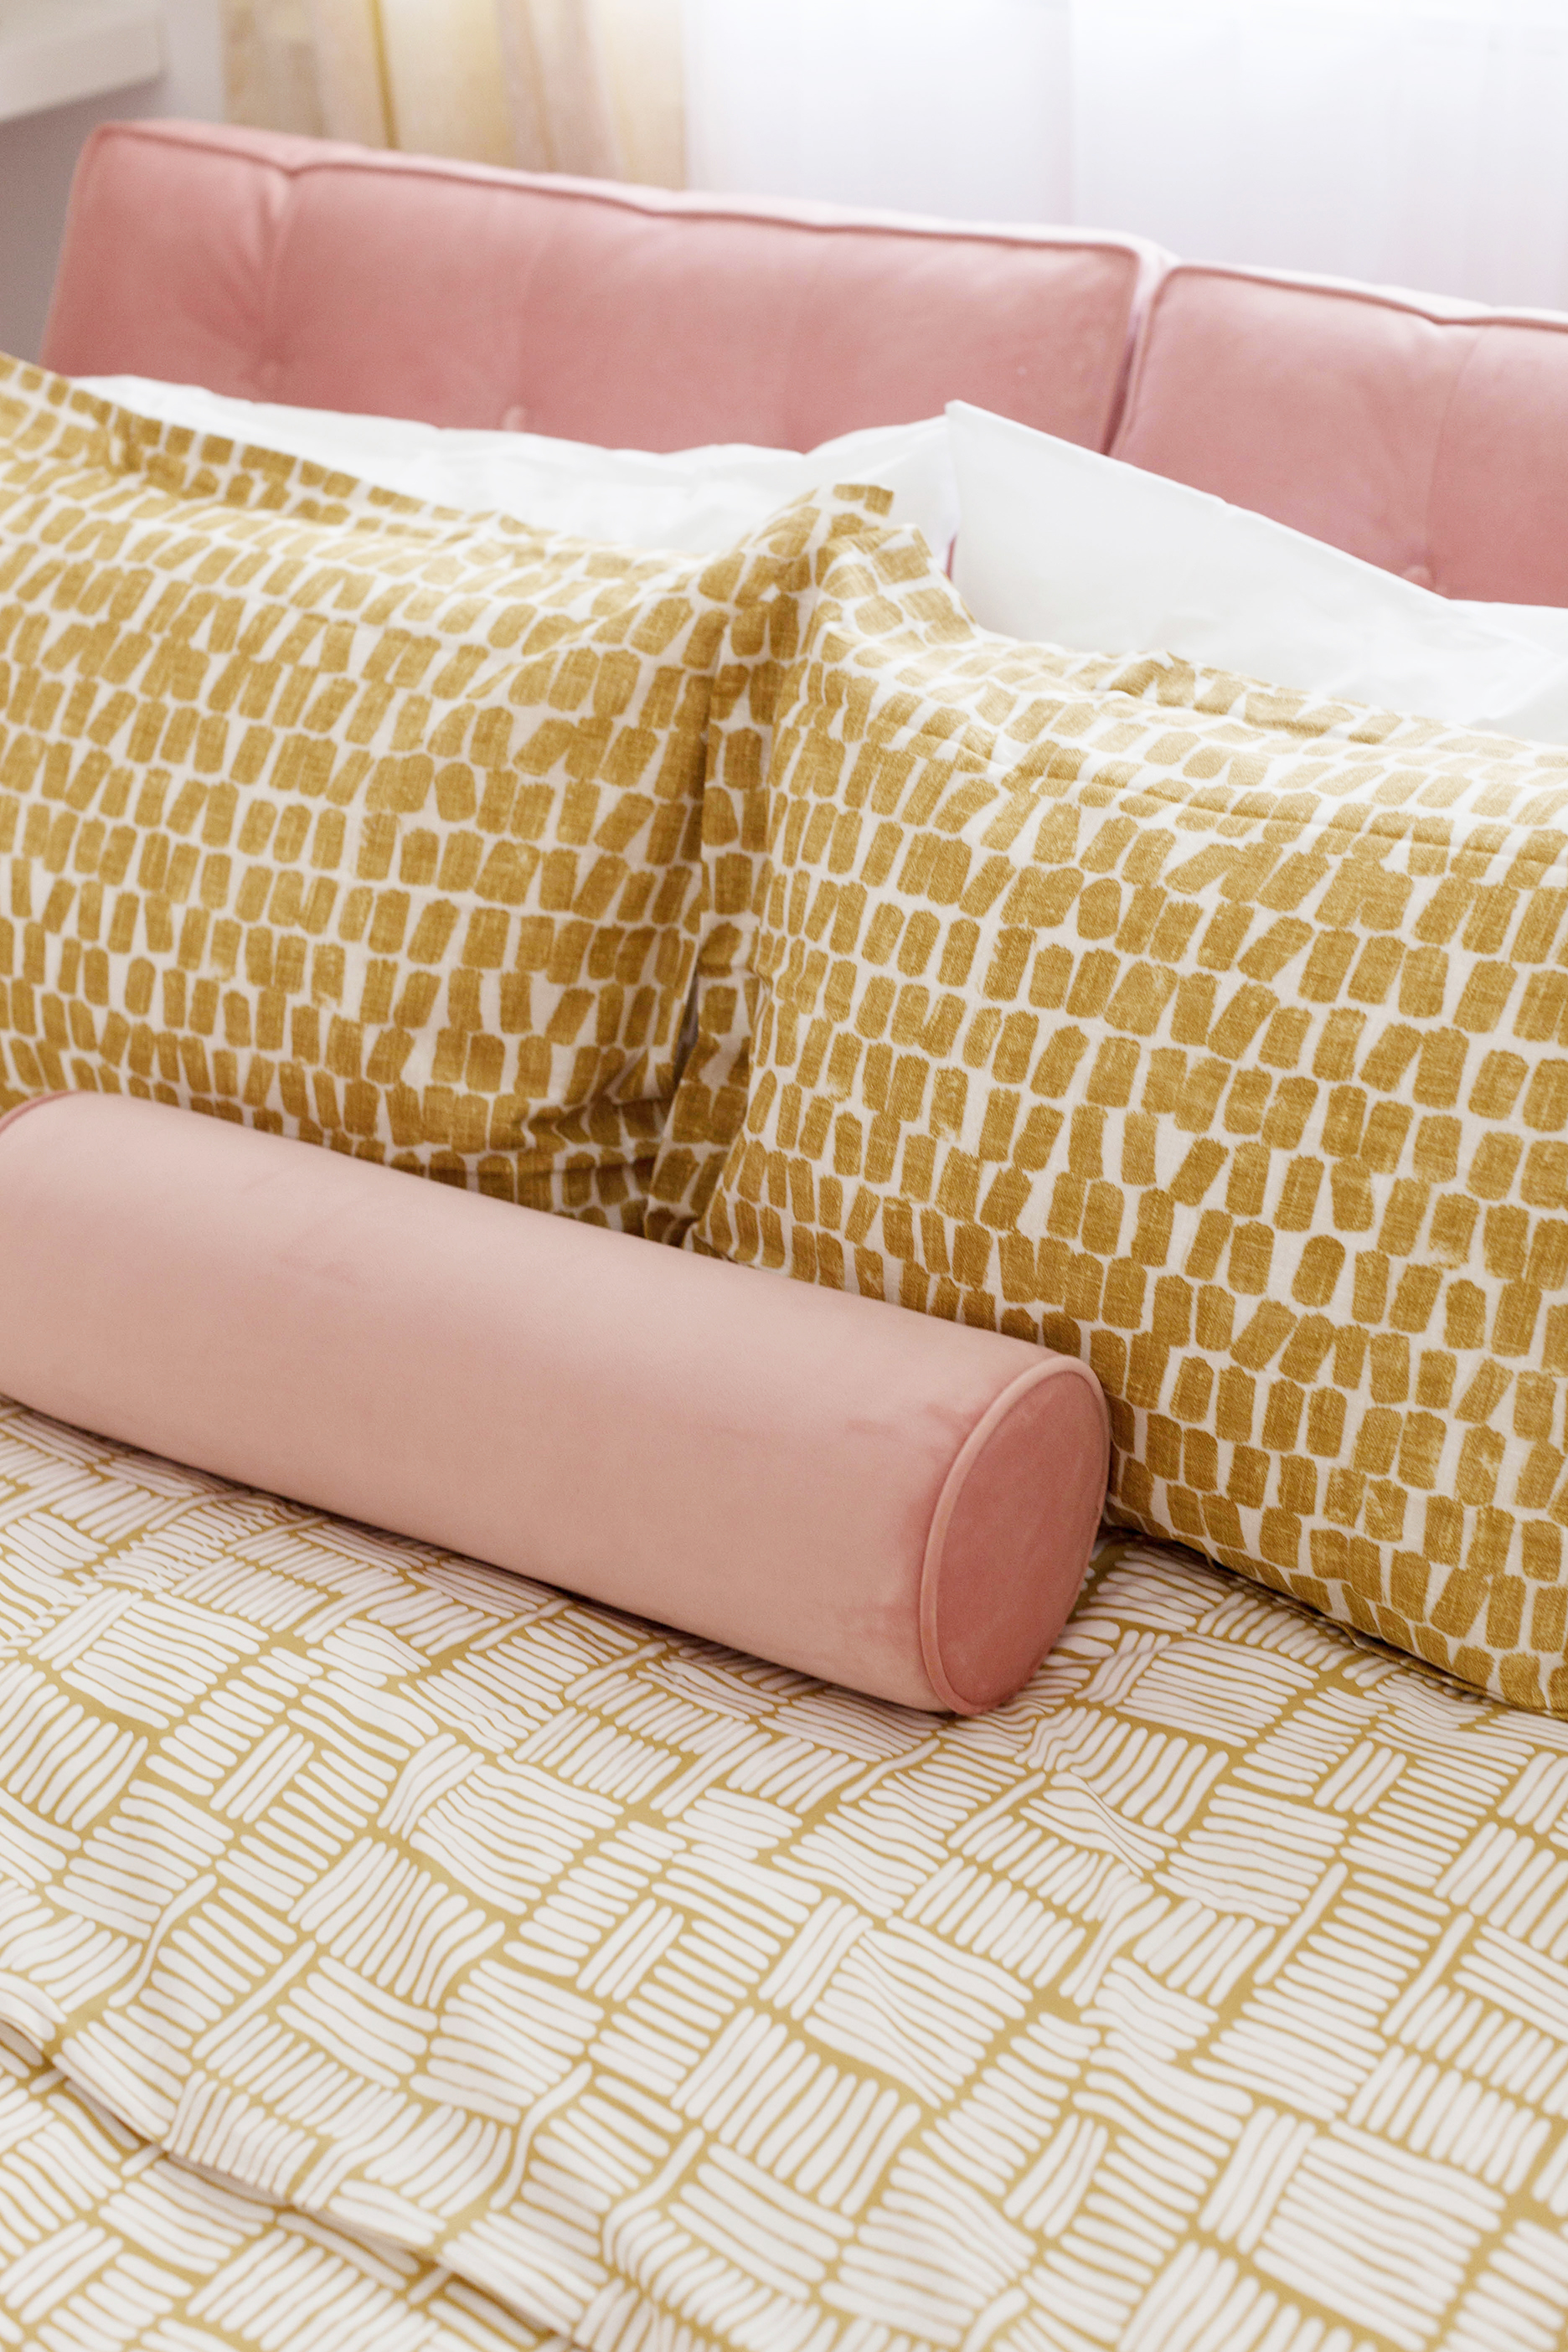
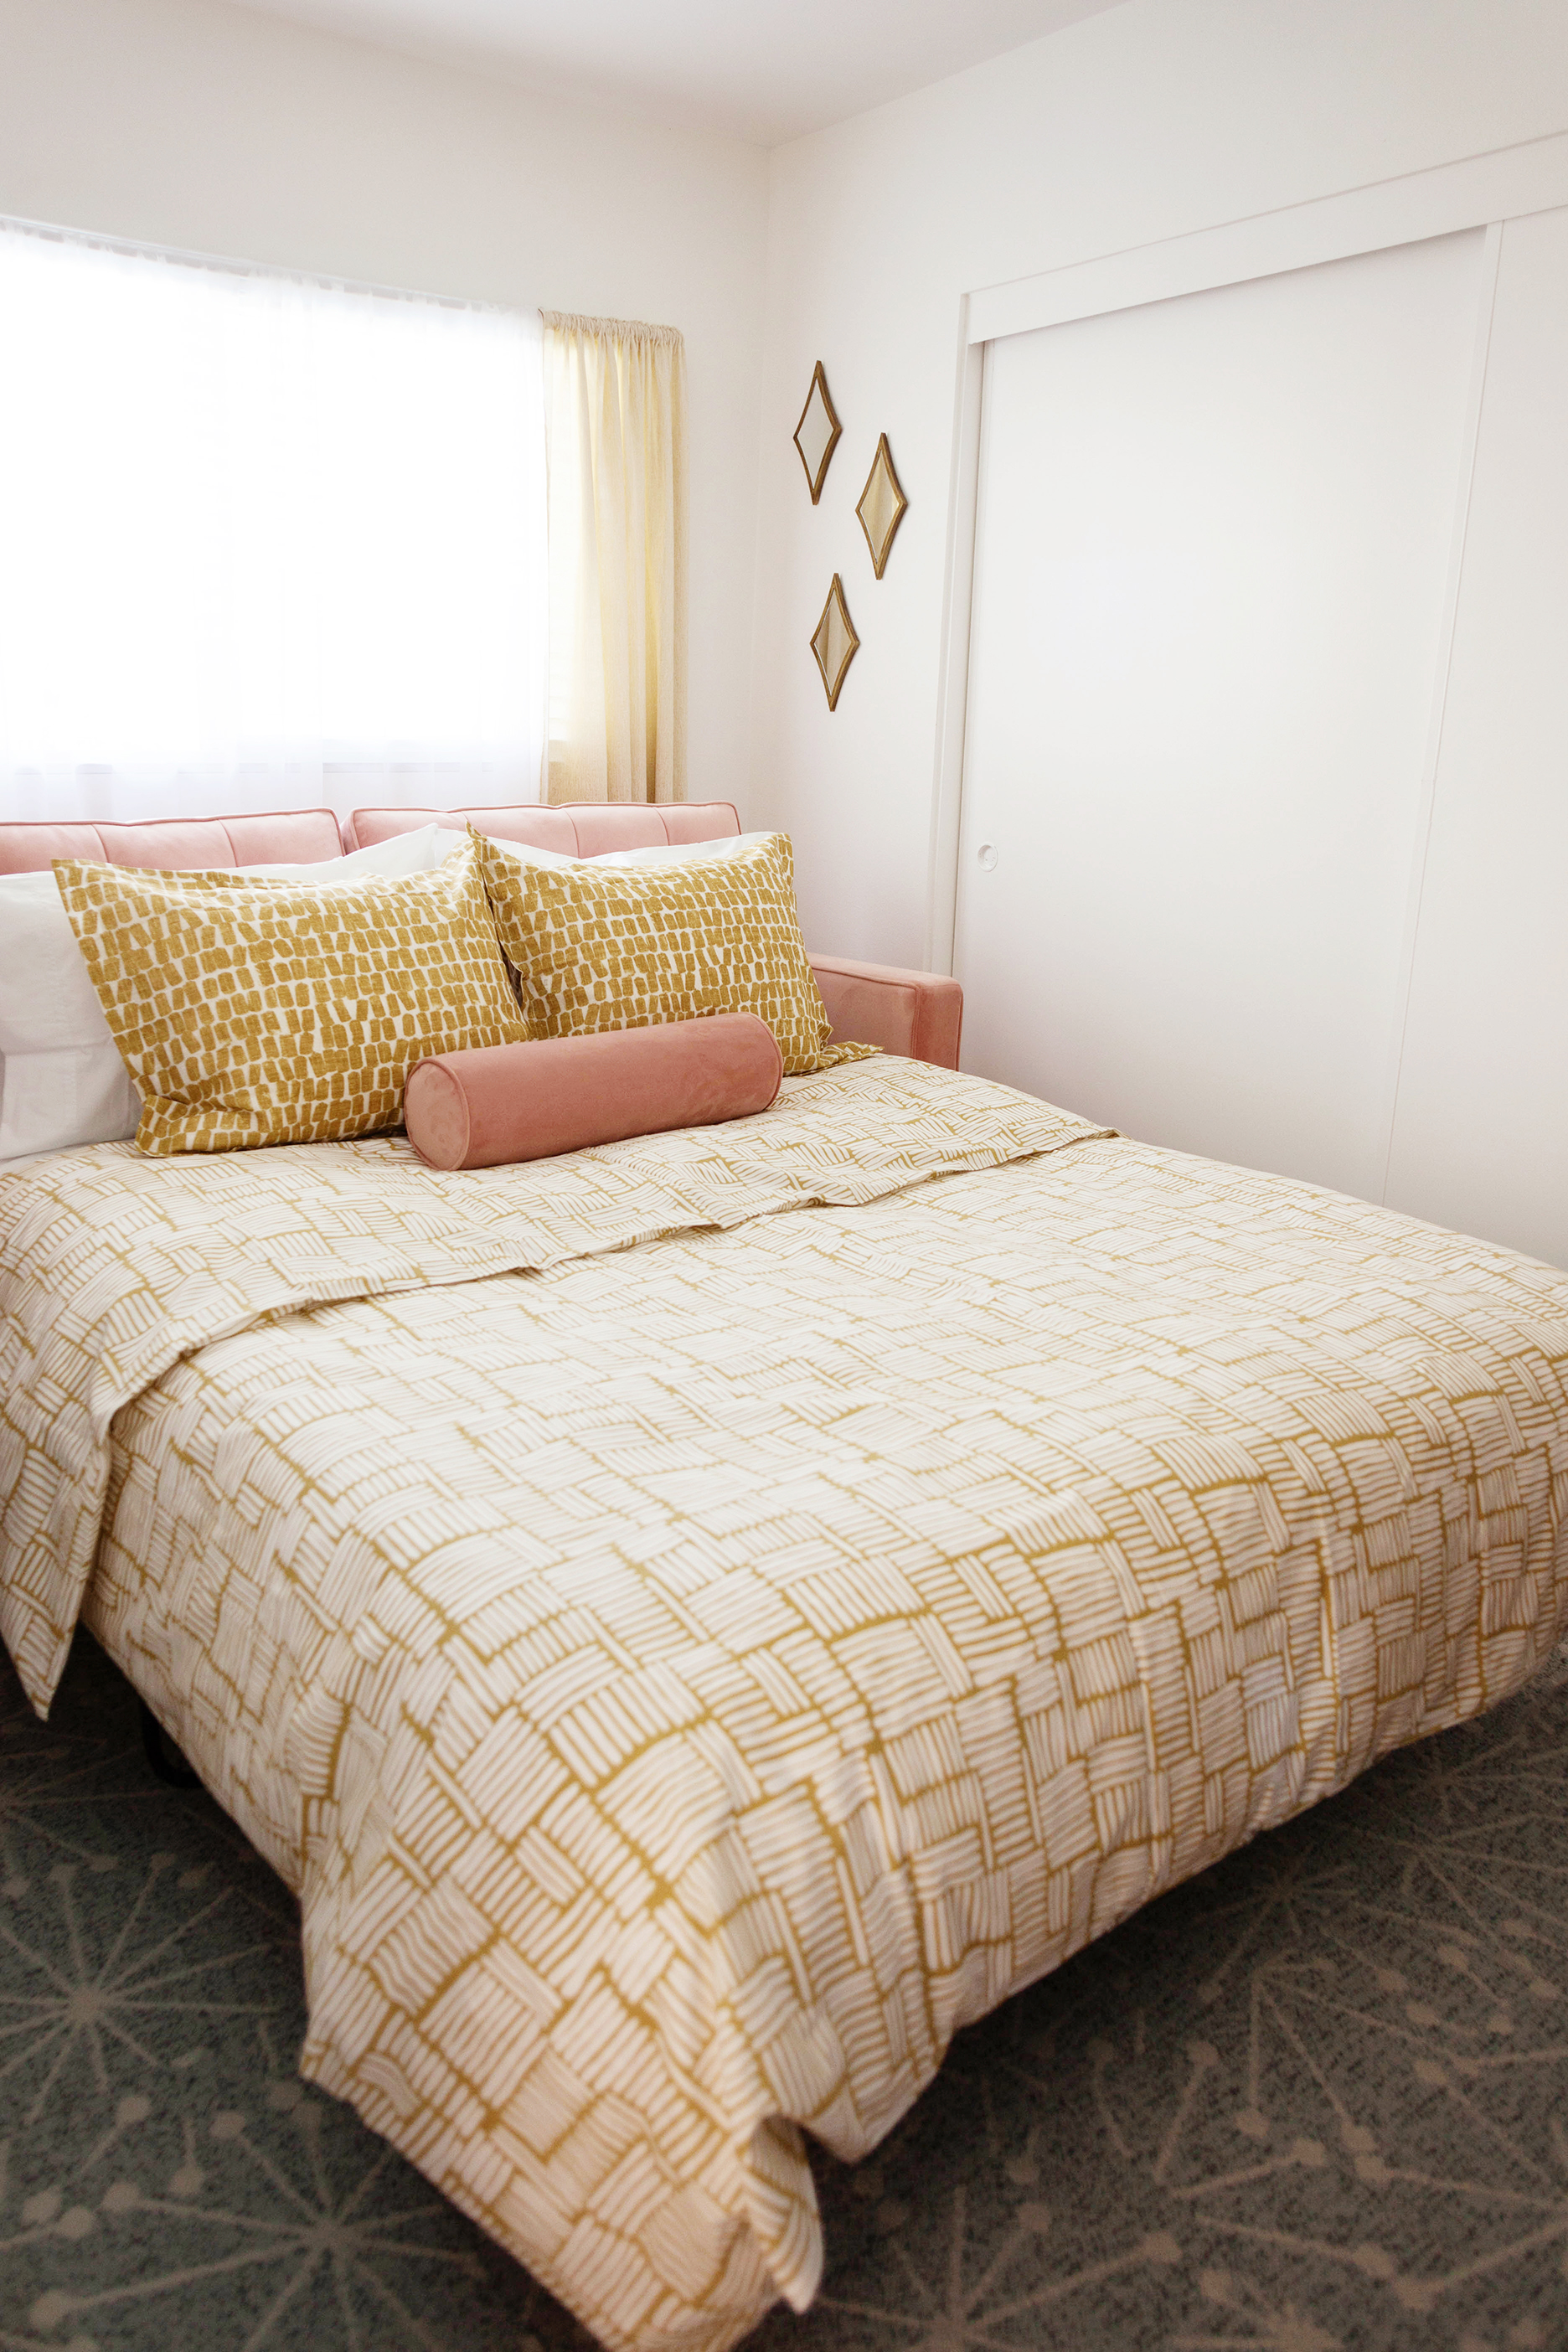 I wanted this bed to not only look good, but also feel good. I used 2 sets of pillows in two different firmness levels – medium and firm – so my guests could choose which feels more comfortable to them. For the duvet I wanted something light enough for desert summer nights but warm enough for winter as well. I also needed it to be easy to store away when not in use. I chose the Cstudio Home Responsible Down Standard Comforter and its exactly what I hoped for.
 The whole set up feels like a nice hotel suite which is always my goal when I set up for guests. Hey, I might just sleep in here myself tonight!
This post was sponsored by Cstudio Home.
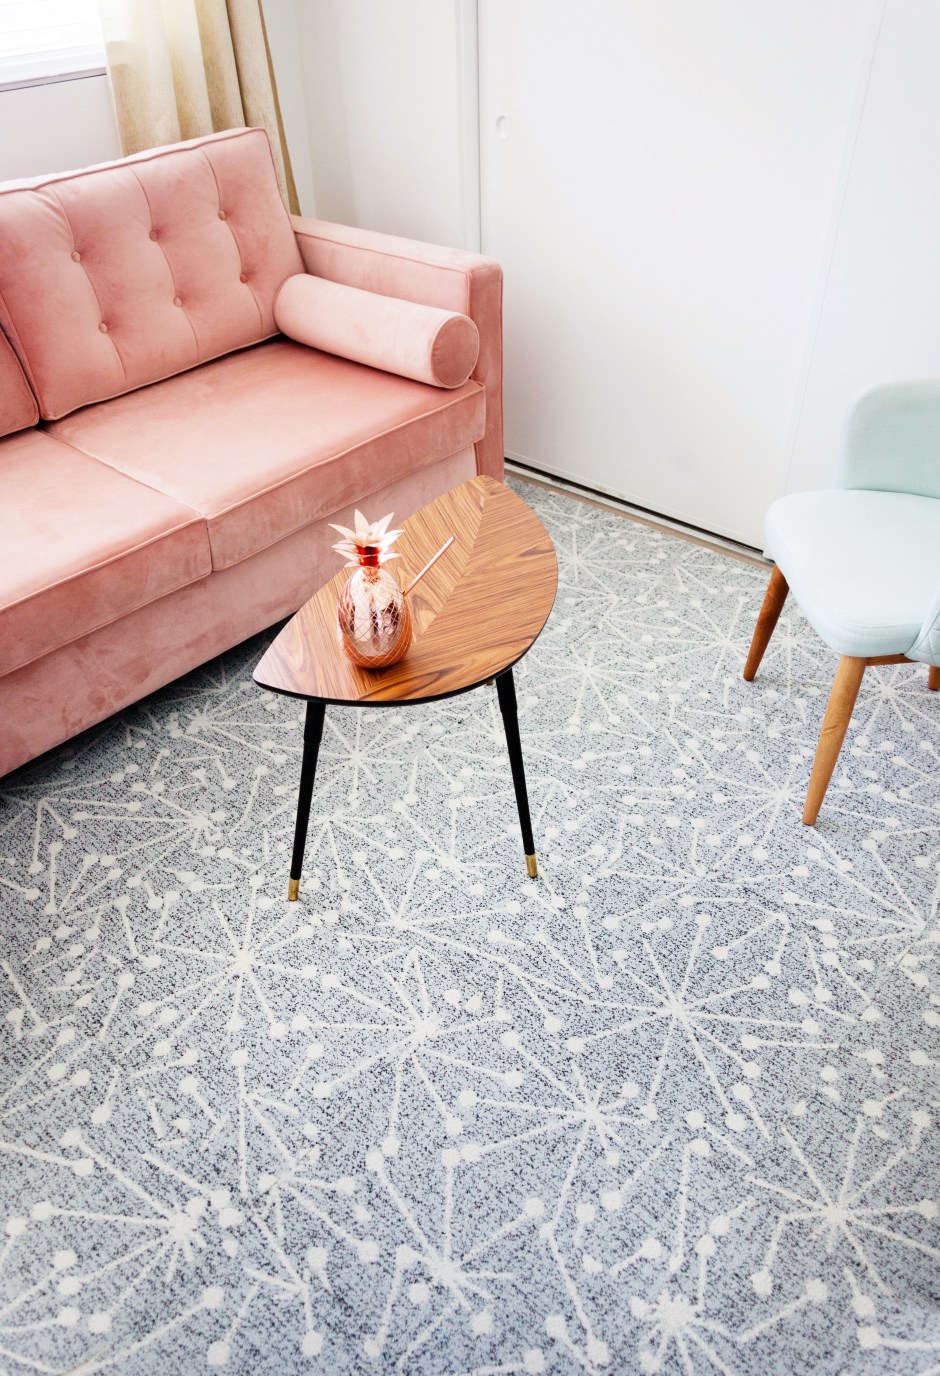
Have I ever mentioned on here how much I love working with FLOR carpet tiles? I’m sure I have. I used them in my own living room and they’re the best ever. 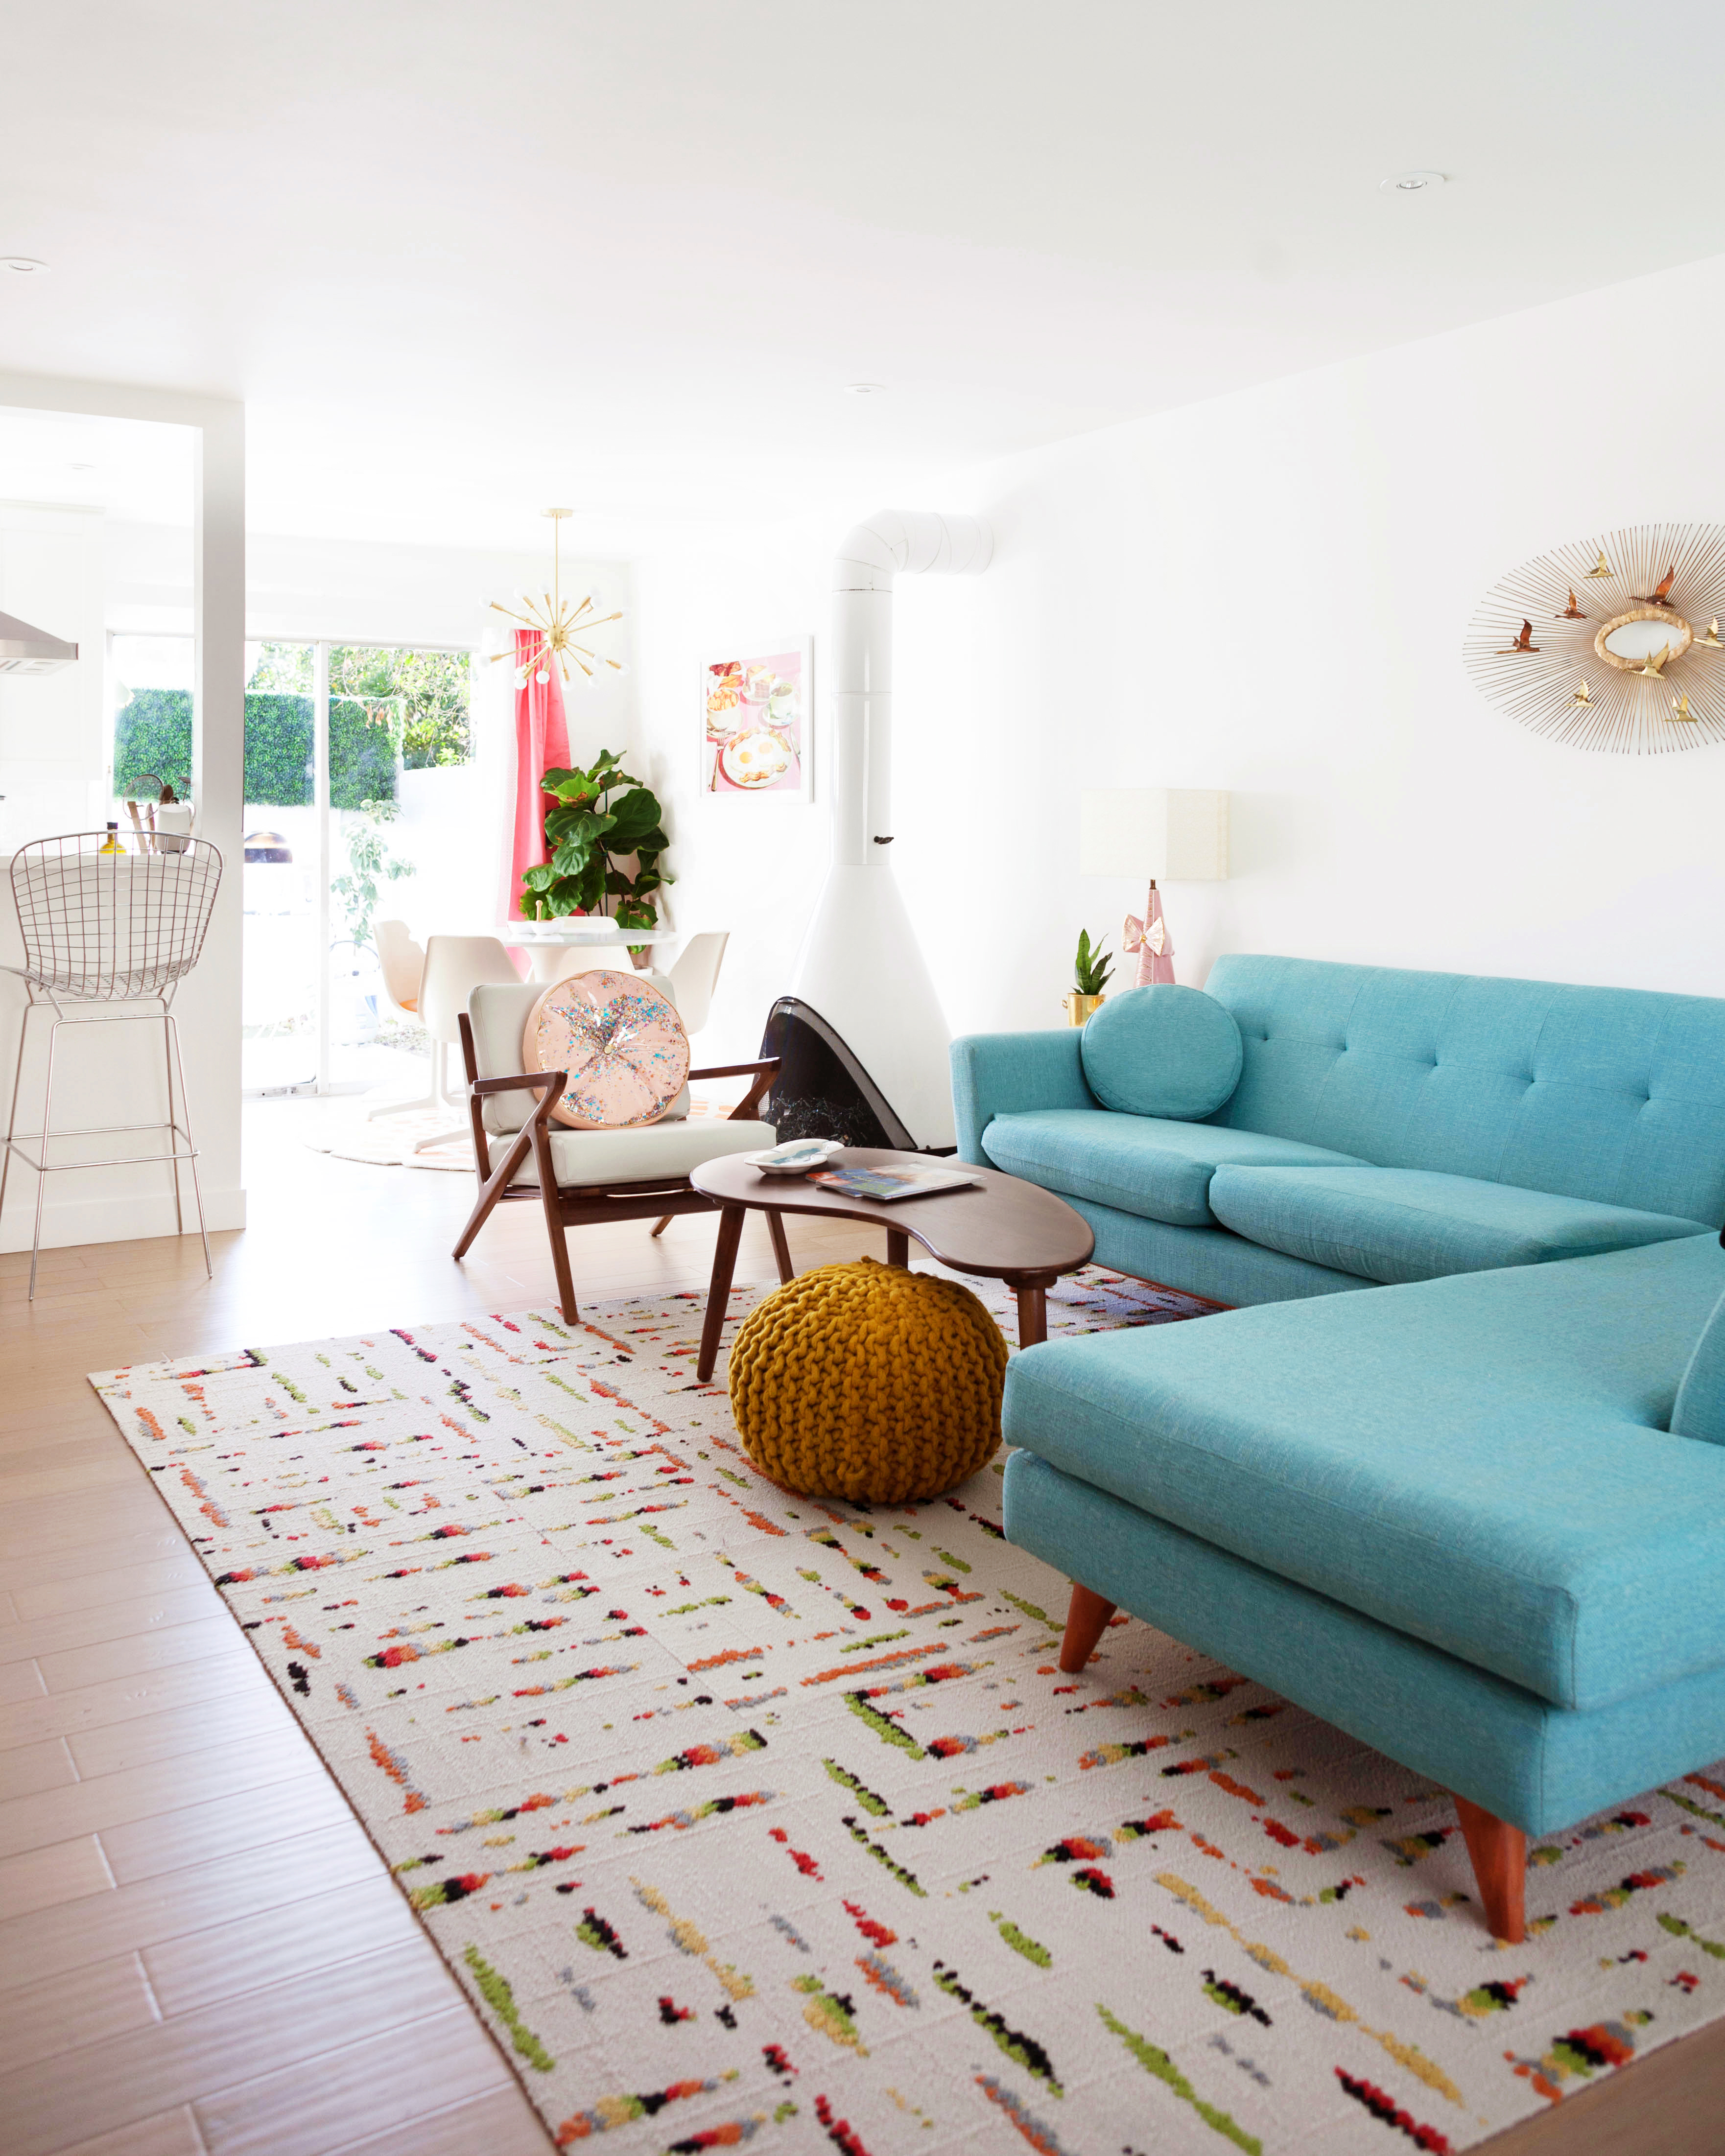
After seeing how easy they are to install and clean, and how durable they are, I knew I wanted to use them somewhere else in my apartment.
We’re currently in the process of decorating our spare room to be a multi-functional office/guest room. Instead of looking for an area rug to fit the wonky dimensions, I decided to use FLOR carpet squares again. I had the Mod Cafe pattern in mind because I thought the sputnik style design would bring in mid-century hotel and vibes. After receiving samples of all the color variations, I chose the color ‘linen’. It’s a blue-grey that changes to more one or the other depending on how the light hits it.
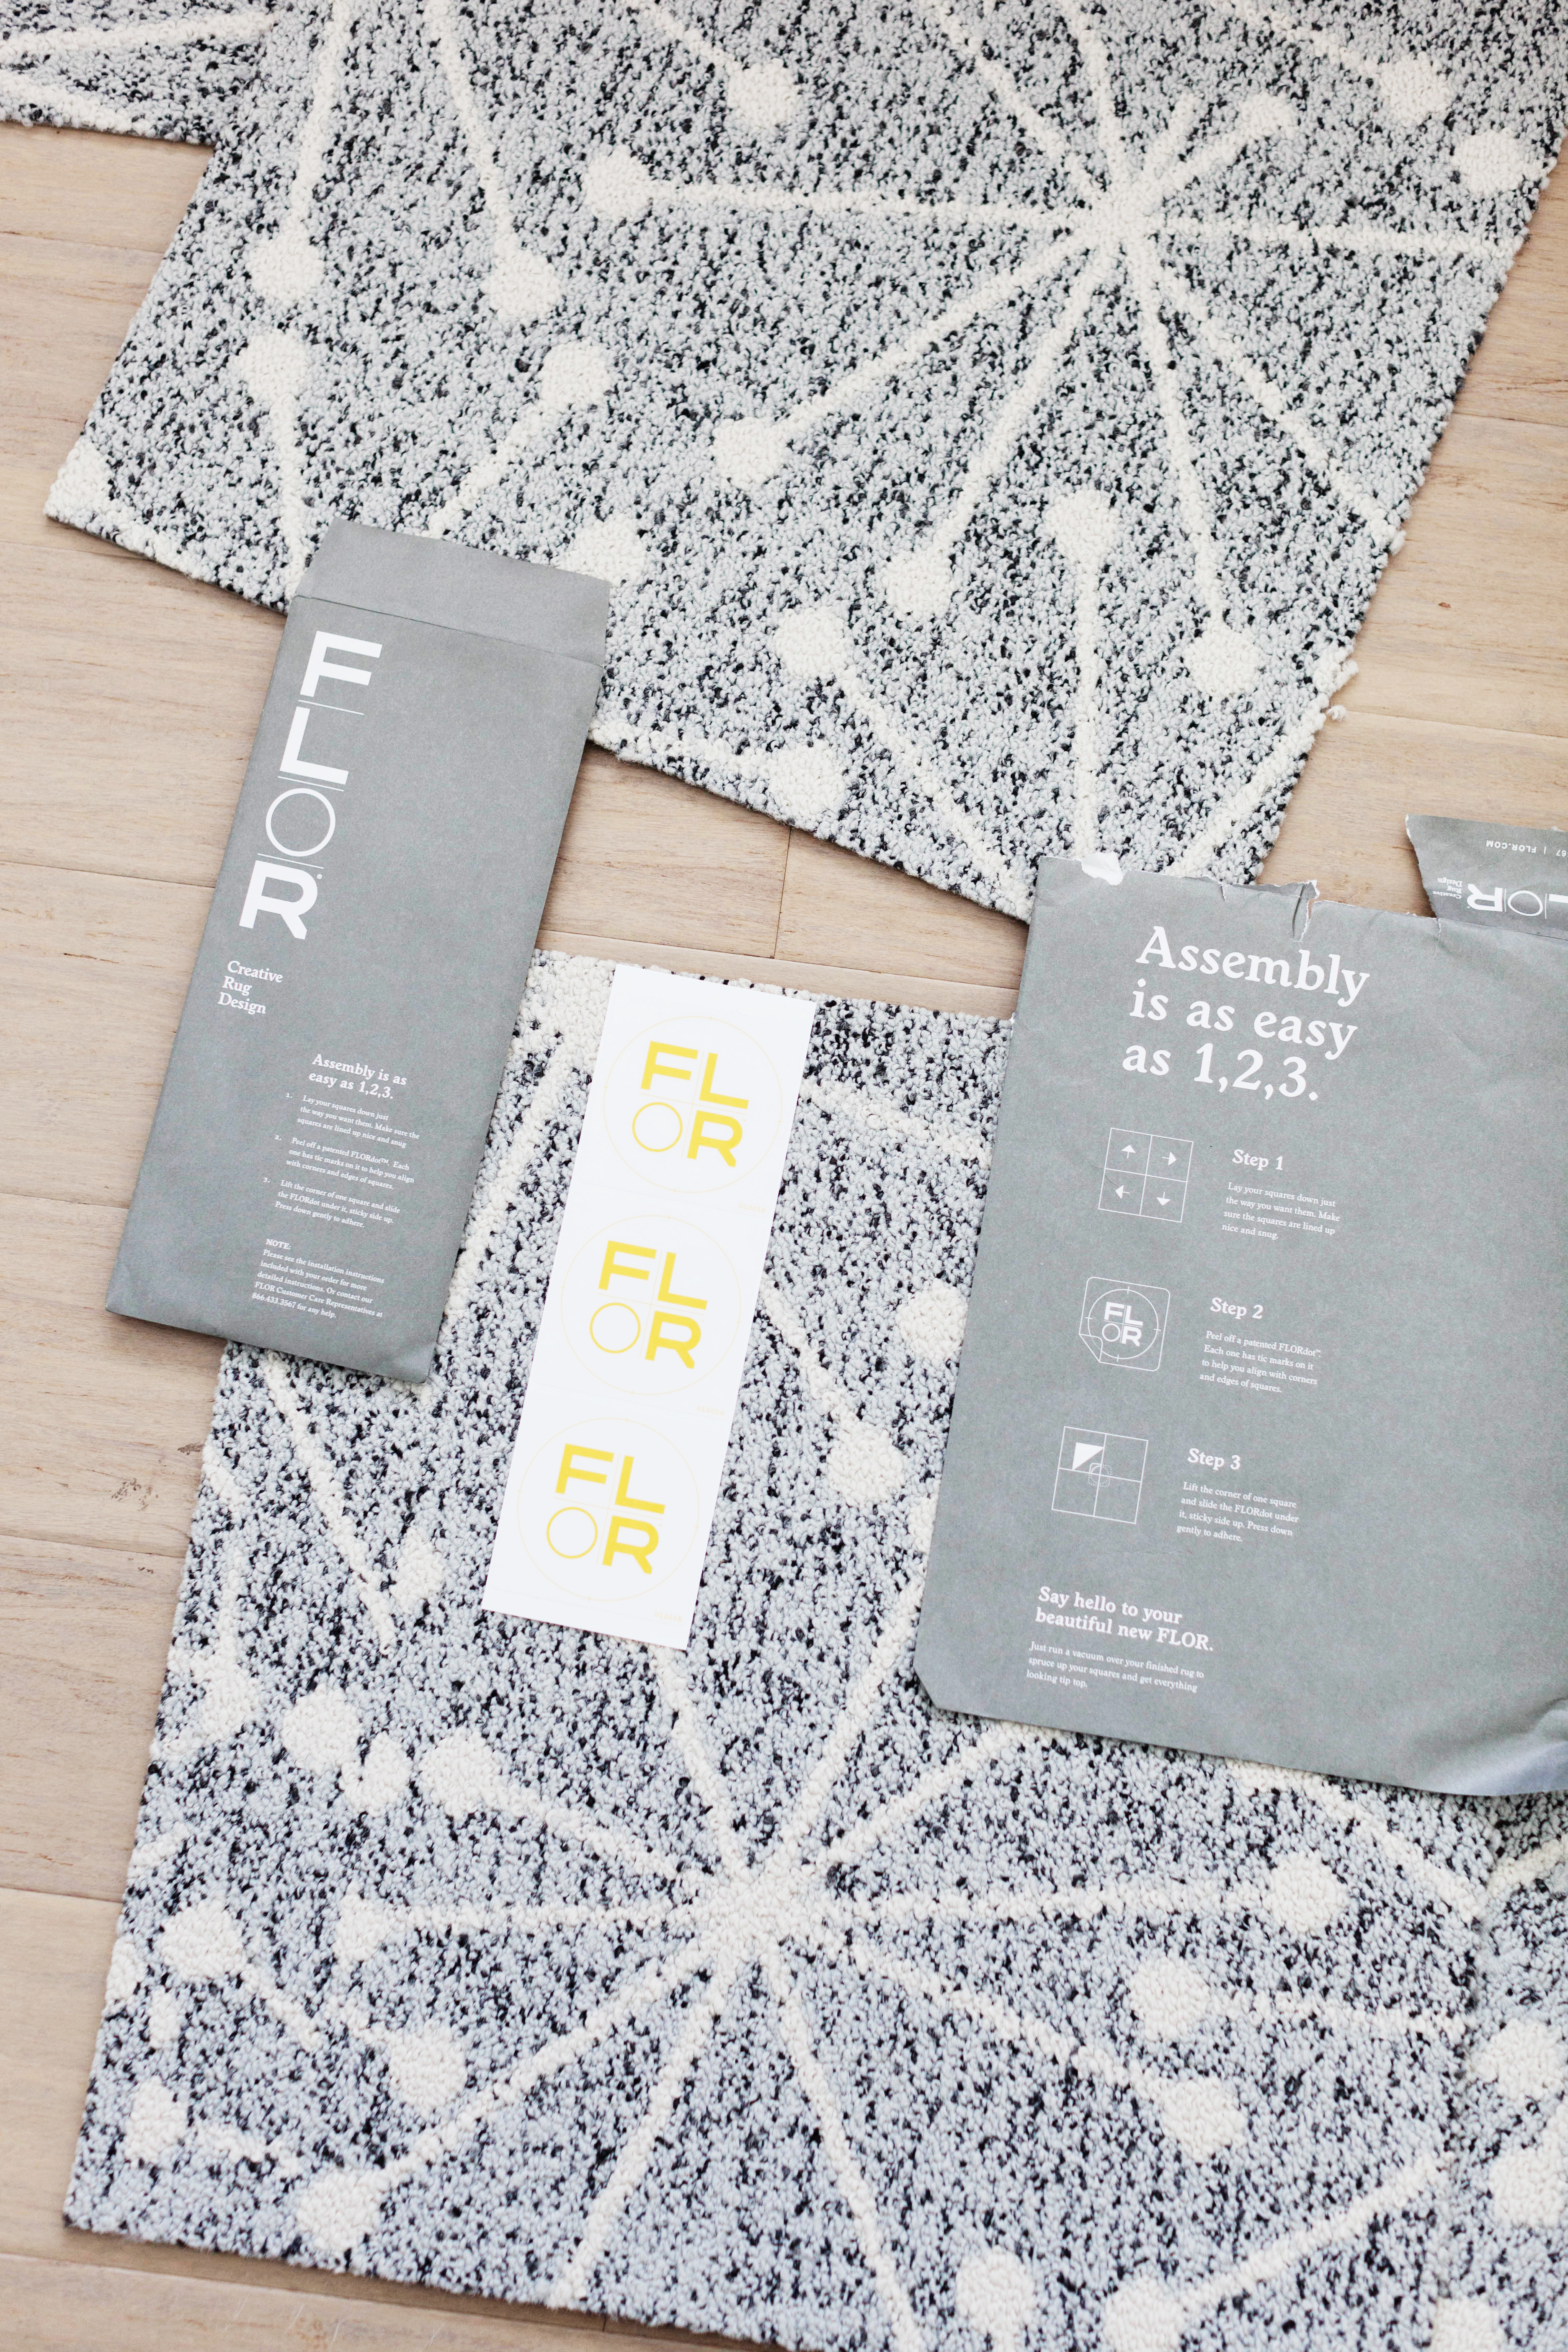 The cool thing about FLOR squares is that you can customize a rug to fit your needs. You can mix and match colors and patterns to create something truly unique, or you can just go with one all over pattern like I’ve done. They’re easy to cut and they simply stick together using the included FLORdots stickers.
 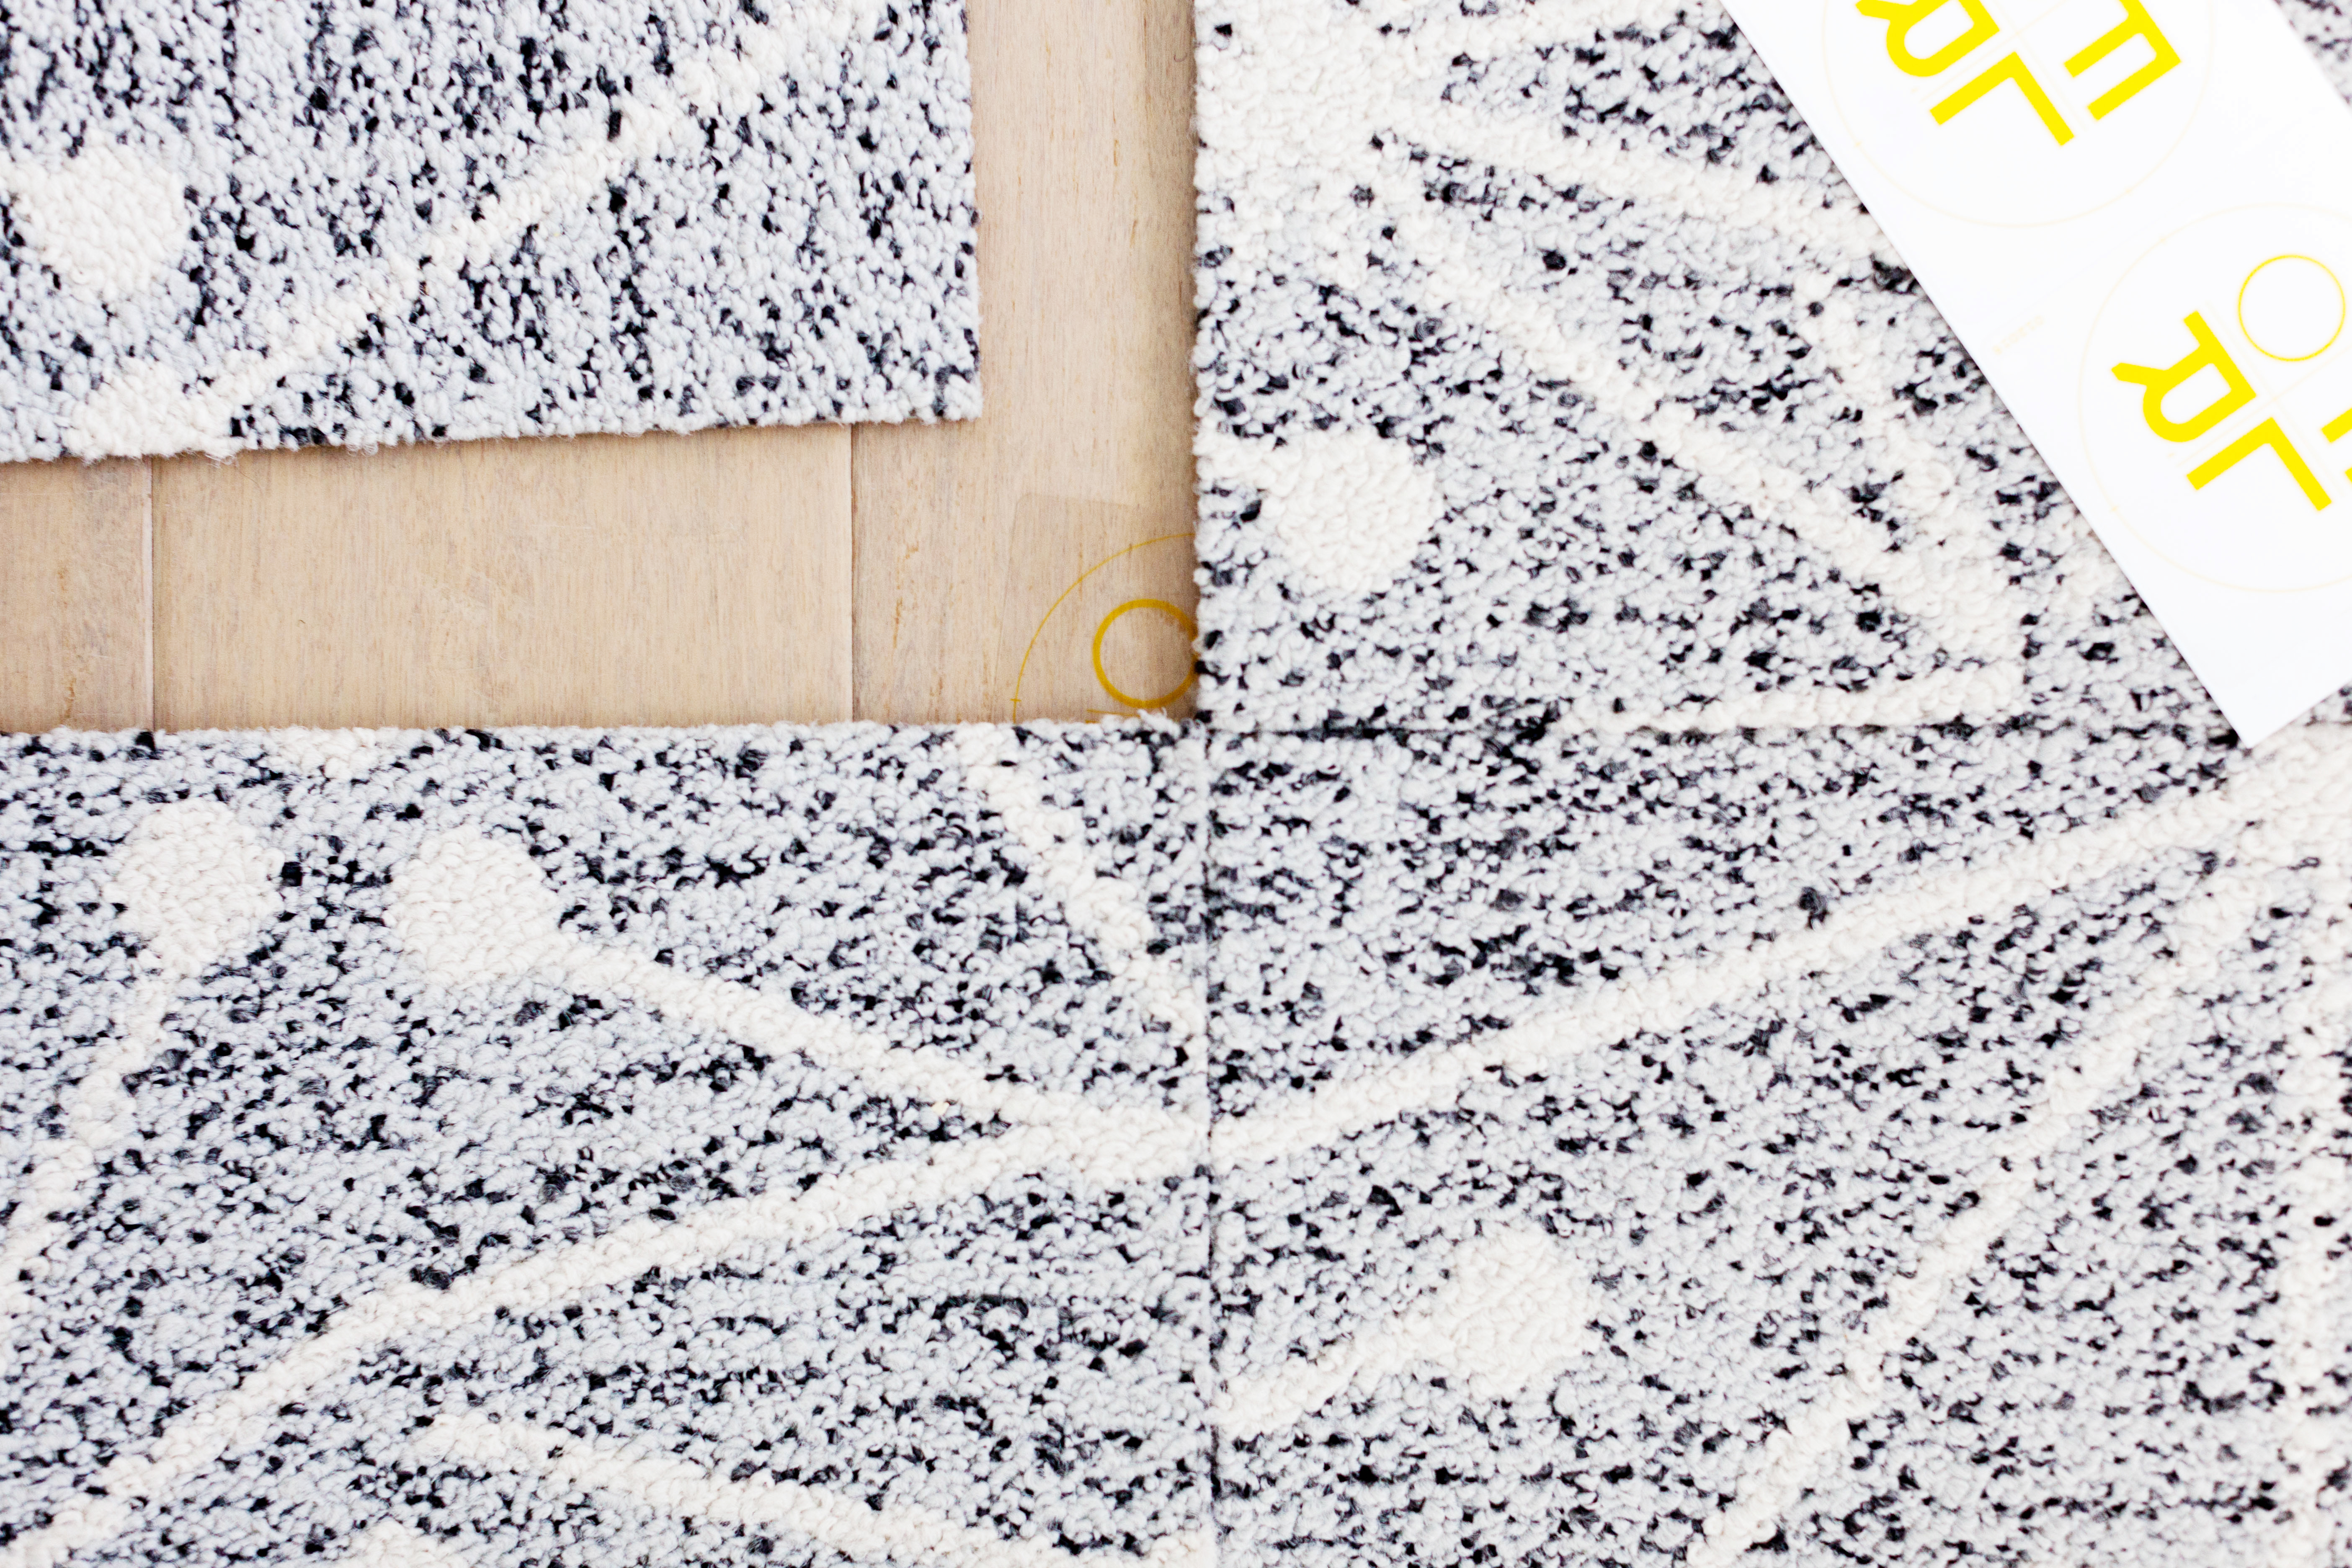 The stickers hold the corners of the tiles together and only stick to the backing of the carpet squares. Nothing actually sticks to your floor underneath so you don’t have to worry about ruining it or having to deal with sticky residue underneath. Plus, when we move we can just stack them up and take them with us to the next place.
OH! They’re also a breeze to clean. Some one spill a drink? Dog had an accident? Just pop up the dirty square and wash it out in the sink. Let it dry and stick it back down. Or if one gets ruined you can replace it.
Here’s what the room looked like before FLOR squares.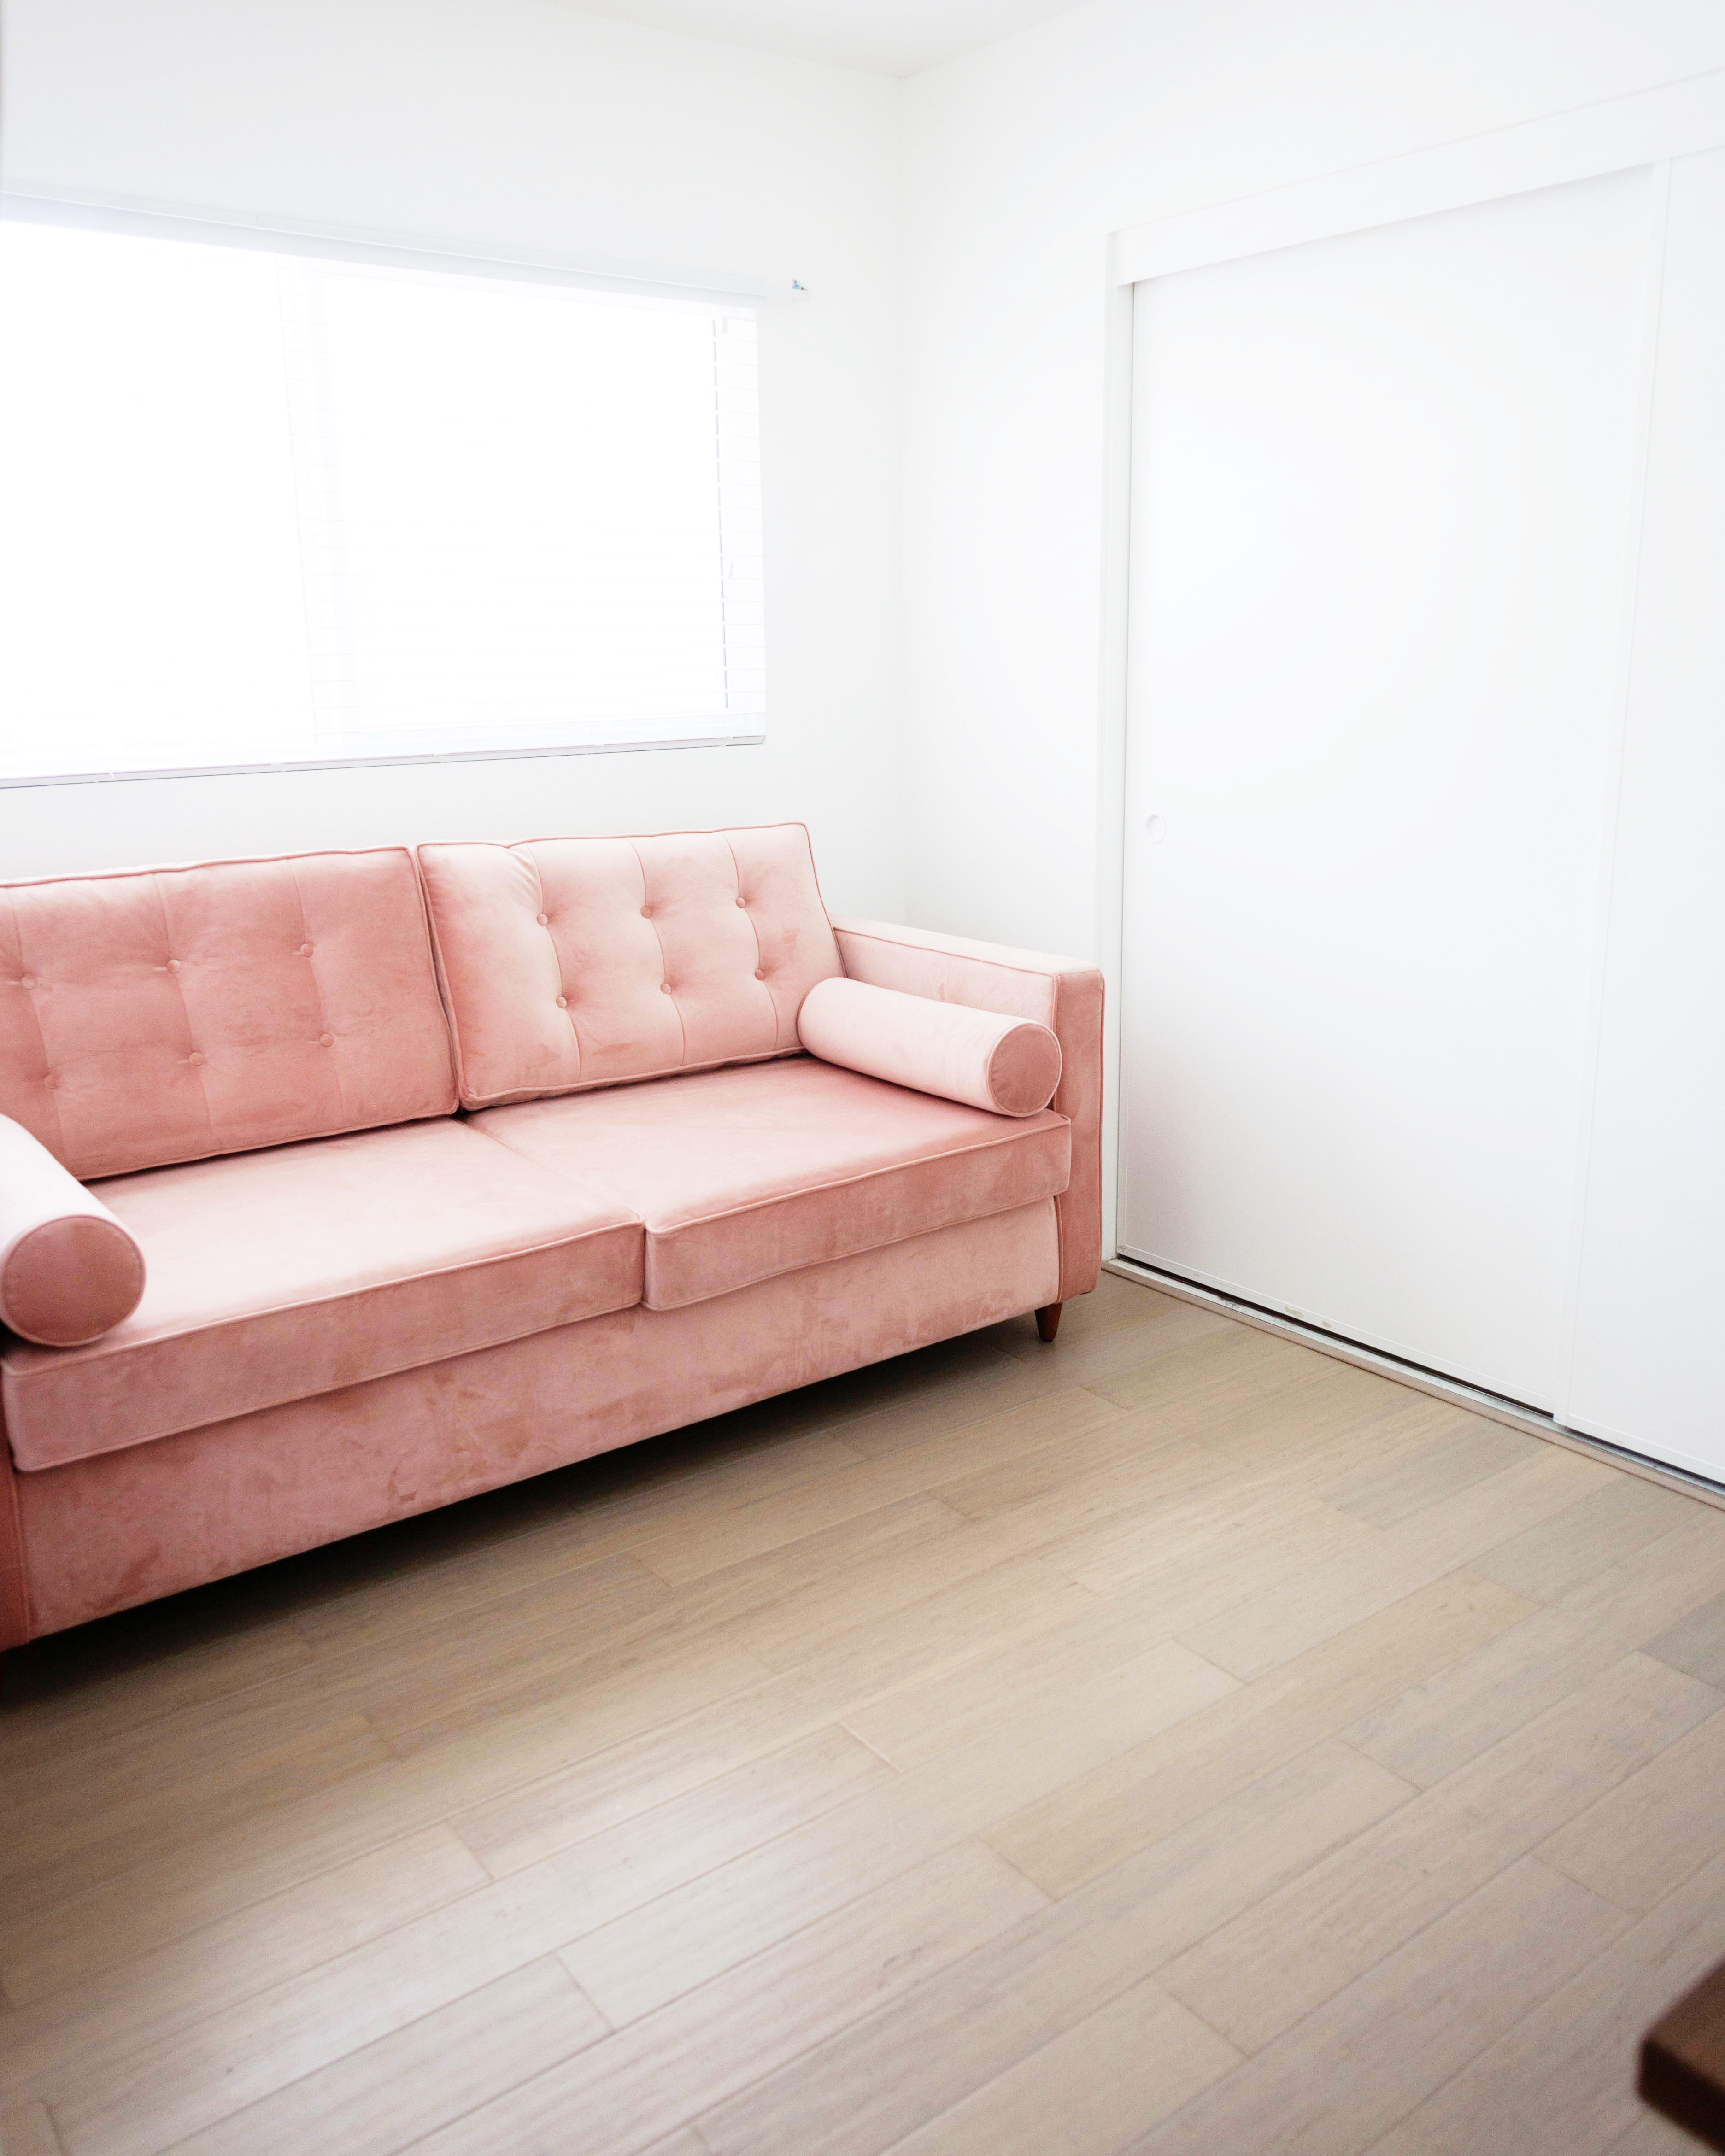
 First I laid out the squares to make sure I was happy with the placement. Any parts that need trimmed are easily cut with a utility knife or box cutter.
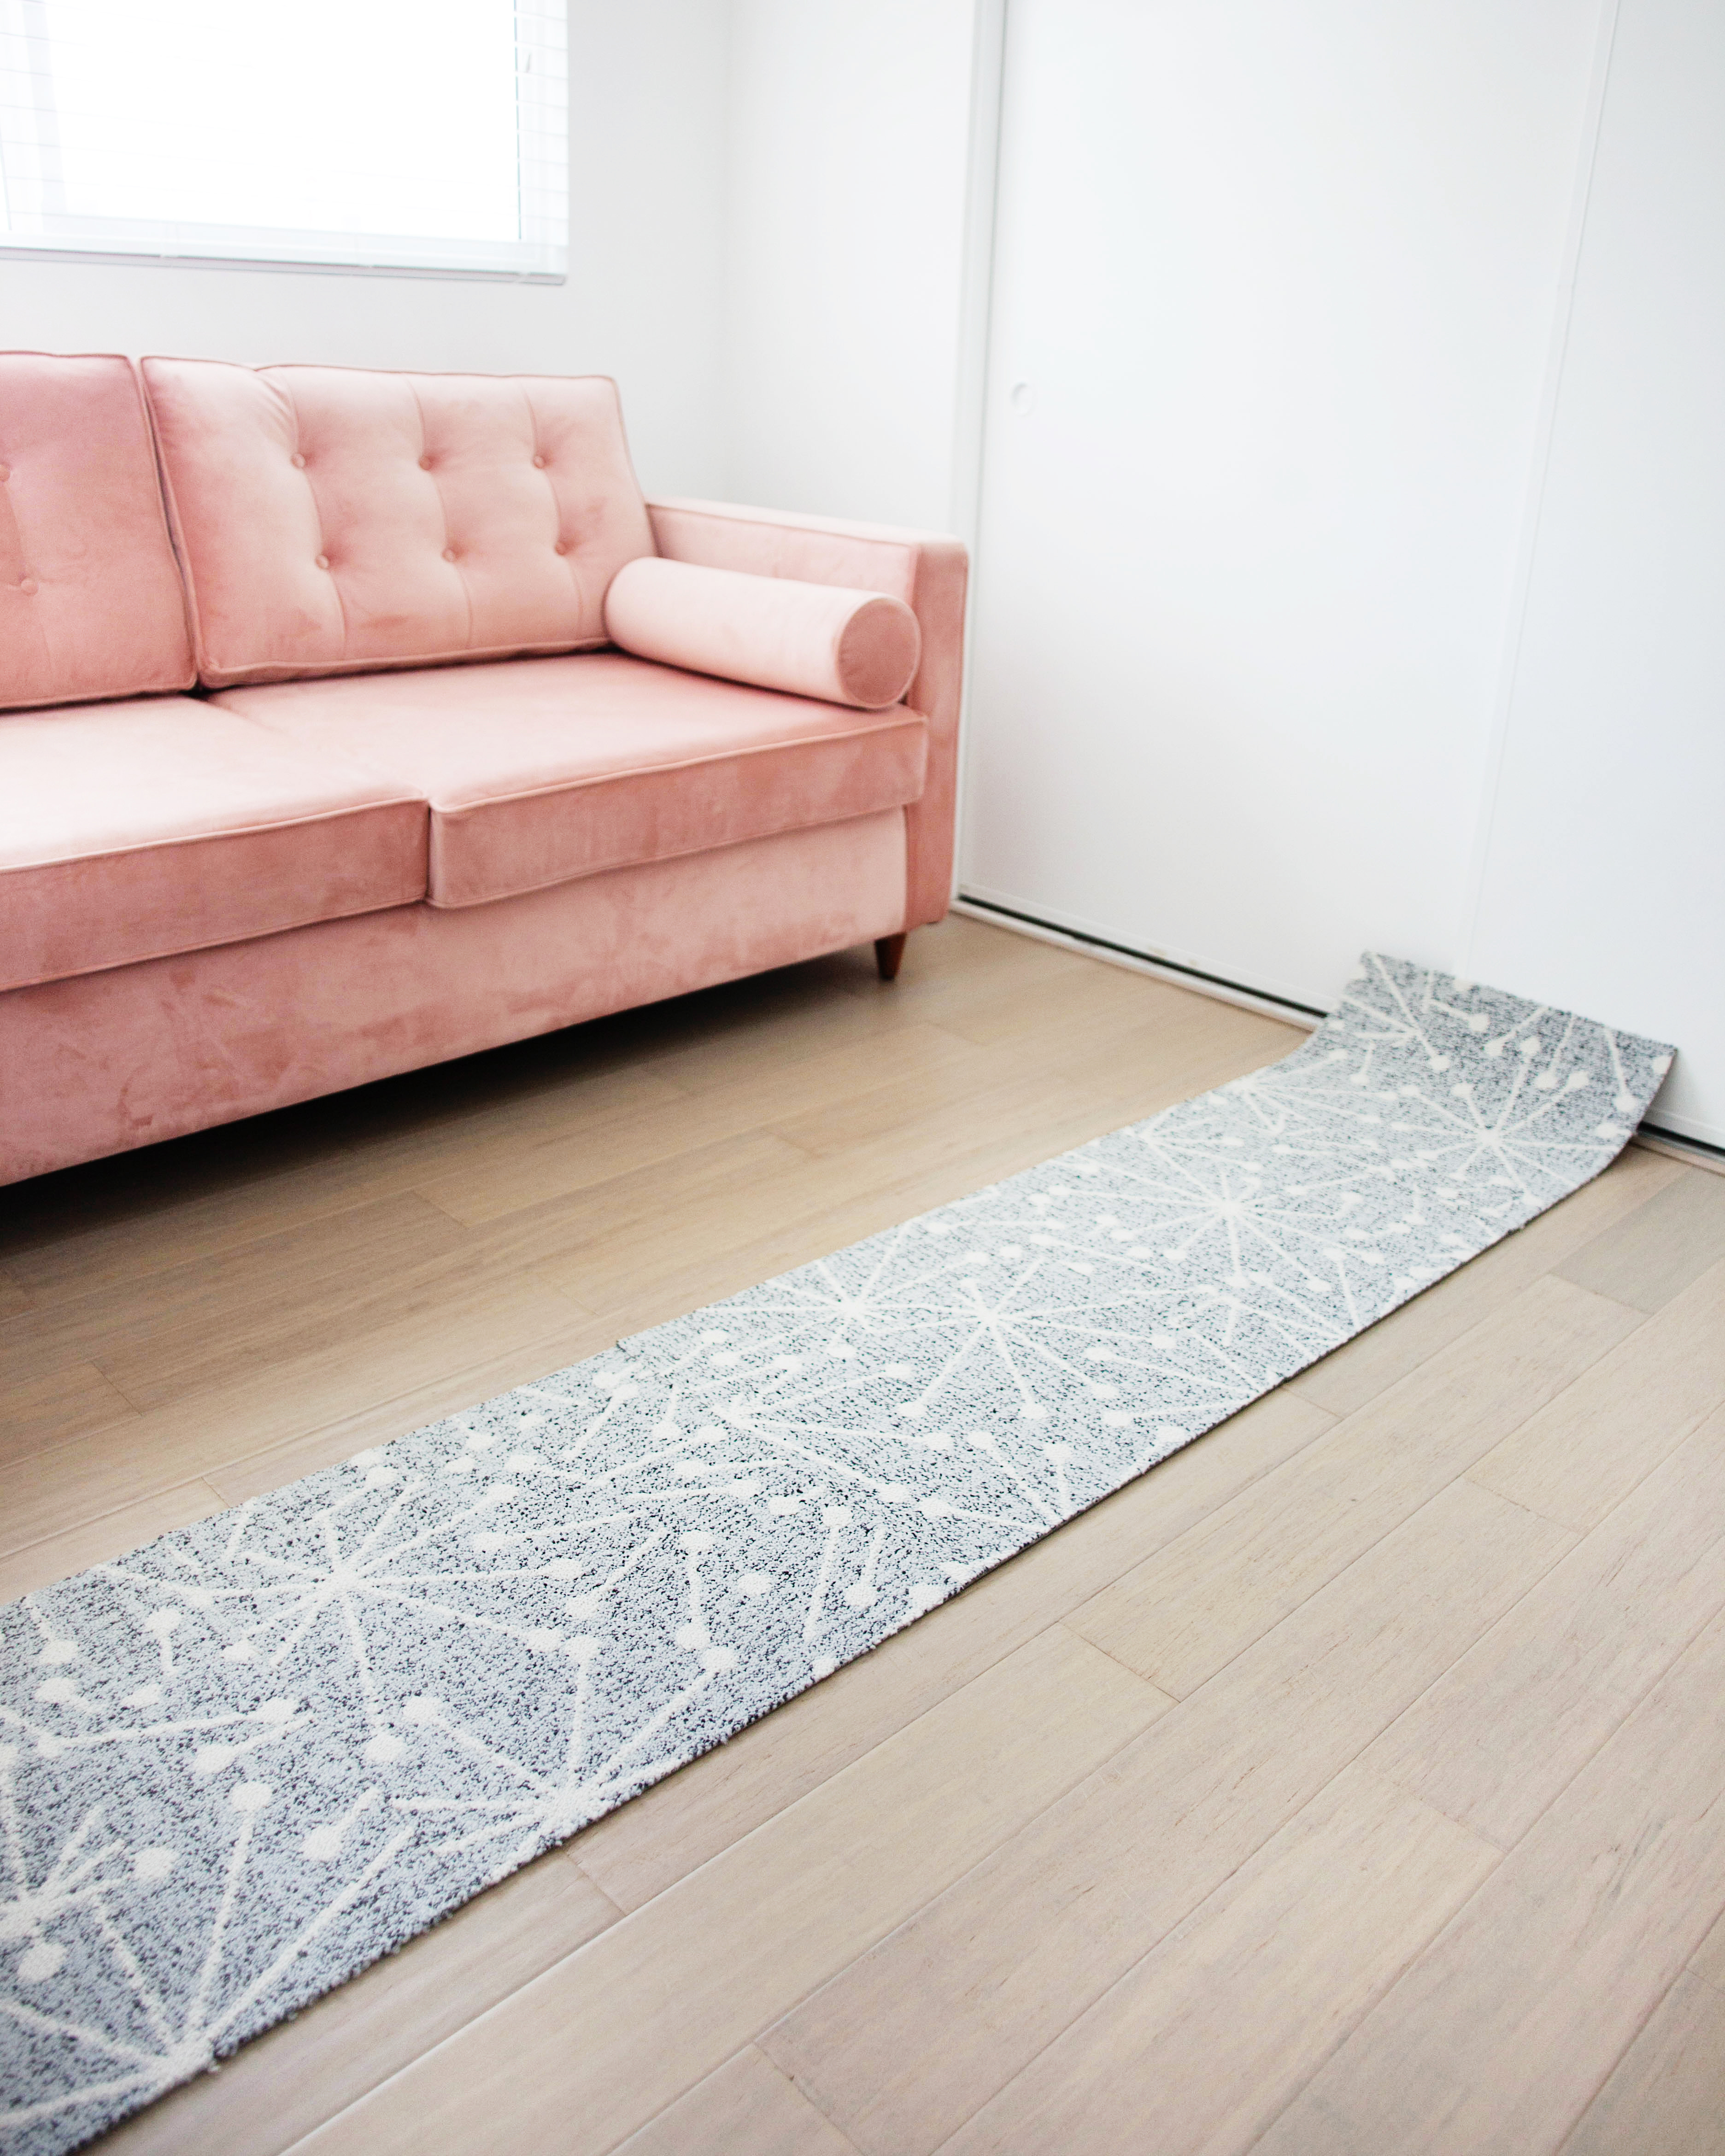 This room is tiny so I decided to do the entire thing. Once I was happy with the placement I easily applied the stickers to the corners to hold it all together and voila!
Atomic carpet! All done in about an hour!
The lines blend together more and more as the carpet fibers fluff up a bit. Vacuuming helps.
Here’s what it looks like now!
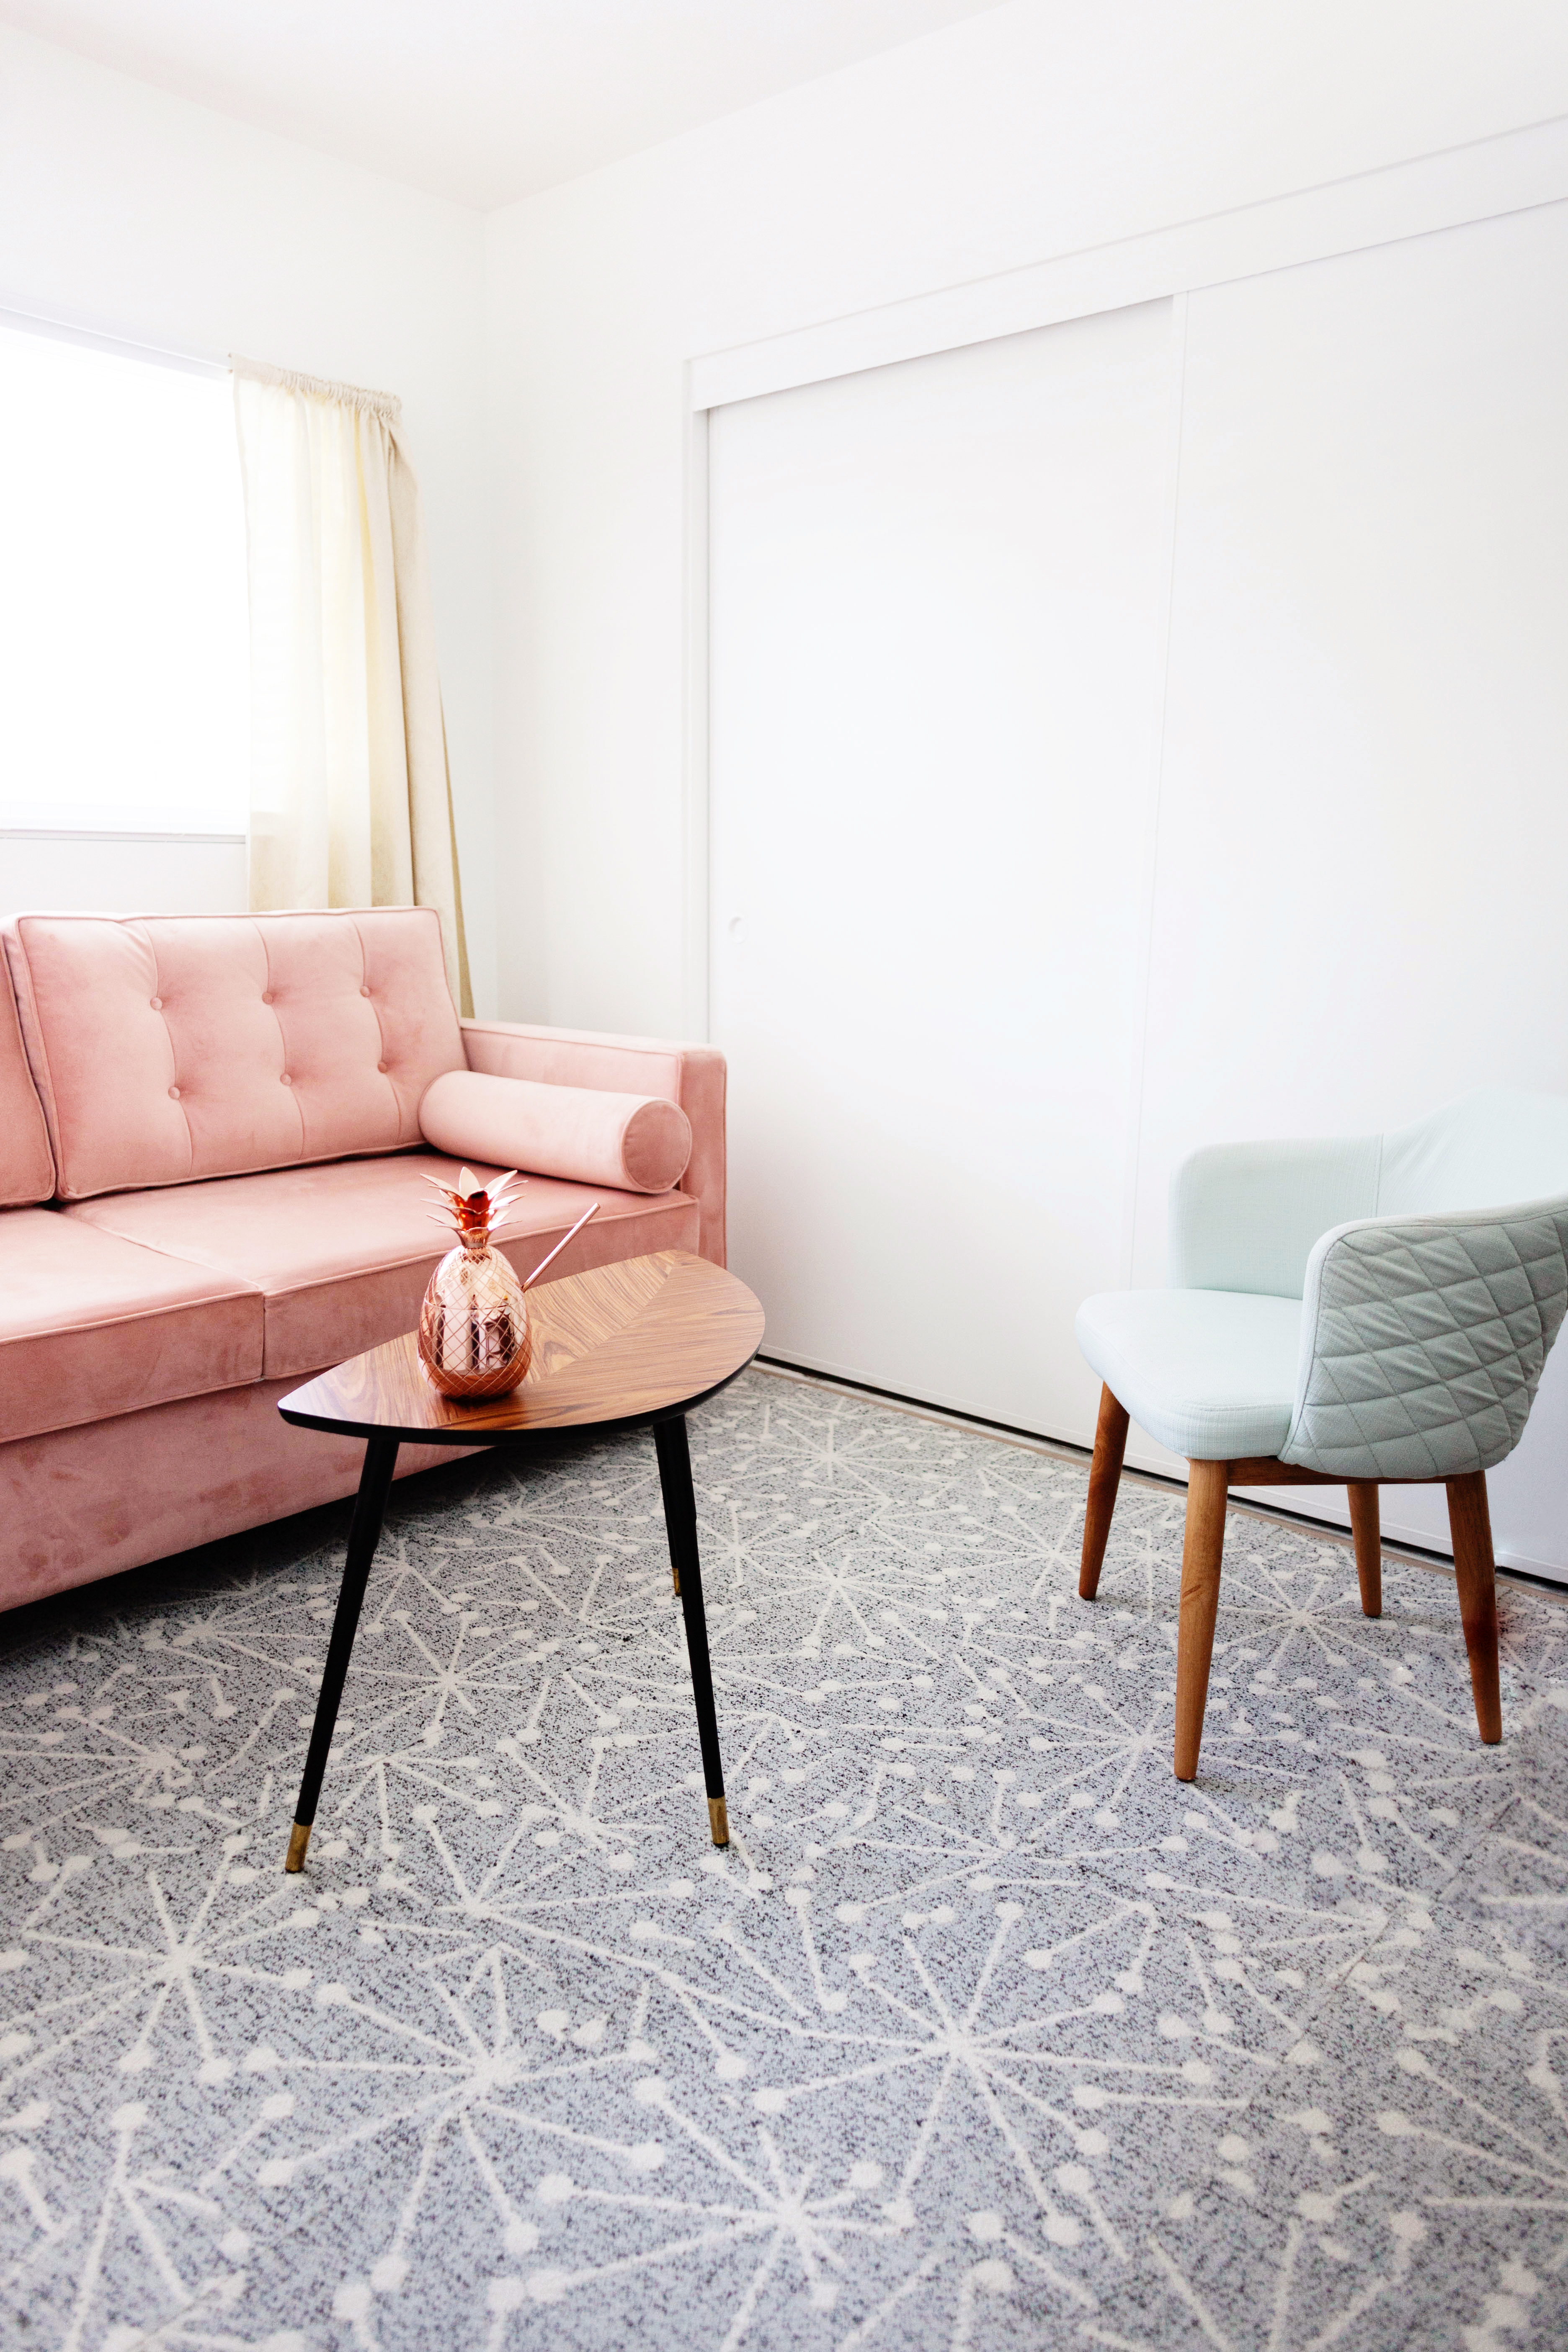 Tada! I think it definitely makes the room feel more put together and adds some much needed pattern. I love the way the blue-grey looks against the blush pink velvet of our sleeper sofa, and the black and gold of the table. Bonus, it’s perfect for home office use because it immediately eliminated any awkward phone echo!
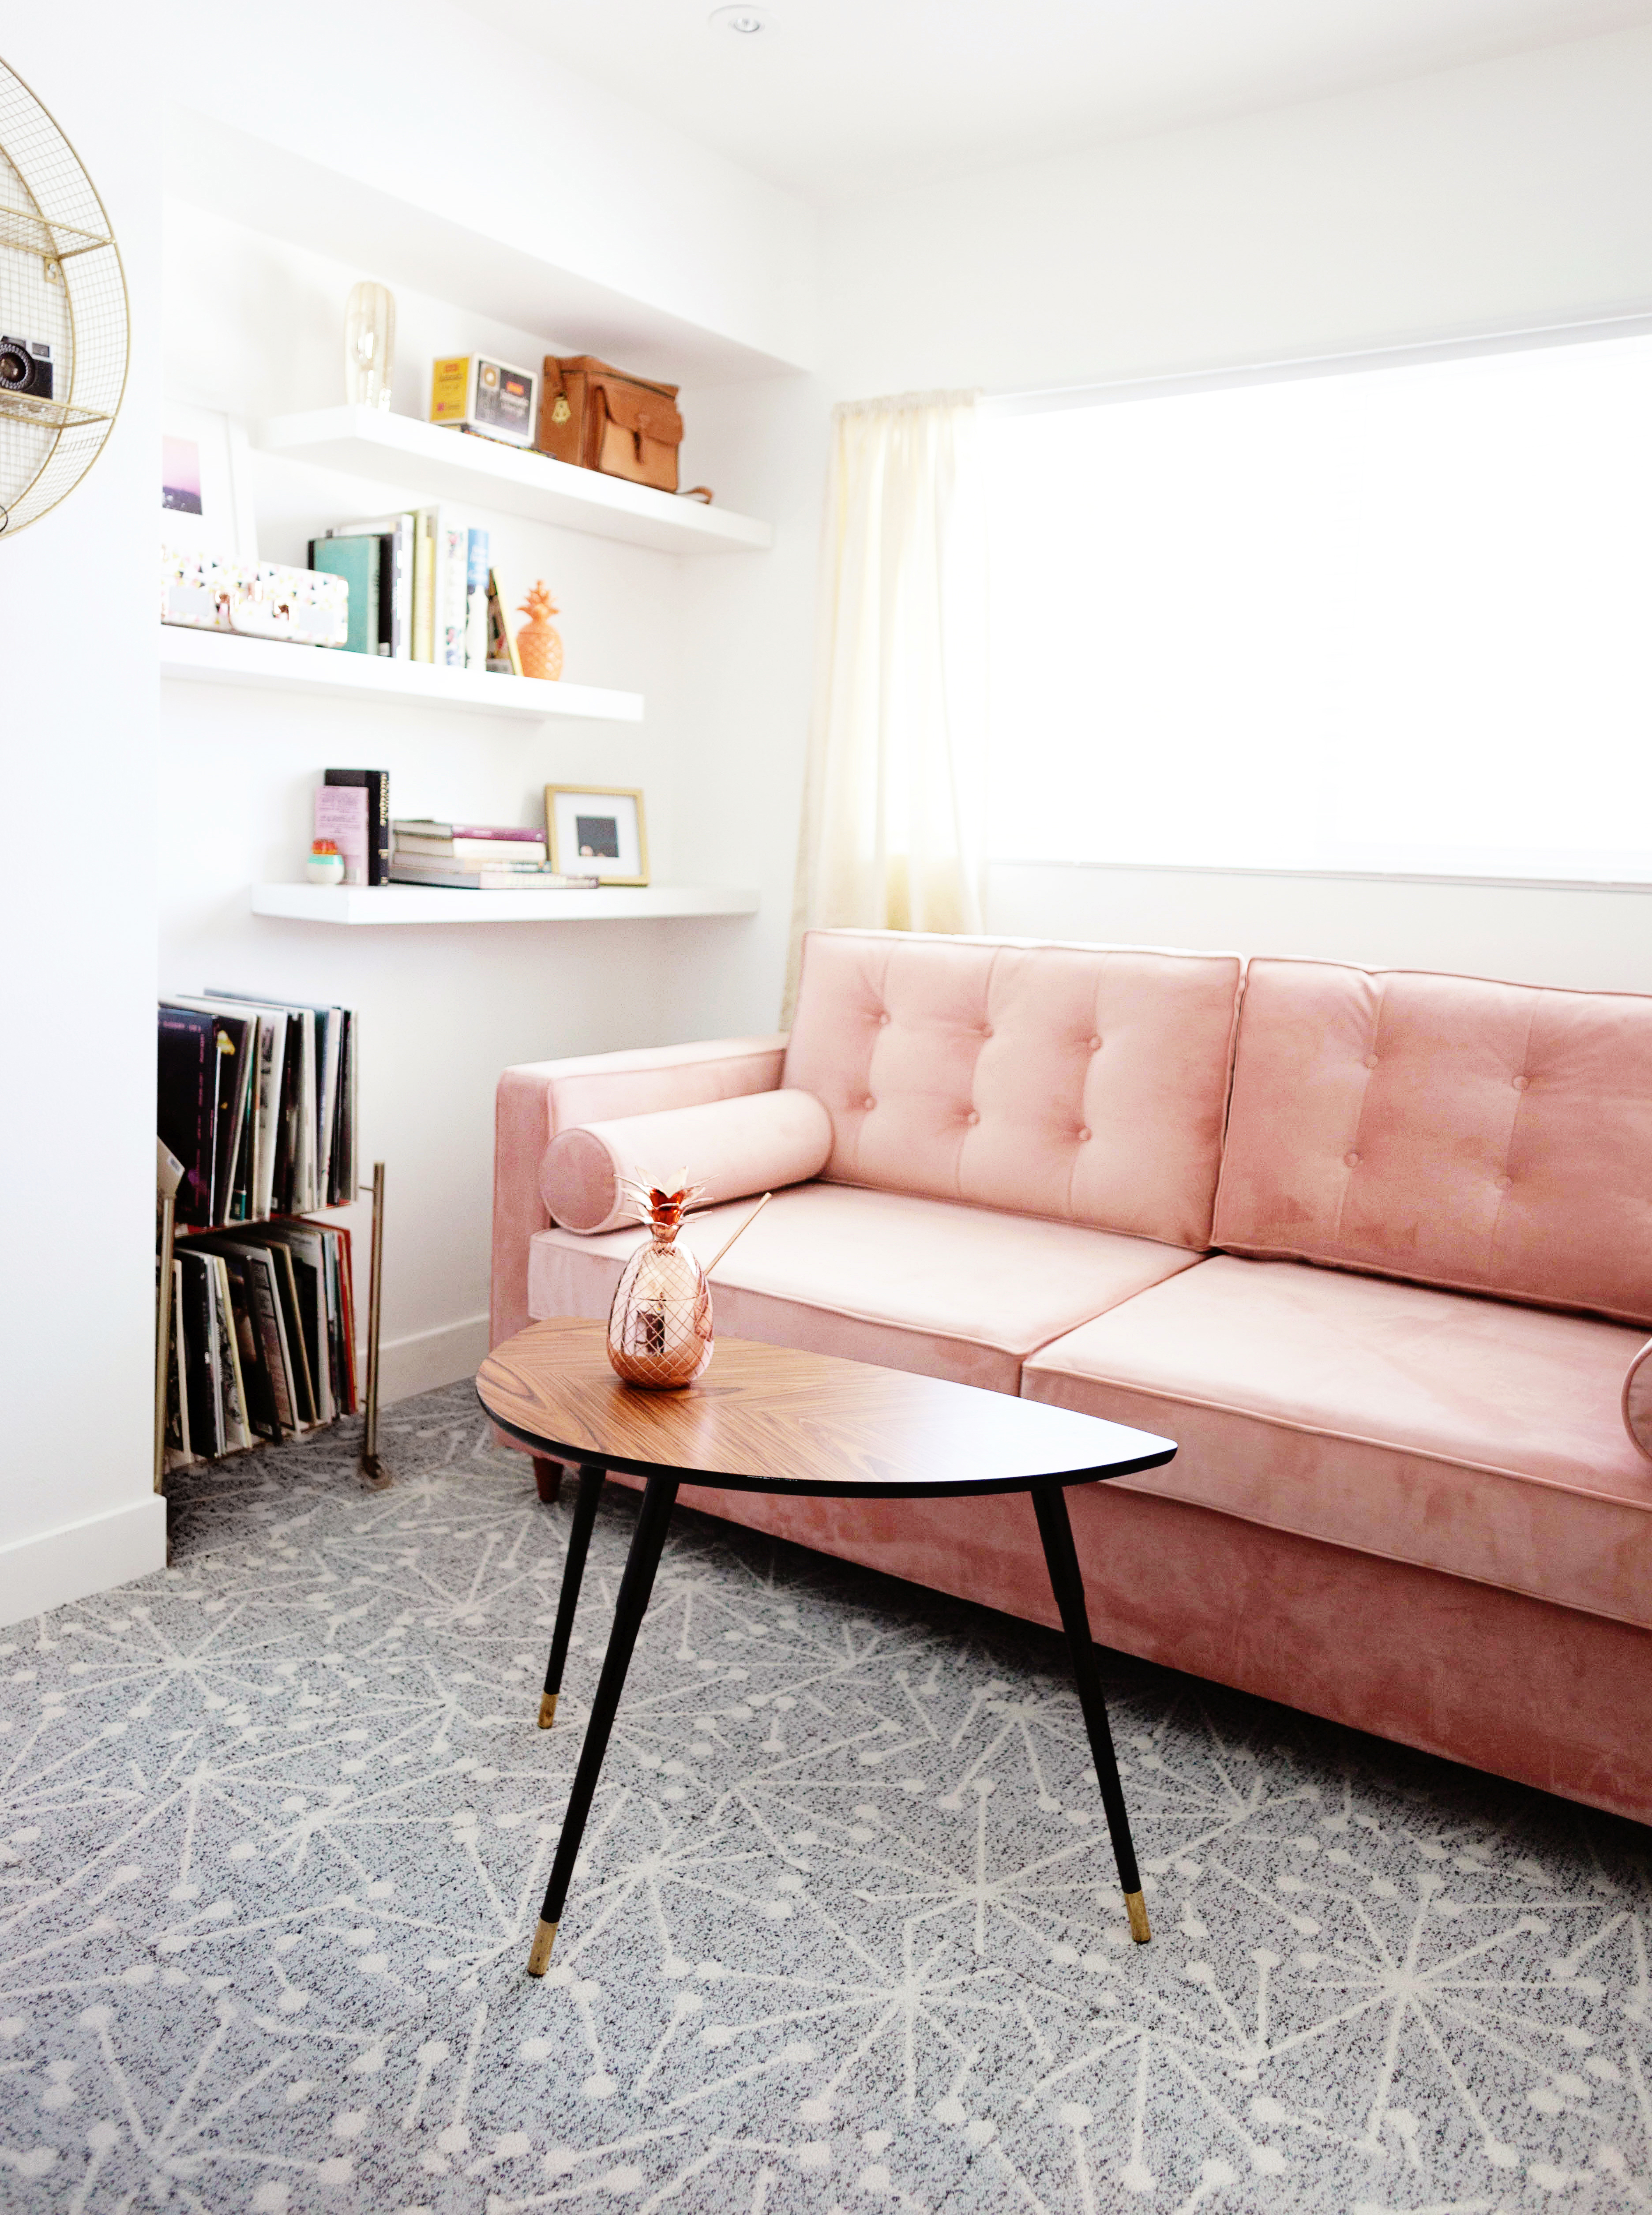
If you’re thinking about getting a little creative with your flooring, be sure to check out FLOR! They always have good sale events and you can purchase in expensive samples of all their patterns before committing.
The room isn’t completely done yet, but stay tuned for a few more DIYs and the final reveal!
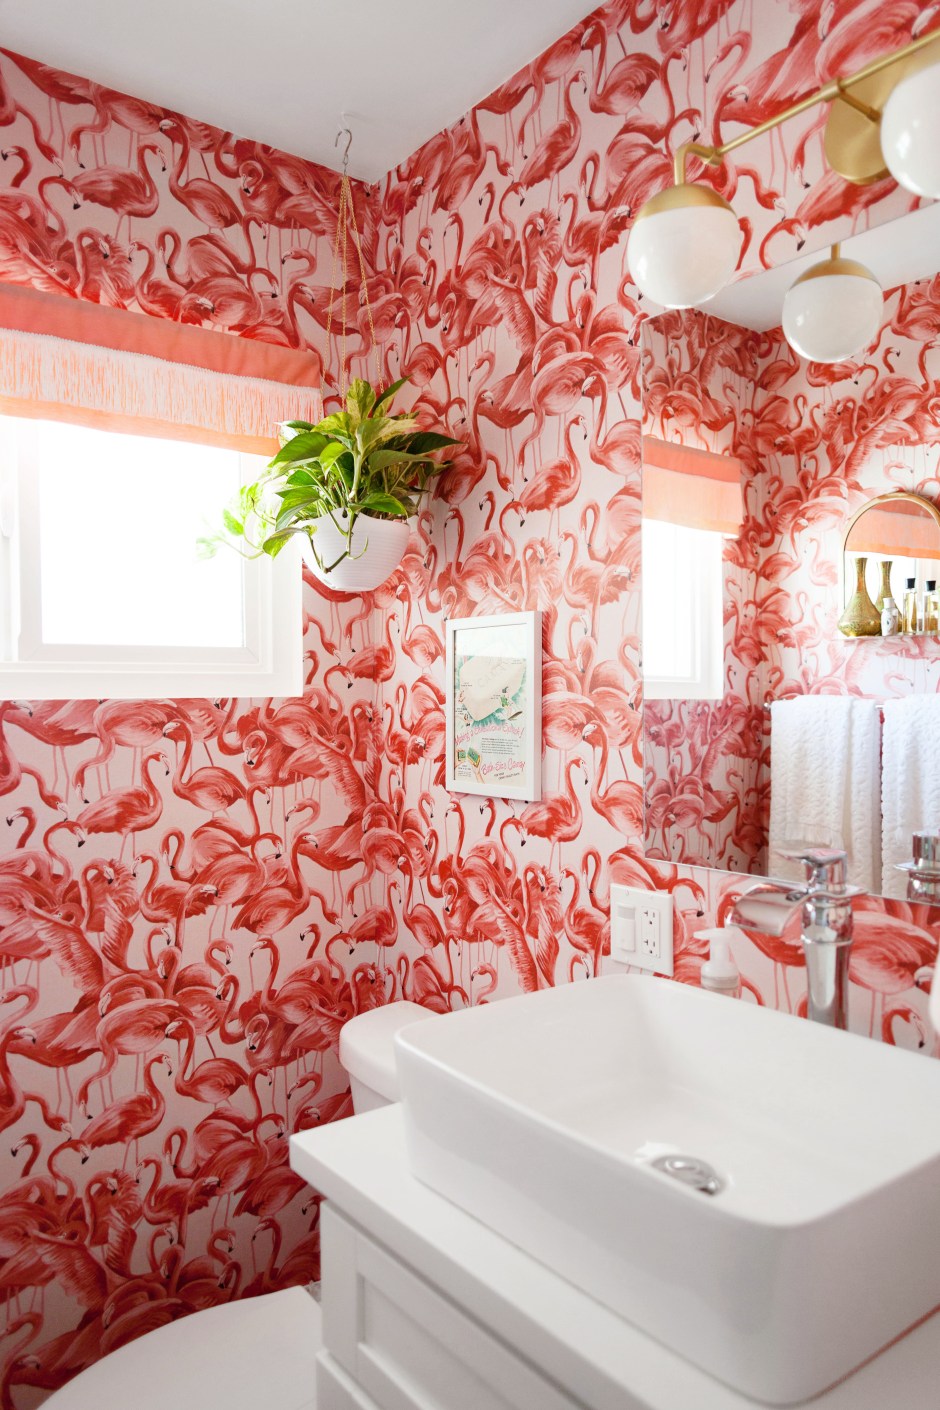
Around this time of year I always get the urge to change my decor up in at least one room. Chalk it up to spring fever I guess. Anyway, after having such a successful attempt at wallpapering a focal wall in my bathroom with Tempaper’s tropical print, I decided I was confident enough to go wild and do new look and wallpaper the entire bathroom. As soon as I saw Tempaper’s new peel and stick flamingo print I knew it was meant to be and immediately jumped on the chance.
To quickly jog your memory, this is what my bathroom looked like before.
 And here’s the new new!
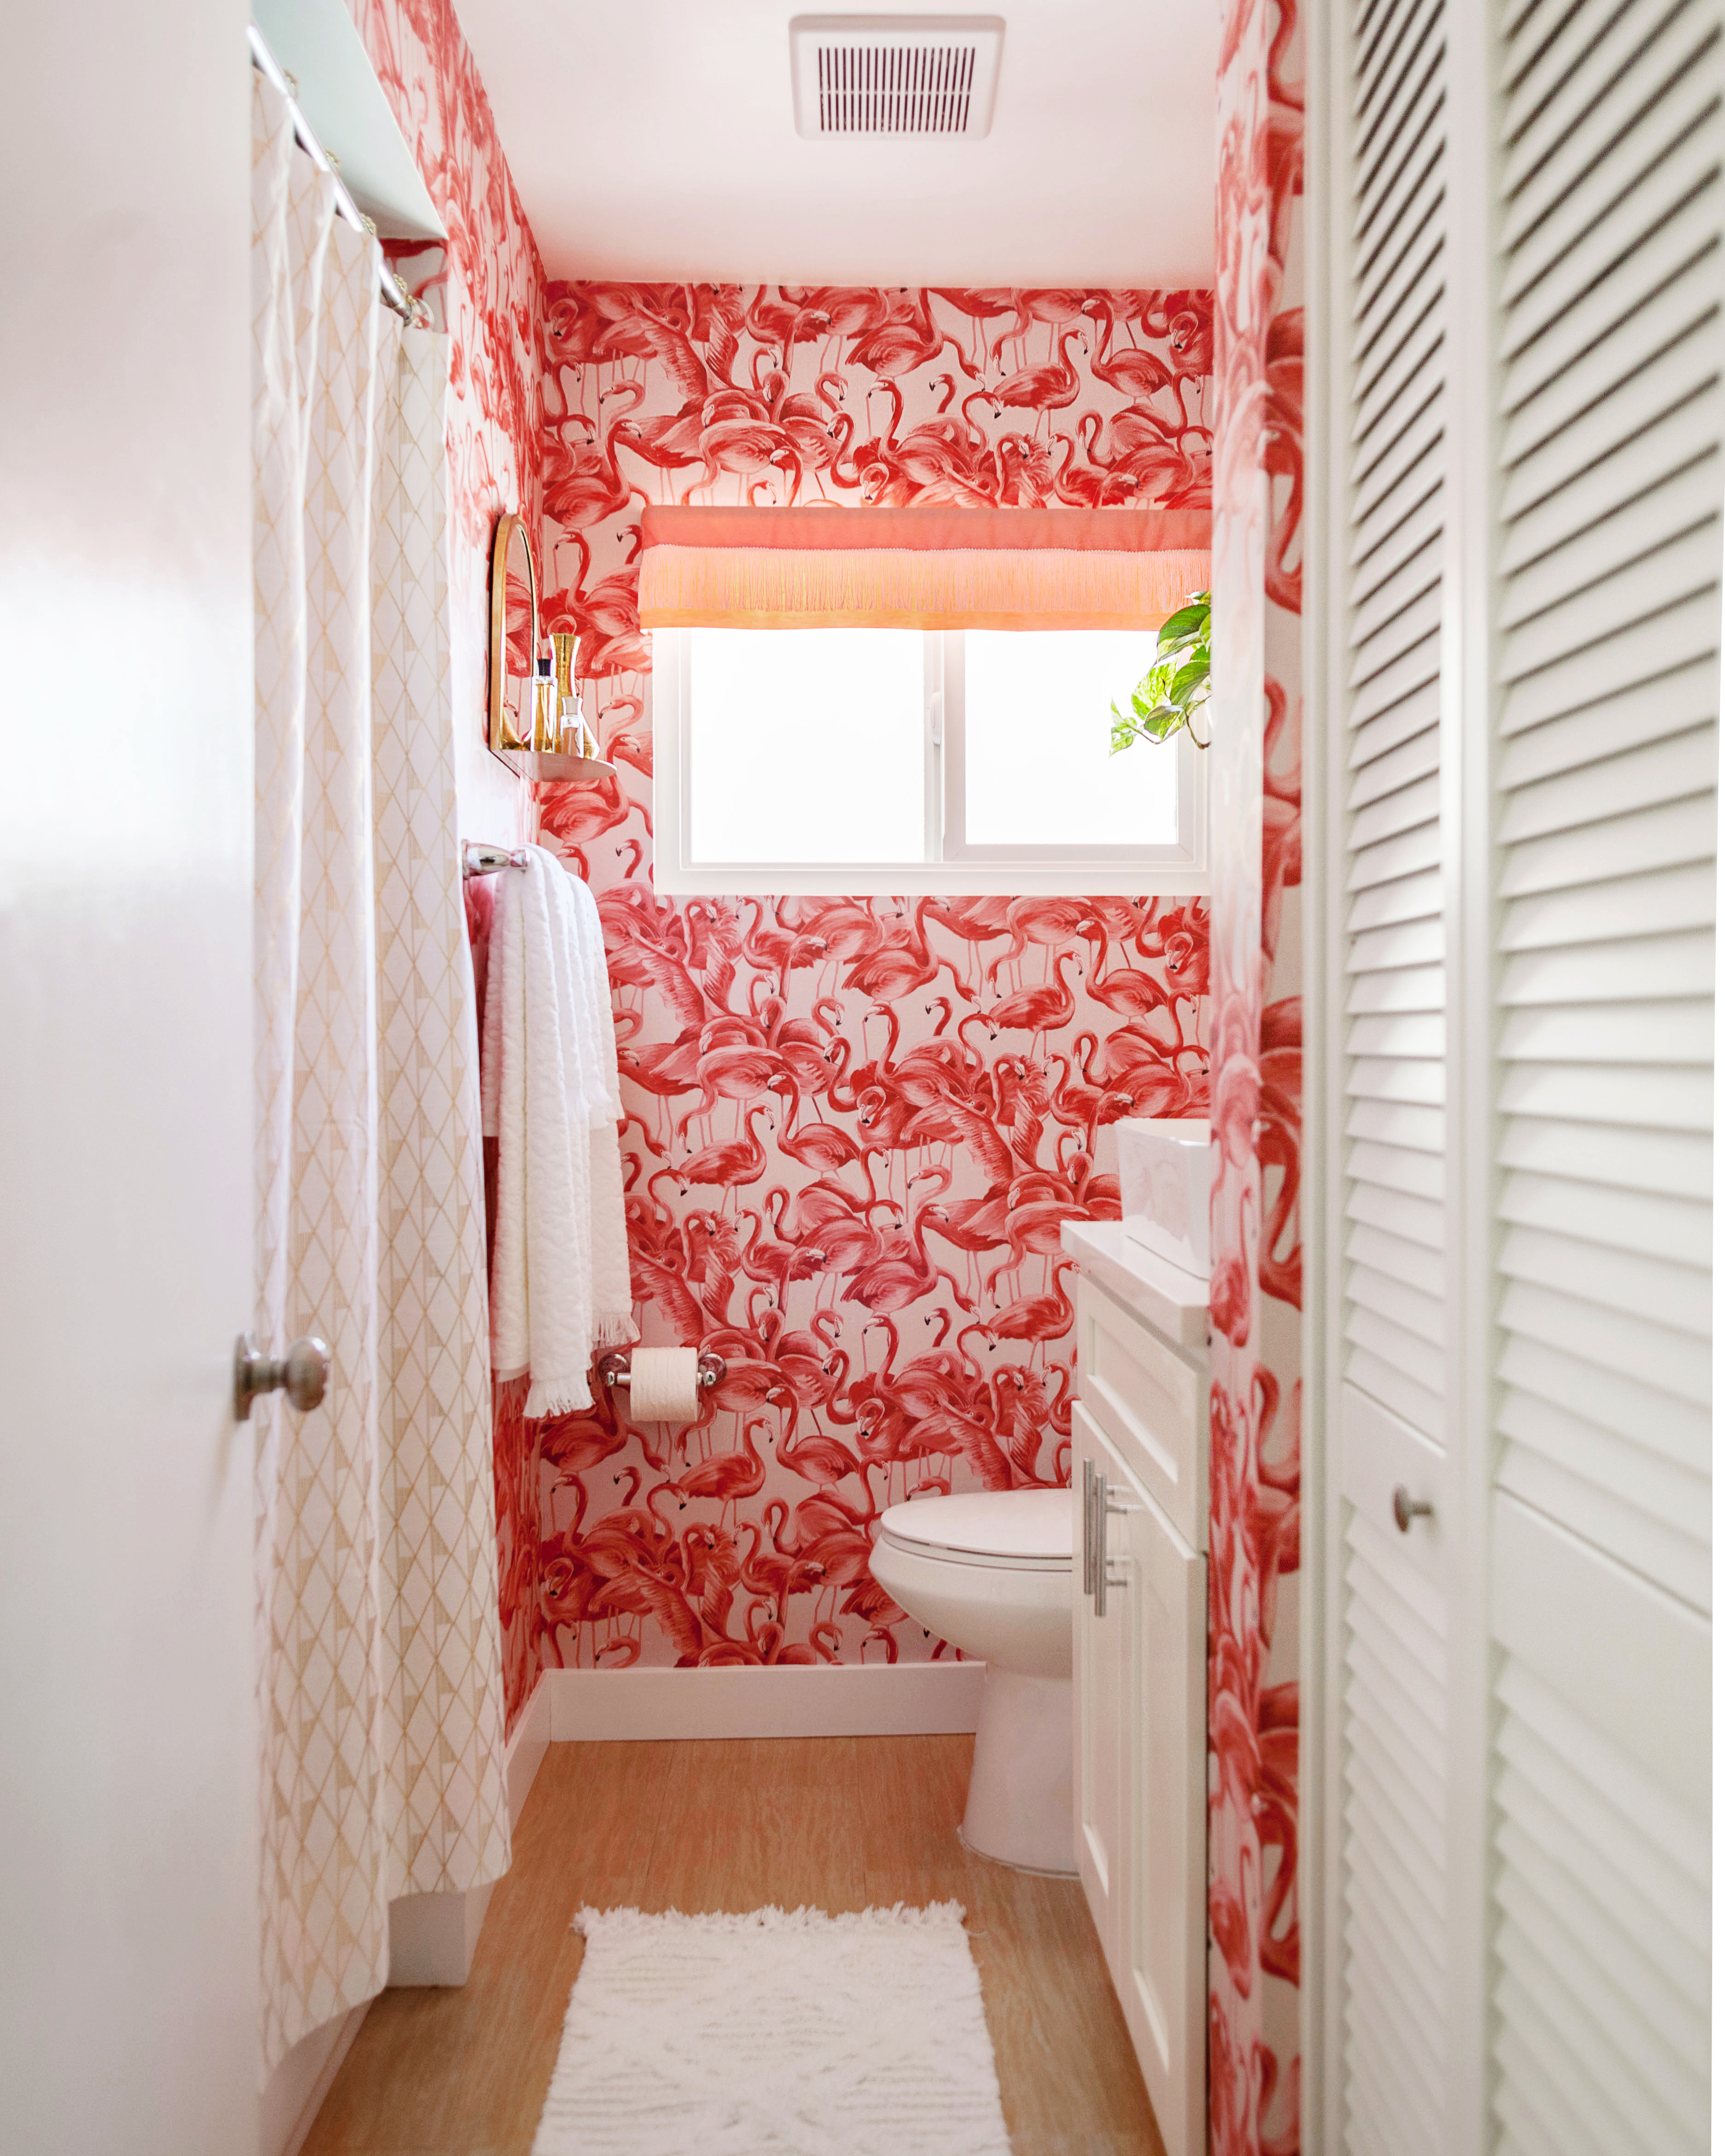 It’s kind of crazy how it makes the room feel bigger. I thought it might feel closed in with so much pattern on the walls, but nope! It works. The print is so lovely. It’s a lovely mix of soft pink and reddish pink that looks amazing against white and gold. As always it was easy to work with and very forgiving. You can refer to my previous post for installation tips that work for me.
  I also added a few new accessories.
 I got this hanging planter on Amazon and changed out the original chain with one from the jewelry making section at Jo-Ann.
 I kept the original window valance and shortened it in order to let more light in. I loved the fringe on the new towels and rug so I added some chainette fringe to tie it all together.
 Above the toilet I removed a badly installed towel rack and replaced it with a cute framed vintage Camay Soap ad.
 I replaced the light fixture with a new mid-century inspired two orb vanity light from Lucent Lightshop.
 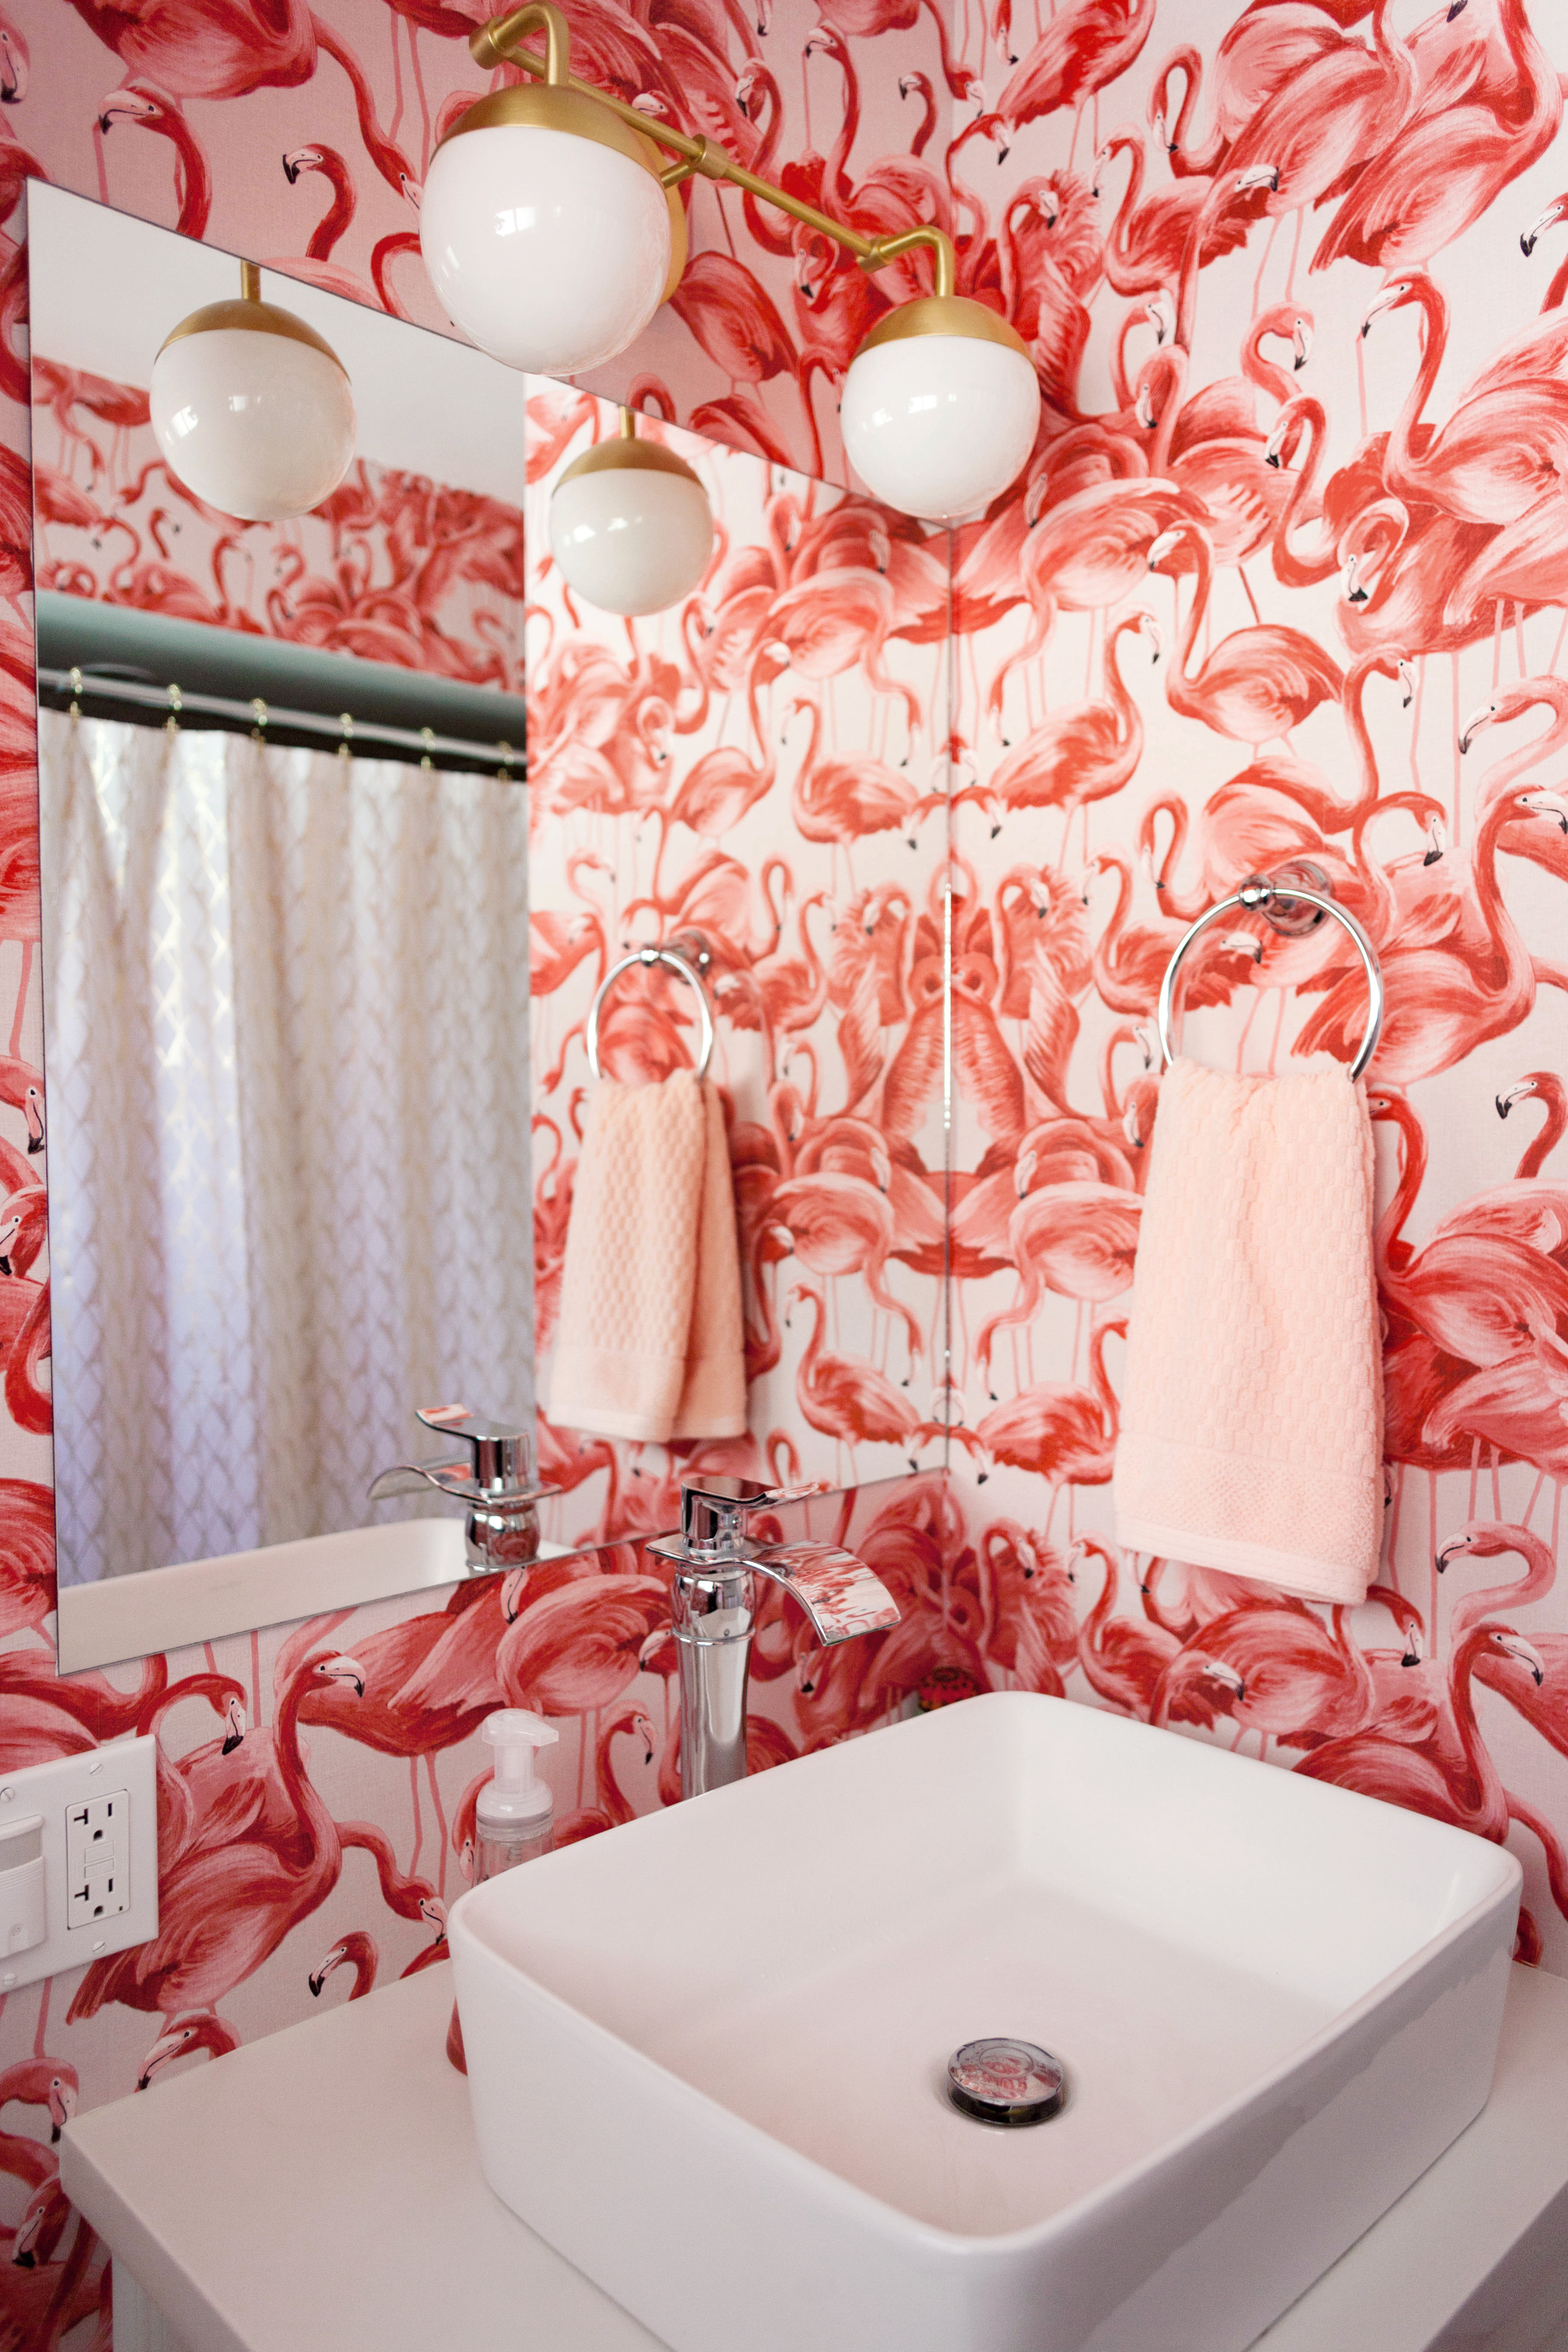 I personally like mixing metals so I went with brass, of course.
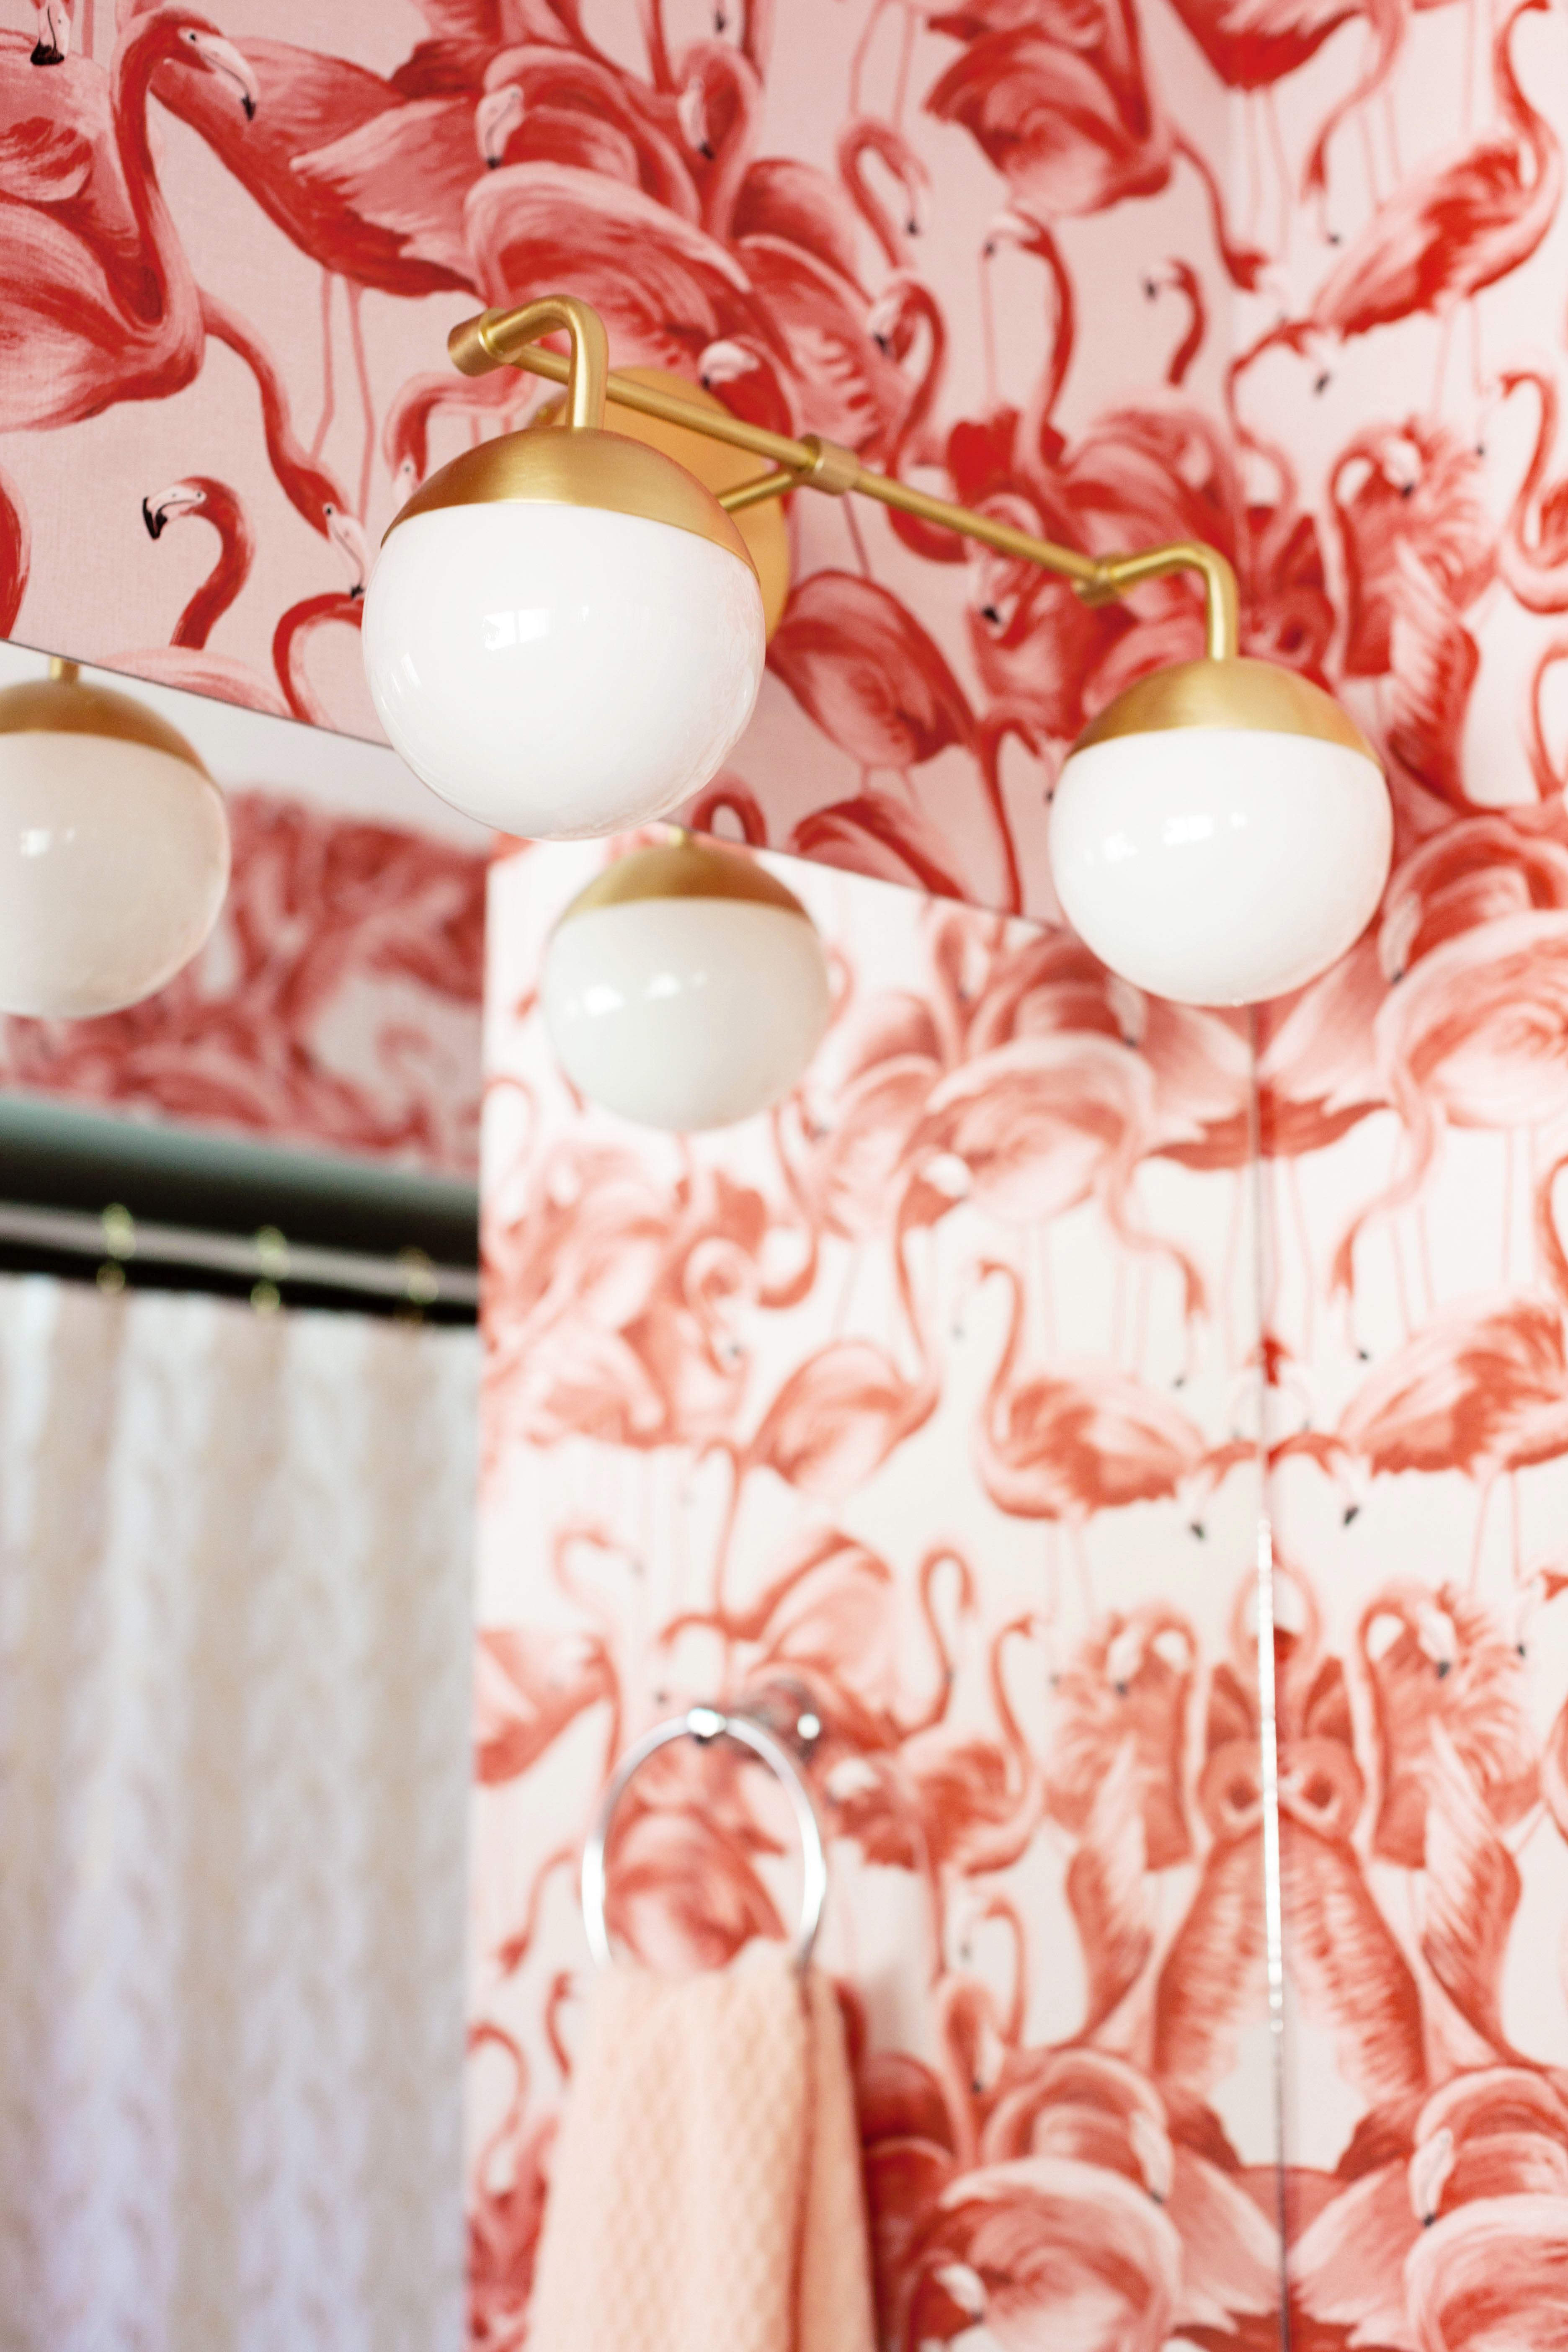
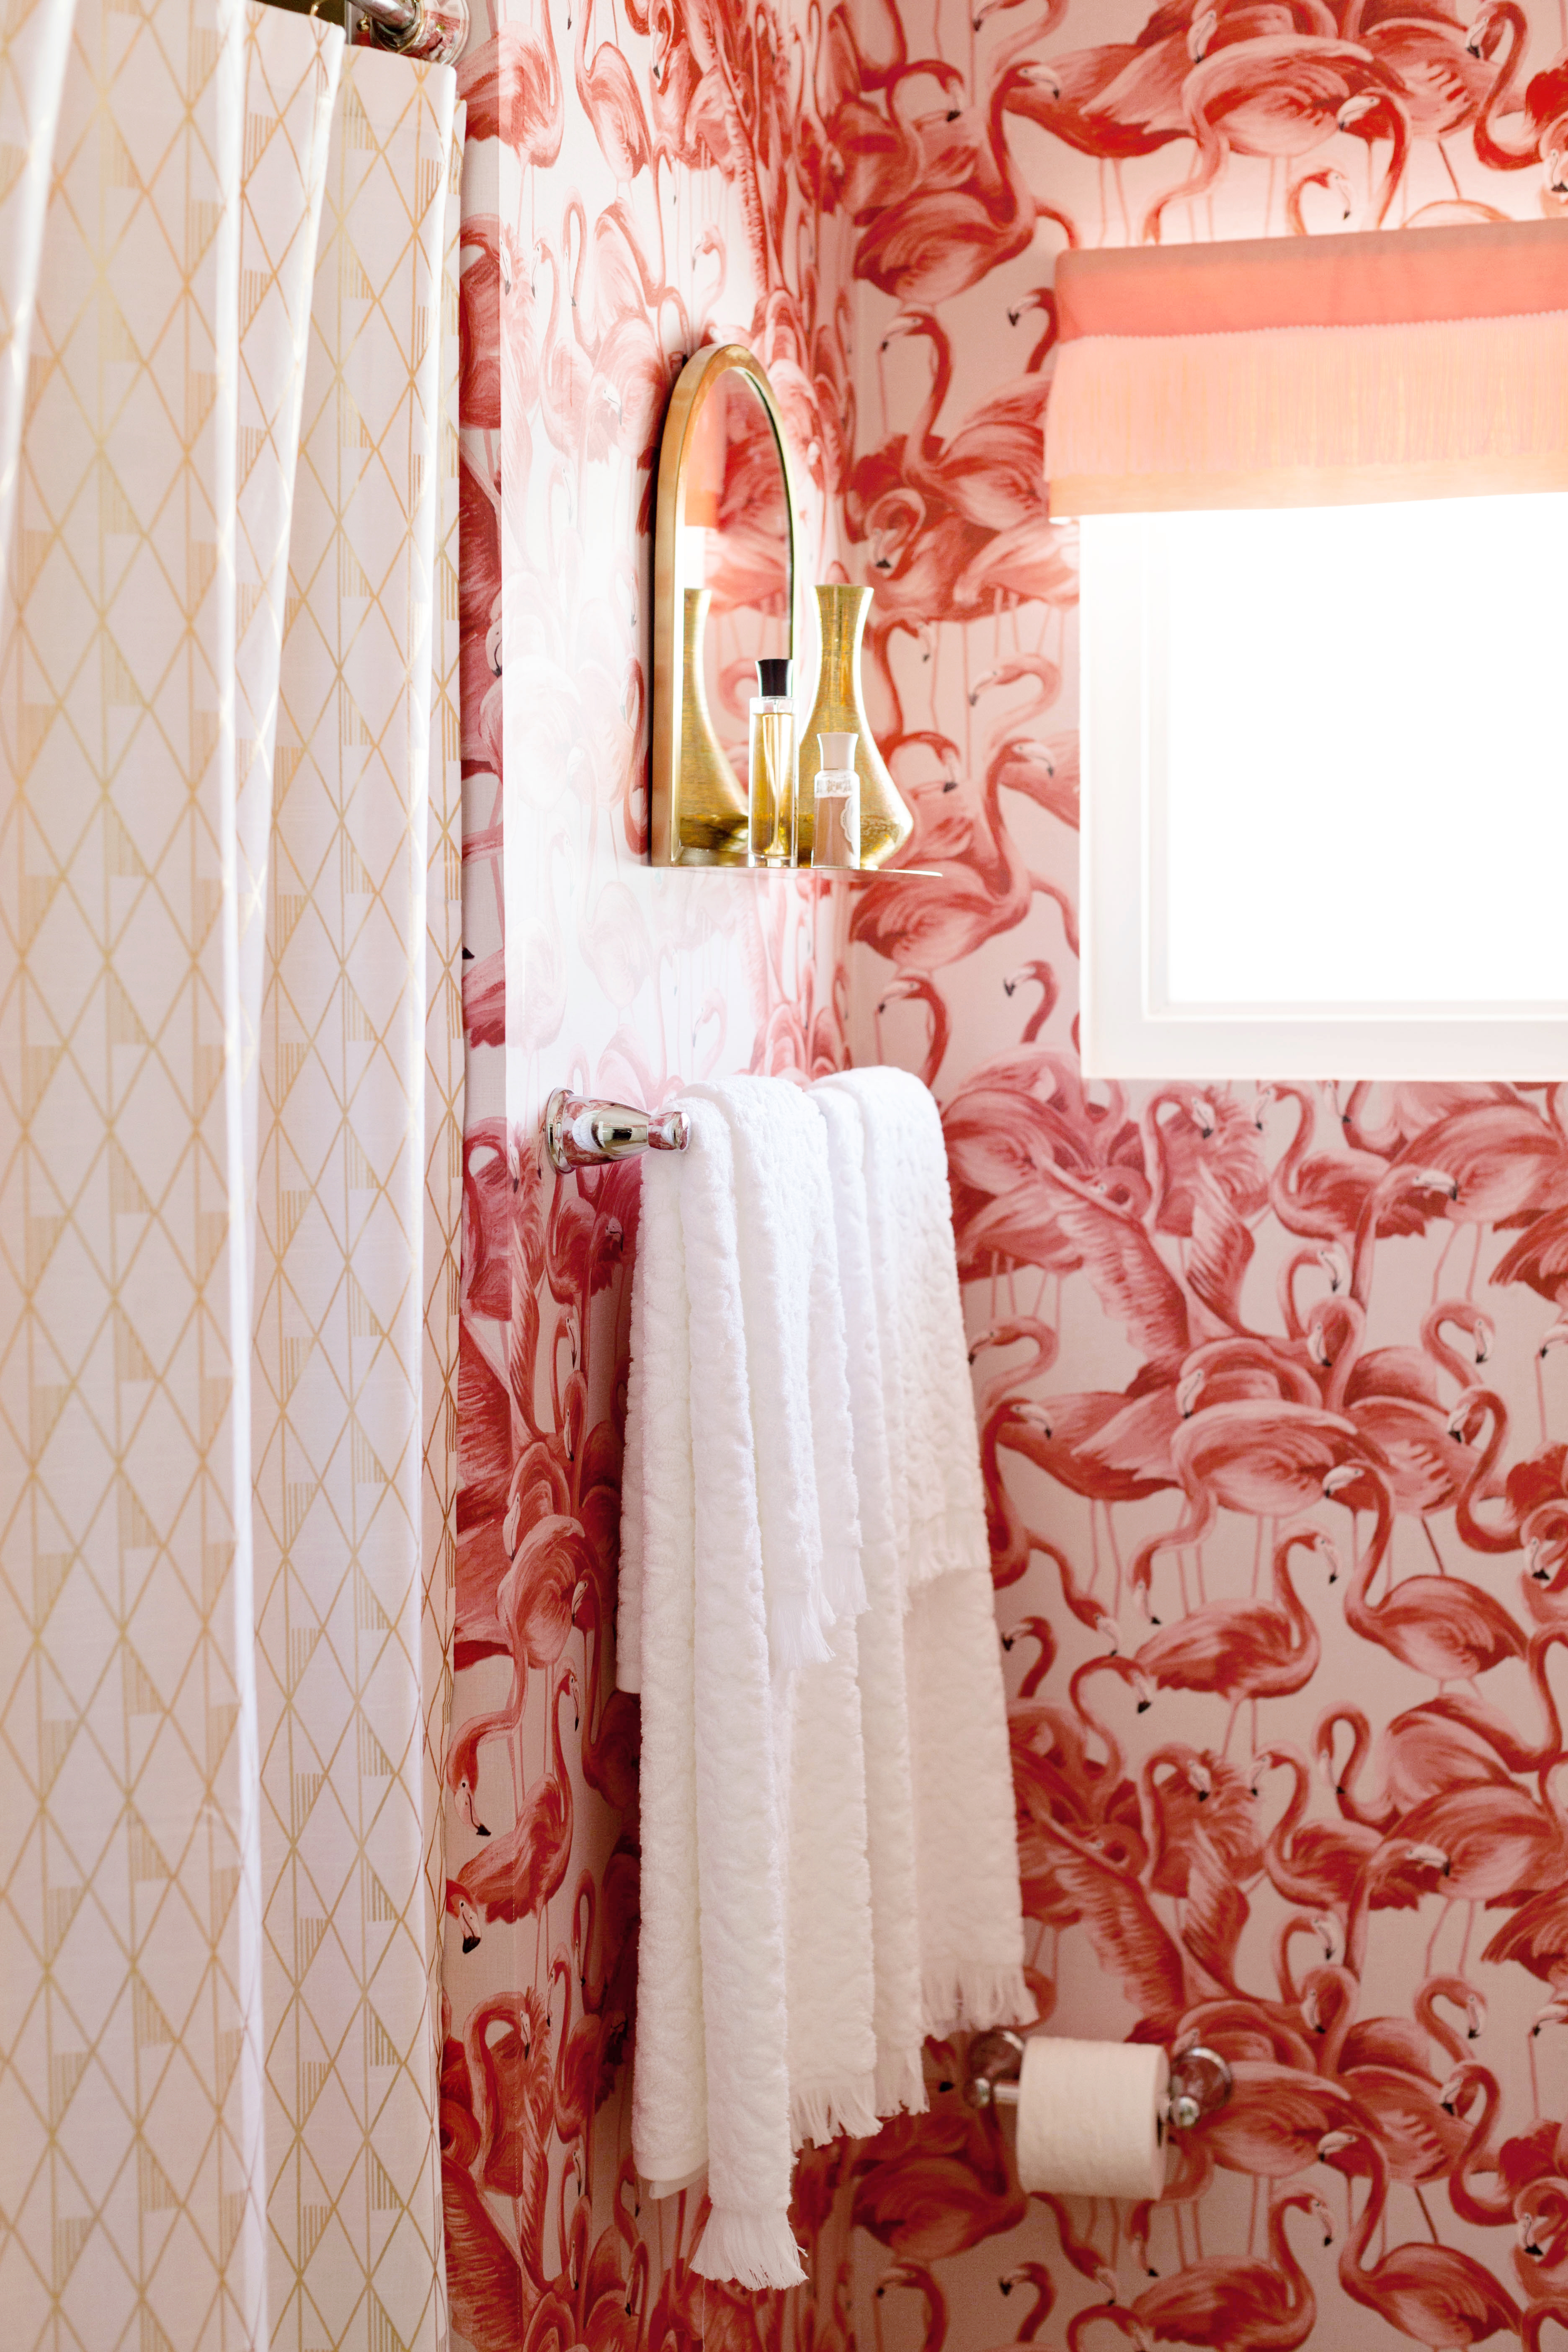 Over on the other wall I picked up a brass mirror/shelf from Target’s Project 62 line and a new metallic gold and white geometric shower curtain from Project 62 as well.
 The new “fancy towels” (you know, the kind you’re not allowed to use), are from Target’s Opalhouse line. I love the texture and fringe.
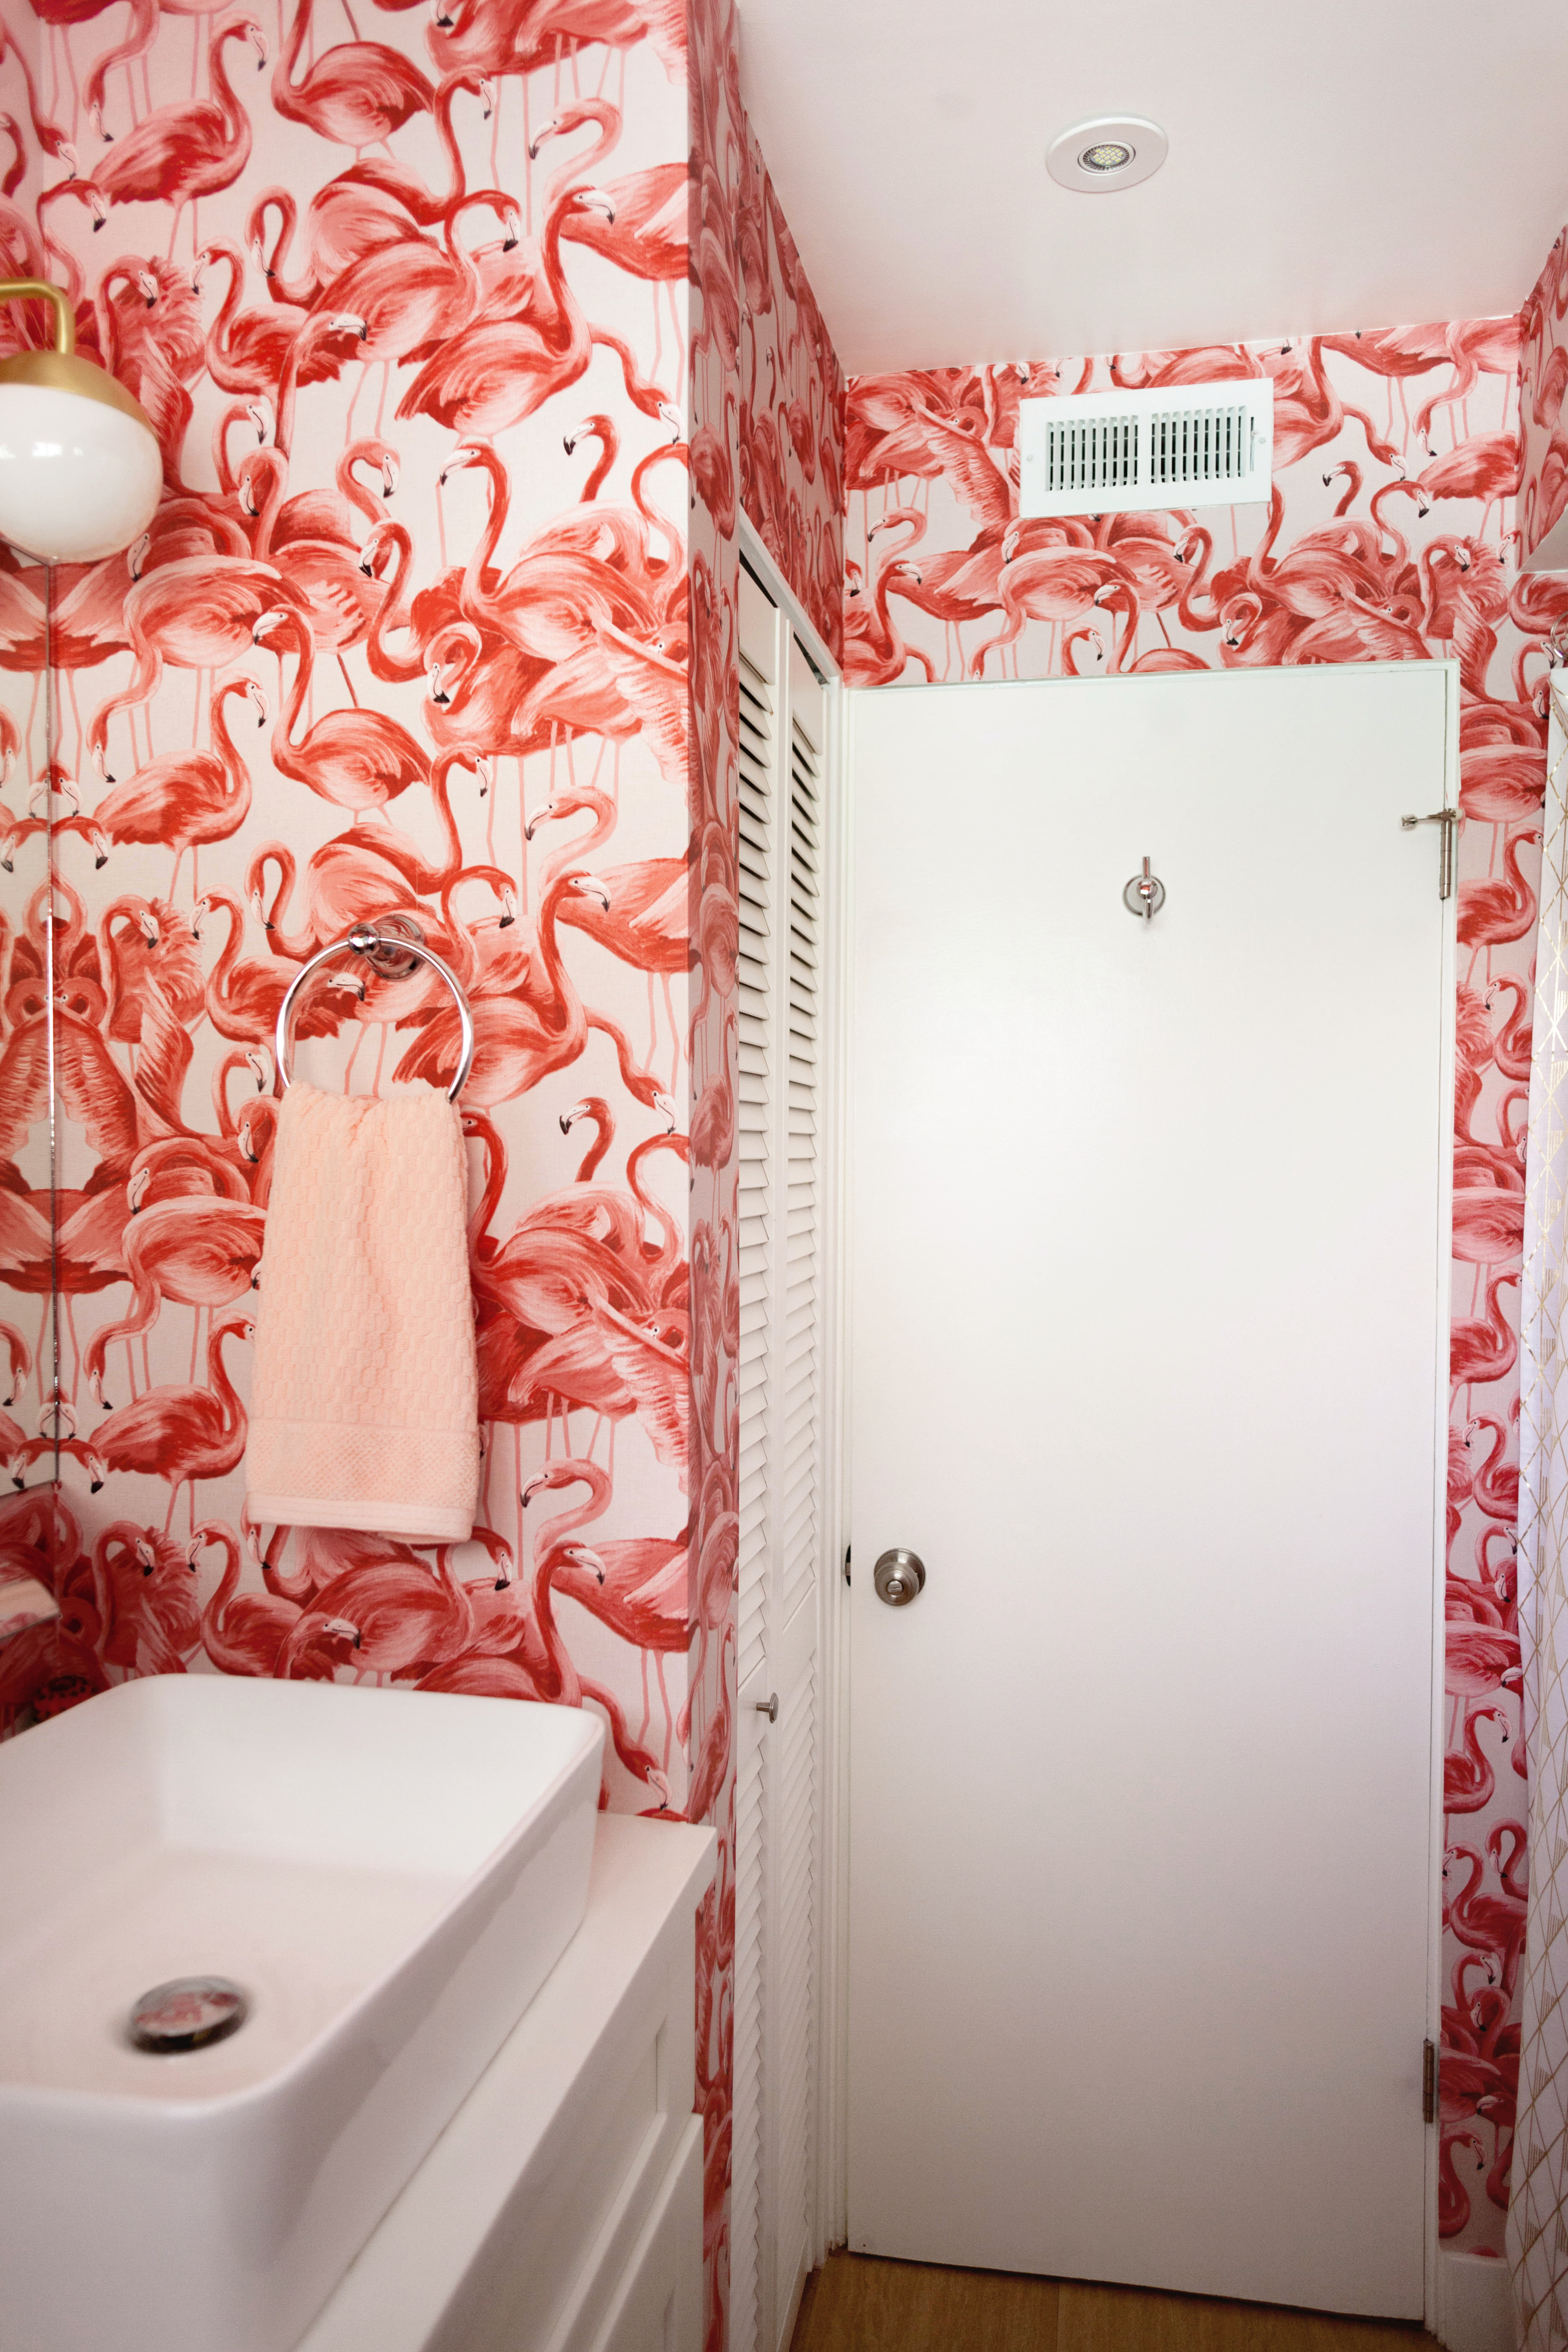 I followed the wallpaper all the way around the room, meeting the last seam in the most inconspicuous corner. Everything is reflected in the mirrors so it’s all pretty much visible from every view point, which was intentional and I’m glad it worked out.
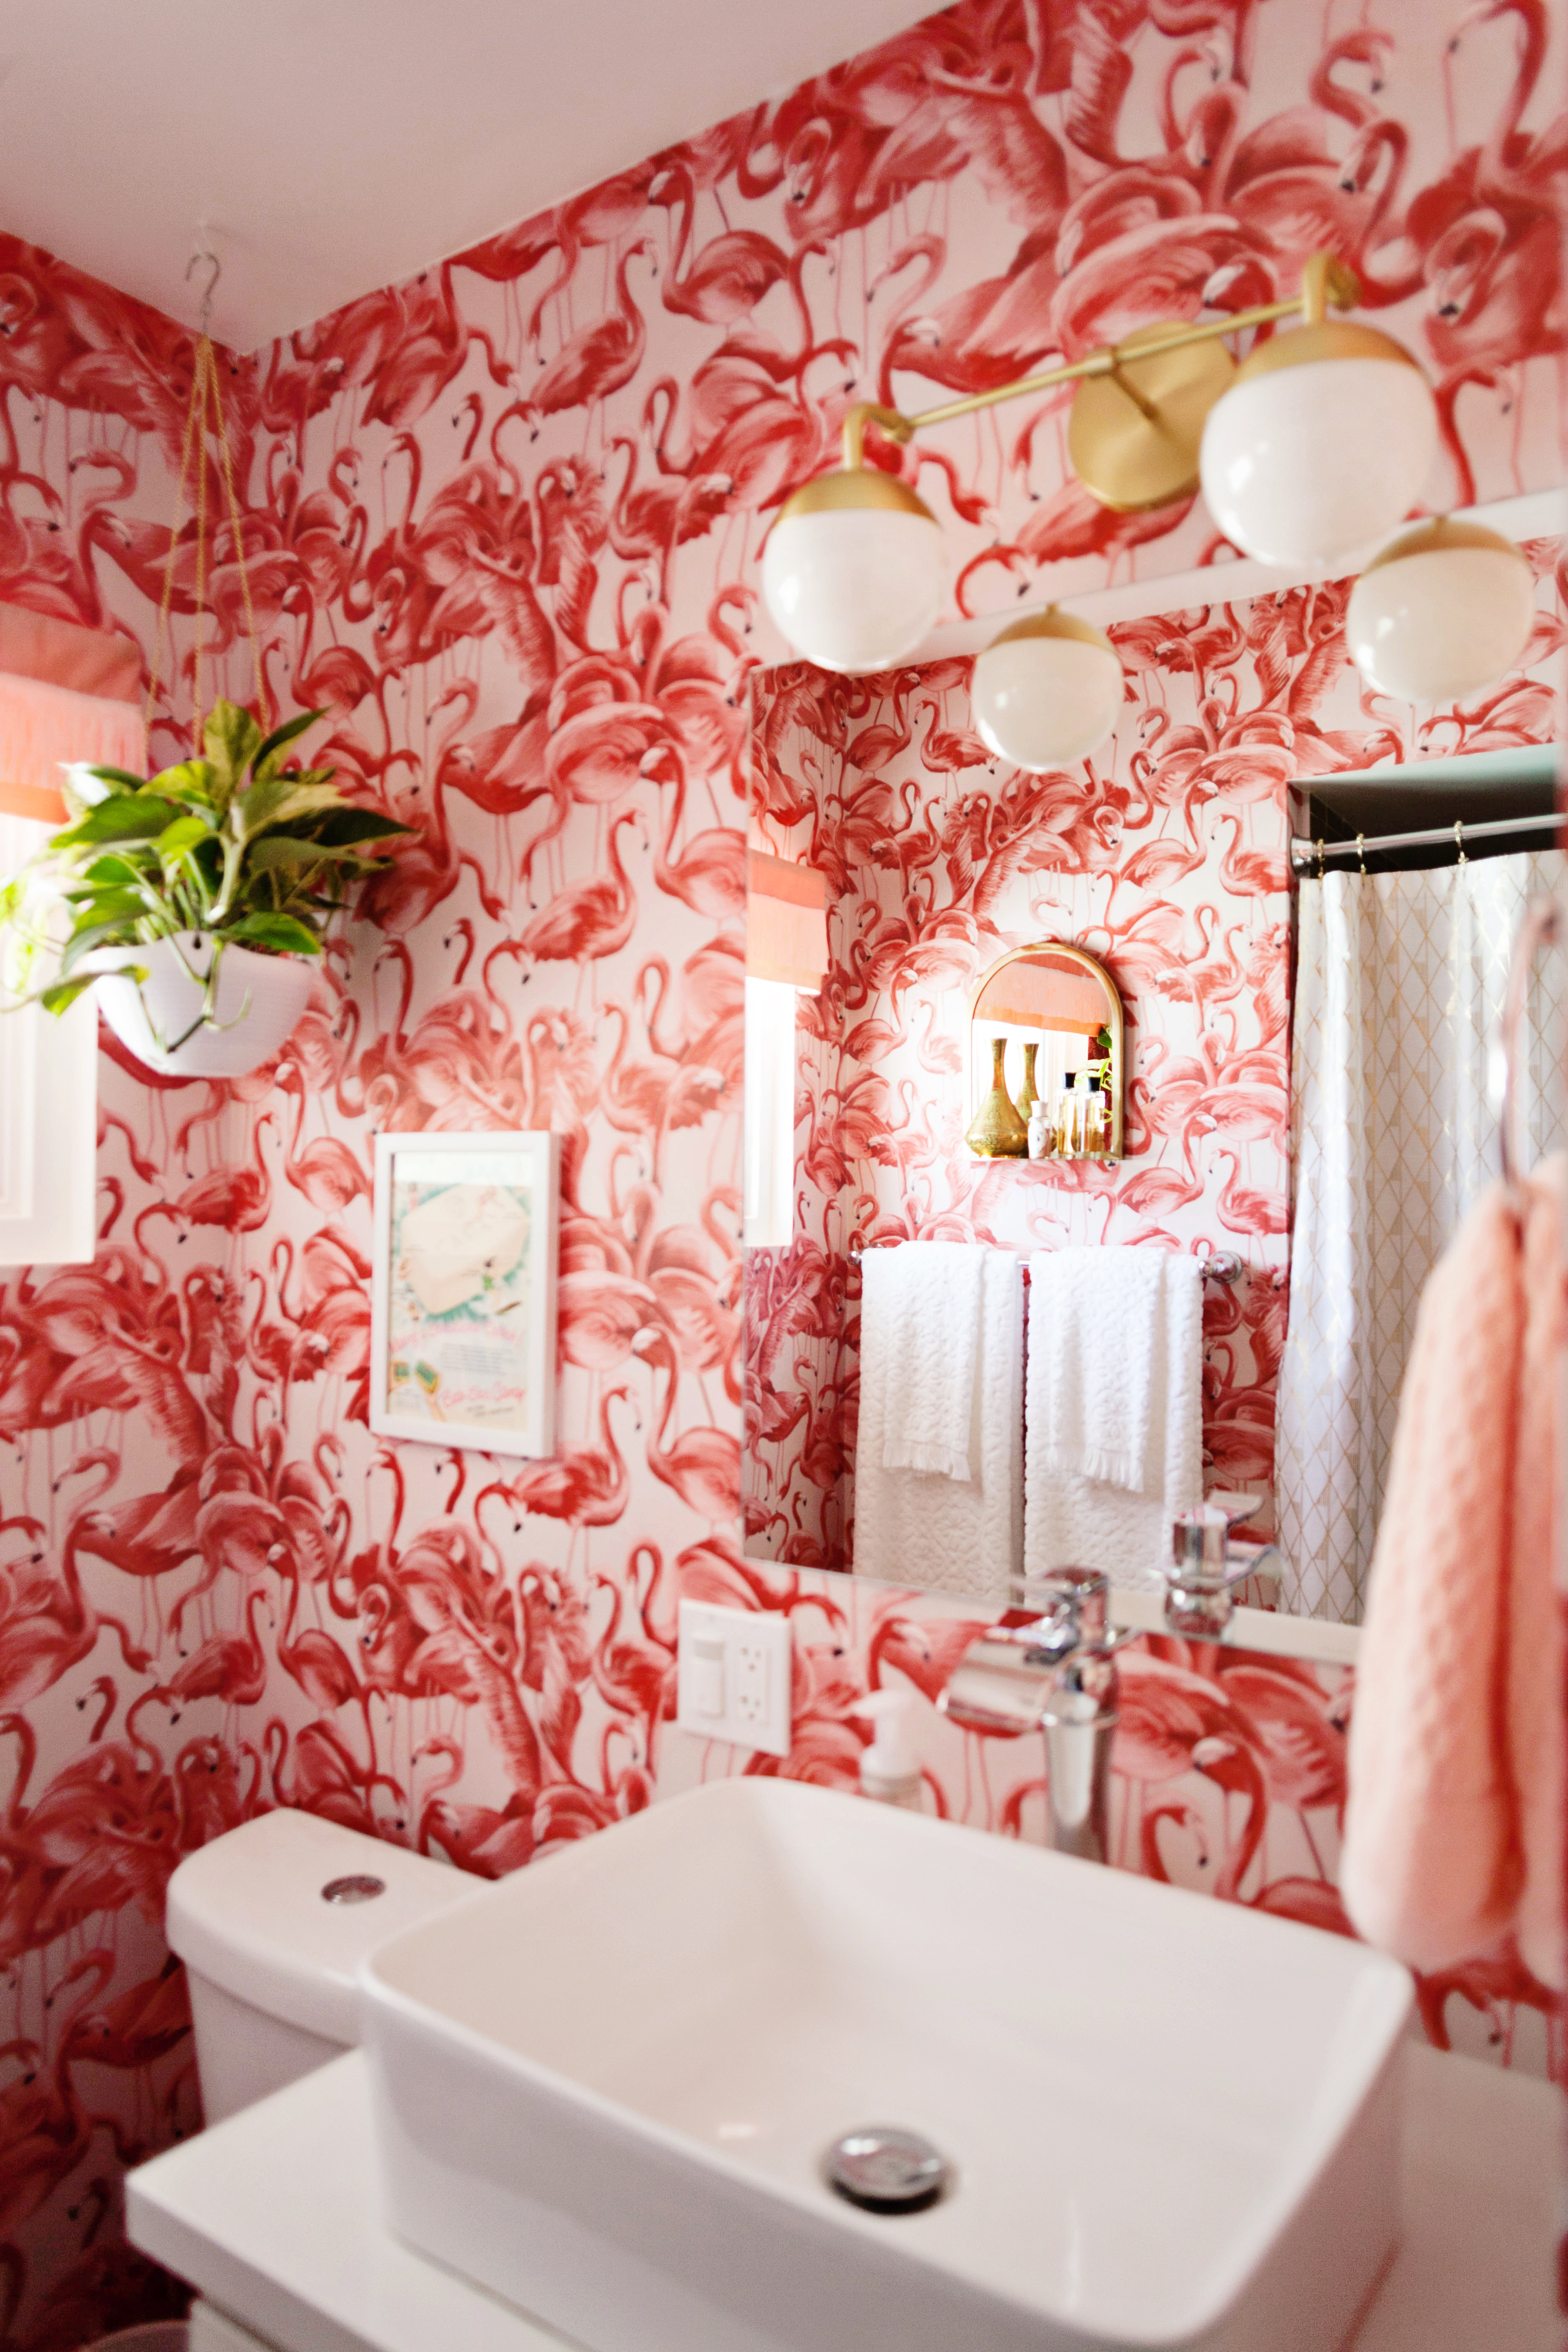 There it is! This year’s new bathroom look. I looooove the way it all came together. Yay!
Next up, the guest room and patio. Stay tuned!
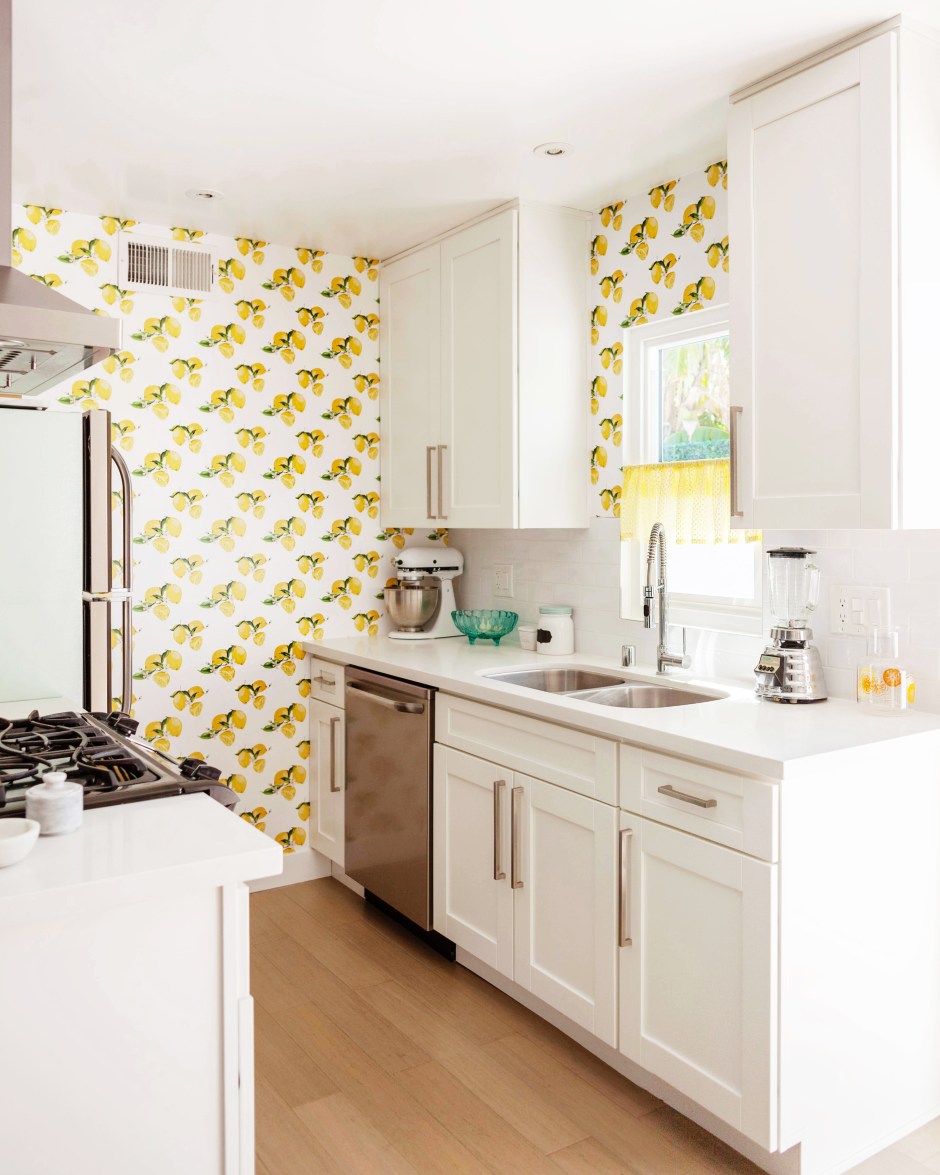
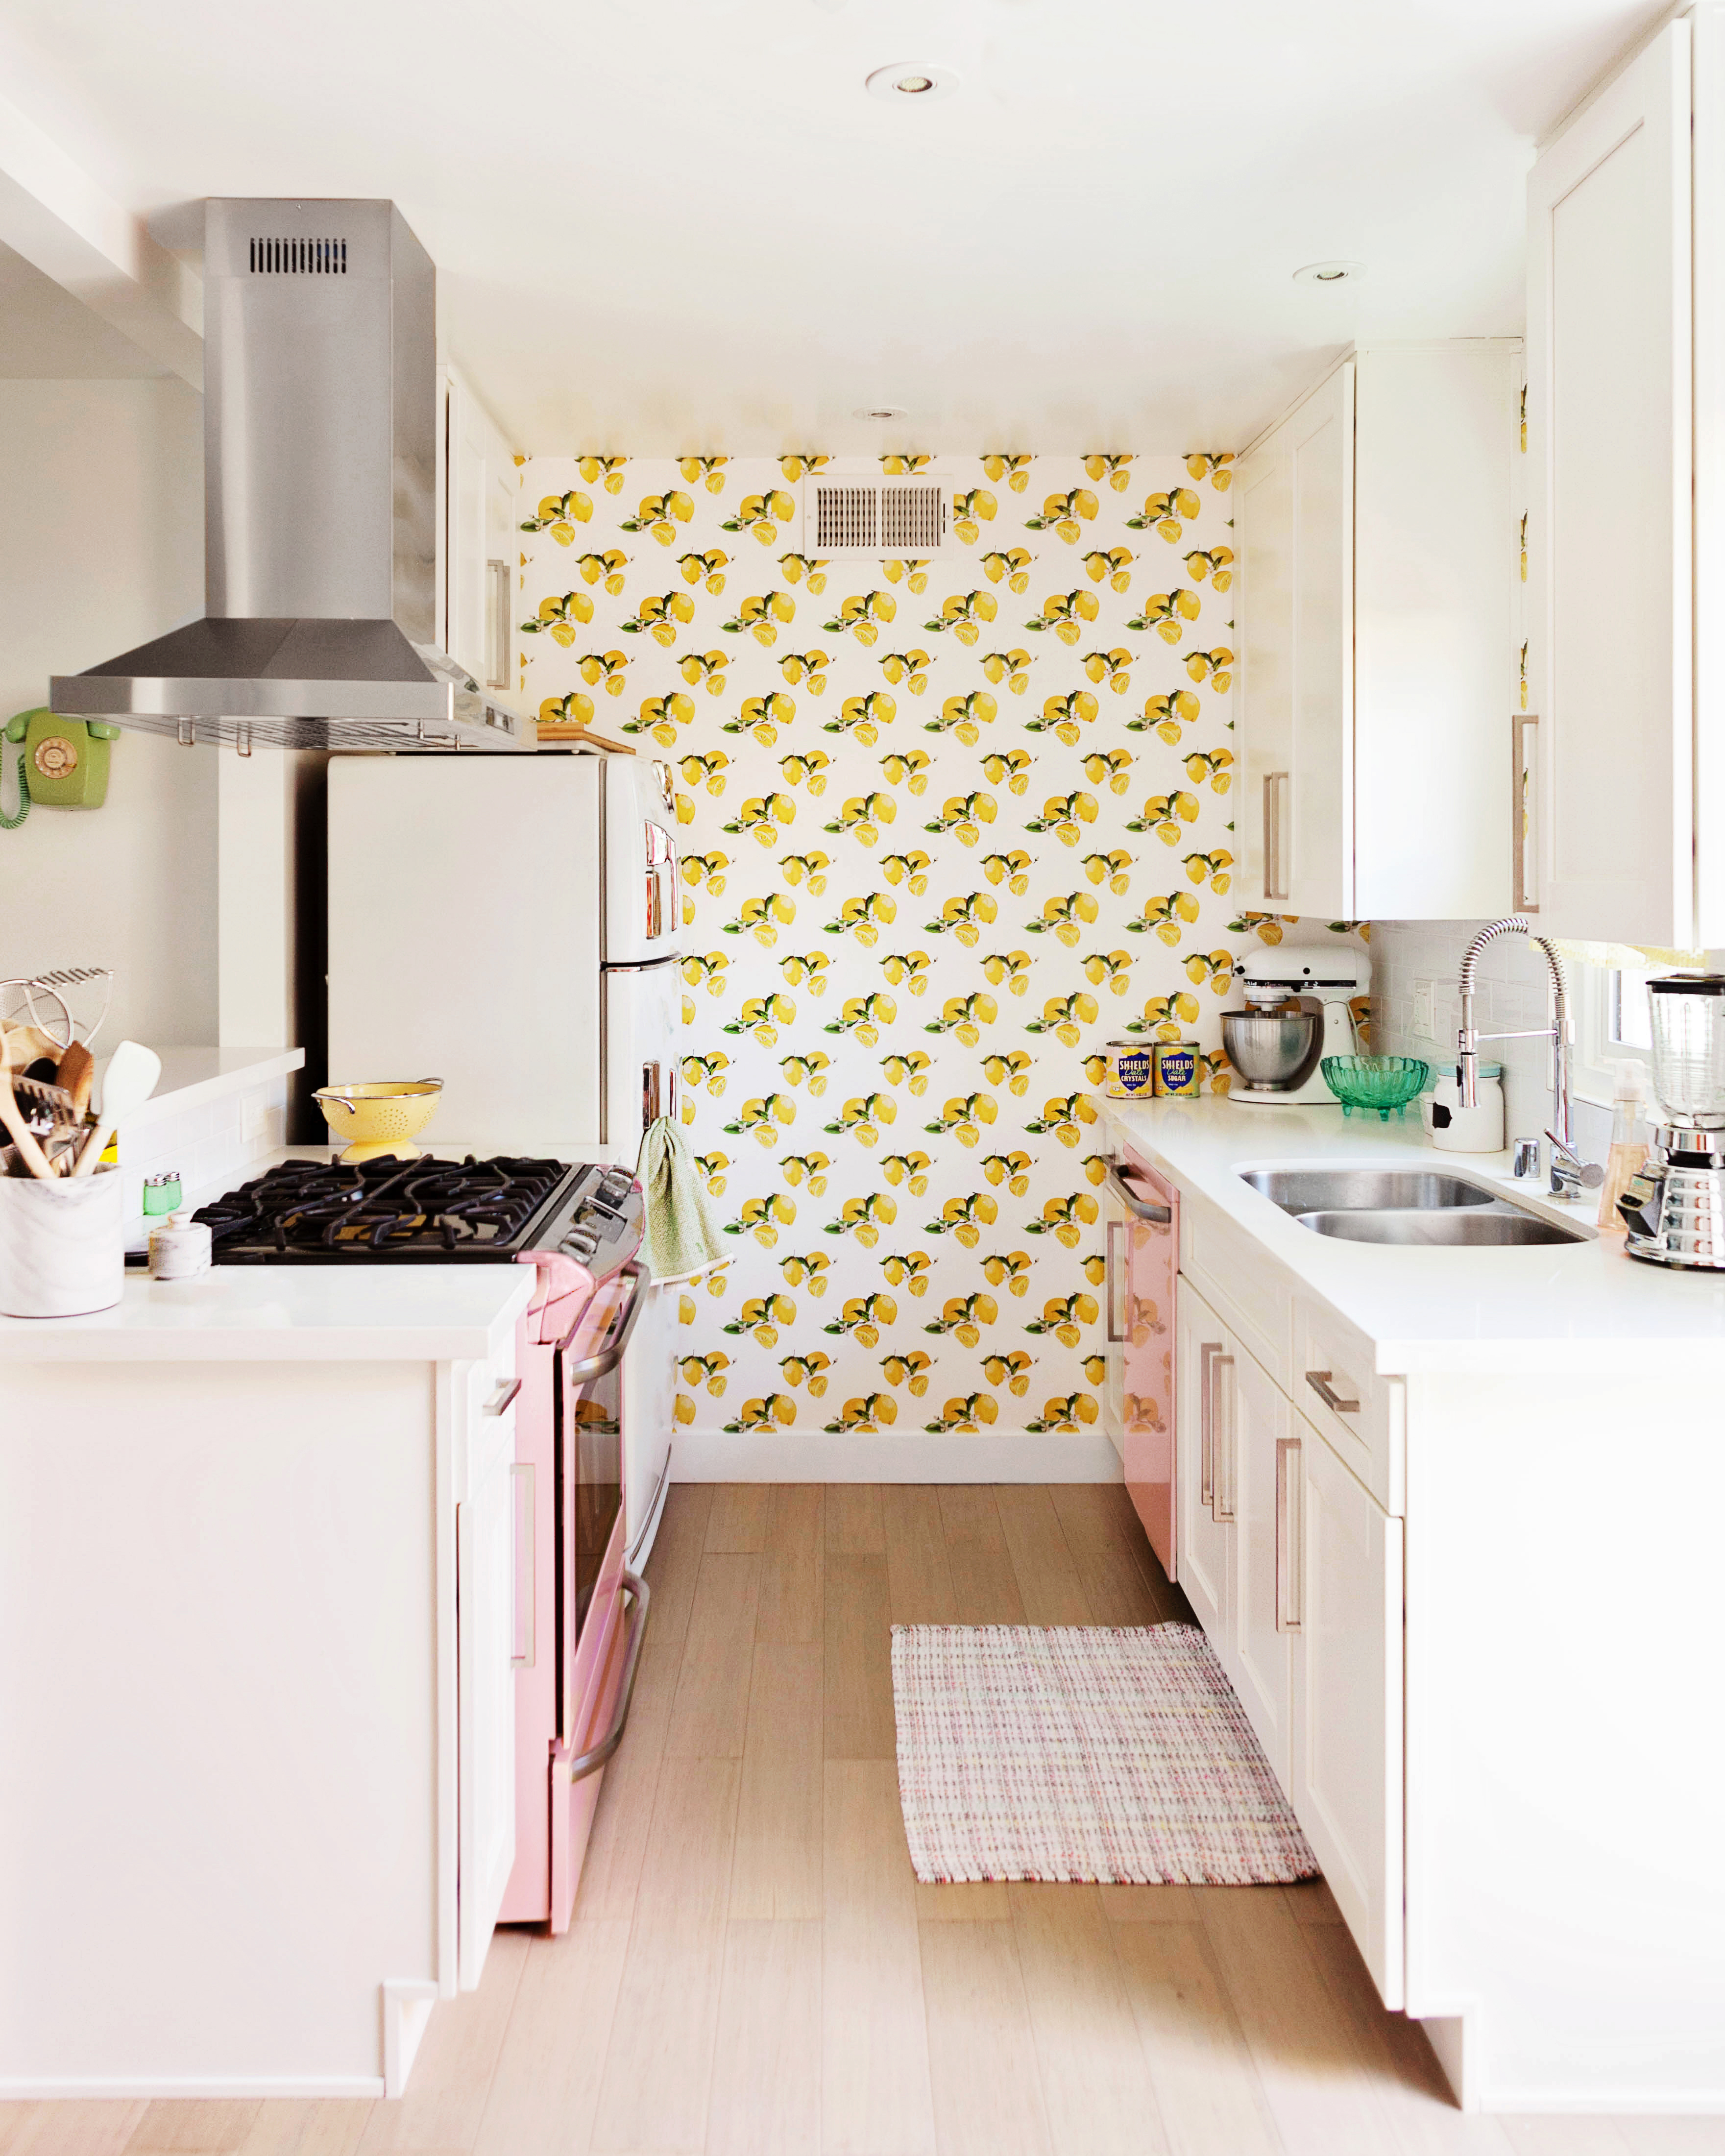
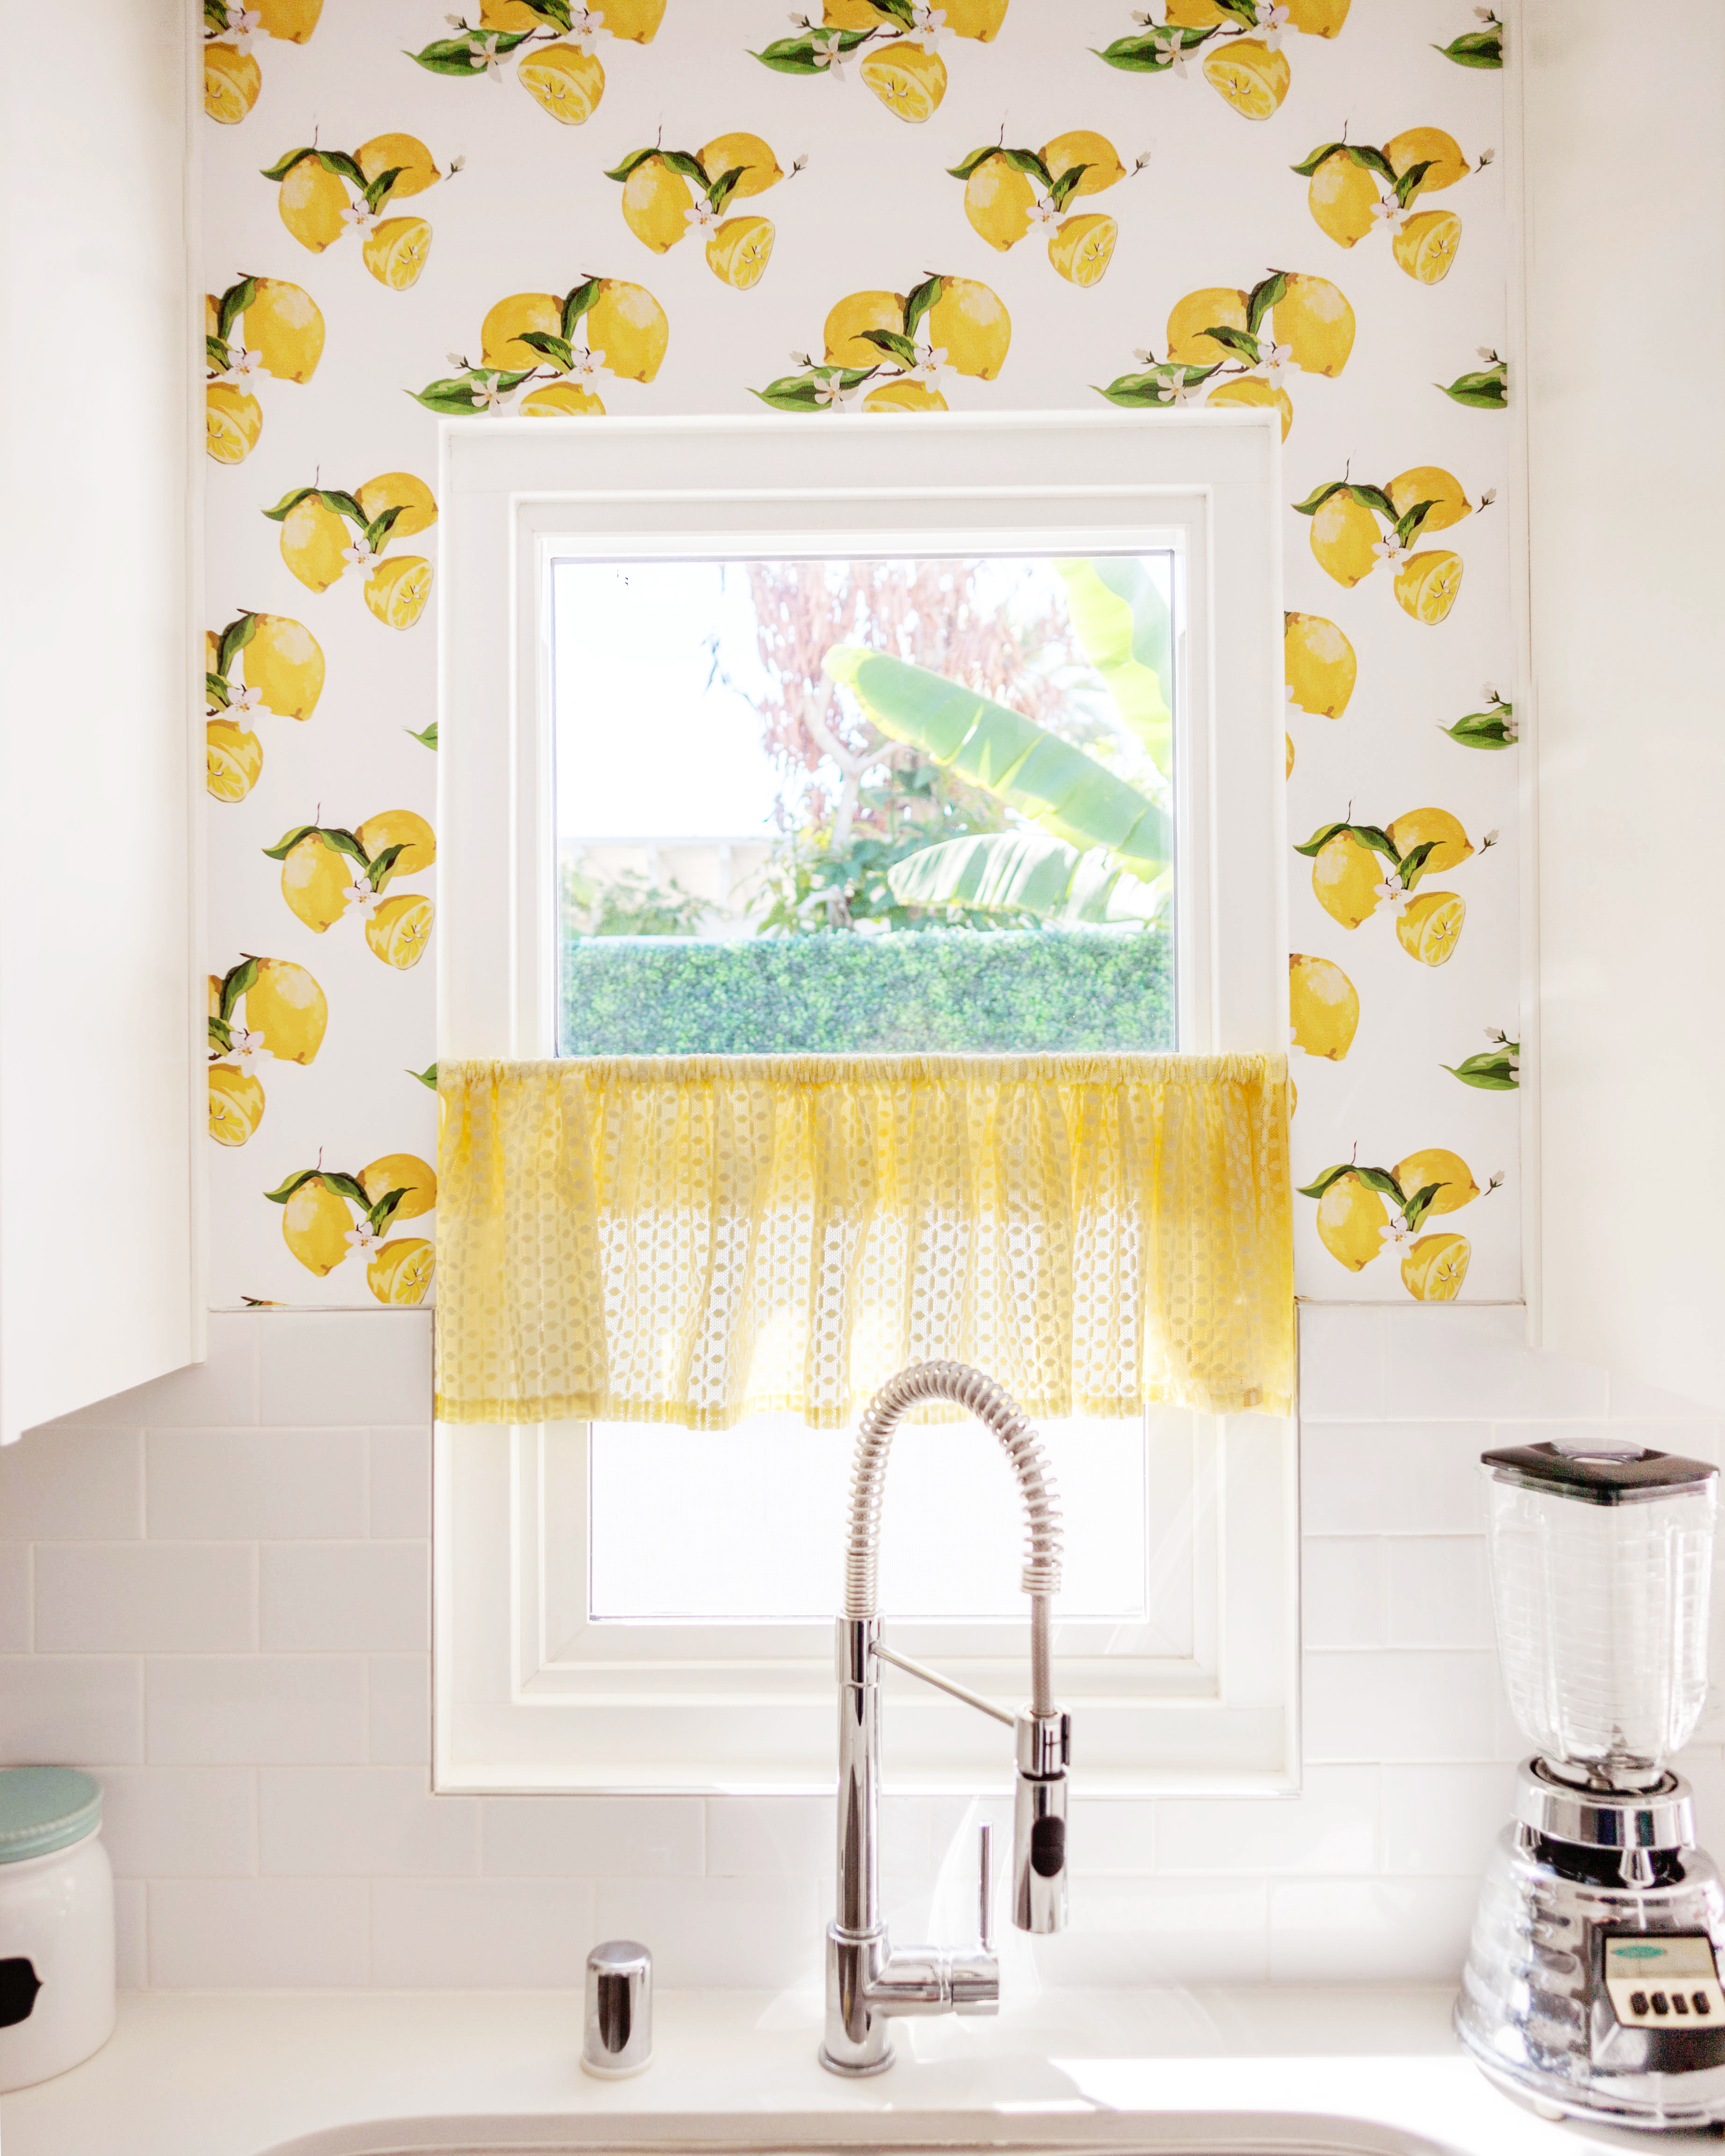 Hello, there! I just wanted to share a little wallpaper update I made to our kitchen recently and talk about the process of ordering custom printed wallpaper through Tempaper.
Here’s the scoop. I already had lemon wallpaper in here from a different company, but it didn’t stand up to the demands of our kitchen. Any time we would wipe a food splatter or try to clean the walls the ink would smear or come right off, often times leaving behind a stain from the splatter. Our kitchen also gets a lot of sunshine and in the summers gets very hot. This caused the paper to yellow and lift at the creases. No bueno!
I already had a hard enough time finding a lemon wallpaper with the vintage look I had in mind, now I had to start all over again! I used Tempaper in my bathroom and bedroom and had no problems whatsoever, so I decided to contact them about printing something custom for me.
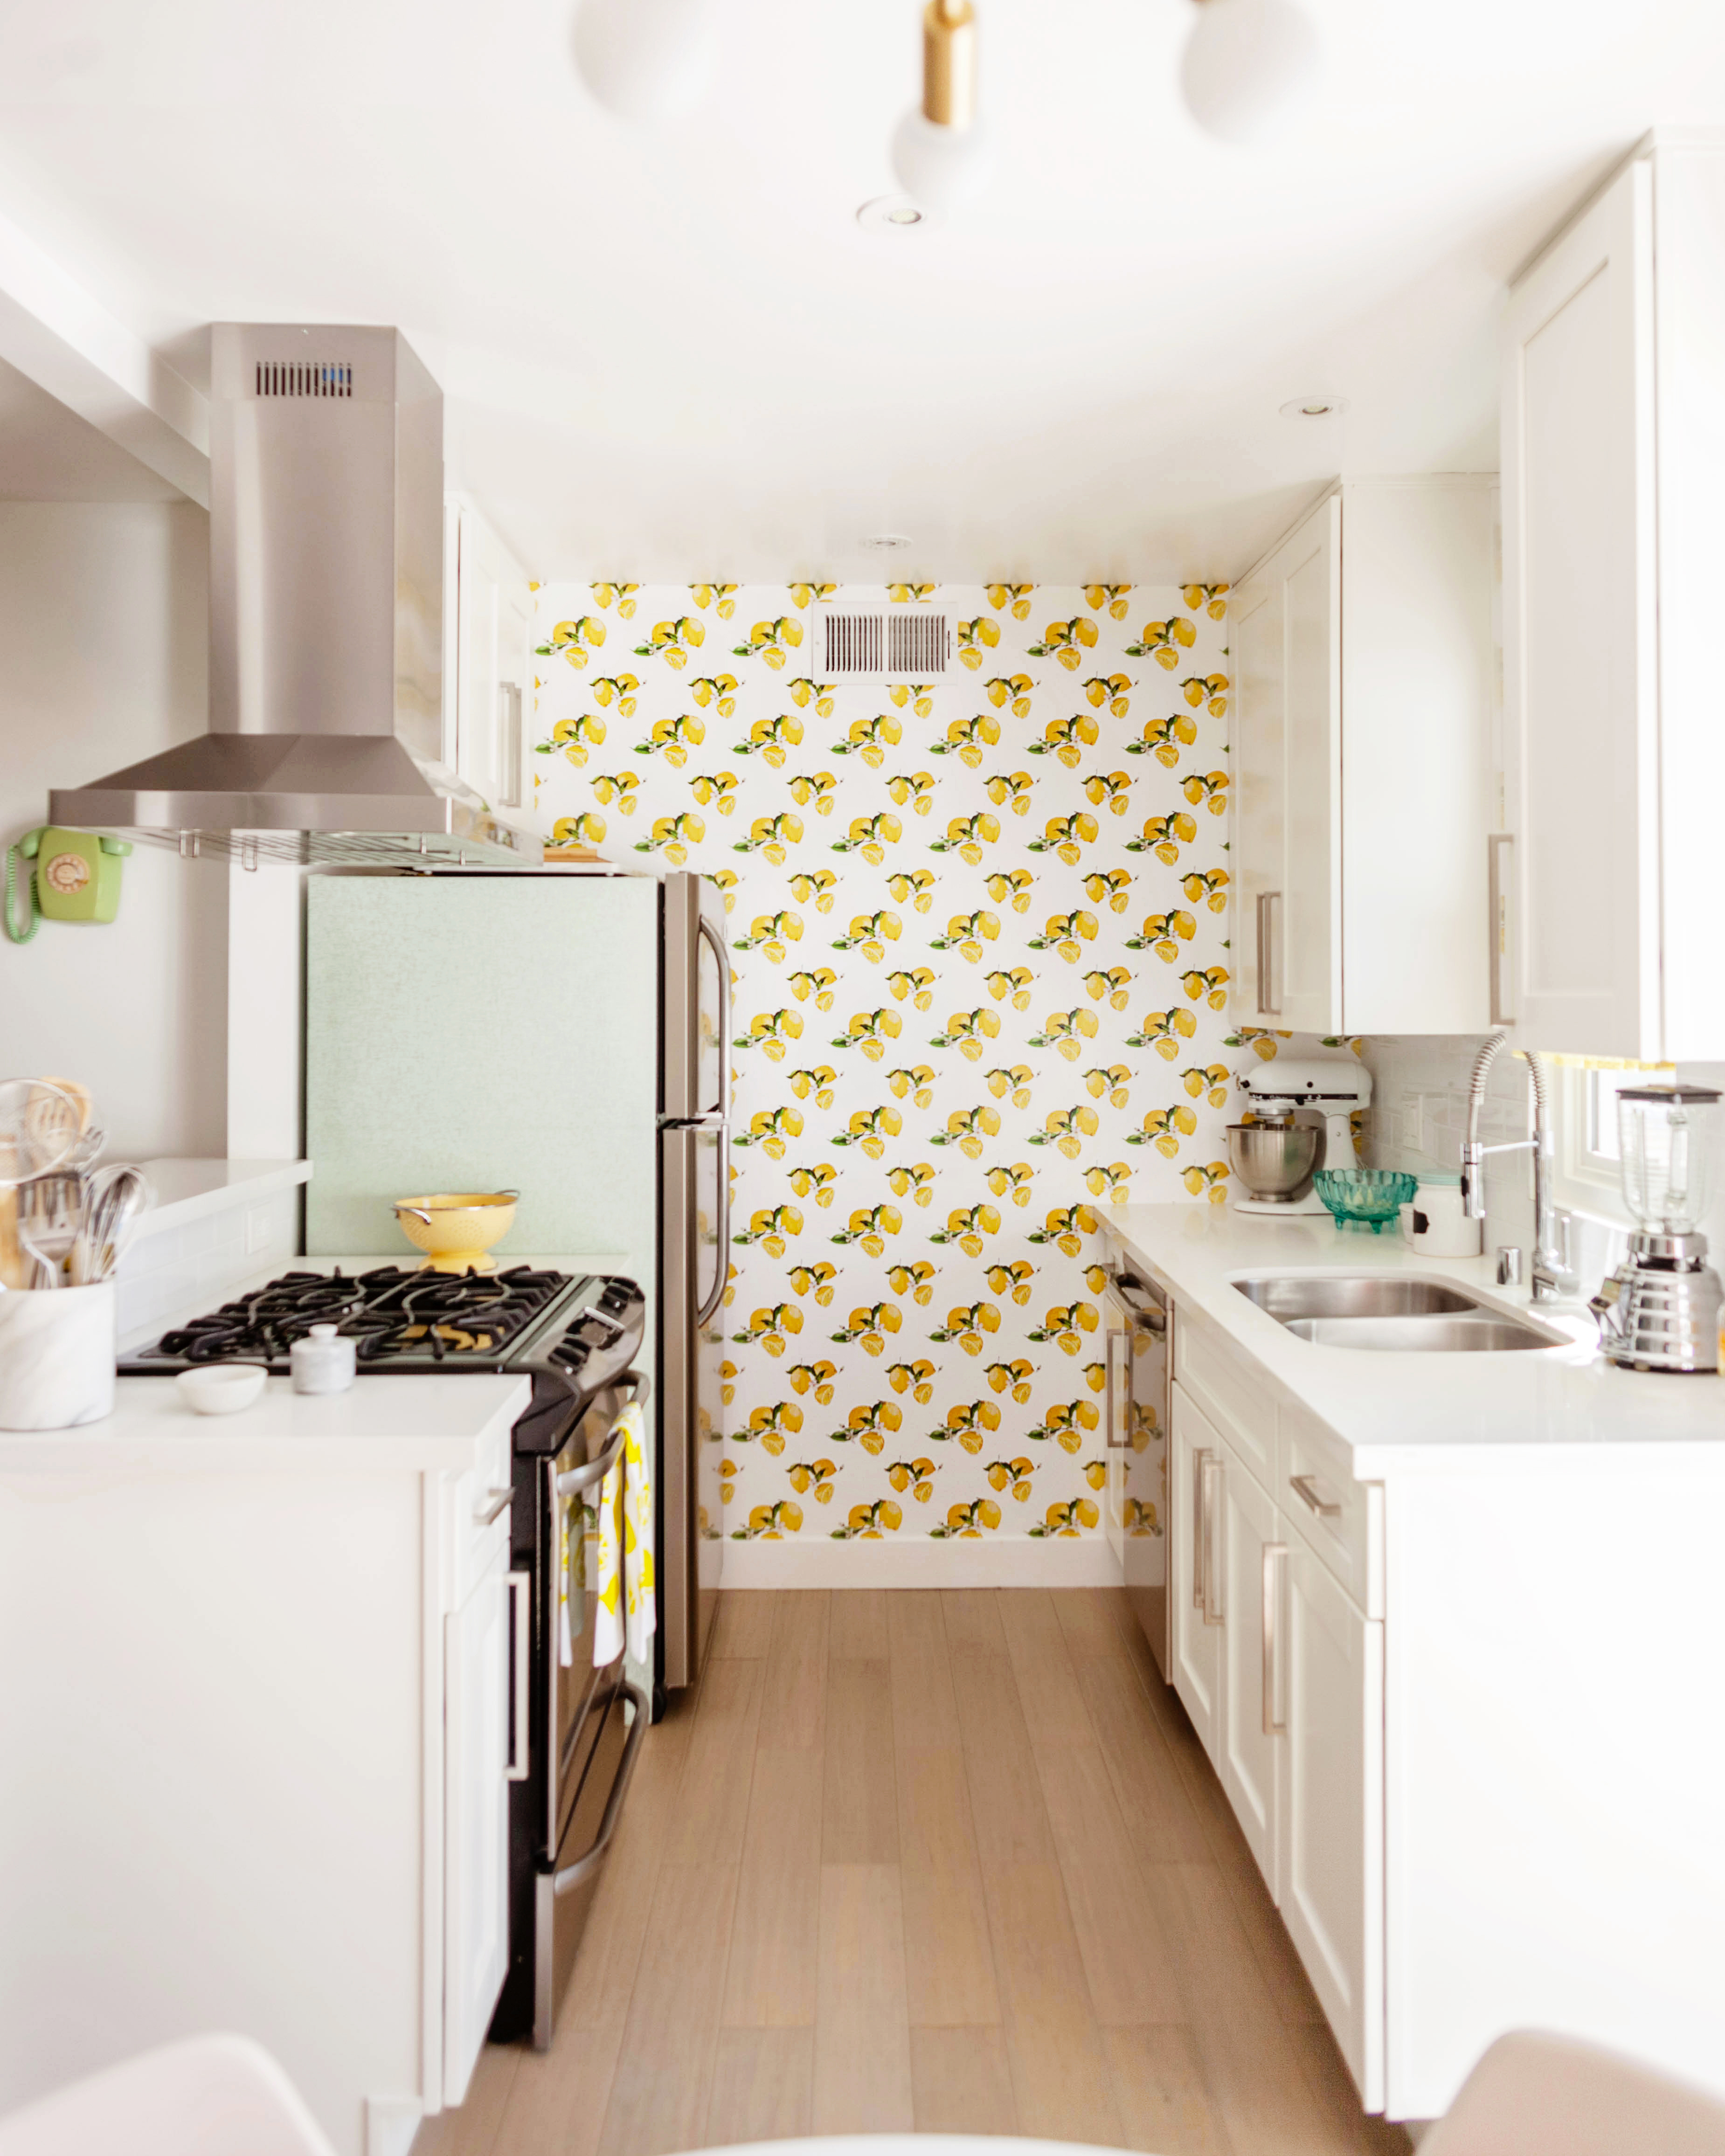
I had a repeating image of lemons that I had saved from a stock image website and was able to purchase the license to have it printed for my own use. I sent it off to Tempaper and worked with their graphic designer to customize the print to fit the exact dimensions of my kitchen walls. They sent a sample right away and I put it through vigorous testing. I poured coffee, pasta sauce, and grease on it. I wiped, scrubbed, and sprayed cleaner on it. I left it in direct sunlight for a week, kept it by the hot stove and oven, and even applied heat with a blow dryer. I did it all! And it passed each test.
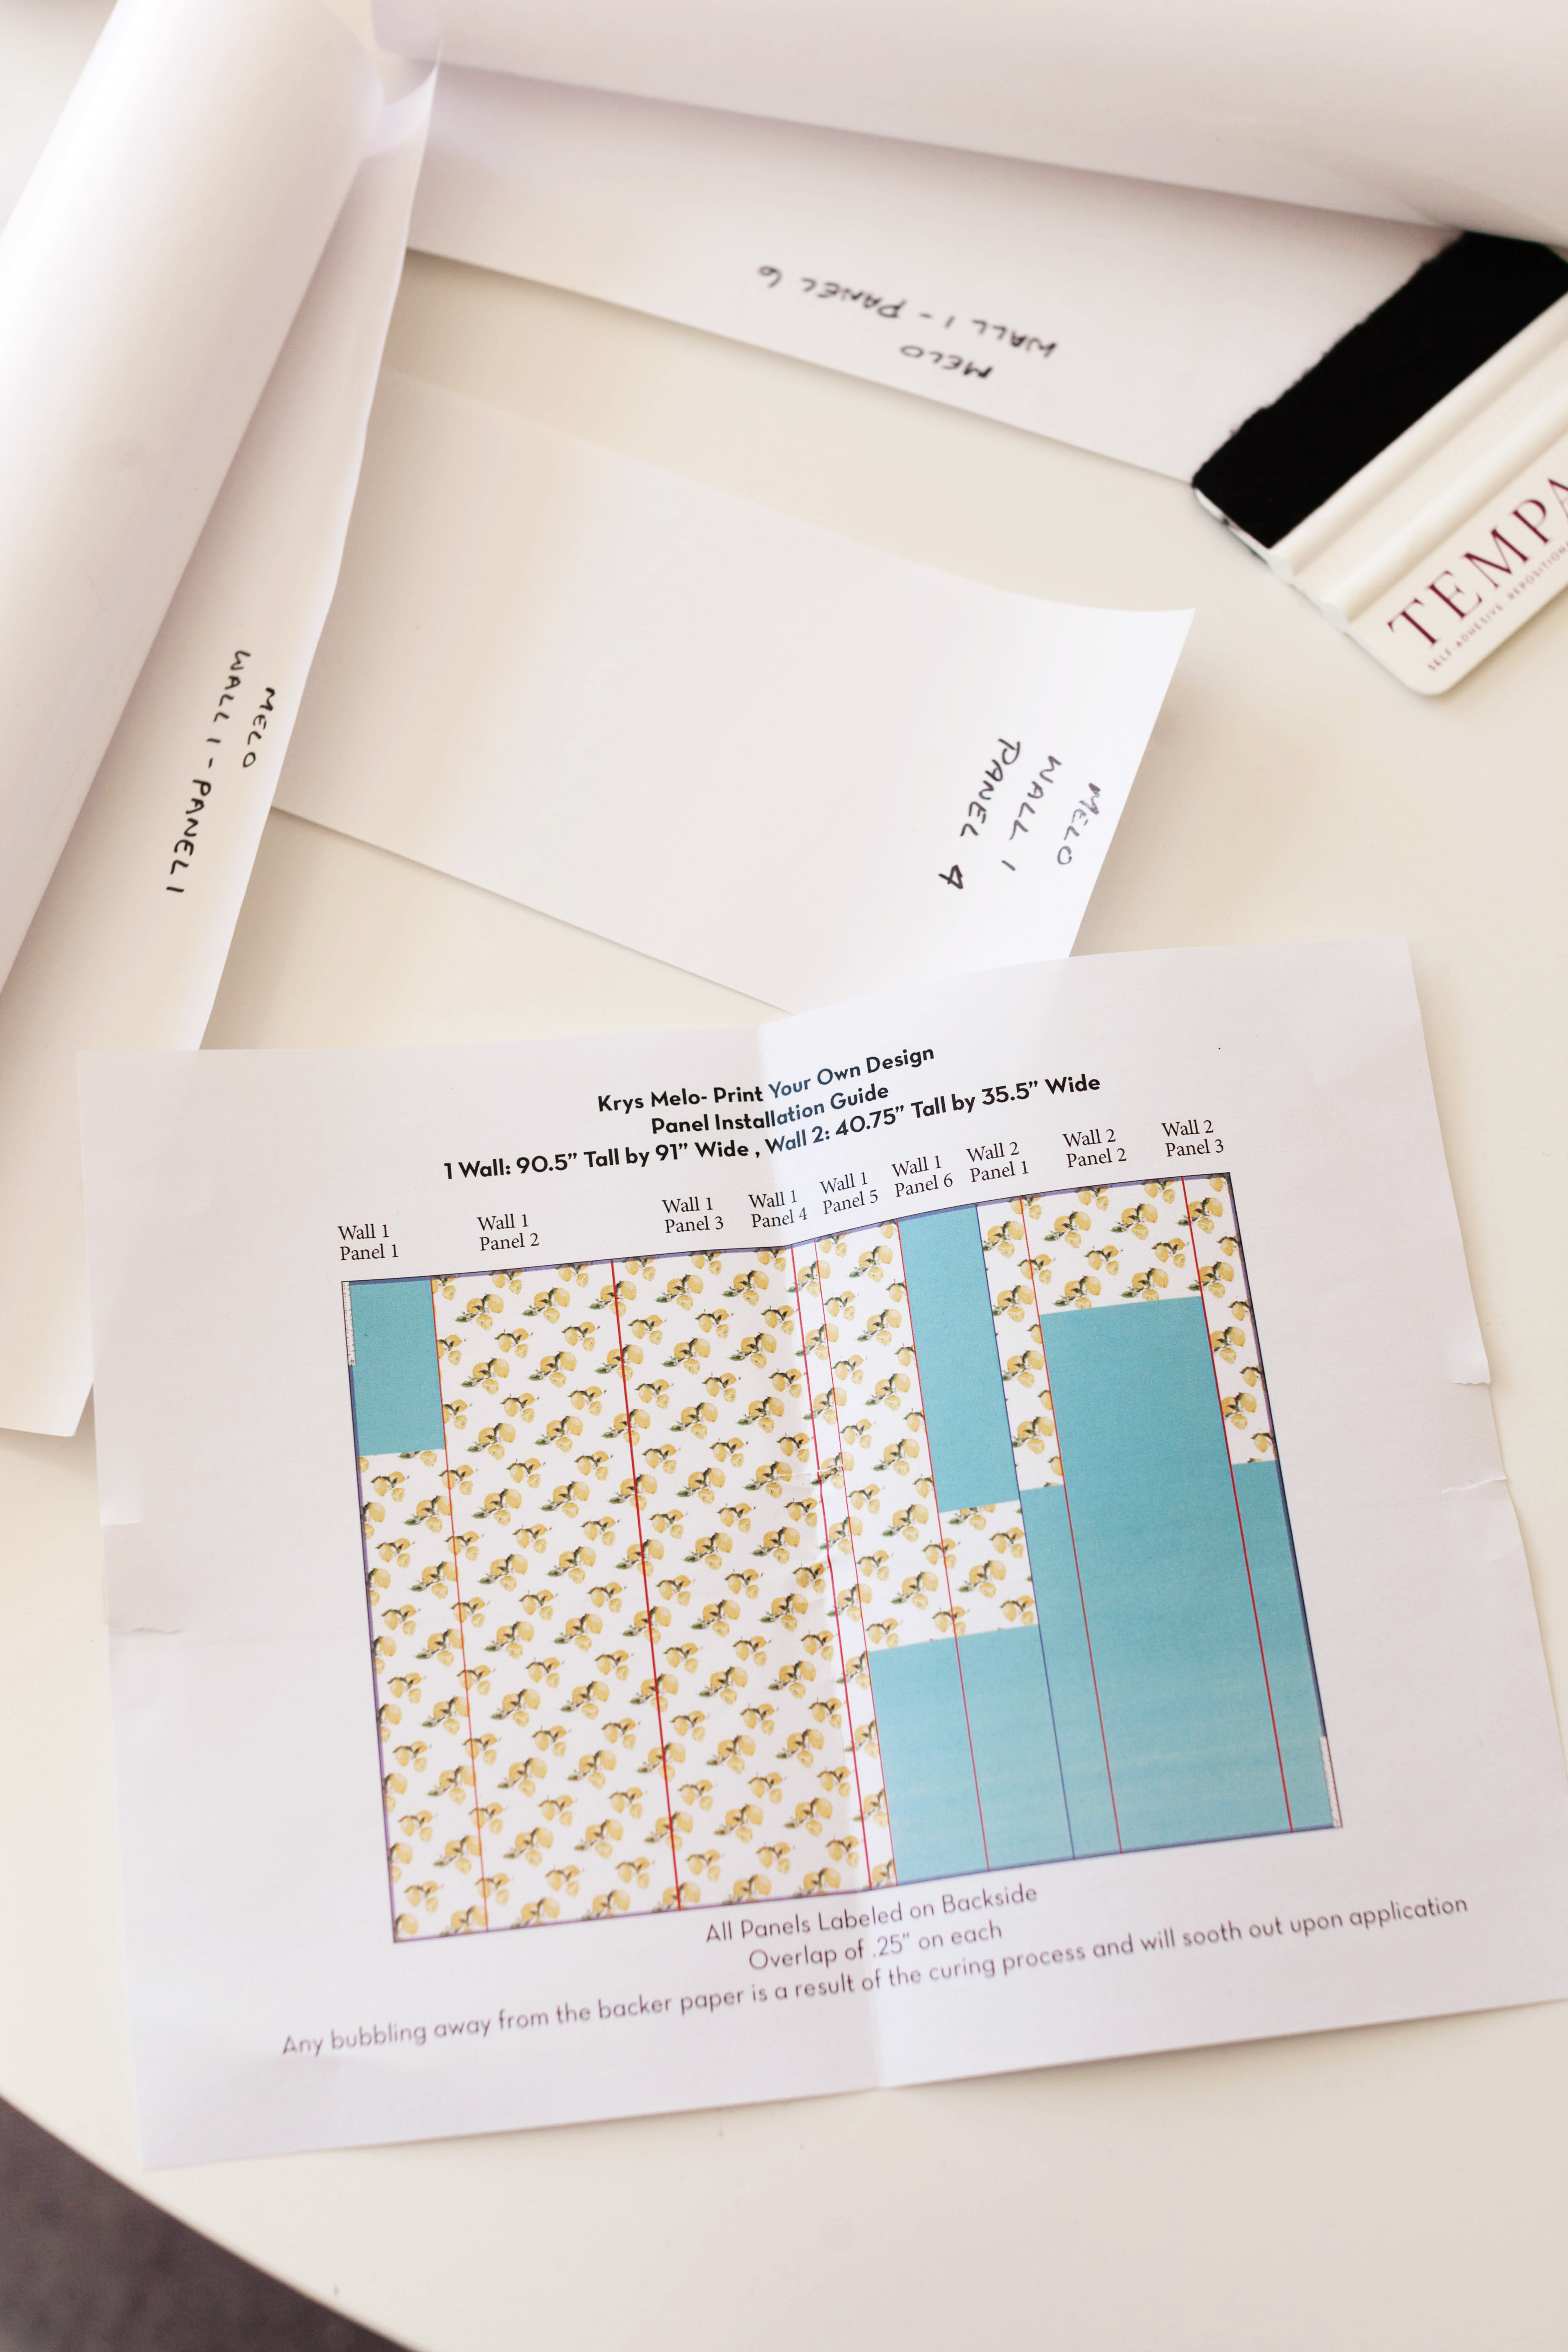 When the final product arrived it was pre-cut into manageable panels to fit each section of my walls. They sent over a little map and labeled each one. I barely even had to trim anything! It fit like a glove.
 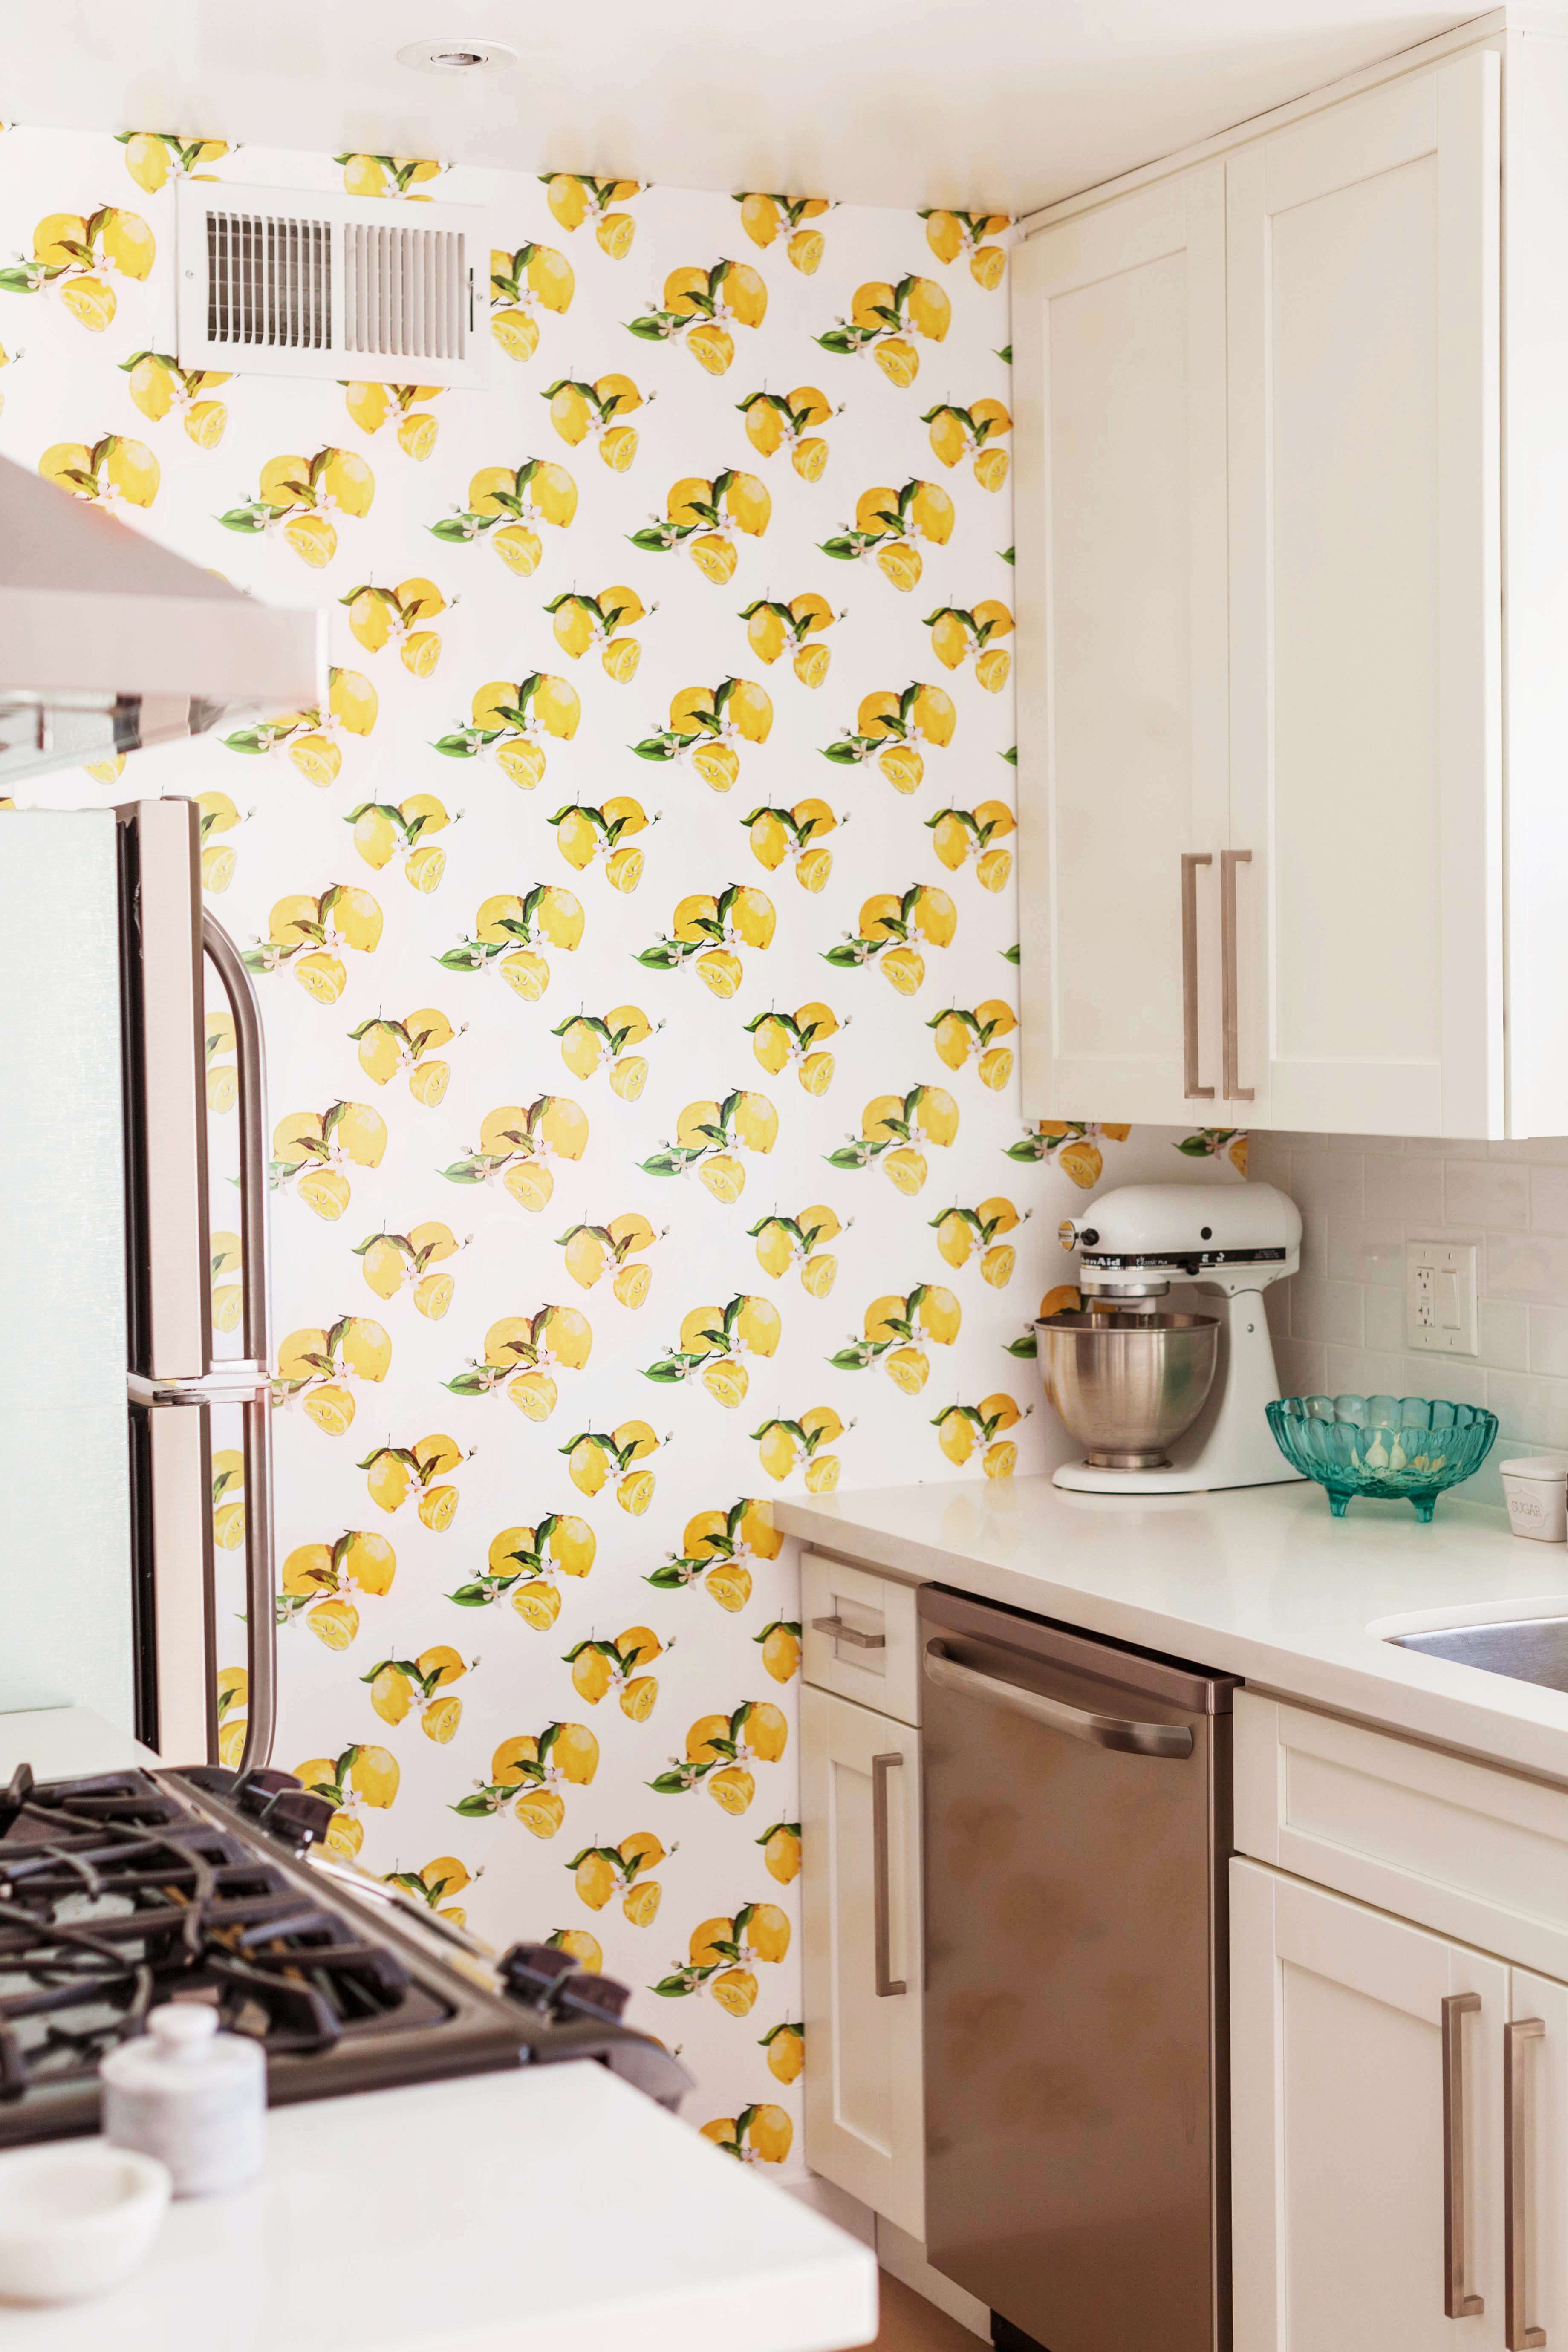 Seriously, those pre-cut panels made getting around all these nooks and cabinets a breeze. And you can barely see the overlapping seams unless you’re super up-close! I’m so picky about that and it doesn’t bother me at all. Overall the entire custom printing process was a breeze.
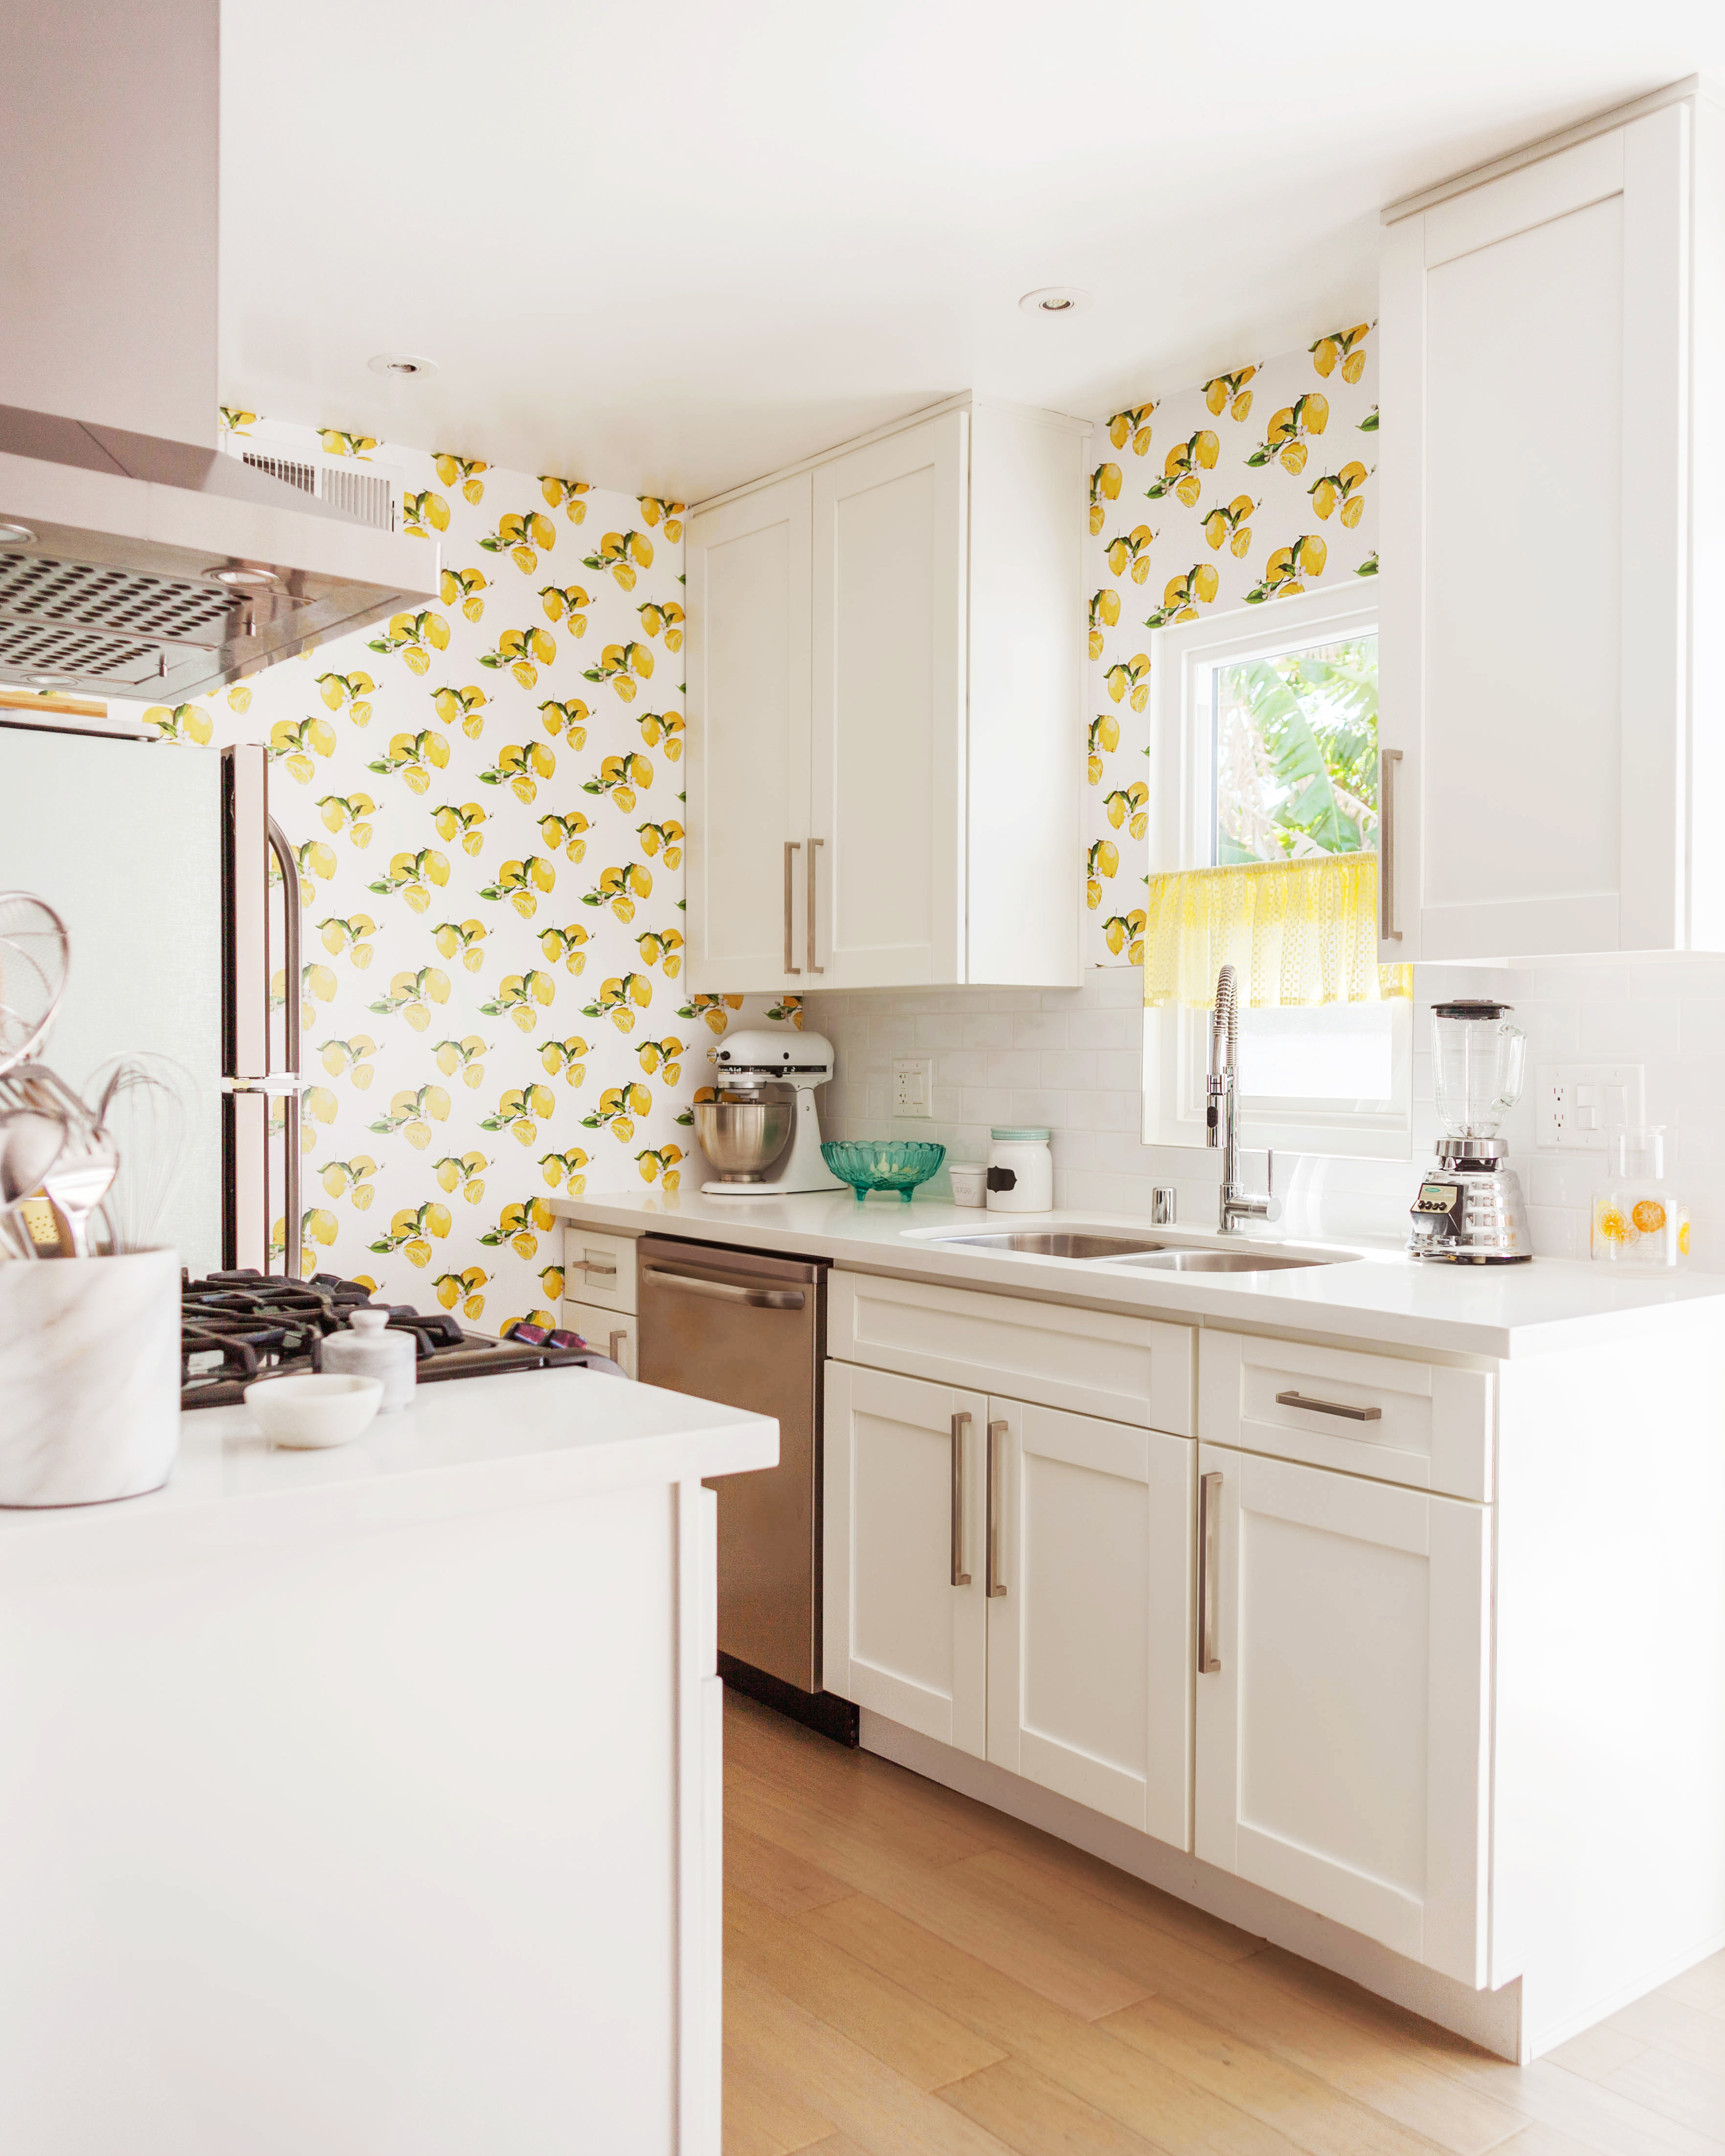 LOVEEE! Now I have exactly what I had in mind to begin with!
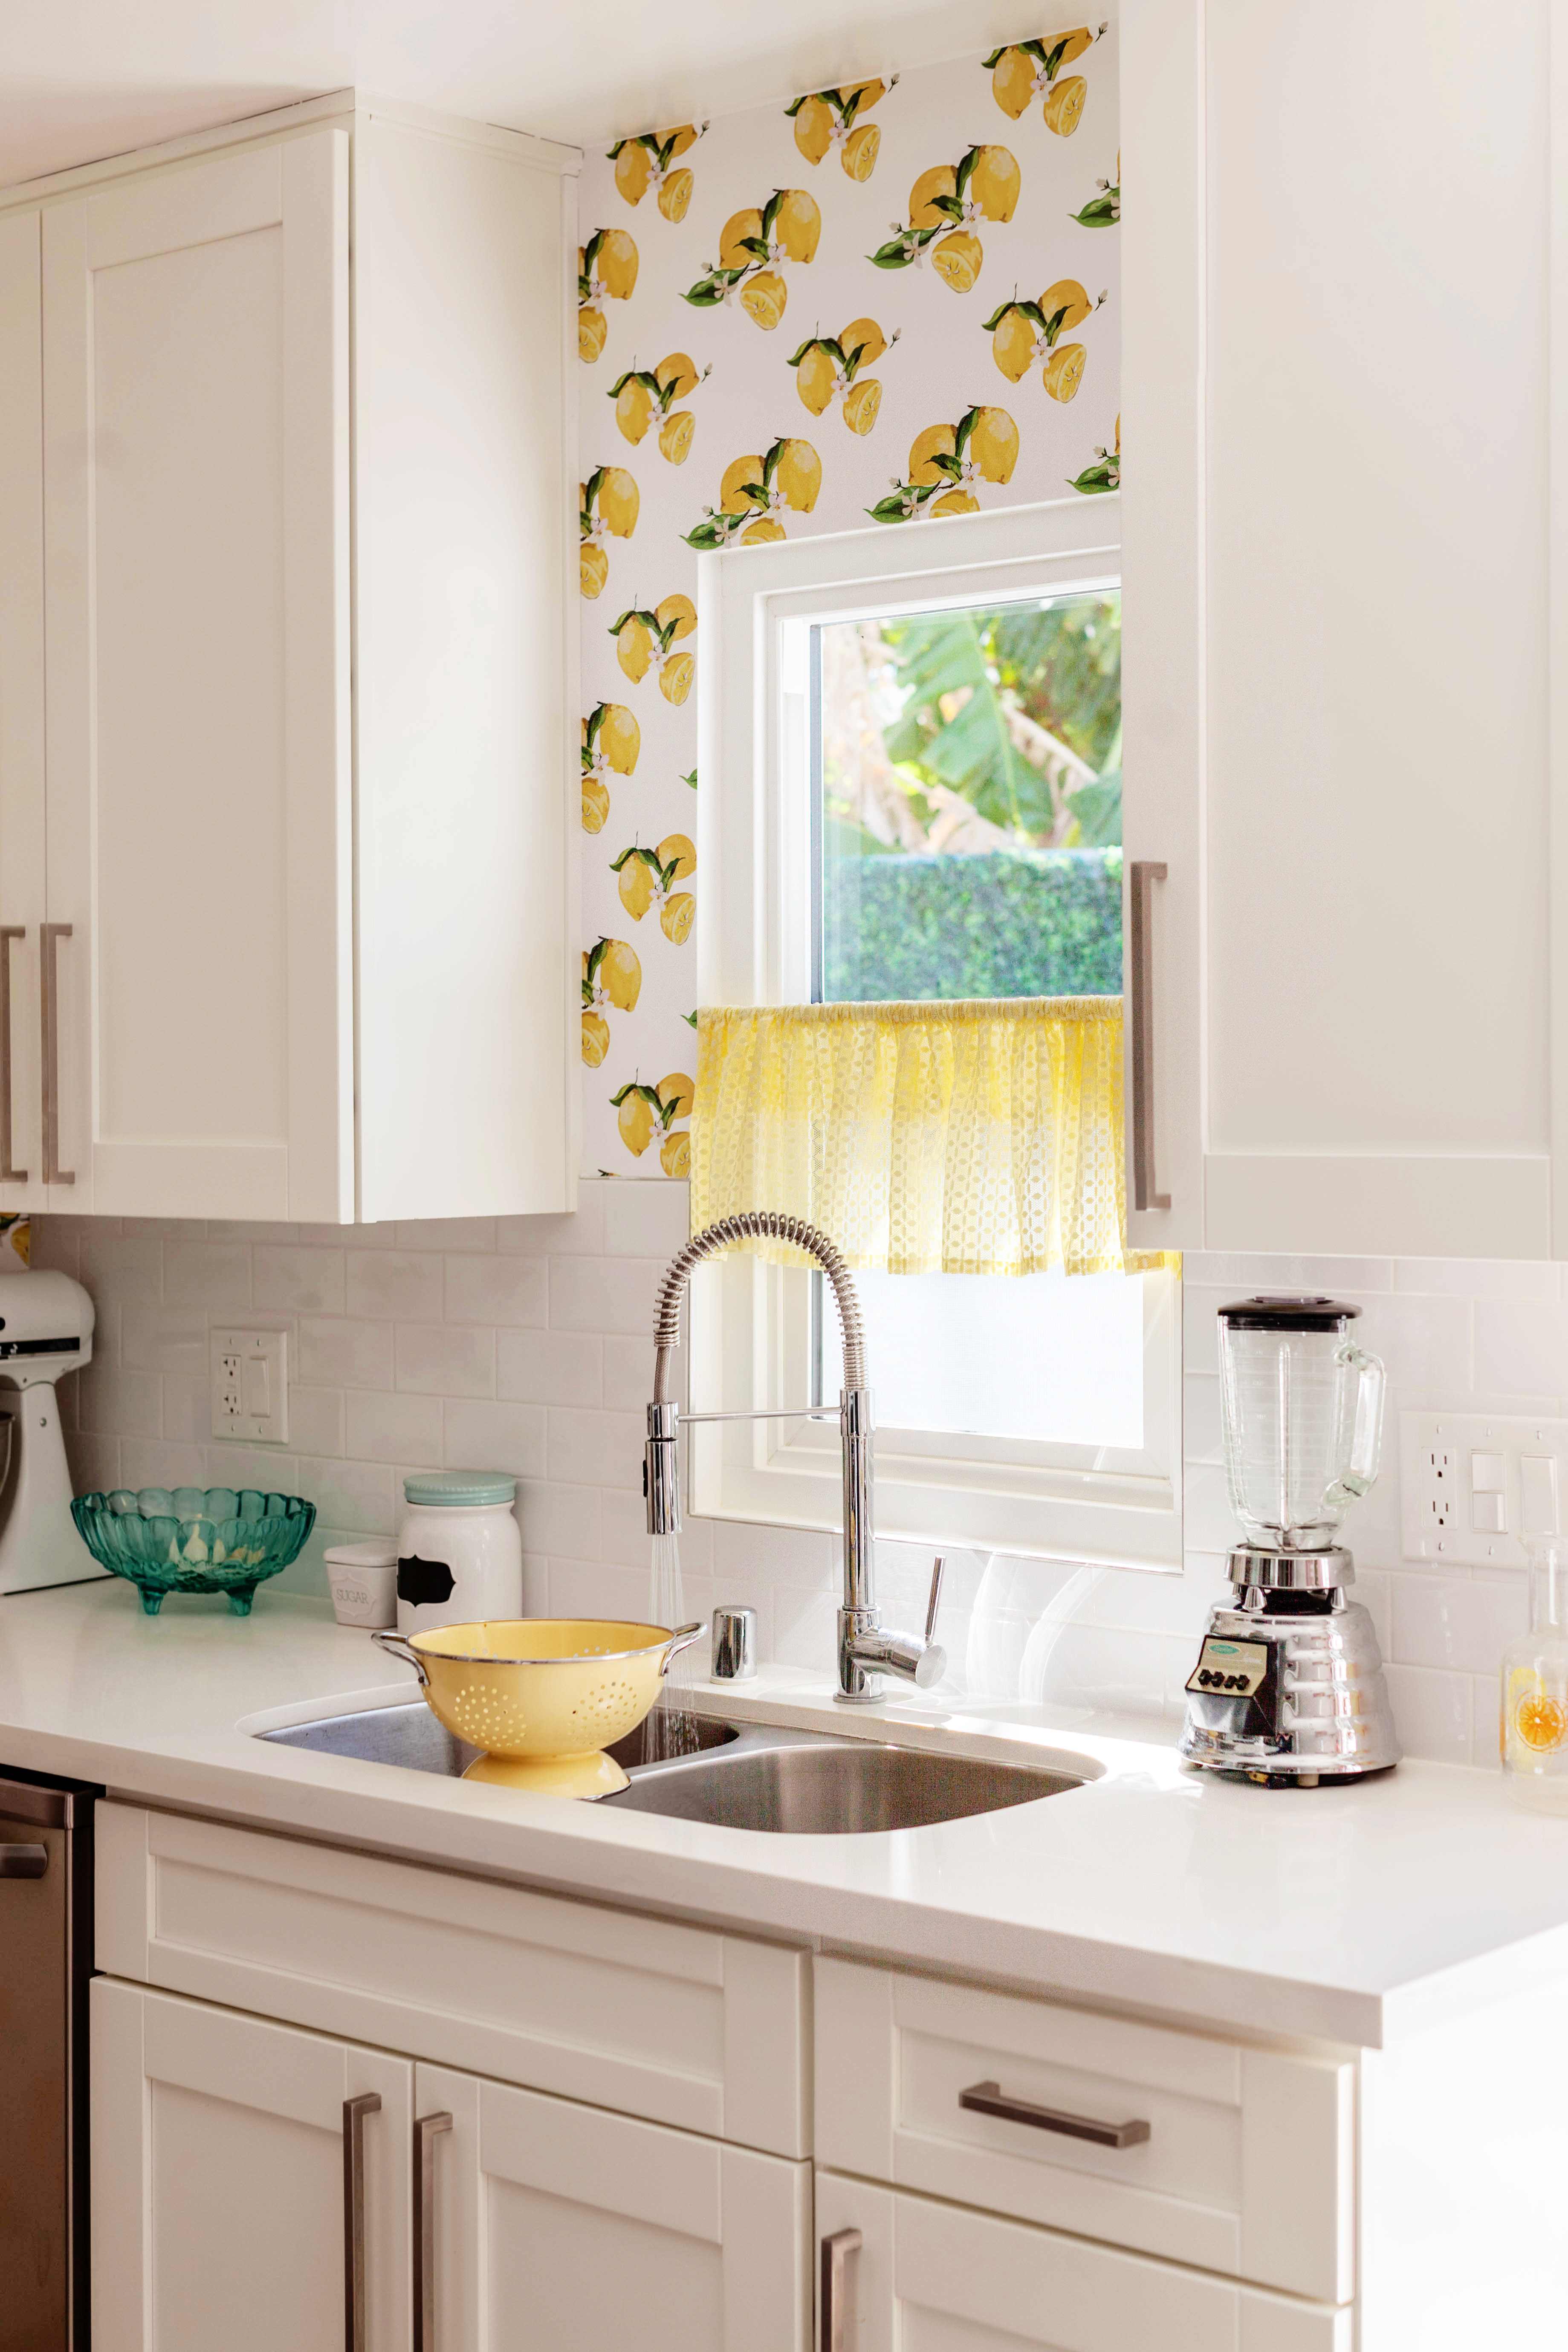
Thank you Tempaper!
Product was provided by Tempaper, but all views and opinions are true and my own.

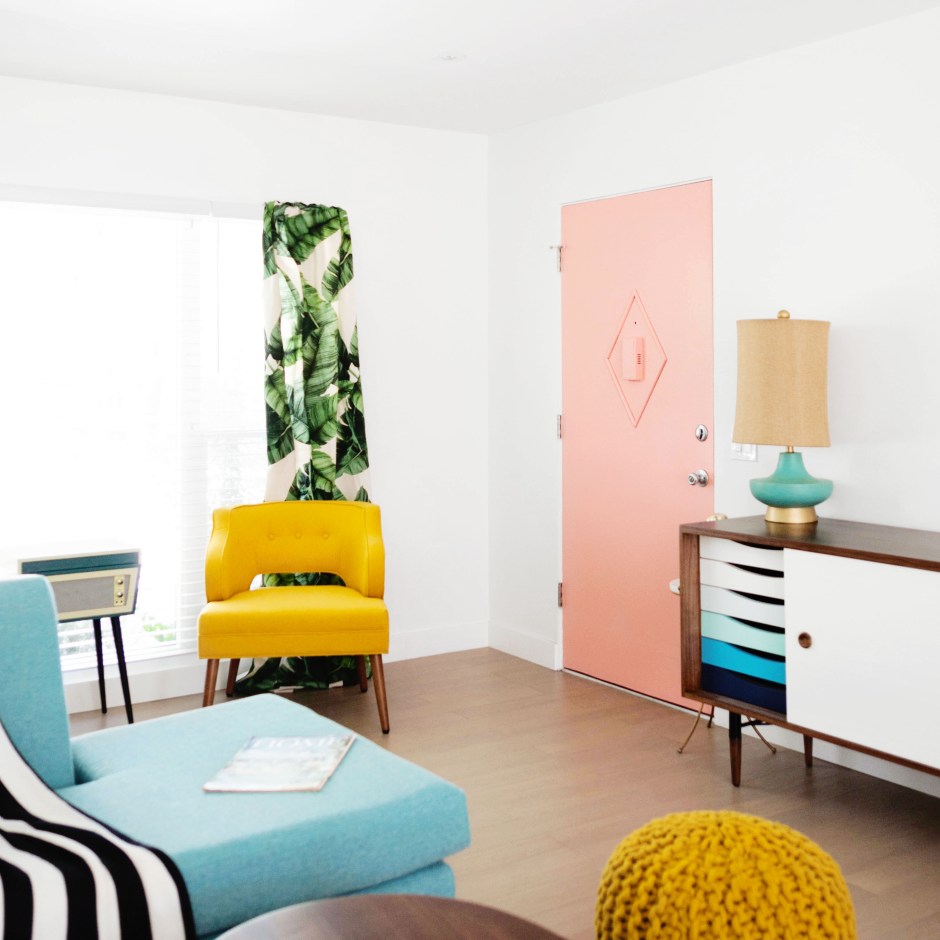
How is it possible that I haven’t done a full post about our living room yet?? I’m the worst! Now that we’re coming up on our one year anniversary in this apartment (whoa already?), I figured now would probably be as good a time as ever!
Welcome to our mid-century inspired living room!
When you walk through our orange front door you’re greeted by all of my favorite retro inspired colors.
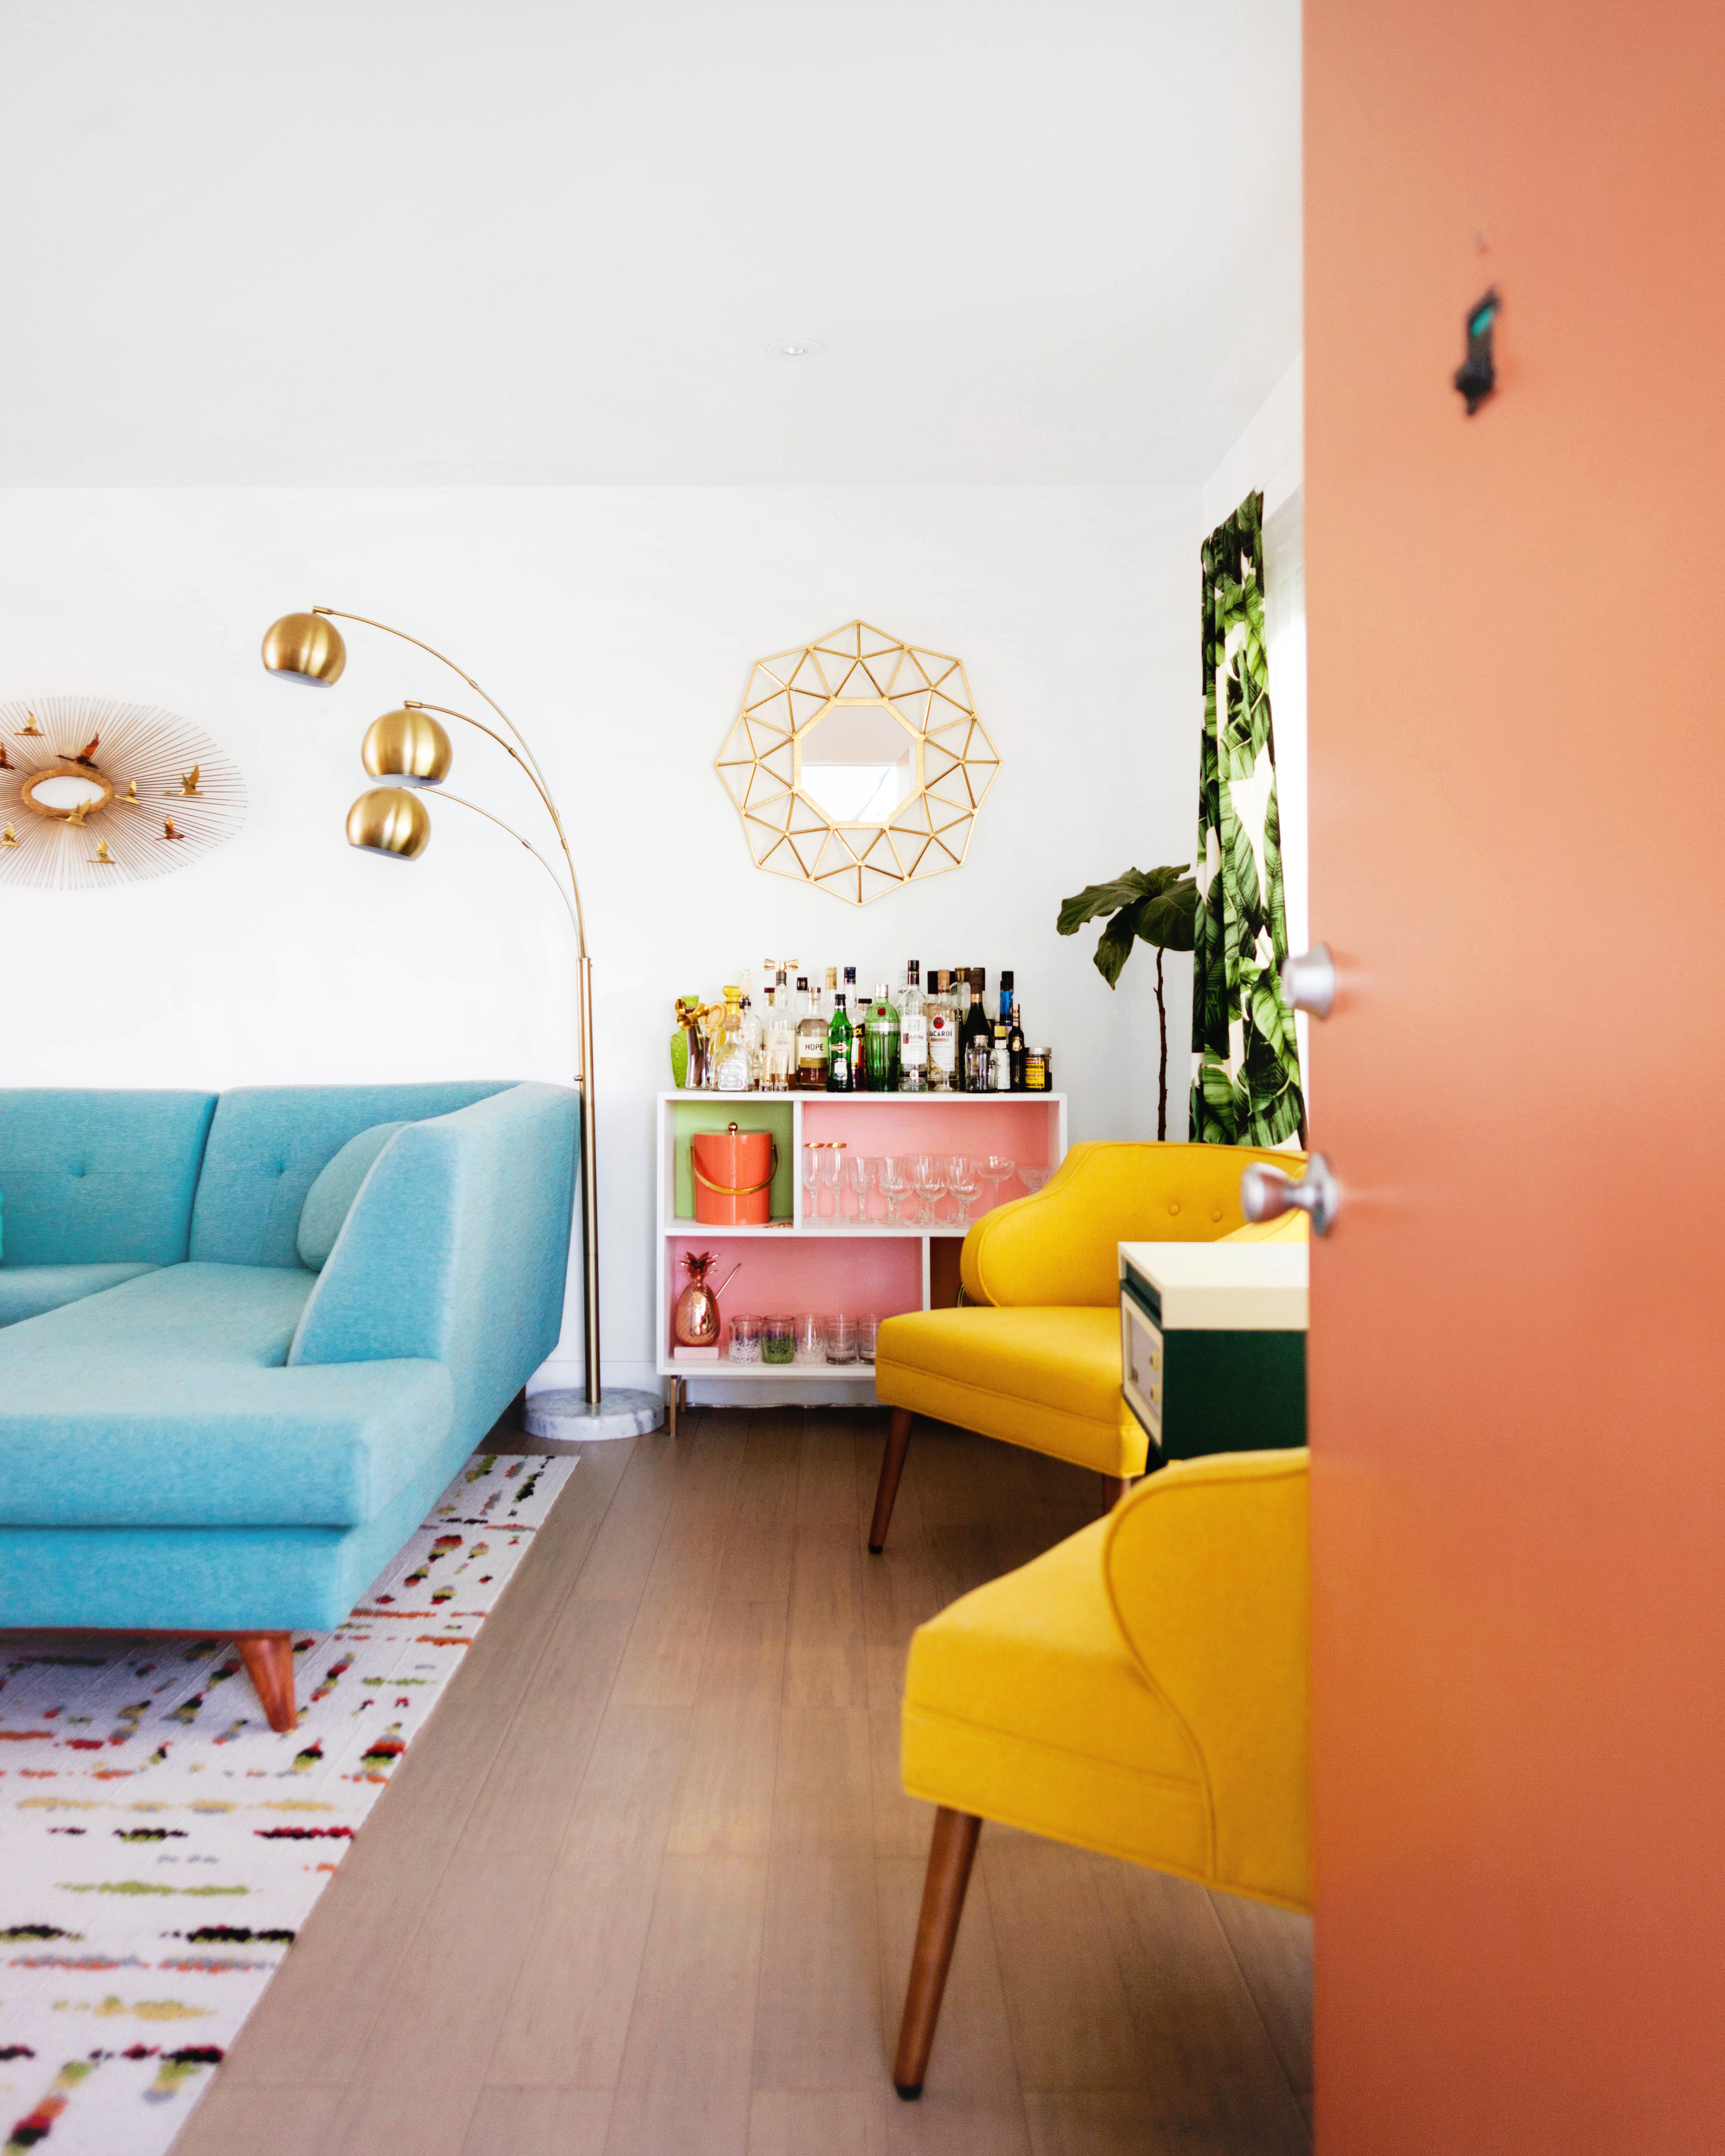
This is what we jokingly refer to as the cocktail corner. The bar is an IKEA bookshelf that I painted and use to store our liquor and vintage cocktail glass collection.
The yellow chairs are from World Market. The color and scale fit the space perfectly which was something I wasn’t having luck with when searching for a true vintage set. I got these on sale for an amazing price so I couldn’t pass them up. In between them is a standing record player.
The mirror above the bar is a score from Home Goods that we had in our last apartment and was originally just going to be used as a place holder, but it worked so great here we decided to keep it.
The 3 orb floor lamp is from Target’s Project 62 line.
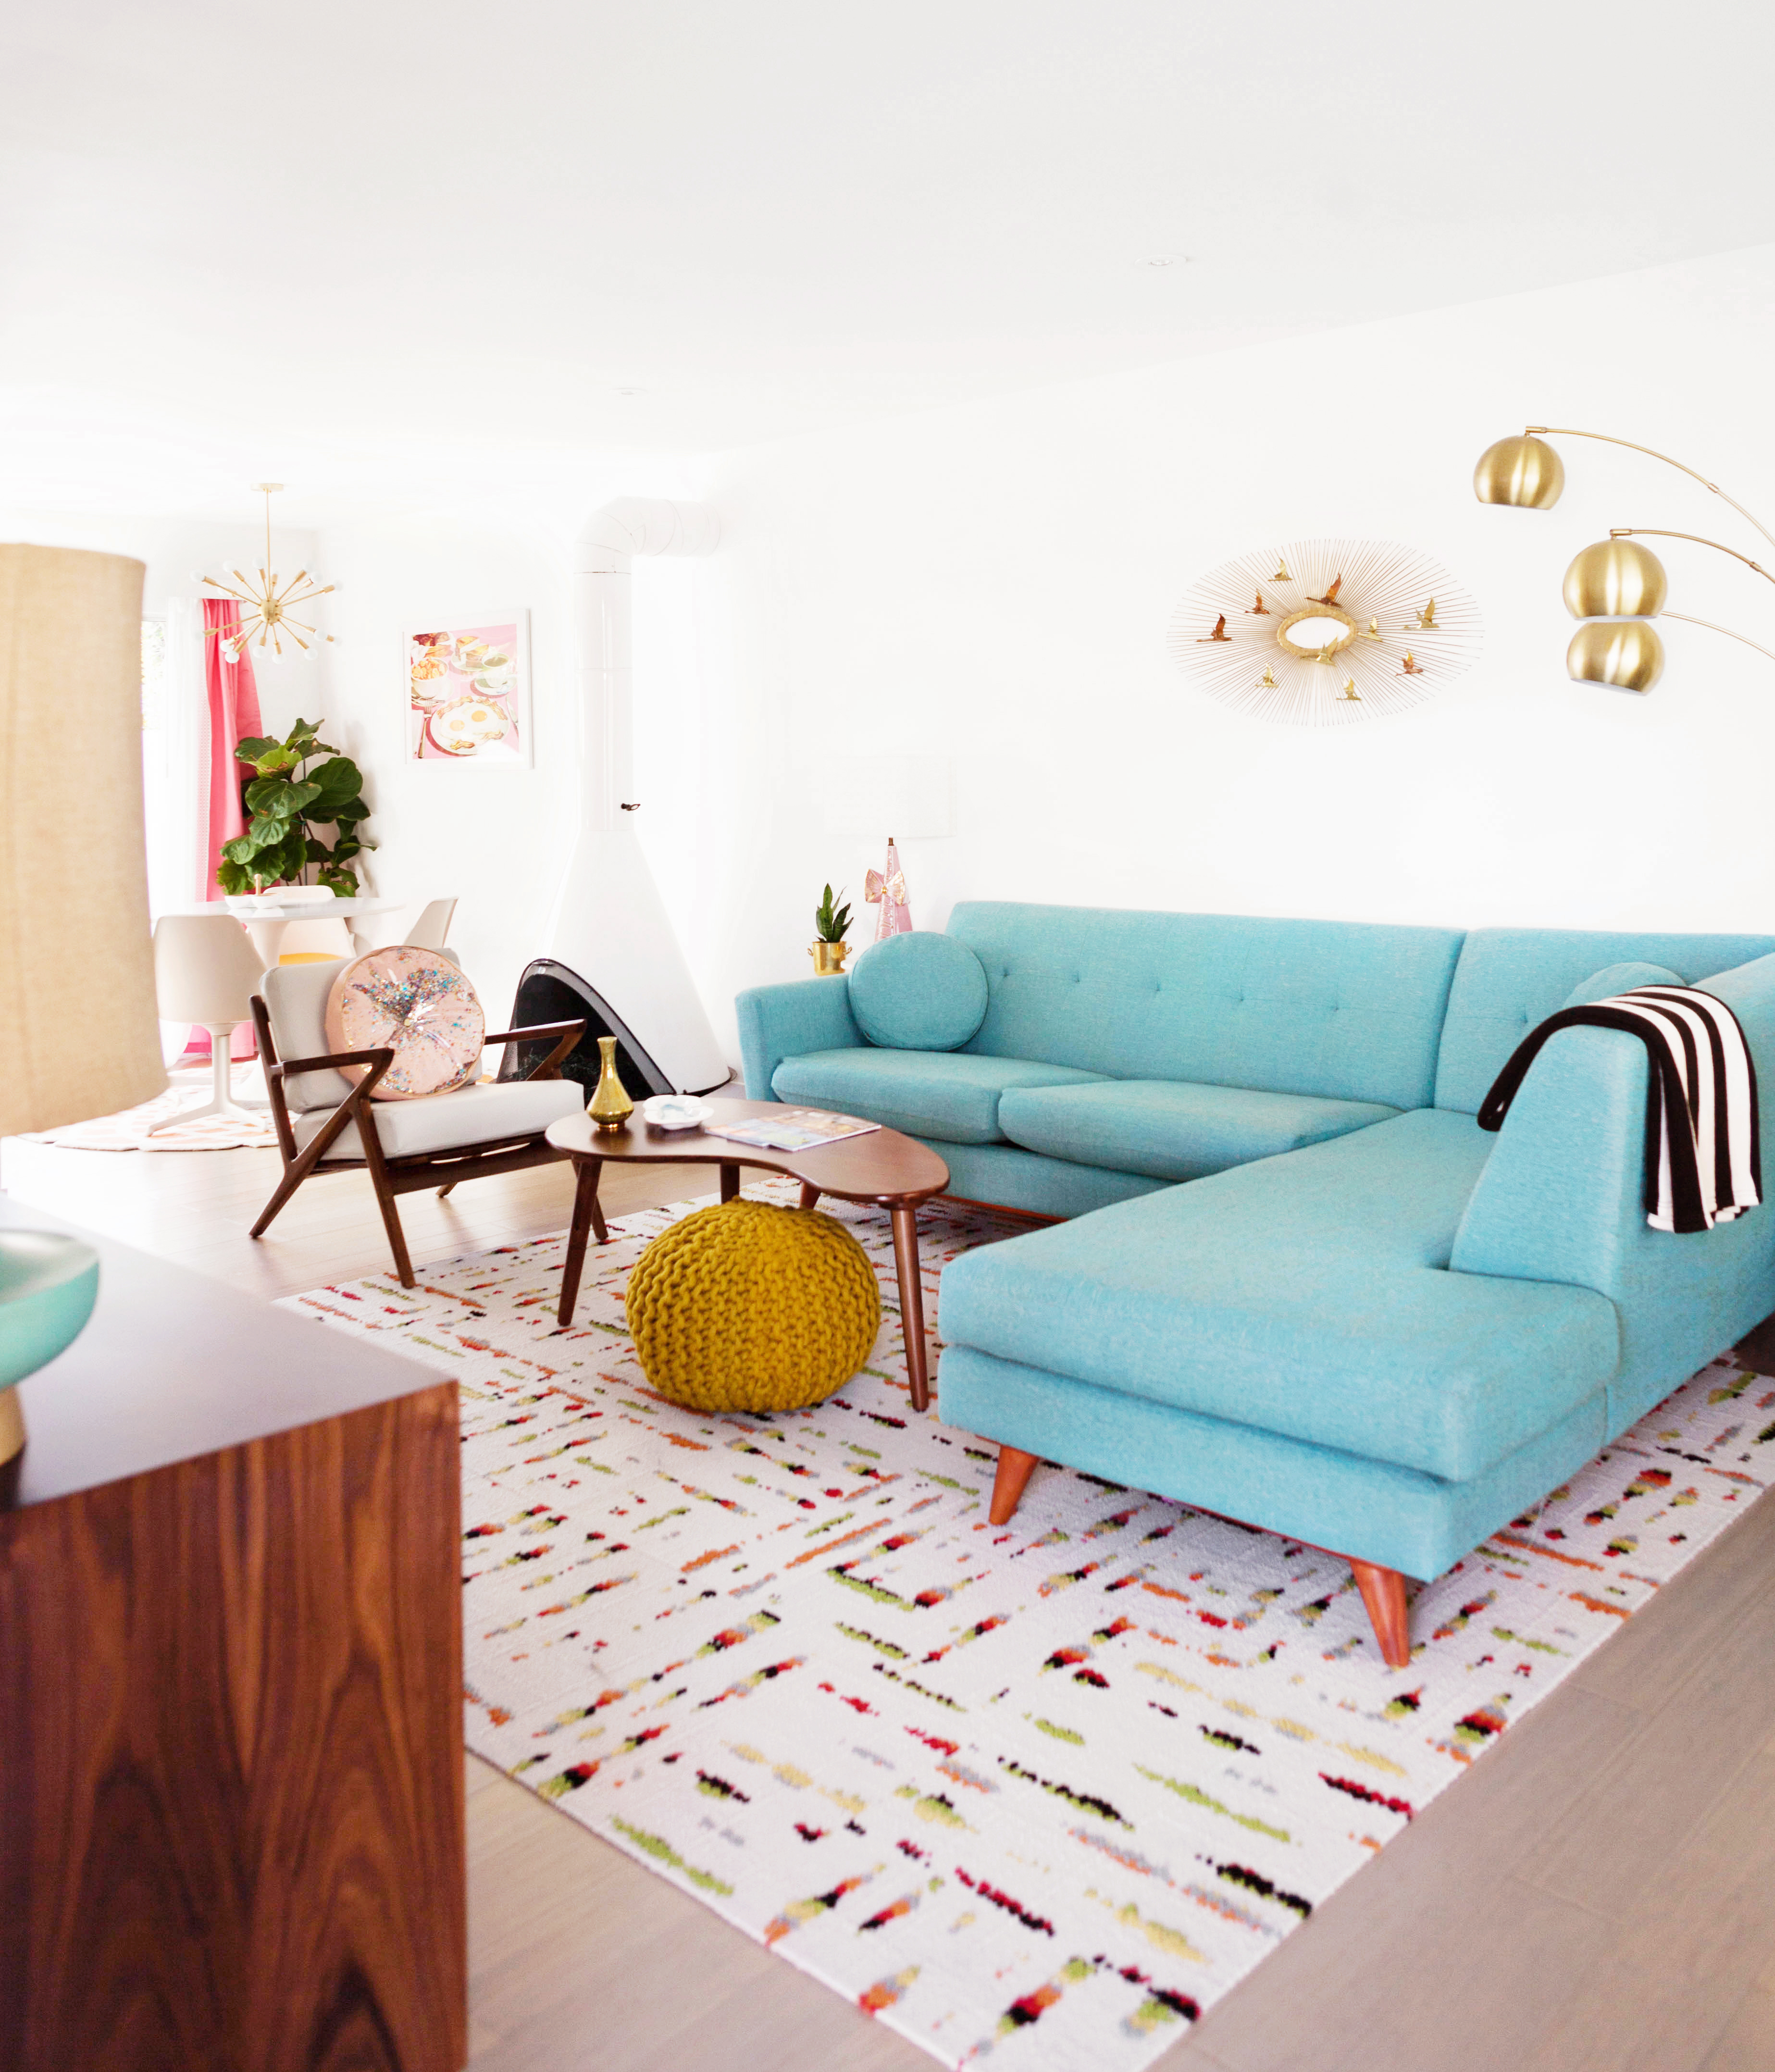
To the left of the cocktail corner is our main conversation area where we hang out and watch tv. Because we have an open concept living space I wanted to create different areas within the room that felt separate but still connected. While a few friends are listening to a record and having a drink by the cocktail corner, more could be hanging out here, and something else could be going on over at the dining table. It makes the room feel bigger and more functional this way.
A sectional is perfect for this type of layout. Last year I was lucky to collaborate with one of my favorite mid-century inspired furniture manufacturers, Joybird, so a lot of our furniture is from there. I love Joybird because you can customize each style with different configurations, wood finishes, and fabrics. For our sectional we chose the Hughes Bumper Sectional in Notion Thunderbird with medium toned wood legs.
The kidney shaped coffee table, knitted pouf, and accent chair are also from Joybird.
I wanted to pull together all of the colors from the room so I chose multi-colored carpet tiles from Flor. These are great if you have pets or children and need to be able to wash your rug easily.
The curvy metal Bertoia barstools are a score from Craigslist.
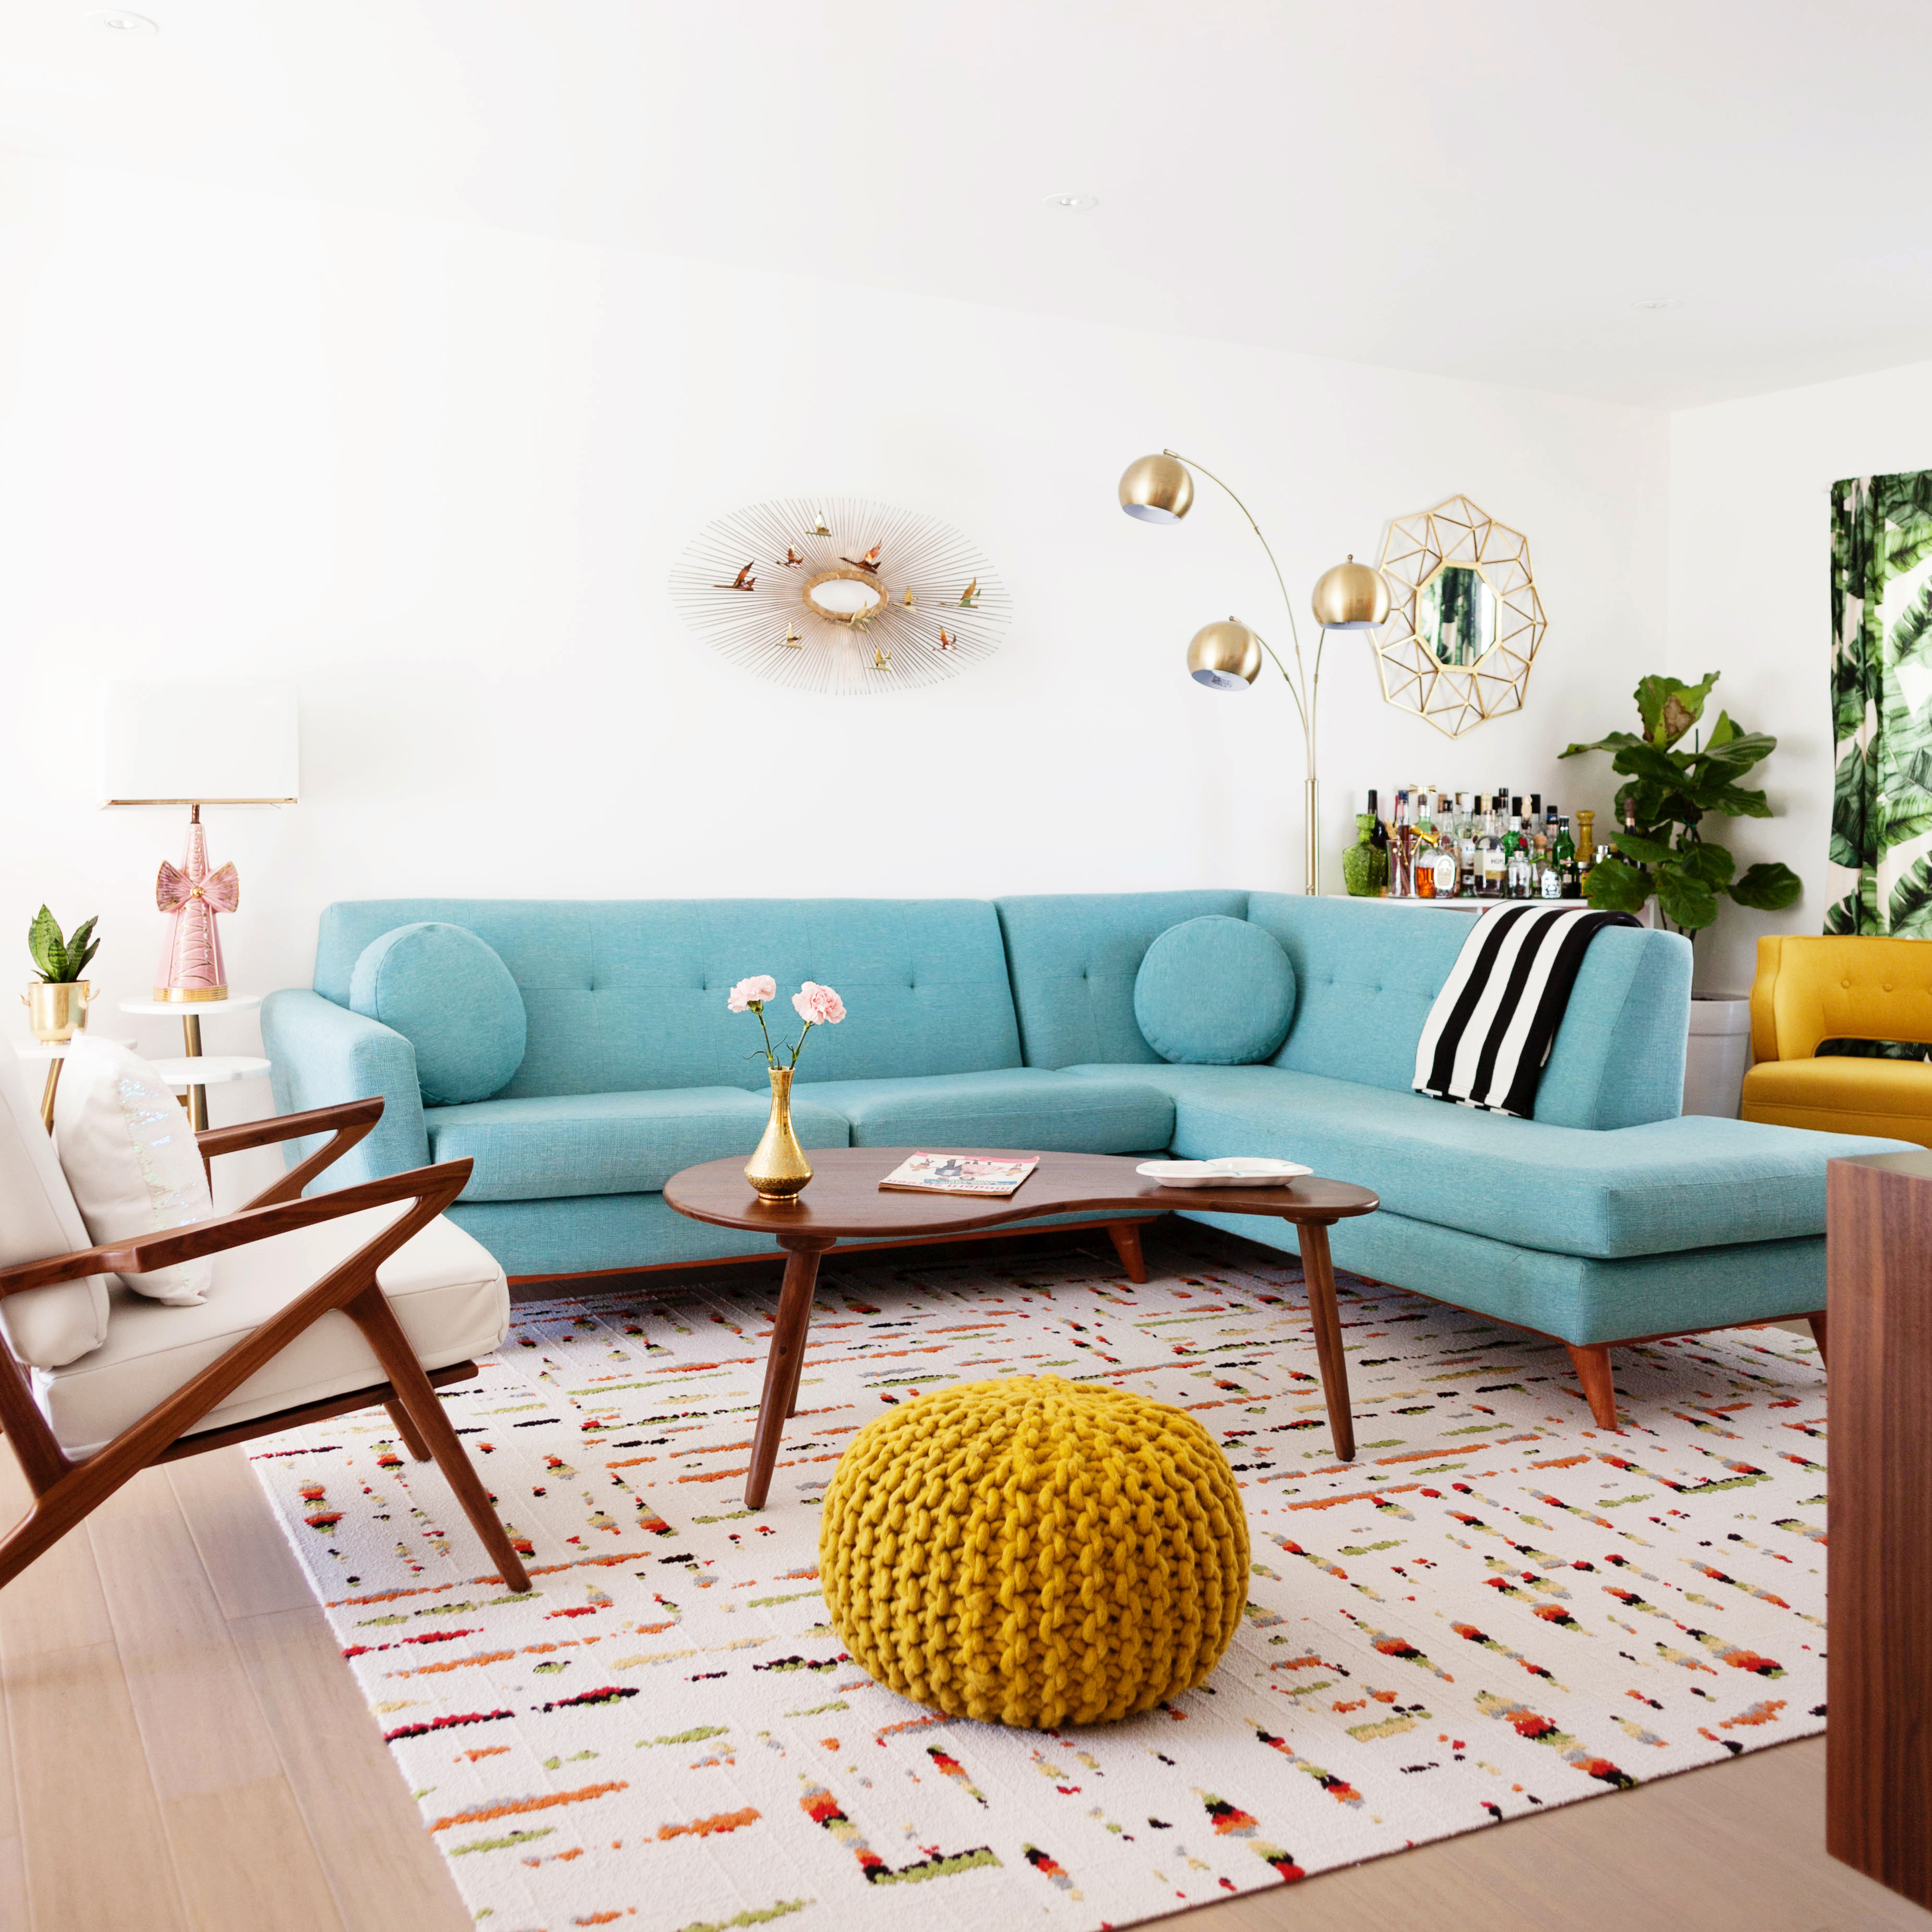 The vintage Curtis Jere brass sculpture above the sofa was in bad shape when I found it at the Long Beach Flea Market but with a lot of patience I was able to fix it up and make it look great again. The Stangl Pottery vase on the coffee table is another vintage score from Long Beach.
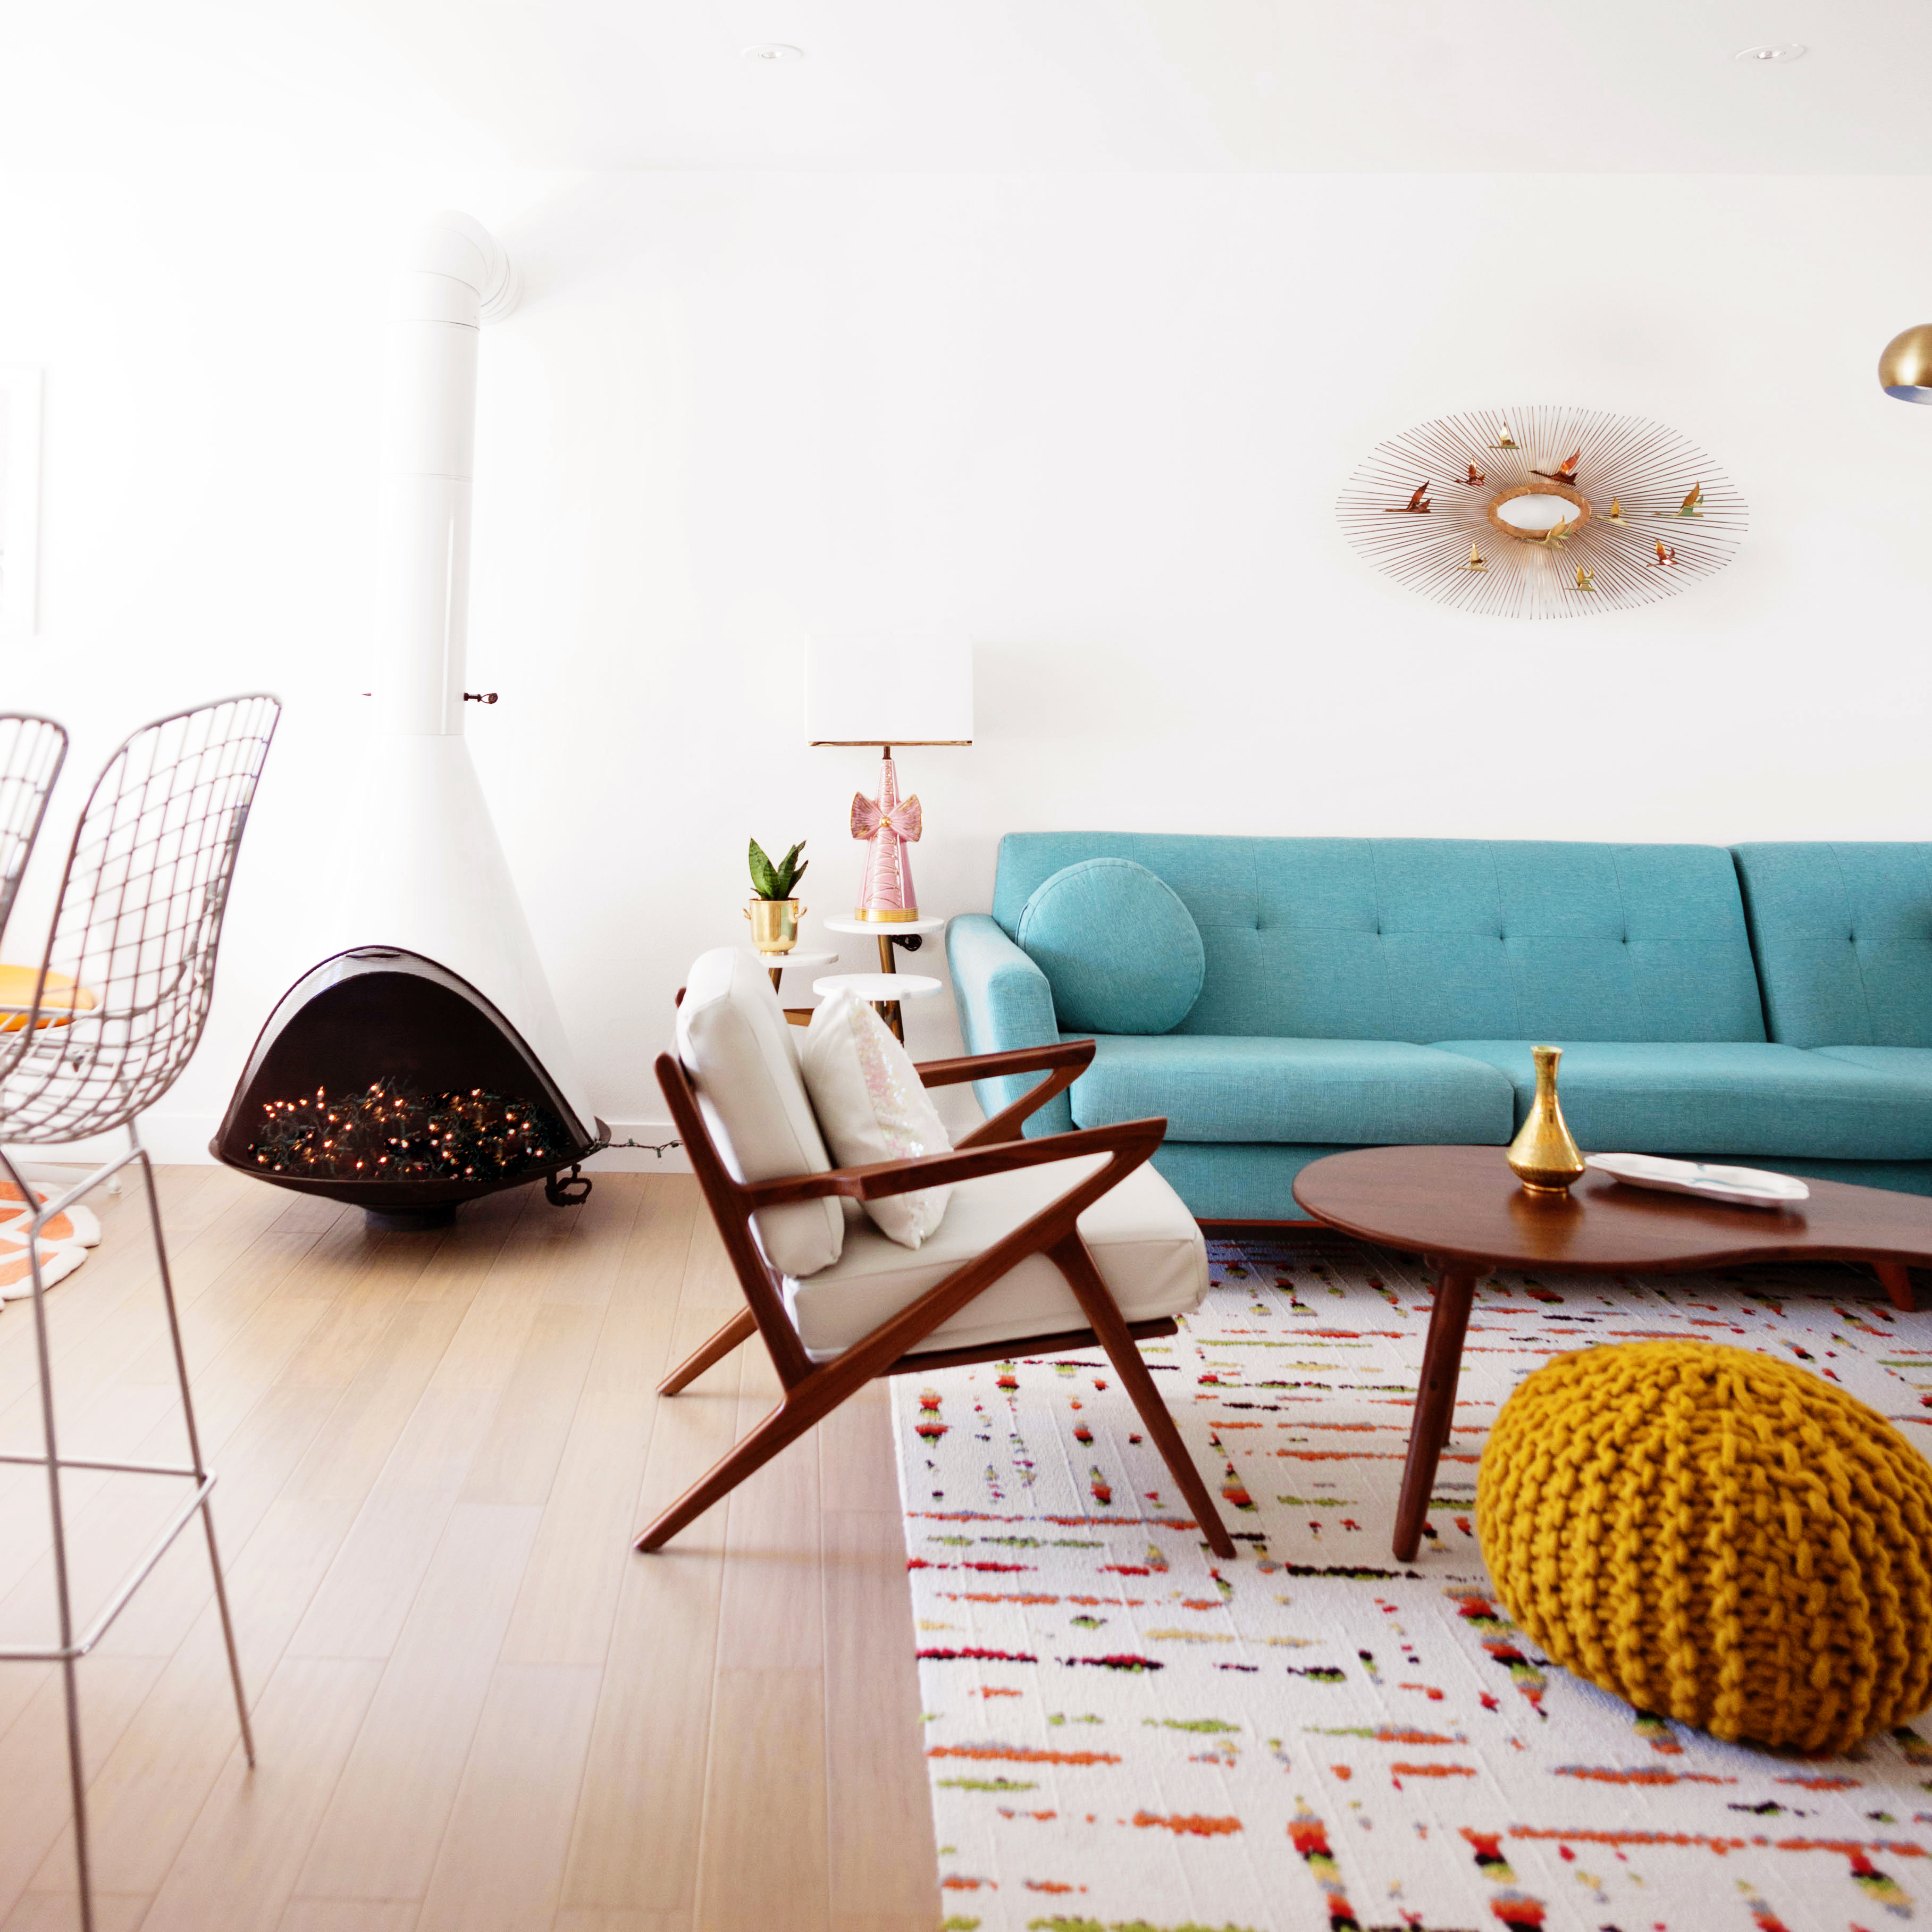 We added the conical fireplace to give the space a little more architectural detail. I found it on Craigslist and picked it up from the house it had been in since 1960. It doesn’t function in here but it has a little electric log and is stuffed with twinkle lights for ambience.
The adorable pink bow lamp is from a shop called RetrOKC in Oklahoma City. I found it while on a cross-country road trip last year.
The 3-tier marble side table and lamp shade are both from Target’s Project 62.
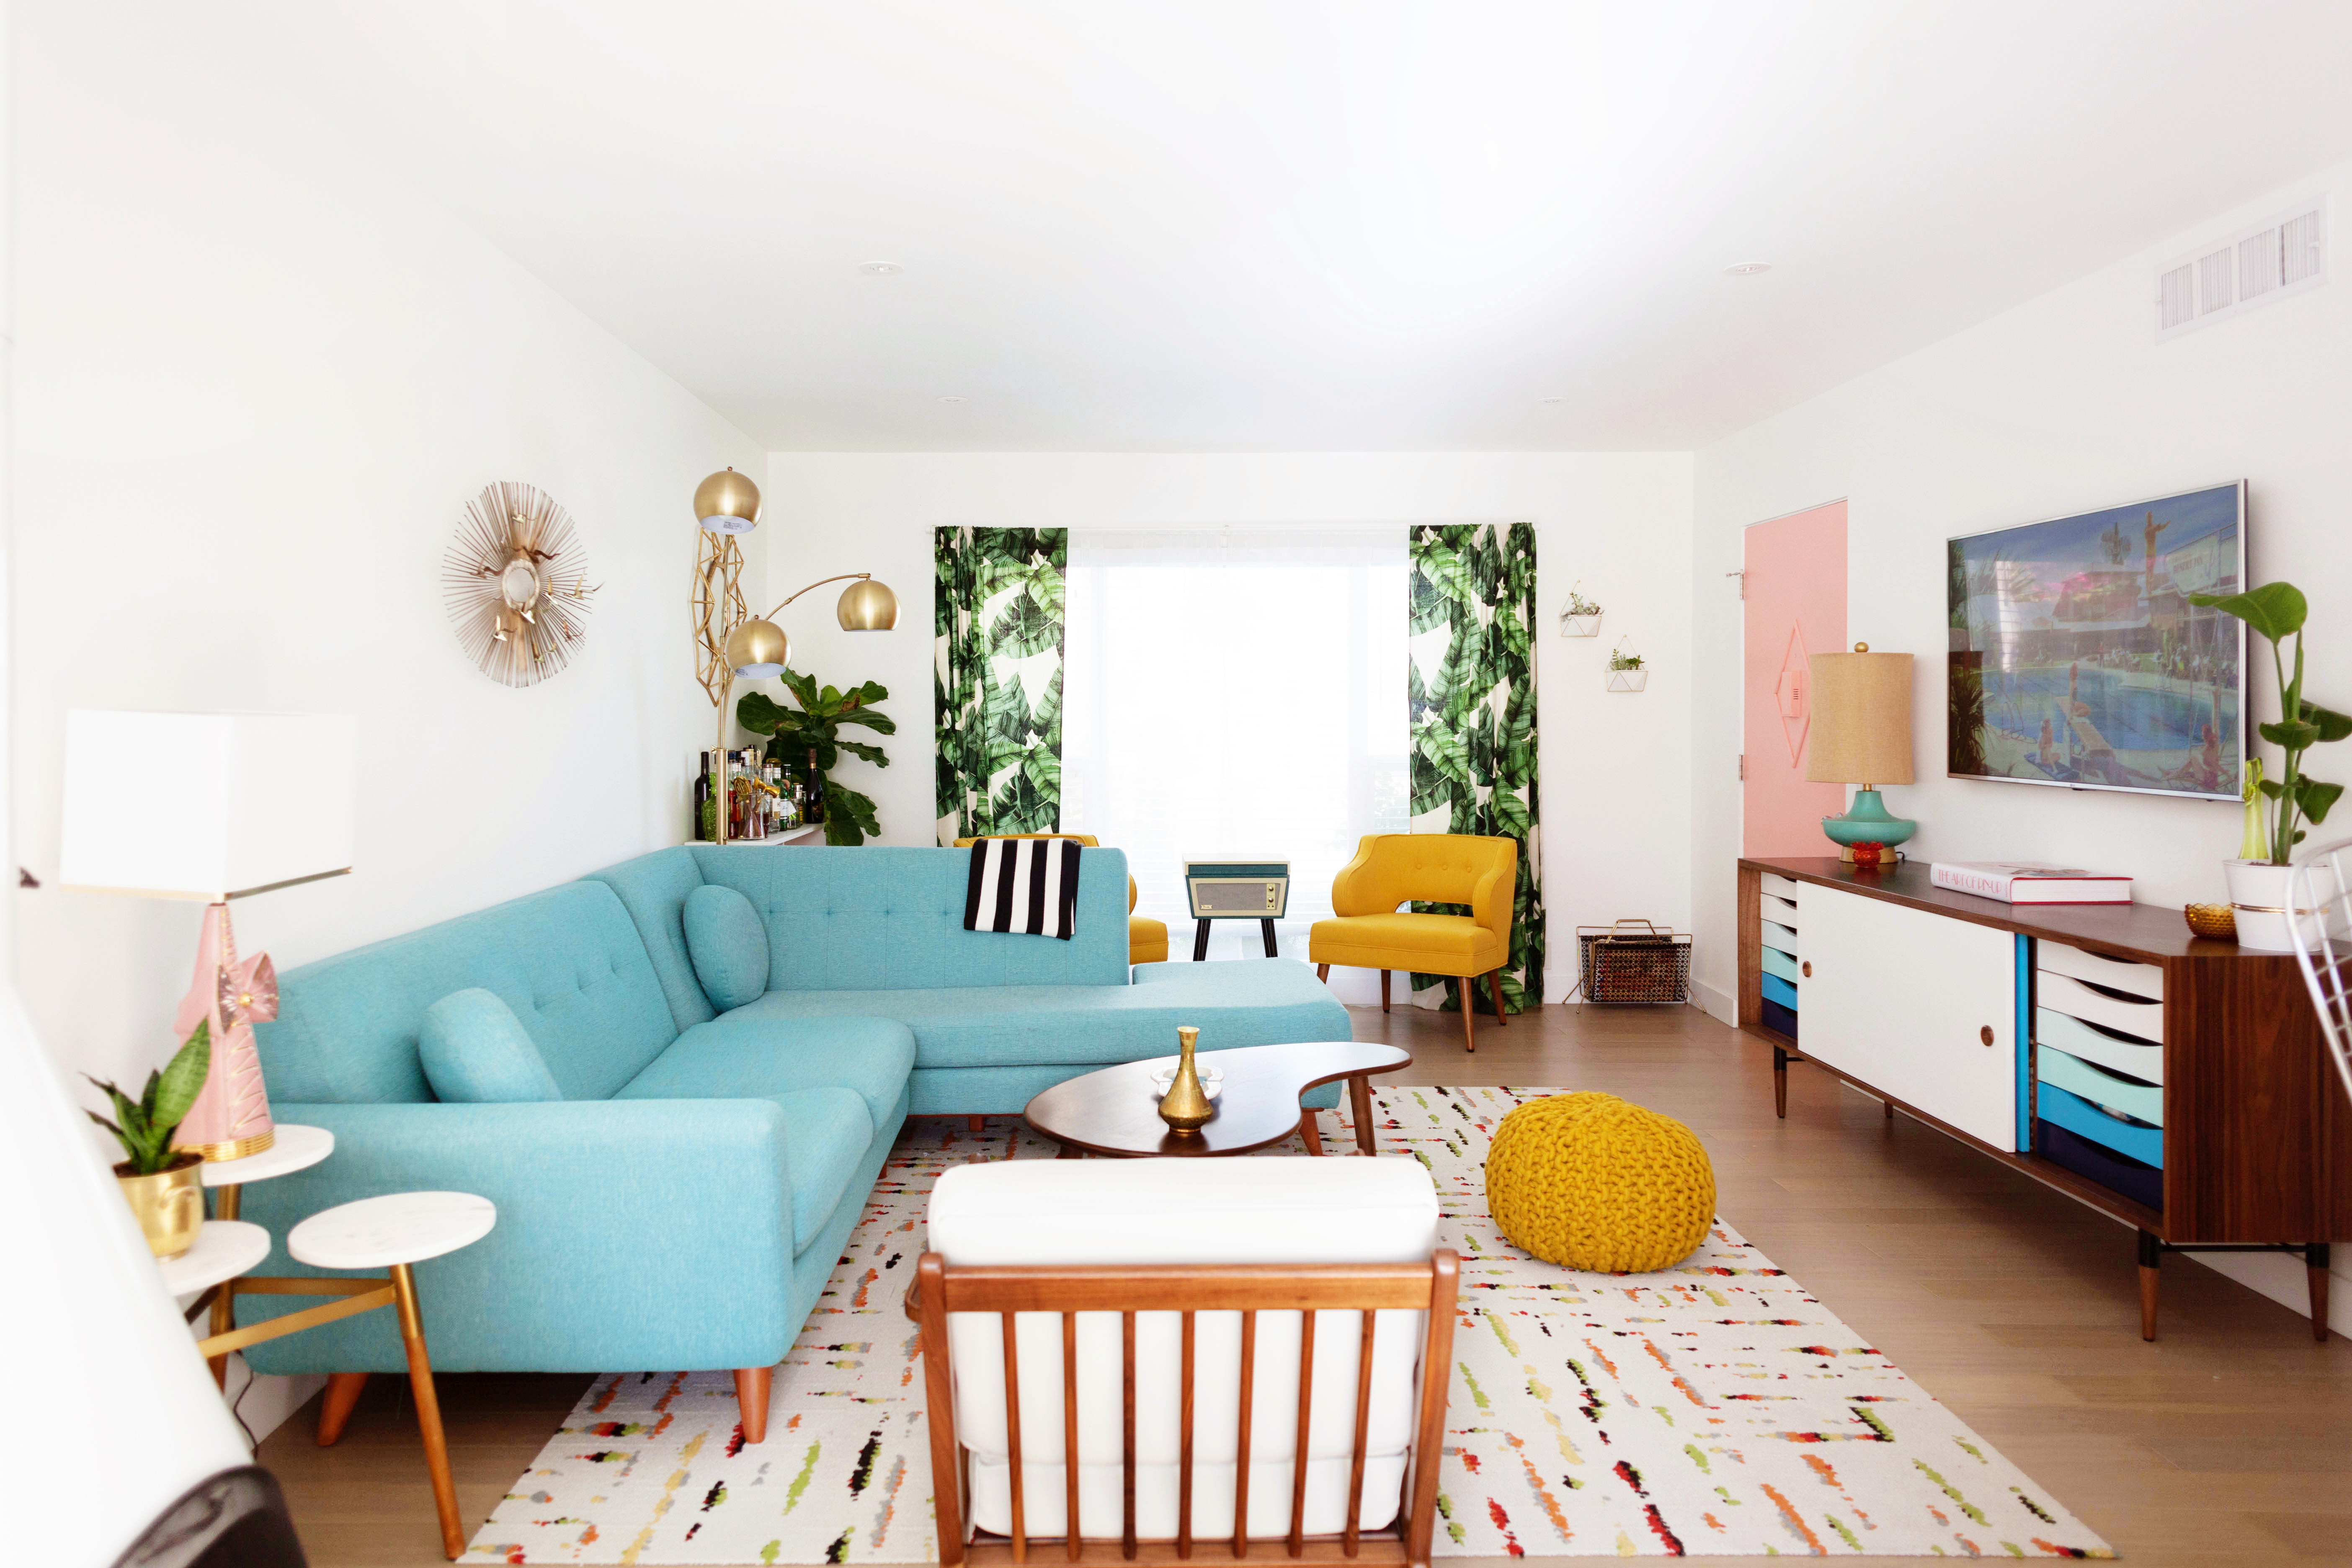
Here’s a wide view of the entire space. The palm print curtains are from H&M Home.

The credenza is from Joybird as well, with our TV mounted above it. We opted for an ultra-slim television mounted on a low-profile base so it can double as artwork when the TV is in stand-by mode. Most modern televisions and streaming devices have a screen saver mode that allows you to choose custom artwork or photographs to display. The lamp is from Joybird and the glassware is vintage.
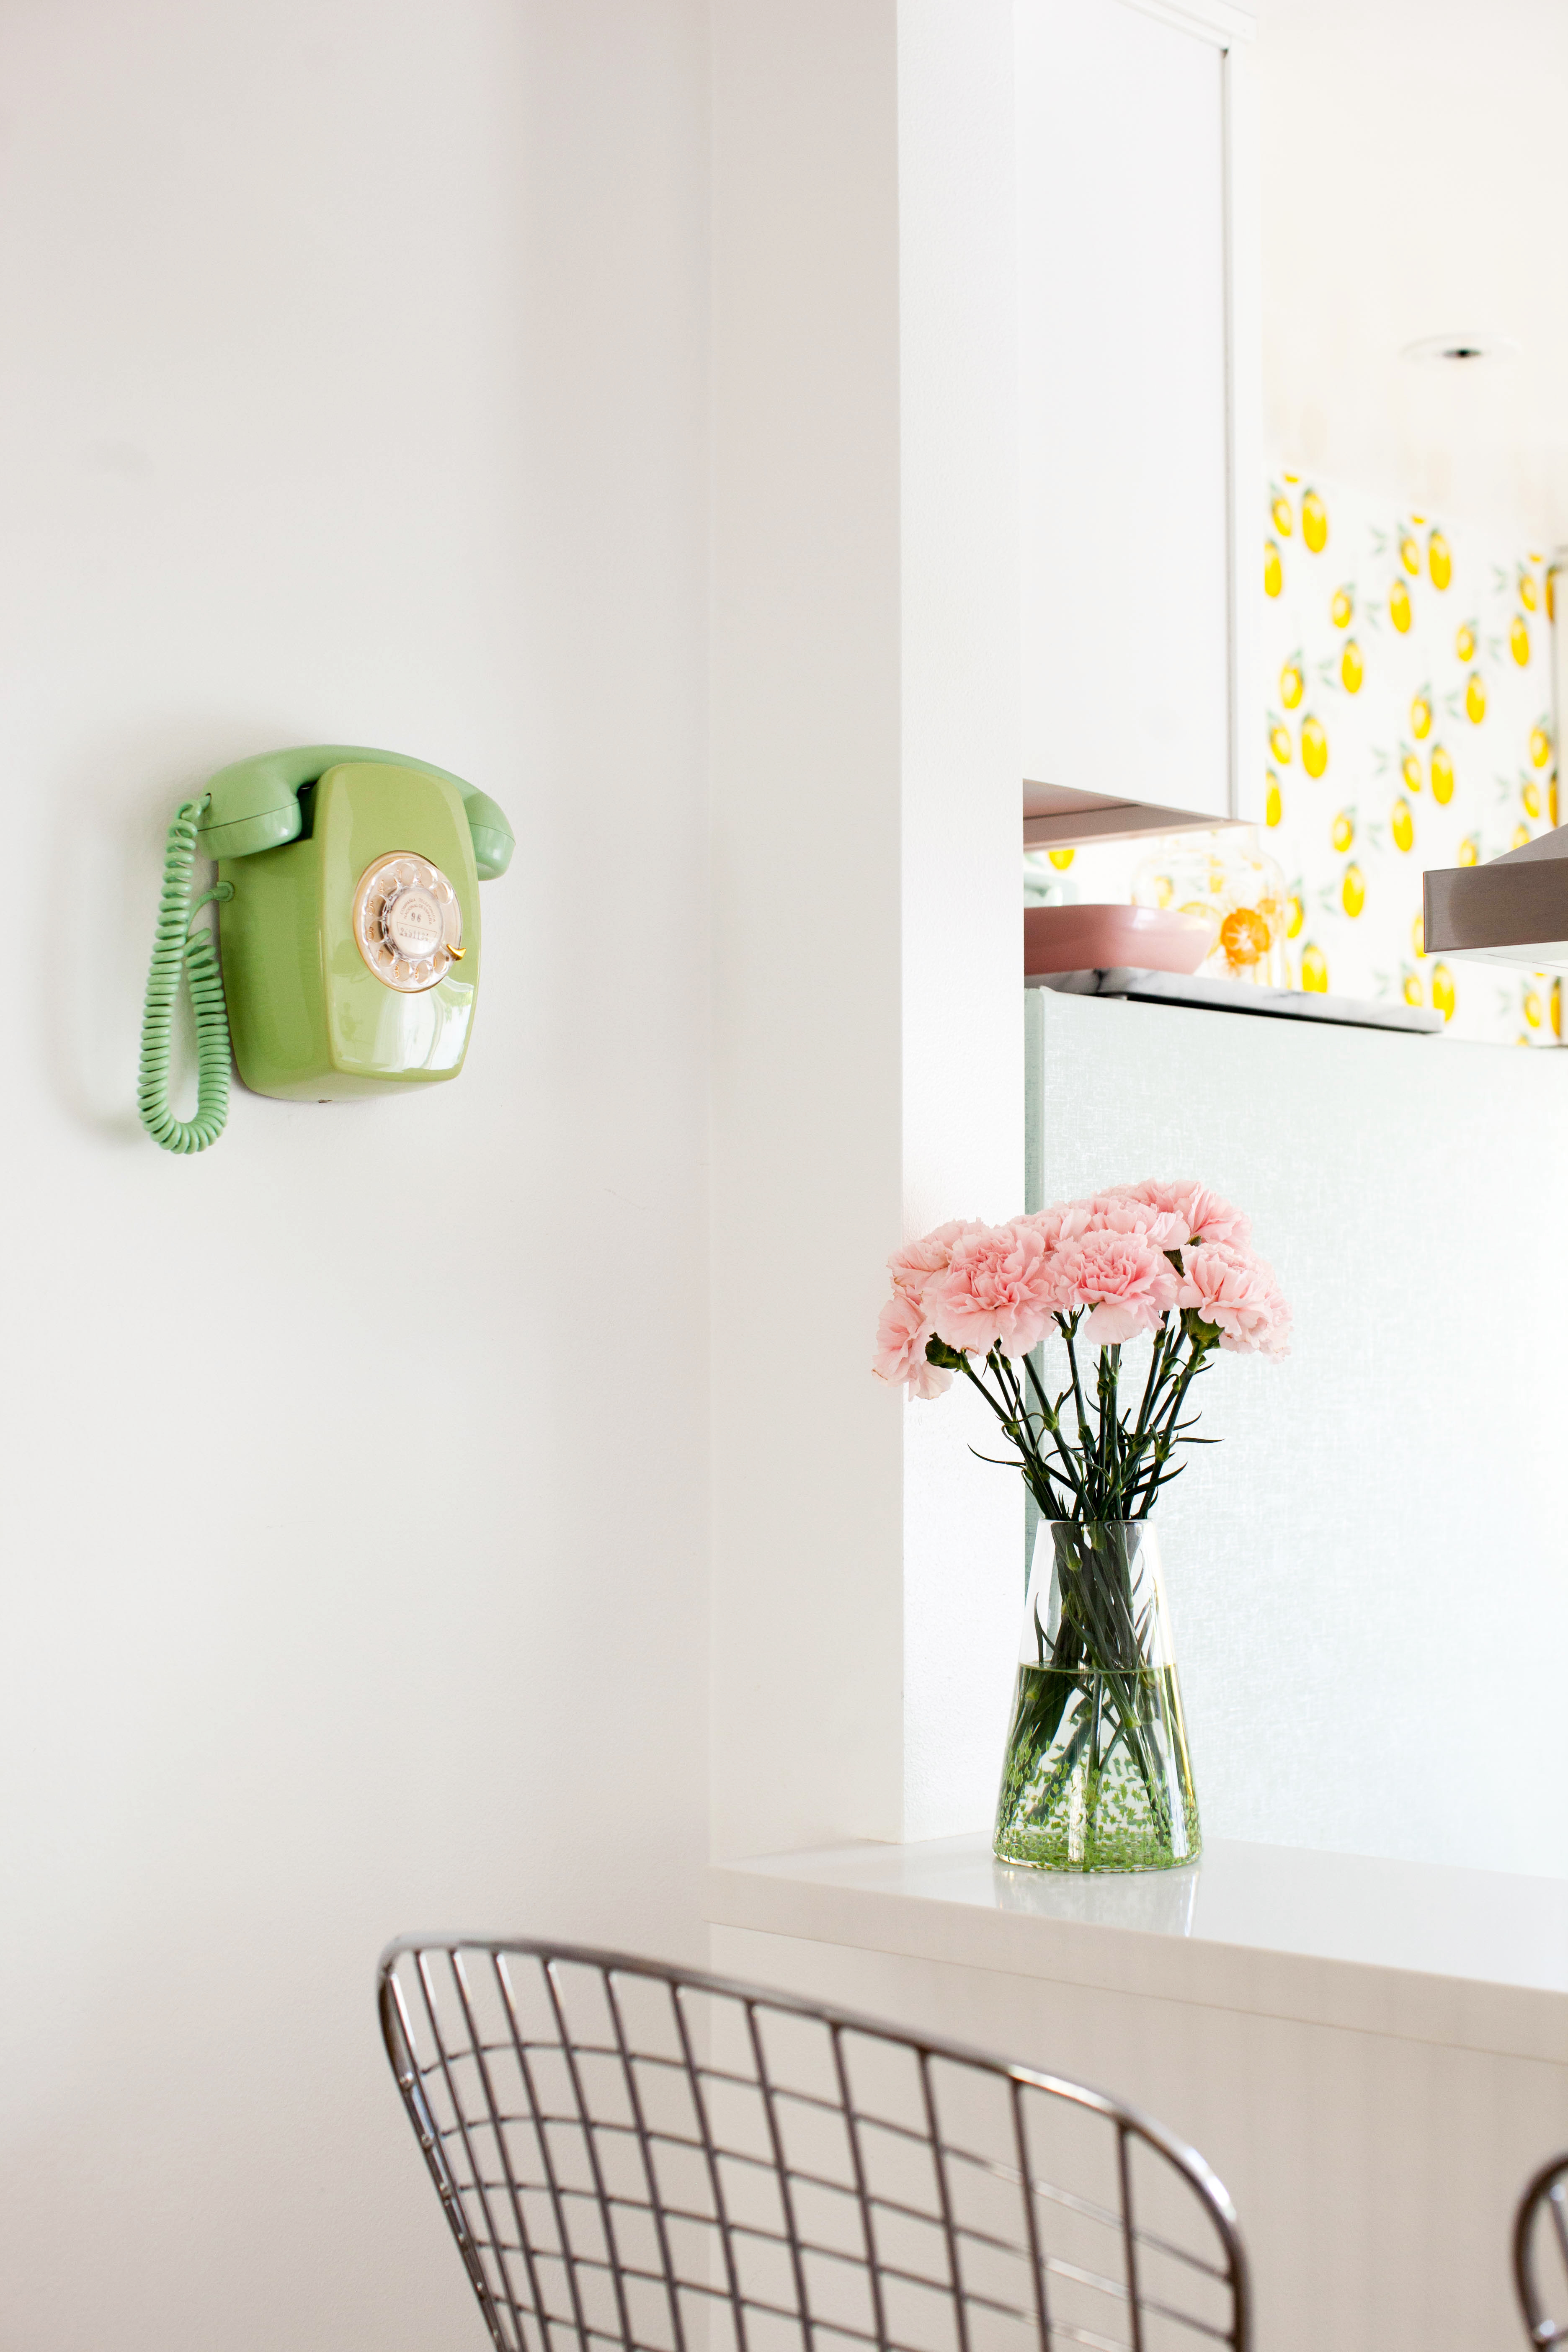 I try to add little moments around each room to give every corner a touch of character. I used a vintage rotary phone and vase from Baigelman Glass to add some color to this area by our breakfast bar.
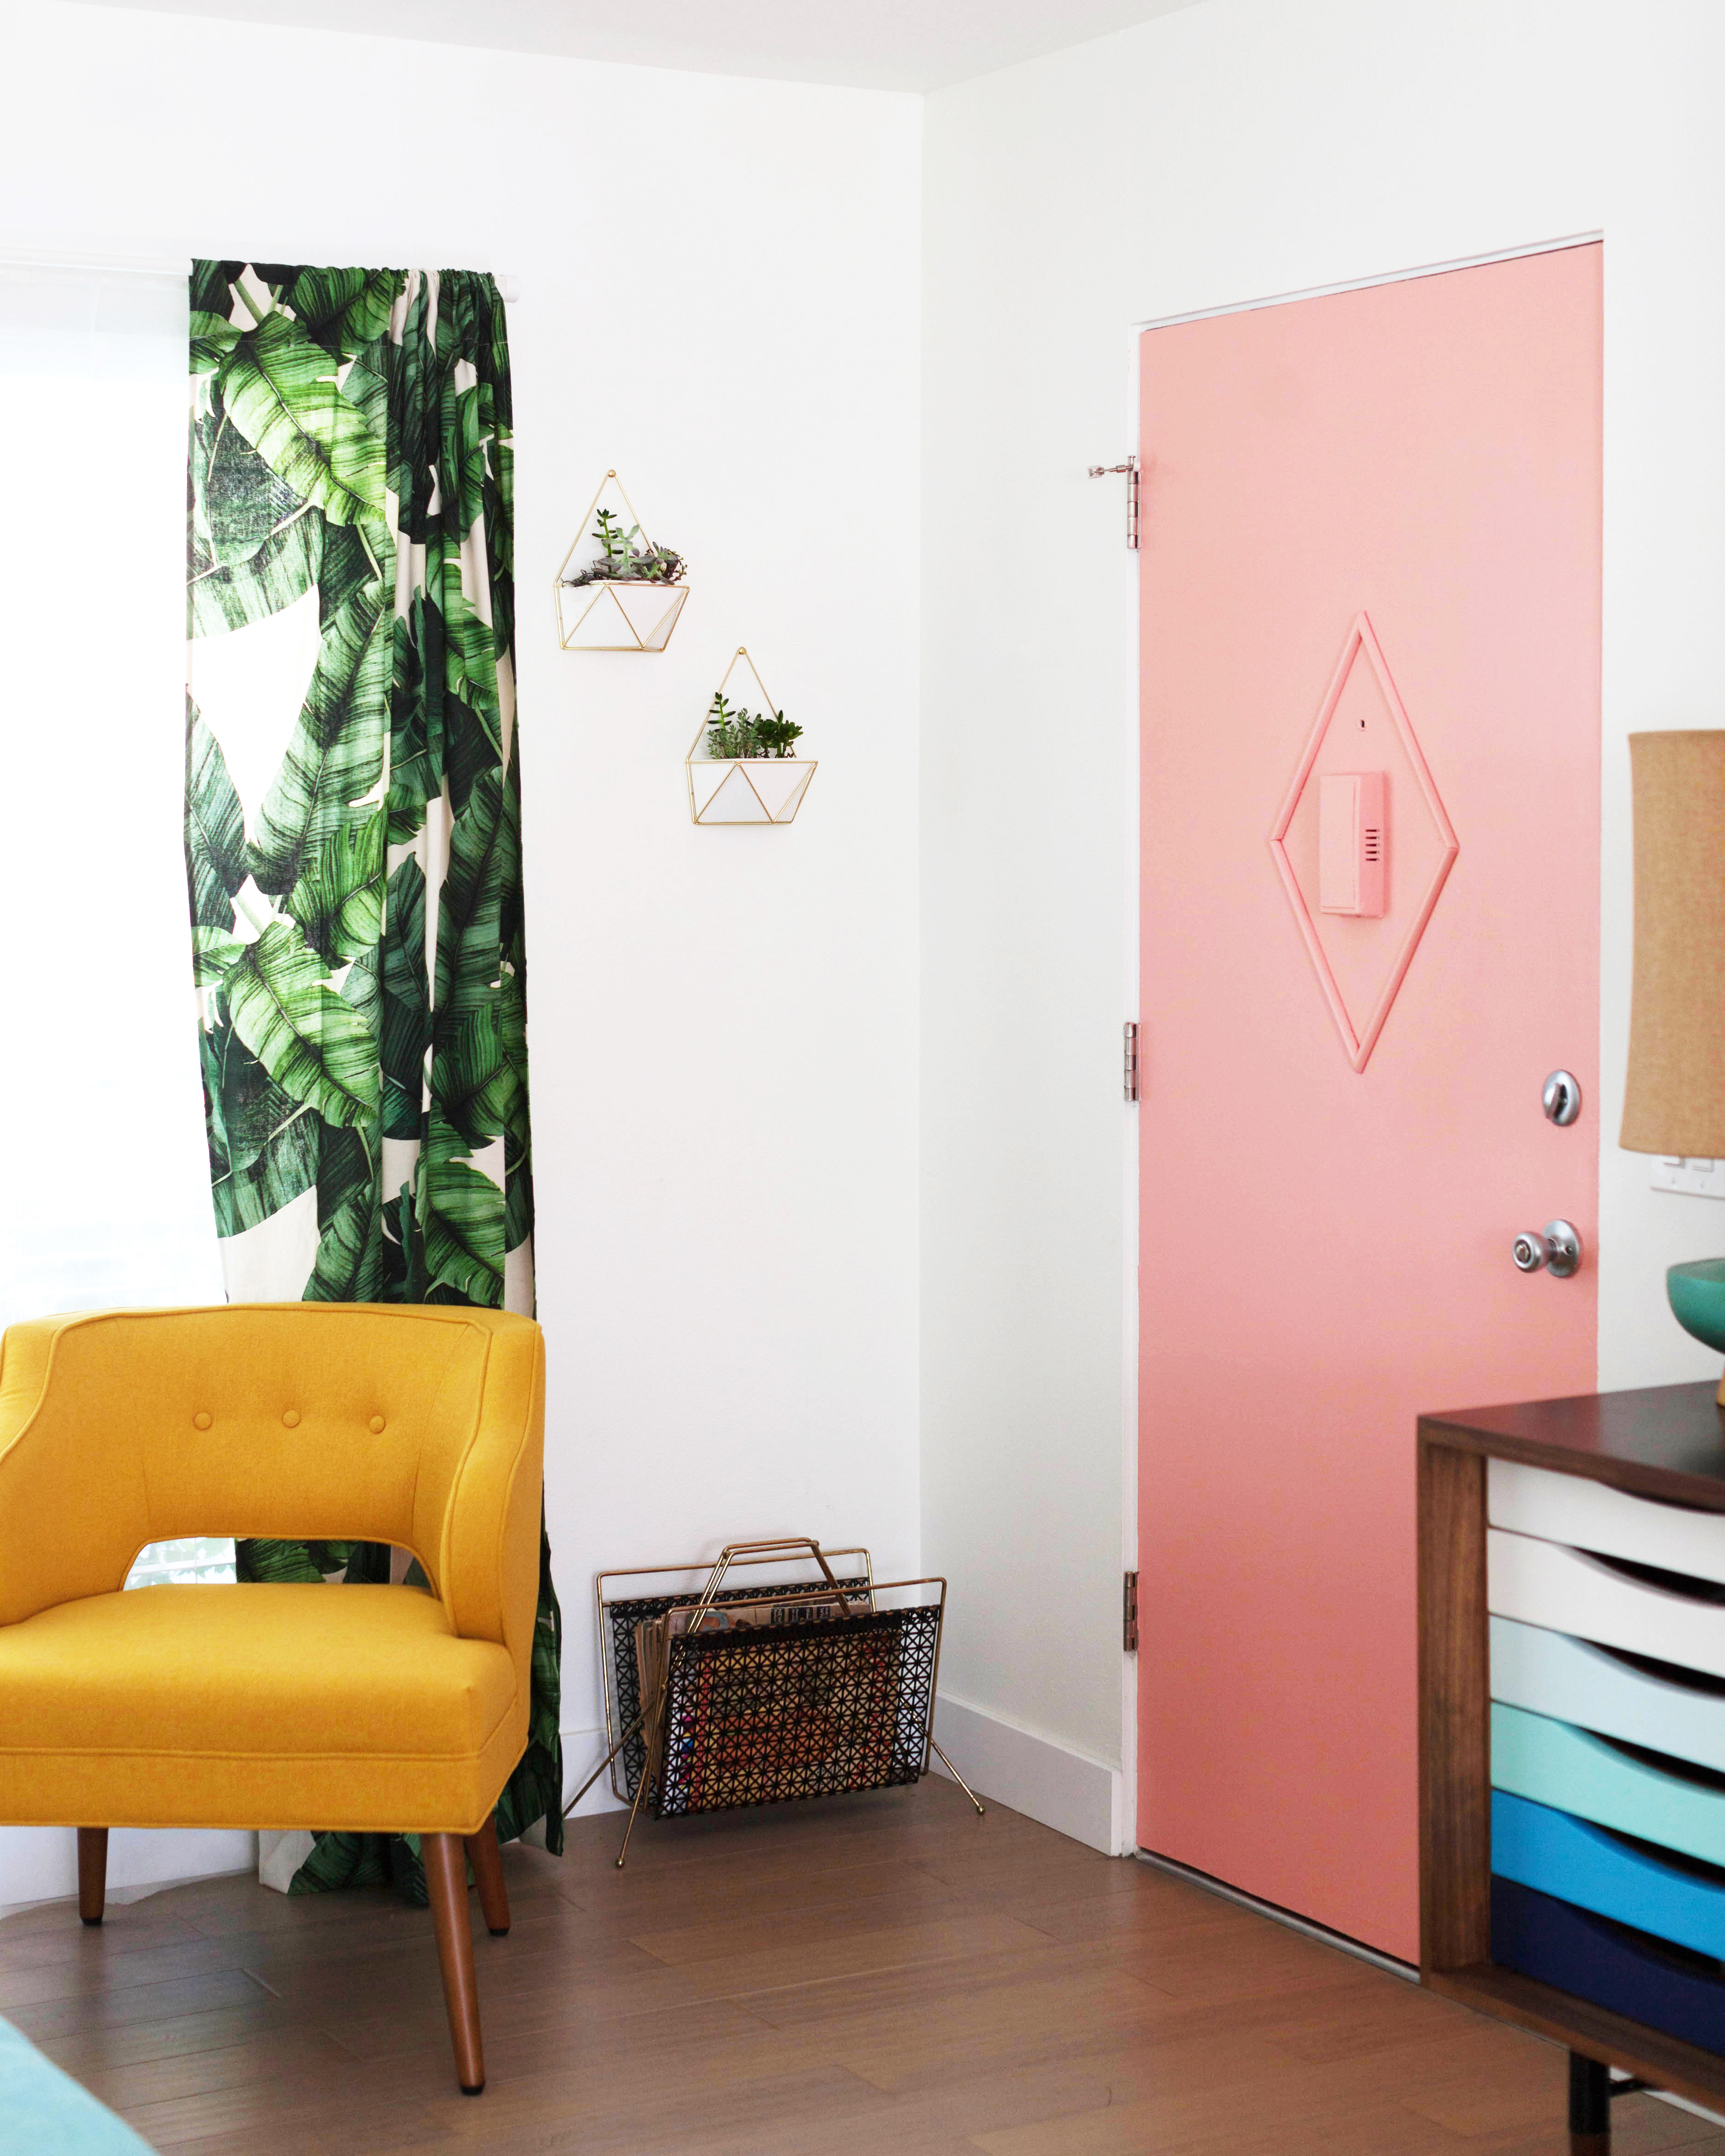 To this corner I added wall hanging planters and a vintage magazine stand filled with home decor magazines from the 50s and 60s. And lastly I painted the front door a peachy pink (Peach Punch from Valspar to be exact) and added a little bit of retro detail with wood molding!
That’s the whole shebang! Thanks for stopping by!

Happy New Year, loves! I don’t know about you but I’ve been in a haze of exhaustion since the holidays ended. I always love Christmas decorations until it’s time to put them away. I’ve been vacuuming up stray pieces of tinsel and glitter for a week and somehow they still keep popping up! Putting away the decorations always feels like a clean slate and I get super motivated to do a little redecorating afterward. I decided I wanted to add a little more color in here for the New Year and thought a new accent chair and pillows would be the best way to do it. Switching out chairs and pillows is my favorite way to change things up. They’re easy to store away and swap from room to room, so you can easily switch things up whenever you feel like! I teamed up with Article to show you a few new color combos!
If you haven’t heard of Article yet, let me introduce you! Article is an online-only brand that offers quality modern furniture with a direct-to-consumer model that avoids price markups you’ll find in stores. This makes shopping with them easy, efficient, and more cost friendly! And the fact that delivery starts at only $49, regardless of order size or delivery location across the U.S. and Canada makes shopping for furniture online a delight.
I not only wanted to add more color but also luxe texture. The velvet Matrix chairs from Article turned out to be the perfect size and shape for my apartment’s living room. The rounded curves and slim legs are versatile enough to fit in with many styles, including my mid-century vibe. AND paired with the Lucca pillows makes for great color combos. Plus, ordering and delivery, and assembly was an absolute breeze.
I was set on the Matrix chair, but I had to pick a color! The Matrix comes in 12 colors, so I pulled colors from my rug and favorite table lamp as inspiration. I went with Blush Pink, Grass Green, and Persimmon Orange as my top contenders. Each one brings a different vibe to the room. Check it out!
The first option was Blush Pink paired with a Claret Red Lucca Pillow. I figured this would pull in the color from my lamp and red from my rug. I like the combination of pink and red, it feels cute and warm at the same time, and is perfect for February!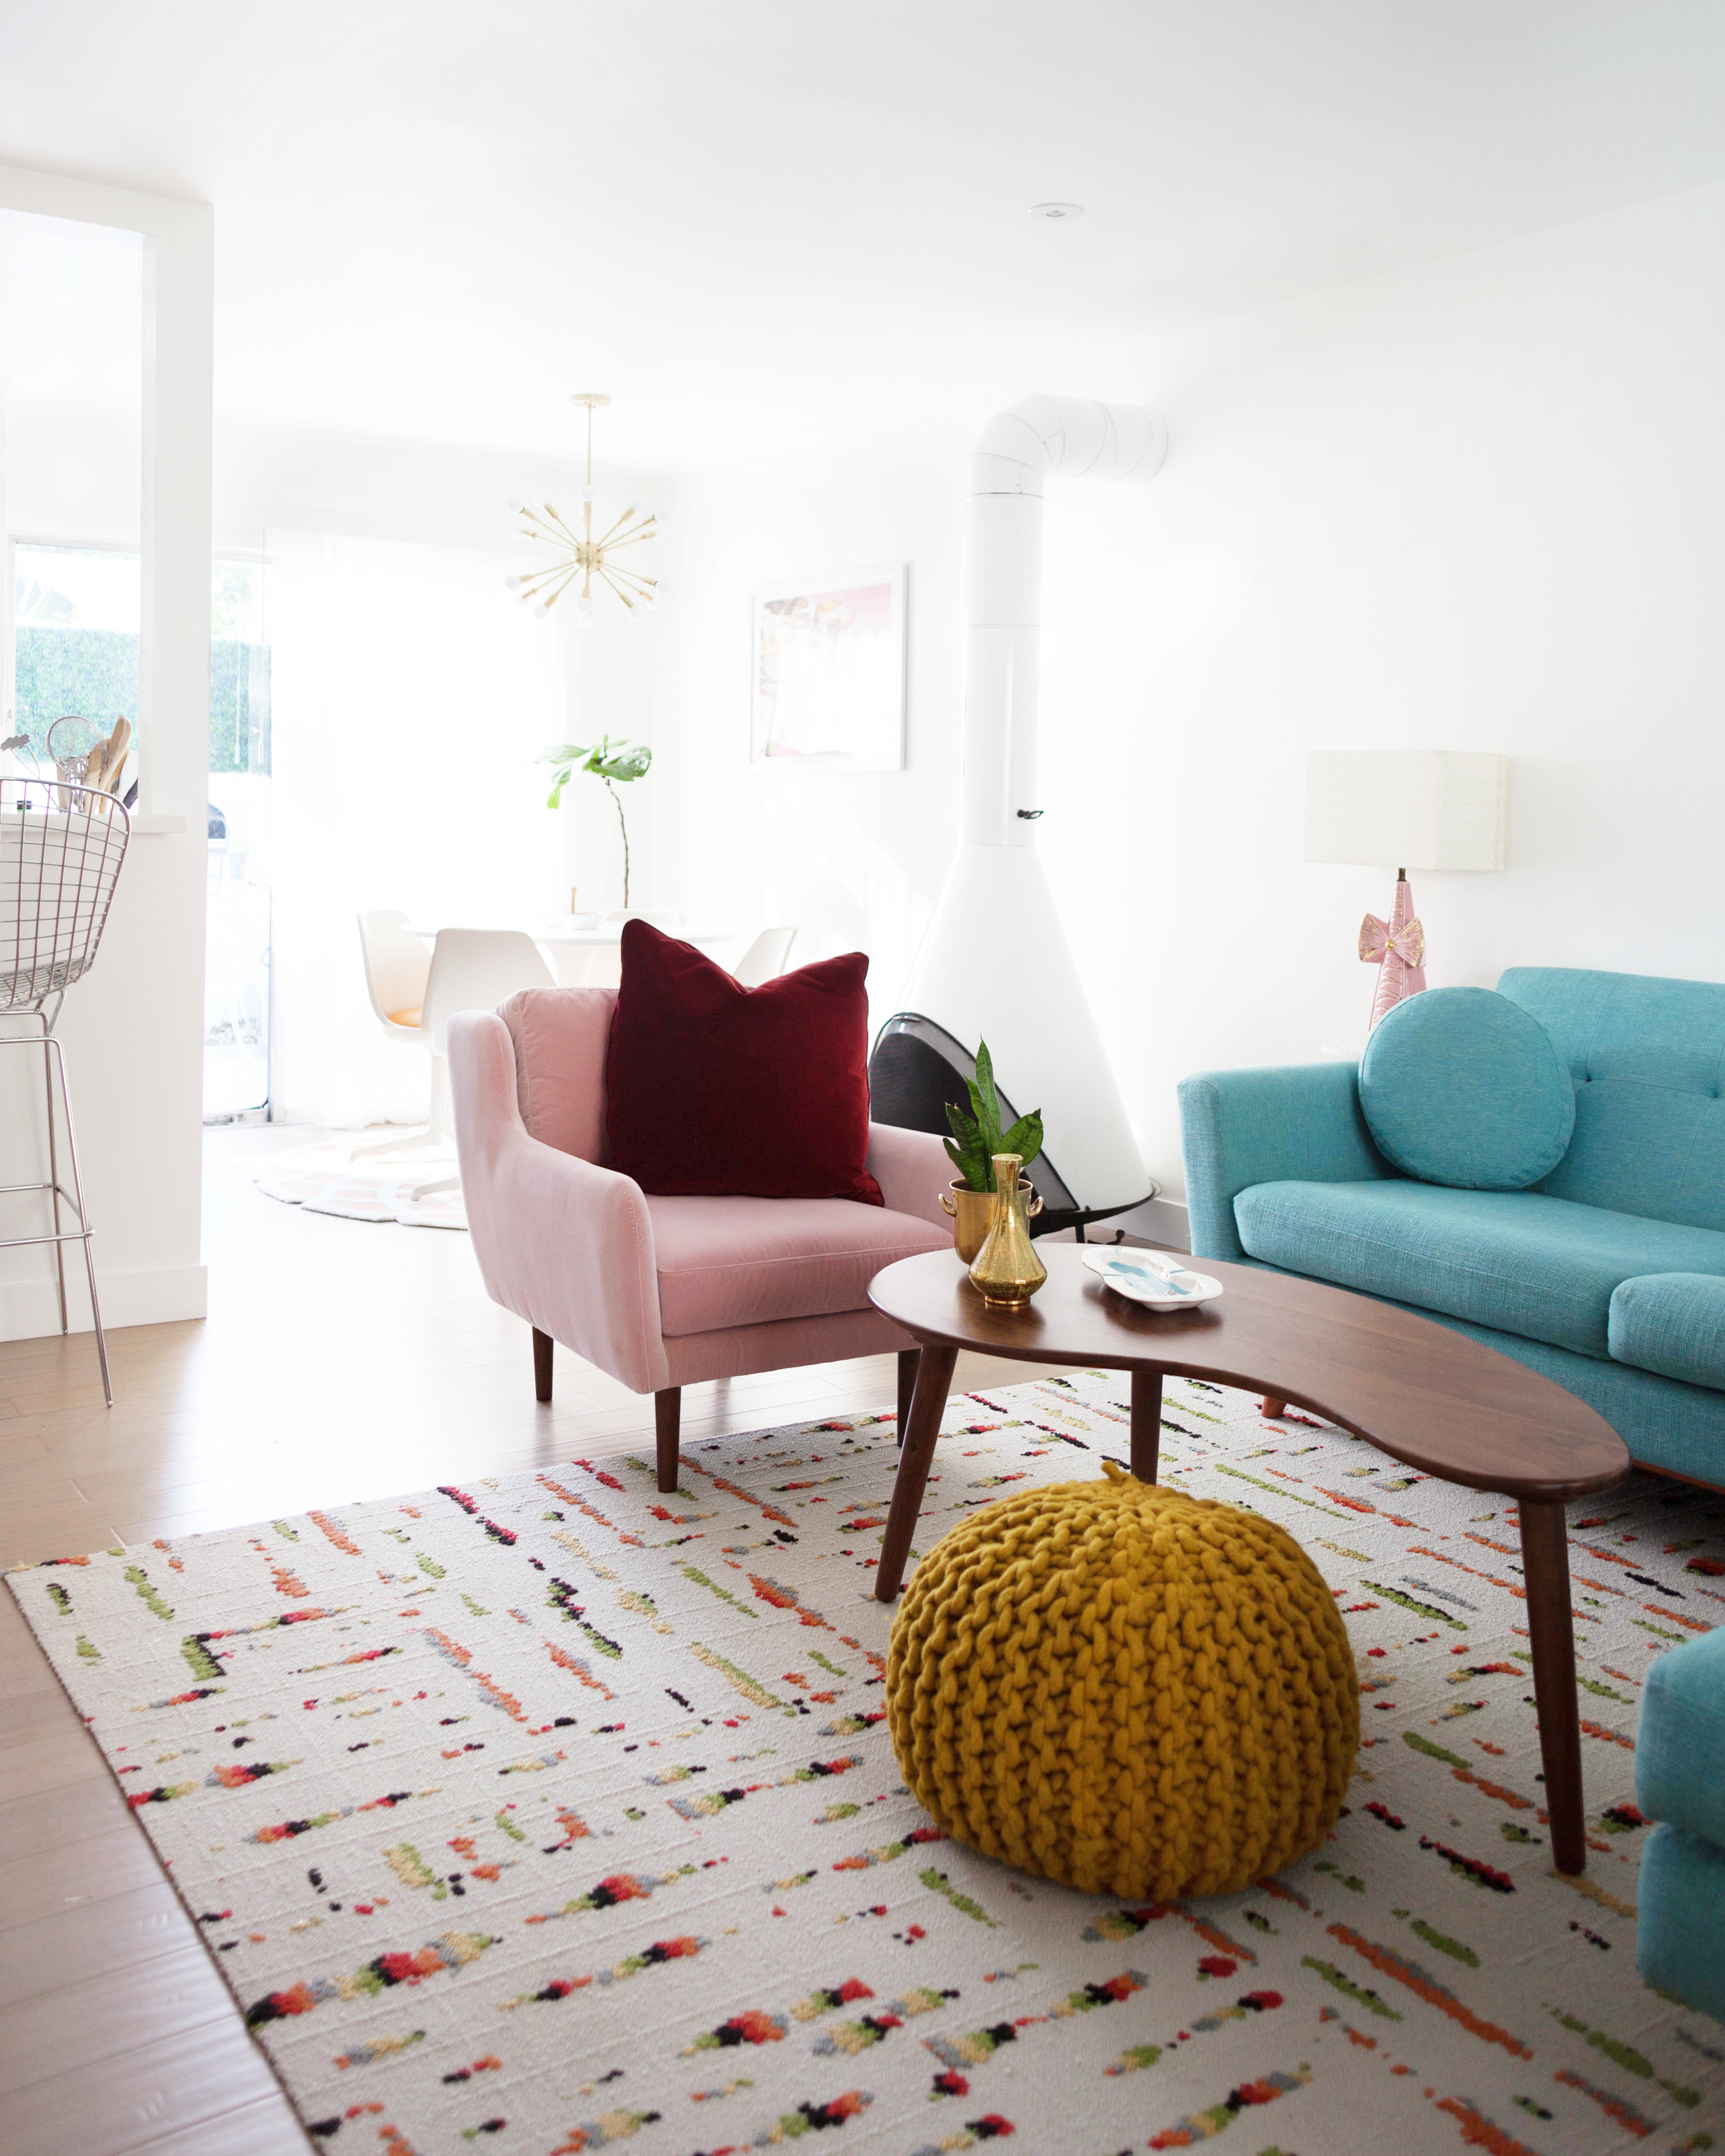
 I also REALLY like it paired with a Persimmon Orange Lucca pillow. It ties together the orange from the rug and my dining room chairs nicely, without it being too orange.
 I love it from this angle!
 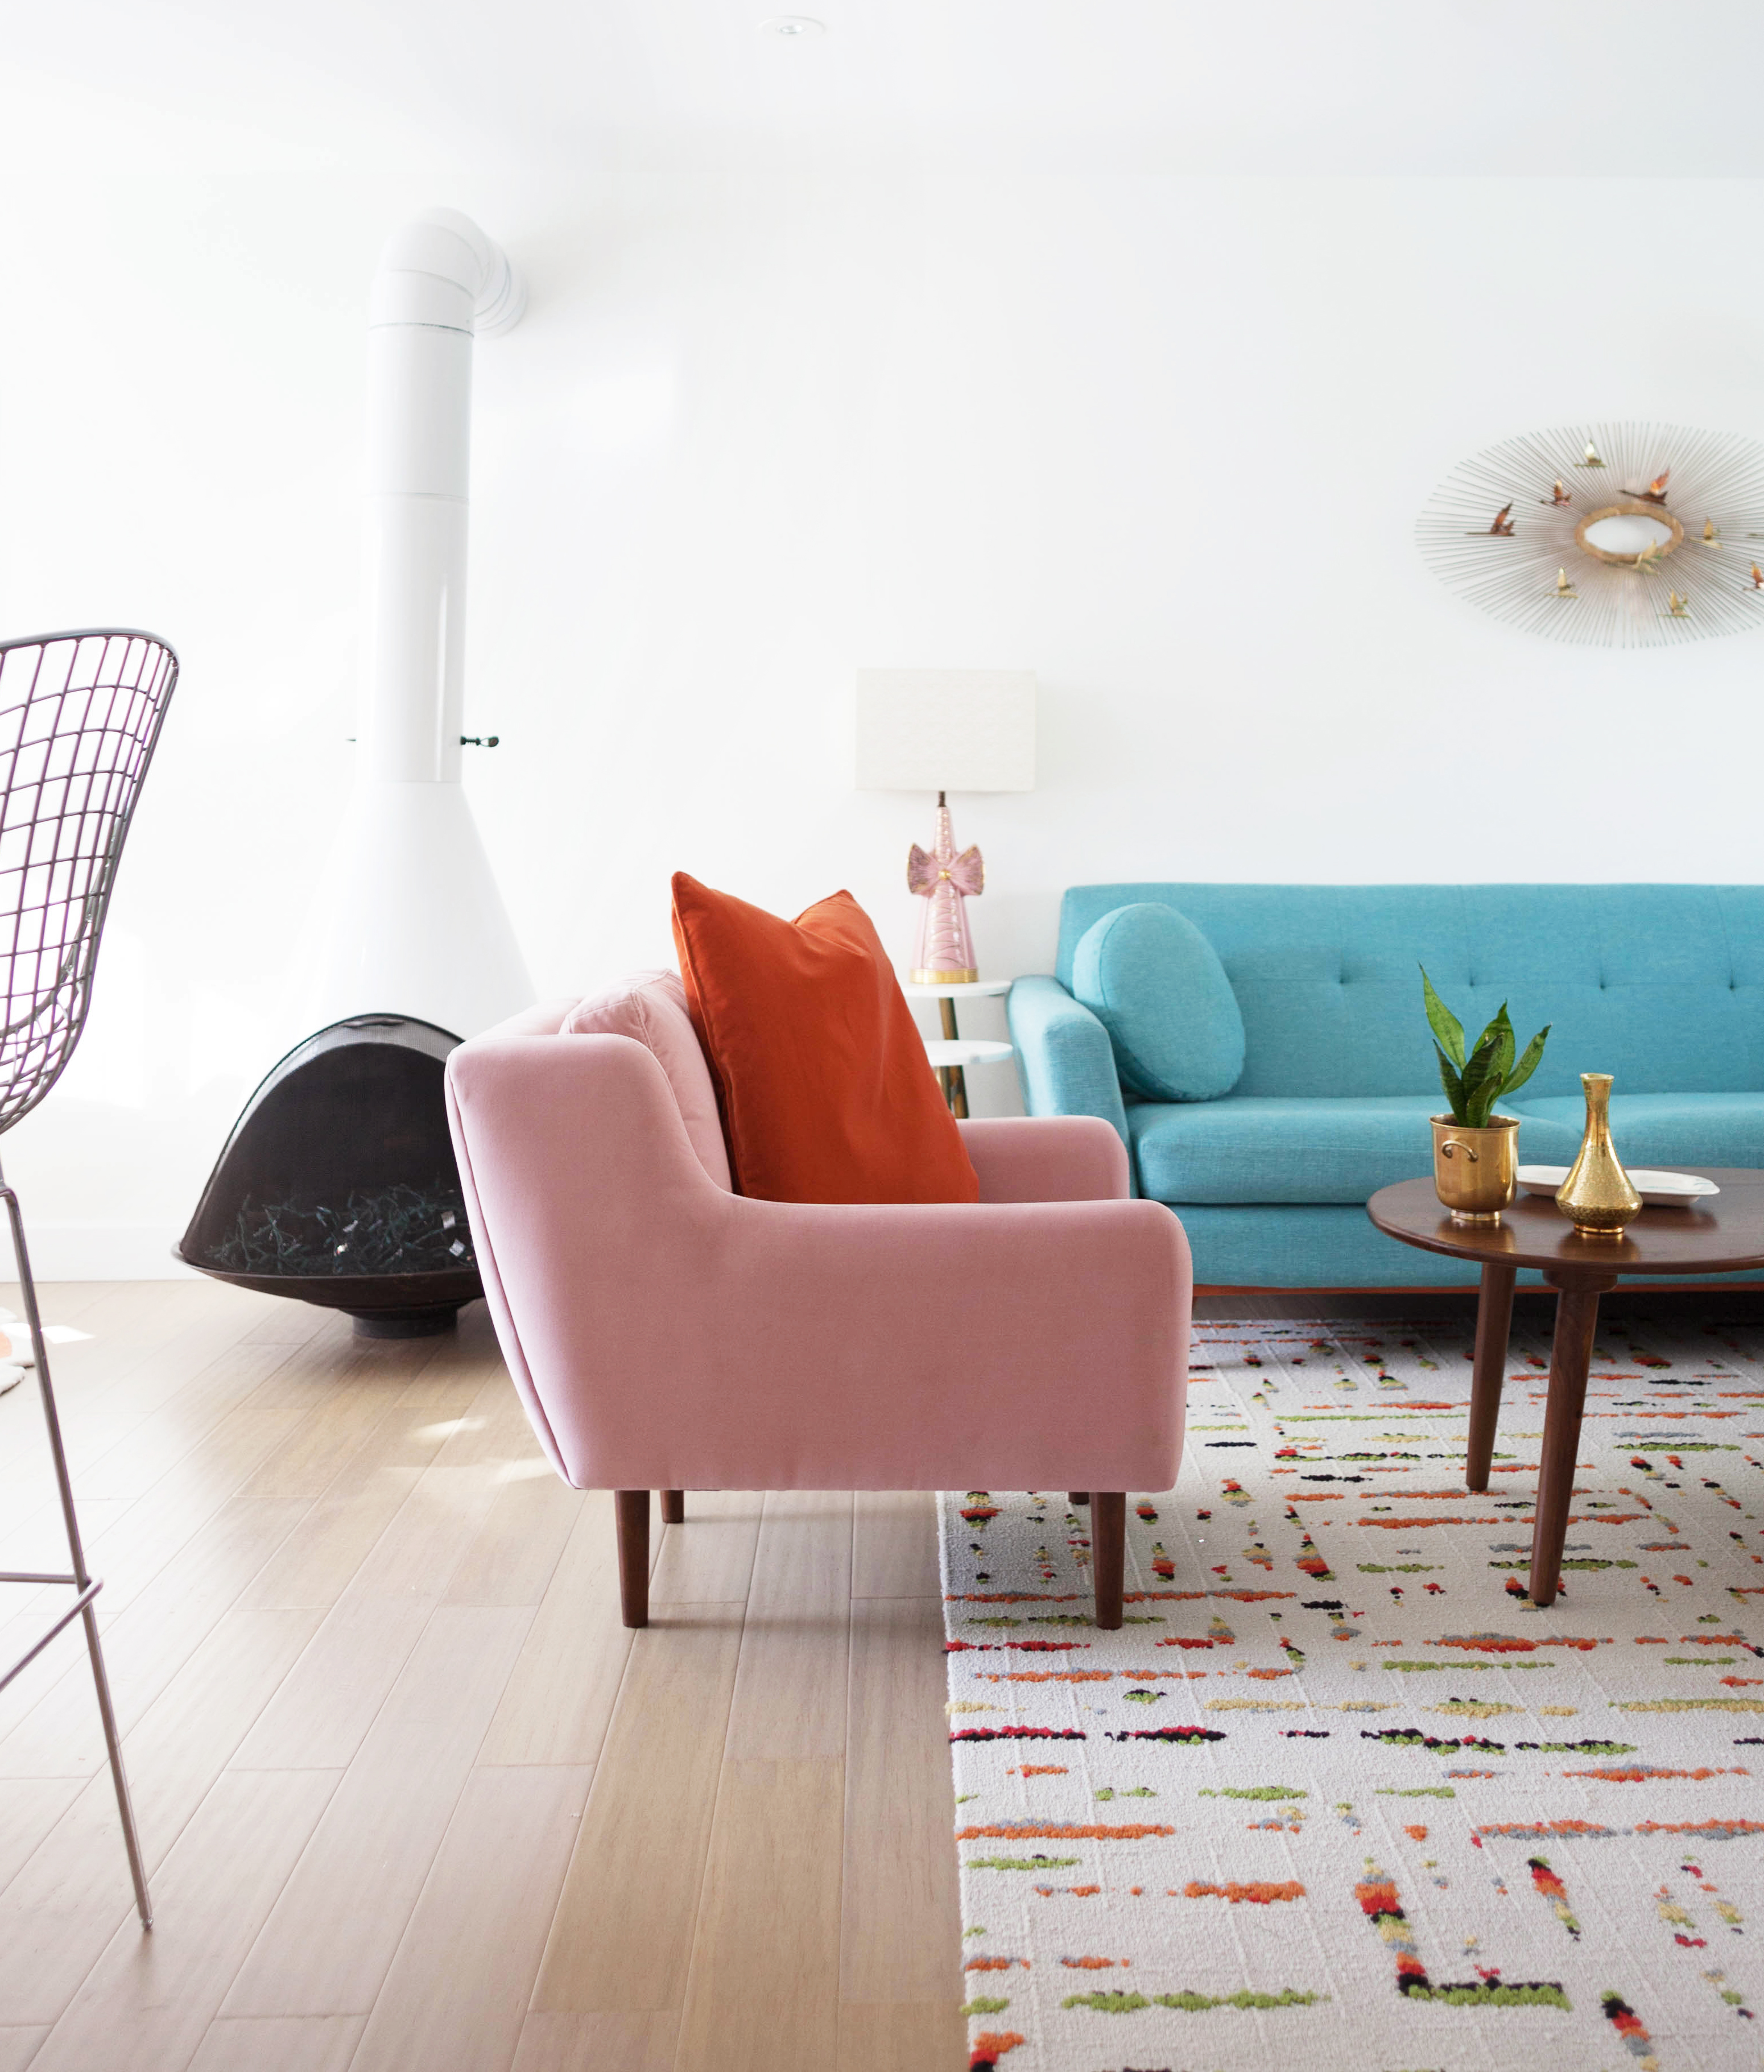 I’ve been wanting to try to incorporate more green into this room so next up is the Grass Green Matrix with Blush Pink pillows.
  Pink and green is one of my favorite color combos ever, buuutttt my room, bathroom, and office already have pink and green as their main colors so that might be overkill…
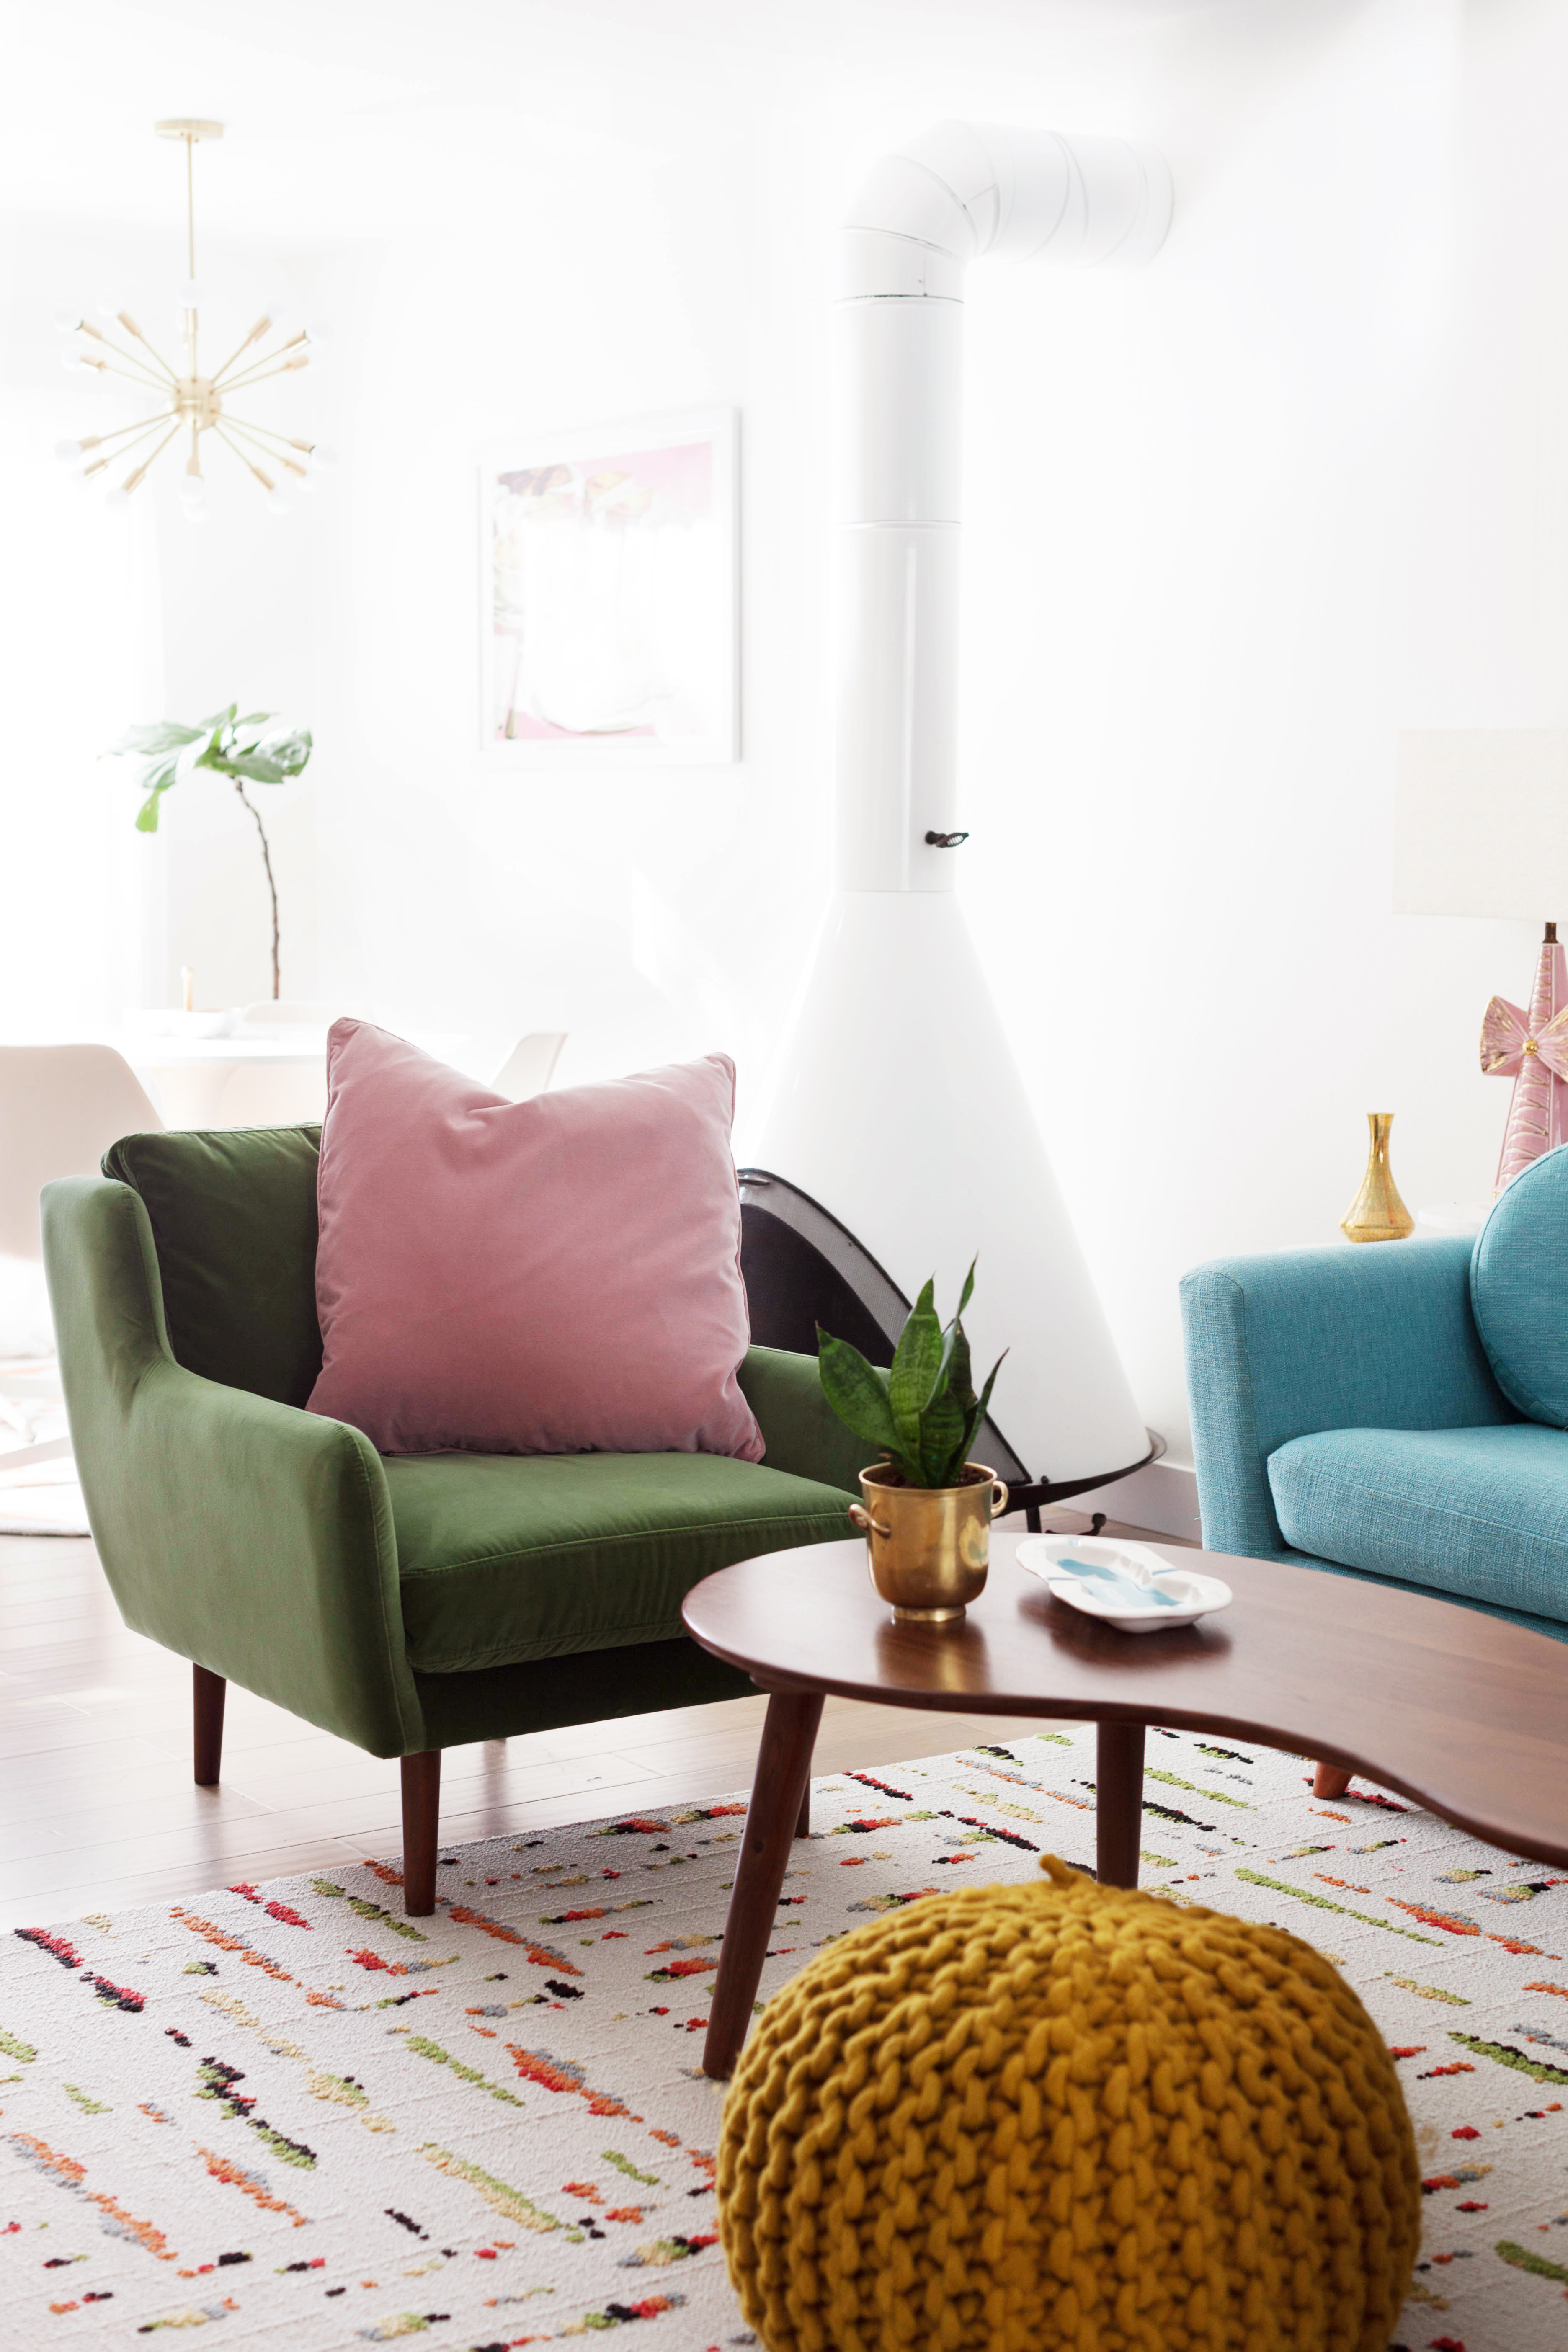 This green is very luxe and gives me major Art Deco vibes.
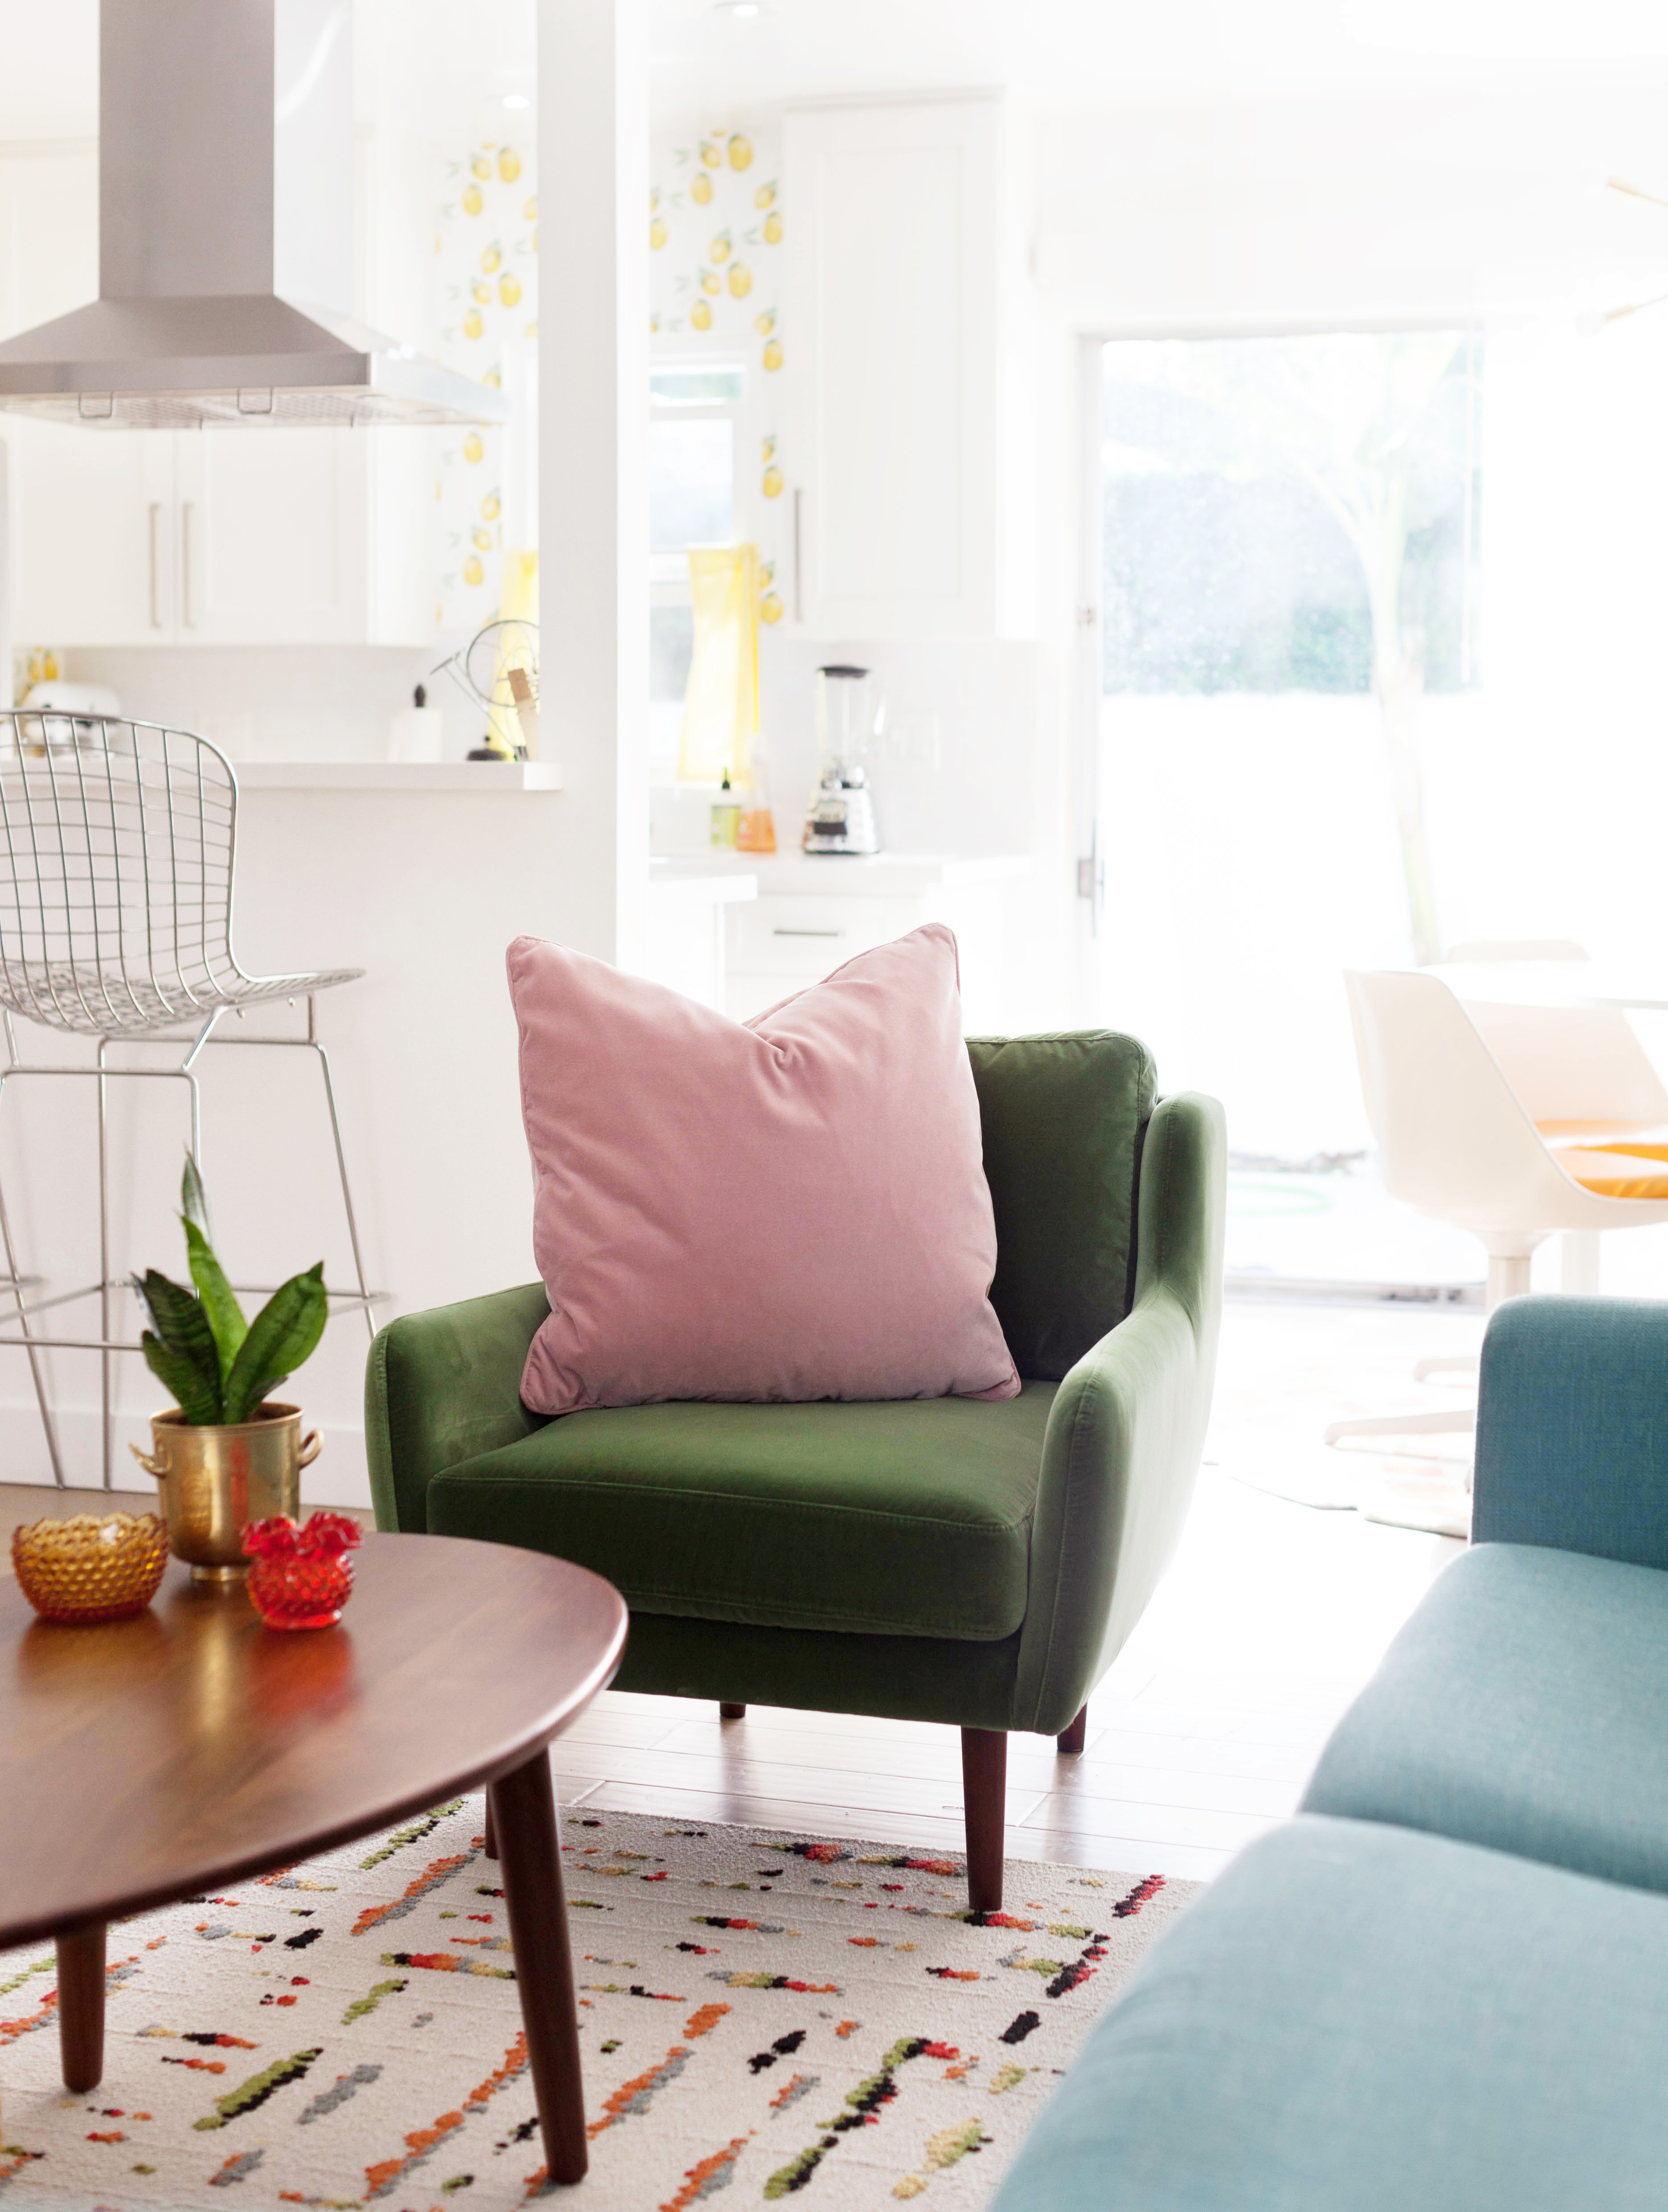 It gets an even warmer feel when paired with the Persimmon Orange pillow.
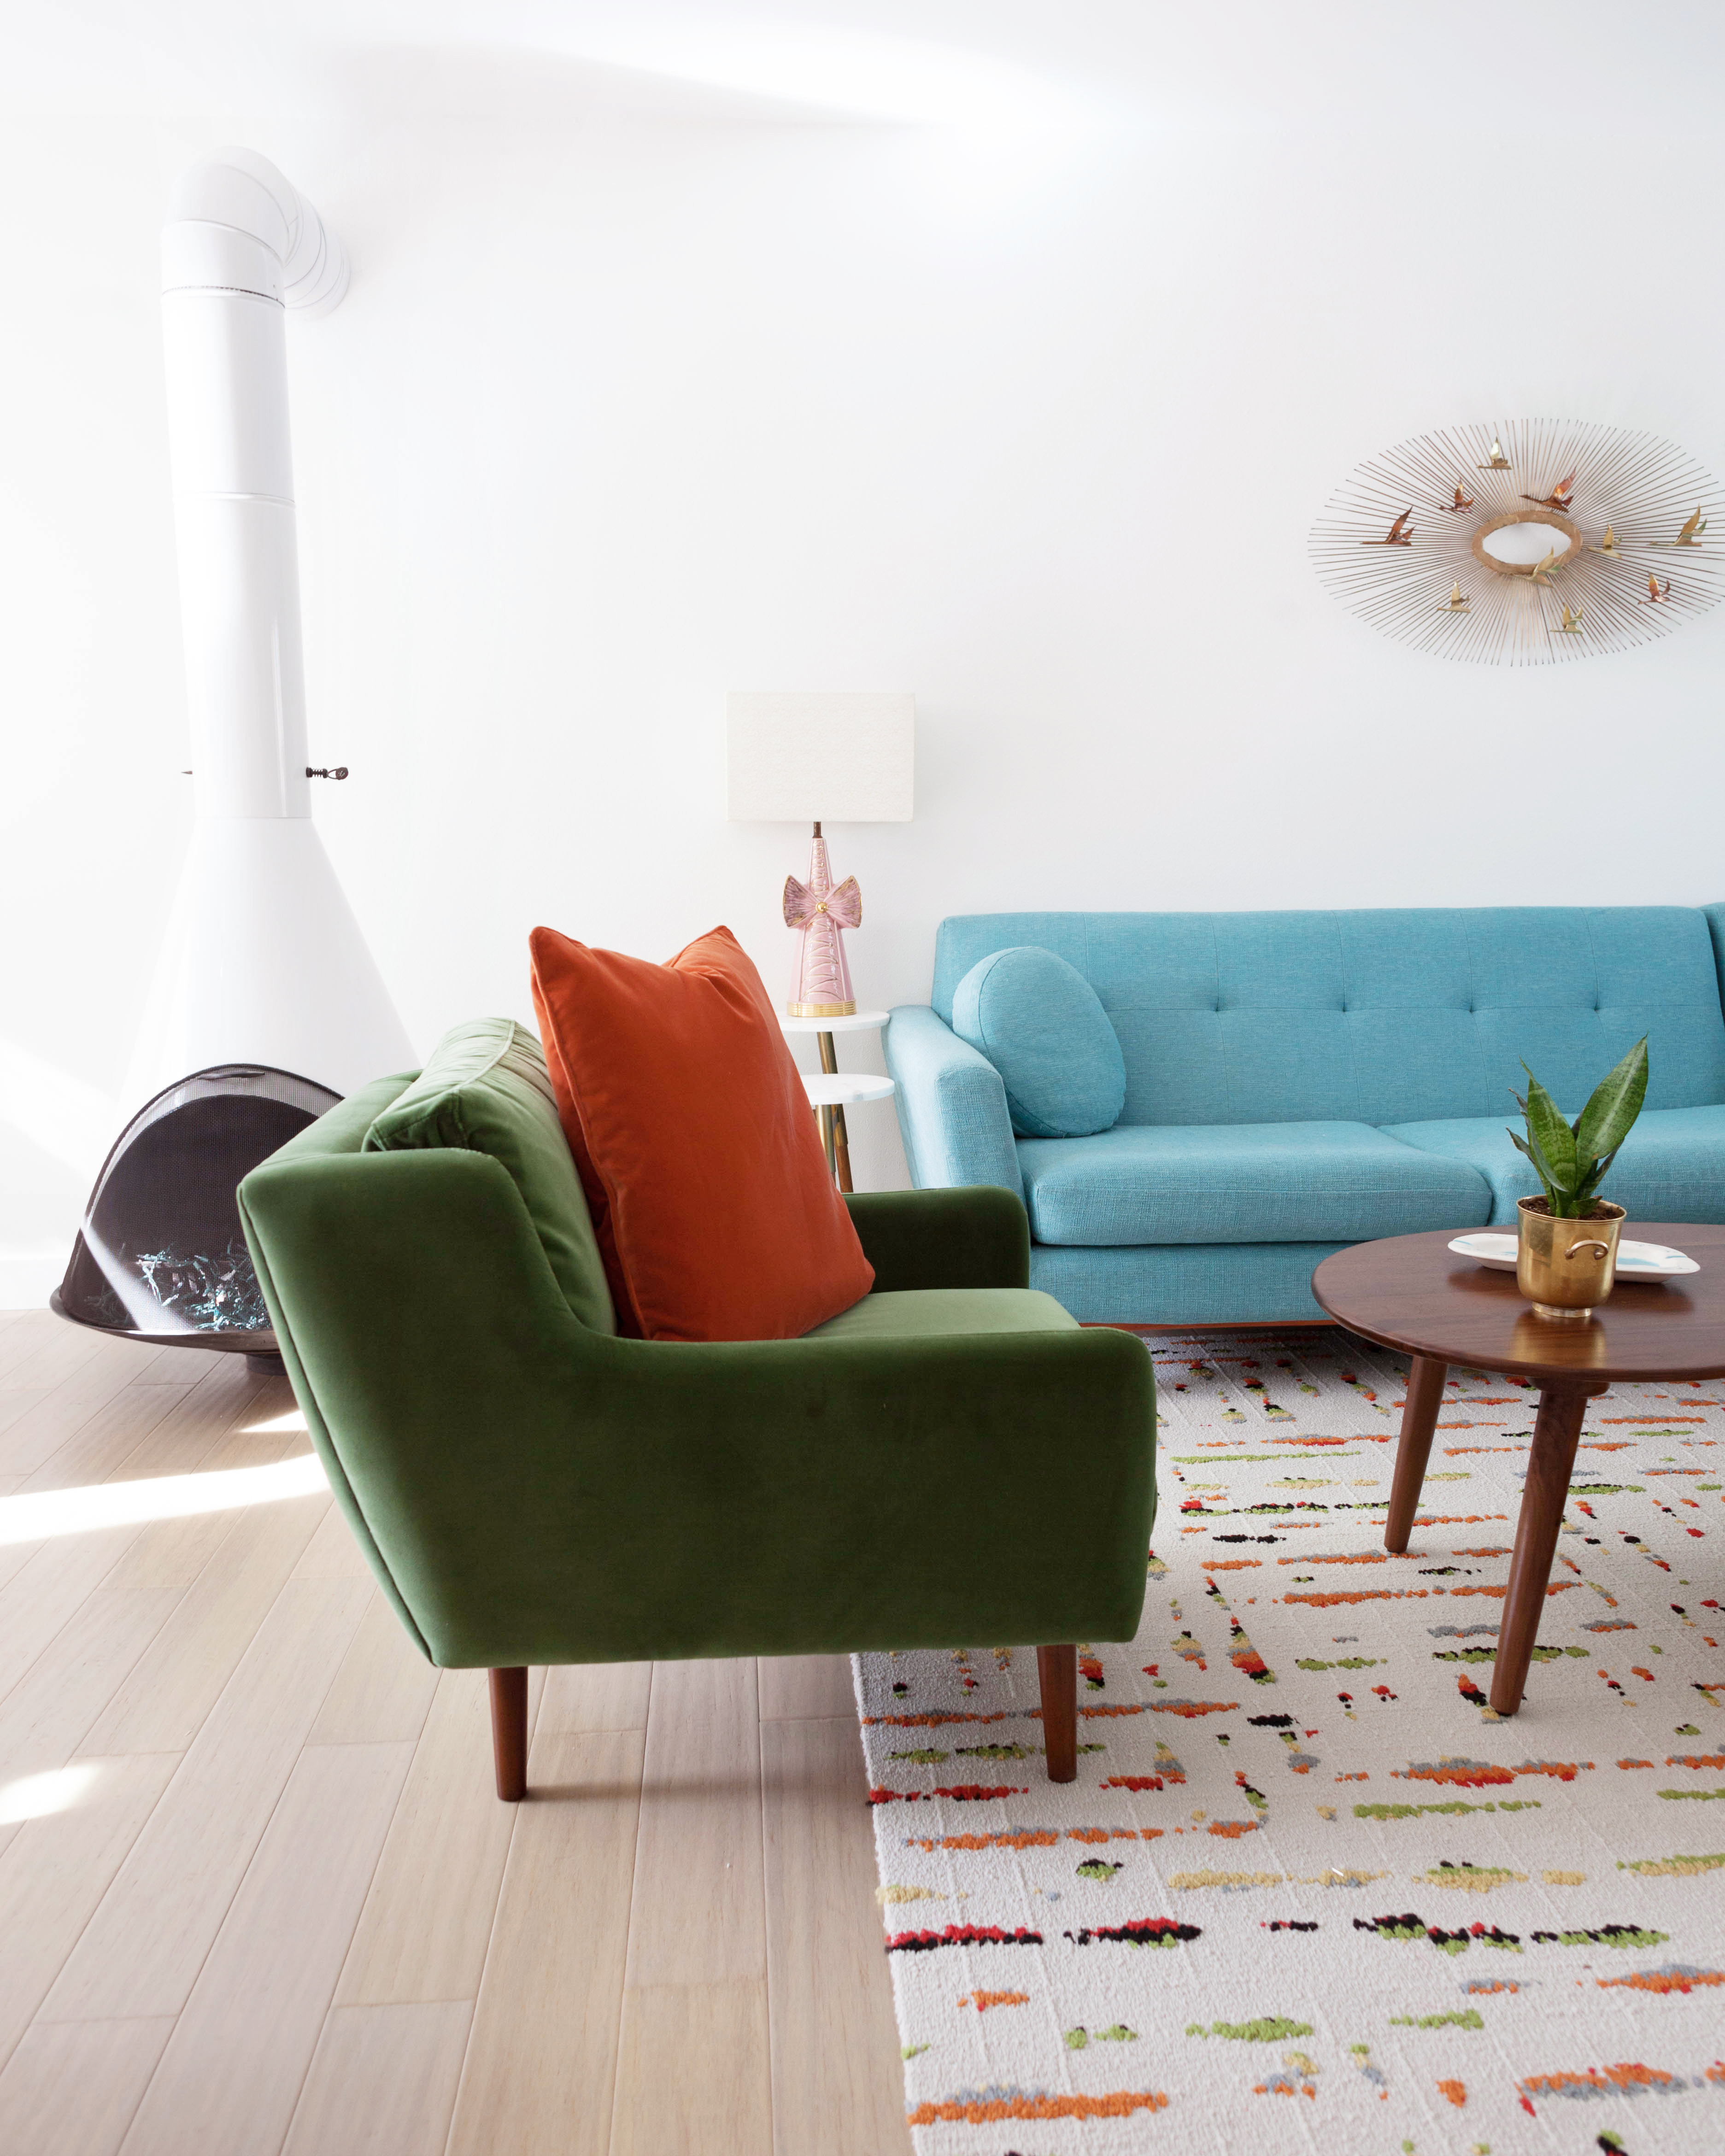
The Persimmon Orange Matrix against my blue sofa feels very retro! This is a popular contrasting color combo that brings a vibrant and fun feeling to the space. The Blush Pink Lucca pillow softens up the boldness a little, too. I think this might be my favorite…
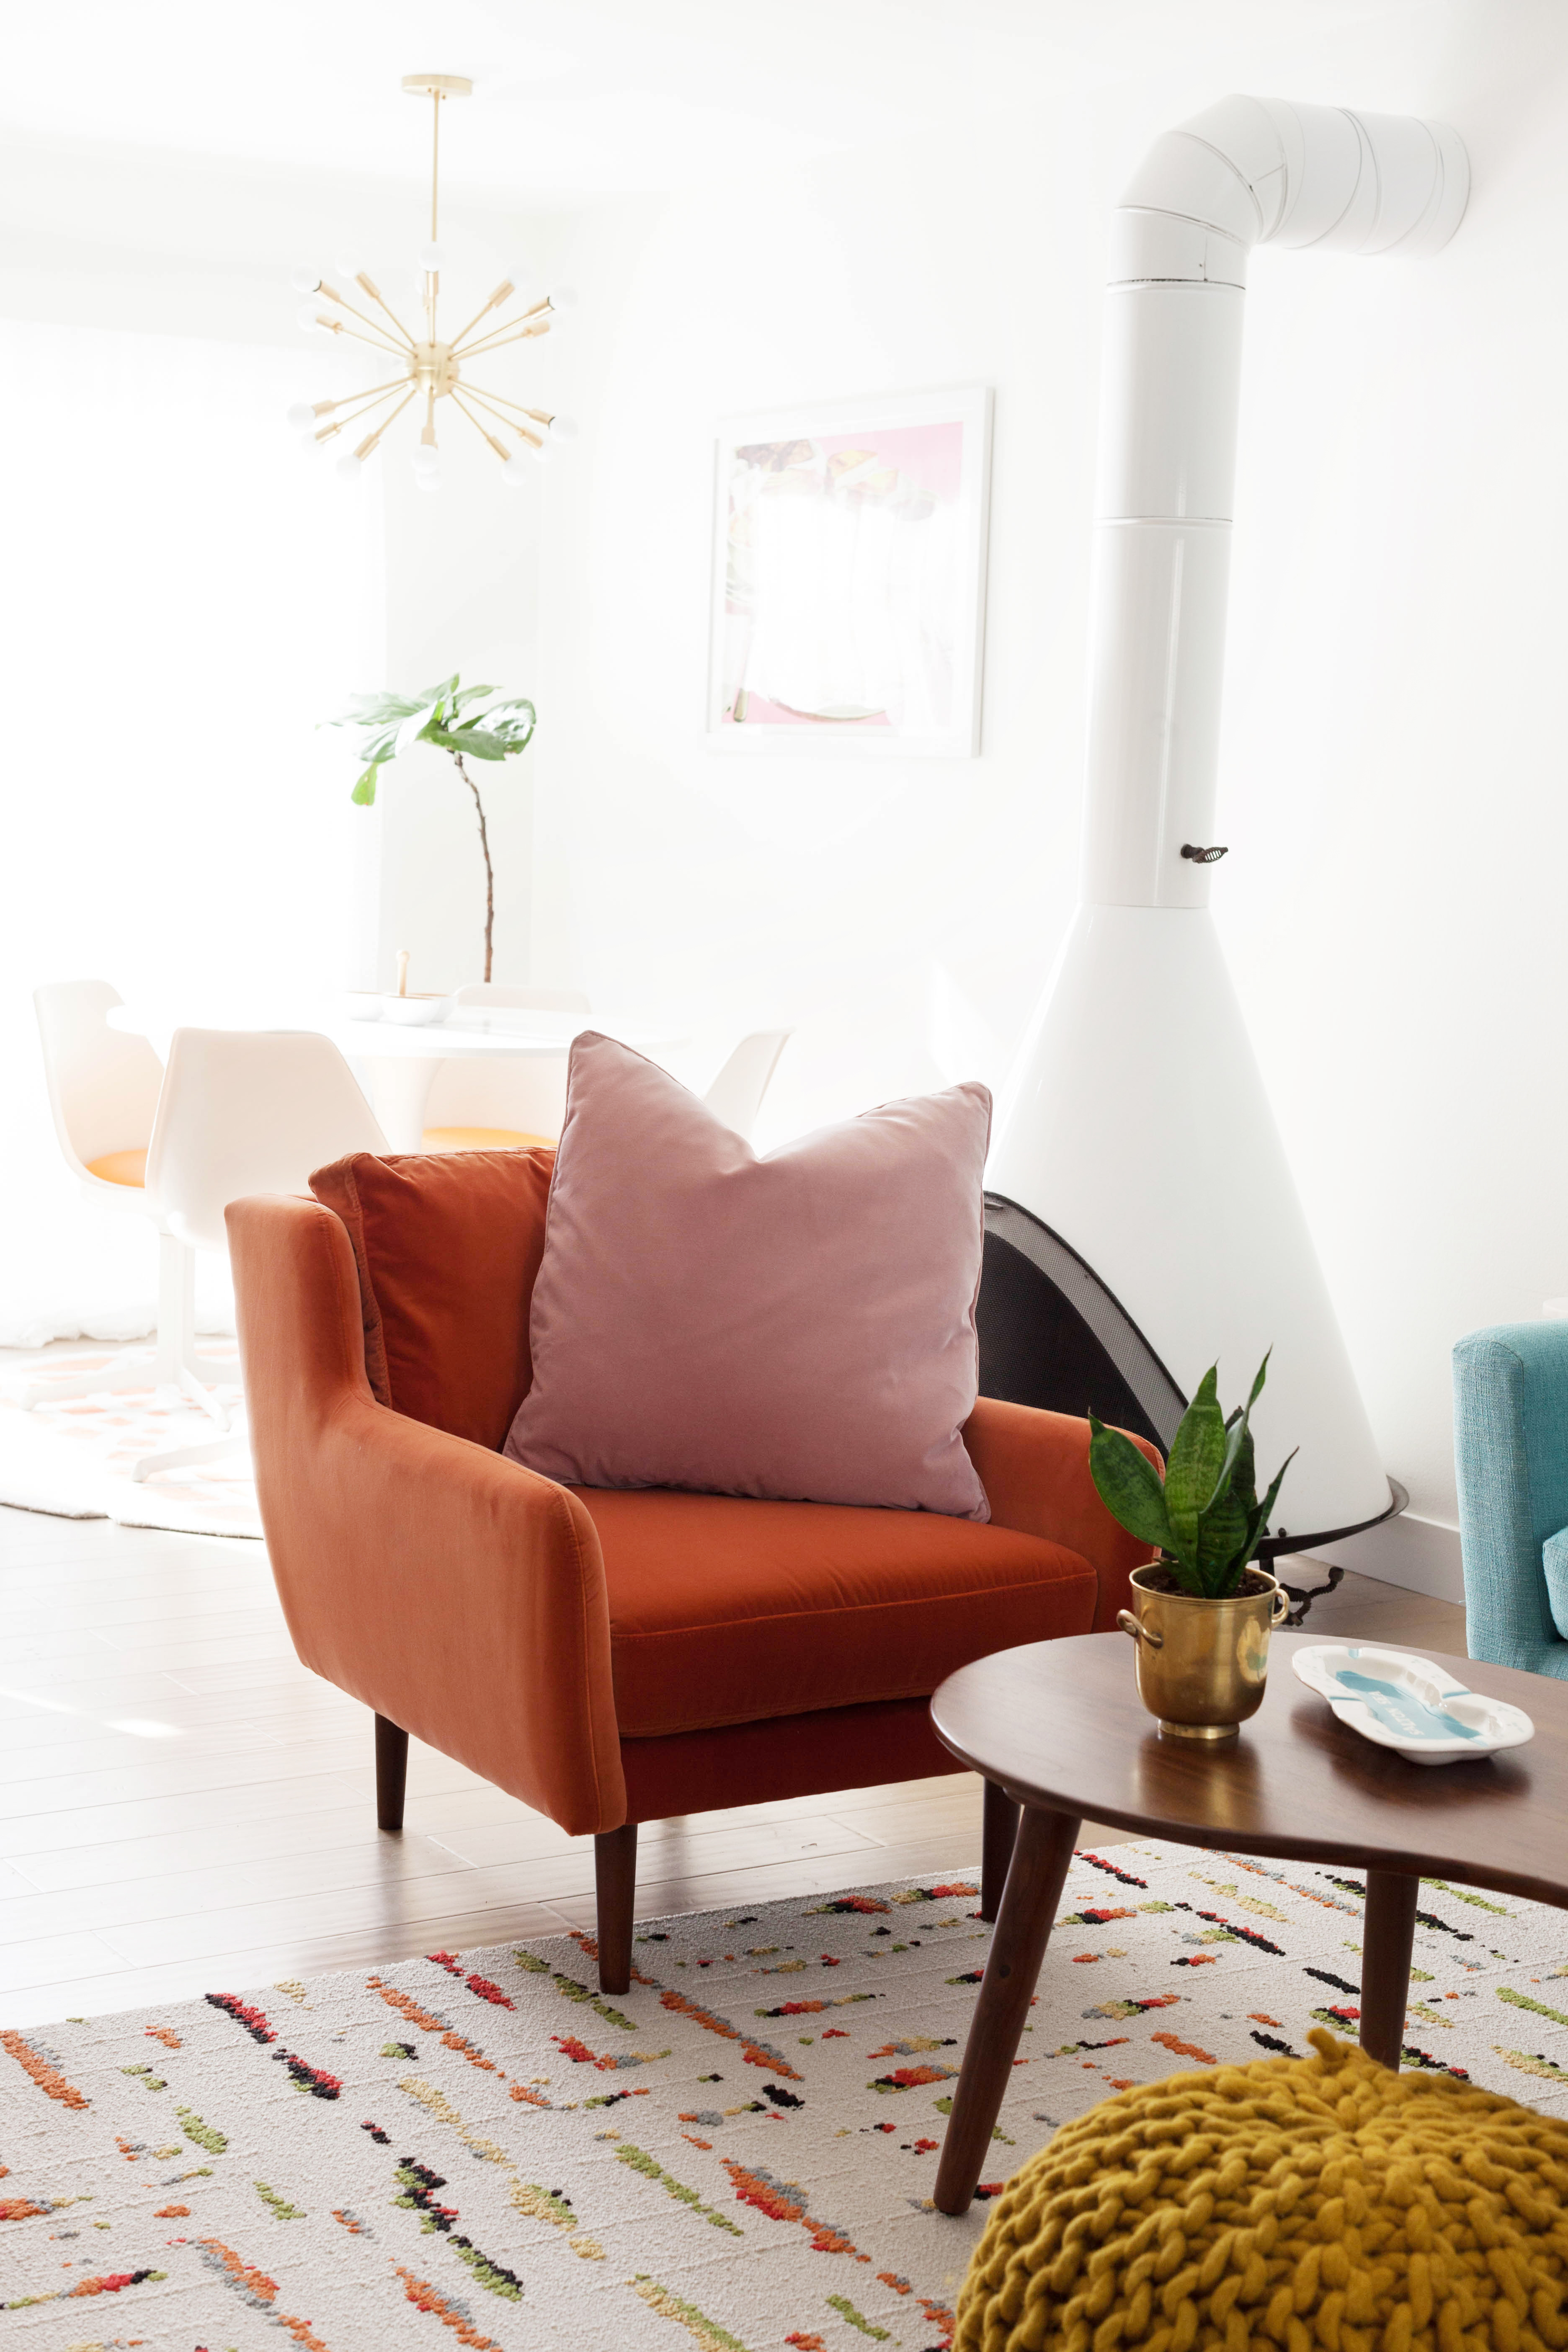 I’m super into this combo.
  The Lucca pillows come in sets of two, so can go on the chair while its twin decorates the sofa. Ooooo.
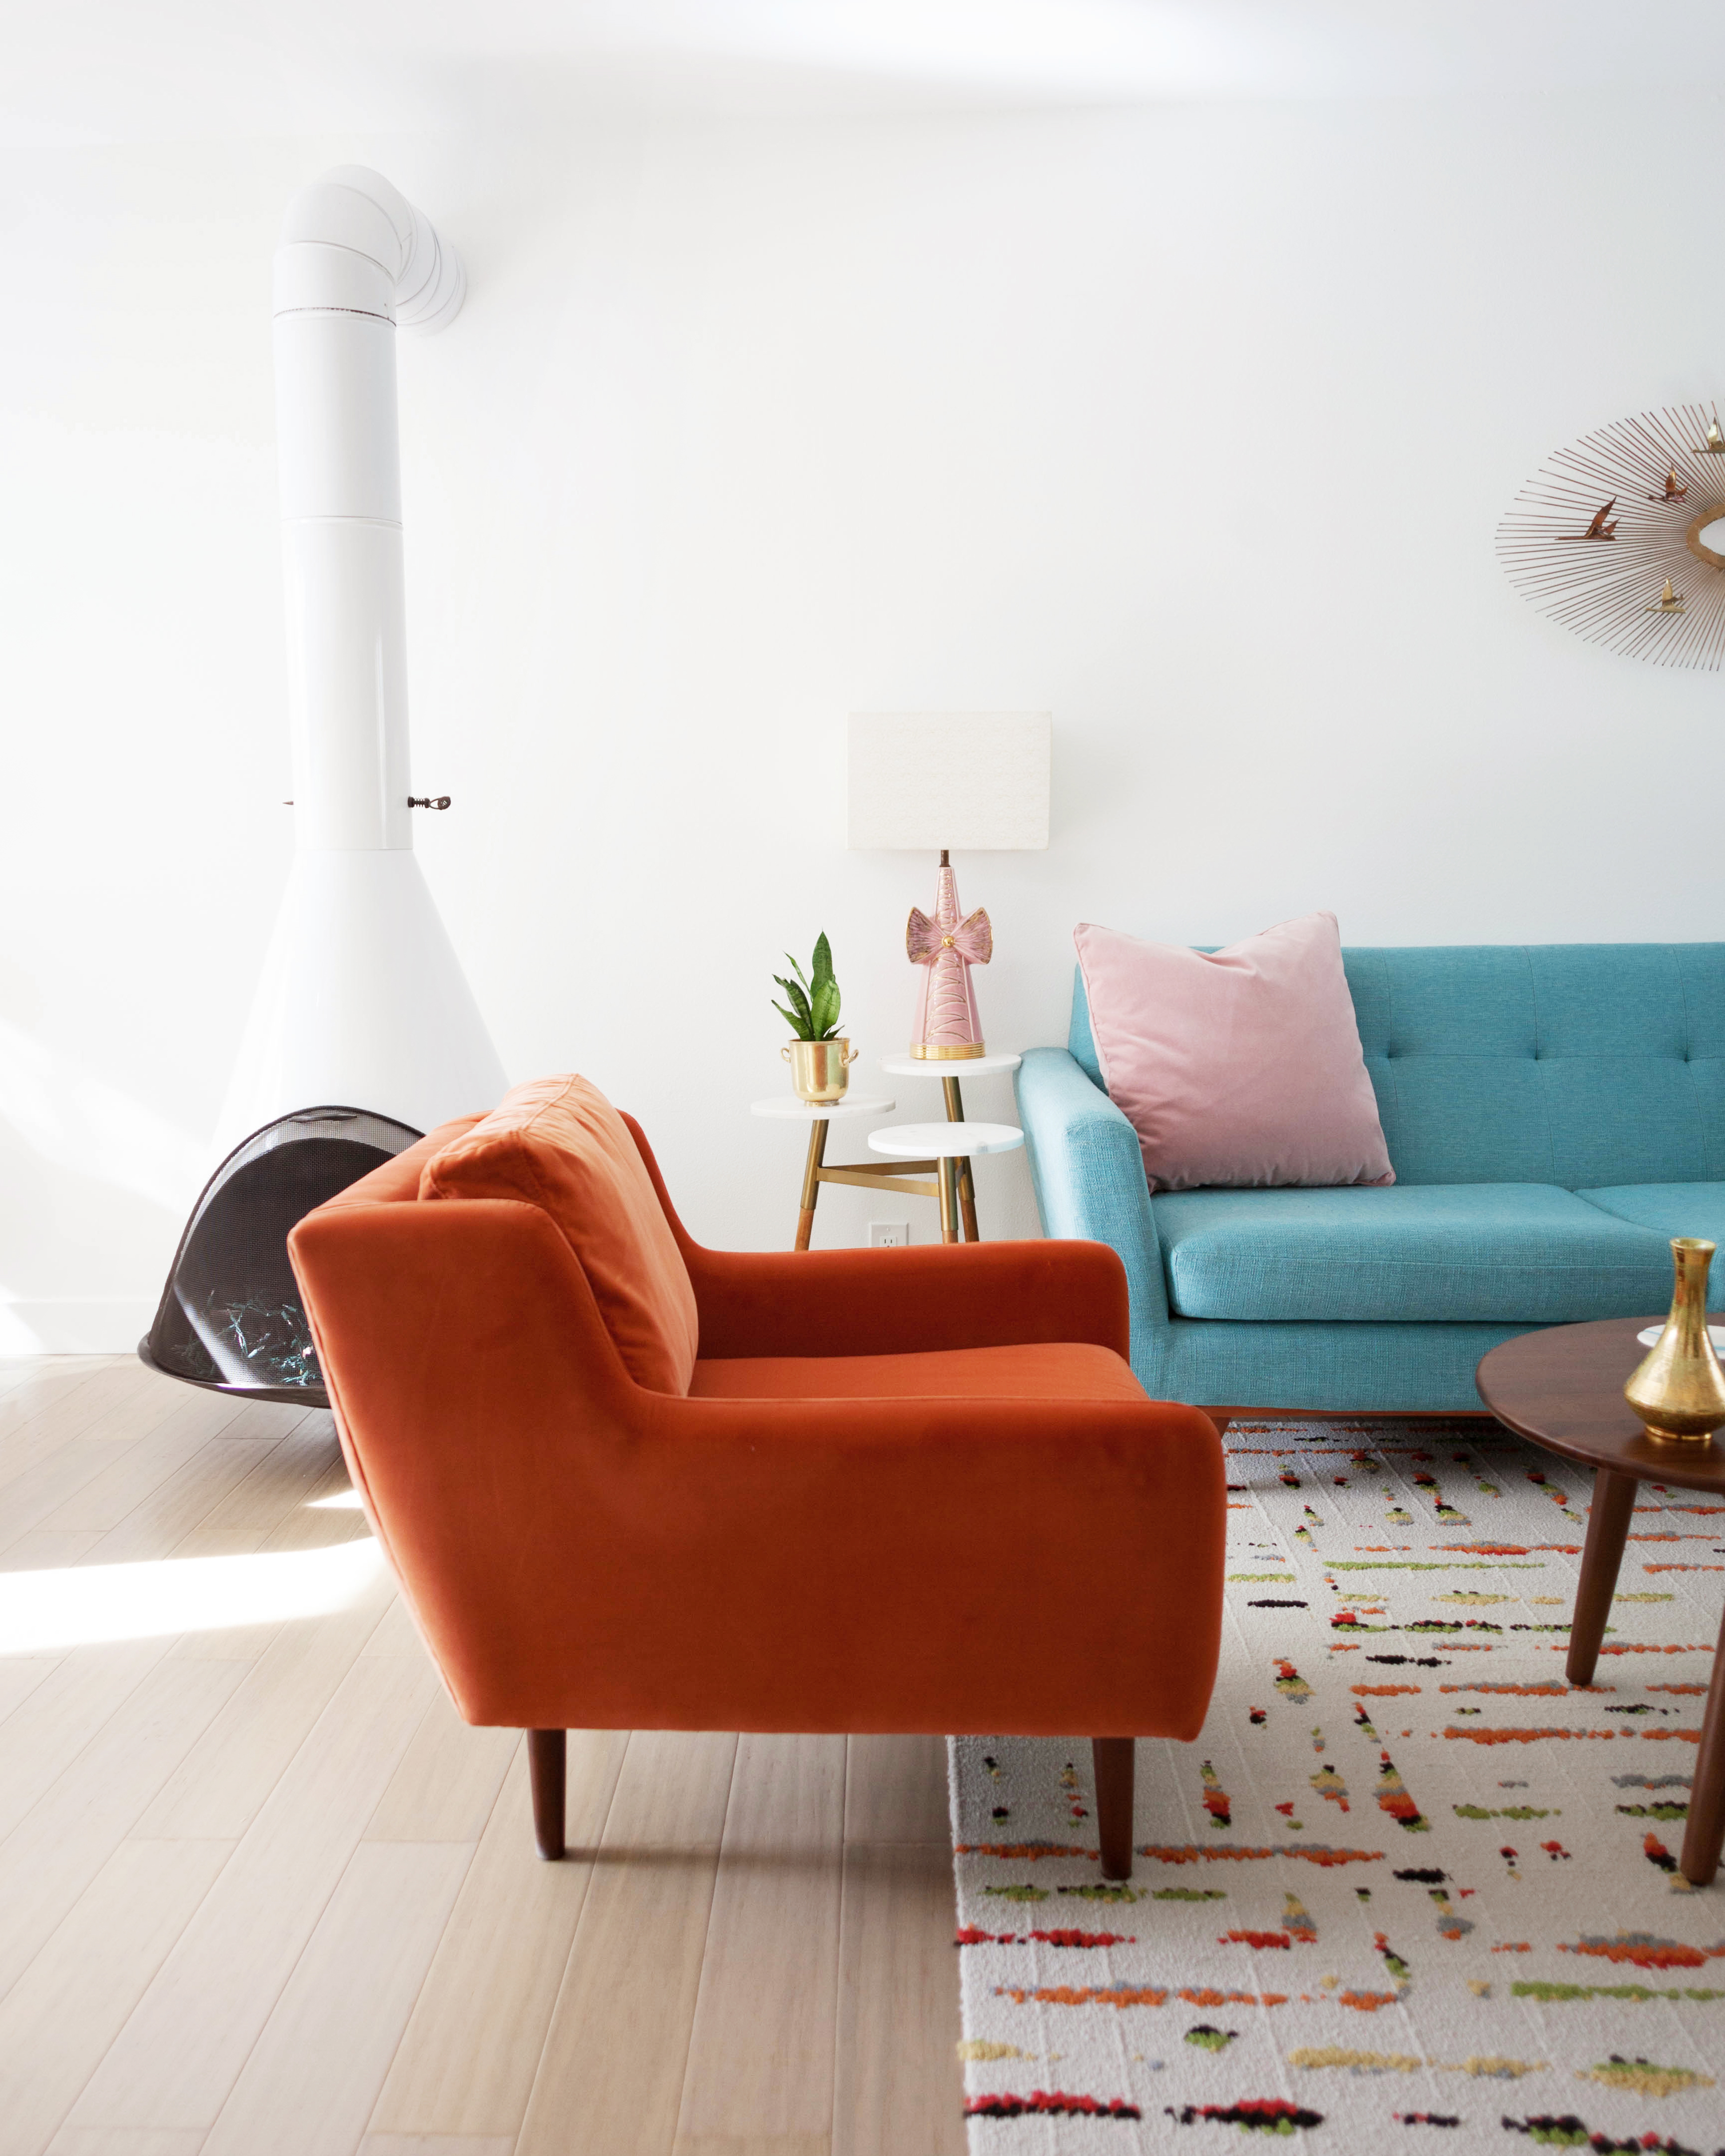
It’s SO hard to choose. I’m very torn between the two pink and orange combos. As much as I am IN LOVE with the persimmon orange, I don’t want that side of the room to feel overwhelmingly orange with the orange dining chairs and dining rug, so I’m going with the pink Matrix with Orange Lucca pillow for now, because it leads perfectly into the dining area and feels balanced while also tying together my lamp and rug.
I’ve been toying with the idea of changing the color of my dining chair cushions though, so I’ll hang on to the orange for a bit in case I go that route sooner than later and change my mind (which I so often do). We’ll see!
I’m curious – which of the 12 colors would you choose to mix and match?! Let me know in the comments!
This post was made possible by Article, but all opinions are true and my own.
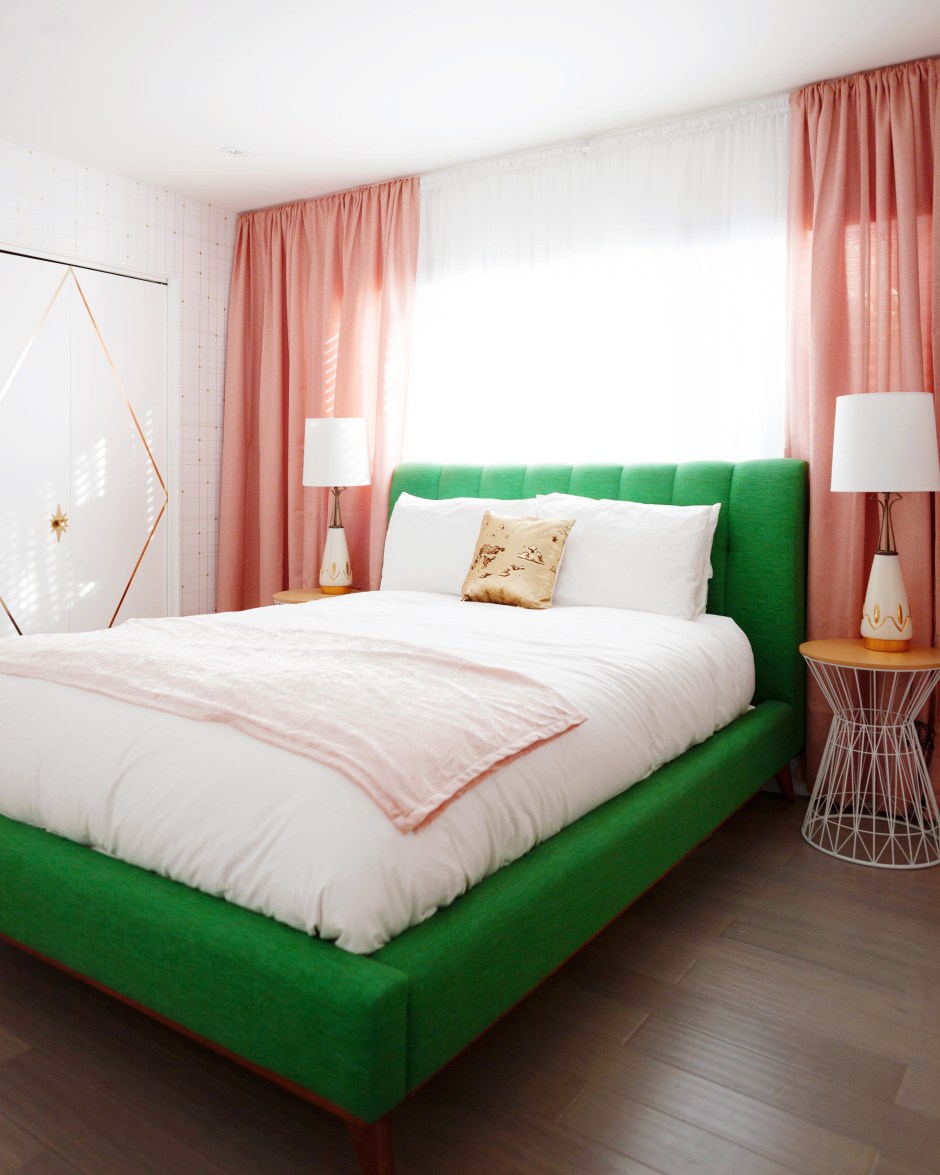
I finaallllyyyy get to show you guys our bedroom before and after reveal! Yay!
I didn’t think it would turn out to be my favorite room in our apartment, but I think it totally is. I was inspired by mid-century atomic and glam styles, and used green, pinks, and lots of gold elements as my palette.
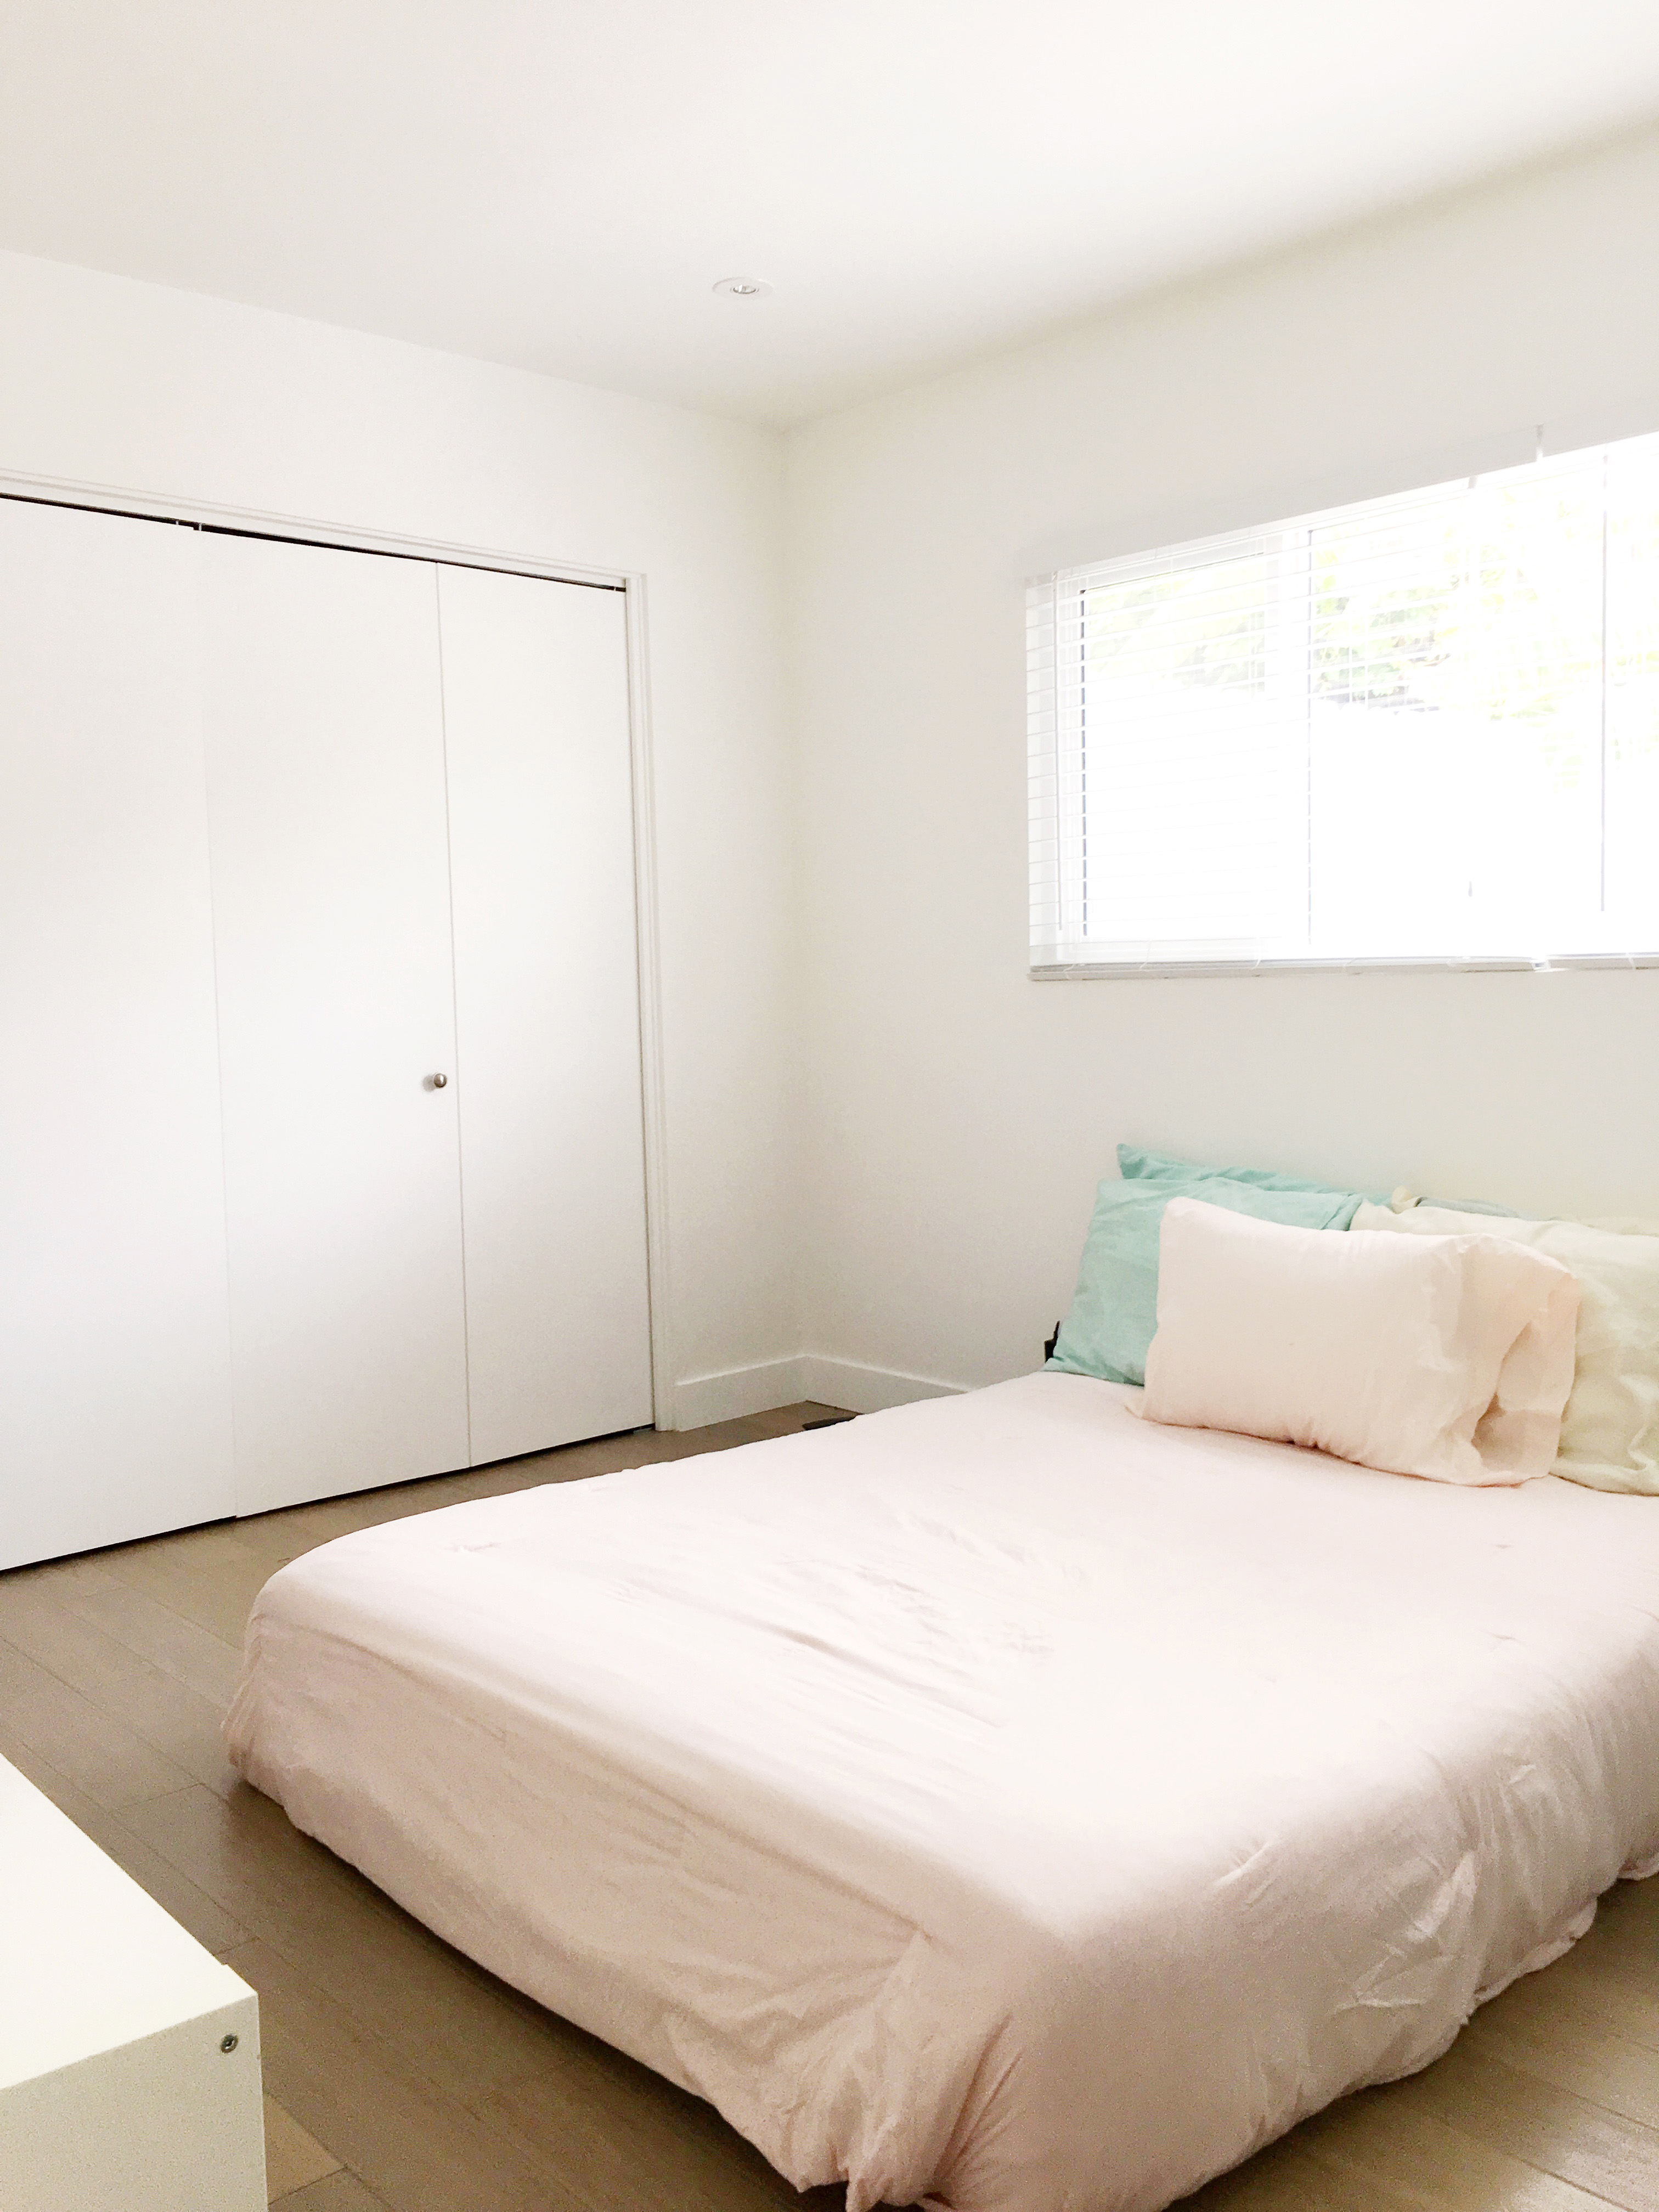
Here’s what it looked like before:
Here’s after!
 Putting a bed in front of a window like this can look a little awkward, so the first thing I did was hung wall-to-wall, floor-to-ceiling shimmery coral-pink curtains and sheers from Target to frame the bed and disguise the window, while still letting tons of light in.
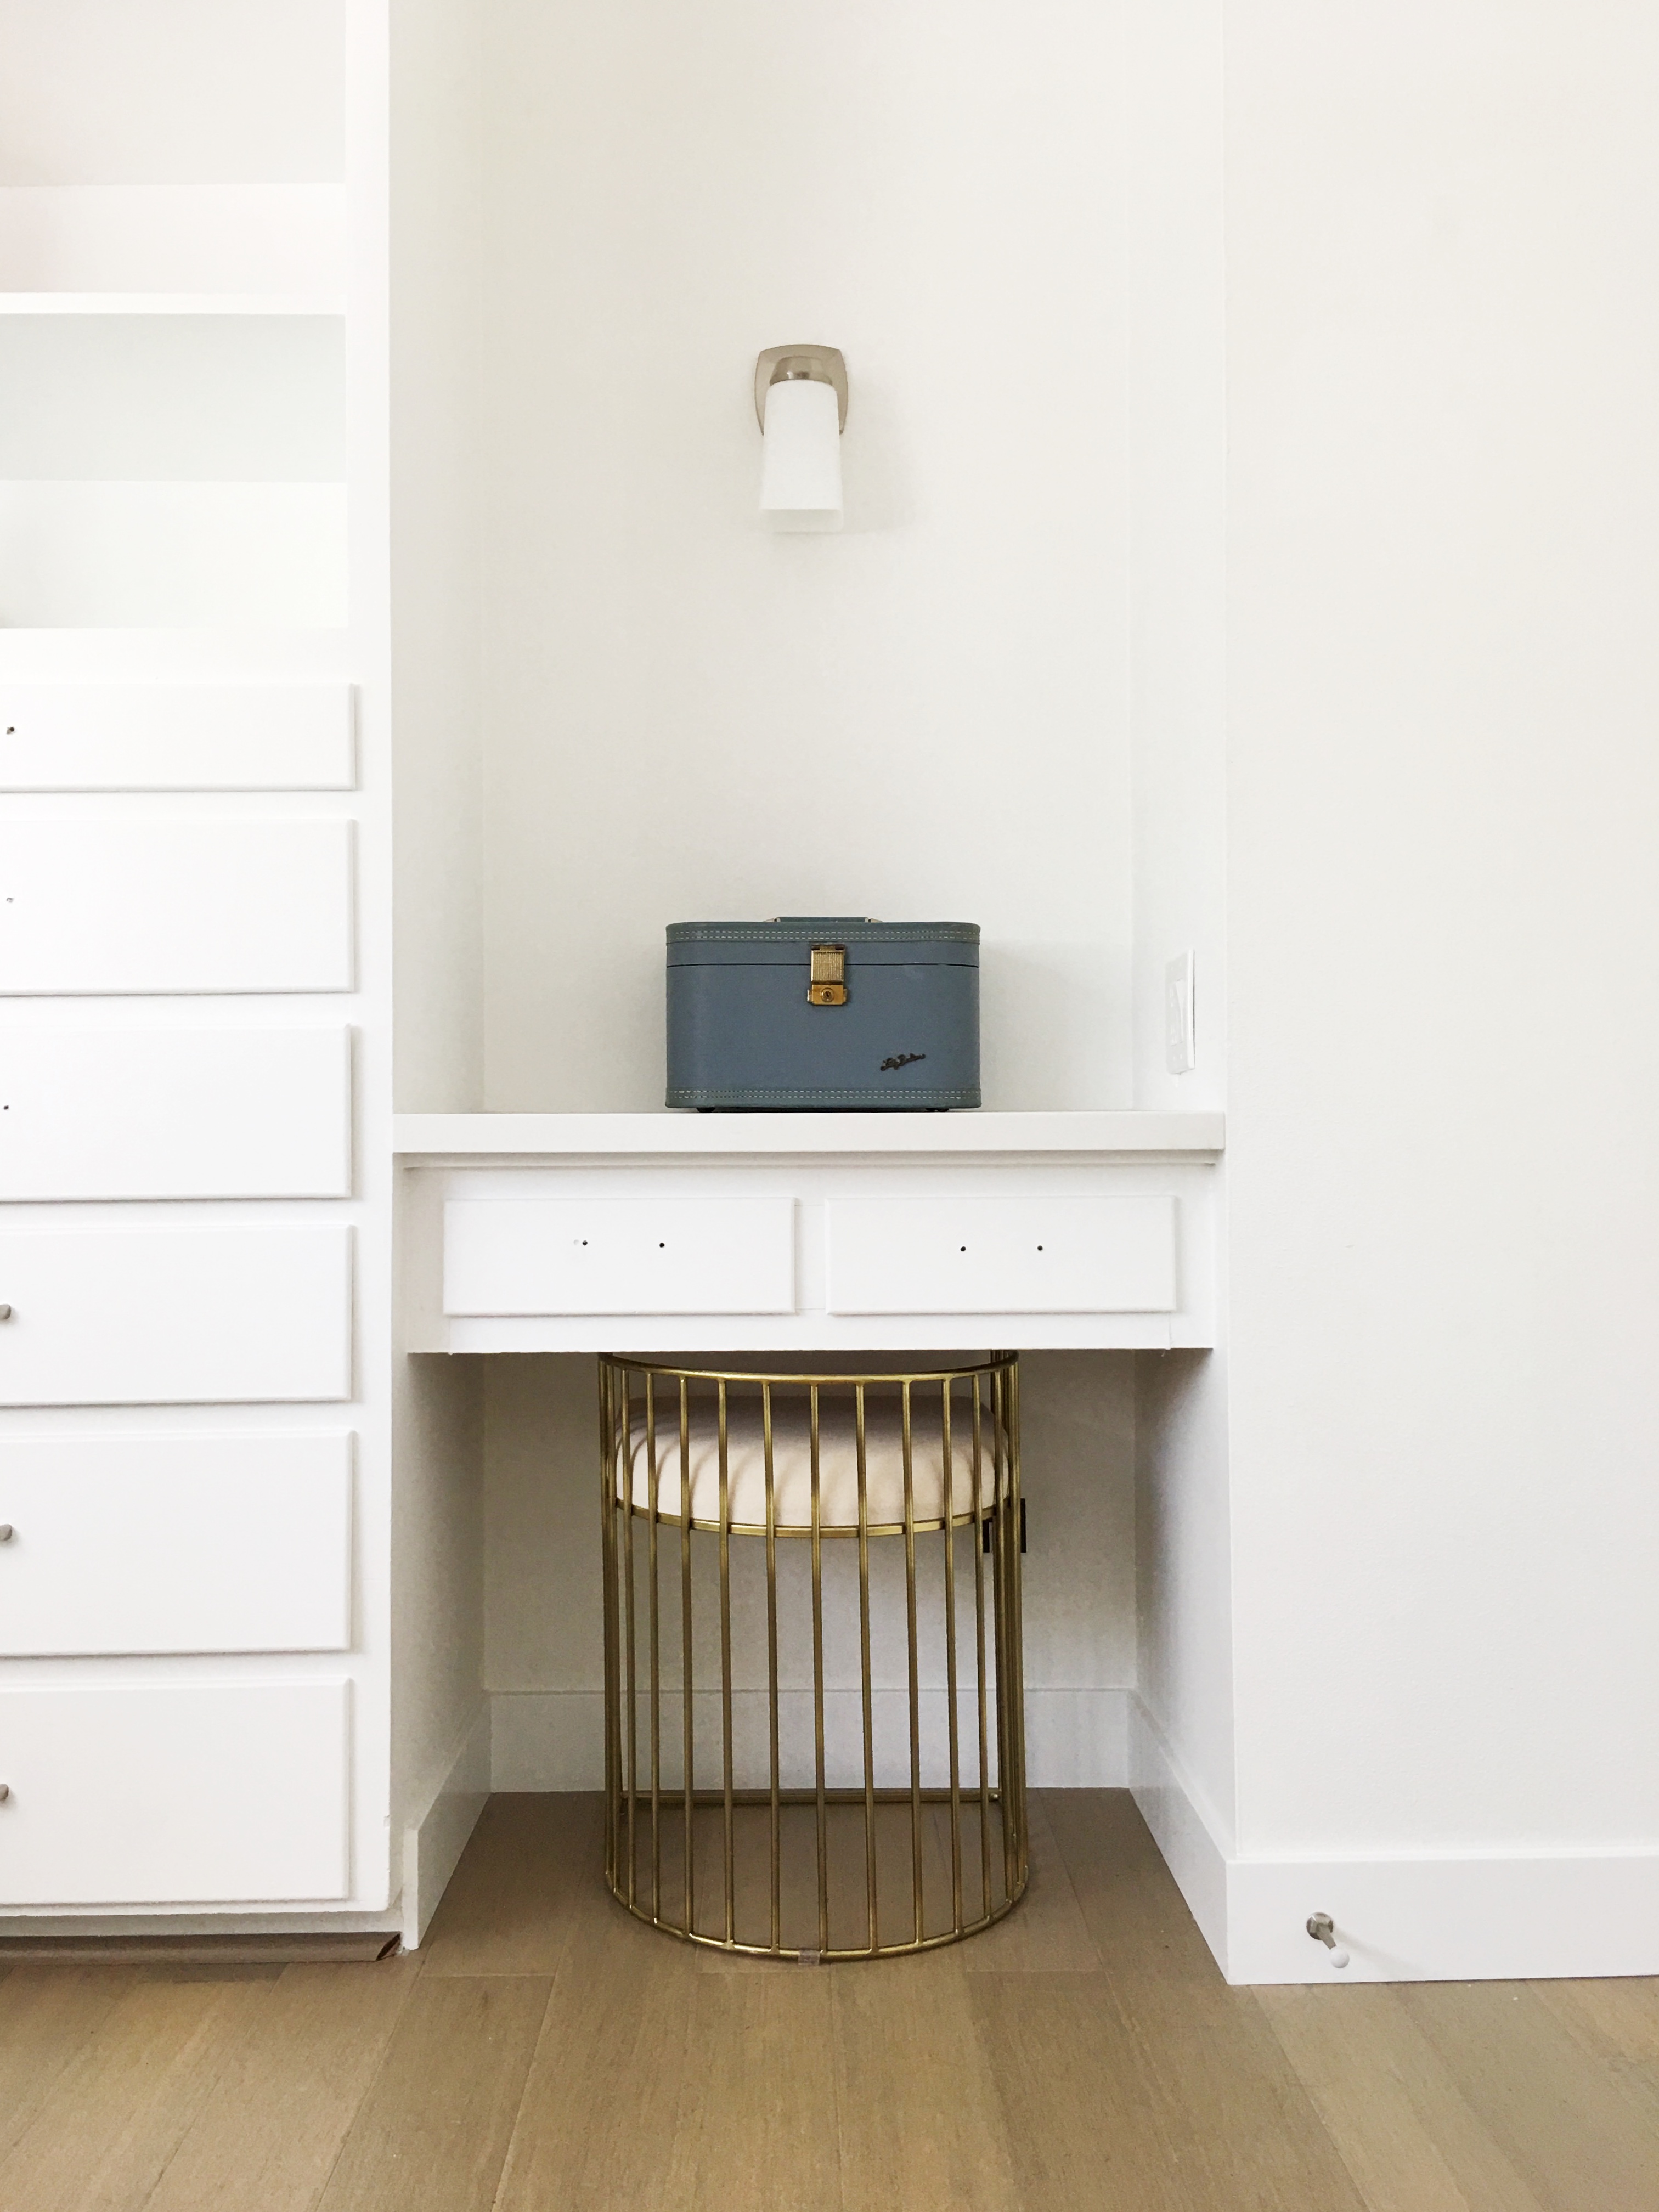
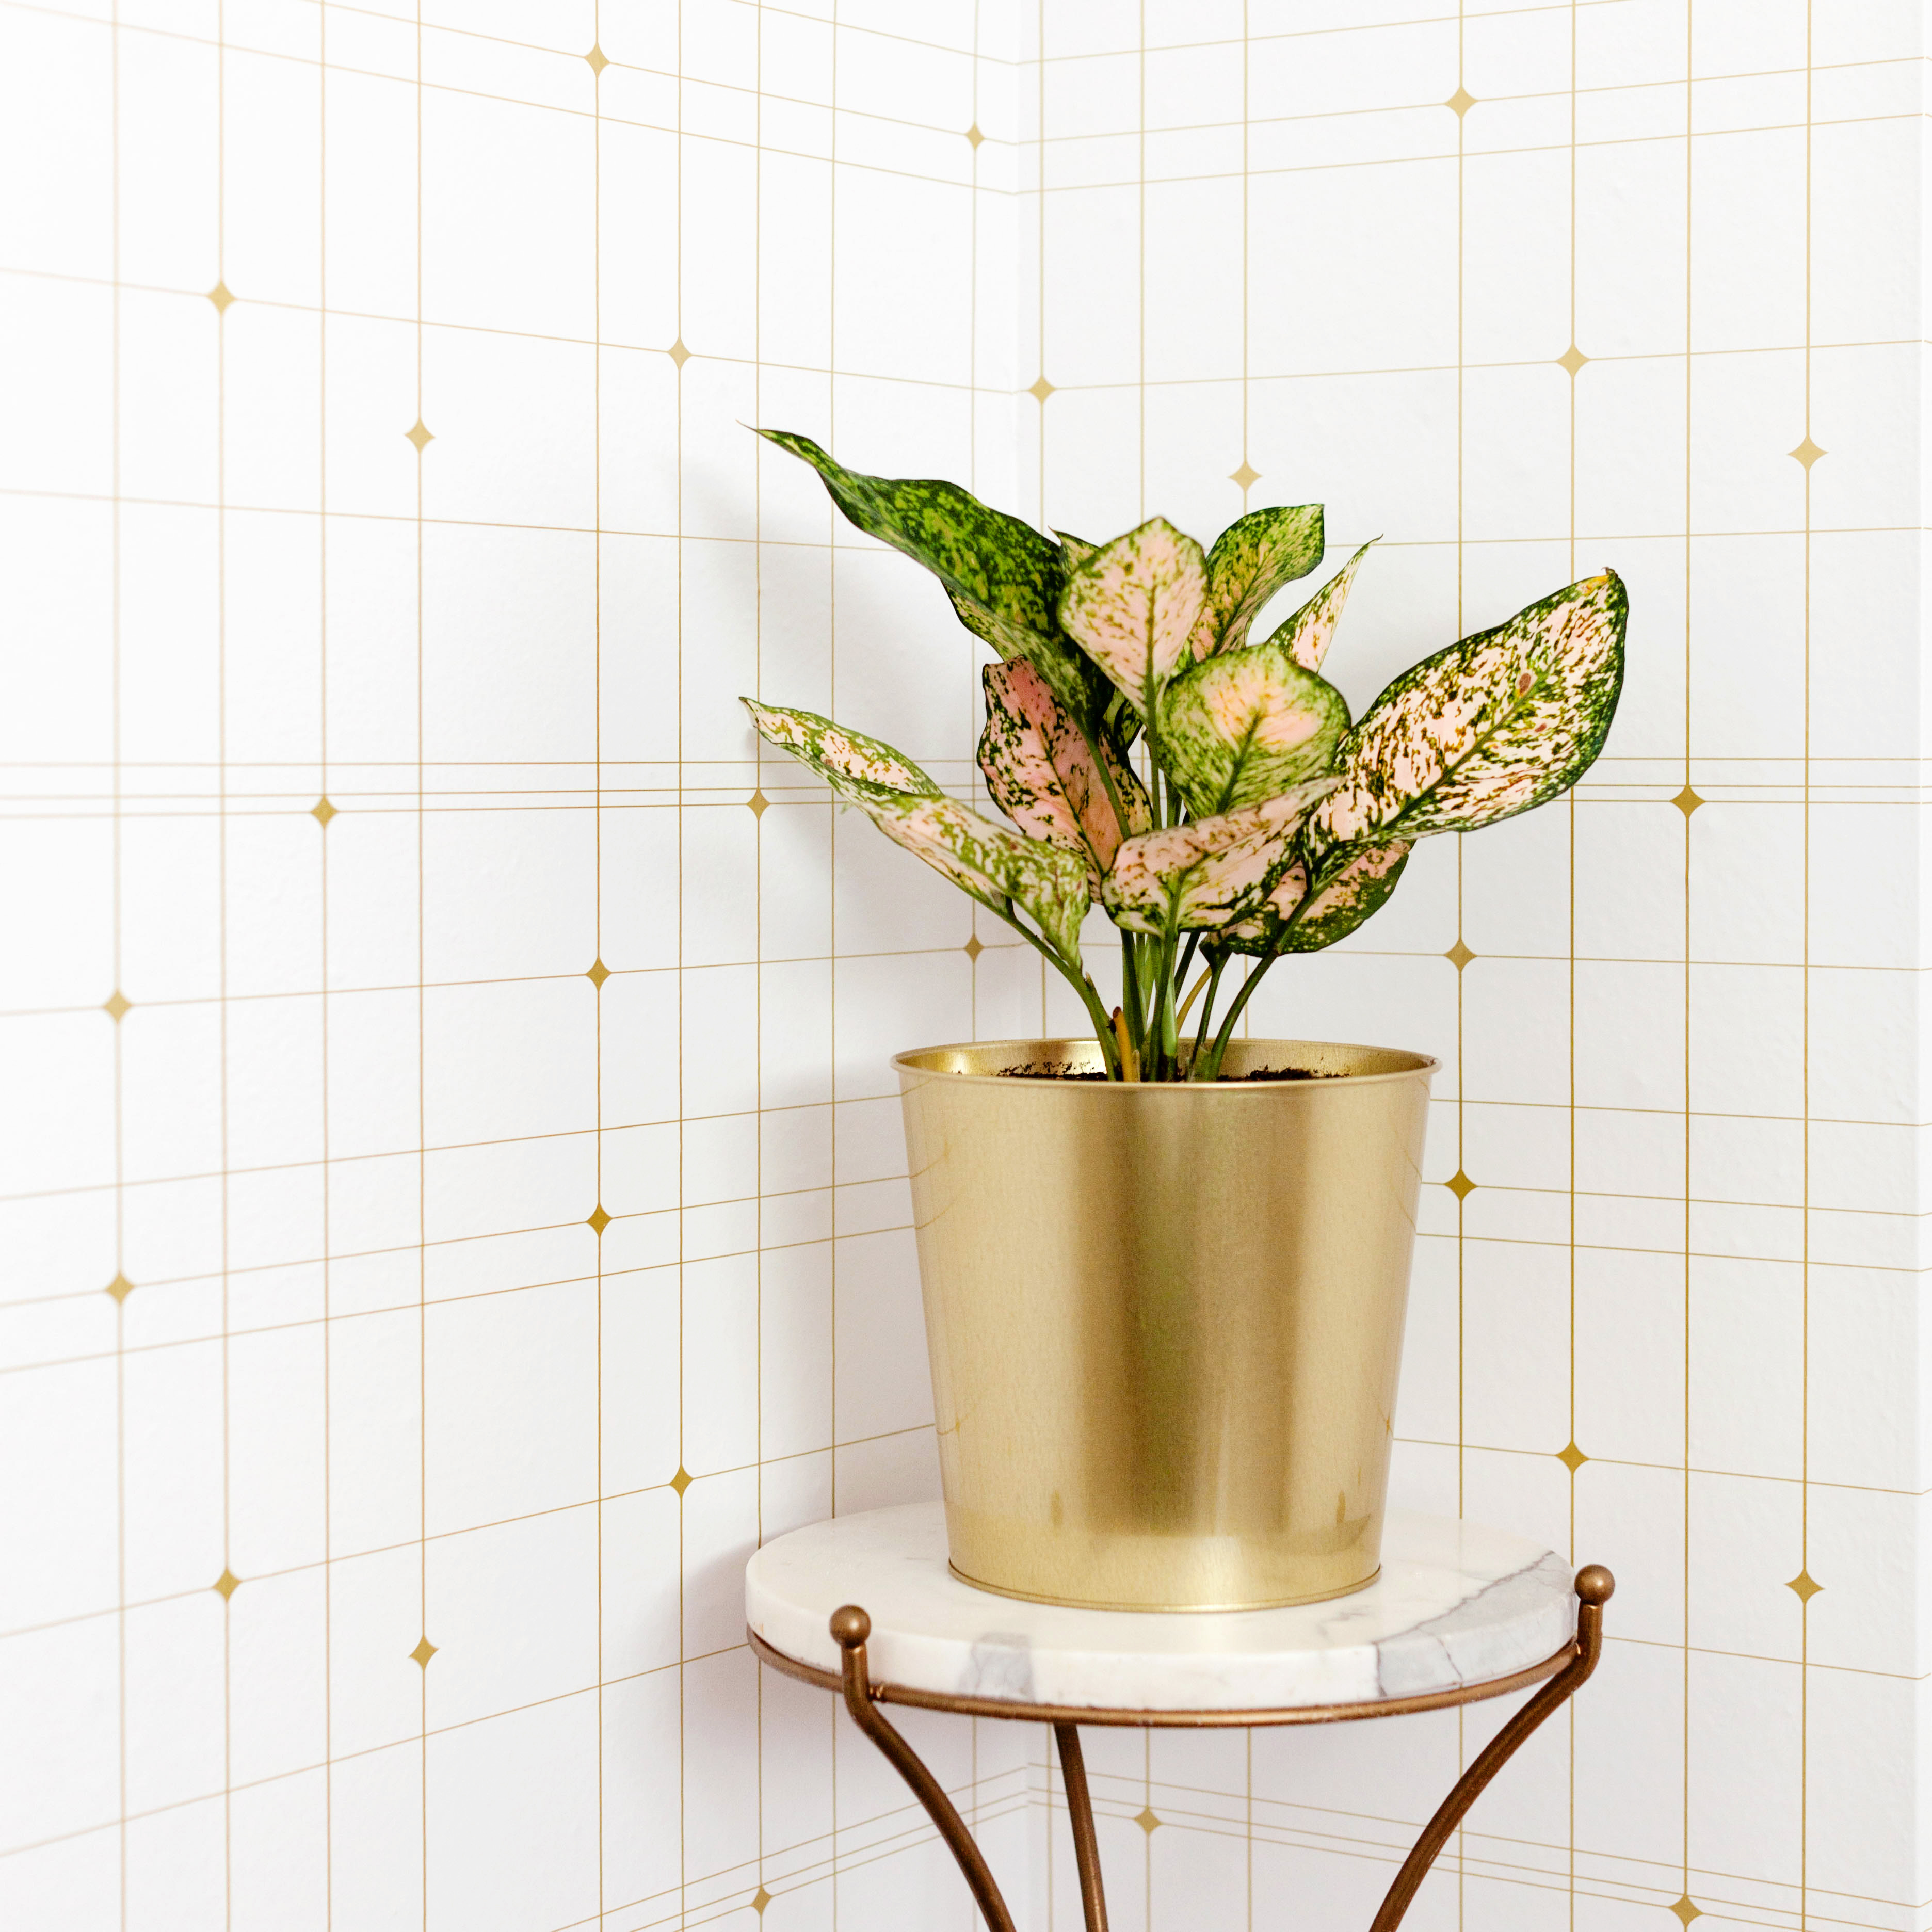
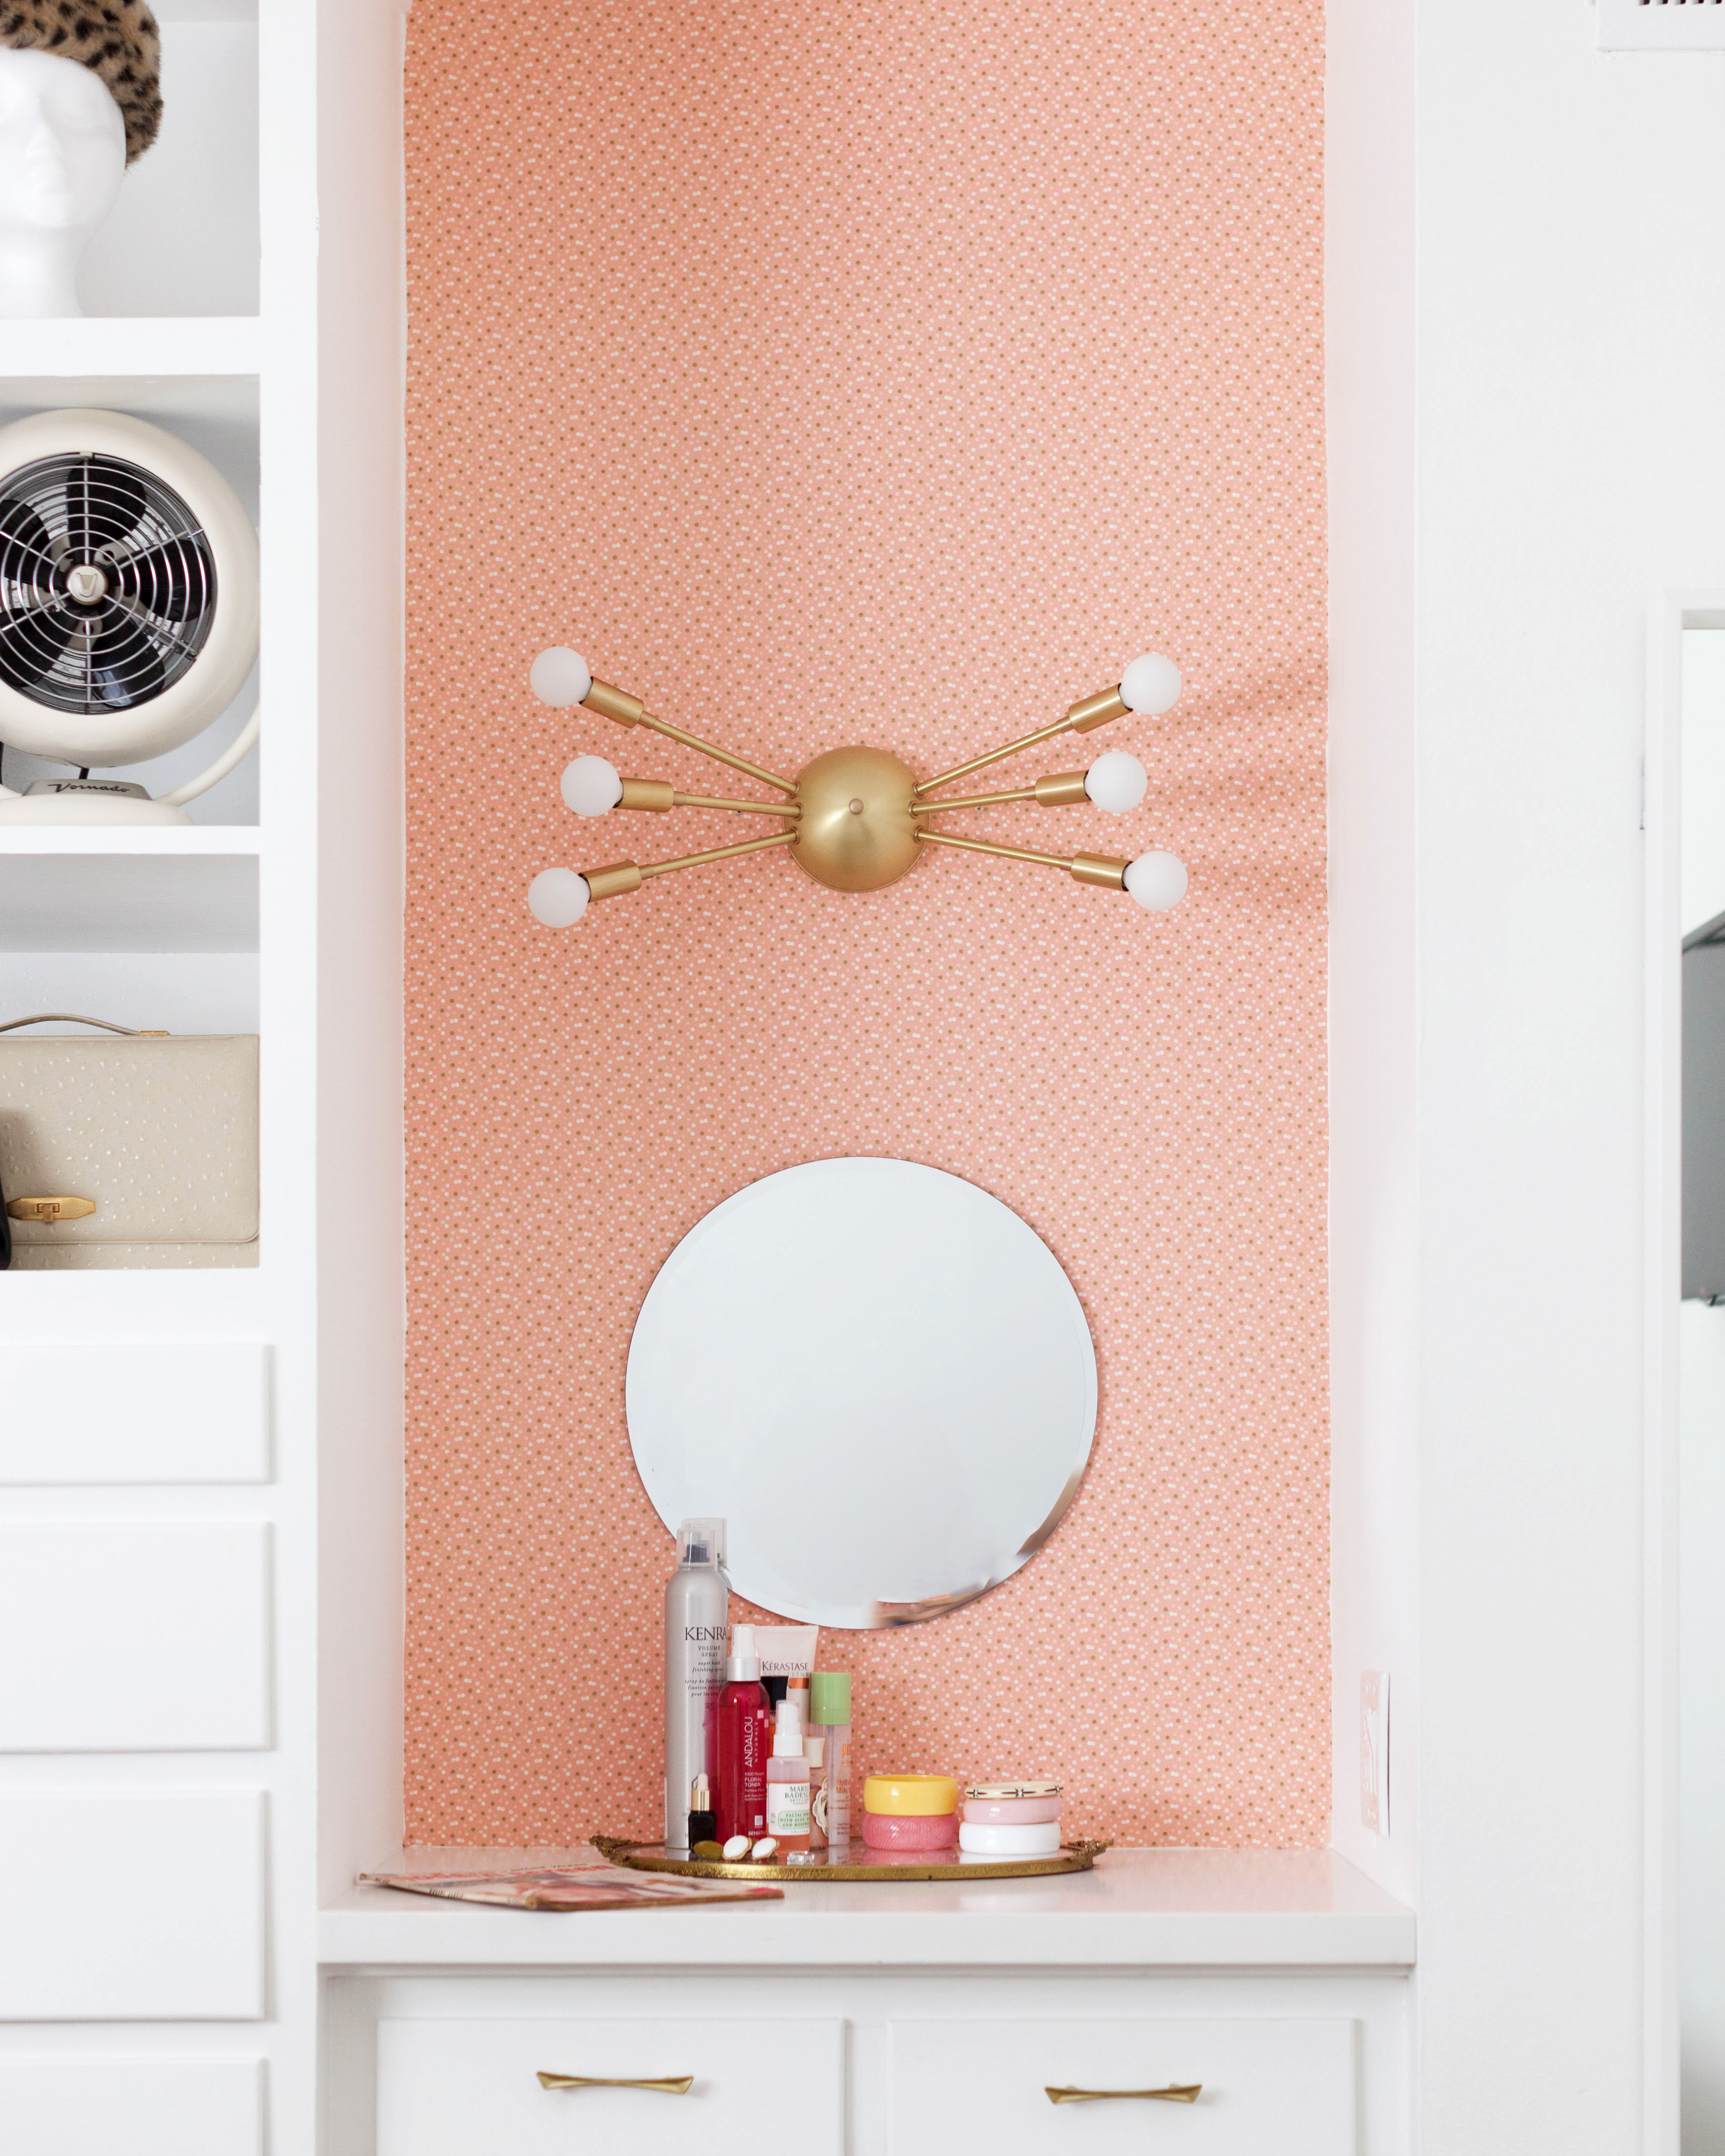 I used a fabric in a similar color to do a wall treatment in the vanity nook. I changed the built-in’s hardware to a vintage 1950/60s set that I found on Etsy and also changed the light to a beautiful brass Sputnik from Lucent Lightshop. The vanity chair is from Nate Berkus for Target.
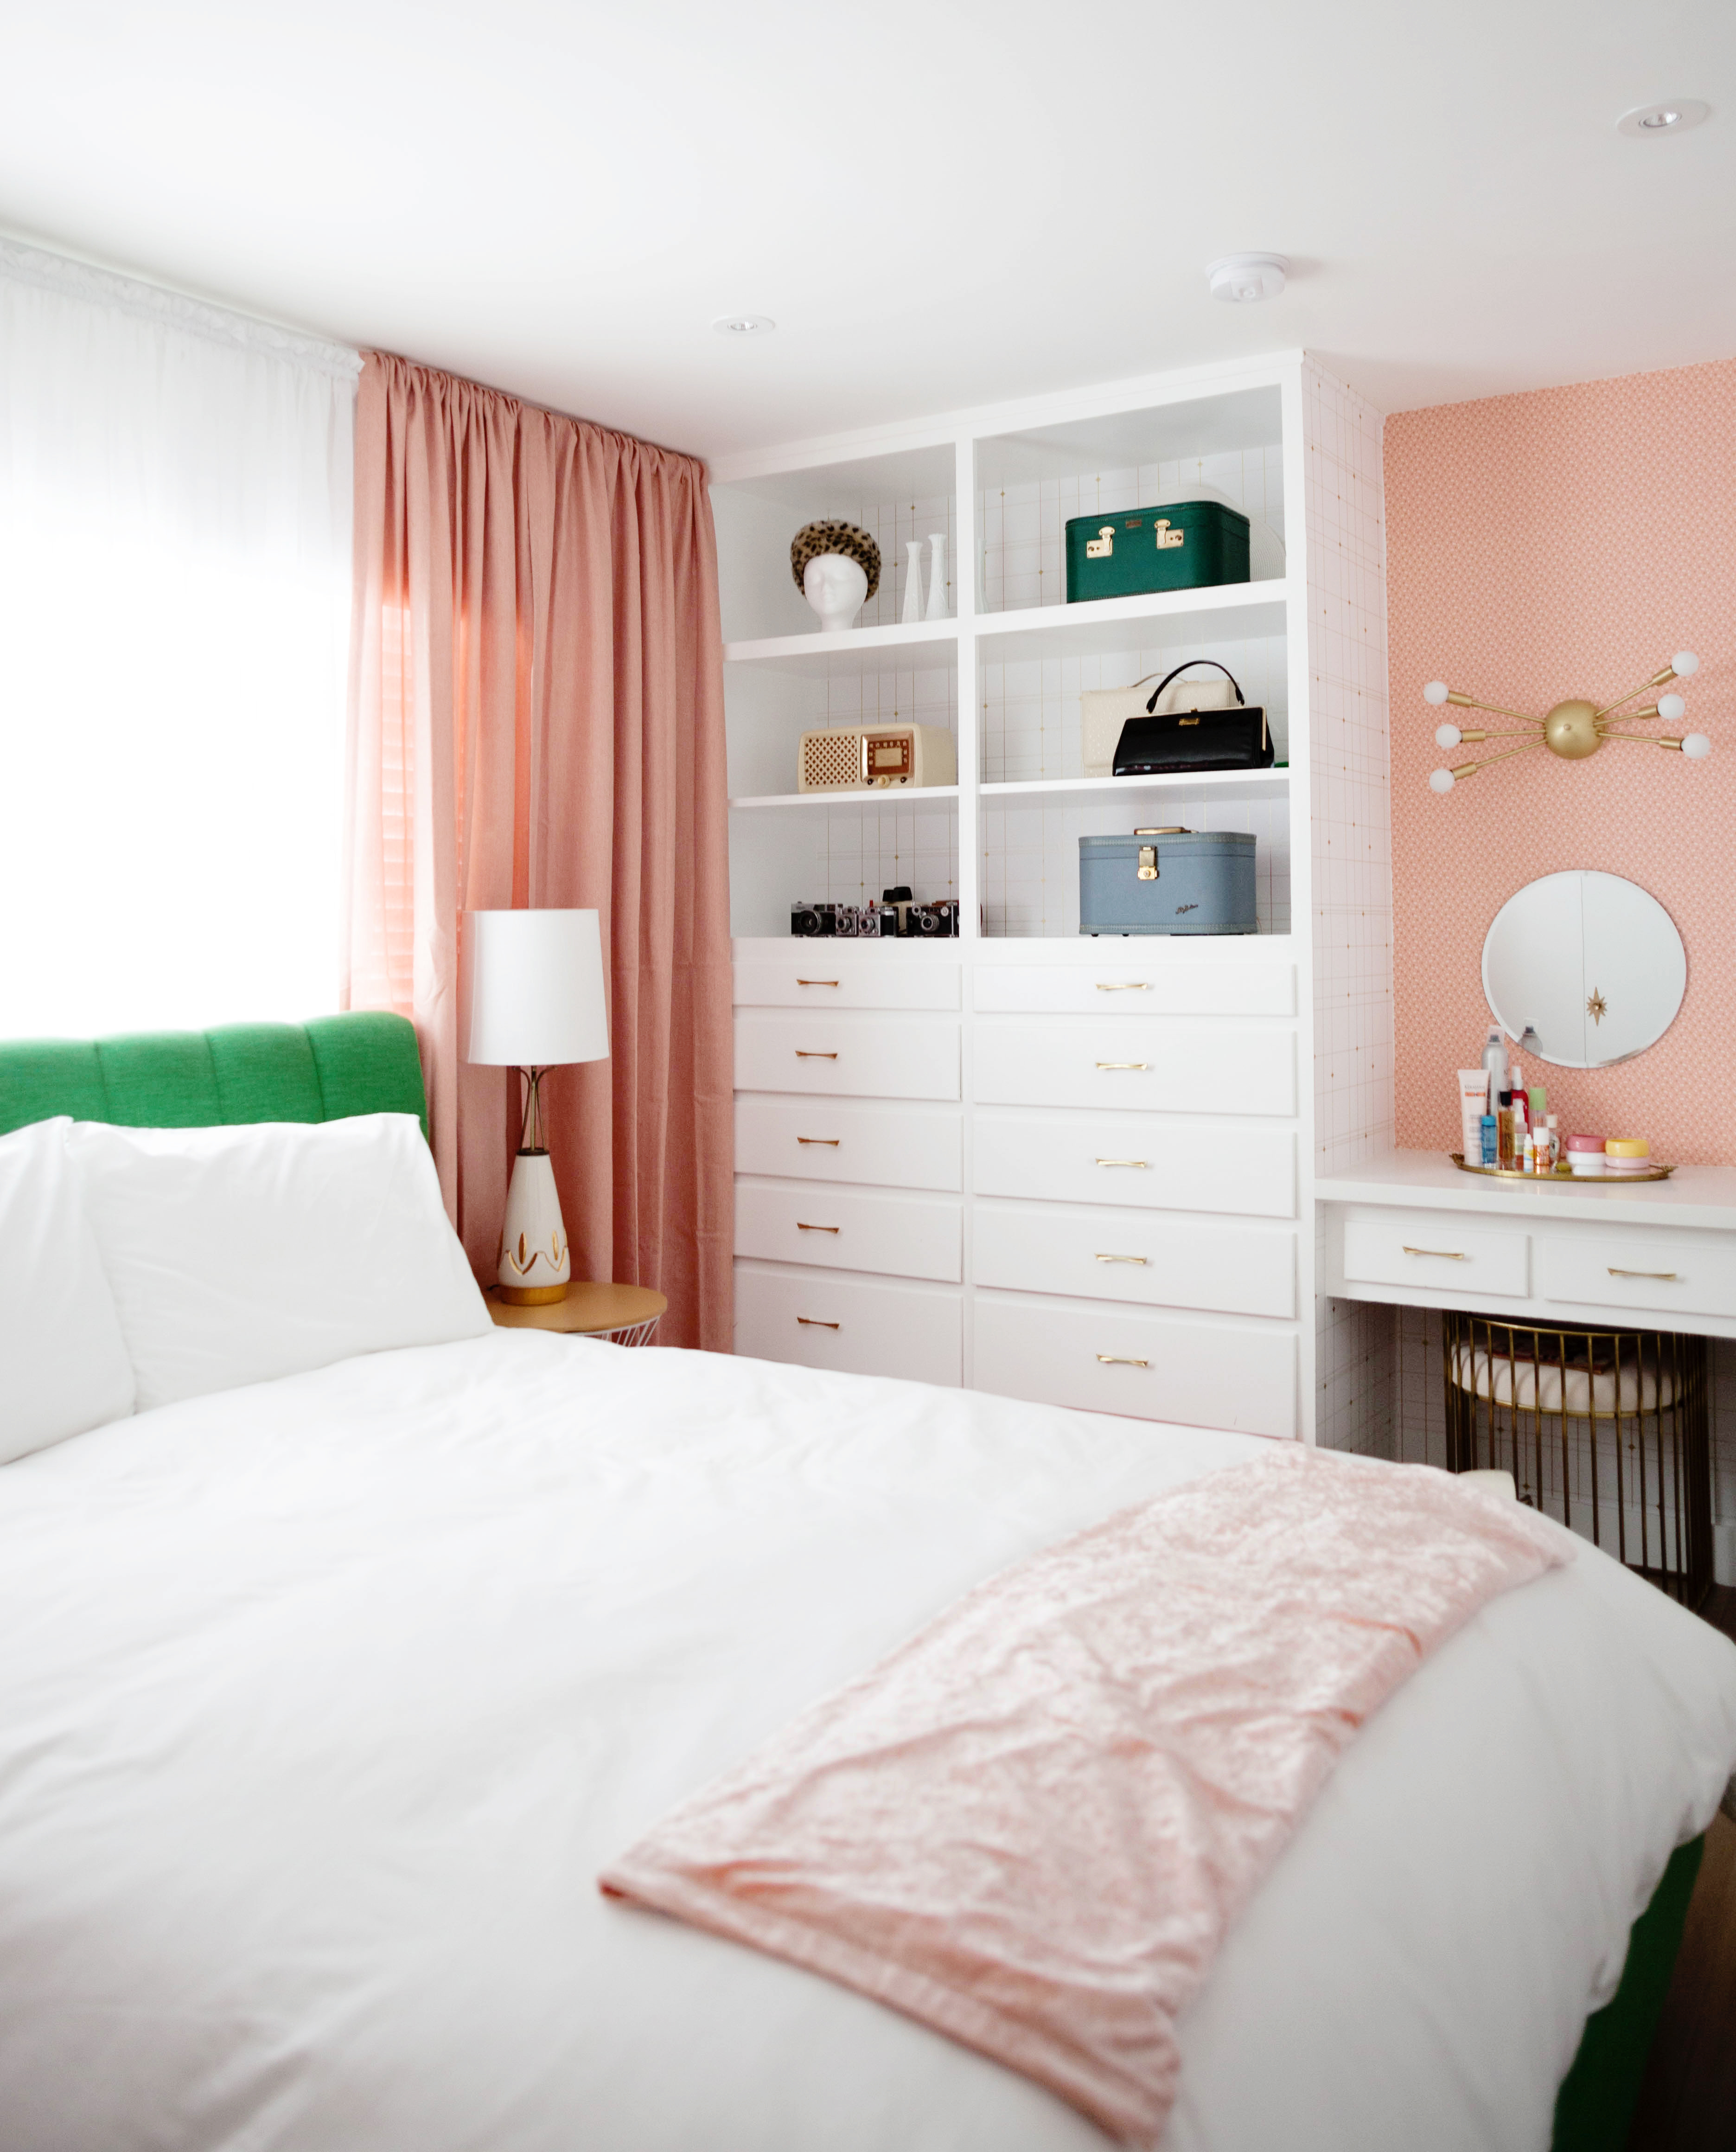
 I installed a beautiful metallic gold and white wallpaper from Tempaper (the same brand I used in my bathroom)! It’s so easy to work with and adds a lot of shine and pattern to the room, but isn’t overwhelming.
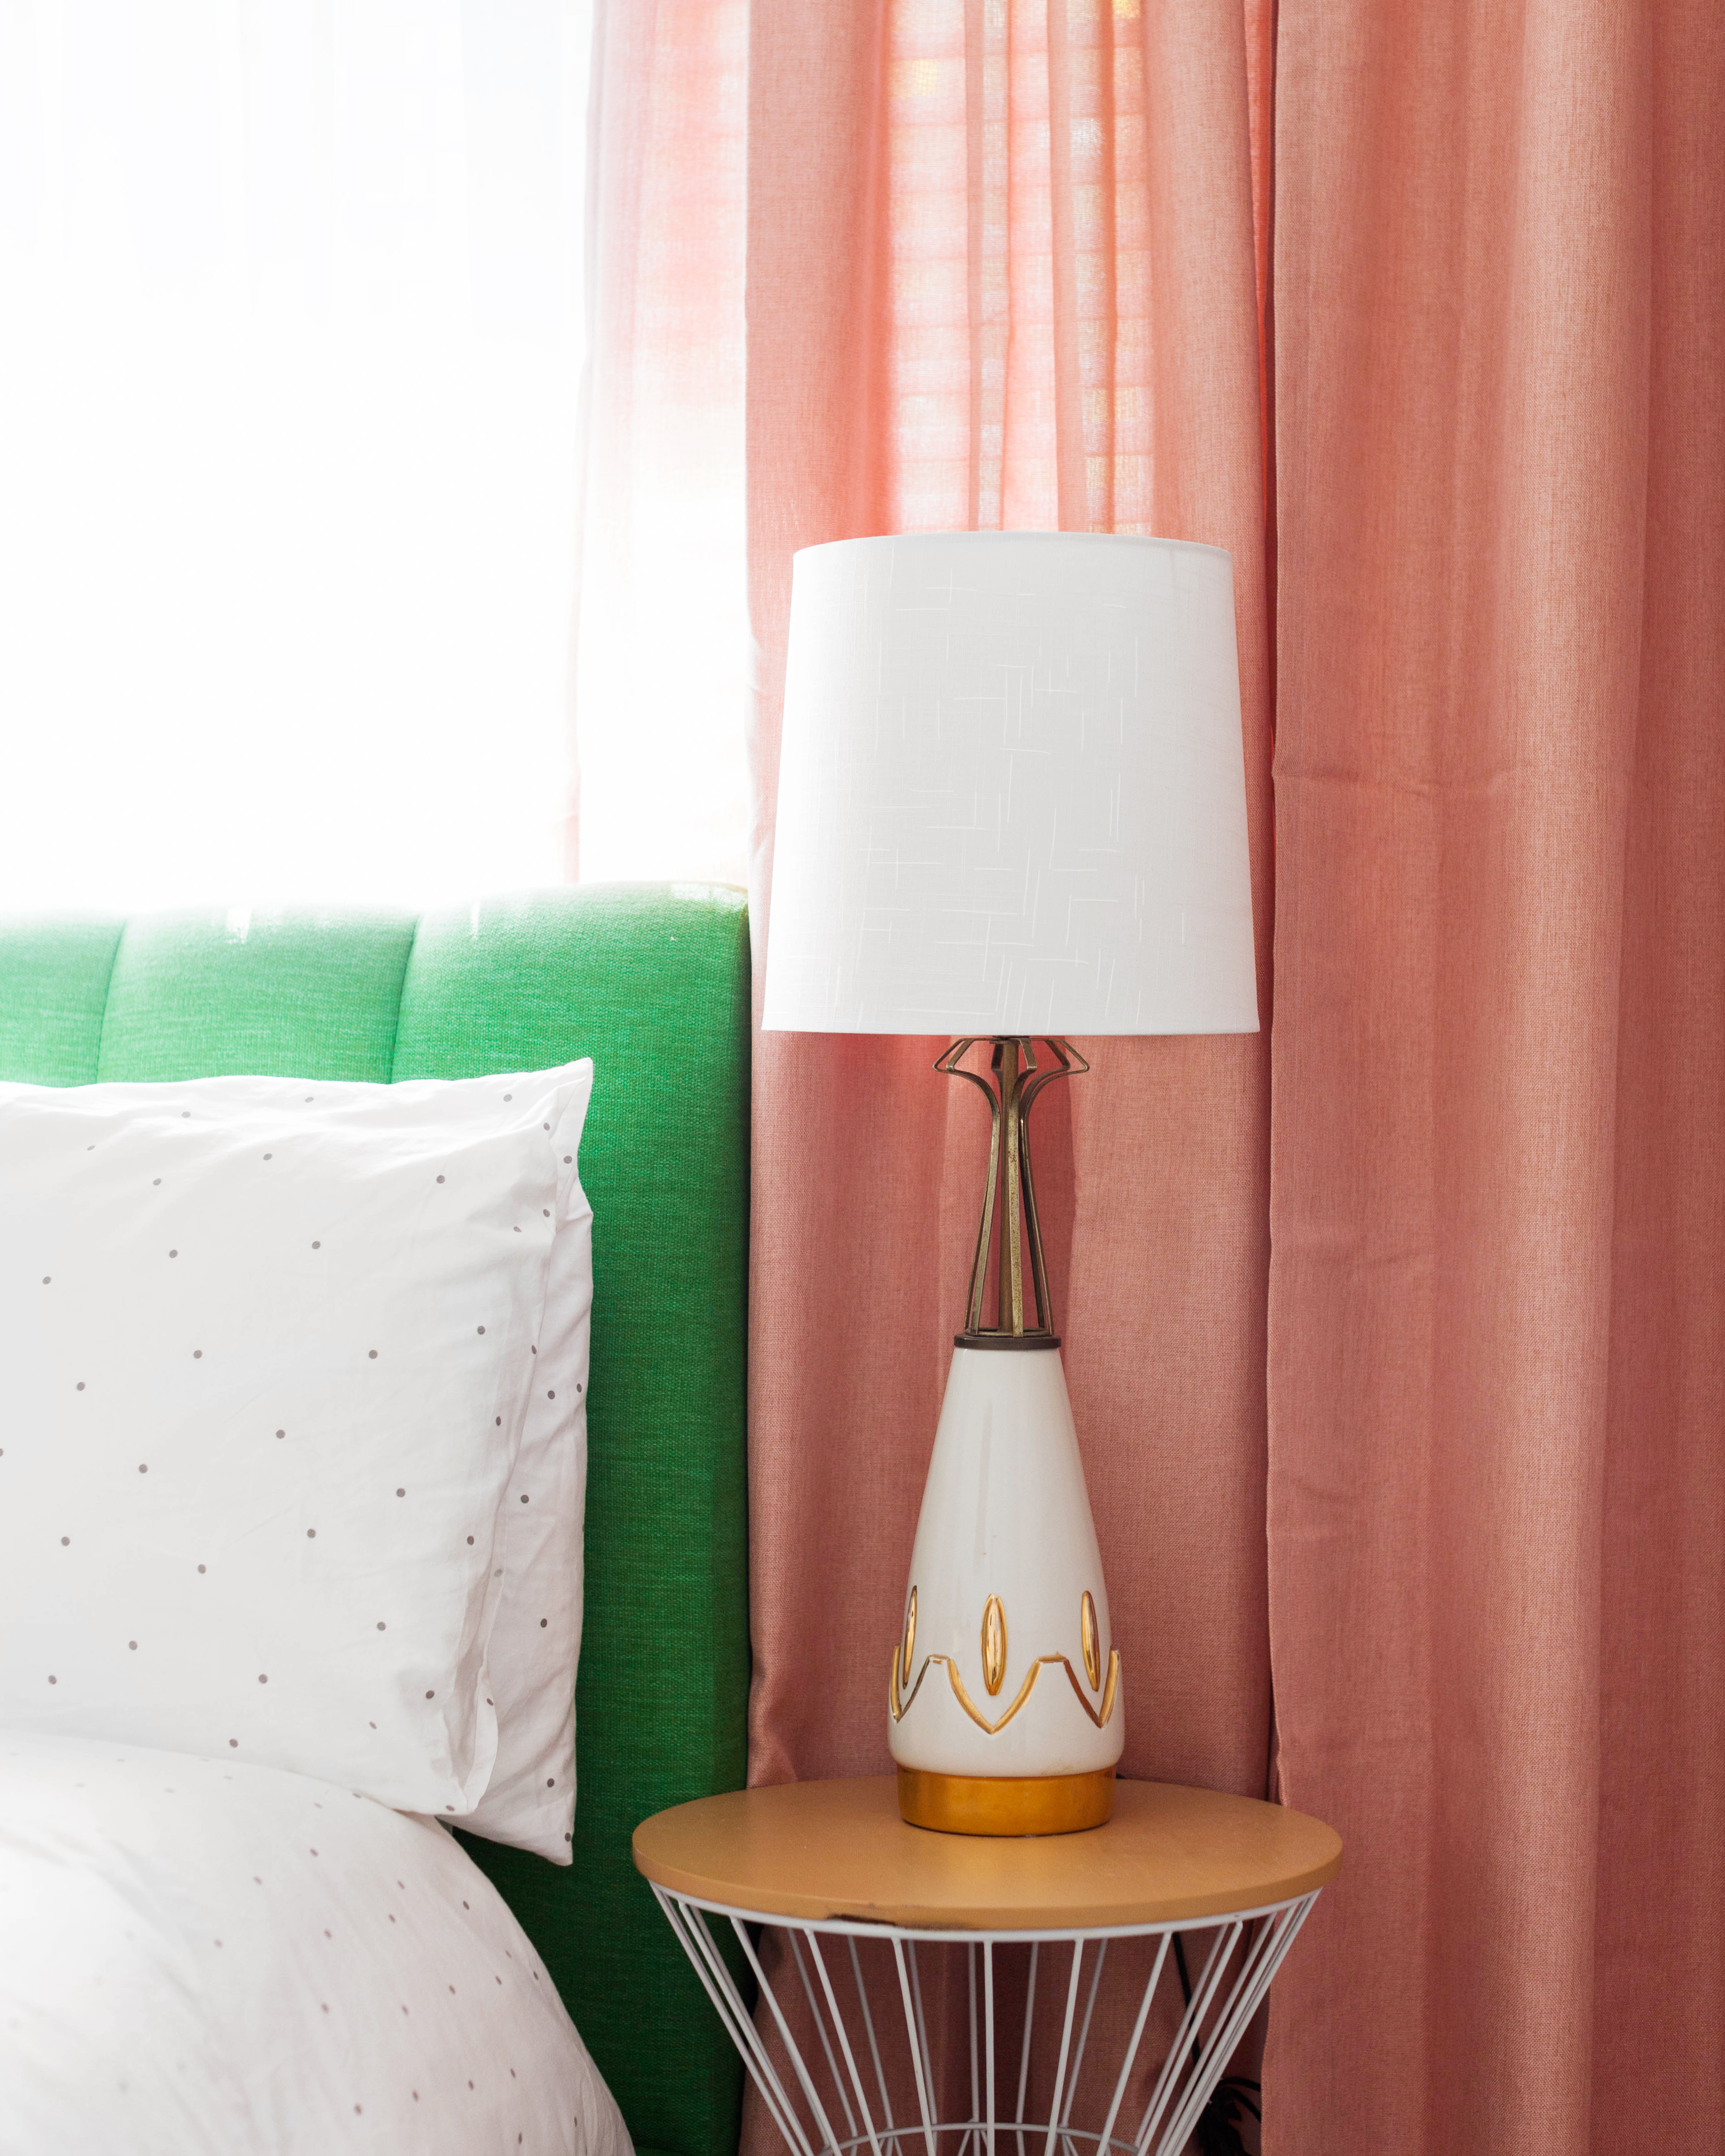 Lamps are a vintage find from Etsy! Shades are from the Project 62 line at Target.
 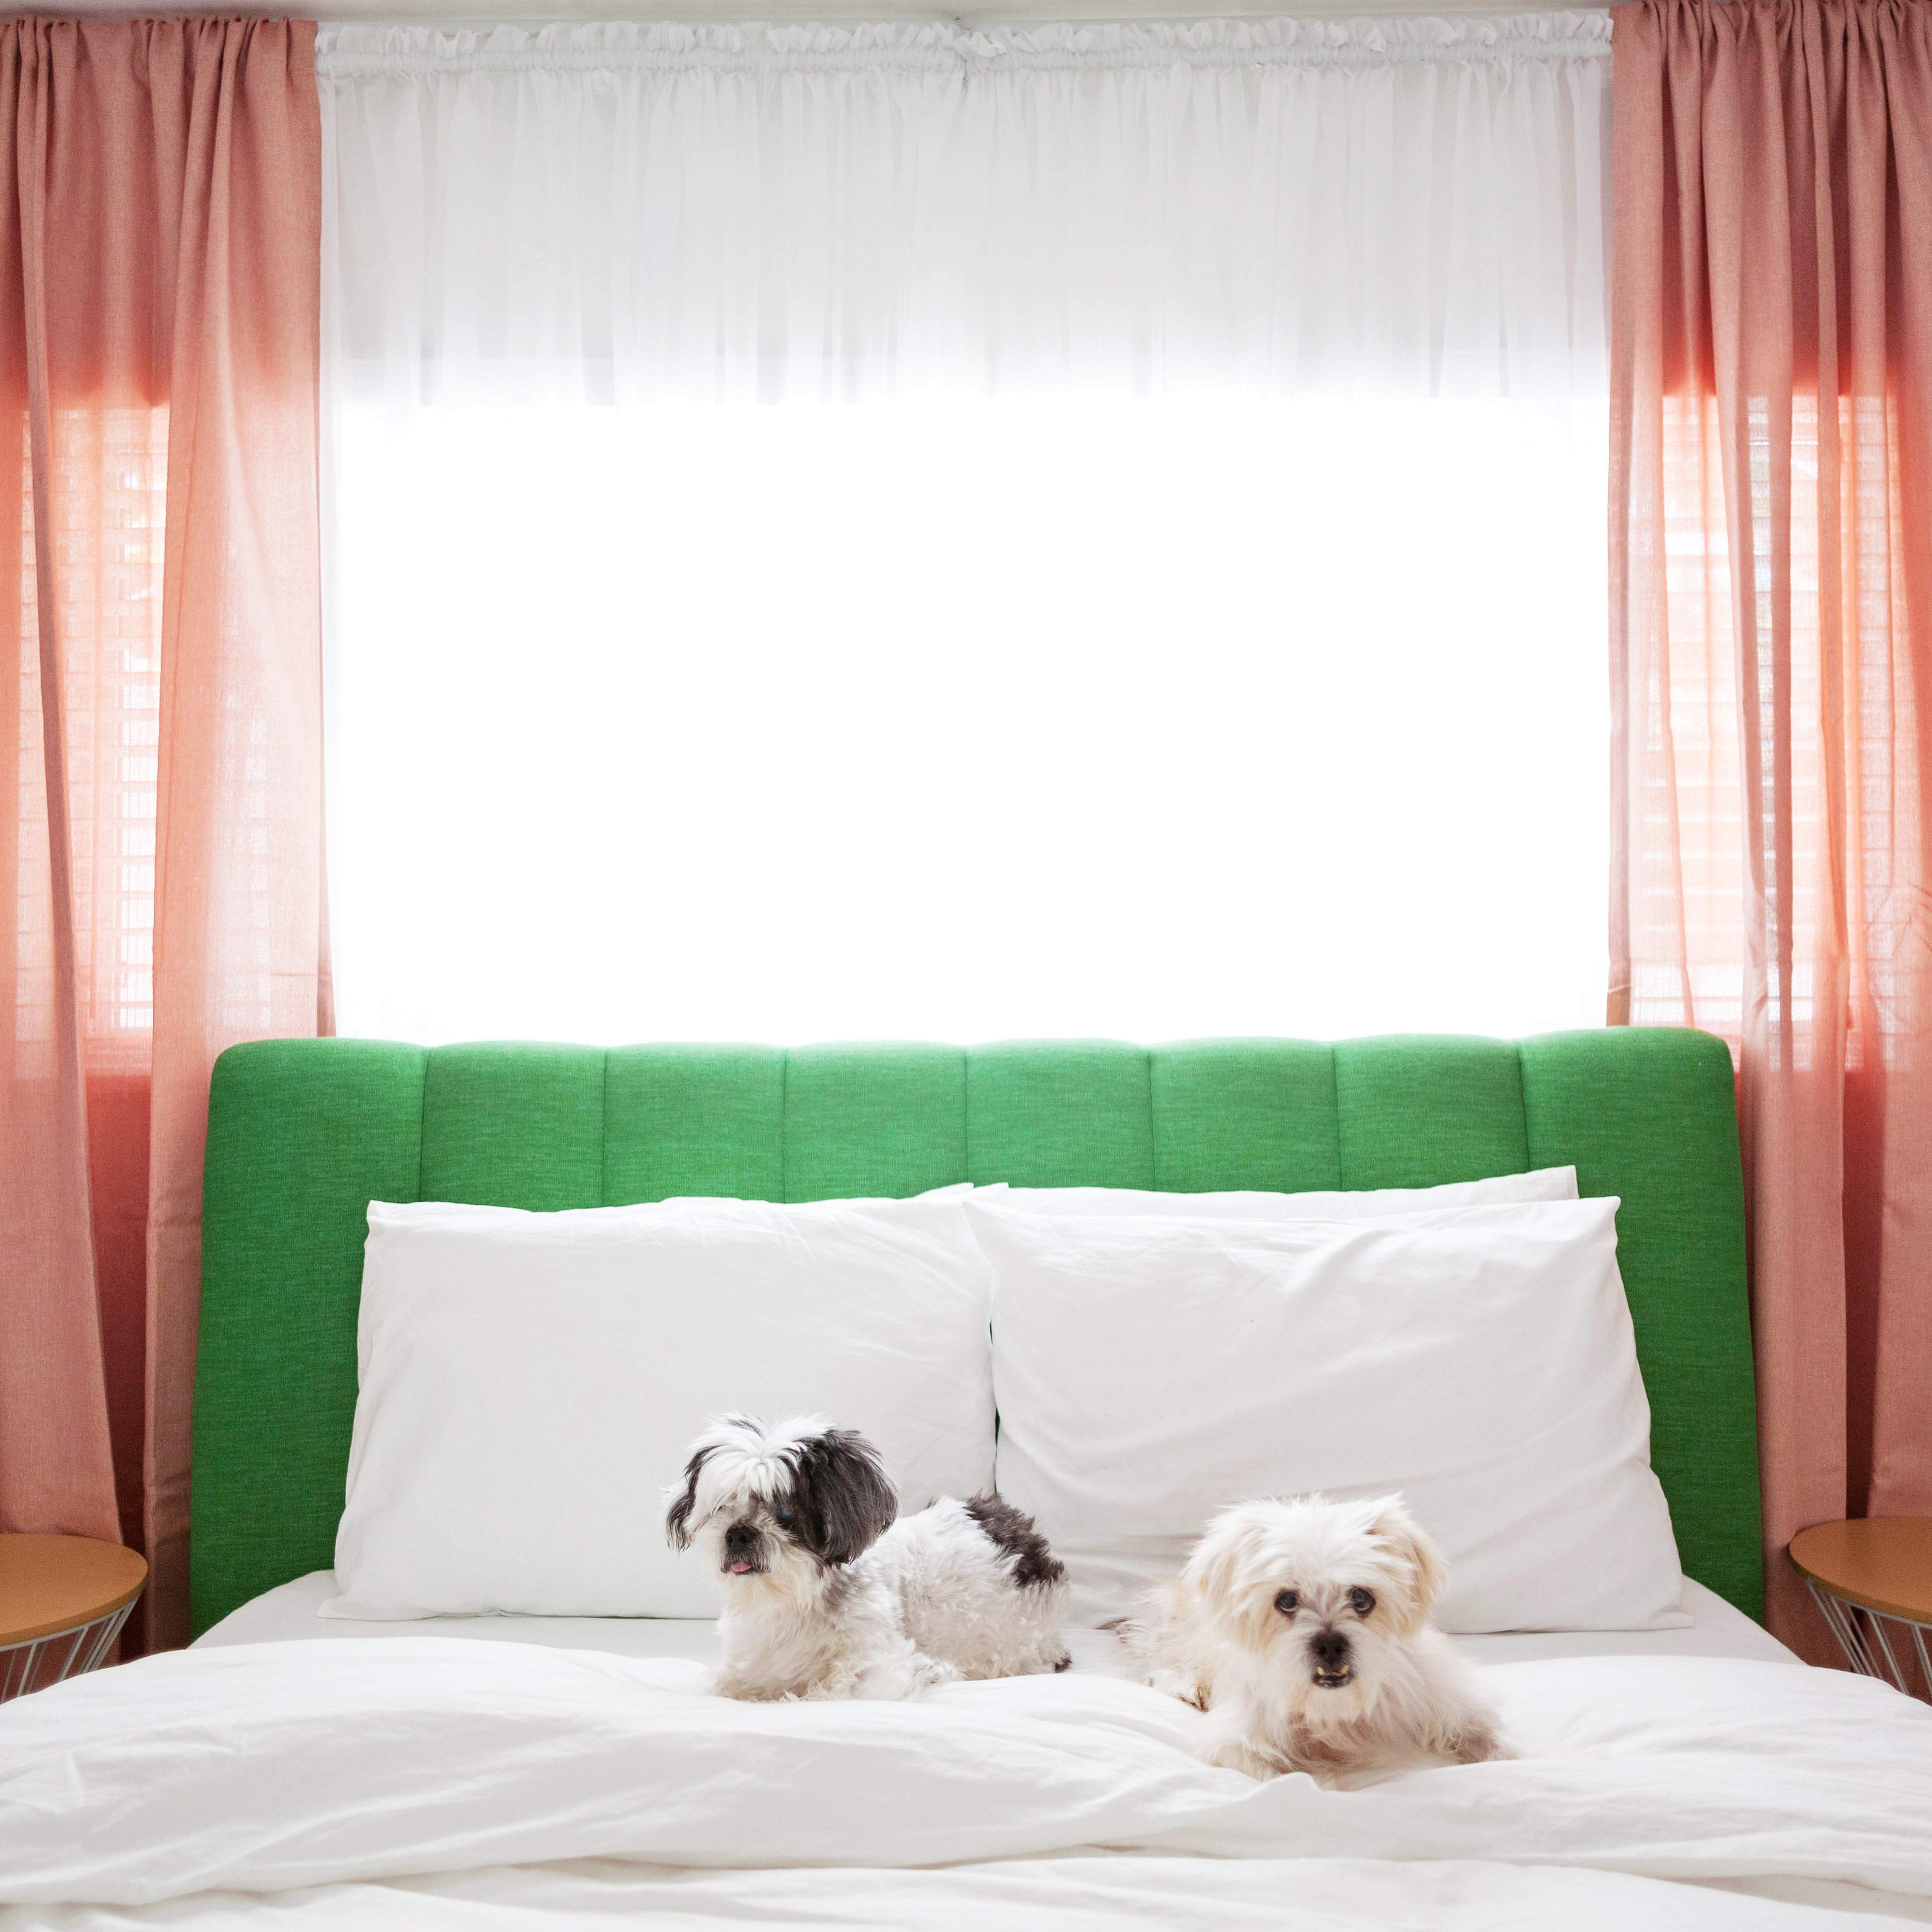 Our bed frame is from Joybird. You know I love me some Joybird.
 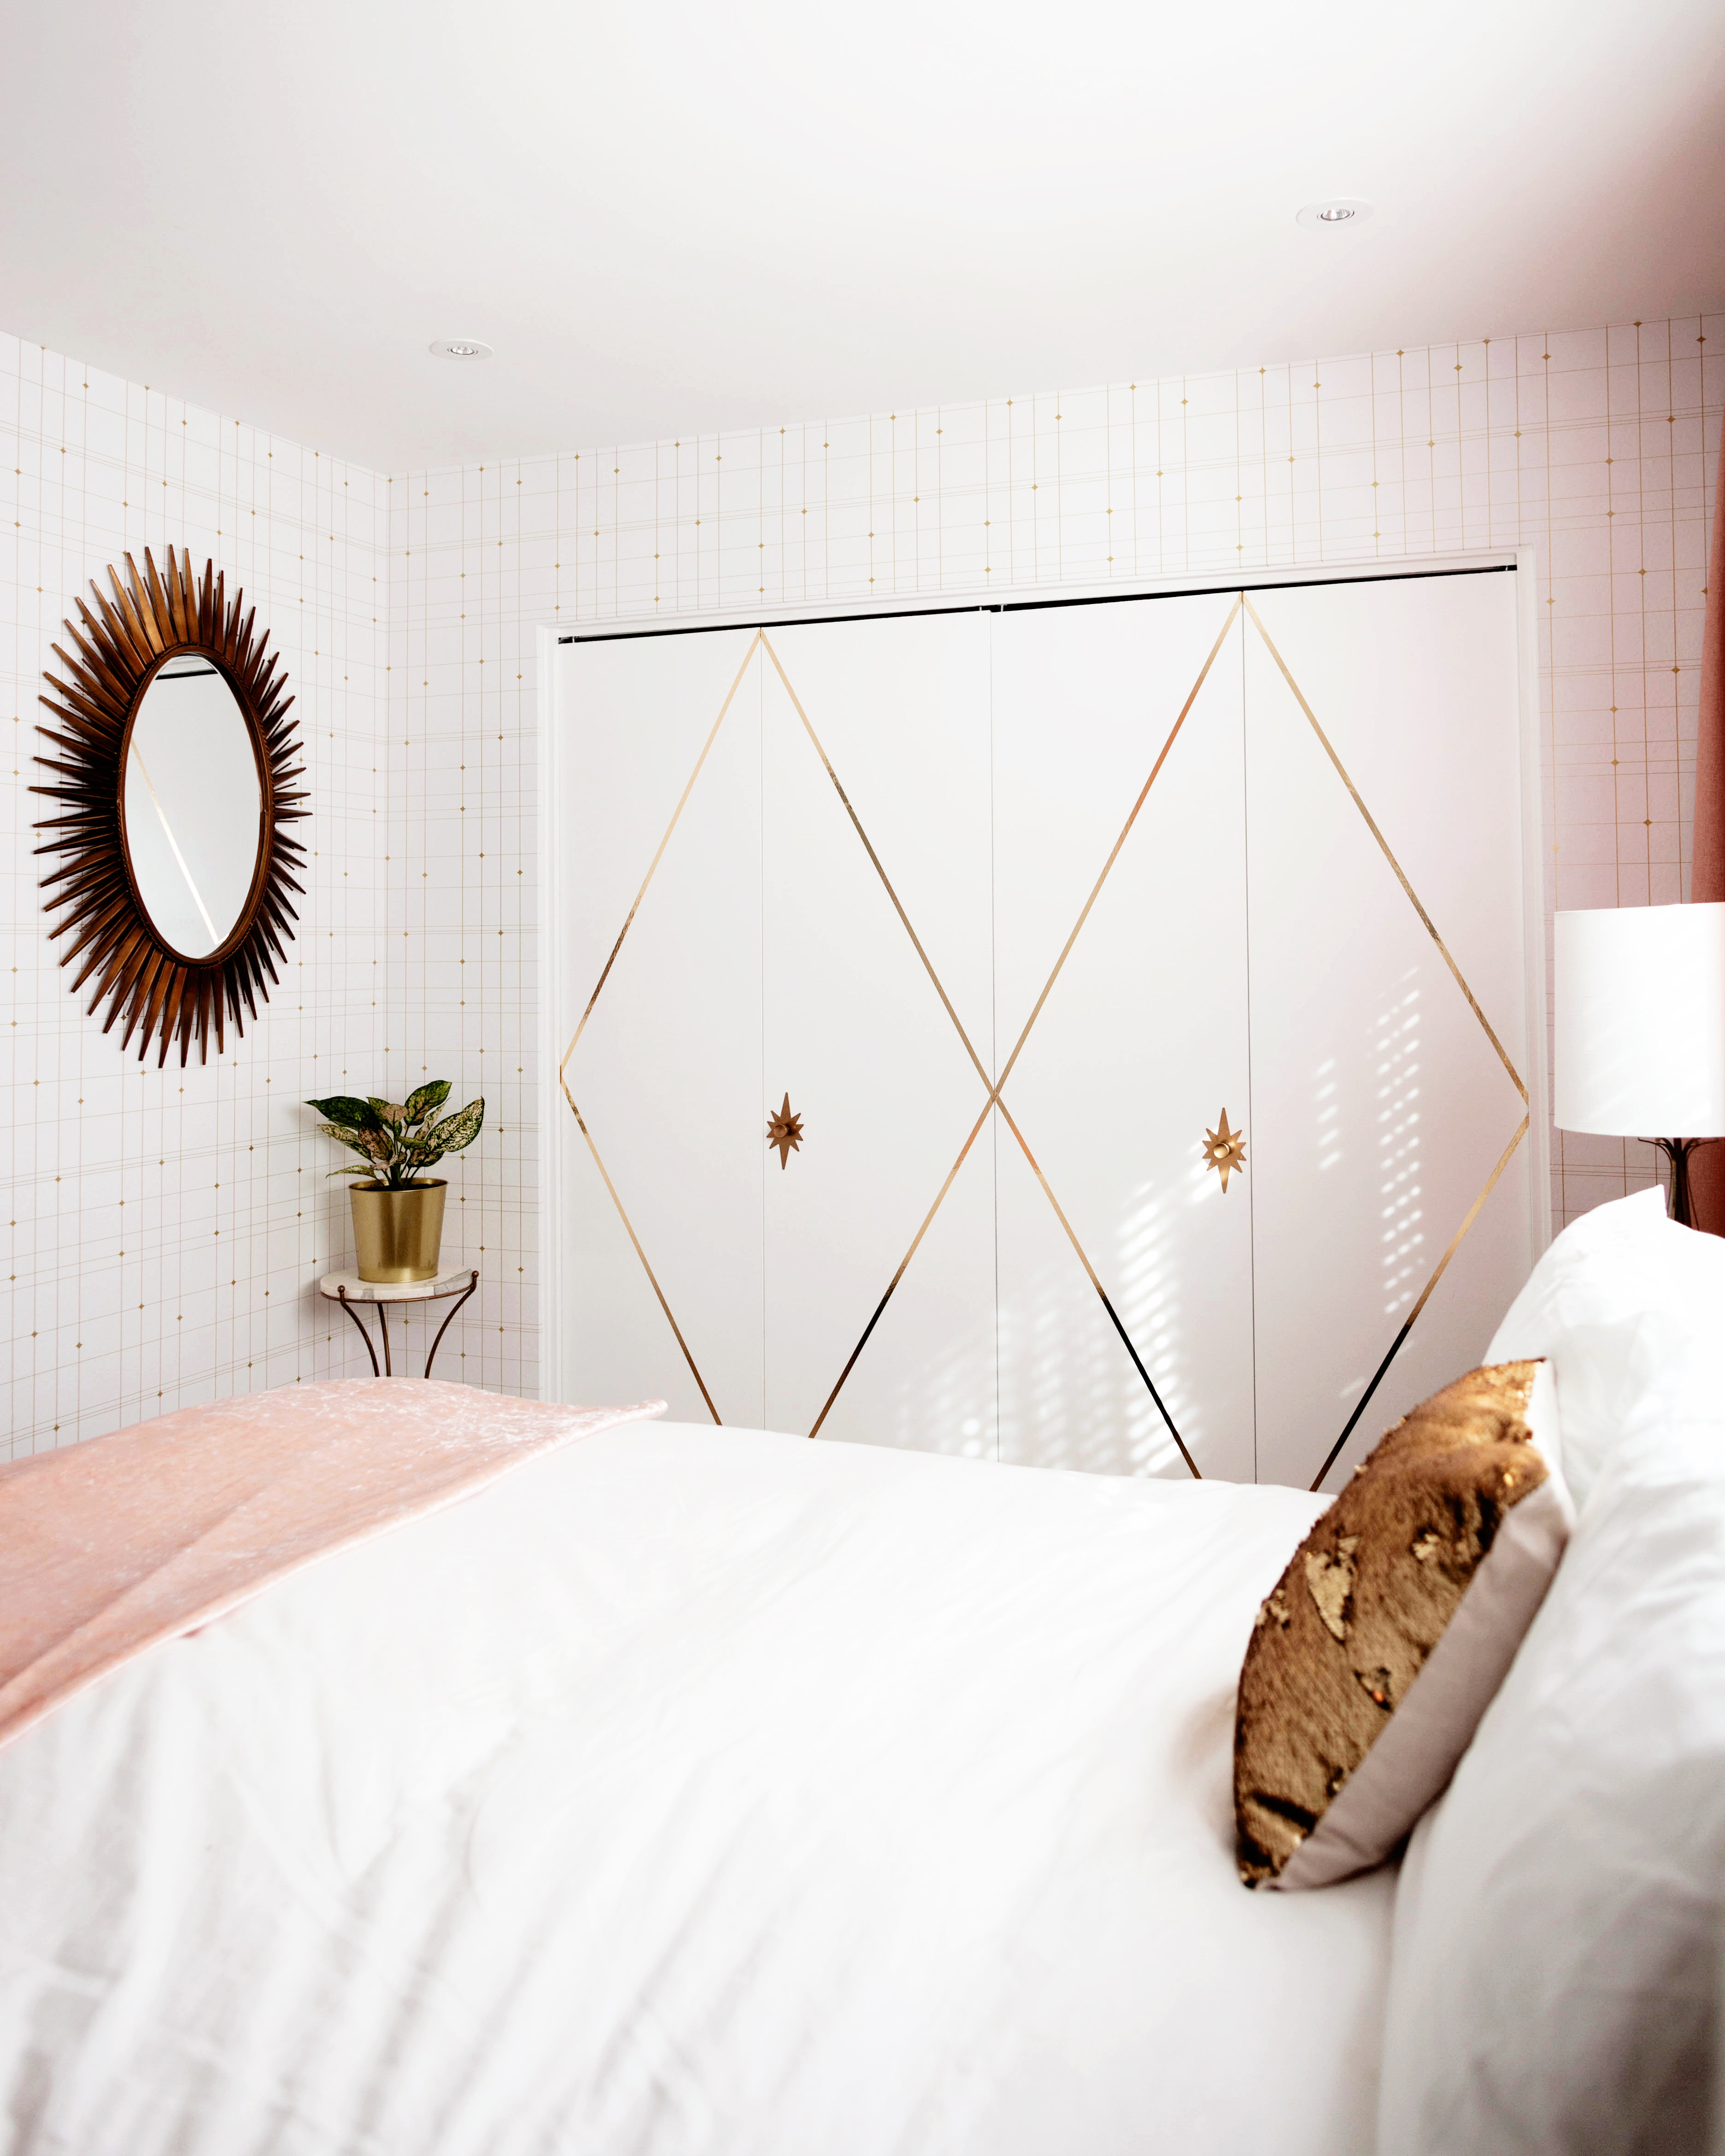 We had our tv mounted in front of the bed for our viewing pleasure. To jazz up the boring closet doors I used metallic gold tape and changed the knobs out to starburst ones from Etsy. The oval starburst mirror is also from Joybird.
And there it is! Can’t wait to show you more rooms soon.
Make sure you’re following on Instagram and search the hashtag #Melodramaville to see more!