DIY Plastic Halloween Flamingo Skeleton

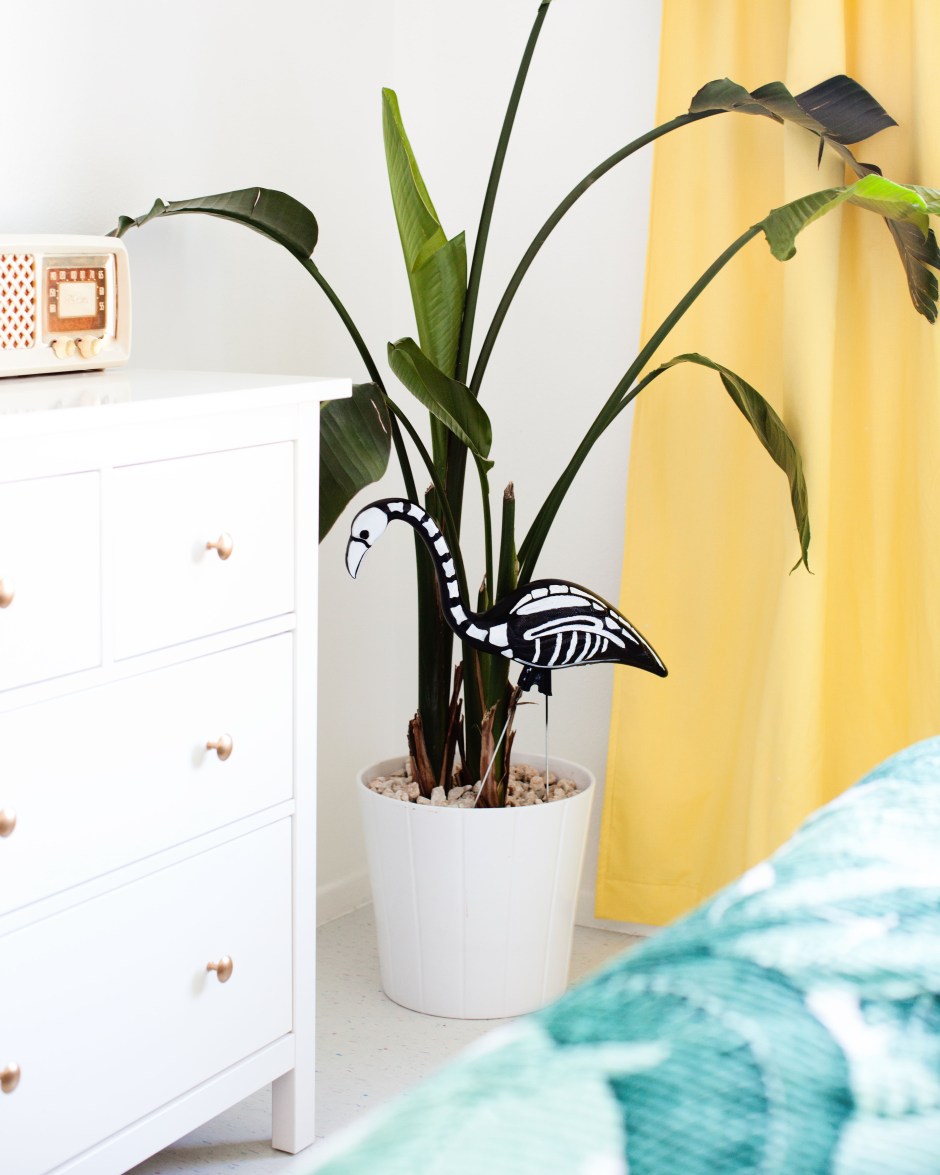
I’m finally getting into the Halloween spirit and wanted to share a quick DIY project with you guys. You probably already know that I love the retro kitschy vibe of plastic lawn flamingos, so I figured why not turn them into skeletons for Halloween?  Cute idea right? Well, I have to admit that this is one of those times where I thought I was being really original and creative, and then saw that you can actually buy them like this. Well, a scarier demon version anyway. Fail. I already had the materials laying around so I did it anyway! Here’s how I did it in case you want to make some yourself.

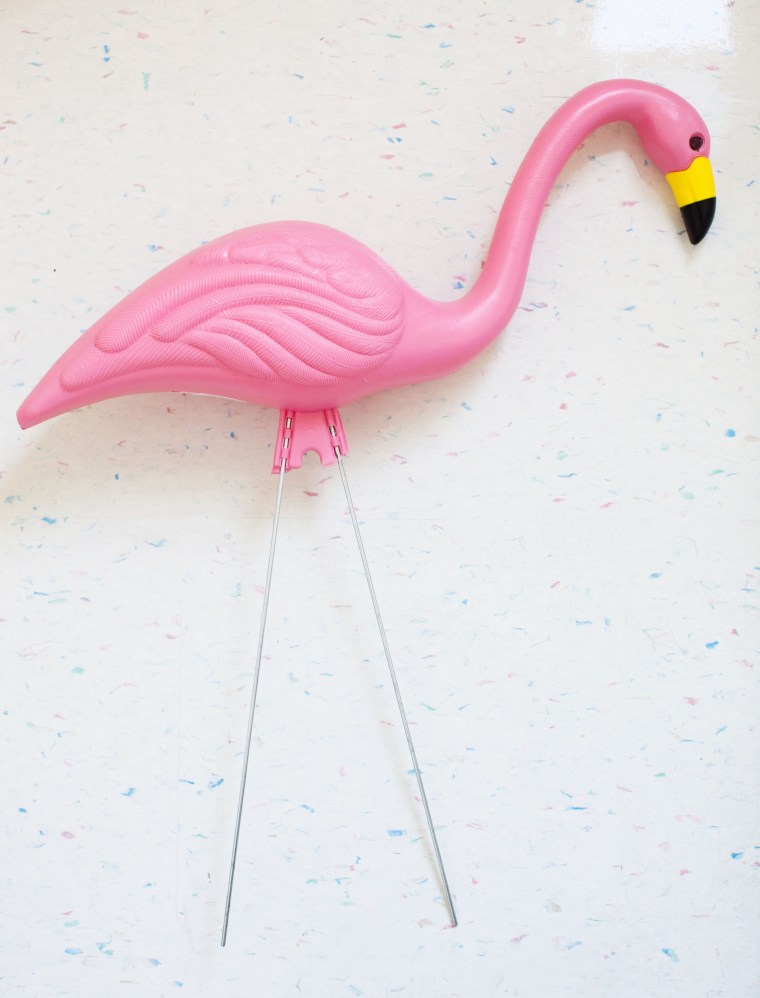
First I started with a plastic pink flamingo.

DIY Plastic Flamingo Skeleton

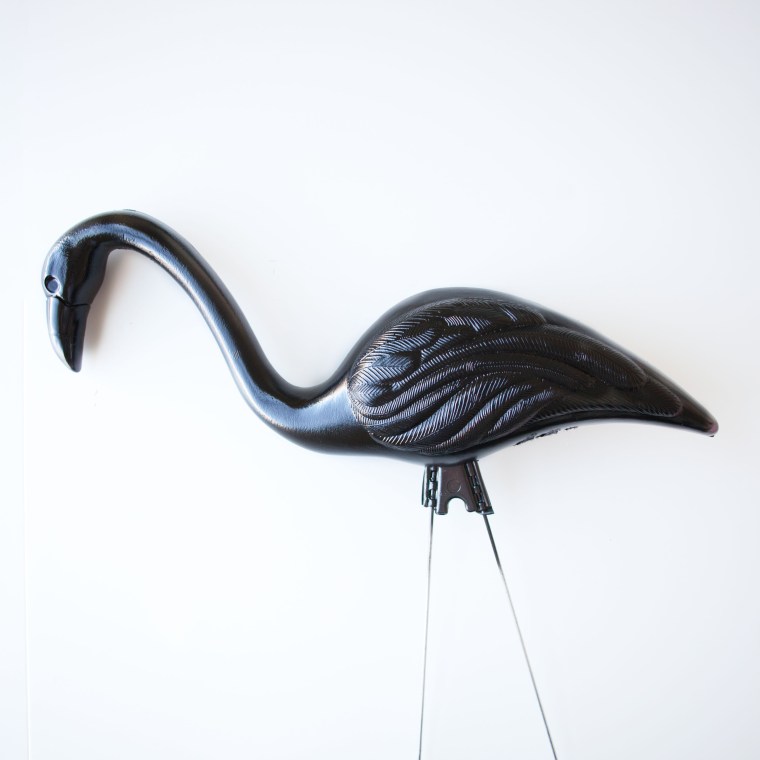
Then I sprayed it with satin black spray paint. Which looked pretty cool on its own, but I went with the skeleton idea anyway.

DIY Plastic Halloween Flamingo Skeletons

Then I used a white Sharpie paint marker to make the skeleton.DIY Plastic Halloween Flamingo Skeleton 
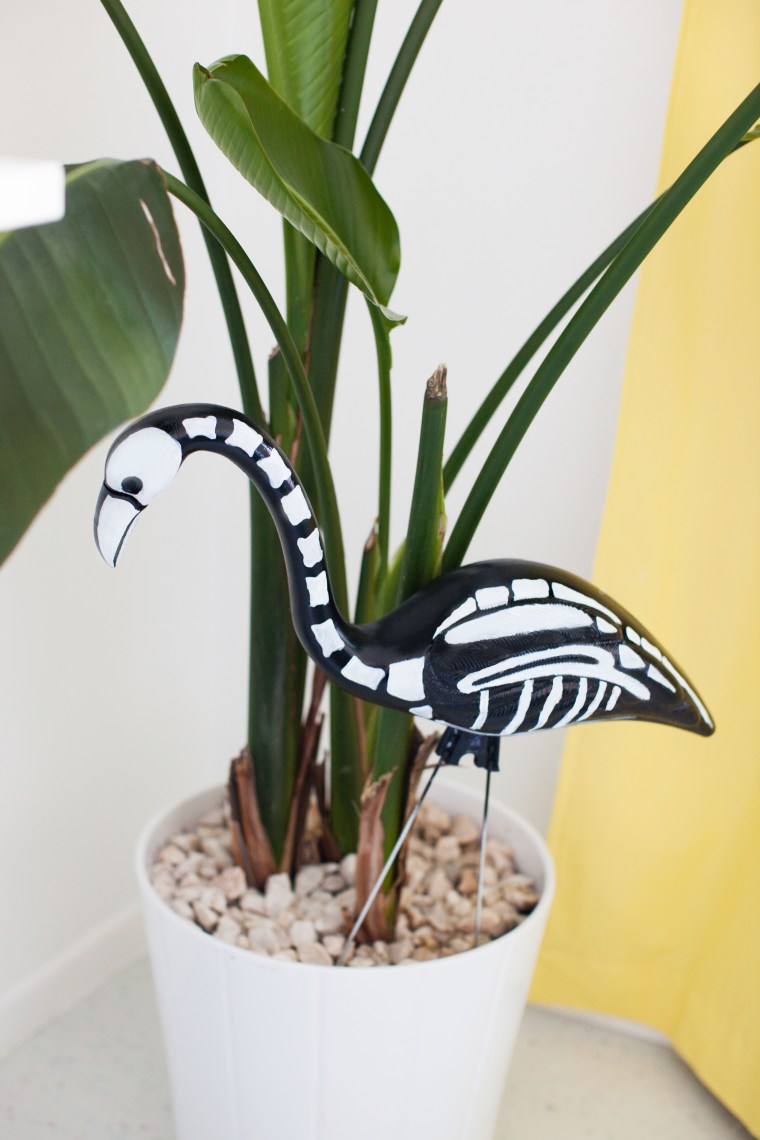
I’m not an expert on bird anatomy so you’ll have to forgive my crude interpretation of a flamingo skeleton. Listen, I did my best!

DIY Plastic Halloween Flamingo Skeleton


DIY Mini Pumpkin Pie Thanksgiving Drink Stirrers

There’s nothing I love more than kitschy holiday decorations and cocktail accessories are no exception. What do you think of when you think of Thanksgiving? Pumpkin pie, right? Me too. That’s why I made these adorable mini pumpkin pie drink stirrers for all of the autumnal cocktails I’ve been drinking (specifically this spiced pumpkin pie nog cocktail).

DIY Pumpkin Pie Drink Stirrer
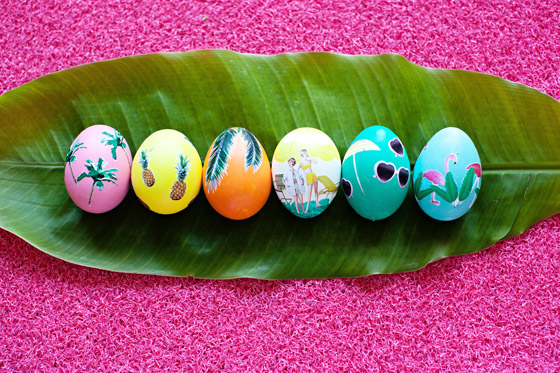
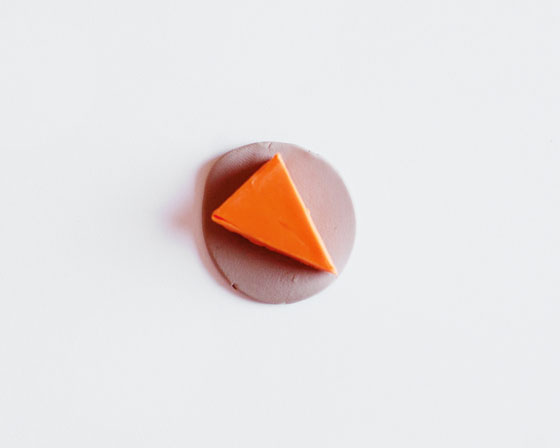
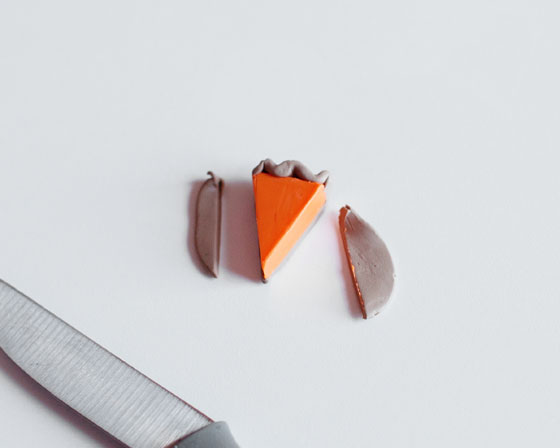
I love making miniature things out of clay. It’s so…therapeutic. These mini pumpkin pies were particularly easy and fun. Here’s how I did it.

What You Need:
Oven-bake Clay (orange, brown or tan, and white)

Plain 6 inch Drink Stirrers

First I cut out triangles out of orange clay. The easiest way to do this was to use a small, sharp knife to cut a 7cm think piece of clay to a 25cm x 20cm rectangle. Then cut it into a triangle.
Mini Pumpkin Pie Drink Stirrer

Mix some brown clay with a little white to get your desired shade of brown for the pie crust. Roll it into a ball and press it out into a 3cm thick disc. Place the orange triangle onto the disc.

Mini Pumpkin Pie Drink Stirrer

Pull up and flute the clay to create the crust.

Mini Pumpkin Pie Drink Stirrer

Then cut the remaining clay off.

Mini Pumpkin Pie Drink Stirrer

Roll white clay into snake-like shapes and spiral it onto itself to make a dollop of whipped cream.

Mini Pumpkin Pie Drink Stirrer

Next, use a cocktail stir to make a hole on the bottom of the clay pie.

Mini Pumpkin Pie Drink StirrerRemove the stick and bake at 275 degrees fahrenheit. Mini Pumpkin Pie Drink Stirrers
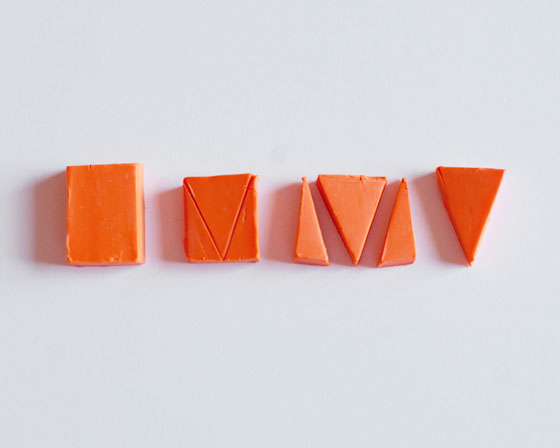
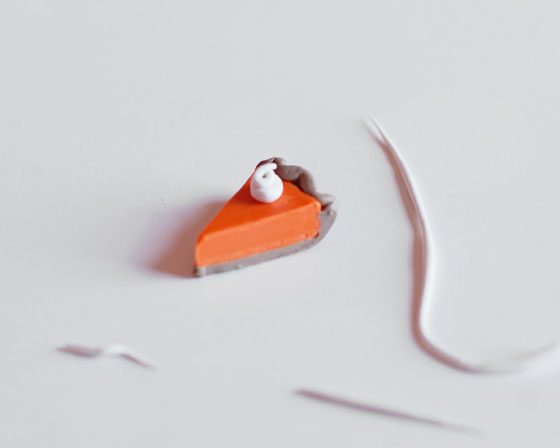
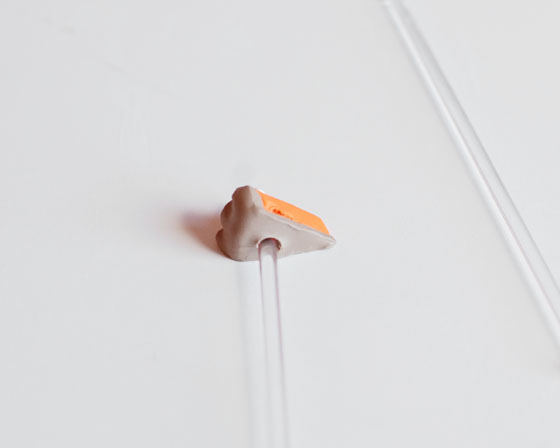
Using a little super glue, replace the cocktail stick into the pre-made hole.

And that’s it! Adorable, right? I got carried away and made a bunch of these as gifts. Happy drinking!

DIY Pumpkin Pie Drink Stirrer

DIY: Tropical Retro Inspired Decoupage Easter Eggs

Unlock this Exclusive Content on Patreon

DIY: Mid-Century Googie Style Glass Mugs

Sometimes I find myself perusing the tablewares section for things I totally don’t need but always end up buying anyway. One of my most recent unnecessary purchases were these little 69 cent glass mugs from IKEA. I figured I could use them for something or another, and I thought the shape was pretty cool, but I thought they needed something to jazz them up. I decided to give them a midcentury, googie style makeover using craft paint and painters tape.

DIY Glass Paint Stenciling

First I found some midcentury style clip art and printed it so I could make my stencil. I used an exacto knife to cut the shapes into painters tape.

DIY Glass Painting

Then I applied the tape to the glass in a random pattern.DIY Glass Paint Stenciling

I used a screen printing method to apply the paint. This is where you put on a drop of paint and use a squeegee to drag it across and fill in the stencil to create a smooth finish. You can use a sponge or brush, too, but it probably won’t have as smooth of a finish.

DIY Glass Paint Stenciling DIY Glass Paint Stenciling

Make sure to remove the tape before the paint dries. Otherwise the tape will take the paint off with it.

DIY Glass Paint Stenciling

DIY MidCentury Painted Glass Mugs

Let the paint dry for about an hour and then place into a cool oven and set the heat to 350 degrees. Let bake for 30 minutes and then shut the oven off. Let the glass cool in the oven and then remove. The paint will be cured and washable.

DIY MidCentury Painted Glass Mugs

Pretty neat looking cups for 70 cents, huh?

DIY MidCentury Painted Glass Mugs

DIY: Sugar String Easter Egg Nests

Ok, guys. I already showed you how to make the sugar eggs I adore so much, now I’m going to show you how to make adorable little nests using the same method.

Sugar String Easter Nest Tutorial

Use the same mixture and method as the Sugar String Easter Egg Baskets (3 parts sugar, 1 part water, crochet string). This time just use a smaller balloon…

Sugar String Nest Tutorial

…and once it’s dry cut it in half.

Sugar String Easter Nest Tutorial

Fill them up with candy eggs and those nasty little marshmallow Peep bird things you all seem to love and watch everyone go gaga over the cuteness!

Sugar String Easter Nest Tutorial

Sugar String Easter Nest Tutorial