A couple of months ago I found a busted down vintage GE refrigerator freezer combination with original ice tray online for about $100. The owner told me it didn’t work but that it should be an easy fix, so I took the risk and drove a couple of hours to San Diego to pick it up. It was in muchhhh filthier condition than the pictures lead on, and had some old wires sticking out of the back, but I figured I’d already invested the time and money to rent a pickup truck and drive out, I might as well just lug it home and see if I could bring it back to life. It’s hard to find the right sized vintage appliances to fit apartment kitchens, and this one was the PERFECT size for mine so I didn’t want to give up. I should note I also drove to Newport Beach, another couple of hours from San Diego, on the same day to pick up a 1950s gas stove that didn’t end up fitting my kitchen. More on that later, but I was extra determined to make the fridge work after that defeat.
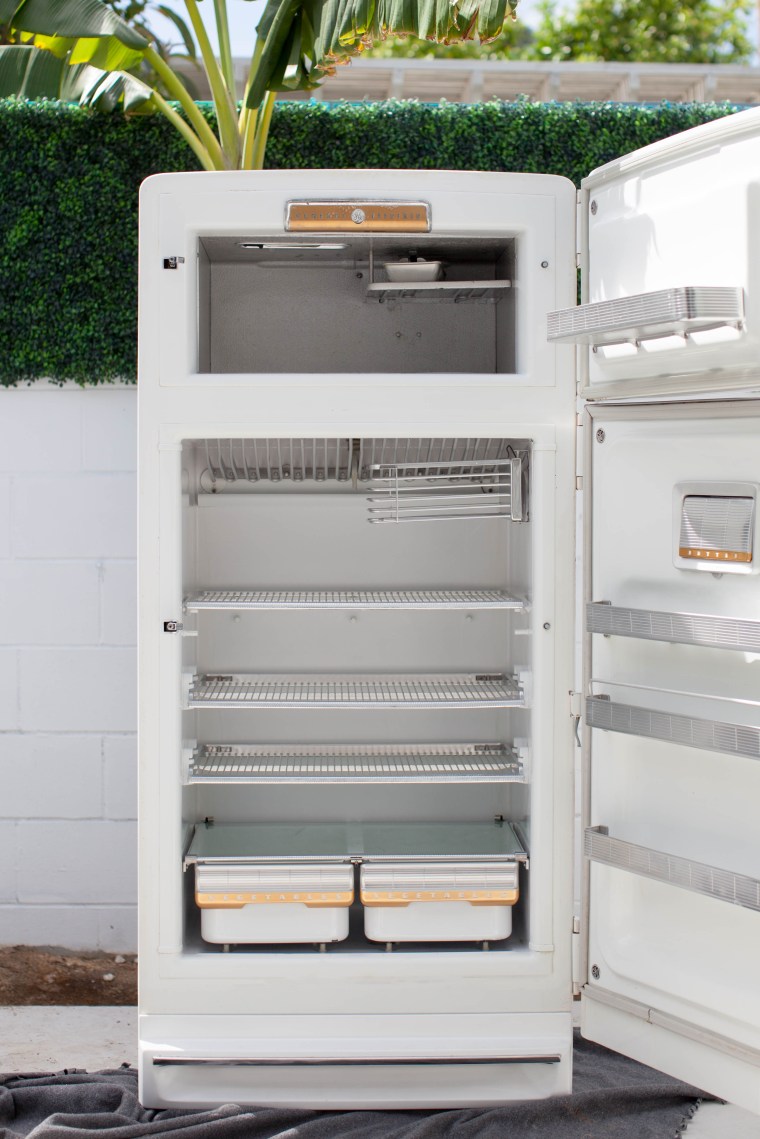
Here’s what I was working with.
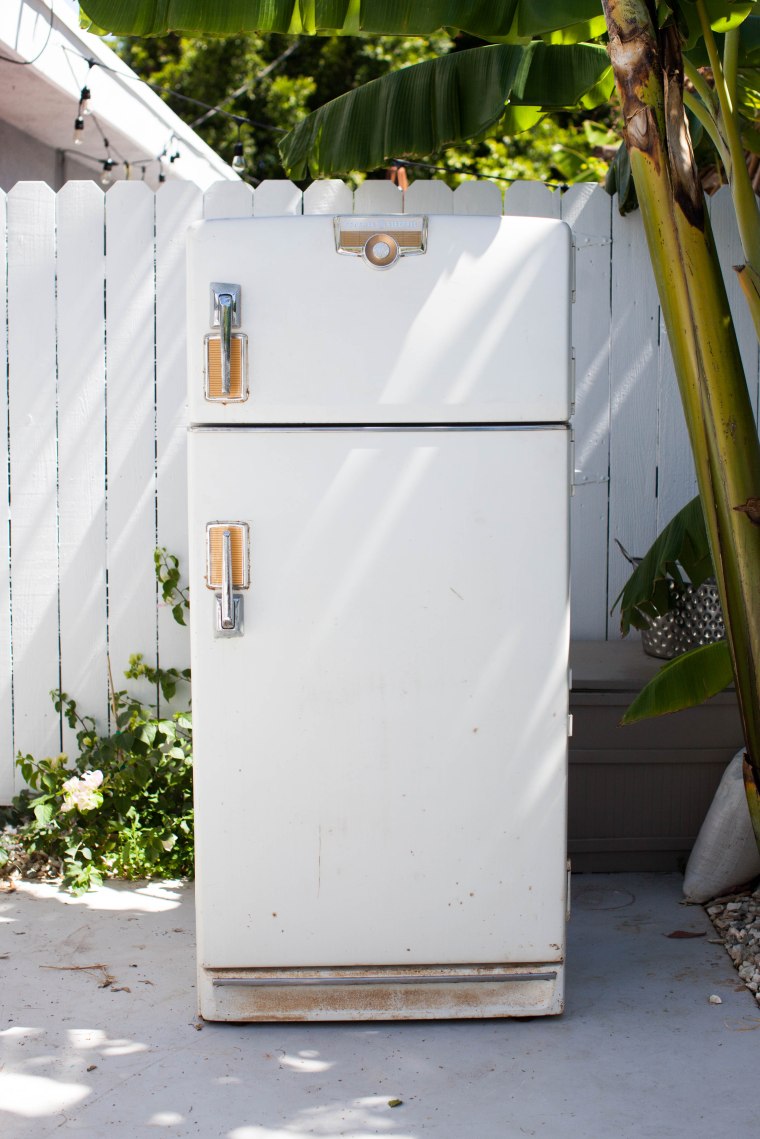
Rust, scratches, dirt, grime, and slightly corroded chrome. Not terrible.
But inside was much worse. Rust, mildew, a weird smell, so much grime. What did I get myself into?
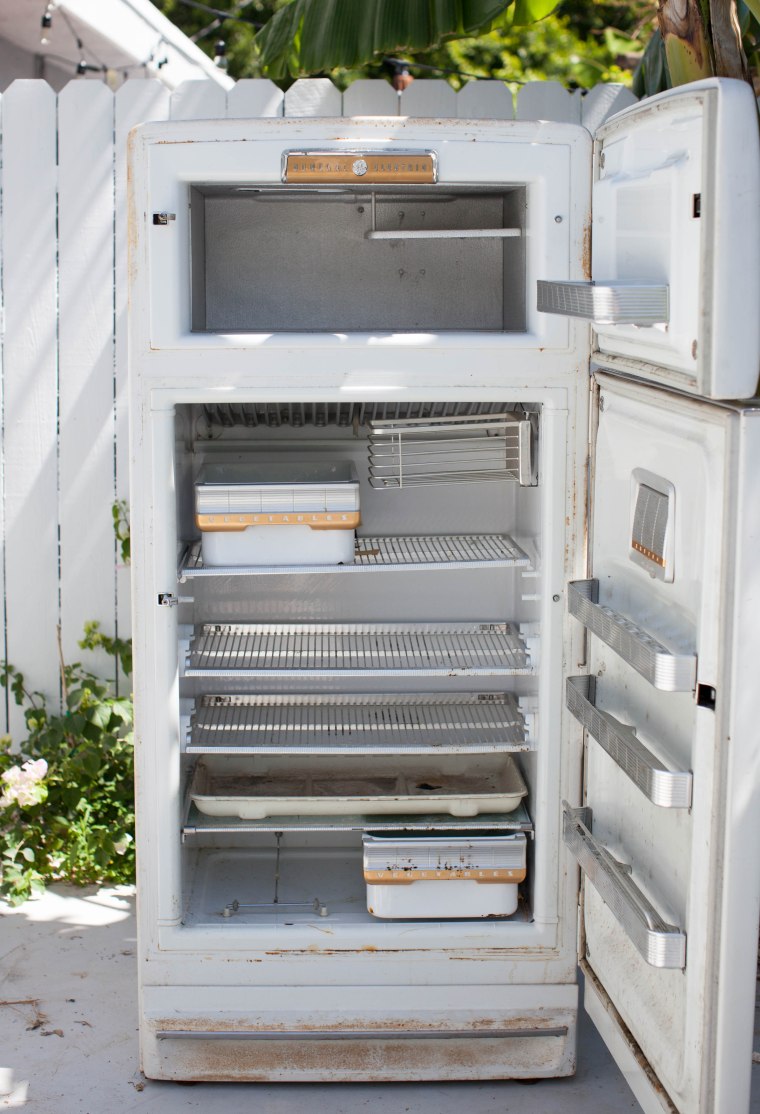
Since this was going to be the place I stored our food I wanted to be cautious about what I used to clean the inside. I didn’t want to use anything that would leave a lingering chemical smell or residue so I turned to the following products and methods, and used A LOT of elbow grease.
First, I removed all of the shelves and drawers and soaked them in my sink and scrubbed the hell out of them. Then I did a whole general scrub down with Simply Green and let it air out with the doors open. I did this a total of four or five times until it was clean enough to move on to the rust and mildew.
For the mildew and rust I used a mixture of good old baking soda and vinegar, a Scrub Daddy sponge, and a toothbrush. The gaskets were still supple and the seal on the doors were good (test with a sheet of paper, if it slides out get new gaskets), so I just I applied the baking soda and vinegar paste and scrubbed over and over until the mildew was completely gone. Some of the rust spots corroded the paint, but I was able to use extra-fine sandpaper to buff it smooth and applied appliance touchup paint over the smaller chipped spots as needed. On the bottom the rust was too extreme so I used a couple of coats of white automotive spray paint. I wouldn’t recommend painting the whole thing that way, but it worked for this small part.
Now onto the outside! The original paint was mostly in ok condition, so I just wanted to fill in a couple of scratches and bring some lustre and shine back to it. For this I used automotive detailing supplies. I applied several layers of a buffing cream and car wax with an electric orbital buffer. Just as you would detail an old car. I used a chrome polish and superfine steel wool to bring as much shine to the chrome as possible. 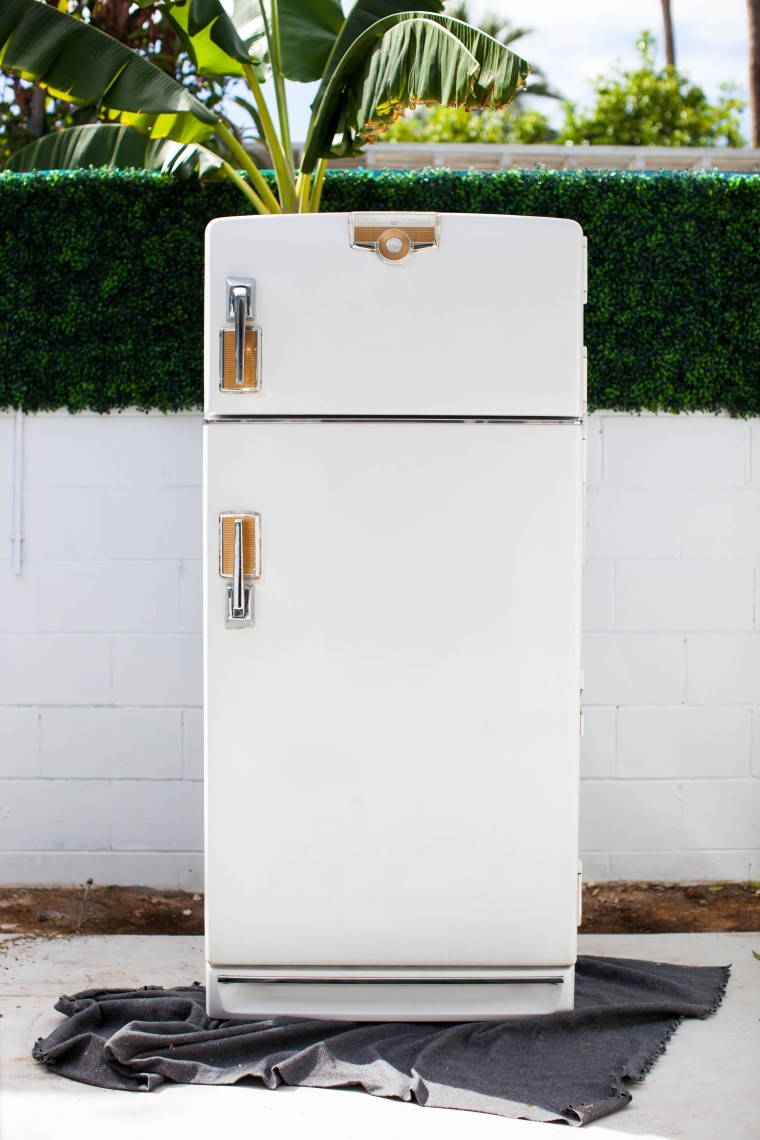
And there it is! The only thing was it still had a lingering smell. Not a horrible smell, just that general old freezer smell. The only thing that worked was these miracle Arm and Hammer Fridge-n-Freezer Packs. They’re super cheap so we replaced them every couple days until the smell was completely gone. That took about a week and now we replace it as needed.
The last thing I needed to tackle was the mechanics. After all of that cleaning the damn thing didn’t work. I consulted a few vintage message boards, and spoke to a repair shop, and was confident it just needed a new relay. The problem is the replacement relay for this model is long gone so I had to rewire it with a new universal relay. This was way easier than it sounds, you literally just follow the directions on the package. Definitely consult with a repair shop or the manufacturer if you have questions though.
As soon as I plugged it in the compressor kicked on and I jumped up and down and ran around in circles because WOW WHAT A PAY OFF! IT WORKS!
I know old refrigerators have a reputation of being energy suckers, but our bill and usage hasn’t gone up at all compared to our modern fridge. From my understanding the high energy consumption comes from older models that incorporate an automatic defrost system. This model needs to be defrosted every couple of months, but I simply use a blow dryer and old towel and it takes me about 15 minutes. Another issue of concern for some people is size. It is smaller inside than a modern refrigerator, but we don’t store very much food at once, so that hasn’t been a problem for us.
Here it is living happily in our kitchen! Perfect fit. I love it.


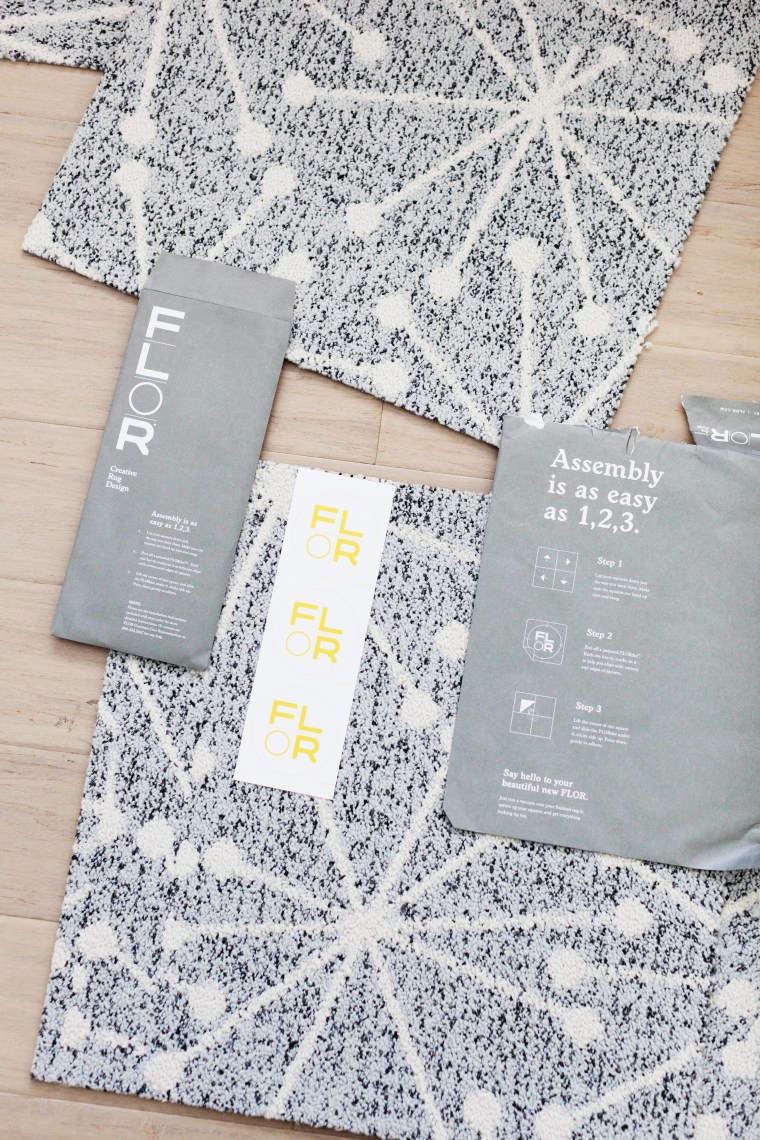 The cool thing about FLOR squares is that you can customize a rug to fit your needs. You can mix and match colors and patterns to create something truly unique, or you can just go with one all over pattern like I’ve done. They’re easy to cut and they simply stick together using the included FLORdots stickers.
 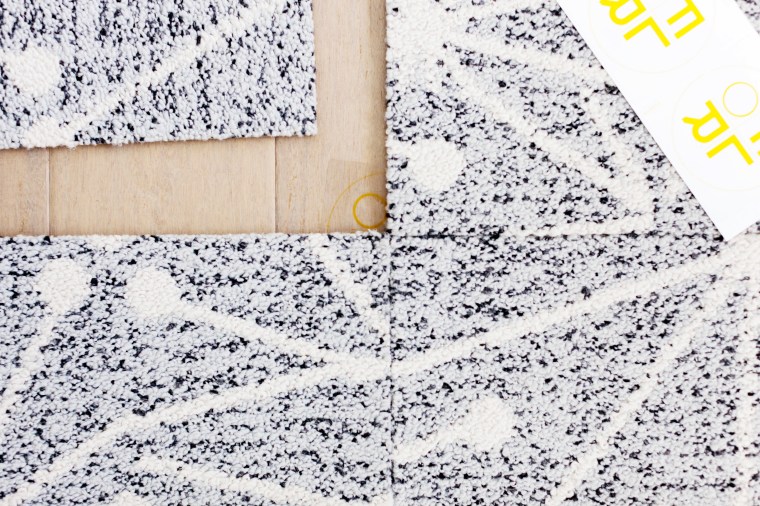 The stickers hold the corners of the tiles together and only stick to the backing of the carpet squares. Nothing actually sticks to your floor underneath so you don’t have to worry about ruining it or having to deal with sticky residue underneath. Plus, when we move we can just stack them up and take them with us to the next place.
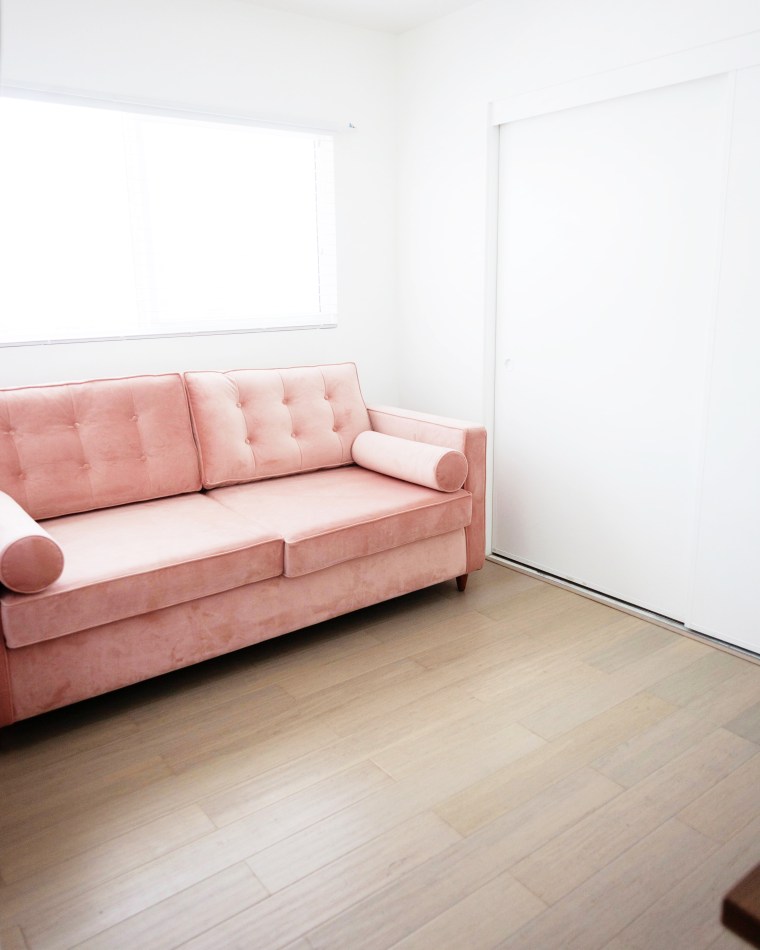
 First I laid out the squares to make sure I was happy with the placement. Any parts that need trimmed are easily cut with a utility knife or box cutter.
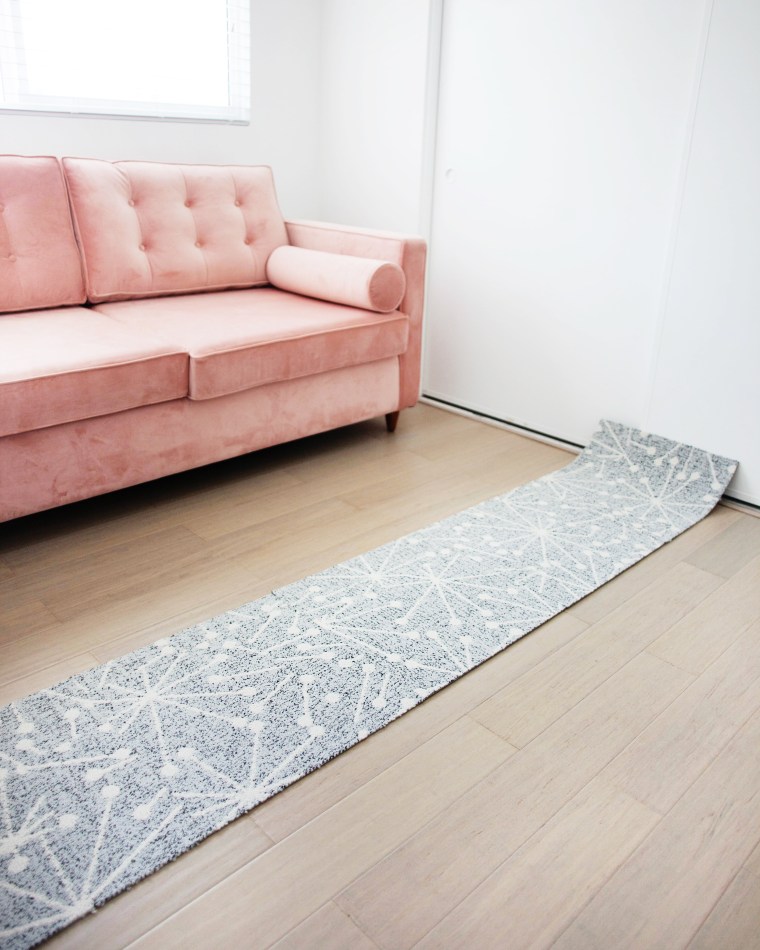 This room is tiny so I decided to do the entire thing. Once I was happy with the placement I easily applied the stickers to the corners to hold it all together and voila!
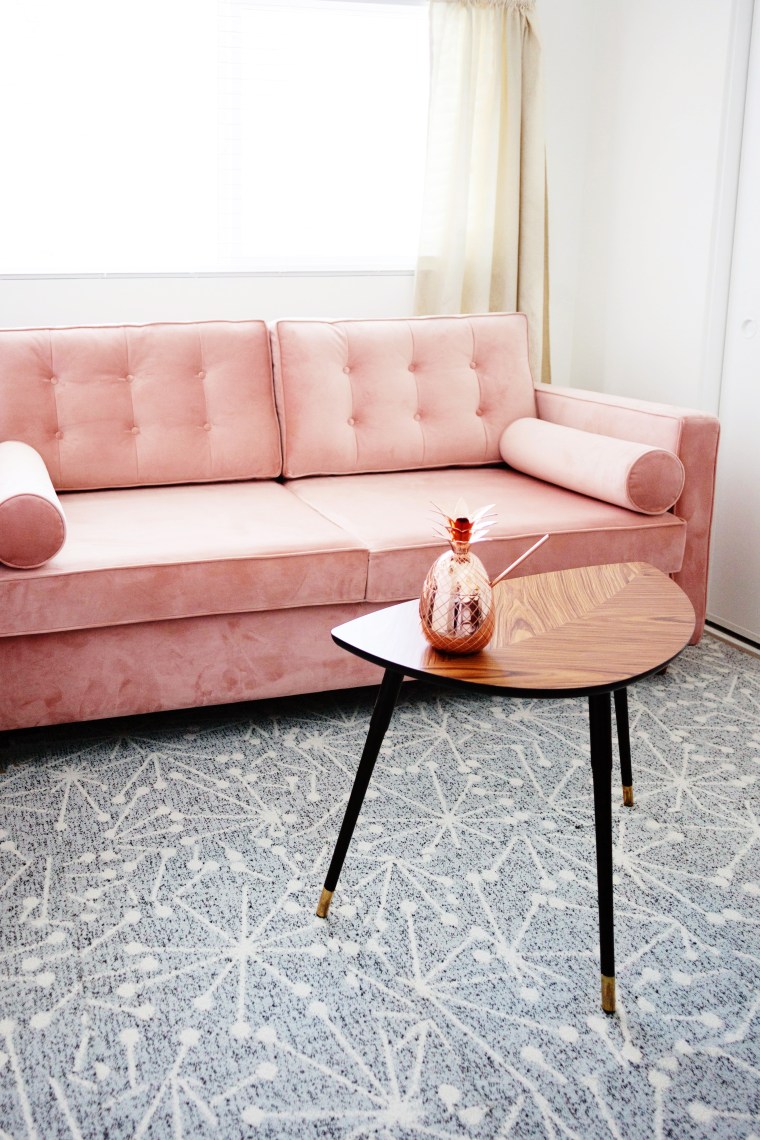
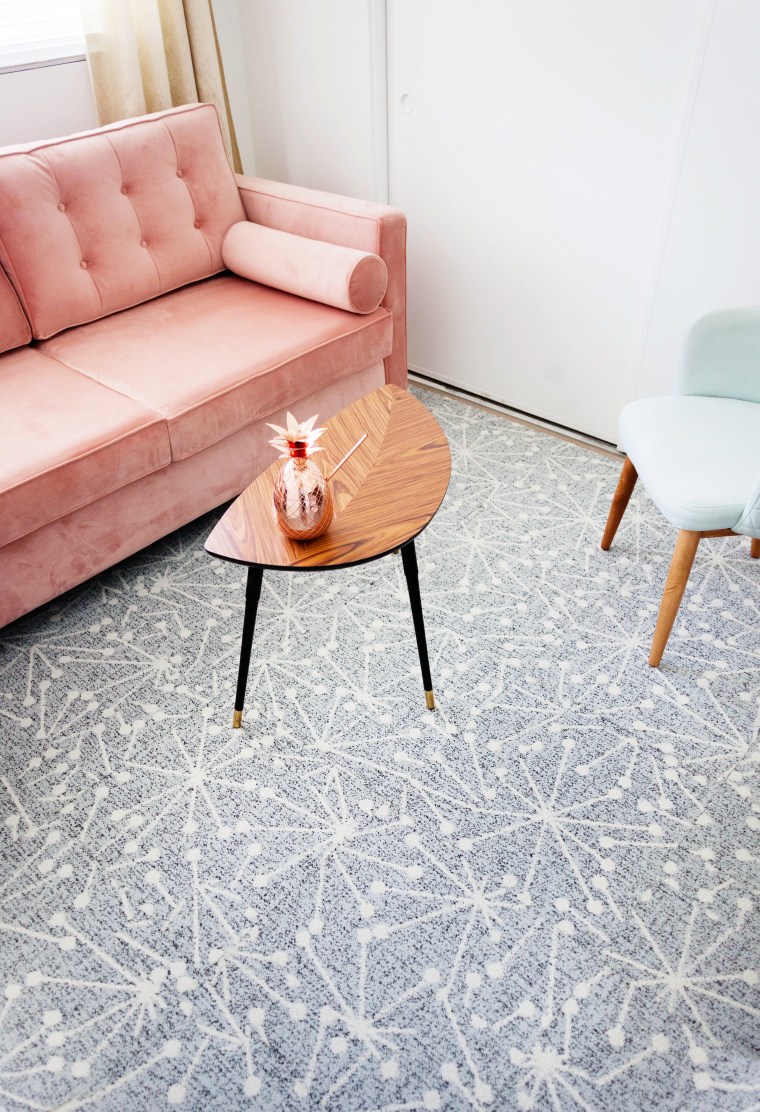
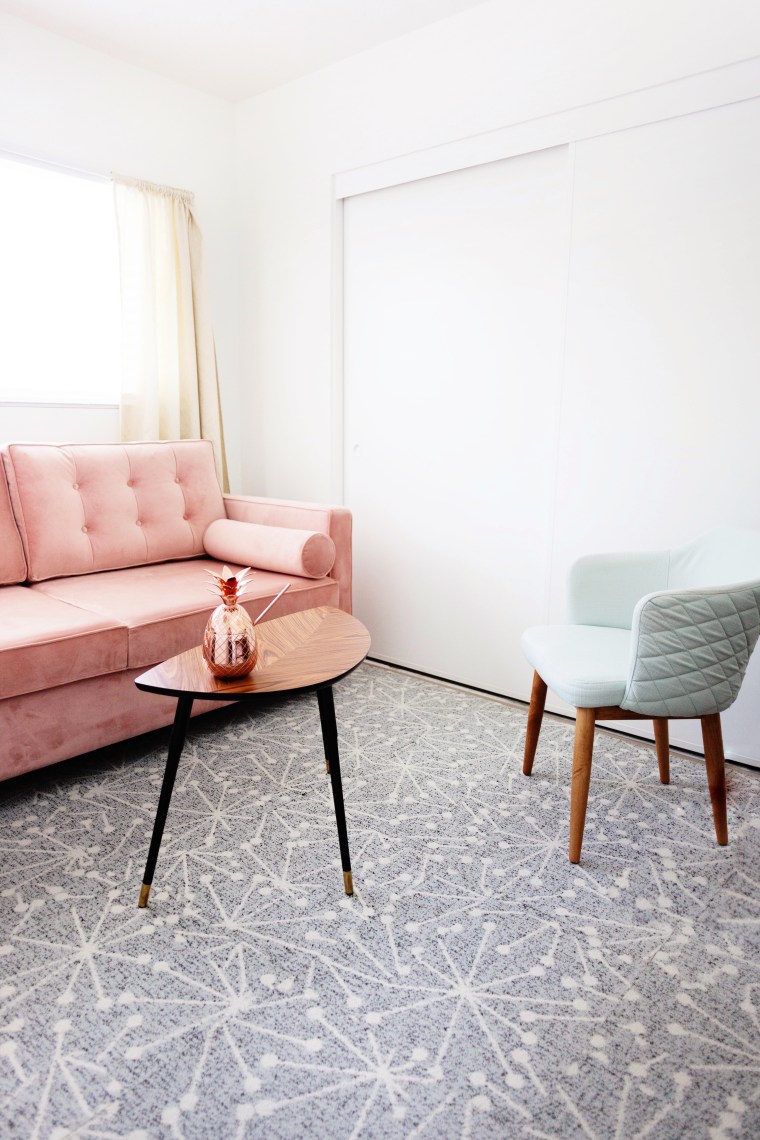 Tada! I think it definitely makes the room feel more put together and adds some much needed pattern. I love the way the blue-grey looks against the blush pink velvet of our sleeper sofa, and the black and gold of the table. Bonus, it’s perfect for home office use because it immediately eliminated any awkward phone echo!
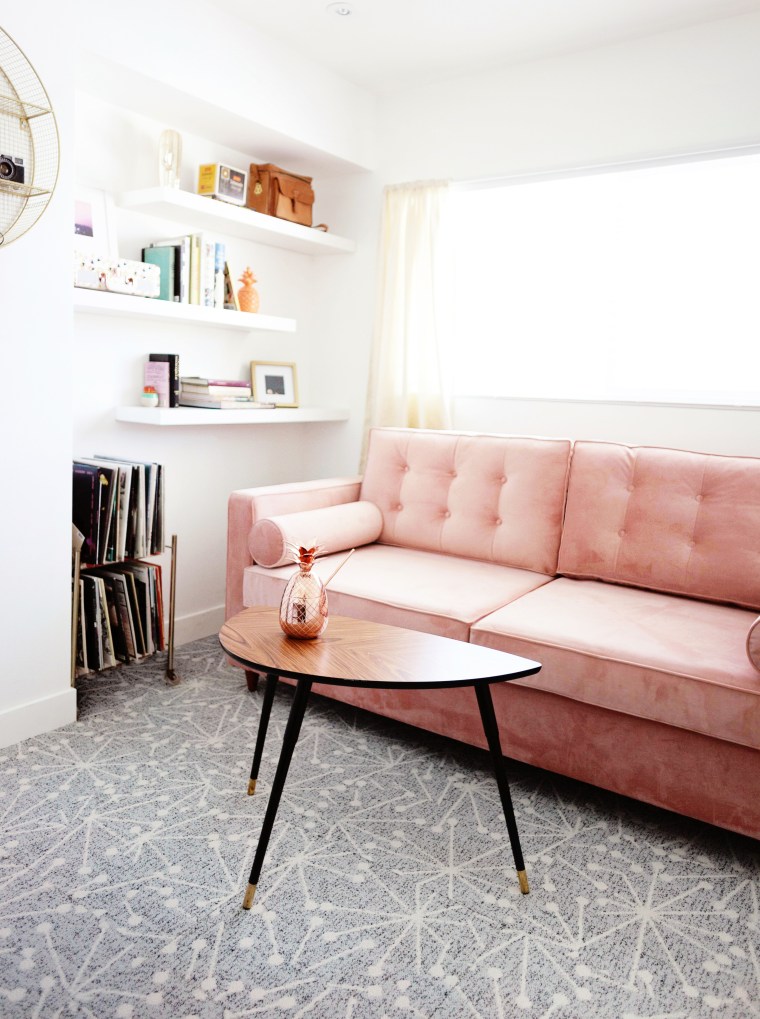
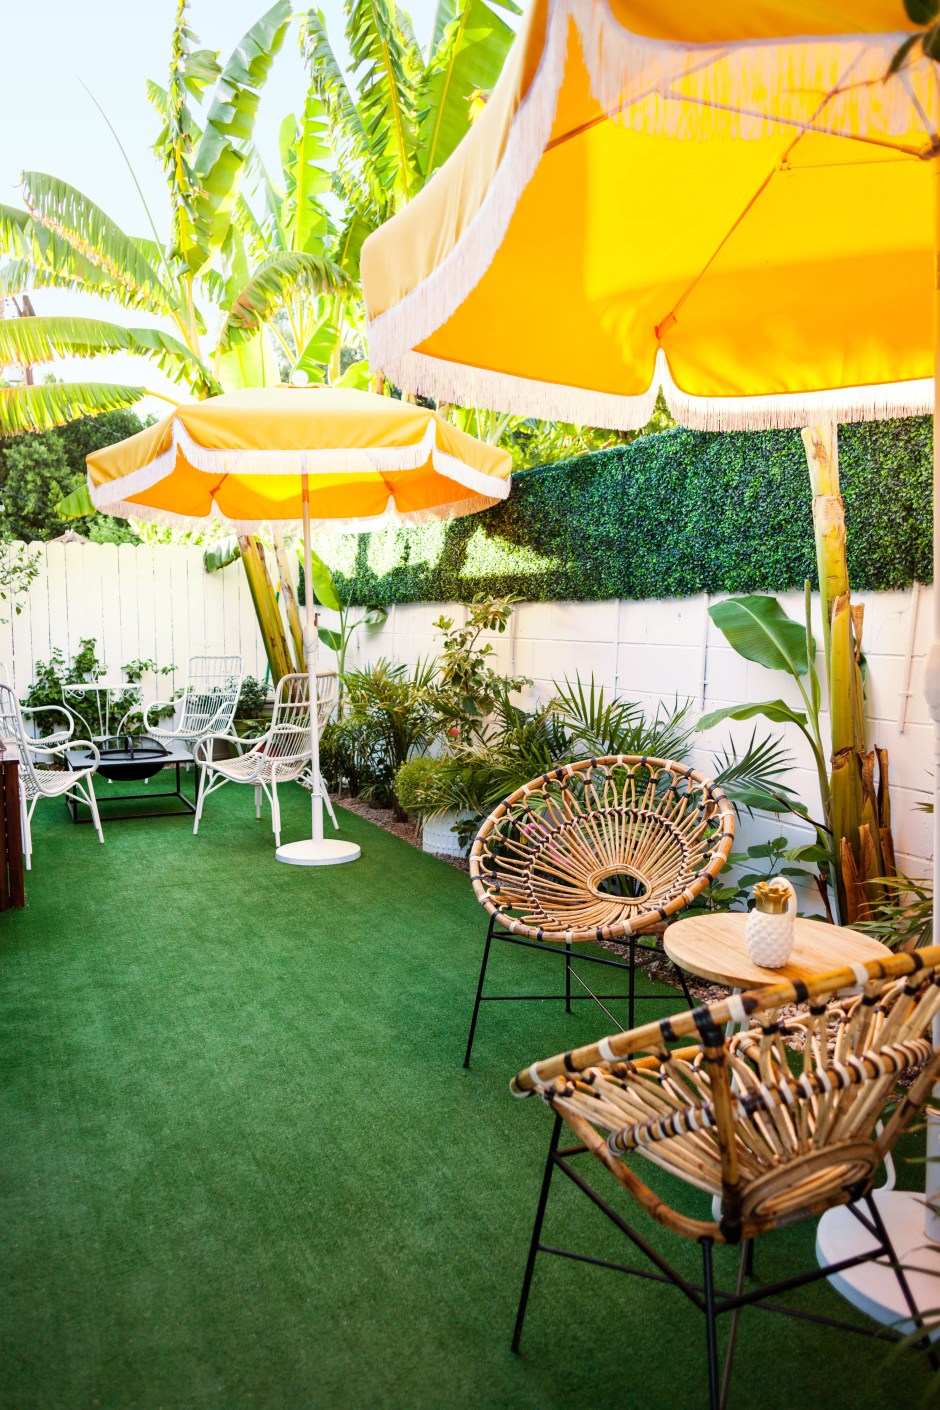


 The
The  Every one who sits in these chairs is pleasantly surprised by how comfortable they are!
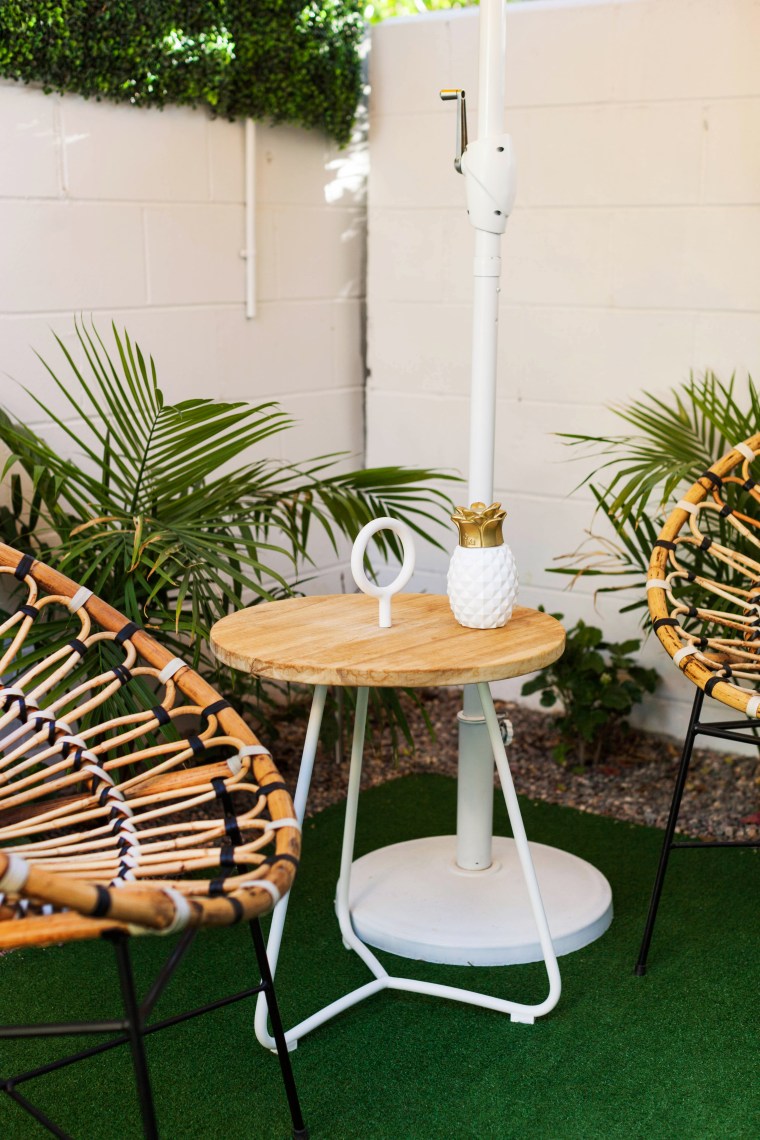 The
The 
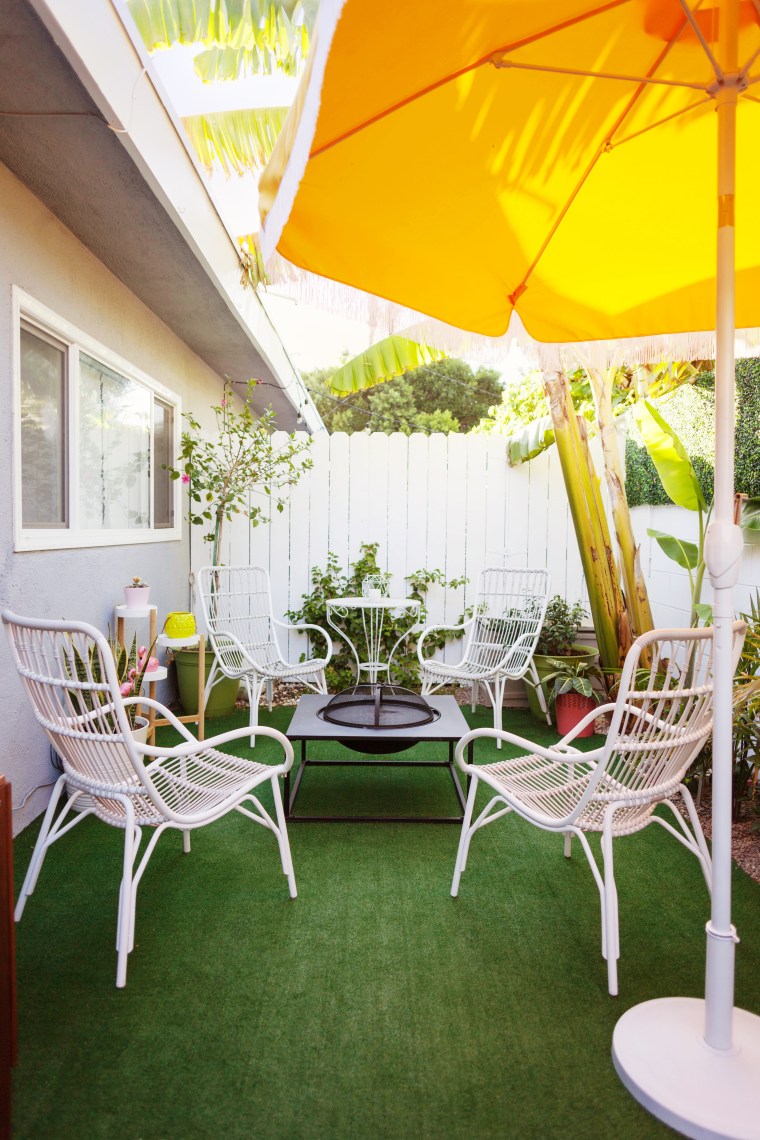
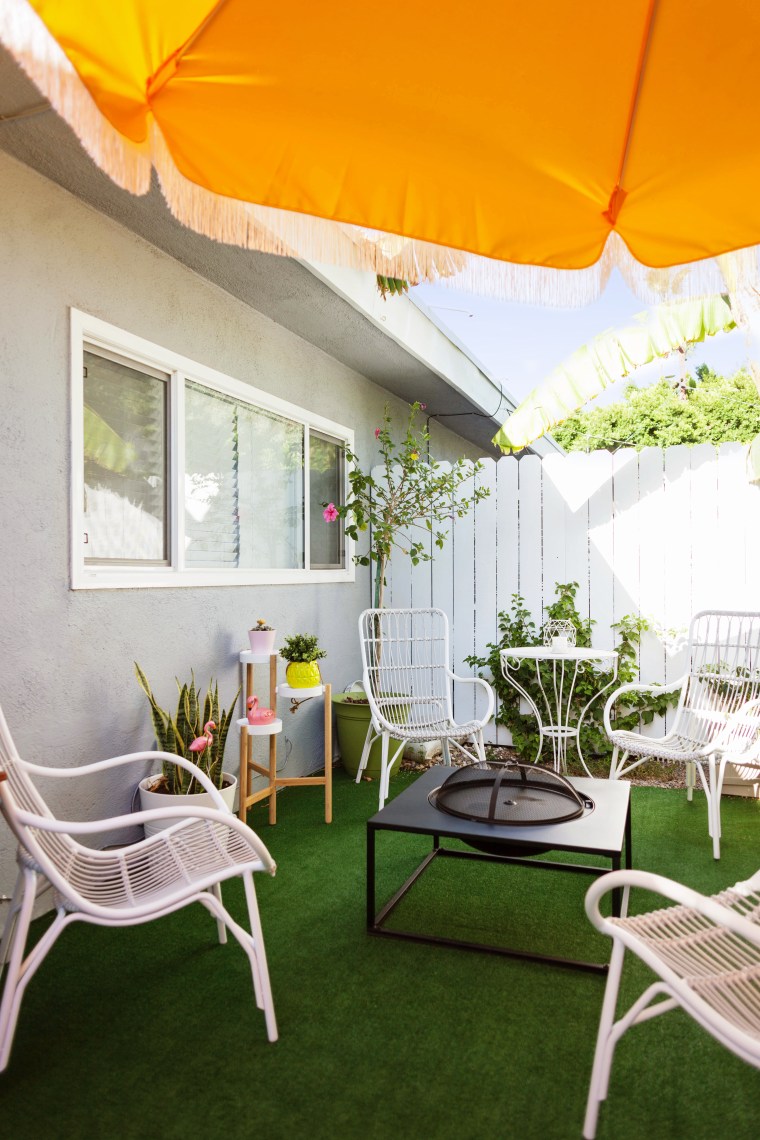
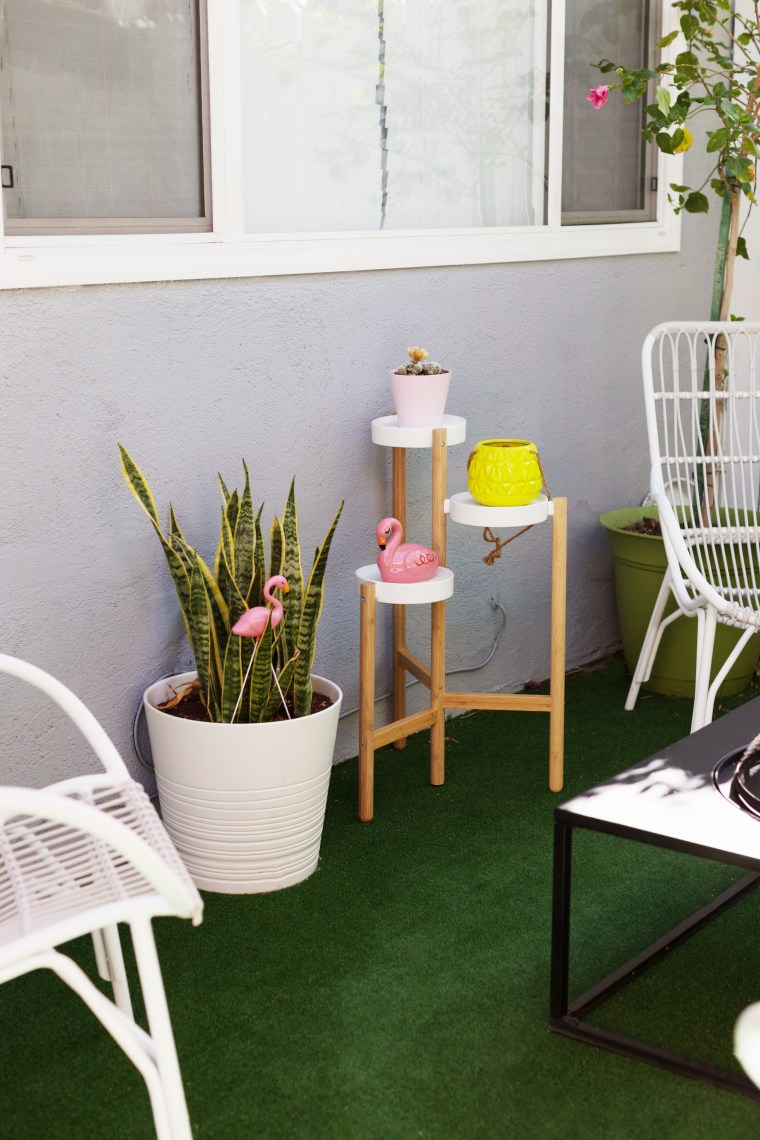
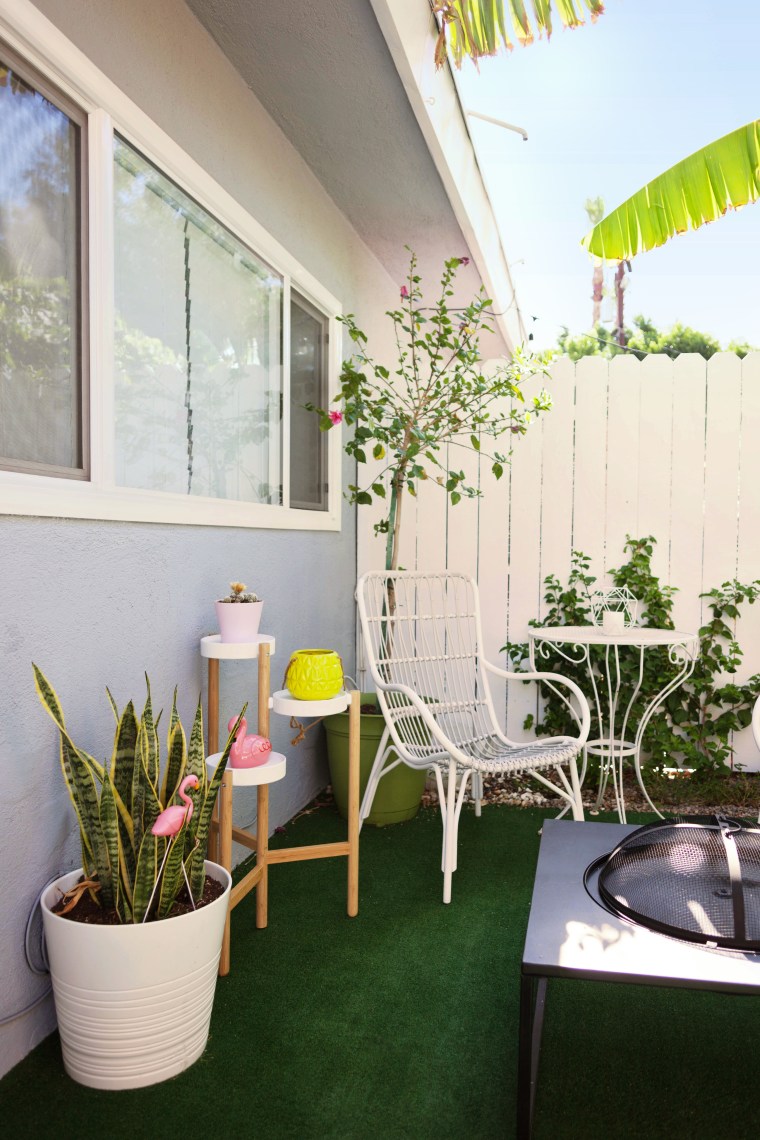 Along the wall we have a table with an outdoor pizza oven and cooking space.


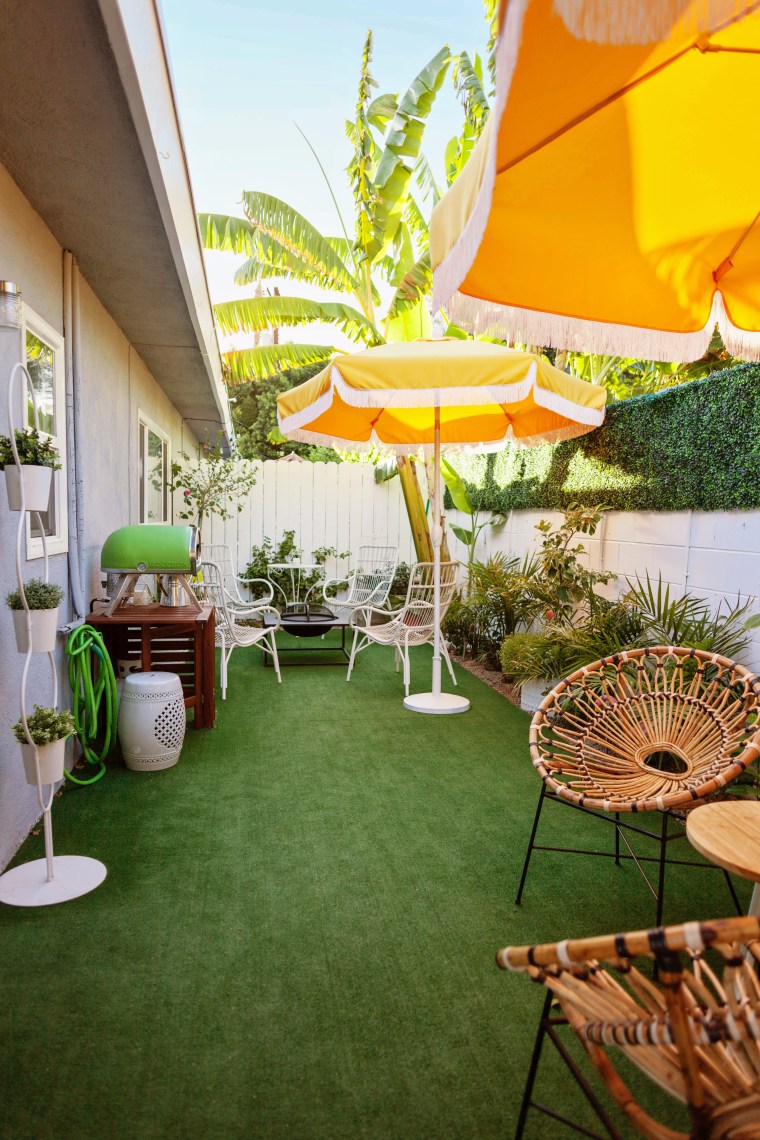
 Now it feels like an extension of our apartment and another living space to enjoy!
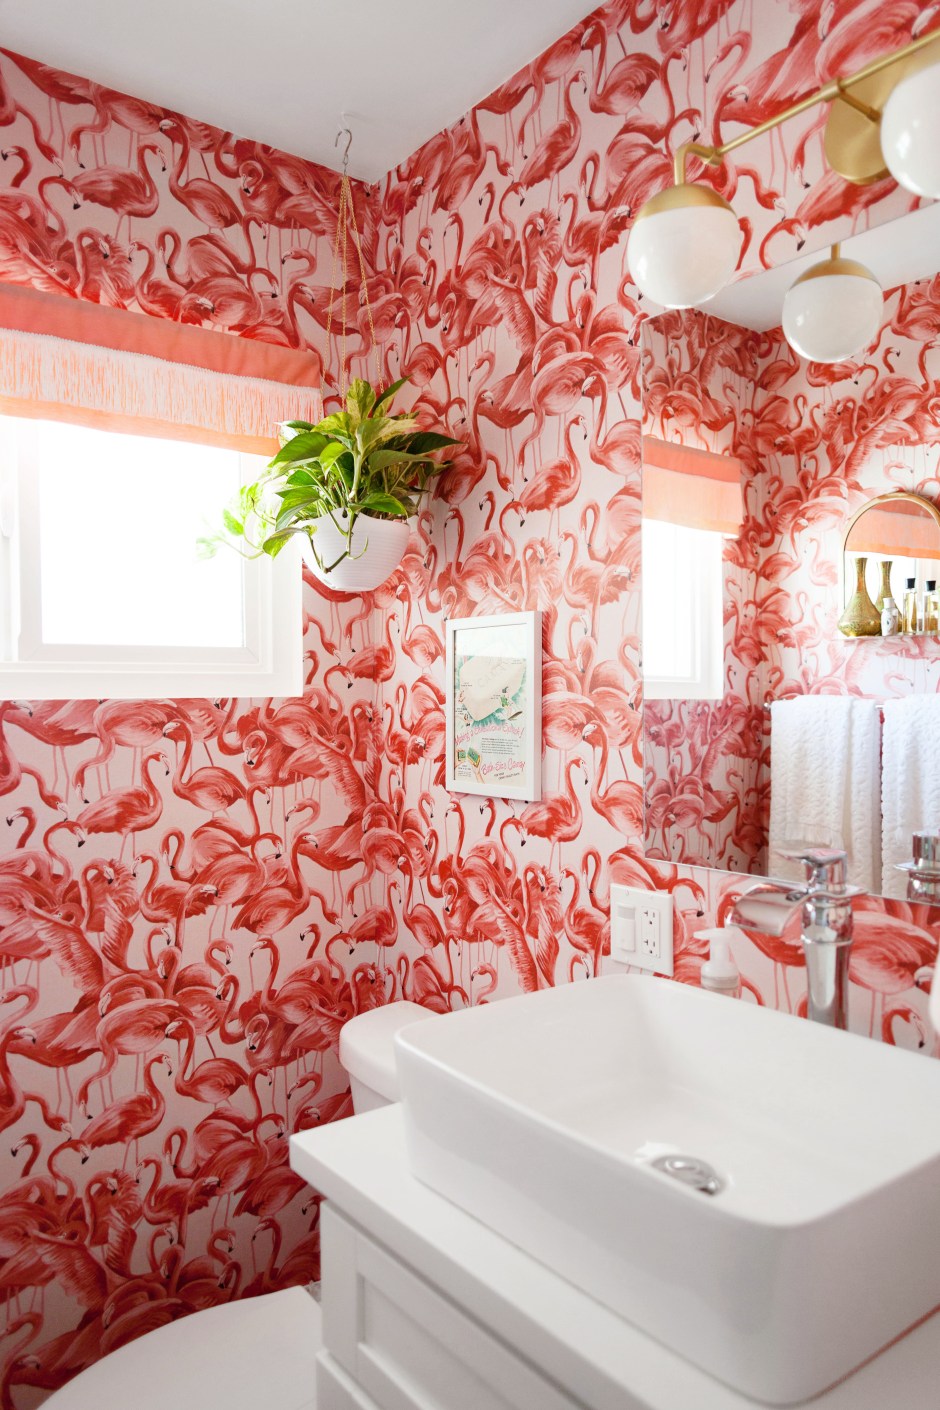
 And here’s the new new!
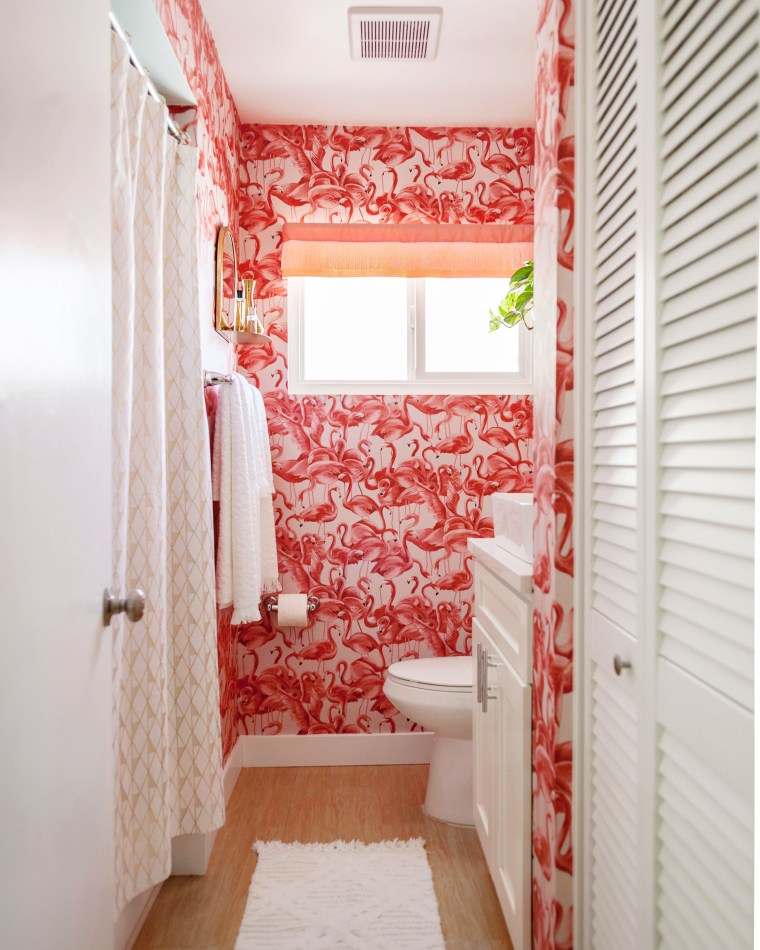 It’s kind of crazy how it makes the room feel bigger. I thought it might feel closed in with so much pattern on the walls, but nope! It works. The print is so lovely. It’s a lovely mix of soft pink and reddish pink that looks amazing against white and gold. As always it was easy to work with and very forgiving. You can refer to my previous post for installation tips that work for me.
  I also added a few new accessories.
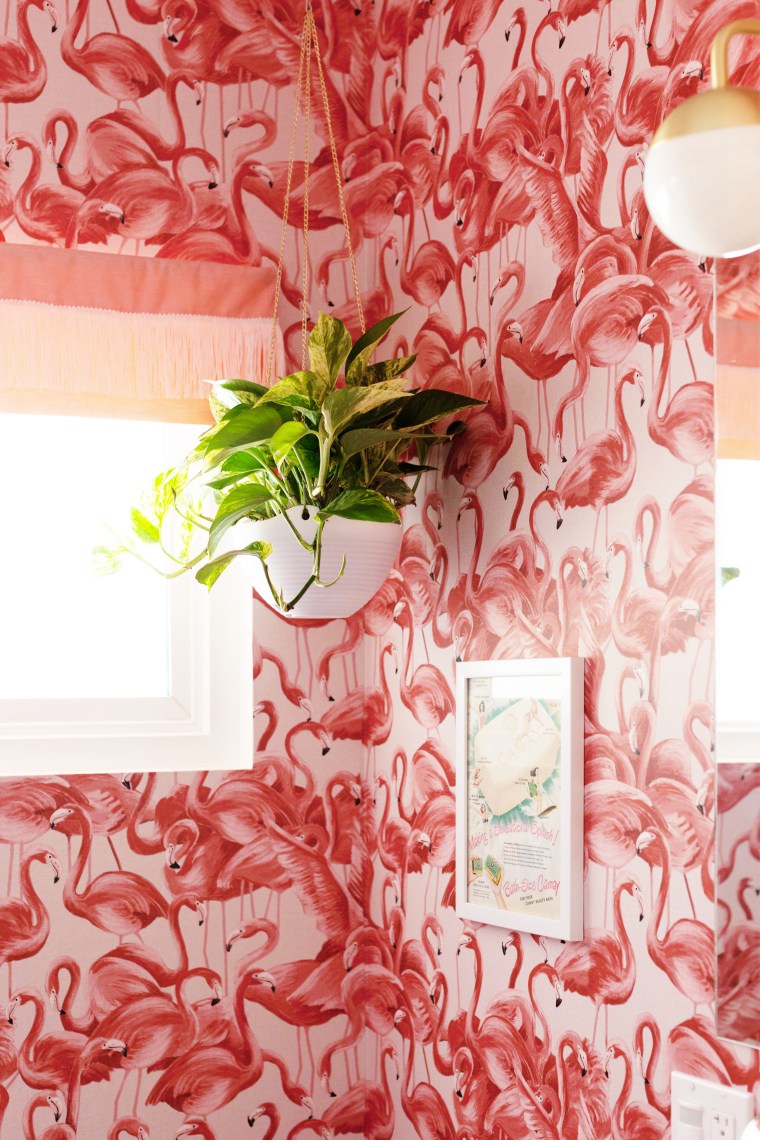 I got this hanging planter on Amazon and changed out the original chain with one from the jewelry making section at Jo-Ann.
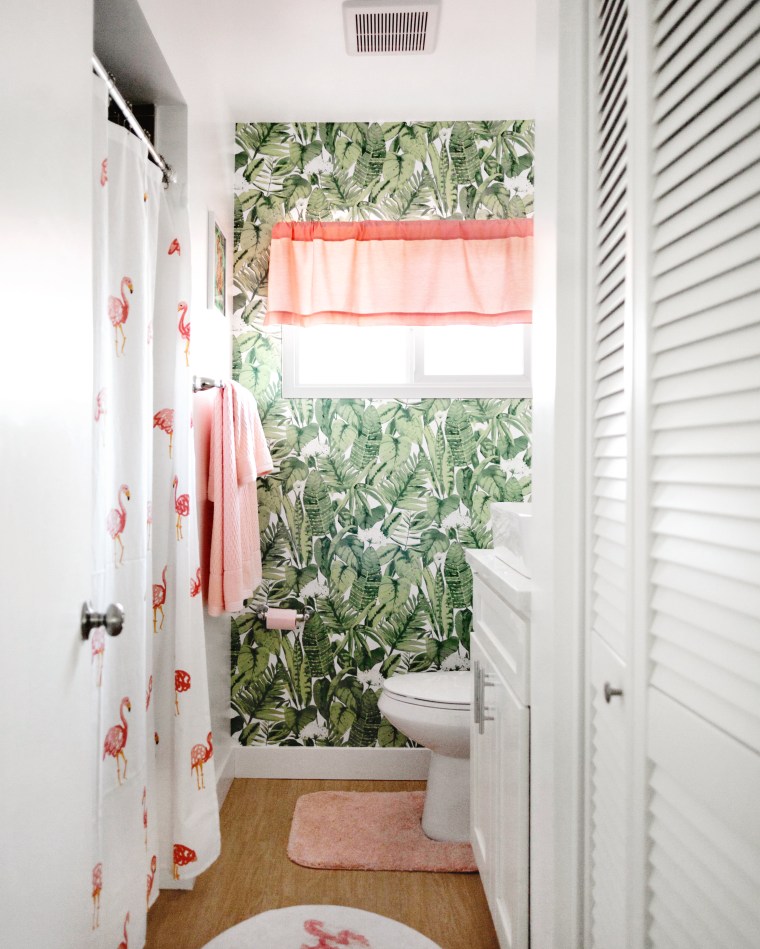
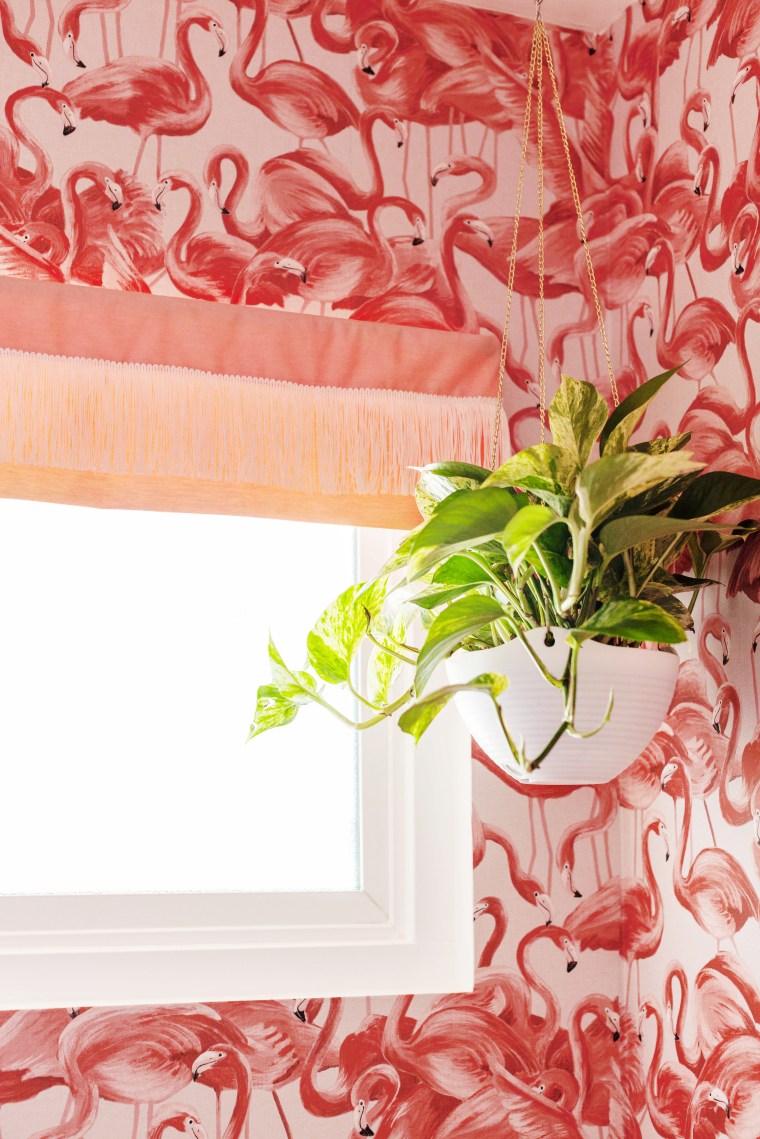 I kept the original window valance and shortened it in order to let more light in. I loved the fringe on the new towels and rug so I added some chainette fringe to tie it all together.
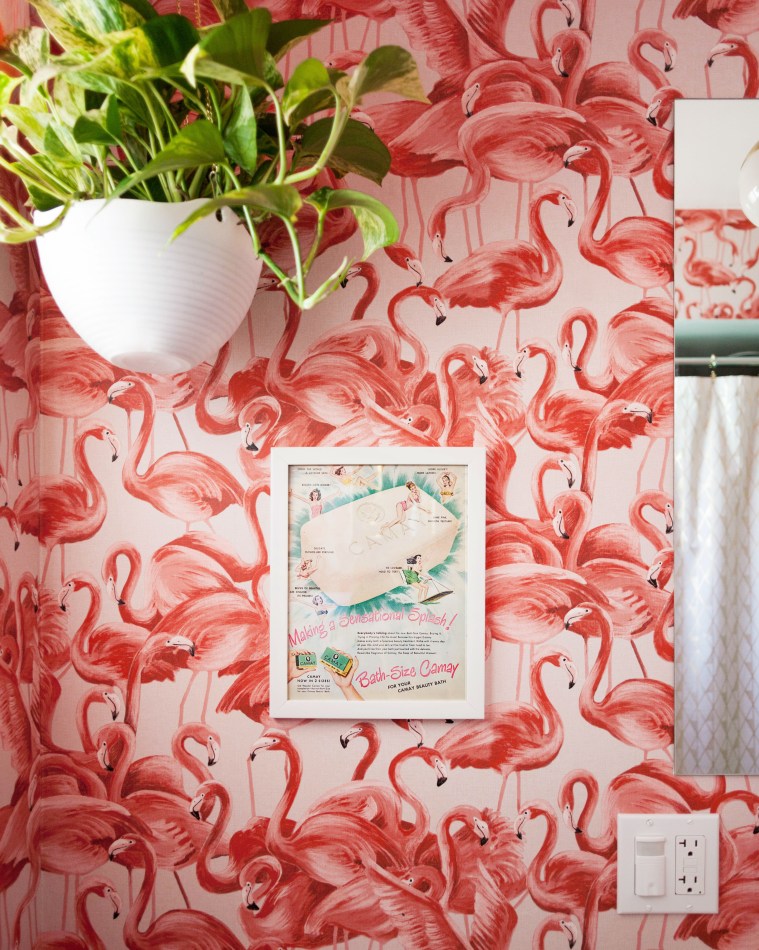 Above the toilet I removed a badly installed towel rack and replaced it with a cute framed vintage Camay Soap ad.
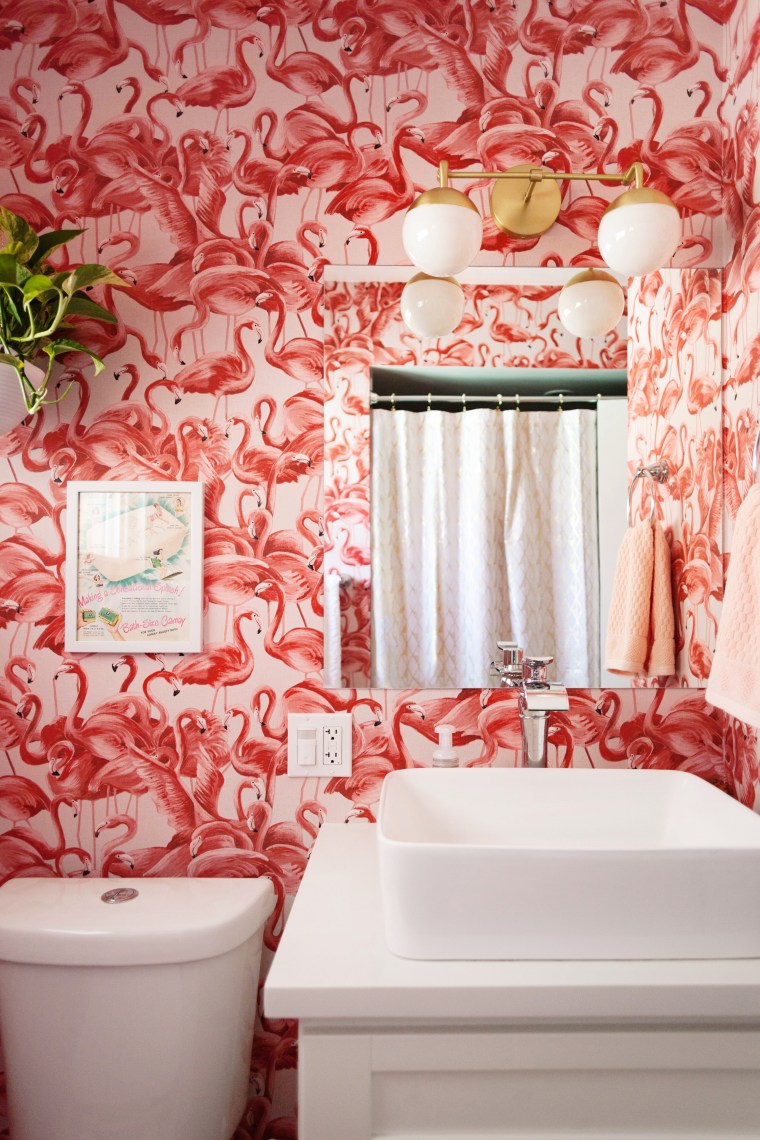 I replaced the light fixture with a new mid-century inspired
 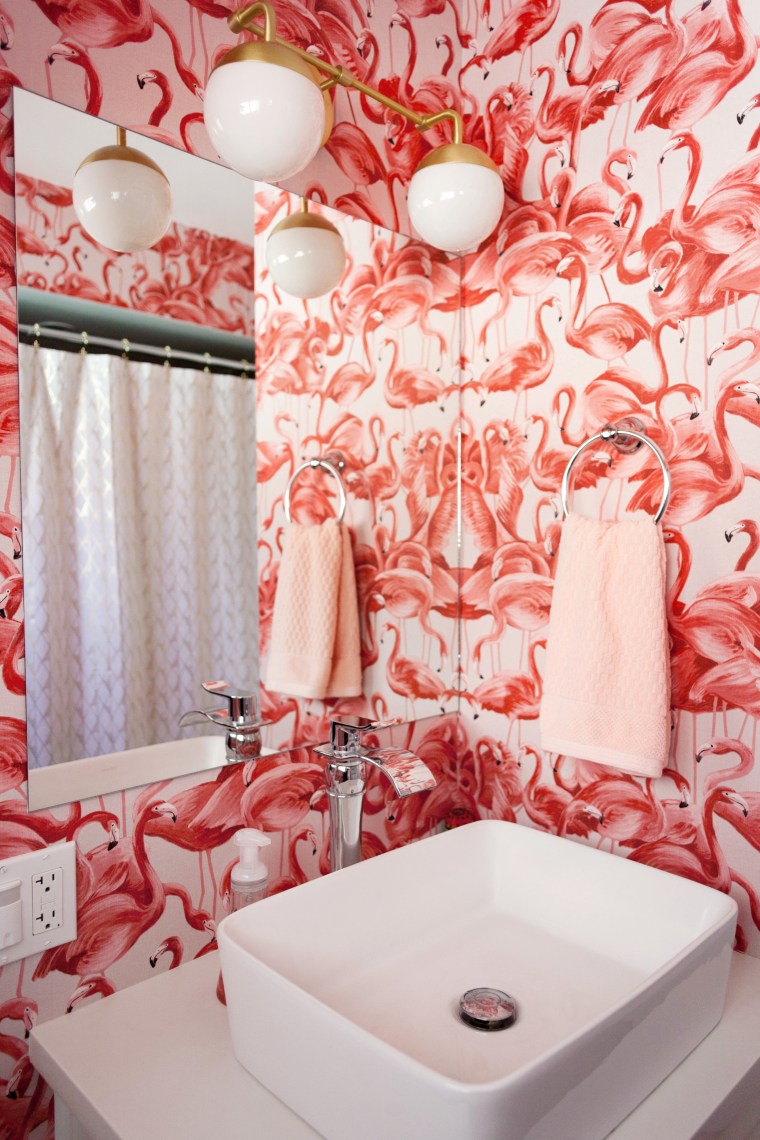 I personally like mixing metals so I went with brass, of course.
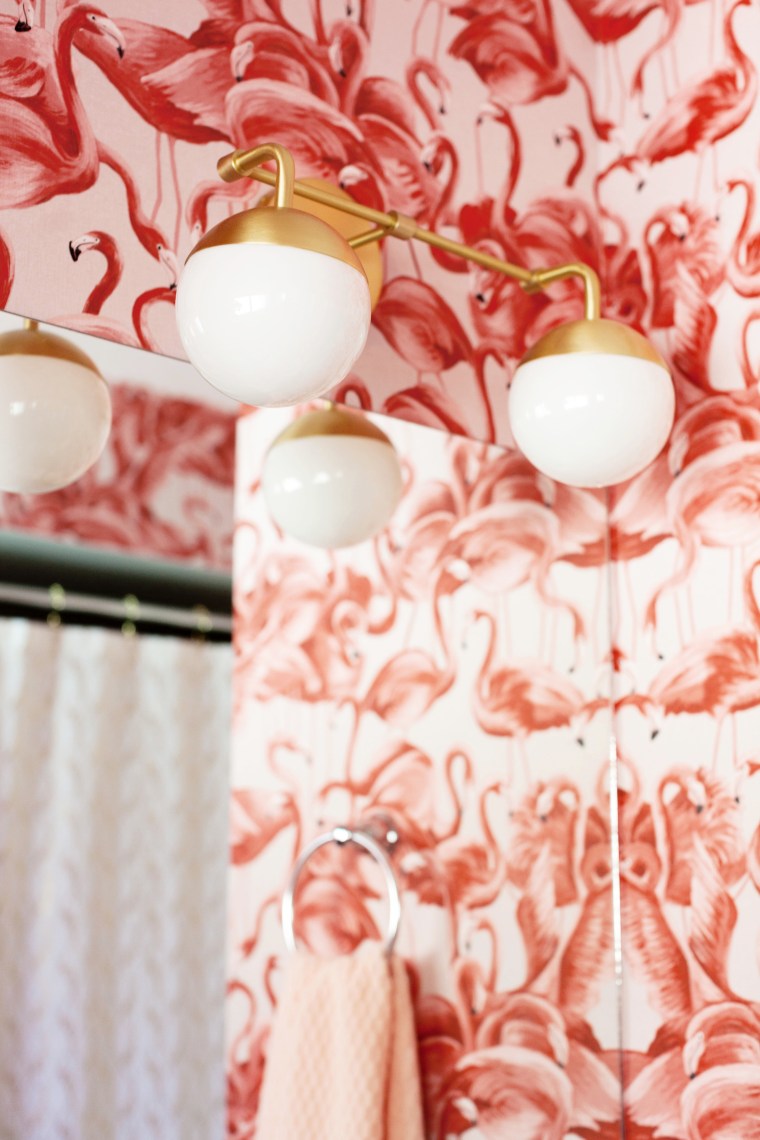
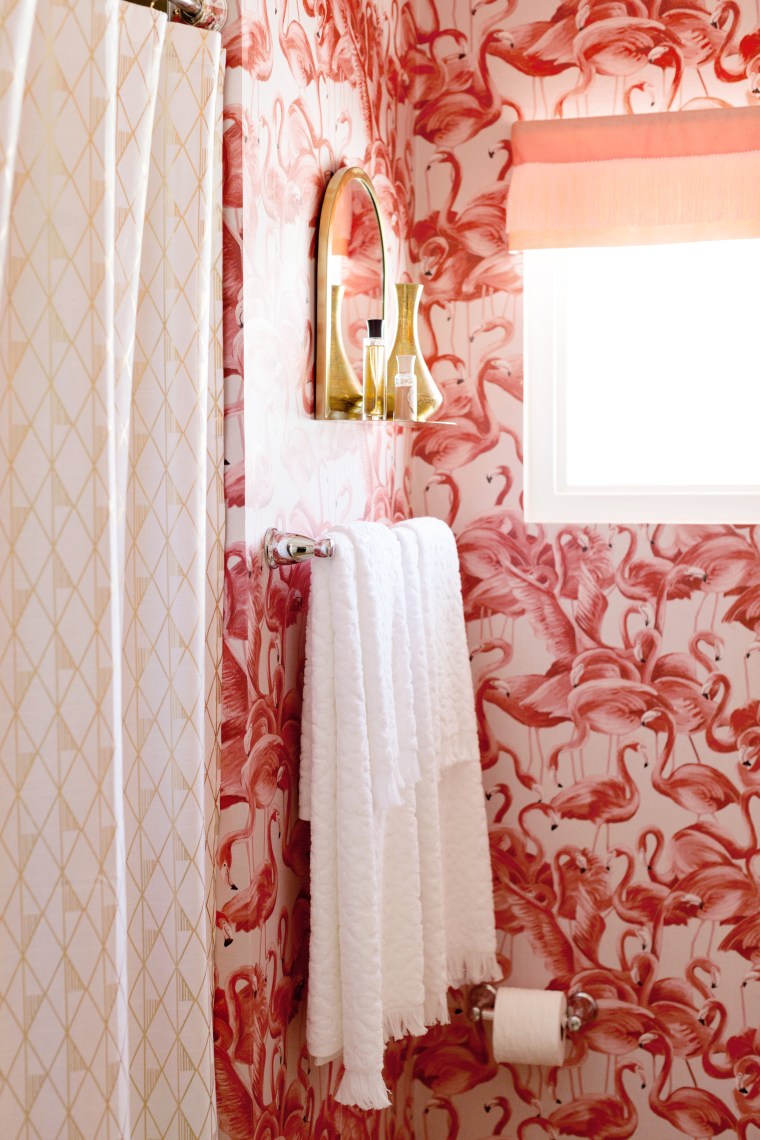 Over on the other wall I picked up a brass mirror/shelf from Target’s Project 62 line and a new metallic gold and white geometric shower curtain from Project 62 as well.
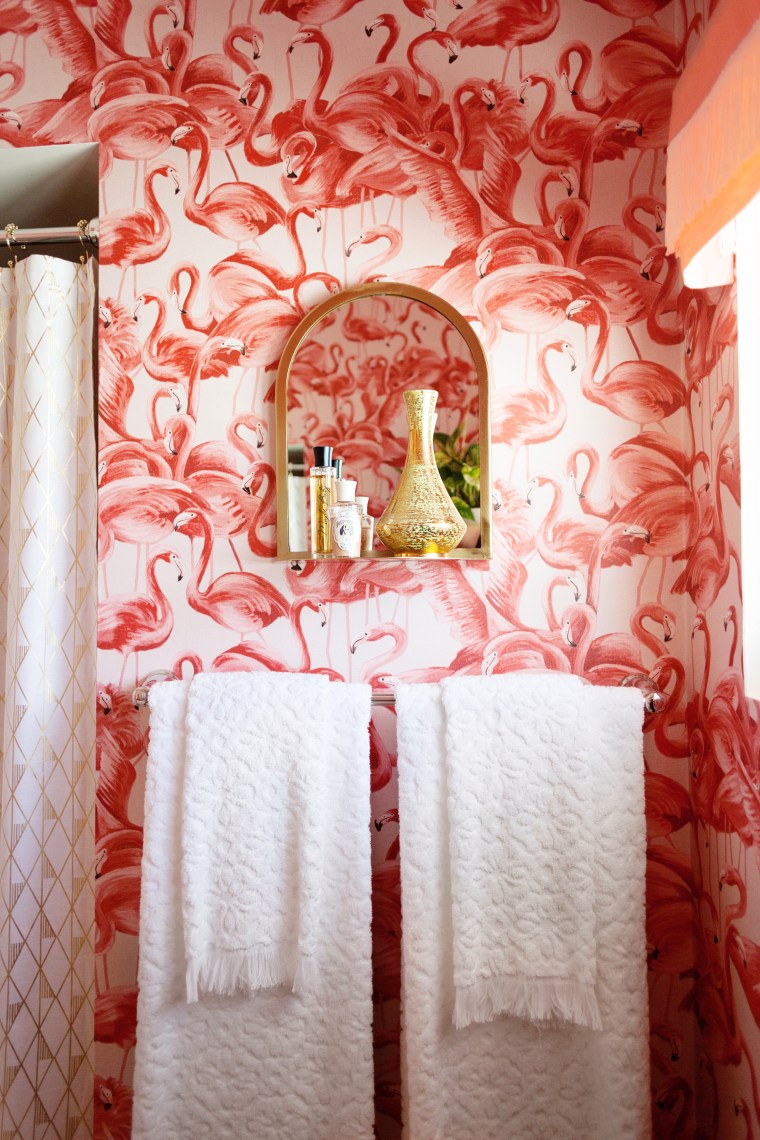 The new “fancy towels” (you know, the kind you’re not allowed to use), are from Target’s Opalhouse line. I love the texture and fringe.
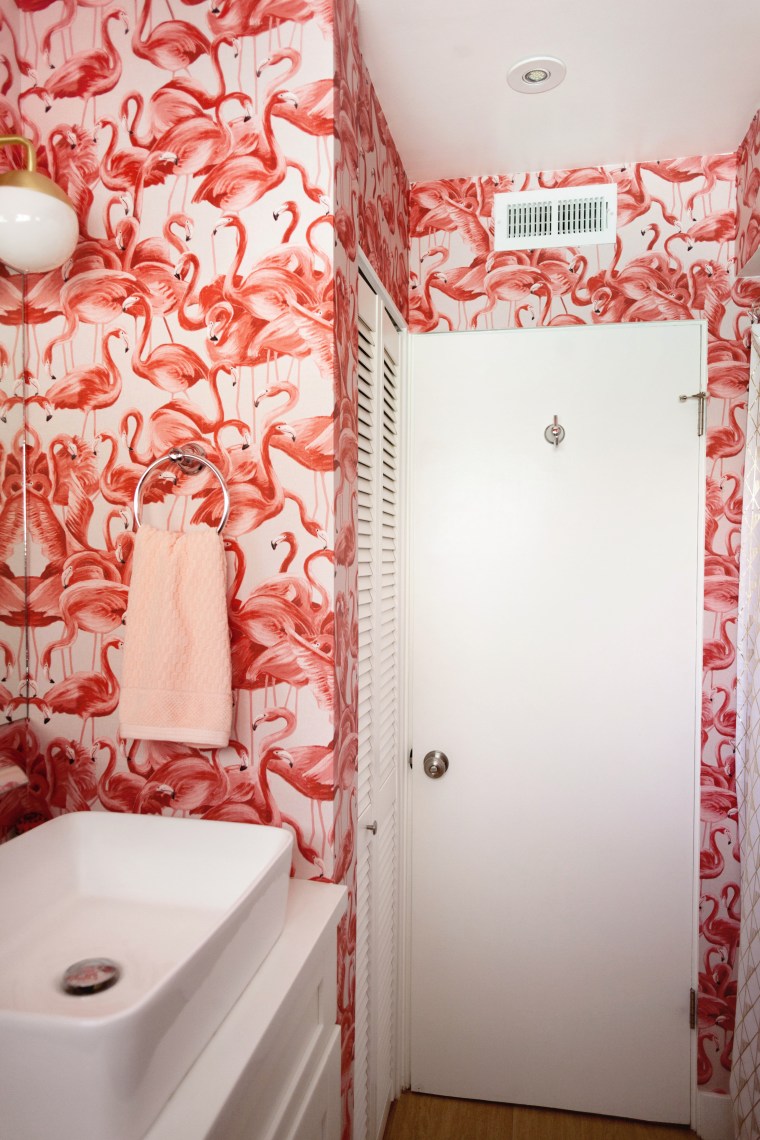 I followed the wallpaper all the way around the room, meeting the last seam in the most inconspicuous corner. Everything is reflected in the mirrors so it’s all pretty much visible from every view point, which was intentional and I’m glad it worked out.
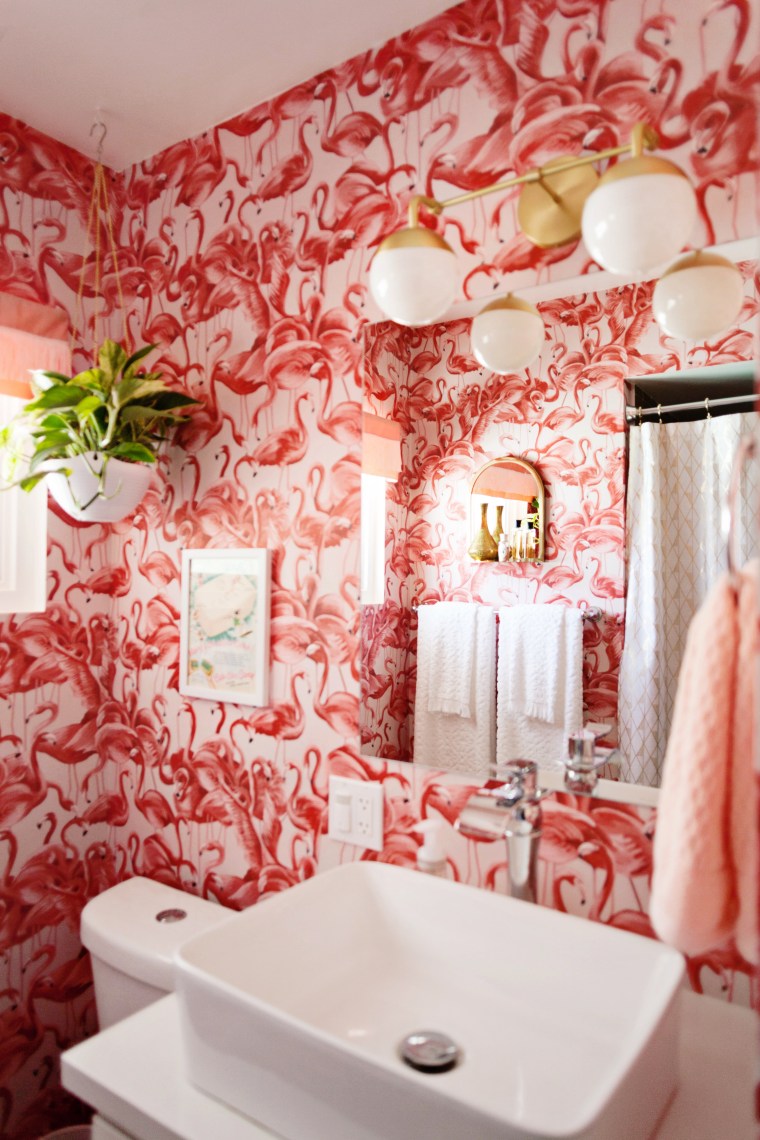 There it is! This year’s new bathroom look. I looooove the way it all came together. Yay!
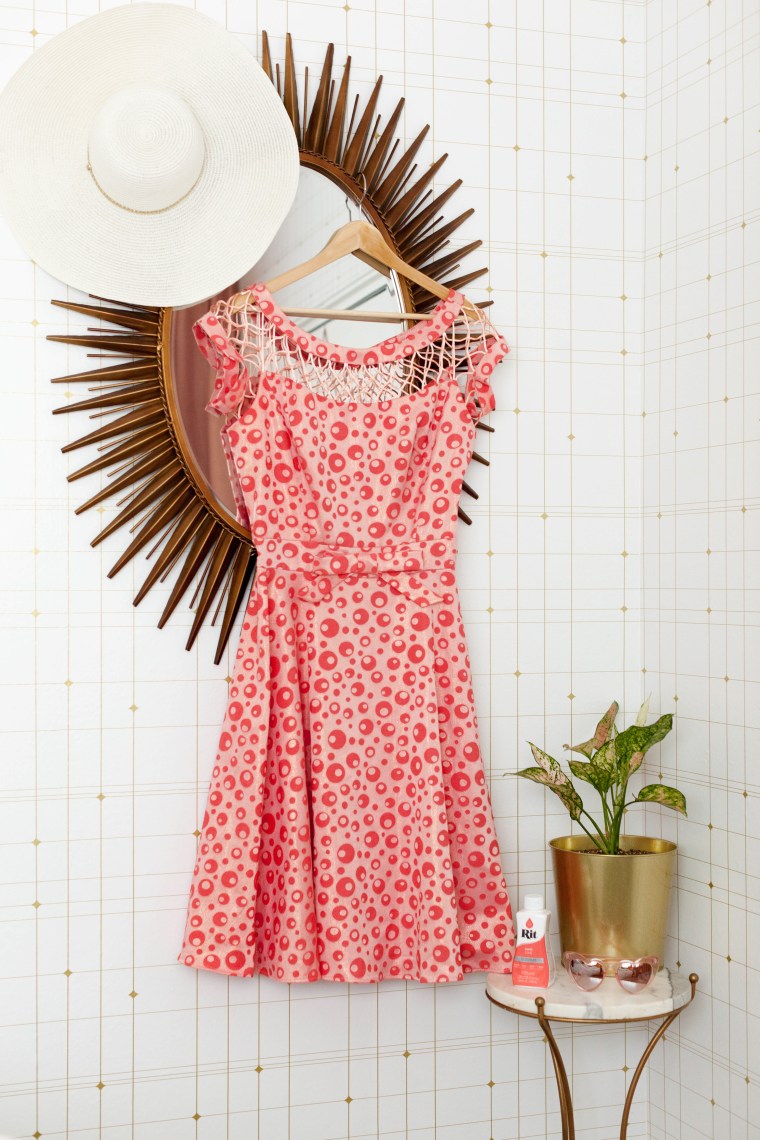 See how the fabric took the dye and made the pattern pop? I love the way it turned out!
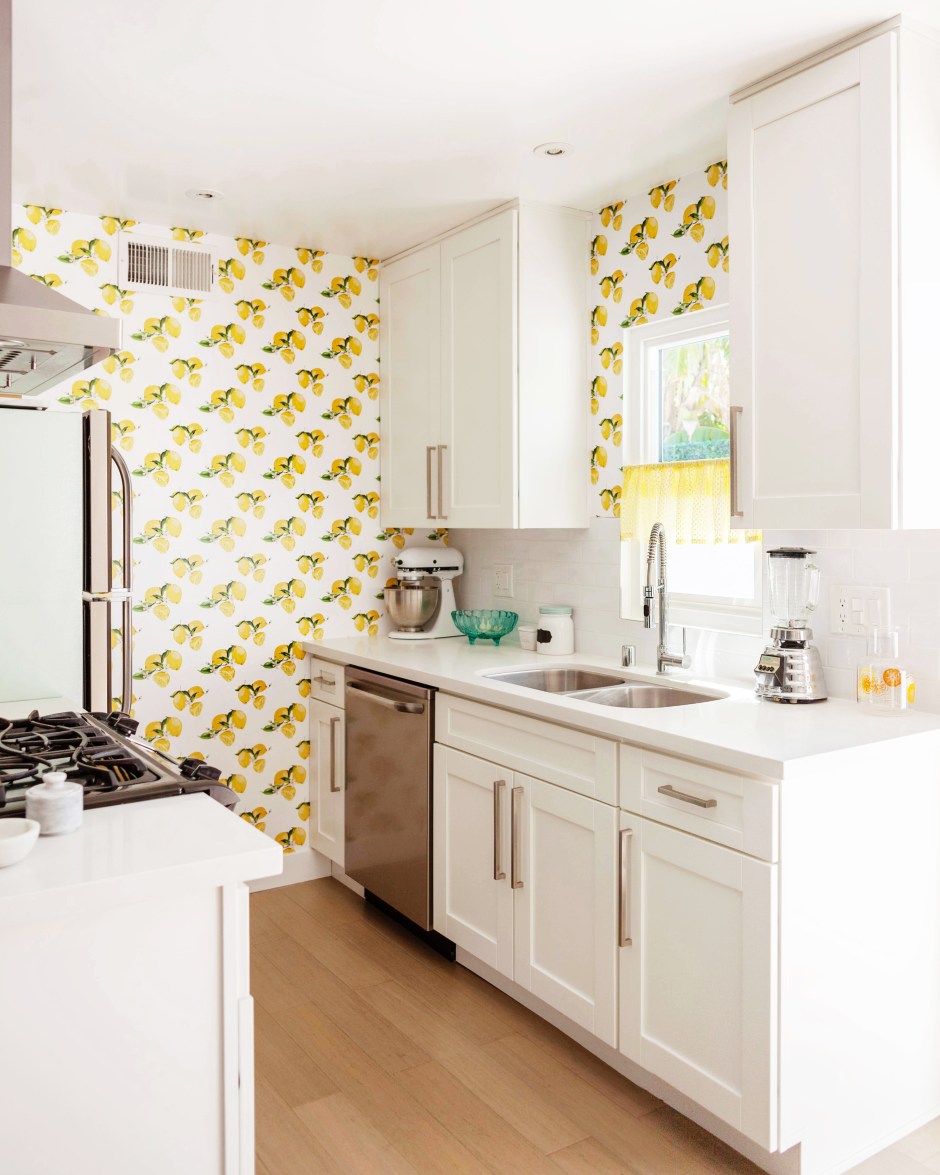
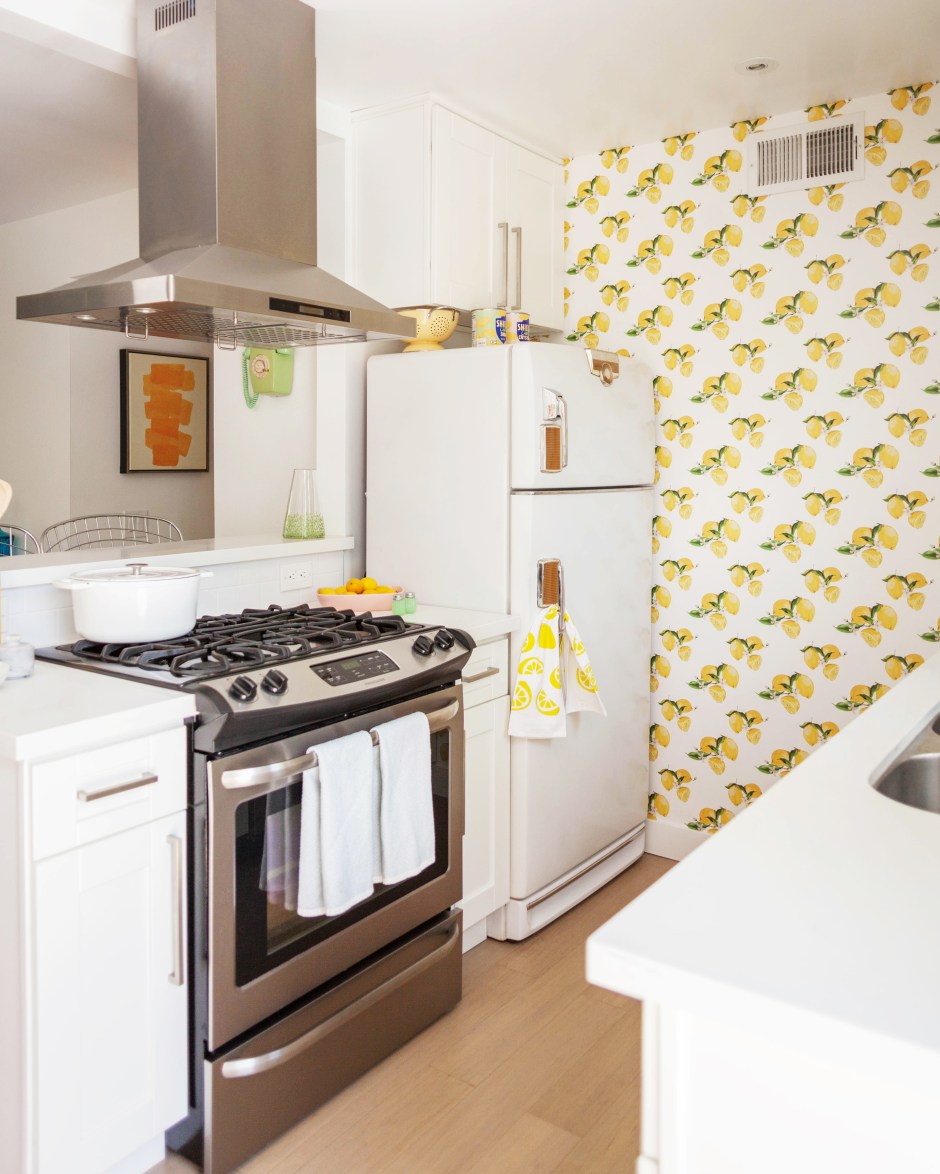
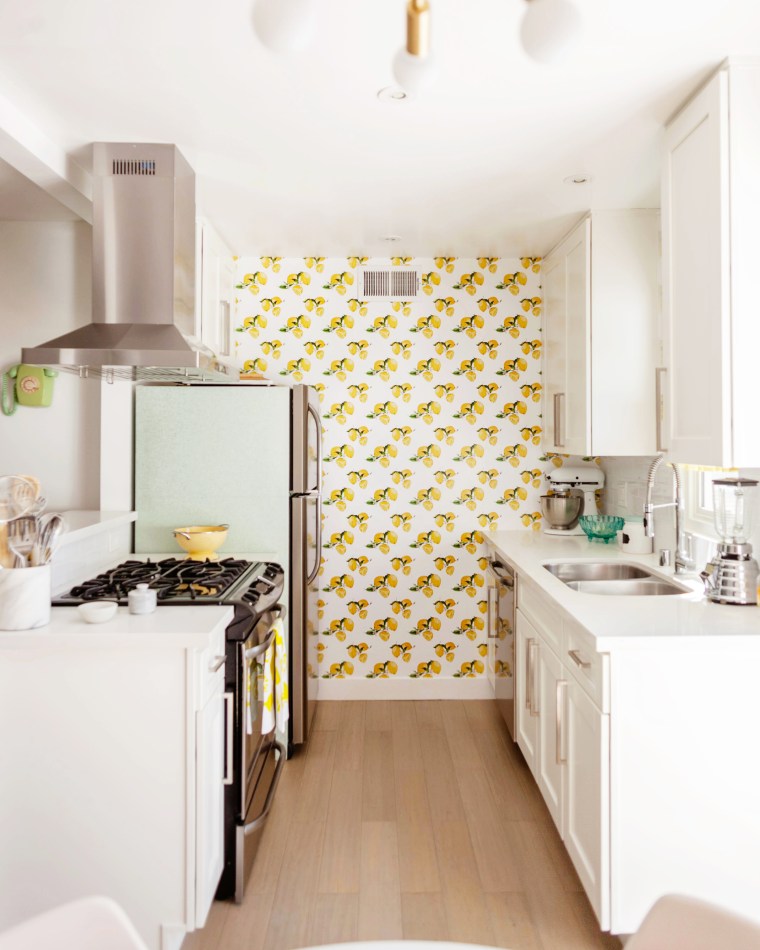
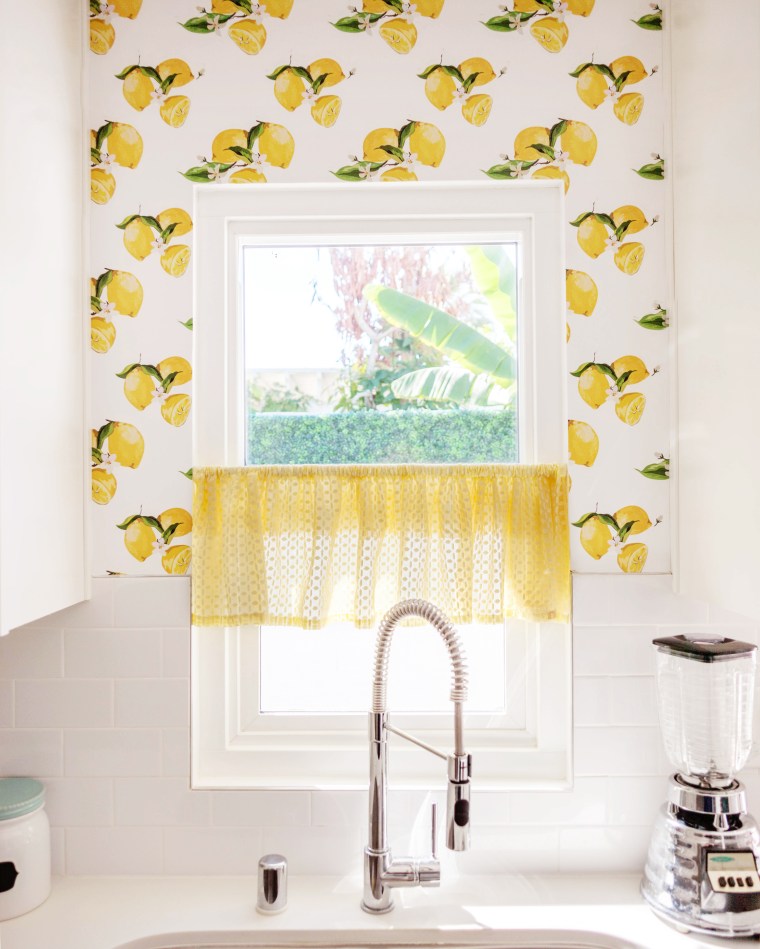 Hello, there! I just wanted to share a little wallpaper update I made to our kitchen recently and talk about the process of ordering custom printed wallpaper through
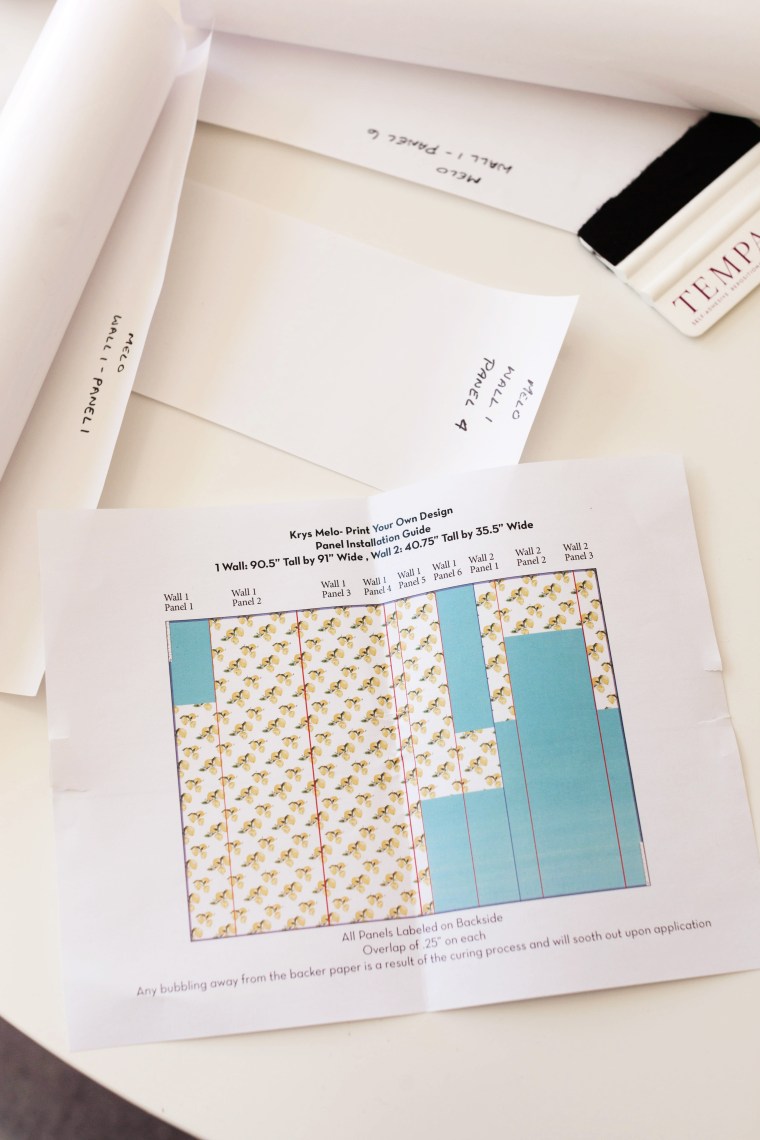 When the final product arrived it was pre-cut into manageable panels to fit each section of my walls. They sent over a little map and labeled each one. I barely even had to trim anything! It fit like a glove.
 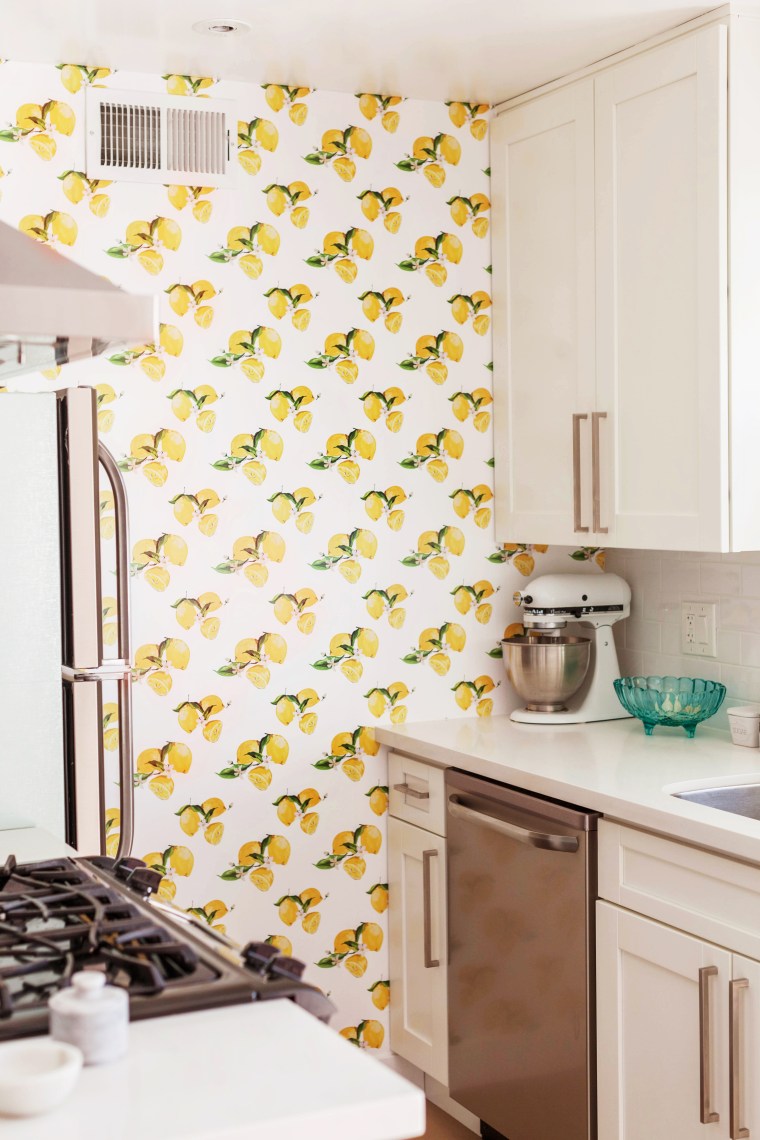 Seriously, those pre-cut panels made getting around all these nooks and cabinets a breeze. And you can barely see the overlapping seams unless you’re super up-close! I’m so picky about that and it doesn’t bother me at all. Overall the entire custom printing process was a breeze.
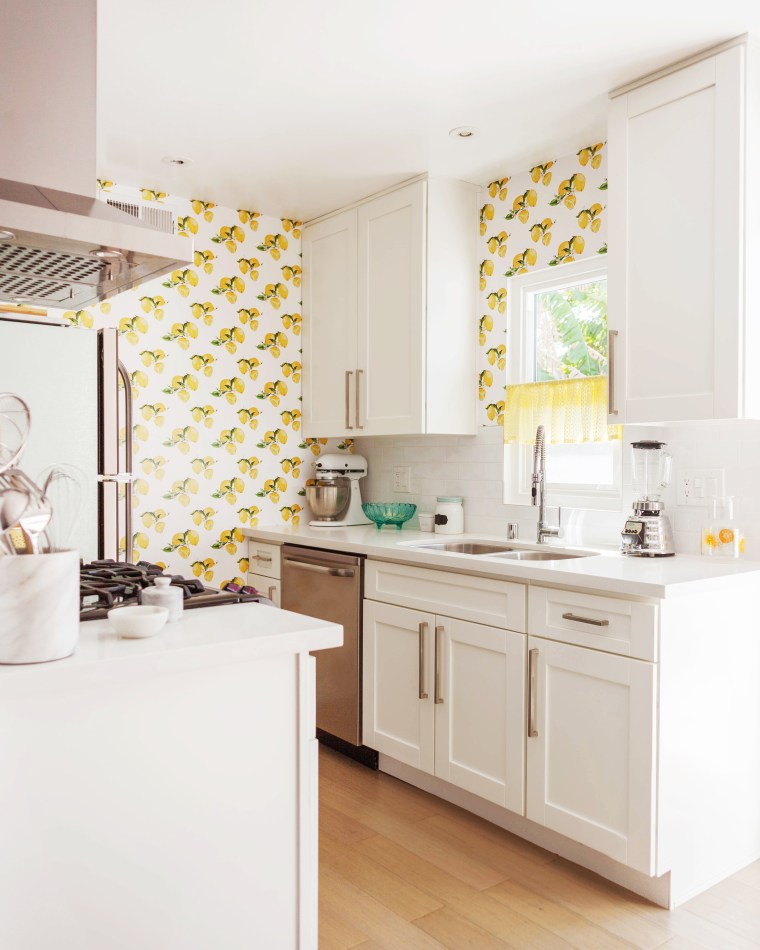 LOVEEE! Now I have exactly what I had in mind to begin with!
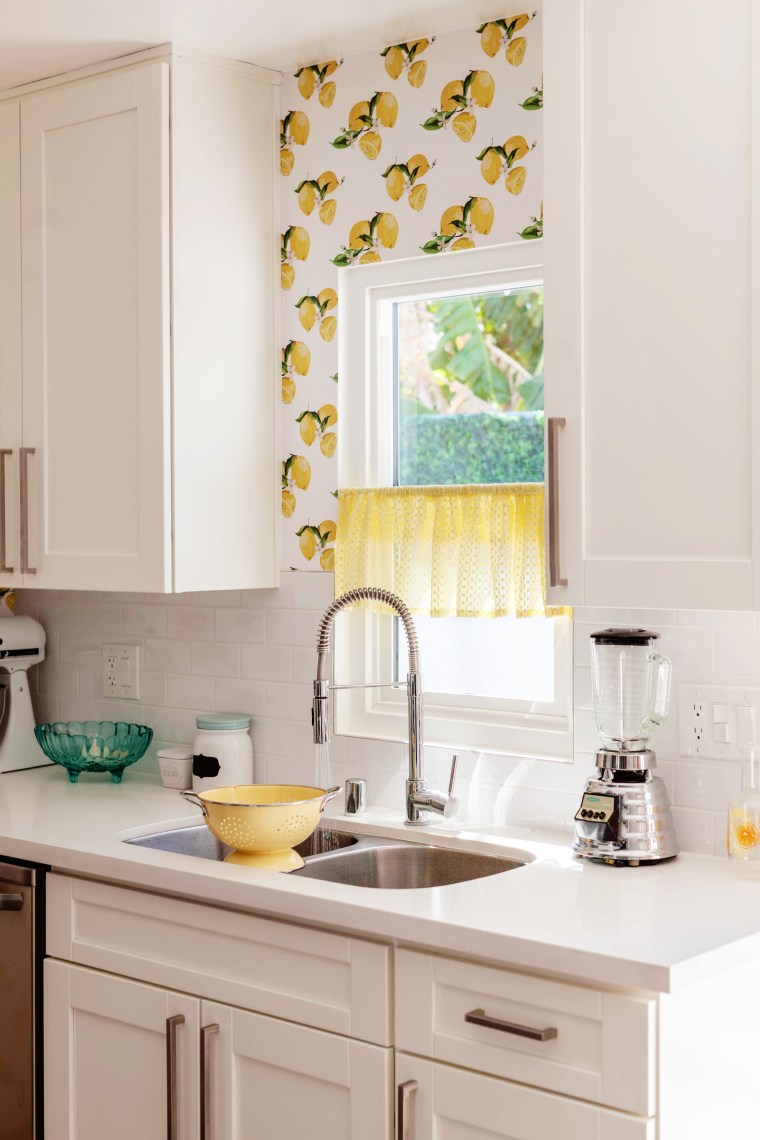


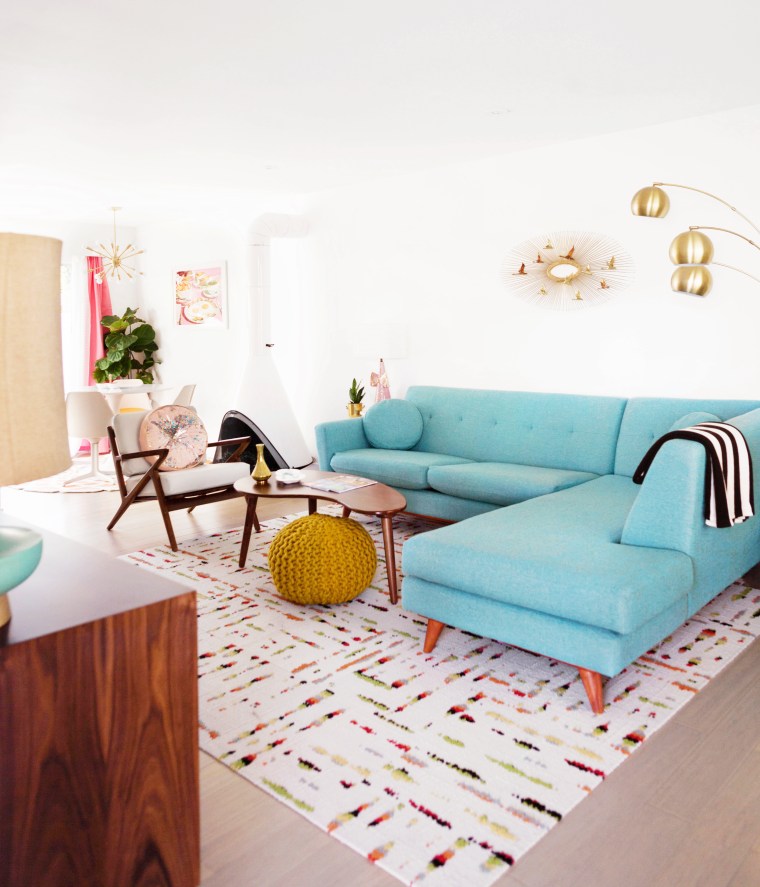
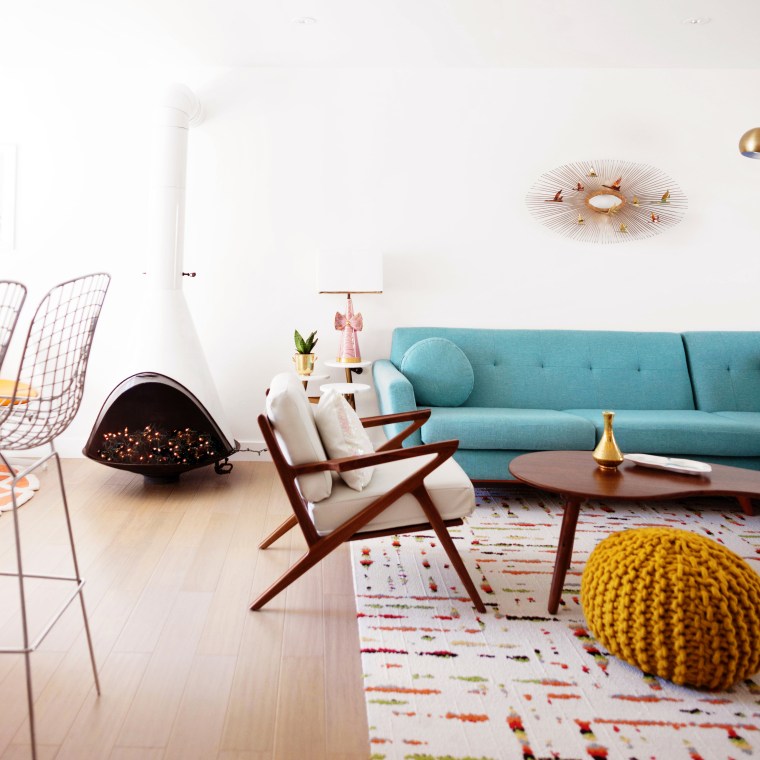
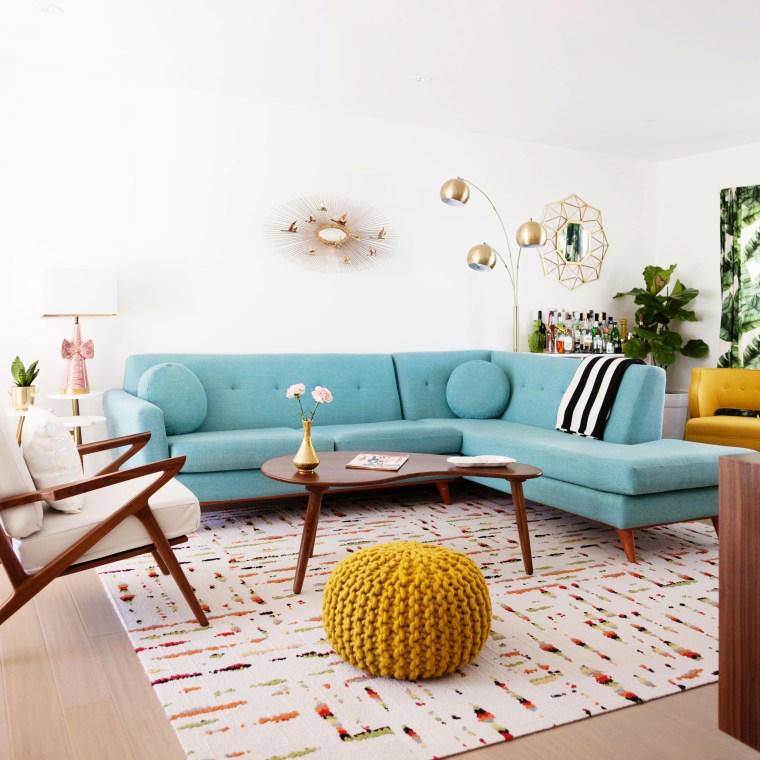 The vintage Curtis Jere brass sculpture above the sofa was in bad shape when I found it at the Long Beach Flea Market but with a lot of patience I was able to fix it up and make it look great again. The Stangl Pottery vase on the coffee table is another vintage score from Long Beach.
 We added the conical fireplace to give the space a little more architectural detail. I found it on Craigslist and picked it up from the house it had been in since 1960. It doesn’t function in here but it has a little electric log and is stuffed with twinkle lights for ambience.
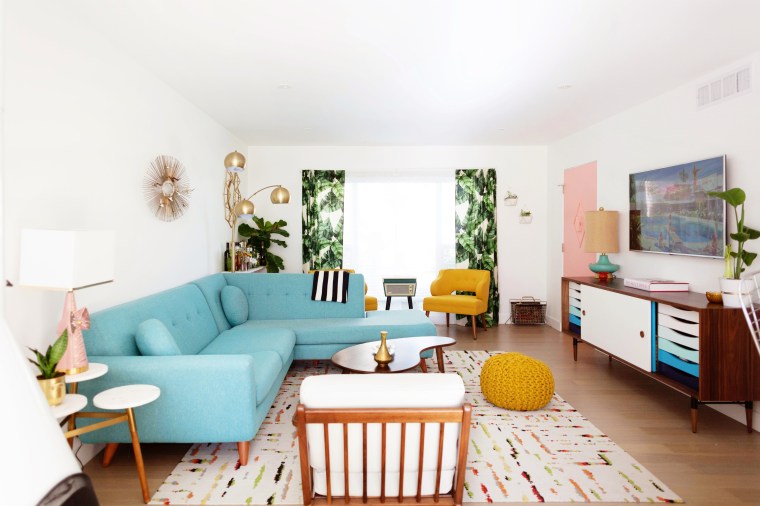
 I try to add little moments around each room to give every corner a touch of character. I used a vintage rotary phone and vase from Baigelman Glass to add some color to this area by our breakfast bar.
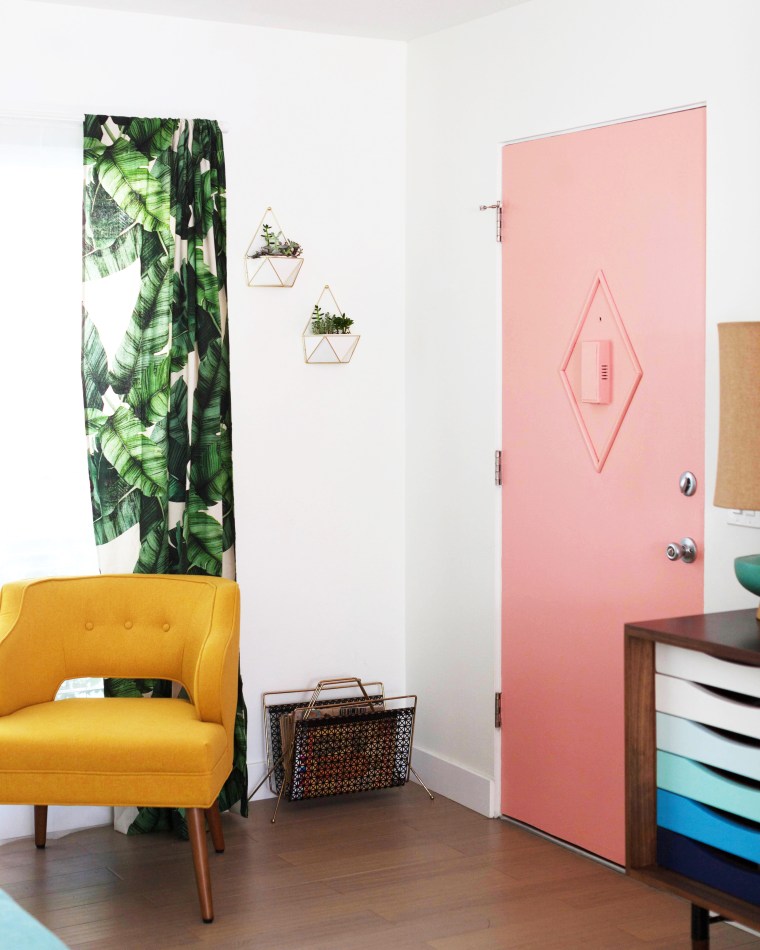 To this corner I added wall hanging planters and a vintage magazine stand filled with home decor magazines from the 50s and 60s. And lastly I painted the front door a peachy pink (Peach Punch from Valspar to be exact) and added a little bit of retro detail with wood molding!
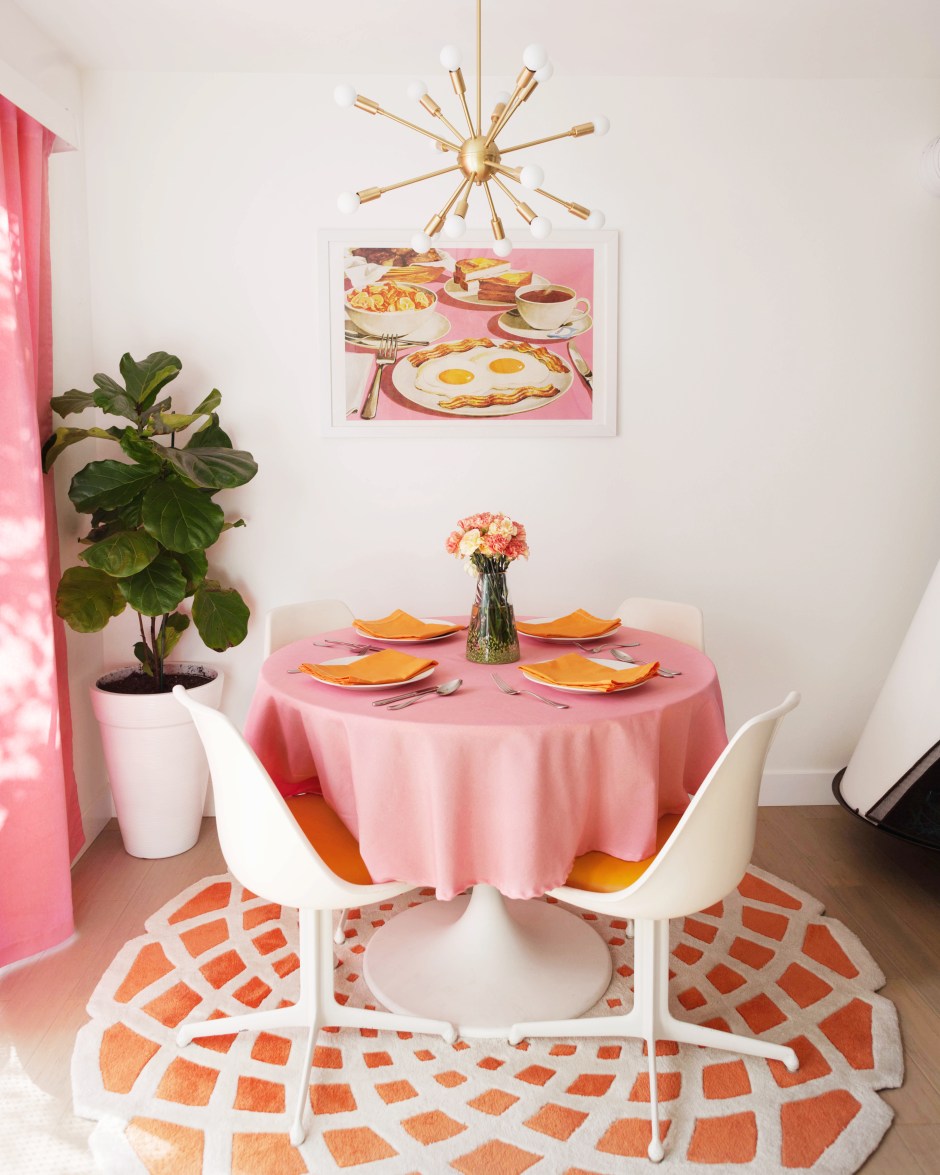

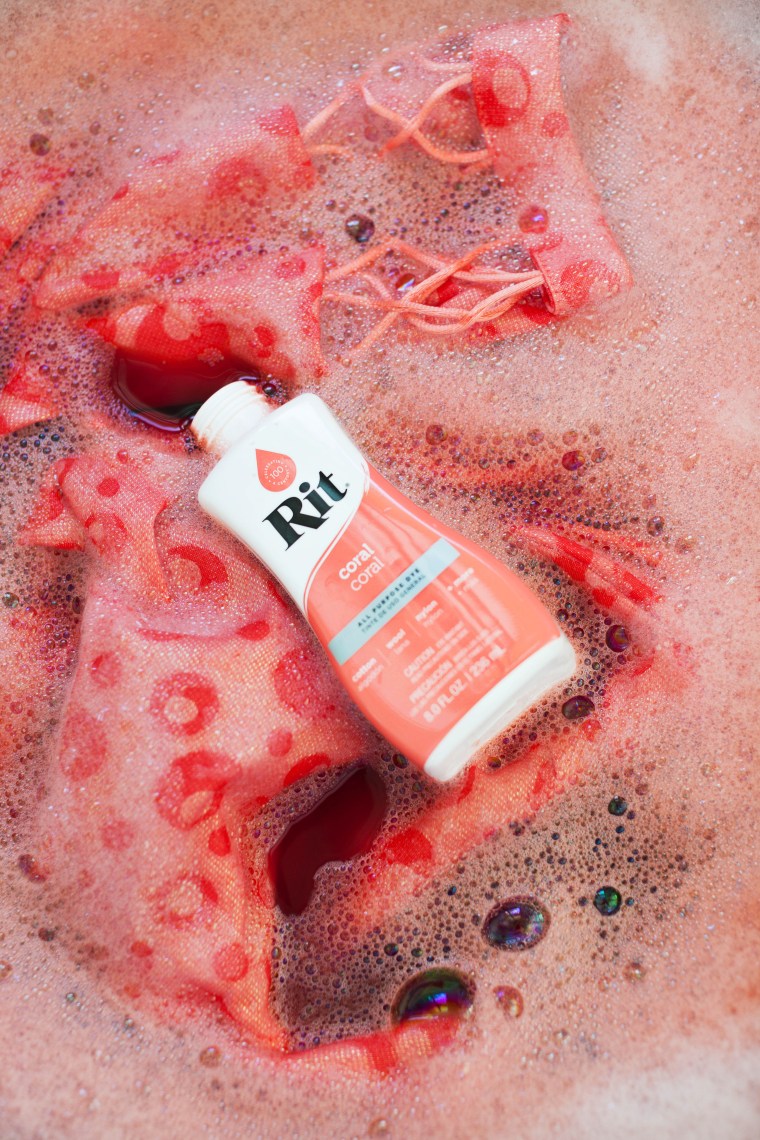
 I just mixed those up with hot water and a little dish soap right in my sink basin. I then soaked them in Rit’s dye fixative and rinsed with cold water. Easy peasy!
 I love how everything ties together with the artwork and my vintage Burke chair pads. Now I just need to throw a little dinner party with a Jell-o salad and few cocktails ;).
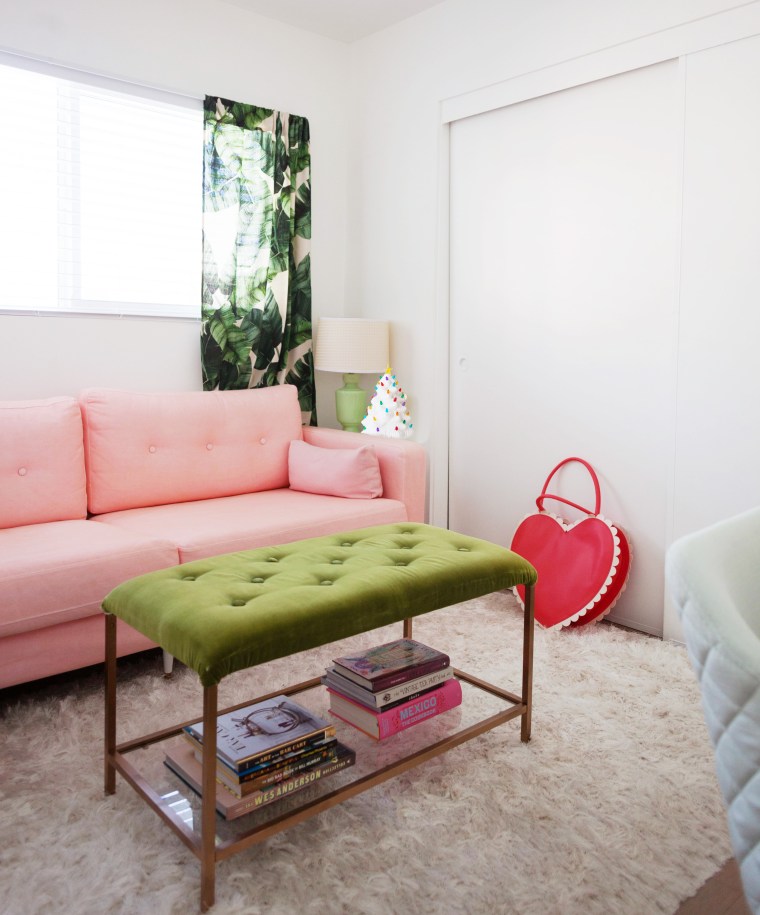
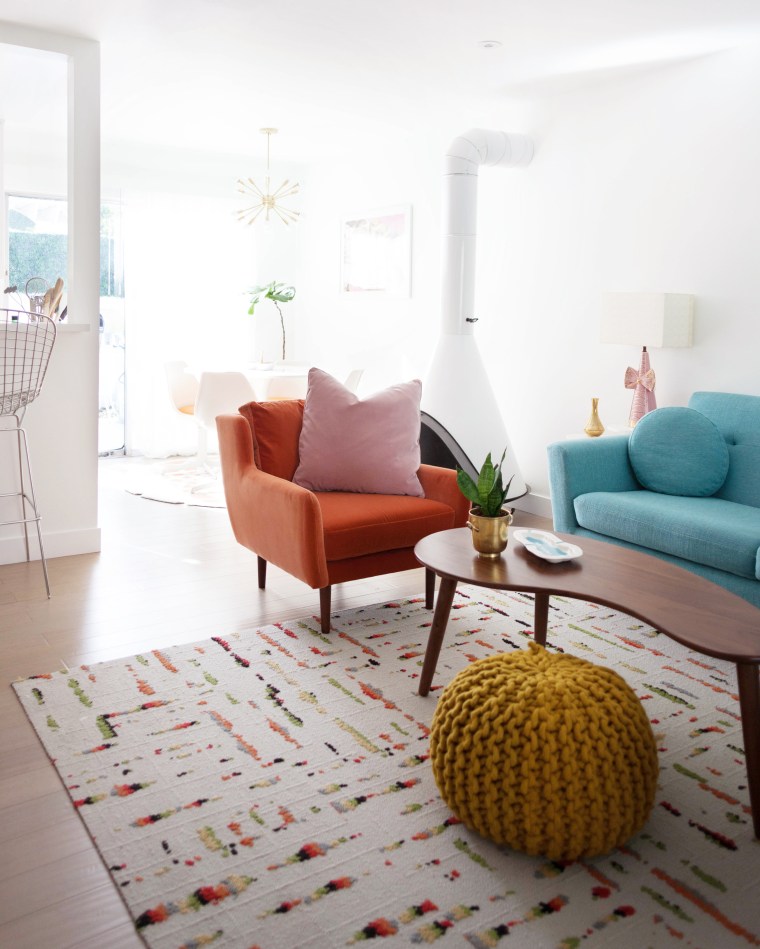
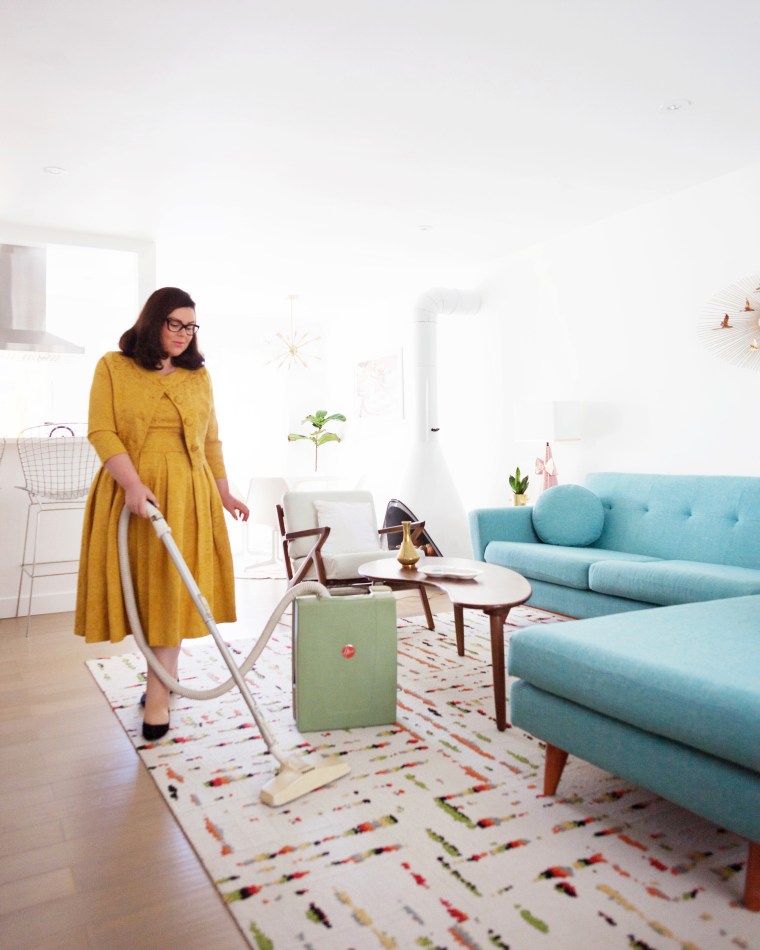 Putting away the decorations always feels like a clean slate and I get super motivated to do a little redecorating afterward. I decided I wanted to add a little more color in here for the New Year and thought a new accent chair and pillows would be the best way to do it. Switching out chairs and pillows is my favorite way to change things up. They’re easy to store away and swap from room to room, so you can easily switch things up whenever you feel like! I teamed up with
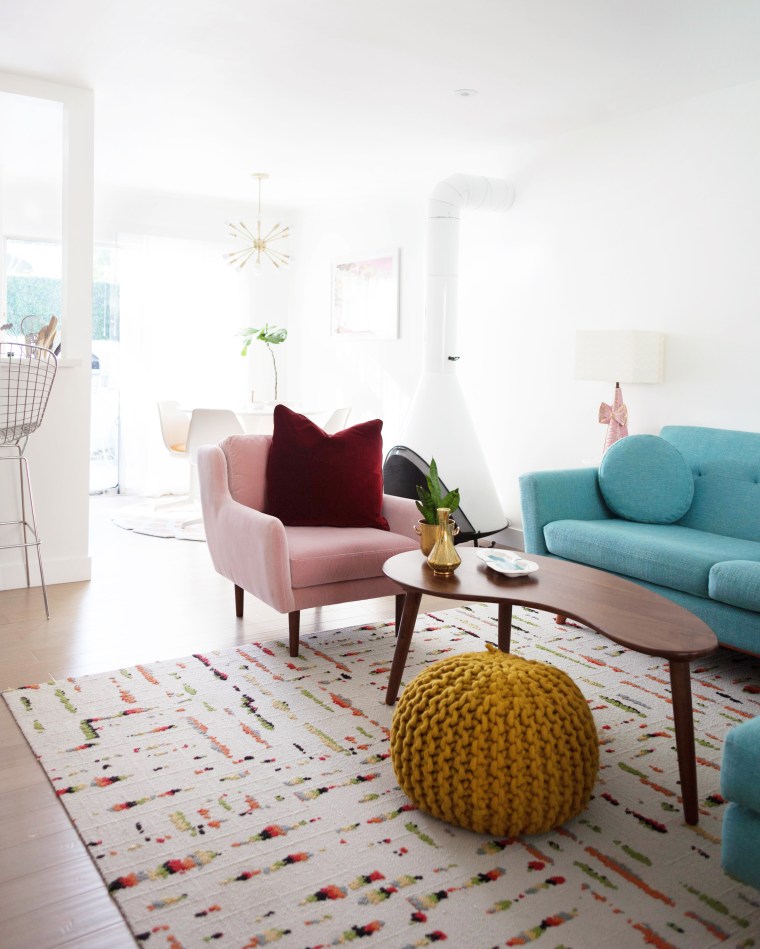
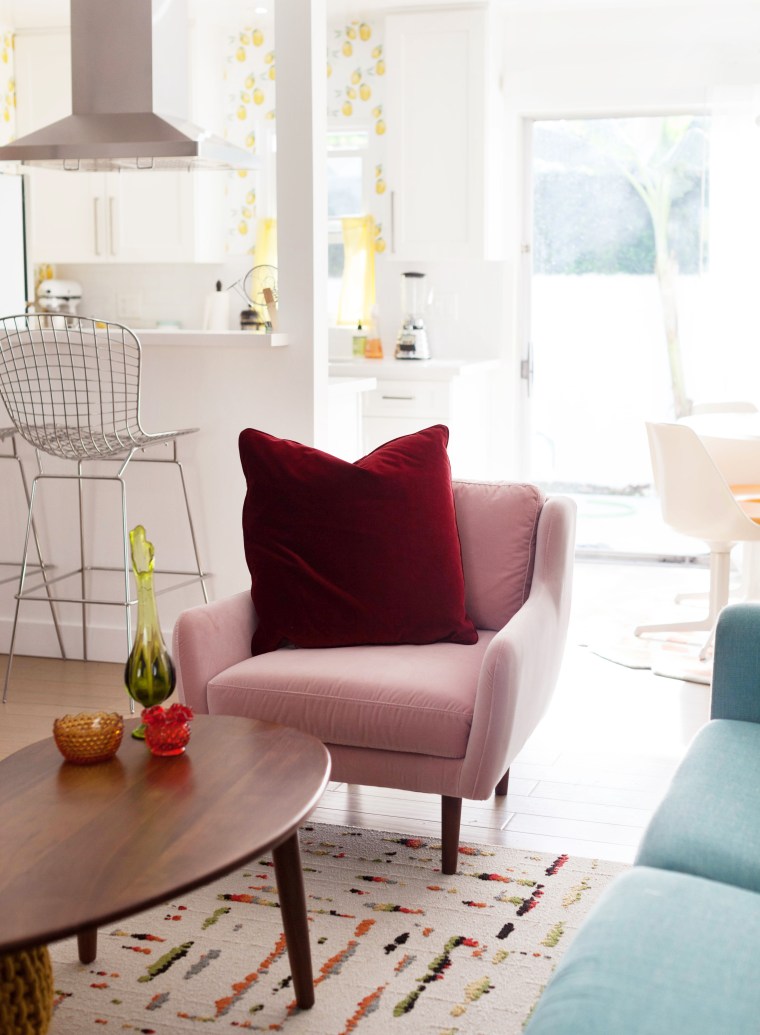 I also REALLY like it paired with a
  I love it from this angle!
  I’ve been wanting to try to incorporate more green into this room so next up is the
 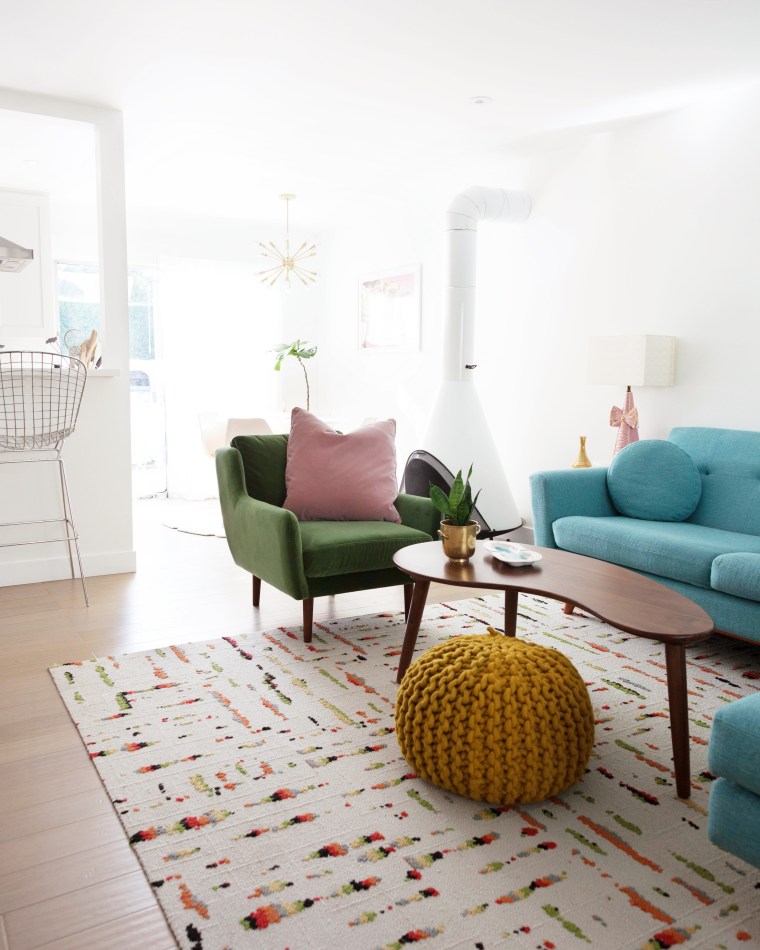 Pink and green is one of my favorite color combos ever, buuutttt my room, bathroom, and office already have pink and green as their main colors so that might be overkill…
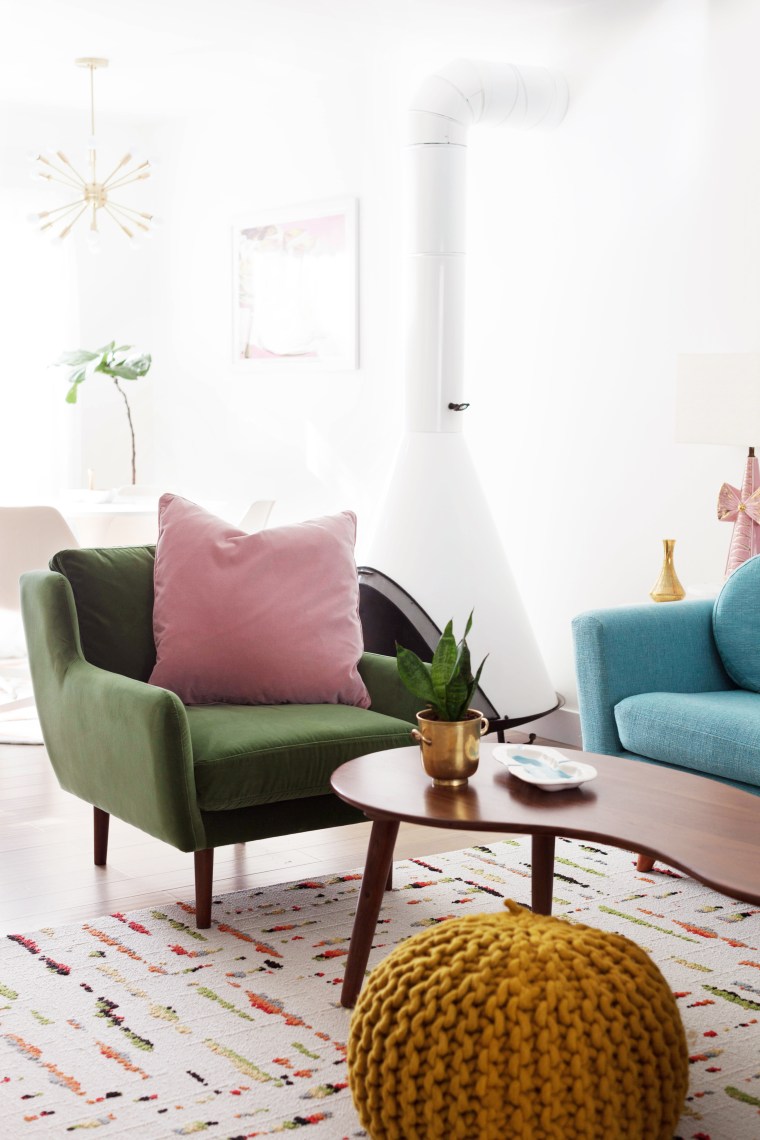 This green is very luxe and gives me major Art Deco vibes.
 It gets an even warmer feel when paired with the
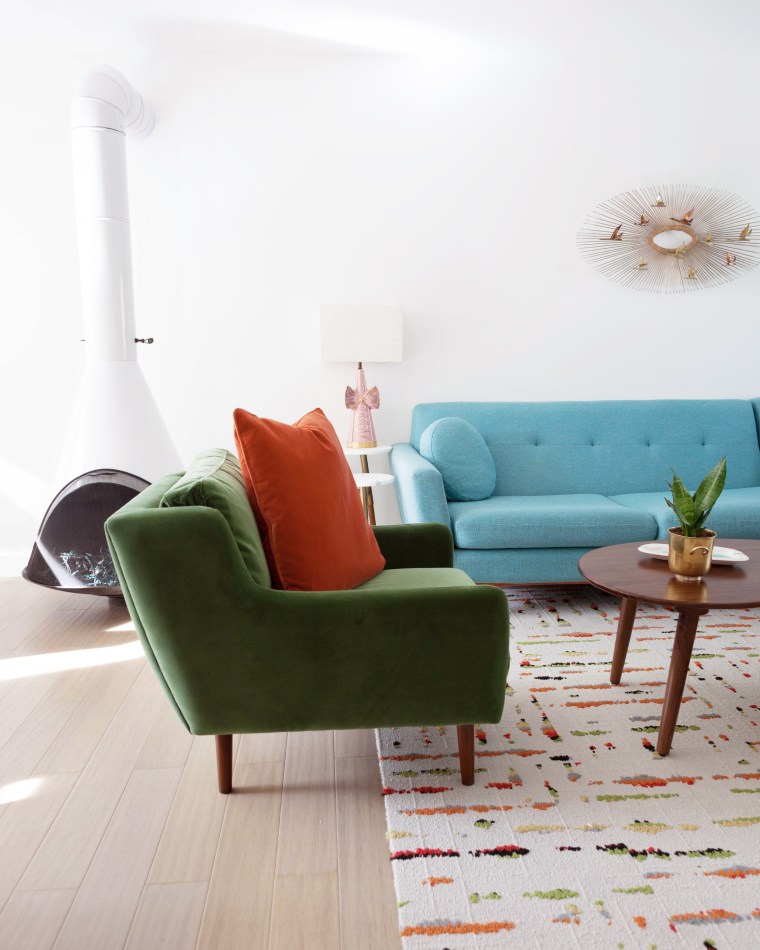
 The
The 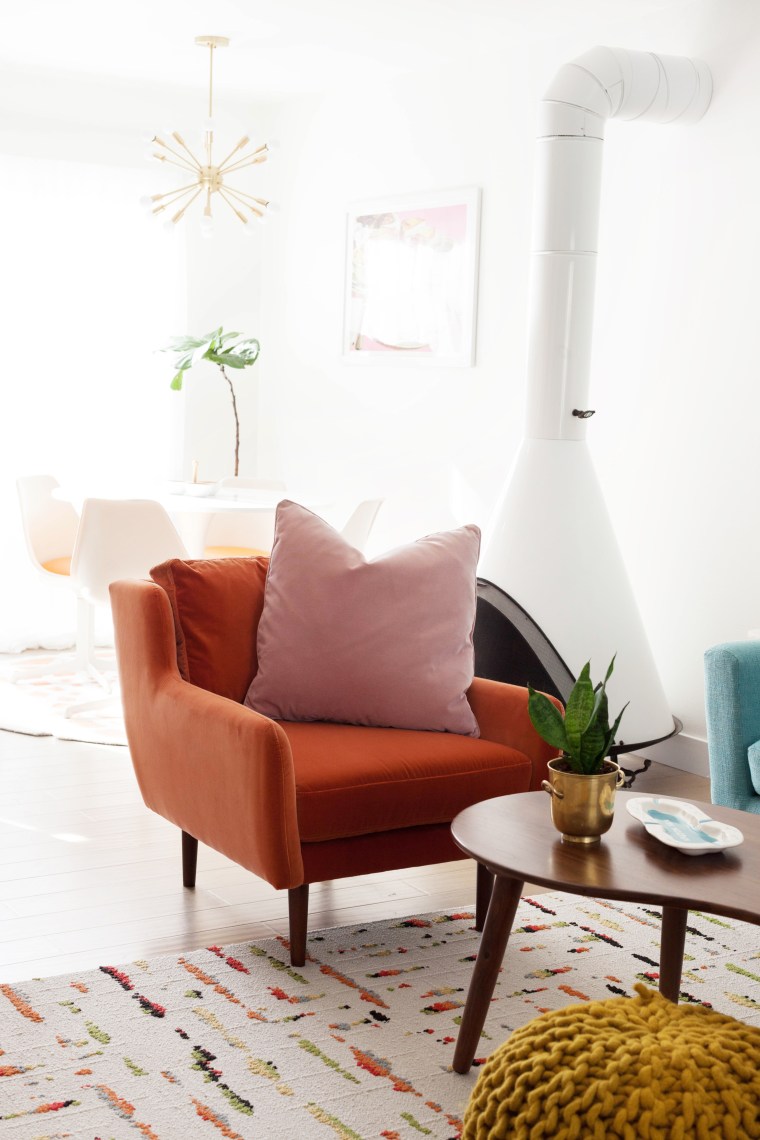 I’m super into this combo.
 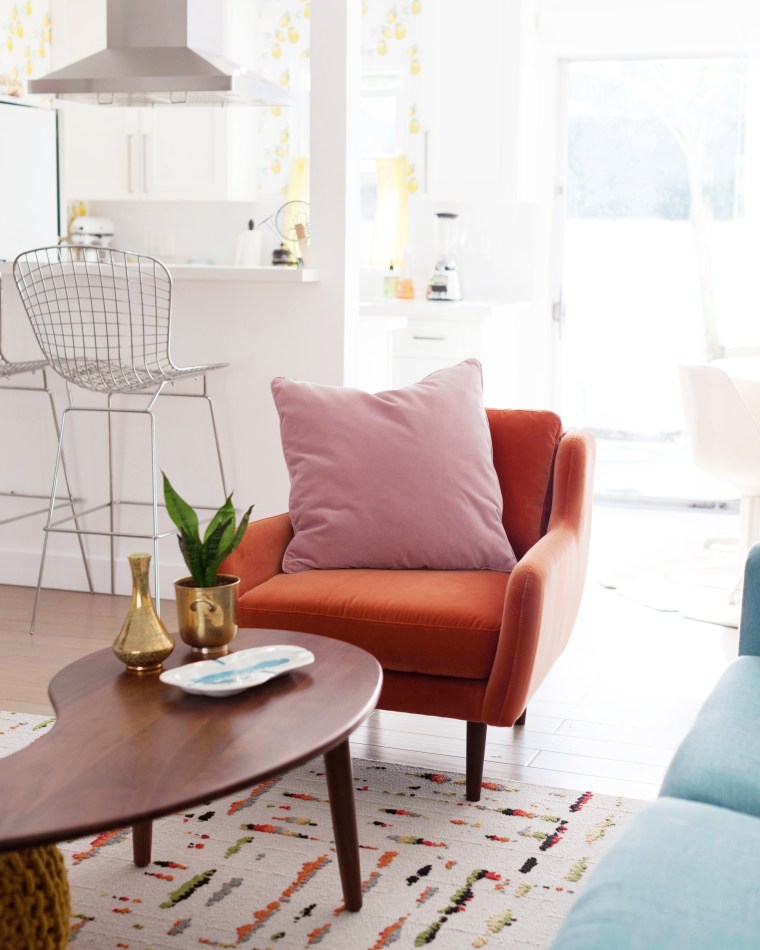 The Lucca pillows come in sets of two, so can go on the chair while its twin decorates the sofa. Ooooo.
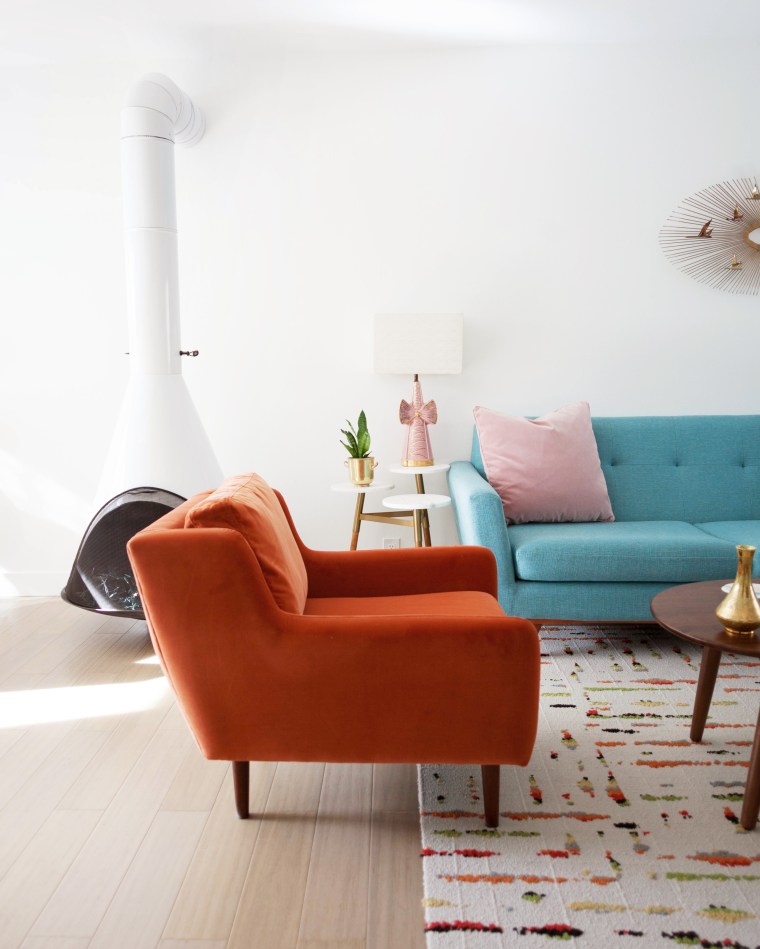


 Every year I make a wreath for the front door. This year I made a
 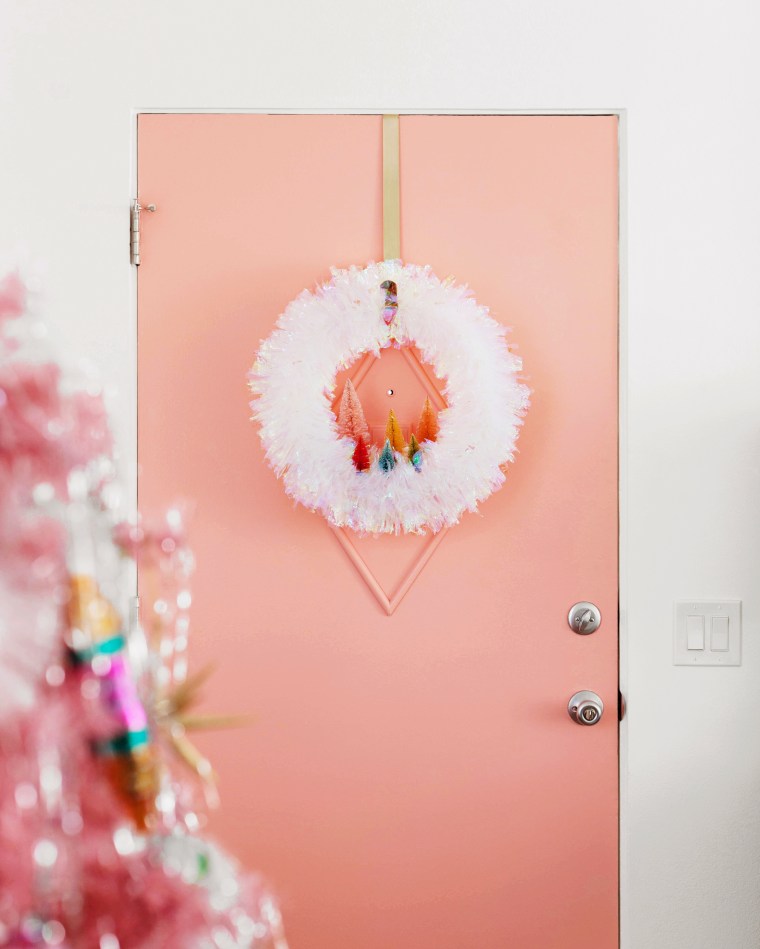 I also made throw pillows inspired by my favorite vintage ornaments.
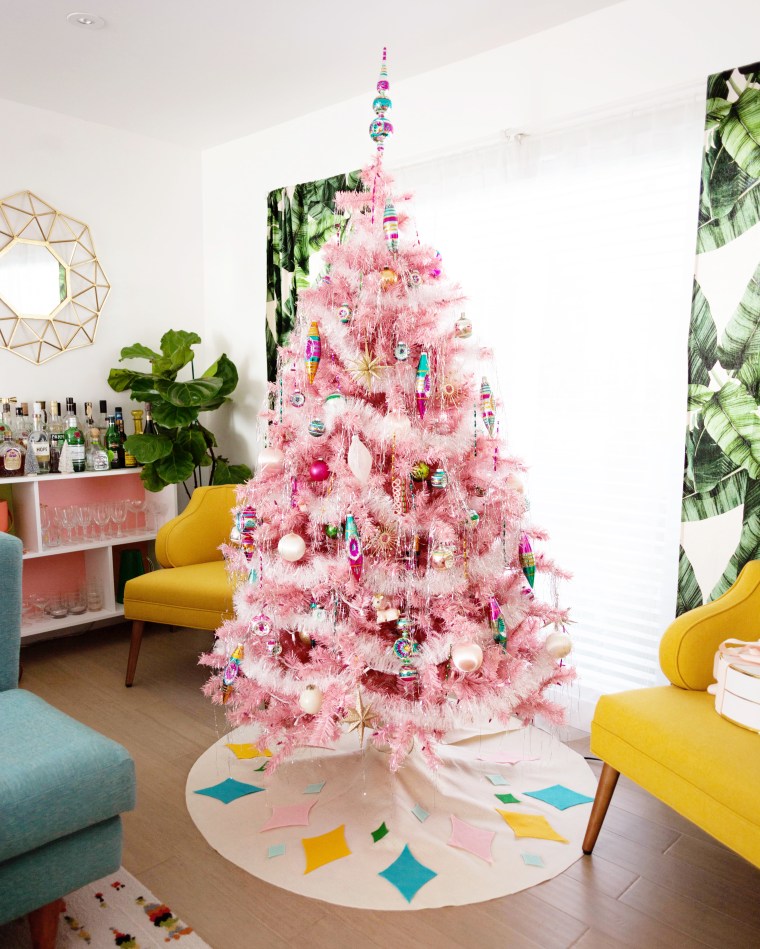
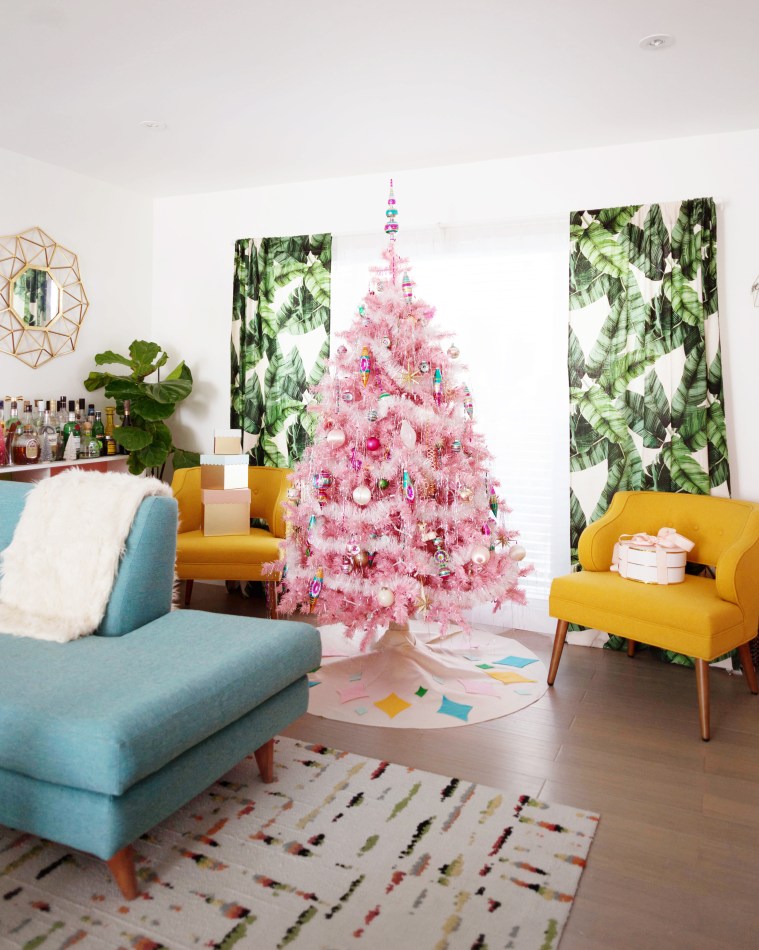
 I have a serious addiction to bottle brush trees. And I couldn’t leave out my
  It’s a house rule that every room needs at least one tree in it.
 I definitely cried a little when I decorated this tree. It’s the one we use to hold all of our special ornaments that we’ve collected on trips and for special occasions. We’ve experienced tremendous loss this year and we miss so many people, but these ornaments also remind us of the really, really good times and memories they hold. Sending all my love to everyone who has a hard time around this time of year. Be gentle on yourselves and hang in there. Try to continue making good memories even though it hurts right now. One day when it doesn’t hurt as bad you’ll be grateful you did
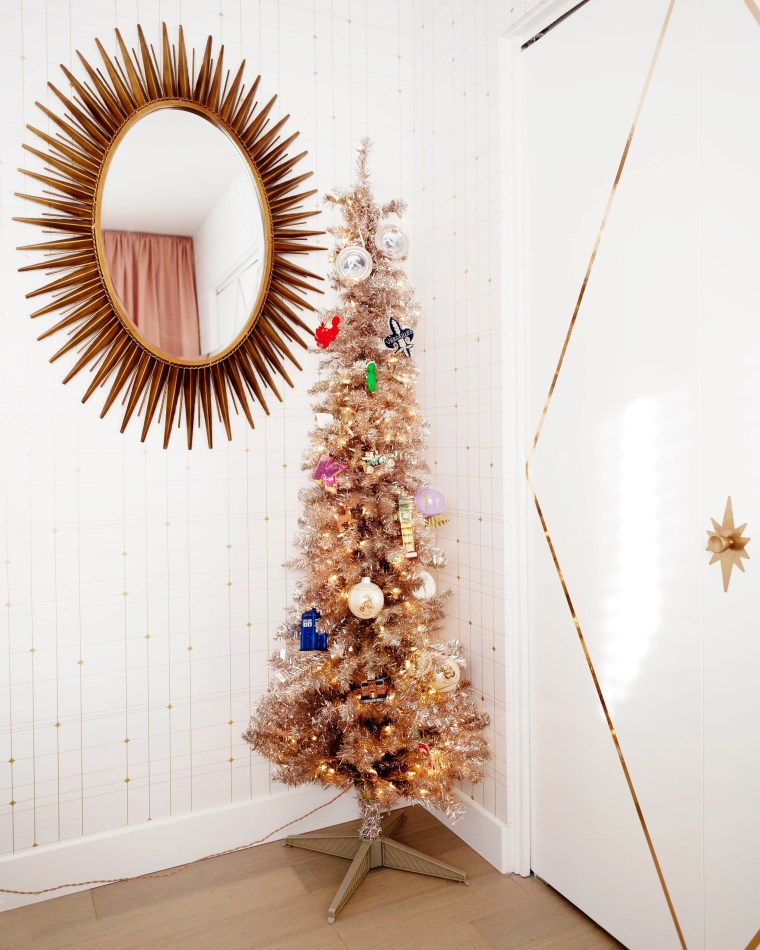 I also took advantage of the vintage inspired ceramic trees that Target had this year, for those rooms that couldn’t fit a full size tree.
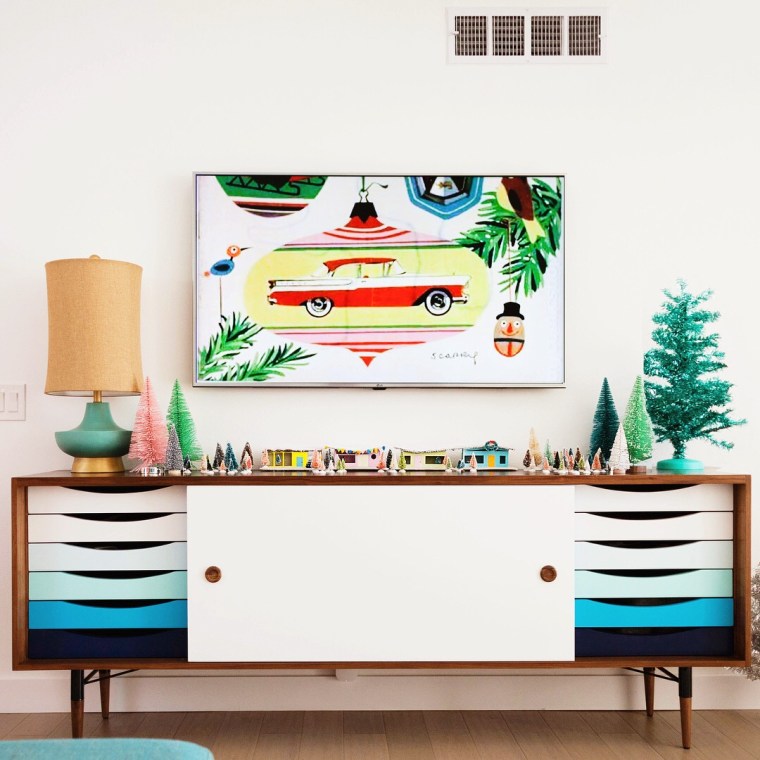